Monthly Archives: February 2024

tulsi plant

How to grow and care Tulsi plant (Holy Basil)

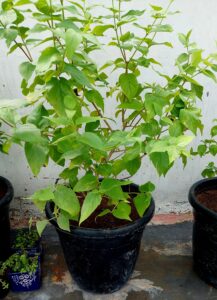
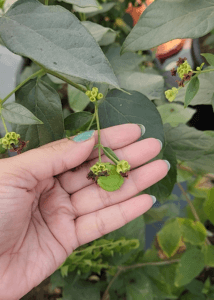
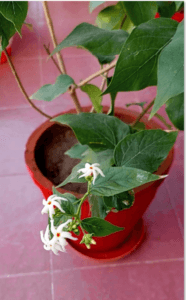
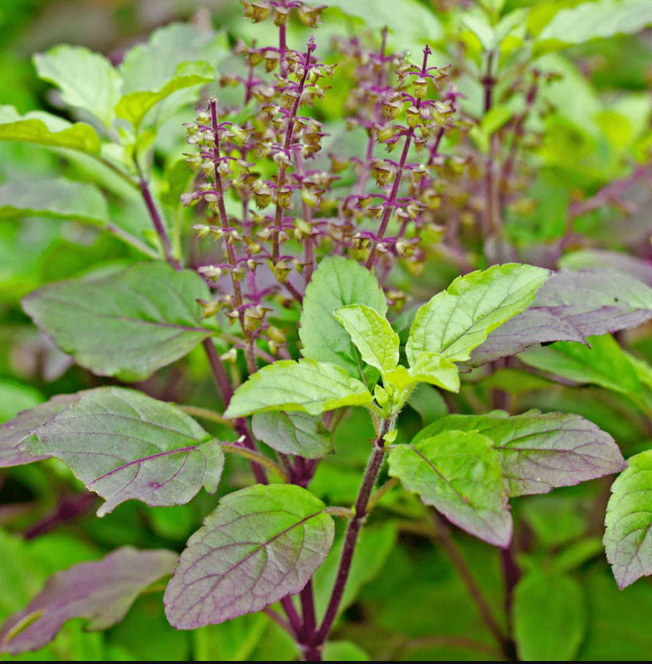
Tulsi, also known as Holy Basil, Vrinda, Vaishnavi, among other names, is a popular perennial plant in many regions. Despite careful attention, it may sometimes dry out, particularly in winter.

We need to take certain steps to keep our plants healthy. Let’s discuss each point one by one.

Tulsi ji

How to grow and care Tulsi plant (Holy basil)

Here are some tips on how to care for a Tulsi plant:

1. Location of Tulsi plant or Temperature for Tulsi plant

Tulsi plants thrive in full sunlight. Choose a spot in your garden or balcony where the plant can receive at least 6-8 hours of sunlight daily.

Important to note:

(i) During the winter season when temperatures drop to 15℃-16℃, Tulsi leaves may start to dry out.

(ii) Conversely, in the summer when temperatures rise significantly, the leaves may become burnt, darken, and shrink in size.

(iii) In both cases, it’s advisable to provide some shade for the Tulsi plant. Keeping the plant in a shaded area can help mitigate the effects of extreme temperatures, whether they are too high or too low.

2. Soil for Tulsi plant

Soil mixture

  • Tulsi prefers well-draining soil rich in organic matter. A mix of garden soil and compost works well. Make sure the soil is not too compacted.

3. Pot Size for Tulsi plant

tulsi plant in 12 inch clay pot
Tulsi plant in 12 inch clay pot

To ensure healthy growth of your Tulsi plant, use a pot that is at least 12 inches in diameter.

  • Larger pots allow the roots to spread freely, preventing them from becoming tangled and ensuring efficient water absorption. This promotes overall plant health and longevity.

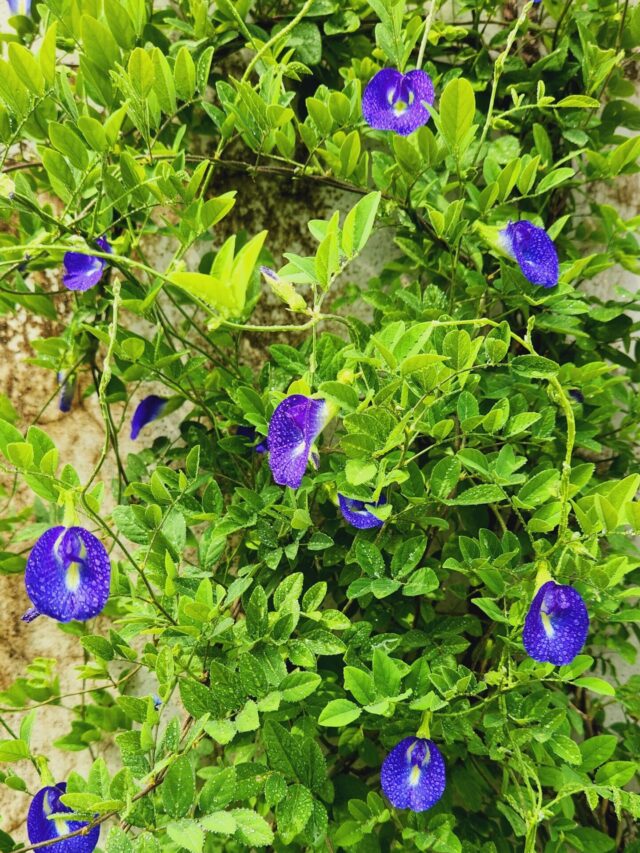
Also read:

How to grow Tulsi plant from seeds


4. Watering tips for Tulsi plant


Watering tulsi plant

Here are the key points to consider before watering a Tulsi plant:

1. Tulsi is a tropical plant and does not require excessive watering. The soil should be moist, not muddy. Water only when the soil is completely dry.

2. Check the soil’s moisture level by touching the surface. If the top layer is wet, the inner soil is likely moist enough, so avoid watering.

3. Before watering, loosen the soil up to 2-3 inches to ensure thorough absorption and promote aeration.

4. Water the plant in the early morning or evening to avoid water evaporation and prevent the soil from getting too hot, which can potentially harm the plant’s leaves and lead to its demise. Avoid watering during the afternoon when the sun is intense.

5. Pruning tips for Tulsi plant


Tulsi ji pruning

Pruning is essential for maintaining the health and longevity of plants. It involves cutting back or removing overgrown or dead parts of the plant.

Regular pruning, especially during the growing season, is crucial for promoting healthy growth.

For flowering plants, pruning can be done regularly to remove spent flowers (deadheading) to encourage continuous blooming.


Important note:

  • It is important to remove flowers before they mature into seeds, as this redirects the plant’s energy towards growth rather than seed production.

6. Fertilizer for Tulsi plant


For fertilizing Tulsi plants, it is generally unnecessary if proper care and watering are maintained, especially during winter.

  • However, during summer, if fertilizers are used for other plants, you can use chemical-free options like “Cow-dung liquid fertilizer” or “Vermicompost” once a month. Ensure cow dung is decomposed to prevent pest issues.

7. Pesticide for Tulsi plant


As for pesticides, the need for them is rare due to Tulsi’s natural immunity. Pests may occur due to weakened immunity from over or under watering. In such cases, opt for chemical-free options like neem oil spray.

Happy Gardening!

flowers

Spring Gardening 10 Important Tasks

The spring season plays a vital role in gardening, serving as a period of rejuvenation for plants that may have become weak or withered during the winter months.

It is a time for plants to recover from dormancy and prepare for the upcoming summer season. Additionally, spring marks the beginning of essential preparations for summer gardening. Basically, it is an important time in gardening for carrying out multiple tasks which are foundations for next year for the plants.

Important tasks to undertake in Spring season

1. Identifying the Correct Time for Pruning

One crucial aspect of spring gardening is determining the right time for hard pruning and root pruning, which is not always straightforward.

pruning of plants

While February is commonly associated with spring, it can vary depending on the yearly cycle and geographical location. To identify the optimal timing for these pruning tasks, gardeners should:

(i) Assess Plant Condition:

  • Look for signs such as the emergence of new leaves, buds, and shoots.

(ii) Observe Weather Patterns:

  • Note when temperatures begin to rise, signaling the transition to warmer weather and reduced need for heavy clothing.

These indicators signify the ideal time for hard pruning, as it’s generally avoided during the summer months. By following these guidelines, gardeners can ensure their plants receive the necessary care and preparation for the months ahead.

Must read:

What is Hard Pruning?

2. Winter Plants Inspection:

Inspect all winter plants to assess their condition.

  • Any plants that are thriving should be left undisturbed.
  •  While those that have withered or become damaged should be removed.

3. Soil Collection from Pots:

Soil mix

Gather any loose or leftover soil from the garden, ensuring it is cleaned thoroughly. Then, sift the soil through a sieve to remove any debris or impurities.

  • Finally, expose the soil to sunlight to ensure it is dry and ready for use in various gardening activities such as repotting plants or sowing seeds.

Must read:

How to Make Soil Mixture for Summer Plants

4. Summer Plants Monitoring:

Monitor each summer plant individually during the spring season and assess their condition. Treat each plant according to its specific needs:

  • some plants may be in excellent condition and require no treatment,
  • others may only need mild pruning, such as the removal of damaged leaves,
  • certain plants might benefit from repotting,
  • there could be instances where hard pruning is necessary,
  • some plants may require both root pruning and repotting.

Carefully assess each summer plant, addressing its specific needs accordingly.

5. Adding Compost after Tilling:

compost

If your plant is thriving and does not require any treatment, start by removing any excess grass or weeds from the soil.

  • Then, make sure to till the soil thoroughly and mix in compost, such as vermicompost or kitchen compost, to boost nutrient levels and enhance soil health.

Adding compost is crucial regardless of whether you perform other tasks like hard pruning, root pruning, or repotting.

6. Seed Collection from Garden:

Seedpods of Vinca plant

Collect seeds from different plants in the garden, including Night Jasmine (Harshringar), vegetables, and flowering plants such as Vinca, Clitoria (Aprajita), etc.

  • Wait until the seeds have fully dried and turned a toasted, brown color before gathering them. These dry seeds are ready to be sown for planting in the next season.

7. Sowing Time for Summer Plant Seeds/Bulbs:

Now is the perfect time to sow seeds and bulbs for summer plants.

seedling tray

  • While it is possible to sow them later, the resulting seedlings might struggle to stand properly, leading to bending and weakness, and even death.
  • Seeds of flowering, fruiting, and vegetable plants can be sown during this period.

8. Propagation through Roots and Cuttings:

Now is the perfect time to propagate plants from cuttings, as dividing plants into cuttings and planting them results in multiple new plants.

snake plant propagation
  • Species like aloe vera, snake plants, money plants, and many others can be propagated through cuttings.
  • Glass bottles are commonly used as containers for growing plants from cuttings, and various mediums such as sand, water, or clay balls are suitable for planting the cuttings.

Spring season offers an ideal opportunity to propagate plants through cuttings.

9. Garden Layout Design:

Designing your garden layout involves:

1. Sunlight & Space: Place sun-loving plants in sunny spots and shade-loving ones in shaded areas. Group plants with similar light needs together to optimize space.

2. Plant Selection: Choose plants that match your preferences, climate, and soil type. 

3. Compact & Climbers: Opt for compact plants in small spaces and use climbers to maximize vertical space. 

4. Seasonal Planning: Map out areas for both summer and winter plants, considering sunlight, temperature, and growth requirements.

By considering these factors, you can create a visually appealing and well-utilized garden space.

10. Initializing the process of composting

During winters, the composting process slows down, while in summers, compost can be generated at a faster pace. Therefore, it is advisable to commence the composting process during this season.

  • You can begin making various types of compost such as cow dung compost, kitchen waste compost, or dry leaves compost from the current season onwards.

Must read:

How to Make Kitchen Waste Compost

At last –

Gathering Garden Assets:

Ensure you have all necessary gardening supplies on hand by assessing your current inventory and acquiring any needed resources such as pruners, spray bottles, coco peat, sand, soil and other items.

gardening tools

Adhering to the dos and don’ts of the spring season can significantly enhance your gardening experience. By following these guidelines, you can effectively nurture and beautify your garden. 

Happy Gardening!

Make Your Own Garden!

banana peel fertilizer

केले के छिलके की खाद कैसे बनाएं: लाभ और उपयोग

पौधों के लिए केले के छिलके की खाद के लाभ और उपयोग

अगर आपको बागवानी का शौक है तो केले के छिलके आपके पौधों के लिए बहुत काम आएंगे। केले के छिलके की खाद जैविक खाद का एक उत्कृष्ट स्रोत है जिसे आसानी से घर पर बनाया जा सकता है। यह पौधों को बढ़ने और पनपने के लिए जरूरी आवश्यक पोषक तत्व प्रदान करने का एक प्राकृतिक और लागत प्रभावी तरीका है।

कई लोगों की शिकायत होती है कि पौधे की सभी आवश्यक देखभाल और उपाय करने के बावजूद, इसके विकास में अभी भी अनियमितताएं हैं। मेरे पौधों में फूल नहीं आ रहे हैं या पौधा स्वस्थ है लेकिन फूल या फल नहीं आ रहे हैं।

  • तो, ऐसा क्यों हो रहा है और इसके पीछे क्या कारण हैं?
  • banana peel

इसका मुख्य कारण आपके पौधे में पोषक तत्वों की कमी है। यह दो कारकों को इंगित करता है:

  1. जब जड़ों में खाद डाला जाता है, तो यह पौधे के अन्य भागों, जैसे तना, पत्तियों, शाखाओं या कलियों तक कुशलतापूर्वक वितरित नहीं हो पाता है।
  2. इसके अतिरिक्त, जहाँ पौधे अपनी पत्तियों में स्टार्च के रूप में अपना भोजन बनाते हैं, यह संभव है कि भोजन पत्तियों में ही रह जाए और पौधे की जड़ों के अन्य भागों में वितरित न हो।

नोट: स्टार्च पौधों, विशेषकर उनकी जड़ों को प्रतिरक्षा प्रदान करने में महत्वपूर्ण भूमिका निभाता है।

उपरोक्त दो कारकों से संकेत मिलता है कि पौधों की “परिवहन प्रणाली” अच्छी तरह से काम नहीं कर रही है जिसके लिए पोटेशियम की कमी को जिम्मेदार ठहराया जा सकता है।

  • सौभाग्य से, केले और केले के छिलकों में पोटेशियम अत्यधिक मात्रा में उपलब्ध होता है और इसका उपयोग पौधे की परिवहन प्रणाली को बेहतर बनाने के लिए किया जा सकता है।
  • यदि इस स्थिति में पौधे में केले के छिलके की खाद डाली दी जाए तो समस्या का समाधान हो जाएगा।

नोट:

    • न केवल पोटेशियम बल्कि केले के छिलके में कैल्शियम, मैग्नीशियम, सल्फर और फास्फोरस जैसे कई अन्य पोषक तत्व होते हैं, जो पौधों की वृद्धि और विकास के लिए आवश्यक हैं।
    • इसके अतिरिक्त, केले के छिलके में अन्य सूक्ष्म पोषक तत्व, जैसे जस्ता, तांबा और लोहा पाए जाते हैं, जो पौधों के स्वास्थ्य के लिए महत्वपूर्ण हैं।

घर पर ही केले के छिलके की खाद कैसे बनाएं? 

घर पर केले की खाद बनाने के कई तरीके हैं। उनमें से कुछ का विवरण यहां दिया गया है:

तरीका – 1

  1. केले के छिलकों को छोटे-छोटे टुकड़ों में काट लीजिए।
  2. इन्हें एक साफ बर्तन में रखें और पानी भर दें. सुनिश्चित करें कि छिलके पानी में ठीक से डूबे हुए हैं।
  3. कन्टेनर को ढककर किसी छायादार जगह पर 8-10 घंटे के लिए रख दीजिए.
  4. इस प्रक्रिया के दौरान केले के गूदे के अवशेष पानी में घुल जाते हैं.
  5. 10 घंटे के बाद, पानी को छान लें और इसे अधिक पानी (उत्पादित खाद की मात्रा से 7-8 गुना अधिक पानी का उपयोग करके) के साथ पतला करें। उसके बाद, अपने पौधों को डालने के लिए पतला मिश्रण का उपयोग करें।
  6. पौधों पर प्रयोग करने से पहले खाद को छानकर पतला कर लेना आवश्यक है। अन्यथा, पोटेशियम की मात्रा आवश्यकता से बहुत अधिक होगी, जो पौधे को अन्य पोषक तत्वों को अवशोषित करने से रोक सकती है।

तरीका – 2 (केले के छिलके का पाउडर खाद)

  1. केले के छिलकों को काटकर धूप में सुखा लें.
  2. 4 दिन बाद छिलके पूरी तरह सूखे, काले और कुरकुरे हो जायेंगे.
  3. सूखे छिलकों को बारीक पीसकर एक कन्टेनर में भरकर रख लें।
  4. जब आवश्यकता हो, पाउडर को पानी में घोलें और इसका उपयोग अपने पौधों में डालने के लिए करें।
  5. वैकल्पिक रूप से, आप केले के छिलके के पाउडर को मिट्टी की ऊपरी परत पर छिड़क सकते हैं और पौधे को पानी दे सकते हैं।
  6. केले की खाद मिट्टी में धीरे-धीरे विघटित होगी, इसलिए बहुत अधिक पानी डालने से बचें। यह विधि आपके पौधों के लिए धीमी गति से रिलीज़ होने वाला खाद प्रदान करती है।

तरीका – 3

  1. केले का छिलका लें और इसे किसी गमले वाले पौधे की मिट्टी में दबा दें।
  2. मिट्टी में कोई अतिरिक्त पानी या नमी न डालें।
  3. समय के साथ, केले का छिलका विघटित हो जाएगा और अपने पोषक तत्वों को मिट्टी में छोड़ देगा, जिससे पौधे के बढ़ने के लिए यह अधिक उपजाऊ हो जाएगी।

यह विधि आपके पौधों को पोषक तत्व प्रदान करने का एक प्राकृतिक तरीका है, लेकिन केले के छिलके को विघटित होने और इसके पोषक तत्व जारी करने में अन्य तरीकों की तुलना में अधिक समय लग सकता है।

केले के छिलके की खाद कब देना चाहिए?

  1. उन पौधों पर केले के छिलके के उर्वरक का उपयोग करने से बचें जो अभी छोटे हैं या बढ़ने की अवस्था में हैं क्योंकि उस समय उन्हें नाइट्रोजन, फास्फोरस और पोटेशियम (एनपीके) की समान मात्रा की आवश्यकता होती है।

केले की खाद में नाइट्रोजन की मात्रा बहुत कम होती है। इससे पोषक तत्वों का असंतुलन हो जाएगा और नाइट्रोजन की कमी के कारण पौधे मर सकते हैं।

  1. केले की खाद हमेशा तब दें, जब पौधा फूल या फल लगने की अवस्था में हो।
  2. जहाँ केले के छिलके की खाद का उपयोग सभी पौधों पर किया जा सकता है, पोषक तत्वों का संतुलन बनाए रखने के लिए इसे अन्य खादों के साथ बदलना महत्वपूर्ण है।
  • केले के छिलके की खाद डालने के बाद, अन्य खाद जैसे सरसों की खली या किसी अन्य खाद का उपयोग करने से पहले कम से कम 20 दिन तक प्रतीक्षा करें।
  • इससे यह सुनिश्चित करने में मदद मिलेगी कि पौधों को उनकी वृद्धि और विकास में सहायता के लिए पोषक तत्वों का संतुलित मिश्रण प्राप्त हो।

महत्वपूर्ण बिंदु:

  1. अधिक पानी देने से पौधा खराब हो सकता है, इसलिए यह महत्वपूर्ण है कि खाद तभी डालें जब मिट्टी पूरी तरह से सूख जाए। इसके अलावा, खाद डालने के बाद पानी तभी देना चाहिए जब मिट्टी सूखी दिखाई दे।
  2. 17 आवश्यक पोषक तत्व हैं, पौधों को स्वस्थ वृद्धि के लिए जिनकी आवश्यकता होती है। सभी पोषक तत्वों की आवश्यकताओं को पूरा करने के लिए पोटेशियम, नाइट्रोजन और फास्फोरस यानी एनपीके जैसे पूरकों की पर्याप्त मात्रा में आवश्यकता होती है।

इसलिए, खाद पौधों की तीव्र वृद्धि में महत्वपूर्ण भूमिका निभाते हैं।

अतः, केले लीजिए, स्वस्थ रहने के लिए उन्हें खाइए और उनके छिलकों का उपयोग अपने पौधों के लिए जैविक खाद बनाने में कीजिए। इस तरह, आप यह सुनिश्चित कर सकते हैं कि आपके पौधों को मजबूत और स्वस्थ रूप से विकसित होने के लिए आवश्यक पोषक तत्व मिलें। उपरोक्त महत्वपूर्ण सुझावों का पालन करके, आप अपने पौधों को पनपने में मदद कर सकते हैं और घरेलू उत्पाद के लाभों का आनंद ले सकते हैं।

शुभ बागवानी!!

curry leaves

गमले में करी पत्ता का पौधा कैसे उगाएं और उसकी देखभाल कैसे करें 

करी पत्ता का पौधा, जो अपनी जादुई सुगंध के लिए जाना जाता है, किसी भी घर के लिए एक आवश्यक पौधा है। हालाँकि यह बाहरी पौधा बढ़ने में काफी संवेदनशील होता है, लेकिन सही पोषण मिलने पर असाधारण परिणाम देते हैं।

आइए इसकी मूलभूत विशेषताओं, आवश्यकताओं और यह विभिन्न स्थितियों और वातावरणों पर कैसे प्रतिक्रिया करता है, इस पर गौर करें। इस लेख में हम महत्वपूर्ण बिंदुओं पर चर्चा करेंगे कि हम घर पर करी पत्ते का पौधा कैसे उगा सकते हैं।

  1. करी पत्ता के पौधे के लिए सबसे अच्छा मौसम
  2. करी पत्ता के पौधे के लिए आदर्श तापमान
  3. करी पत्ता के पौधे के लिए सूर्य के प्रकाश की आवश्यकता
  4. करी पत्ते के पौधे के लिए पसंदीदा गमले के प्रकार
  5. करी पत्ता के पौधे के लिए मिट्टी का मिश्रण
  6. करी पत्ता के पौधे में पानी देने के टिप्स
  7. करी पत्ता के पौधे के लिए जरुरी खाद
  8. करी पत्ता के पौधे के लिए कीटनाशक

करी पत्ता का पौधा एक बारहमासी पौधा है

करी पत्ता, बारहमासी पौधे होने के कारण, कई वर्षों तक  पनपने की क्षमता रखता है यदि लगन के साथ इसका पालन-पोषण किया जाता है और पूरी क्षमता विकसित किया जाता है।

गमले में करी पत्ता का पौधा कैसे उगाएं और उसकी देखभाल कैसे करें

1. करी पत्ता का पौधा कैसे प्राप्त करें?

  • नर्सरी से खरीदें: करी पत्ते के पौधे नर्सरी से खरीदे जा सकते हैं।
  • बीज: वैकल्पिक रूप से, इस पौधे को उगाने के लिए बीजों का उपयोग किया जा सकता है।
  • कटिंग: इसे कटिंग के माध्यम से भी उगाया किया जा सकता है।
  • स्व-प्रसरण: कभी-कभी नए करी पत्ते मौजूदा पौधे से उसकी जड़ों के माध्यम से अपने आप अंकुरित होने लगते हैं।

2. करी पत्ता के पौधे के लिए सबसे अच्छा मौसम

curry plant 1

नर्सरी से करी के पौधे खरीदने का आदर्श समय वसंत ऋतु के दौरान होता है, आमतौर पर फरवरी से मार्च तक। ग्रीष्मकालीन पौधे के रूप में, यह अक्टूबर तक अच्छी तरह फलता-फूलता है।

सुप्त अवधि: सर्दी के मौसम में करी पत्ता का पौधा सुप्त अवधि में प्रवेश करता है और पौधे की वृद्धि धीमी हो जाती है। पत्तियाँ पीली पड़ने लगती हैं और सूखने लगती हैं।

3. करी पत्ता के पौधे के लिए आदर्श तापमान

करी पत्ते की वृद्धि के लिए आदर्श तापमान 18-35 डिग्री सेल्सियस है। इस सीमा से परे, पौधा जीवित रहने के लिए संघर्ष करता है, पत्तियाँ काली या भूरी हो जाती हैं और सूख जाती हैं।

  • अत्यधिक गर्मी के दौरान छाया प्रदान करना और सर्दियों में जब तापमान 8-10 डिग्री सेल्सियस तक गिर जाता है तो पौधे को ढंकना इसकी सुरक्षा में मदद करता है।

4. करी पत्ता के पौधे के लिए सूर्य के प्रकाश की आवश्यकता

जब करी पत्ते के पौधों को गमलों में उगाया जाता है, तो उन्हें मजबूत विकास के लिए कम से कम 4 से 5 घंटे की सीधी धूप की आवश्यकता होती है।

5. करी पत्ता के पौधे के लिए गमले के प्रकार

curry leaves plant in pot

करी पत्ते को विभिन्न कंटेनरों जैसे कपड़े की थैलियों, प्लास्टिक की बाल्टी, मिट्टी के बर्तन, चीनी मिट्टी के बर्तन, सीमेंट के बर्तन, प्लास्टिक के बर्तन, या ग्रो बैग में उगाया जा सकता है। शुरुआती लोगों के लिए, मिट्टी के गमले से शुरुआत करने की सलाह दी जाती है।

  • कम से कम 10 इंच के गमले चुनने की सलाह दी जाती है।

6. करी पत्ता के पौधे के लिए मिट्टी का मिश्रण

Soil mix

करी पत्ता के पौधों के लिए अच्छी जल निकासी वाली मिट्टी का मिश्रण सबसे अच्छा होता है।

  • इस मिश्रण में आमतौर पर बगीचे की मिट्टी, खाद (वर्मीकम्पोस्ट या पत्ती की खाद या गाय के गोबर की खाद), बेहतर जल निकासी के लिए रेत, और वैकल्पिक रूप से, नमी बनाए रखने के लिए कोकोपीट शामिल होता है। इन घटकों को अच्छी तरह से मिश्रित करने से करी पत्ते के पौधों के लिए एक आदर्श विकास माध्यम बनता है।

7. करी पत्ते के पौधे के लिए पानी देने के टिप्स

करी पत्ते के पौधे को तभी पानी दें जब मिट्टी पूरी तरह से सूखी हो, क्योंकि अधिक पानी देने से जड़ सड़ सकती है।

  • सुनिश्चित करें कि जलभराव को रोकने के लिए पानी गमले के निचले छेद से बहता रहे। इष्टतम मिट्टी की नमी के स्तर को बनाए रखने के लिए जलवायु, आर्द्रता और बर्तन के आकार जैसे कारकों के आधार पर पानी देने के कार्यक्रम को समायोजित करें।

8. करी पत्ता के पौधे के लिए खाद

अन्य पत्तेदार पौधों की तरह, करी पत्ता के पौधों को भी नाइट्रोजन (एन), फास्फोरस (पी), और पोटेशियम (के) की संतुलित आपूर्ति के साथ आवश्यक पोषक तत्वों की आवश्यकता होती है।

  • हालाँकि, वे विशेष रूप से अपने उर्वरक मिश्रण में नाइट्रोजन के उच्च अनुपात से लाभान्वित होते हैं। हरे-भरे पत्ते के विकास को बढ़ावा देने के लिए नाइट्रोजन महत्वपूर्ण है, जो स्वस्थ करी पत्ते के पौधों की विशेषता है।

9. करी पत्ता के पौधे के लिए कीटनाशक

कीटों और बीमारियों के संभावित हमलों को रोकने के लिए, अपने करी पत्ते के पौधे की सुरक्षा के लिए सक्रिय उपाय करने की सलाह दी जाती है।

  • एक प्रभावी तरीका नियमित रूप से पत्तियों पर नीम के पानी के घोल का छिड़काव करना है।
  • इसके अतिरिक्त, सप्ताह में एक बार मिट्टी में नीम का घोल मिलाने से कीटों और बीमारियों के खिलाफ पौधे की प्रतिरोधक क्षमता में और वृद्धि हो सकती है।

निष्कर्षतः, गमले में करी पत्ते के पौधे को उगाने और उसकी देखभाल करने के लिए उपरोक्त जानकारी पर ध्यान देने और विशिष्ट परिस्थितियों के पालन की आवश्यकता होती है। इन दिशानिर्देशों का पालन करके, आप अपने घर के बगीचे से ही ताज़ी चुनी हुई करी पत्तियों की मनमोहक सुगंध और स्वाद का आनंद ले सकते हैं।

शुभ बागवानी!

अपना स्वयं का बगीचा बनाएं!

cherry-blossoms

Why Spring Season is Best time for Gardening

Welcome to the wonders of spring!

Spring is a magical season when nature comes alive, painting everything with bright colors and filling the air with the sweet scent of flowers. As the frost fades away and the days get longer, gardeners everywhere celebrate the arrival of spring. It is the perfect time to take care of our plants.

In India, the spring season usually spans from mid-February to the start of April. During this time, the weather is sunny and pleasant.

Benefits of Spring Gardening

As the world around us starts to bloom again, gardeners get excited to revive their gardens.

They use the energy of spring to plant seeds, grow new plants from cuttings, and take care of delicate young plants and revive the dormant plants.

Let’s delve into why the spring season stands out as the optimal time for gardening endeavors.

Favorable Weather Conditions

In winter, temperatures decrease and daylight hours shorten, posing challenges for plant growth by slowing metabolic processes. The diminished warmth and sunlight hinder efficient photosynthesis, the process by which plants generate energy from sunlight.

crocuses spring

Spring’s mild temperature and ample sunlight create an ideal environment for plant growth and development.

  • Long hours of daylight provide ample photosynthetic opportunities, allowing plants to produce energy and thrive. Additionally, the moderate temperatures of spring reduce stress on both plants and gardeners, creating optimal conditions for gardening endeavors.

Abundant Growth and Blooming Possibilities

One of the most exciting aspects of spring gardening is witnessing the rapid growth and blooming of various plant species.

Tulips

From colorful tulips and daffodils to fragrant roses and vibrant cherry blossoms, spring offers an explosion of hues and scents that rejuvenate the senses. This abundance of growth possibilities inspires gardeners to experiment with diverse plant varieties, creating captivating landscapes brimming with life.

Optimal Soil Condition

garden soil

After the dormant winter period, the soil in spring becomes enriched with nutrients, making it fertile ground for planting. Spring replenishes the soil’s moisture levels, ensuring adequate hydration for plant roots to establish and thrive.

Additionally, the soil’s temperature rises gradually, promoting microbial activity and nutrient absorption, vital for robust plant growth.

Seasonal Pests and Diseases Under Control

Spring heralds the awakening of not only plants but also pests and diseases that can wreak havoc on gardens. However, by starting early in the spring season, gardeners can stay one step ahead of potential infestations and diseases.

  • Implementing preventive measures such as proper sanitation, regular inspection, and timely interventions ensures that plants remain healthy and pest-free throughout the growing season.

Time for Planning and Preparation

As nature awakens from its winter slumber, gardeners have ample time to plan and prepare for their gardening endeavors.

gardening planning

  • Whether it is sketching out garden layouts, selecting seeds and plants, or organizing gardening tools, the spring season offers a window of opportunity to set the stage for a successful growing season ahead. This meticulous planning lays the foundation for a bountiful and beautiful garden landscape.

Therapeutic Benefits and Mental Well-being

Beyond the tangible rewards of a flourishing garden, spring gardening also provides valuable therapeutic benefits for the mind and soul.

Engaging in hands-on activities such as planting, pruning, and nurturing plants fosters a sense of connection with nature and promotes mindfulness.

  • The tranquil ambiance of a garden in bloom serves as a sanctuary for relaxation and rejuvenation, offering solace from the stresses of modern life.

Conclusion

In conclusion, the spring season serves as a beacon of hope and renewal, igniting the passion for gardening in enthusiasts worldwide.

With its favorable weather conditions, abundant growth opportunities, and therapeutic benefits, spring offers the perfect canvas for creating enchanting garden landscapes that delight the senses and nourish the soul.

So, seize the moment, roll up your sleeves, and immerse yourself in the wonders of spring gardening!

Thanks

Make Your Own Garden!

chrysanthemum

Chrysanthemum Plant Care Tips, Soil, Watering, Sunlight

The chrysanthemum plant is indeed hardy and resilient, capable of surviving with minimal care, although optimal care leads to better flowering and overall health. While beginners may encounter challenges in nurturing these plants, they generally thrive well even with basic attention.

chrysanthemum

In this article, we will cover all aspects including pruning, fertilizer requirements, ideal season, pot size, and other essential needs.

  • How to care Chrysanthemum plant?
  • How to encourage flowering in Chrysanthemum plant?
  • What to do to troubleshoot bud blooming issues in Chrysanthemum plant?
  • How to promote denser and bushier growth in Chrysanthemum plant?

Let’s understand Chrysanthemum plant basic nature

Chrysanthemums are perennial plants, meaning they can live for several years with proper care. With consistent attention, they can maintain their green foliage year-round. However, Chrysanthemum plant typically bloom in the fall, starting around October, although the exact timing may vary depending on the specific variety and growing conditions. Flowering during the summer and monsoon seasons is less common but not impossible, especially with certain cultivars or in controlled environments.

How to Grow Chrysanthemum plant

chrysanthemum

To grow chrysanthemum plants, there are several methods you can employ:

1. From Cuttings:

  • Remove the lower leaves from the branch and insert it into the soil, ensuring that at least one node is buried beneath the surface.

2. Dividing Roots:

Chrysanthemum plants (Guldavari) can produce new plants from their roots also.

  • To propagate in this manner, separate a portion of the plant from the roots and bury it under the soil to obtain multiple plants from a single root. This method is straightforward and offers an easy way to propagate chrysanthemums.

3. From Seeds:

Chrysanthemum plants can also be grown from seeds.

  • Seeds are available from nurseries, seed markets, or online retailers.

However, if purchasing from a nursery, the best time to buy chrysanthemum plants is during autumn, from the end of October to November.

Chrysanthemum Plant Growth Cycle:

Chrysanthemum Plant

  • If the plant is purchased in October with abundant flowers and buds, perform light pruning at this time.
  • In February, consider hard pruning as plants grow vigorously; follow regular care thereafter.
  • During extreme summer (May/June), relocate to a shaded area to protect from heat.

In August, the Chrysanthemum plant undergoes a significant transition. It is advisable to repot the plant or refresh the soil during this month.

  • Check the roots by carefully removing the plant from its pot, apply fertilizers, and begin lightly pinching the plant. Typically, growth occurs from August to October, with new branches emerging and flowers blooming towards the end of October.

Soil Mixture for Chrysanthemum Plant

The soil mixture for this plant must be of exceptional good because once it starts growing, it becomes so dense that there will be no room left to add anything later on.

  • Additionally, this plant is susceptible to fungus and insect infestations, which can quickly proliferate in the soil.
  • If the soil becomes compacted and water cannot pass through, the plant will not survive.
  • Furthermore, during the peak flowering period, the soil requires ample nutrition to support the plant’s needs, so it should be enriched with nutrients.

The soil should be well-balanced with all the necessary nutrients and have proper drainage characteristics.

Note:

  • Mix local soil, compost, sand, cocopeat, fungicide, and fertilizers for optimal soil quality.

Sunlight Requirement for Chrysanthemum Plant

sunlight for CRYSANTHEMUM plant

Chrysanthemum plant prefers maximum sunlight exposure.

  • At least 4 hours of sunlight daily needed for proper growth. However, keep plant in shaded are during extreme summer.
  • During rainy season, allow some rainfall but otherwise keep shaded. Excessive water may lead to a fungus attack.

Watering Tips for Chrysanthemum Plant

watering for CRYSANTHEMUM plant

Give water whenever the soil appears dry, but avoid overwatering.

  • However, during the peak flowering period from October to January, the soil tends to dry out rapidly, requiring more frequent watering.

Happy Gardening!

Make Your Own Garden!

rose plant repotting

How to repot a Rose plant?

Repotting is the process of transplanting a plant from one pot to another.

Why should you repot a rose plant?

rose flower
rose plant

The main objective behind repotting the plant is:

  • to provide more space to grow,
  • to avoid root-bound,
  • to provide better soil conditions,
  • to provide adequate supply of nutrients for healthy growth,
  • to ensure the plant’s continued health and well-being.

In this article, we will guide you through the process of repotting new rose plant, ensuring that it thrives in its new pot.

When to repot a rose plant?

rose plant in pot
rose plant in pot

The best time to repot your new rose plant to a bigger pot is in early autumn during October month. If you received a potted rose as a gift or you bought one, and its roots are coming out of the pot or it feels unstable, it is time to repot it.

Steps to follow before repotting a rose plant

rose plant in clay pot

1. When you bring the plant home, don’t put it in direct sunlight for the first two days to prevent it from getting sunburned.

2. Make sure it is not kept in a dark place, look for a bright place to keep it.

3. After two days, if the plant looks healthy, you can place it in the sun and water it when the top soil dries.

4. If the plant still looks good after five days, it’s ready for a new pot.

5. Only transplant your rose plant in the evening.

6. Roses don’t like clayey soil, so use the right soil mixture.

What is needed for repotting?

1. New pot: Select a pot that is at least 2-3 inches larger in diameter than the current pot. Ensure it has drainage holes at the bottom.

2. Fresh soil mixture: Use good soil mixture which is prepared for roses or other flowering plants.

3. Gloves: Rose plants have thorns, so protect your hands with gloves.

4. Watering can: To water the plant once it is in its new pot.

5. Pruner: To trim roots and prune the leaves of the plant if needed. 

Steps to repot rose plant:

1. Remove the plastic: If the plant is in plastic bag, first, remove the plastic covering and soil from the roots.

or

1. Remove the rose plant from its current pot: If the plant is in old pot, gently tap the pot to loosen the root ball. 

2. Immerse the roots of the rose in water: After removing, immerse the roots of the rose in water, so that the remaining soil also gets removed in the water.

3. Trim if needed: Check the roots for any damaged parts and trim them if needed to help the roots grow well.

4. Fill new pot with soil: Always use clay pot. Fill the new pot with the right soil mixture, after covering the bottom hole with any newspaper.

soil mix
soil mix

5. Place the rose in the new pot: Put the plant in the new pot and press the soil gently so it stays in place. Add more soil, pressing it down gently to remove air gaps.

6. Water thoroughly: Water it well but in installments, until you see water draining from the bottom hole. 

watering to rose plant

7. Keep rose plant in a shade: Now, keep the plant in the shade for two more days.

Read here:

How to prepare Soil Mix for Rose plant

Conclusion:

Repotting your rose plant is important to help it stay healthy and beautiful. With the right tools and a little care, you can give your rose the space it needs to grow and thrive. Doing this regularly, along with proper care, will reward you with a beautiful, fragrant rose that will brighten your garden for years to come.

Plant it! Love It !

Happy gardening !

epsom salt indoor plants

Is Epsom Salt Good for Indoor Plants?

Benefits of Epsom Salt for Indoor plants

Many of us might already be acquainted with the practice of soaking in an Epsom salt bath to relieve sore muscles. Surprisingly, this can also benefit your indoor plants!

Epsom salt, chemically known as magnesium sulfate, is a versatile compound with numerous benefits for indoor plants. It has long been used by gardeners and plant enthusiasts as a natural remedy to enhance plant growth and overall health.

What is Epsom Salt?

Epsom salt
Epsom salt

Epsom salt is a crystalline substance comprised of magnesium, sulfur, and oxygen. It derives its name from the town of Epsom in Surrey, England, where it was first discovered in natural springs. Its molecular structure enables it to easily dissolve in water, making it readily available for plant uptake.

Composition of Epsom Salt

Magnesium and sulfur are essential nutrients for plant growth.

  • Magnesium plays a crucial role in chlorophyll production,photosynthesis, and the activation of enzymes involved in plant metabolism.
  • Sulfur is a component of amino acids and vitamins essential for plant development.

How Does Epsom Salt Benefit Indoor Plants?

indoor plants

1. Nutrient Absorption Enhancement:

  • Epsom salt helps improve the uptake of essential nutrients such as nitrogen, phosphorus, and potassium, promoting vigorous growth and lush foliage.

2. Boost their growth 

  • Epsom salt can promote lush foliage and vibrant green color in indoor foliage plants like ferns and philodendrons, ZZ plant, Aglaonema, Syngonium, Areca Palm, Spider plant, Pothos (Money plant), etc. 

How to Apply Epsom Salt to Indoor Plants

epsom salt plants blog

There are two methods to provide Epsom Salt to your plants:

1. First Method:

  • Dissolve 1 tablespoon of Epsom Salt in 1 liter of water. Then, spray this solution on the plant leaves. Through this method, Epsom Salt will enter the plant via the leaf pores.

2. Second Method:

  • Loosen the soil around the plant and dig a little. Place Epsom Salt into the soil. For larger pots, use 1 tablespoon, and for smaller pots, use ½ tablespoon of Epsom Salt. Cover it with soil and mix thoroughly. Then, water the plant.

epsom salt in soil

Note

  • After this procedure, wait for 8-10 days as it works slowly and gradually. It is not a magical solution that yields instant results.
  • So, after applying Epsom Salt for the first time, repeat the same process after 8-10 days.
  • You will notice visible changes in your plant’s growth.

Precautions and Considerations

1. Dosage:

  • Excess use of Epsom Salt, like with anything, can be harmful. Epsom Salt is not a fertilizer, so it should not be used repeatedly on plants.
  • As excessive application can lead to magnesium toxicity.

2. Frequency of Application:

  • Apply Epsom salt to indoor plants every 6-8 weeks during the growing season.

3. Signs of Overuse:

  • Monitor plants for signs of yellowing leaves or stunted growth, which may indicate overuse of Epsom salt.

Conclusion

In conclusion, Epsom salt offers numerous benefits for indoor plants, ranging from improved nutrient absorption to pest deterrence. When used judiciously and in conjunction with proper plant care practices, it can contribute to the health and vitality of indoor greenery.

Thanks
Make Your Own Garden!

How to Control Pest Attack in the Rose Plant

Roses are susceptible to a variety of pests, including mealybug, aphids, spider mites, and black spot

Signs of Pest Infestation

Early detection is key to preventing serious damage to your rose plants. Look out for signs such as distorted or yellowing leaves, wilting, sticky residue (honeydew), or visible pests on the leaves and stems.

mealybugs in the rose plant

Preventive measures

The best way to prevent pest attacks is to keep your roses healthy and vigorous. This means providing them with the proper amount of water, fertilizer, and sunlight. You should also inspect your roses regularly for signs of pests. Prune regularly to remove dead or diseased plant material and improve air circulation.

black spot in rose
black spot in rose

How to Control Pest Attack in the Rose Plant

If you do find pests on your roses, there are a number of things you can do to control them:

1. One option is to use insecticidal soap or neem oil.

  • These products are natural and effective against a variety of pests. 
neem oil
neem oil

2. Second option – If your plant is infested with insects and pests, follow these steps:

1. Take 8-10 garlic cloves and grind them using a food processor, blender, or mortar and pestle.

2. Boil the ground garlic in half a liter of water for 5-10 minutes, then sieve the mixture to obtain a liquid solution.

3. In a separate 1-liter container, combine 2 teaspoons of the garlic water, 1 teaspoon of neem oil, and a few drops of hand wash water solution.

4. Thoroughly spray this mixture on the entire plant, ensuring that all parts are adequately covered. It’s best to do this spray in the evening to avoid direct sunlight.

5. The next morning, rinse the plant thoroughly with clean water.

spray water to rose plant

6. Repeat this process for 2-3 days, and you should notice the insects and pests disappearing from the plant.

Here are some additional tips for preventing and controlling pests on roses:

1. Remove dead and diseased leaves and stems:

deadheading of roses
  • This is essential as it prevents pests and diseases from proliferating in the garden. Timely removal of such plant parts helps in maintaining overall plant health.

2. Encourage beneficial insects:

ladybugs
ladybugs
  • Beneficial insects, such as ladybugs and lacewings, prey on pests.
  • You can encourage beneficial insects by planting a variety of flowers and plants in your garden.

3. Space your roses properly:

  • Proper spacing between rose plants is crucial for good air circulation.
  • This improved airflow can reduce the risk of pests and diseases taking hold in your rose garden, as it creates a less favorable environment for them to thrive.

These tips can be very effective in keeping your roses healthy and pest-free.

Thanks

Make Your Own Garden!

cinnamon powder

Is Cinnamon Powder Good to Prevent Fungus in Soil?

Are you tired of dealing with annoying fungus in your garden soil? Well, you can solve that problem with cinnamon powder! This common ingredient in your kitchen not only makes your food taste great but also helps fight off fungus in your garden. In this guide, we will talk about how cinnamon powder can keep your plants healthy and make your garden flourish.

Is Cinnamon Powder Good to Prevent Fungus in Soil?

Without a doubt, cinnamon powder is an excellent natural remedy for preventing fungus in soil. Its antifungal properties, coupled with its safety and affordability, make it a valuable asset for gardeners seeking to protect their plants’ health and vitality.

Understanding Cinnamon’s Antifungal Properties

Cinnamon powder boasts potent antifungal properties, making it a formidable opponent against soil-borne pathogens.

  • Its active compounds, such as cinnamaldehyde, work synergistically to inhibit fungal growth and protect plant roots from infections.

How Cinnamon Powder Acts as a Soil Sterilizer

One of the key benefits of cinnamon powder is its ability to sterilize soil, eliminating harmful fungi and bacteria without harming beneficial microorganisms. By creating a hostile environment for fungal pathogens, cinnamon powder promotes a healthy soil ecosystem conducive to plant growth.

How to use Cinnamon Powder as a Fungicide?

Sprinkle Cinnamon powder on the soil surface (1)

If the soil is well-drained, the risk of fungal attack is lower. To use cinnamon powder as a fungicide:

 If fungus is present on the surface, carefully remove that layer of soil.

  • Once the affected soil is cleared, evenly sprinkle cinnamon powder on the surface.
  • You will notice the fungus disappearing. This is a simple and effective remedy for the issue.

Note:

  • This treatment is typically effective as a one-time solution; there’s usually no need to repeat it. While there are many fungicides available in the market, such as Trichoderma spp, cinnamon powder can often yield better results.

Benefits of Using Cinnamon Powder

Explore the numerous benefits of incorporating cinnamon powder into your gardening routine:

1. Safe and Natural

Unlike chemical fungicides, cinnamon powder is non-toxic and environmentally friendly, making it safe for use around children, pets, and beneficial insects.

2. Cost-Effective Solution

Say goodbye to expensive fungicides! Cinnamon powder offers an affordable alternative for controlling soil fungus, saving you money without compromising effectiveness.

Precautions and Considerations

While cinnamon powder is generally safe for use in the garden, it’s essential to exercise caution and follow these guidelines:

Avoid Overuse

While cinnamon powder is effective against soil fungus, excessive application may disrupt the natural balance of soil microorganisms. Use sparingly and monitor your plants’ response to avoid unintended consequences.

Quality Matters

Opt for high-quality cinnamon powder free from additives or synthetic ingredients. Look for organic options to ensure purity and efficacy.

Conclusion

In conclusion, cinnamon powder emerges as a versatile and effective solution for preventing soil fungus and promoting healthy plant growth. Its natural antifungal properties, coupled with its safety and affordability, make it a valuable addition to any gardener’s toolkit. By harnessing the power of cinnamon powder, you can enjoy lush, thriving gardens free from the grip of fungal pathogens.

Thanks

Make Your Own Garden!