Rose plant is considered to be the most popular and favorite plant throughout the world. To keep your rose plants healthy and blooming at their best, it is important to provide them with proper care, including regular fertilization and pest control.
Best fertilizers for the Rose plant
pink rose flowers
Rose plants require regular fertilizers because they are nutrient-intensive, which helps them develop strong roots, leaves, and flowers. The best type of fertilizer for rose plant is a balanced fertilizer that contains nitrogen, phosphorus, and potassium (NPK).
List of fertilizers is mentioned below which would help the plant to survive and to grow slowly.
fertilizers for rose plant
Rose Bloom Fertilizer
Vermicompost
Cow Dung Compost
Vermicompost Teas or Cow Dung Compost Tea
Epsom Salt
Seaweed Fertilizer
Mustard Cake Fertilizer
Give liquid tonic to the Rose plant
It is very important to give liquid tonic to the rose plant when it is about to bloom and after the formation of buds.
If you notice the leaves turning white, fading, or the plant becoming weak, you can apply Epsom salt once a month.
Mix a small amount of Epsom salt with 5 liters of water and use it as a monthly treatment for the plant.
For maintaining the nutrient levels in the soil and promoting significant plant growth, here’s a schedule to follow:
If you apply any fertilizer from the first batch on the 1st of the month, then on the 15th of the same month, alternate it with either Epsom salt, Seaweed fertilizer, Mustard cake fertilizer, vermicompost tea, or cow dung compost tea.
Important note:
During summers, the rose plant is under partial dormancy, which means they are still growing, but at a slower rate compared to their active growing season.
So, if strong fertilizer is given at this time then the plant would get scorched but any mild fertilizer is needed to sustain the plant.
Giving strong or heavy doses of fertilizer during this time can harm the plant, causing damage or “scorching.”
Instead, it’s advisable to use a milder or more gentle fertilizer to support the plant’s minimal growth and sustain its overall health during the summer months.
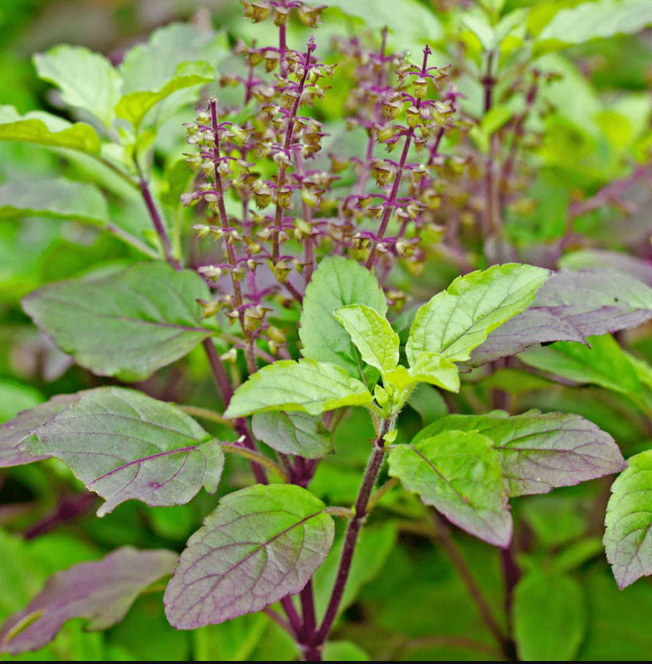
Tulsi, cherished for its perennial nature, sacred aura, and aromatic allure, is a beloved presence in countless homes. This remarkable plant has the capacity to thrive for numerous years without the need for seasonal replacements.
Despite its resilience, many individuals are unaware of the proper care essential for sustaining the vitality of the Tulsi (Holy basil) plant, which can lead to its demise within a single season.
This comprehensive article identifies common mistakes that, with careful attention, can be addressed to extend the lifespan of your Tulsi plant. Now, let’s explore some common mistakes that, when addressed with care and attention, can significantly extend the lifespan of your cherished Tulsi plant.
Tulsi Plant Care in Winter Season: 10 mistakes to avoid
1. Not Following Perfect Growing Season – Summer Season:
Many folks are still unfamiliar with the optimal growing season for the Tulsi plant. They often plant it haphazardly and then wonder why it’s not thriving. The issues can be categorized into three main mistakes:
Planting Tulsi cuttings at the wrong time.
Sowing Tulsi seeds in the soil at an inappropriate time.
Purchasing Tulsi from a nursery at the wrong season.
Avoid buying or cultivating Tulsi plant during winters
Tulsi is essentially a summer plant and in regions where warmth persists throughout the year, there’s no cause for concern.
However, during the cold season, it requires special care.
The season significantly influences the plant’s growth, so it is crucial to avoid buying or cultivating it during winters; otherwise, it may wither or experience stunted growth.
2. Not following proper technique of watering:
If the tulsi plant does not receive adequate water, it may show initial growth but eventually dry up. Striking a balance between not underwatering and avoiding overwatering is crucial for its well-being.
Watering tips
Ensure you water the plant when the top layer of soil is dry and provide a sufficient amount so it reaches the plant’s roots.
Avoid giving small amounts that don’t penetrate the bottom layers of the soil.
Avoid watering daily to Tulsi (holy basil) plant
It’s essential to dispel the myth of daily watering for tulsi.
Watering daily, especially when the soil is already moist, can lead to root rot.
During summers, be extra cautious. Water the plant promptly when the soil dries and continue until water starts draining out from the bottom hole of the pot.
3. Not Grown in healthy soil:
The ideal soil is crucial for the fruitful growth of any plant. Well! After taking proper soil mixture also, there can be chances where the quality soil is not promoting the abundant growth of the plant. Prevailing reasons for that could be any of them stated below. Like-
Soil is clayey, too sticky, too hard.
Soil gets cracks in it easily after some days.
Soil might be infected with insects or termites.
Enhance the soil
To address these issues, enhance the soil with compost, such as cow dung manure and sand, to make it soft, nutrient-rich plus porous.
A healthy soil composition facilitates easy root spread and encourages the overall flourishing of the plant.
A well-draining soil mix is essential for Tulsi plants!
While plants in open lands may require less care but those planted in pots or containers demand more attention to ensure the soil is appropriately enriched for optimal growth.
4. Not picking perfect pot:
avoid fancy pots
Despite the variety of attractive pots available in the market designed specifically for Tulsi plant, such as small square ceramic pots, these pots may pose a challenge over time.
Tulsi plants thrive when they can spread their roots and the limited space in these small pots can lead to suffocation.
For optimal growth, it is recommended to choose – a clay pot with a size of 10-12 inches
12 inch clay pot
The porous nature of a clay pot provides the necessary space for tulsi roots to expand.
Opting for a clay pot can significantly extend the plant’s lifespan, adding an extra 1 or 2 years to its vitality.
5. Not doing tilling at time:
Sometime different situations prevails like-
Formation of algae on the top of soil
Appearing of cracks on the soil
Plant is not growing up to the remarkable level.
Well ! The simple reason for all these issues could be neglecting the essential practice of soil tilling.
Tilling of soil
In container gardening, soil tilling holds utmost importance. Loosening the soil before watering allows for better water absorption. This, in turn, facilitates the effective shuffling of nutrients and expedites the process of soil aeration.
Despite its simplicity, the act of tilling has a significant impact on the overall growth of the plant.
6. Not doing regular pruning:
Well! Big myth prevails in the society that pruning of Tulsi plants should not be practised but in reality, pruning plays a vital role in promoting its growth.
“Proper pruning results in a bushier plant with healthy, elongated stems or branches”.
Pruning, when done with the right methodology, is a crucial aspect of plant care.
You can use your hands for pruning, ensuring that basil leaves are plucked by pinching from the tip. This technique encourages the emergence of more branches.
Regular removal of manjaris (flowers of the tulsi)
Pruning of Manjaris
It’s essential to regularly remove the manjaris (flowers of the tulsi) because, once dried, they turn into seeds that can adversely affect the parent plant’s growth.
Timely removal of these flowers is crucial to prevent the plant from drying up.
7. Not feeding fertilizers:
Many visible changes in the plant give signals that it need fertilizers like-
Whitening of leaves
Colour change of leaves
Plant is bending
Plant not becoming bushy
Plants is not showing any growth
Well! With the change of time the nutrition level of everything is getting depleted , hence for the soil also. So nowadays, it is a compulsive act that the plants are fed with required fertilizers at regular intervals of time without any compromise.
So, if there is not any concerned issue with the plant then any fertilizer like cow dung fertilizer fed once in a month is sufficient for the Tulsi plant.
Rotation of different organic fertilizers can be given here like –
In the first cycle if cow dung fertiliser is given then
Next month other fertilisers like vermicompost can be given after doing proper tilling of the soil
In the similar manner, next month any other fertiliser like mustard cake or any other liquid fertiliser (neem tonic) can be used.
Plants get weaker , leaves start shrinking due to lack of nutrients, hence fertilizers are important to meet the desired nutrients levels of soil.
8. Not protecting from pests attack:
Indeed, prevention is more effective than cure when it comes to safeguarding your plants from pests.
Establish a routine of spraying neem leaf concoction on the plants either weekly or every 15 days.
Alternatively, neem oil spray can be utilized as a preventive measure against pest attacks.
Unfortunately, some individuals neglect pest protection and only address the issue after an attack has occurred.
Treating the plants with various remedies at that point adds additional stress to the plants already dealing with the aftermath of a pest attack.
It is more beneficial to proactively protect plants to avoid such stress and damage.
9. Not providing adequate sunlight:
Absolutely, Tulsi plant is an outdoor plant that requires –
a minimum of 4-5 hours of direct sunlight and exposure to fresh, open air.
Placing it indoors where sunlight is scarce will only sustain its well-being for a few days, after which it will weaken and eventually wither.
10. Not caring in winter:
Being a summer plant, it demands additional attention during the winter season. Avoid exposing it directly to dew, cold winds or rainwater.
Opt for a sheltered spot under a net where it can still receive sunlight but remains shielded from the harsh winter elements.
For added protection, cover the plants with plastic polythene in the evenings to guard against the cold winds, removing it the next morning when the sun is out.
cover your tulsi plant with polythene in winter season during evening
Refrain from applying excessive fertilizer during winters, instead, use mustard cake fertiliser only at the beginning of November.
Additionally, avoid using cold water for watering the Tulsi plants in winter.
Conclusion
Refrain from doing all these ten mistakes with the tulsi plant ,you ensure the longevity and well-being of your Tulsi plant.
ZZ plants, scientifically known as Zamioculcas zamiifolia are known for their resilience and ability to thrive in low-light conditions. They are considered perennial indoor plants and are well-suited for various locations within a home. They are recognized for their low-maintenance characteristics and are often used as decorative elements. Understanding the specific needs of ZZ plants is essential for their successful growth.
In this article, we will discuss key steps on how to grow and care for ZZ plants at home.
ZZ plants known for Air-purifying qualities
ZZ plants are recognized for their air-purifying qualities and ability to contribute to oxygen levels in indoor environments. These plants are often included in lists of air-purifying houseplants because they can help remove certain toxins from the air and enhance indoor air quality.
Preferred Season and Temperature
ZZ plants thrive in typical summer conditionsand can prosper year-round in regions without harsh winters.
During winter, they may face challenges such as yellowing leaves and occasional branch loss. However, they generally remain manageable and tend to recover independently once the weather shifts.
The optimal season for their growth is spring, with an ideal temperature range of 15-25°C.
Types of ZZ plant
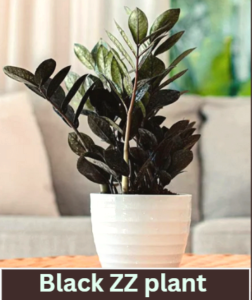
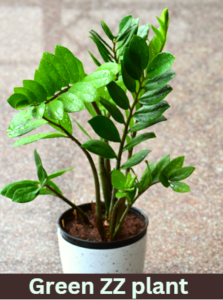
ZZ plants come in two varieties: Green ZZ and Black ZZ.
Mature black ZZ plantsfeature leaves with a blackish hue, while their smaller leaves initially exhibit a green color.
On the other hand, green ZZ plants maintain their characteristic green leaves throughout their growth.
How to Get ZZ Plant
From Nursery Green ZZ plants are readily available at all nurseries, while black ZZ plants can be found at select renowned nurseries. They are also easily accessible online, though prices may be comparatively higher.
A medium-sized ZZ plant typically costs between Rs 150-200, and prices increase with the size of the plant.
Propagation Methods
➢ By bulbs ZZ plants propagate through bulbs in their roots.
By carefully separating a healthy ZZ plant from its dense growth, you can collect a ZZ plant along with its bulb and nurture a new plant using this method.
➢ By stem ZZ plants can also be grown from stem cuttings.
Simply place cut pieces of the stem into the soil, and you can cultivate a new plant from these cuttings.
➢ By leaves ZZ plants can be propagated through leaves as well.
By placing the leaves in the soil mixture, a new plant will emerge after some time.
Preferred Pots for ZZ plants
1. ZZ plant can thrive in the same pot for years
ZZ plants thrive when their roots are tightly bound, this condition encourages robust leaf growth. However, they are not fond of frequent pot changes or relocations. Once comfortably settled, a ZZ plant can thrive in the same pot for years.
Note:
When obtained from a nursery, it is recommended to refrain from repotting the plant for a minimum of three months after purchase.
2.Versatile pot types ZZ plants are versatile in terms of pot types—they can be grown in ceramic, clay, plastic, soil, cement, or metal pots.
The choice of pot material depends on the plant’s placement; for decorative purposes, ceramic pots are a great option. However, it’s recommended to avoid using grow bags.
3. Repotting Guidelines When repotting, always choose a pot that is 1 or 2 sizes larger than the current one.
Going beyond that size increase is not advisable for the well-being of the ZZ plant.
Sunlight and Location for ZZ plants
The ZZ plant does not thrive in direct sunlight or exposure to rainwater, as its leaves are prone to drying out in heat.
To ensure its well-being, it is recommended to keep the ZZ plant indoors, away from direct sunlight and rain exposure.
Choose a location inside the home with bright, medium, or low light for the optimal growth of the plant.Despite being a slow-growing plant, it flourishes best in an area with bright light.
The bulbs of ZZ plants are adept at retaining moisture, making them well-suited for minimal watering. Typically kept indoors away from direct sunlight, the soil tends to stay wet for extended periods.
Check soil condition before watering to ZZ plant
To gauge the need for watering, insert a stick into the soil, reaching the bottom where the bulbs are located. If the soil is dryat that depth,move the plant outdoors and water it generously until drainage occurs from the bottom hole.
After-Watering Care:
After watering, spray water on the leaves and ensure they are thoroughly cleaned.
Once water stops draining from the bottom hole and the leaves have dried (usually after 2-3 hours), relocate the plant back indoors. This careful watering routine contributes to maintaining the ZZ plant’s health and well-being.
Importance of Careful Watering:
Careful watering is crucial for ZZ plants due to their delicate bulbs, which can be adversely affected if not handled with care.
Overwatering may lead to bulb melting or rotting, with the plant showing signs such as yellowing leaves and drooping stems. If these indications are observed, a thorough inspection is essential.
Dealing with Bulb Rot:
If bulb rot is detected, remove the ZZ plant from its pot and examine the bulbs.
Any rotted bulbs should be removed, cleaned, and surrounded with soil or coco peat to enhance soil dryness.
It is important to note that the rotting of one bulb can impact others. After thorough cleaning, repot the plant with a well-balanced soil mixture to ensure continued health.
Resilience to Underwatering:
ZZ plants are resilient to underwatering, but caution must be exercised to avoid overwatering.
Determining the frequency of watering can be challenging due to varying weather conditions across regions.
As a general guideline, individuals in North India often check every 20 days by inserting a stick into the soil to assess its moisture content.
“Watering is recommended when the soil is completely dry at the bottom of the pot, creating a balanced and suitable environment for the ZZ plant.”
How to prepare Soil mixture for ZZ plant
1. Collect local garden soil:
Begin by collecting local garden soil for the ZZ plant. Ensure the soil is clean by removing any debris or glass pieces.
2. Add Compost in the soil
For a well-balanced soil mix, add compost which should be half the amount of soil. You can choose from various compost options such as vermicompost, kitchen compost, cow dung compost, or leaf compost.
3. Add Sand in the soil
Include construction sand in approximately ¾ of the compost quantity.
Adding sand to the soil promotes good drainage.
4. Add cocopeat in the soil
To further enhance the soil mixture, consider adding a small amount of cocopeat.
Coco peat is effective in retaining water. It has excellent water-holding capacity, helping the soil stay moist for a longer time.
However, in regions where temperatures are not excessively high, cocopeat can be omitted.
5. Optionally, add perlite and vermiculite in small quantities.
Mix all the ingredients thoroughly, and your ZZ plant’s soil is ready for use.
———————-
If you like this article, kindly leave a comment and consider sharing it with your friends. Your support is greatly appreciated!
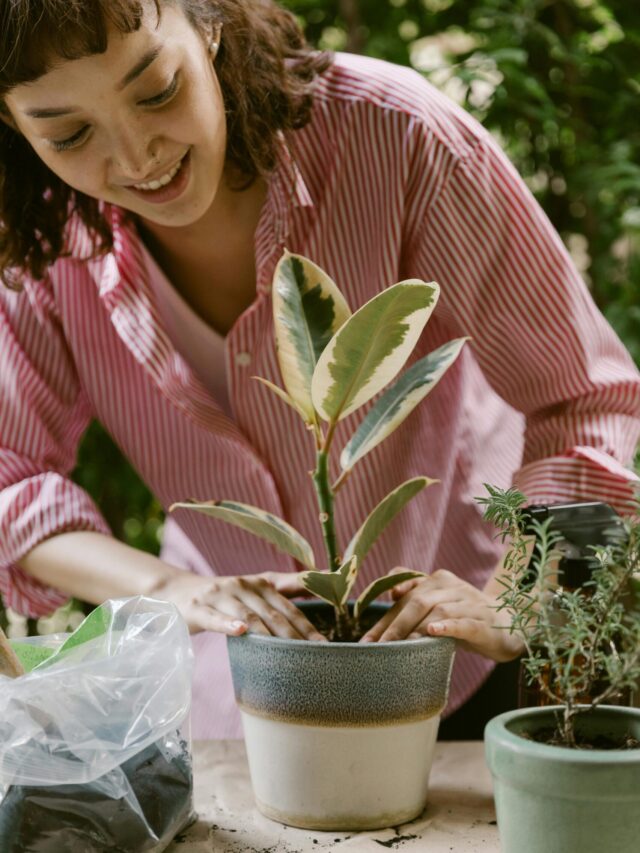
Nowadays there is a lot of trend for indoor plants. People like to have indoor plants in their homes and offices. This not only increases the beauty of the homes and offices but also brings positive energy along with it.
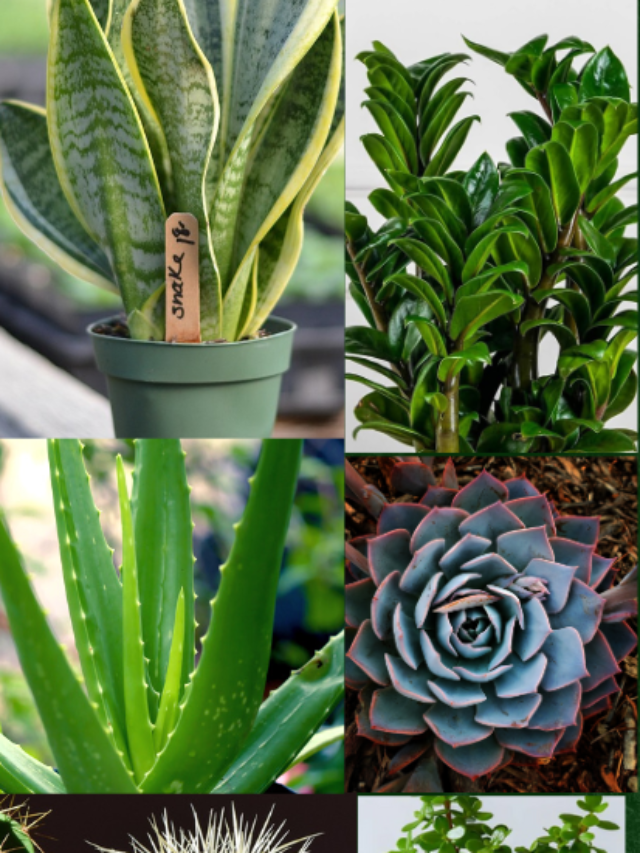
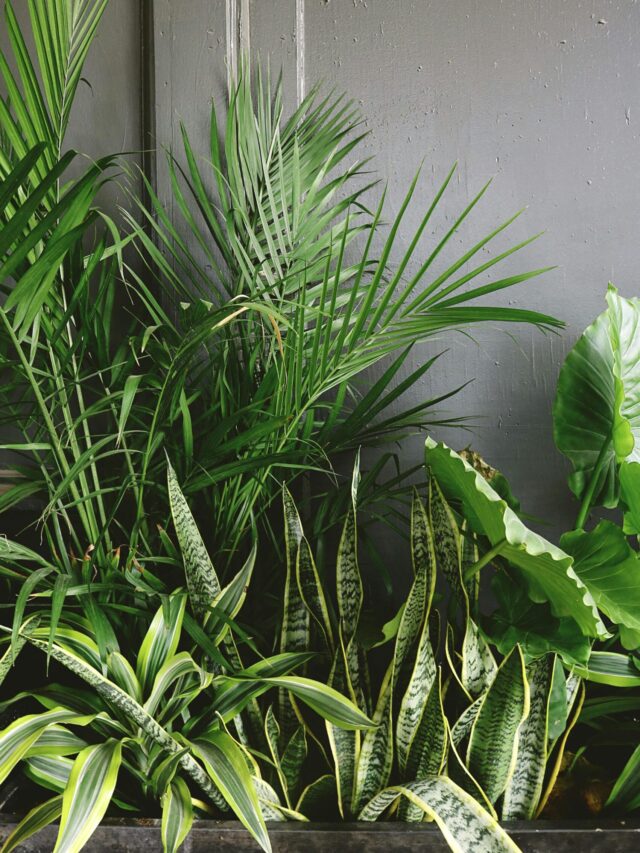
One of the most commonly grown indoor plants, the “Snake plant” has gained popularity due to its hardiness and ease of growing and air-detoxifying properties. Snake plants are often used as home decorations, as they are very attractive to look at. They can be seen in almost all places.
In this article, we will discuss complete care and tips on Snake plant such as;
watering tips for snake plant,
sunlight for snake plant,
fertilizers for snake plant,
soil mixture for snake plant,
propagation for snake plant,
repoting tips for snake plant, and many more.
How to Grow and Care Snake Plant
Snake plants are recognized for their evergreen-looking sword-shaped leaves. Its leaves grow upwards and look like a sword.
Snake plant is also known as “mother-in-law’s tongue”, “St George’s sword” or “viper’s bowstring hemp”, as it is one of the sources of plant fibers used to make bowstrings.
The snake plant is a life-giving plant as it increases the level of oxygen in the atmosphere to a remarkable level.
It is also known for its ability to help remove toxic air pollutants.
It purifies the air and maintains the freshness in the room.
Why is it called a Snake plant?
It has leaves with a snake-like texture and from the top, it looks like a snake’s hood. This plant does not attract any snakes toward it. It is just the physical appearance of the plant which gave it the name “Snake plant”.
How to Grow and Care Snake Plant
Snake plant requires very little care in maintenance. This is the reason why people easily plant it at home.
The snake plant is a flexible, hardy plant and can survive in relatively dry environments both indoors and outdoors.
If you plan to plant a snake plant in your home, then it is important for you to take care of some things.
Now, let’s discuss some important tips to care for the Snake plant:
1. Watering for Snake plant
Often people do not know when and how to water the snake plants. So, let’s discuss some of the important points on “how to water snake plants”.
The snake plant is a succulent and its requirements are a little different from any other plant. Its leaves already have moisture locked in so, it does not require much water. The biggest reason for the failure of this plant is overwatering or underwatering.
Before watering to Snake plant, follow the below steps:
Give water only, when the soil is completely dries
Water the snake plant only when the soil is completely dry.
Dig the top layer of soil at least for 2-3 inches not only the topmost layer, if it is dry till 2-3 inches then only give water.
When giving water, give it properly because the next watering might be done after 10-15 or 20 days.
Always give water at regular intervals
It should not be like that in the first go, your plant was watered at the gap of 4 days, and in the next round break of 20 days was taken.
The plant would start decaying in that case.
Always maintain the frequency of a 7-8 days gap.
During winter, it would need less water.
Important note:
Clean the leaves twice a month with a wet wipe or tissue paper.
Water should not get stagnant on the leaves, leaves might rot out.
Too much water can rot the roots of this plant.
Rainwater is good for Snake plant
Rainwater is good for this plant but not rain showers.
Store the rainwater in a bucket and give it to them (it works as a tonic for this plant).
Whenever it rains, shift them to shaded areas where rainwater would not fall directly.
2. Sunlight for Snake plant
Never keep snake plants in direct sunlight. Indirect sunlight is best for a snake plant. Bright light and medium light areas are the best for snake plants.
The ideal temperature for a Snake plant:
This plant grows well throughout the year, and may slow down for some time but does not stop growing.
The perfect temperature for this is 15-35℃.
During very high temperatures it slows down its growing speed.
In the course of extreme cold, it should be kept inside.
Save it from direct dew. Otherwise, it might start decaying but it will recover also as soon as the weather changes.
Important note:
Never beautify the corner (where there is no light) of your home with a snake plant because it would not survive in darkness. Snake plants would not hold on in darkness or dark areas.
3. Fertilizers for Snake plant
Snake plants are never fed by strong fertilizers because they do not give any fruits, flowers, or dense leaves.
It is just that the right fertilizer at the right time is the key followed by this plant for fruitful growth.
Fertilizers thrice a year is the agenda here.
Once in February, preferably cow dung fertilizer.
Next in July end,vermicompost tea can be given at this time.
After that, at the start of November, – you can use Mustard cake liquid fertilizer.
Mustard cake fertilizer is warm in nature and at this time winter starts, so it will help the soil to maintain its temperature.
Moreover, stored rainwater also acts as a tonic for it. Keep on giving that also whenever it rains.
4. Soil mixture for Snake plant
The soil of a snake plant is different from other plants because it is succulent.
Never go for clay soil.
Always go for a sandy mixture soil.
Follow the below steps to make the best soil mixture for snake plants:
1. Take river sand which should be 50% of the total mixture.
2. Take local soil (available in your area) which should be 25% of the total mixture.
3. Take compost which should be 25% of the total mixture.
How to make the best soil mixture for snake plants:
1. Take the local soil (available in your area).
2. Sieve it and clean it properly.
3. There should not be any plastic, glass pieces, termite, or insects in it.
4. Any compost can be taken like vermicompost, leave compost, cow dung, and kitchen compost.
5. Mix the proposed quantity of each ingredient properly.
6. A very little quantity of neem cake can be added to prevent fungus and insects.
5. How to propagate the Snake plant?
1. Select a small pot with a proper drainage hole at the bottom.
2. Fill the pot with the prepared mixture and pour some water.
3. Now, remove the plant from the existing pot by loosening the soil. Do it very carefully.
4. The roots of this plant are very small. Divide the plant into different parts by cutting it from the main root(called naadi).
5. Now, take one divided plant and place it inside the soil by making holes in the soil.
6. Cover the roots properly with soil. Do not give water now, as it was already given before placing the plant.
7. Place the pot where there is light but not direct sunlight.
8. Keep them undisturbed for a few days, and pour water when the soil gets dry.
9. They will bloom and flourish in heavy dense plants sometimes.
6. When to repot the Snake plant?
This plant is always available in pots, not in polybags.
Do not transfer it unnecessarily, give time to get it settled at your place.
Report it when it is required as this plant does not like unnecessary disturbance.
Shift this plant when the existing pot gets full by small -small baby plants.
Take one size bigger pot from the existing pot.
Do not go for a very big pot.
Important note:
Always prefer small pots for Snake plants.
It loves root bound. This plant loves roots bound and small – small pups propagate in these bounded roots.
If it is grown in a big pot, then its roots will take more time to spread and more time for the propagation of pups.
Hence, more time will take to grow and become dense.
7. How to deal with rotten Snake plants?
If you have a snake plant whose leaves started decaying then first of all cut out all the leaves which are rotting.
Now, keep it in any corner where there is a medium or bright light (not in direct sunlight).
Do not feed any fertilizer or water.
Just keep it for some days undisturbed and it will start recovering on its own.
8. Best time to purchase & grow
March-October is the best time to buy snake plants.
Always prefer dense snake plants with 2-3 pups while buying them from the nursery.
9. Availability, Cost, and Varieties of Snake Plants
Snake plants are easily available at all nurseries and can be bought for Rs 100-200.
Approximately it has 60-70 varieties in it but 10-12 categories are the most common and easily available.
Some are very long, some can be short, and denser, and some are in different colors.
For indoors, long ones are not preferred. Opt for the more dense plant to keep indoors as they look more beautiful.
Aloe Vera is a magical and very famous plant. It can be found very easily in any nursery. It grows very fast without much care but sometimes it faces some problems like its growth getting stopped, tips starting getting brown, leaf color starting deteriorating, the arrival of black spots on the leaves, and sometimes the complete plant getting dull.
How did this happen?
Why does this happen?
How to fix all these problems?
What are the remedies for all these complications?
In this article, we will discuss “how we can take care of the Aloe Vera plant” at home:
About the Aloe Vera plant
Aloe Vera is a perennial plant. It does not survive only for 6 months or 1 year, its life span is of longer duration.
It is a succulent plant hence liquid is filled in its leaves. It does not need much water for survival.
It is a xerophytic plant and can survive in drought, where there is no water like a desert.
Due to all these features of Aloe Vera plant needs very less care. It is a very hardy plant.
Benefits of Aloe Vera plant
Slice Aloe Vera very useful herbal medicine for skin and hair.
Aloe Vera is an African plant with more than 500 species.
It is also a Medicinal plant that is used in making medicines and cosmetics.
It is very helpful for skin and hair care.
You can apply its gel on the burnt area also, it will give instant relief.
How to take care of the Aloe Vera plant?
1. Temperature and sunlight requirement for Aloe Vera plant
It grows very fast between 10℃-30℃.
If it is extremely cold or hot, then its growth stops but plants do survive.
You can keep this plant outdoors as well as indoors. We have some reasons to keep it an indoor plant.
Firstly, it will survive in bright light as well as medium light. Secondly, they absorb harmful chemicals and purify the air.
Most importantly, they do not give carbon dioxide during night time. You can keep them near your bed also.
If you want fast growth of your plant, then keep it outside in the sunlight.
You can give 5 hours, 8 hours, 10 hours of sunlight or as much as possible, it would be good for it.
If it is extremely hot, there might be a chance of sunburn also, leaves will start to fade, start turning yellow and plants will be dull.
To avoid this you can keep your plant in shade or cover it with some cloth.
2. How often to water the Aloe vera plant
As it is a succulent, it needs very little water. Give water when the soil is completely dry.
It is also a xerophytic plant, so it can live for a longer duration without water.
3. Soil for Aloe vera plant
You do not need to prepare separate soil for Aloe Vera, you can use the same soil which you have prepared for the rest of the plants.
4. Pot Size for Aloe vera plant
The roots of this plant are very small so it does not need much depth or a deeper pot.
The pot has to be a wide pot because its roots spread widely.
If you want more Aloe Vera, then you can place it in a tub also.
The more area they will get, the more pups will come out.
5. Fertilizer for Aloe vera plant
You can give any organic fertilizer to the aloe vera plant once every 2 months.
Give only organic fertilizer because if you are using its gel for your face, hair, or drinking, it should be chemical-free.
Areca palm plants are available in different sizes from 4 feet to 6 feet and some are very small called young plants.
You can keep plants of smaller sizes on the table also. You can buy it according to your needs.
2. Propagation of Areca palm
You can grow areca palm from seeds. Seeds are available in the market. This plant grows very slowly, seeds will take around 2-3 months to get germinated and they arrive with 1-2 leaves.
If you have a healthy and bushy Areca plant then you can divide it into many plants from the roots.
The best option for having this plant is to buy it from a nursery.
Choose healthy areca palms from the nursery.
If you see brown leaves or weak plants then don’t buy them.
Sometimes nursery people try to misguide you but we should monitor carefully before buying it. Select green and healthy plants.
3. Pot size for Areca Palm
We can grow this plant in any type (ceramic, plastic, clay, etc) of pot but select a medium size pot.
If you are not experienced with areca plants then, you should use clay pots over other pots.
4. Soil Mixture for Areca Palm plant
The soil of this plant should be well drained as well as compact.
The upper portion i.e. leaves of this plant are very big in size as compared to the roots.
If we take soft soil then, its roots and the grip of the plant inside the soil will get spoiled.
The plant won’t be able to stand straight, it will start bending after some time. If we take compact soil then it will help in keeping the plant straight.
We can take 60% of garden soil, 25% construction sand, and 15% compost for its soil mixture.
We should not add coco peat here plus we are keeping compost quantity also very low because both these things make the soil very soft.
You can add neem cake powder, fungicides, or any insecticides also in very small quantities.
5. Temperature requirement for Areca Palm
The ideal temperature for an areca plant is 15-25℃.
If the temperature goes beyond 30 degrees and below 11 degrees, this plant goes into stress.
Tips of the leaves start getting brown and the growth of the plant stops there only.
6. Sunlight requirement for Areca Palm
Areca palm plants need bright and indirect sunlight.
If you have kept it at places where light is dim like stairs or corridors then, its growth would stop there only.
There should not be direct sunlight falling also otherwise its leaves will start turning brown.
In fact, areca plants which are planted on the ground and have direct sunlight also face the issue of sunburn. Their leaves also burn and become brown.
If you want to keep Areca in the sun, then keep her in the same sunlight that you can bear.
Keep these plants near windows and doors where fresh air comes along with bright and indirect sunlight.
7. Watering for Areca Palm
The water requirement of this plant is different in comparison to other indoor plants.
Areca palm likes moisture very much so if the topsoil of this plant is completely dry then, the tip of the leaves will turn brown due to underwatering.
Check the top layer of soil with your hand and if you notice that it does not have any moisture in it then, give water. It can become completely dry if we do not give water at that time.
Give water in installments, like giving one mug of water first then, after some time one more mug and keep on giving in regular intervals till the point water comes out from the bottom drainage hole.
If the soil is wet and still you are giving water then, there would be a problem of over-watering. It might catch fungus and pests (like mealybugs and all), plus the tips of the leaves will turn brown. Roots will also get spoiled and it will damage the whole plant.
One more thing, If you give water again and again in wet soil, then some white thing starts accumulating in it. It can be fungus or salt present in water.