Monthly Archives: June 2024

mint

How to Grow Miint from Seeds at Home

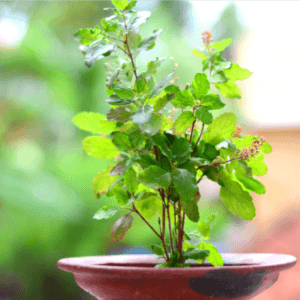
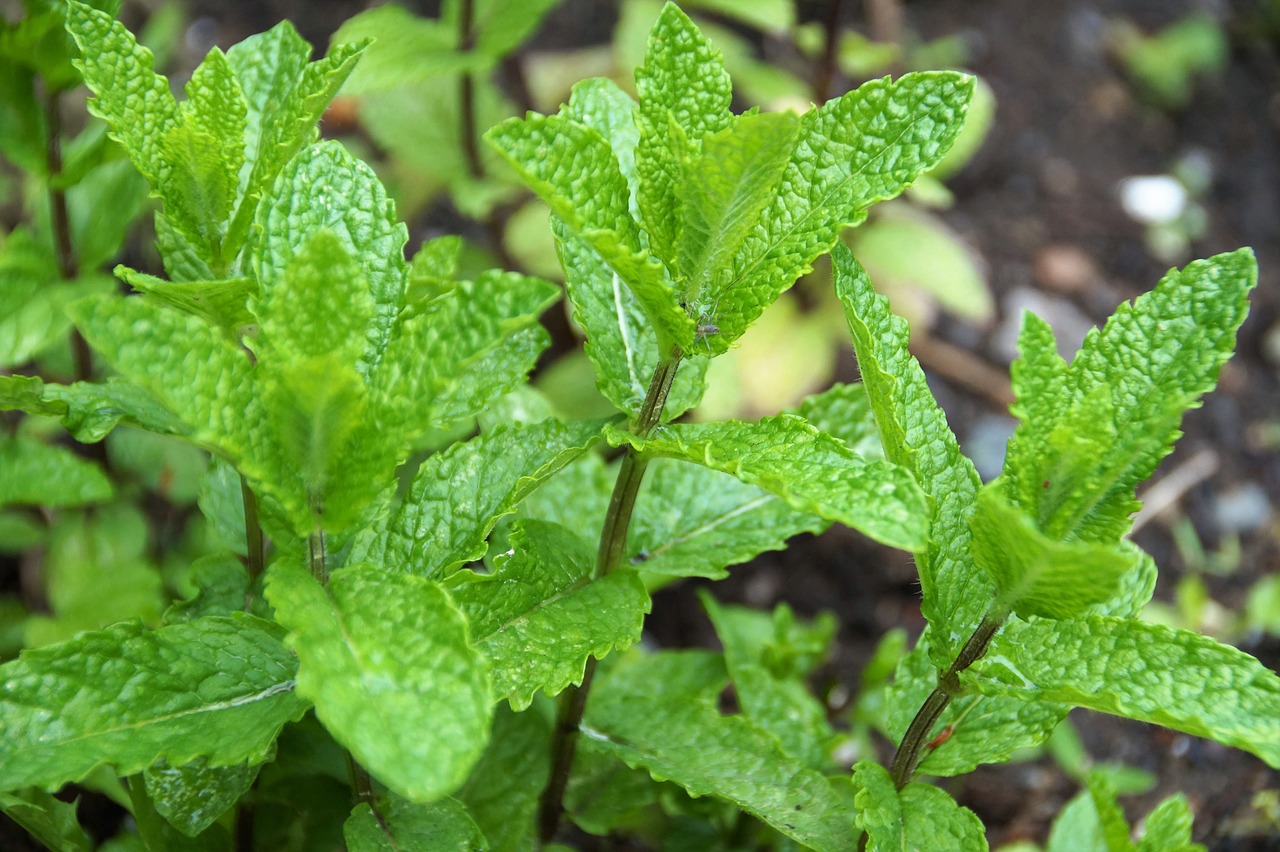
Tips to grow Mint from seeds


 Mint leaves not only add delightful flavor to dishes but also offer numerous health benefits. Due to its non-seasonal nature, having a mint plant at home allows for year-round availability. The aromatic qualities of mint serve as an excellent mouth freshener, provide relief to the stomach, and contribute to mental relaxation. Additionally, mint acts as a natural pest repellent in the garden. Its versatility extends to the kitchen, where it can be used to create a variety of tasty dishes and drinks.

Mint

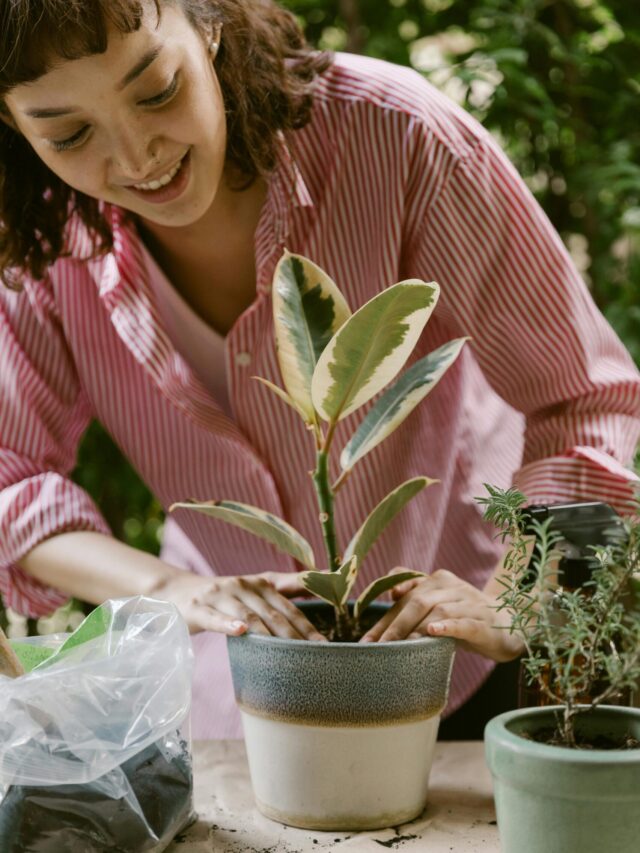
With countless uses and benefits from a single plant, mint is a must-have in any garden. Let’s explore how to obtain, grow, nourish, and cultivate this versatile herb at home. 

How to get a Mint plant?


Mint plant in pot

1. From Nursery:

    • Mint plants are readily available at nurseries from April to October.
    • The cost is reasonable, ranging from Rs 30-40.
    • This is the easiest method for obtaining a mint plant.

2. Grow from cuttings:

    • Purchase mint from the market and use its stems.
    • Plant the stems in the soil using the correct method.
    • This is an effective way to propagate mint.

3. Grow from seeds:

    • While growing mint from seeds is a lengthy and challenging process, the resulting plant lasts for an extended period, typically around 3-4 years.
    • This method offers a more sustainable and long-term solution.

Plants cultivated through the first two methods have a limited lifespan and do not endure for an extended period.

Growing Mint From Seeds: Optimal Conditions and Timing

Now, let’s delve into the details about the optimal conditions and timing for growing mint from seeds.

1. When to Grow?

The ideal period for sowing mint seeds is either in February-March or during the rainy season.

2.Perfect Temperature:

Mint grows well between 15-20℃.

  • Fluctuations in temperature can cause stress and deviation in the plant.
  • During periods of stress, the plant’s leaves may fade, but with a change in weather, it will recover and regain its health.

3. Quality of Seeds:

Always choose premium and fresh seeds when growing new mint plants.

  • Avoid using expired or old seeds, as they may not germinate properly if of poor quality. Buy premium quality seeds and refrain from purchasing old dated seed packets.

4. Germination Rate:

The germination rate is relatively sluggish.

  • Initially, only 3-4 seeds may germinate in 10-12 days, and the rest may follow after a month.

5. Use Pots for Germination:

Avoid using a seedling tray for germination.

  • Instead, directly sow the seeds in the pot where the plant will ultimately grow.
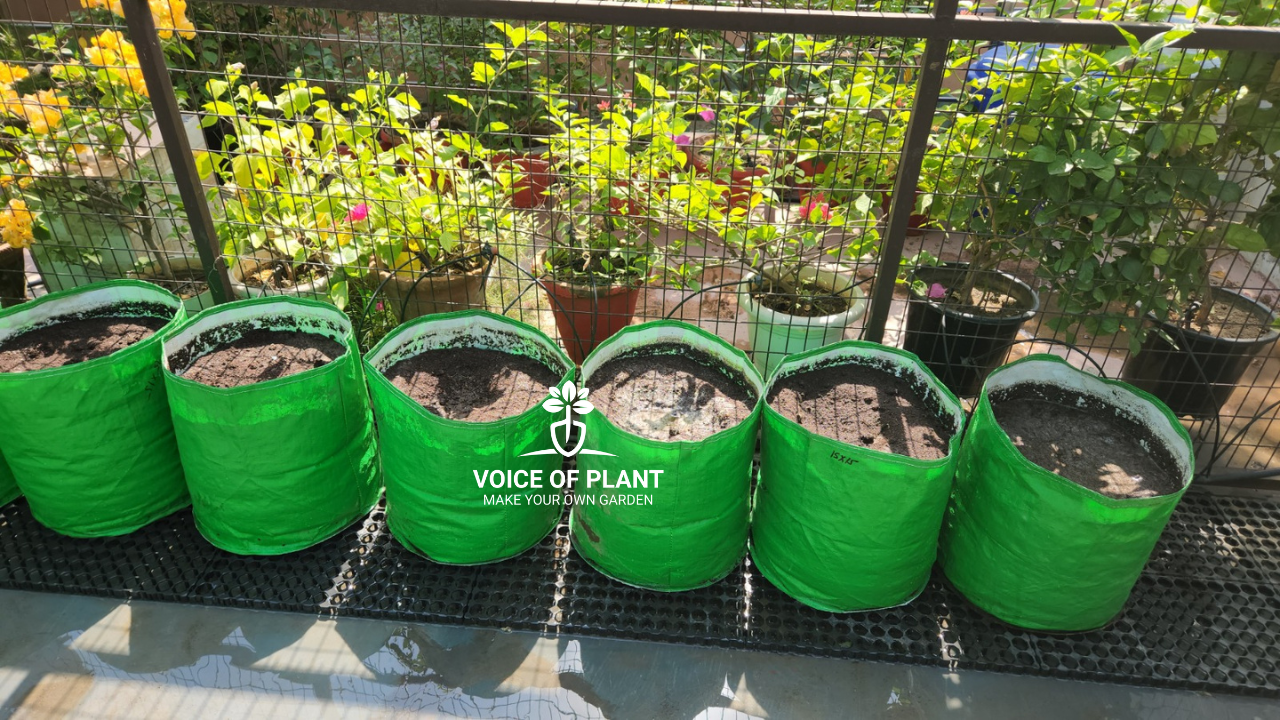
6. Perfect Pot:

rectangular pot for mint

Mint plants have spreading runner roots that grow rapidly and easily cover the ground.

  • Therefore, it is recommended to avoid planting them directly in the ground at home.
  • Choose broad-shaped or rectangular pots with a depth of at least 1 foot and as wide as possible.

Note:

  • Mint can hinder the growth of other plants if grown together or in the same pot.
  • It is advisable to cultivate mint in separate pots.

Soil Mixture for Mint plant

Soil mixture

1. Take local soil, clean it thoroughly using a sieve.

2. Use vermicompost in an amount equal to half of the soil quantity (Vermicompost can be replaced with any other compost).

3. Add river or construction sand in a slightly smaller quantity than the vermicompost to improve soil friability and drainage.

4. Take coco peat in a quantity equal to half of the sand quantity.

5.  Add a handful of neem cake powder and mustard cake powder.

6. Incorporate a small amount of fungicide to mitigate the risk of fungal growth.

Thoroughly blend all the ingredients, and the mint plant’s soil is ready for cultivation.

Mint seed sowing process in pot

1. Take a small pot, cover the bottom hole with newspaper, and  

Pot for Mint seeds germination

fill it with soil, pressing it in between and

Soil in pot

water the soil thoroughly to ensure it becomes moist.

water the soil thoroughly to

2. Add a layer of moist cocopeat on top, as mint seeds germinate well in cocopeat.

Add a layer of moist cocopeat

3. Position the seeds in the pot, covering them with a thin layer of moist cocopeat. Avoid planting them too deep, as excessive depth may hinder germination.

Mint seed

4. Since cocopeat is already moist, no additional water spray is needed at this point.

5. Place the pot in an area with sufficient light, either indoors or outdoors, avoiding direct sunlight or excessively dark rooms.

6. When the top layer appears dry, gently water the plant without applying excessive force.

7. Seeds will take at least 10-12 days to germinate.

8. Once germination occurs, move the pot to an area with 1-1.5 hours of sunlight after 1-1.5 months, avoiding intense sunlight.

Mint in pot

9. After 1-1.5 months, transfer the plant to a broad-shaped pot with the prepared soil mixture.

Broad pot for mint plant

Note:

  • Repotting is advisable in the evening to minimize stress on the plant. Thoroughly water the plant after repotting and use support sticks to prevent leaning.

Fertilizer for Mint plant

1. After approximately 2 months, provide additional nutrients to encourage growth.

cow dung liquid fertilizer

2. Feed the plant cow dung liquid fertilizer or vermicompost tea.

3. Before winter, nourish the plant with mustard cake liquid fertilizer for better winter resilience.

Sunlight requirement for Mint plant

1. Mature mint plants need 2-3 hours of sunlight, preferably gentle sunlight.

2. Place the plant under early morning or evening sunlight, shading it if exposed to intense afternoon sunlight.

Pruning of Mint plant

Pruning of Mint plant

Mint plants generally do not require pruning but consider it for:

  • Shaping the plant for a more organized appearance.
  • Trimming dull or damaged leaves, especially in winter or extreme summers.
  • Removing flowers to prevent seed formation and potential stress to the plant.

Watering tips to Mint plant

Watering tips to Mint plant

1. Mint thrives in consistently moist soil, so water before the soil dries out.

2. Avoid overwatering to prevent plant deterioration.

3. Mint plants benefit from rainwater, so allow them to bask in the rain for enhanced growth.

This article provides a comprehensive guide on growing mint from seeds, covering all aspects to successfully cultivate mint at home.

Happy Gardening !!

plants at home

9 Plants You Should Grow at Home

Creating a diverse garden with plants that offer multiple benefits is a wonderful way to contribute to the ecological richness of your outdoor space. So, here goes the list of nine essential plants that everyone should have, each offering a multitude of benefits to enrich and beautify any garden.

1. Tulsi plant

2. Curry leaf

3. Ajwain plant

4. Giloy

5. Aloe Vera

6. Pothos

7. Jade Plant

8. Hibiscus Plant

9. Jasmine Plant

9 Plants You Should Grow at Home

1. Tulsi Plant (Holy Basil)

tulsi plant
Tulsi plant

Embarking on your gardening journey? Make room for the auspicious Tulsi plant – it is a must-have at home.

  • This summer-loving plant thrives from February to October, although it may start to wither in winter. With proper care, it can recover after the cold season.

Direct sunlight

  • For this outdoor plant, ensure it receives at least 4 hours of direct sunlight. When it comes to hydration, water it when the top layer of soil gets parched.
  • Be cautious not to drown it if the soil is still damp; that’s a surefire way to root rot.

Medicinal benefits

  • This Ayurvedic plant has many medicinal benefits and is used to treat cold, cough and many other problems.

2. Curry Leaf

The curry leaf is a fantastic addition to kitchens because it smells and tastes great. It is also a useful herb and you will find it in many homes.

curry leaves

Summer plant

  • It is a plant that loves the summertime, growing well from February to October.
  • In winter, its leaves may look sad and black, but do not worry, it comes back to life in February after a good trim.

Sunlight

  • This plant likes lots of sunlight, about 5-6 hours a day, but it does not need too much water.

Curry leaves provide various medicinal benefits:

  • Curry leaves are a good source of vitamins A, B, E and E, which provide essential nutrients for overall health.
  • Curry leaves are a good source of antioxidants, which help deal with oxidative stress and protect the body from damage.
  • They may contribute to maintaining healthy cholesterol levels, supporting heart health.

3. Mexican Mint/ Ajwain plant

ajwain plant

The Mexican mint, also known as Indian Borage or ajwain plant, is a cool addition to your garden, smelling like carom seeds.

Summer plant

  • It is a summer -hardy plant, flourishes in warmer months but might struggle in winter season.
  • As winter sets in, its growth may face some challenges—leaves could lose their shine, turn black, and wither.

Sunlight

  • A minimum of 2-3 hours of direct sunlight is a must, but if you can offer more, it will surely appreciate the extra sunshine.

Medicinal benefits

  • Being a medicinal plant, it is very beneficial in treating gastric problems.
  • The problem will be cured by eating some leaves on an empty stomach. Moreover, it enhances aroma in various dishes.

4. Giloy (heart-leaved moonseed)

giloy plant

Giloy is an important plant that should be in your home. The plant is characterized by heart-shaped leaves, which is reflected in its common name, “heart-leaved moonseed.”

Summer plant

Giloy is a summer plant that thrives in a warmer season but tends to get a bit sad in winter, losing its leaves and keeping only the stem.

  • It starts growing again when summer comes back, usually in the hottest months, not so much in February or March.

Sunlight

  • For optimal growth, provide abundant sunlight. Place it in the area with the maximum sun exposure.

Medicinal benefits

  • In traditional medicine, especially Ayurveda, Giloy (Heart-Leaved Moonseed) is highly valued for its medicinal properties.
  • Giloy is often used to boost the immune system, promote longevity, and support overall health and well-being.
  • People use Giloy sticks to make a special drink that helps in fever and other health problems.

5. Aloe Vera

Aloe-Vera-Plants

Aloe Vera is one of the most important plants that you should keep at your home. It has many benefits.

  • This plant loves ignorance, occasional watering is sufficient, and it doesn’t require extensive care for optimal growth.

Flourishes in all seasons

  • Aloe vera flourishes in all seasons—summer, winter, and the rainy season.
  • While its growth may experience a slight hindrance in winter, autumn is considered the optimal season for cultivation.

Medicinal benefits

  • Aloe vera, a medicinal plant, is famous for its healing properties, which solve problems like joint pain, stomach discomfort and migraine.
  • The gel extracted from aloe vera serves many purposes and provides various benefits.
  • People apply its gel on the face and hair, using its soothing properties to treat sunburn and deal with hair fall, respectively.

6. Pothos (Money plant)

Here is another plant you should keep at home: Pothos, also known as the Money Plant.

pothos money plant

It is a popular indoor plant known for its attractive trailing vines and heart-shaped leaves. It is also commonly referred to as the Devil’s Ivy.

Summer plant

  • As a typical summer plant, this plant is highly adaptable and can thrive in various conditions, making it suitable for both beginners and experienced plant enthusiasts.

Light Requirements:

  • Pothos can tolerate a wide range of light conditions, from low to bright, indirect light. However, it tends to do best in moderate, indirect light.

Air-Purifying Qualities:

  • Pothos is known for its air-purifying abilities, helping to remove common indoor pollutants.

7. Jade Plant

Jade Plants are known for their hardiness and adaptability. They can thrive in outdoor environments with proper care. 

jade plant

The Jade Plant, also known as the Lucky Plant, is a popular succulent and bring glory to your garden. 

Summer plant

While it’s a typical summer plant, it doesn’t succumb entirely to winter.

  • Although its growth may slow down, and leaves might gracefully exit, with proper care, it can retain its green charm even through the winter months.
  • This sun-friendly plant thrives with a minimum of 2 hours of sunlight, but it’s even happier with an extended exposure of up to 8 hours.

Jade plant in clay pot

Pot size

Its adaptability shines through, fitting seamlessly into any type of pot—small, big, hanging, or whatever suits your gardening style.

  • If buying a new pot, an 8-12 inch size is preferred.

Watering

The plant requires minimal watering—just ensure the soil is completely dry, even at a deeper level, before giving it a drink.

  • Succulents know how to thrive with a little negligence.
  • Overwatering can lead to issues like leaf shedding, darkening, and unwanted insect guests.

This lucky plant can make your luck shine if cared for well, bringing brightness to your garden.

8. Hibiscus Plant

Hibiscus in pot

A blossoming plant that enhances the garden with its splendid beauty.

Summer plant

  • This flowering plant is a classic summer variety that experiences stress in winter.
  • Young plants of 5-6 months might exhibit a slowdown in flowering, while mature plants bloom consistently throughout the year, with the possibility of smaller flower sizes.

Sunlight

  • It will blossom well if exposed to 5-6 hours of sunlight.

Medicinal benefits

  • Many medicines and hair oils are being made from hibiscus flowers.

9. Jasmine Plant

jasmine pot

A beautiful white flowers yielding plant , graces the garden with its magical aromatic flowers. This plant can offer the option to be either a graceful creeper or kept as a normal plant by propagating its cutting.

  • Flower jewellery like Gajras and all are also crafted from jasmine flowers.

Summer plant

  • A classical summer plant grows well in summers, growth gets hindered during winters but mature plants would yield the flowers throughout the year.

Sunlight

  • Medium sunlight of 3-4 hours is enough for its ample growth.

Medicinal benefits

  • This medicinal, aromatic, sacred and beautiful plant is such a stress reliever that everyone should grace their garden with it.

————————–

Sounds like a fantastic lineup of plants! Having a variety that not only enhances the beauty of the garden but also brings multiple benefits is a win-win. It’s like creating a harmonious and beneficial ecosystem right in your own backyard.

Also read:

6 Best plants that need less water

Happy Gardening !!

Gardening in Monsoon Season

Gardening in Monsoon Season


Plants behave differently in each season, each having its advantages and disadvantages for plant growth. The rainy season is particularly beautiful and beneficial for both us and the plants, as they grow much faster compared to other seasons. However, we need to be attentive to certain aspects of plant care.

While rain itself usually poses no problems, there can be side effects afterward, such as issues with fungus, ants, and insects. Overwatering can also damage plants, causing leaves to turn yellow.

By following the small precautions outlined below, you can ensure your plants remain healthy after the rain.

Precautions in Rainy Season


1. Shift Succulents


Shift all the succulents inside the home because succulents already have the optimum level of water stored inside them. They do not need much water like Aloe vera, Jade plants, Echeveria, etc.

succulents plant

2. Well-drained soil


tulsi soil


If you are gardening directly in the ground, it’s generally fine because the soil naturally absorbs water. However, when gardening in pots, it is crucial to use well-draining soil since pots have limited water-holding capacity.

Let’s discuss what actions can be taken in this regard.

(i) Shift plants into shaded area:

If you have fewer plants say 5-6 only then you can shift them to a shaded area after showering 2-3 days of rain.

(ii) Cover your plants with a green net:

green net

If you do not want to shift your plant then cover your plants with a green net.

  • Air and water both keep on passing through this net and plants will get rain water also.

(iii) Use well-drained soil

To avoid over-watering, the soil should be well drained.

  • If water is entering from the top, then it should be able to drain out from the bottom. Water should not be sustained inside the soil or pot.

Also, check – Why Rainwater is best for plants


3. Check the bottom hole of the pot


water flows out from the bottom hole

If water is not coming out from the bottom of the pot, then there are no benefits of well-drained soil.

  • Check the functionality of the bottom hole properly, sometimes roots or any other things might get obstructed inside these holes and water would not be able to come out.

Keep watering your plant till water comes out from the bottom hole. Some people give little water on a daily basis which is actually totally wrong.

By this method, the outer soil of the pot would be moisturized but the bottom soil would become like a stone. So give water to the plant till the point water comes out from the bottom hole.

Gardening in monsoon season

4. Fill the pot completely


zz plant soil

Fill the soil in the pot completely. Do not leave any space on the top, normally we leave 2-3 inches of space.

  • During heavy rain, water starts standing on the top of the soil and it might lead to fungus and green algae on the top of the soil.

5. Remove the bottom leaves


When filling your pot completely with soil, make sure to remove the bottom leaves of the plant.

  • These leaves can come into constant contact with the wet soil, increasing the risk of infection and fungus. Removing them will help prevent these issues.

6. Remove unwanted weeds

During the monsoon, the moderate temperature causes unwanted weeds in the pots to grow rapidly.

  • It is important to remove these weeds from the roots; otherwise, they will deplete the plant’s nutrients.

7. Remove the plates from the bottom of the pots


Generally, we place pots on plates to prevent staining the surface beneath them.

  • However, during the rainy season, it is important to remove these plates to prevent water from accumulating and flooding the pots.

8. Raise the level of plants


During the rainy season, place plants on stands to allow water to drain easily.

  • If your pots have flat bottoms or you are using gardening bags, elevate them with bricks or any other objects to raise their level.
all plants outdoor

9. Give support to your plants


wooden support sticks

During the monsoon, heavy rains are often accompanied by strong winds.

  • Wet soil increases the risk of plants being uprooted, so it is important to provide them with support. This will help them remain upright even during heavy winds.

10. Fertilizer for plants


Apply neem cake fertilizer to your plants before the rain starts; it will help prevent problems like fungus and insects.

  • Since rainwater contains a good amount of nitrogen, there’s no need for additional fertilizers. Plants will thrive naturally during the rainy season.

11. Fungicides and Pesticides


During the rainy season, you can use neem oil solution, neem soap solution, cinnamon powder, and cinnamon liquid solution.

  • Spray your plants with a neem solution weekly to protect them from fungus and pest attacks.

Care for Indoor Plants


all plants indoor

During the monsoon season, the increased moisture in the air requires careful attention to indoor plants.

You may notice that the soil of indoor plants remains wet for longer periods.

  • Be cautious when watering your plants to prevent the appearance of white fungus on the soil surface.
  • If you see any white fungus, simply remove it and sprinkle cinnamon powder on the affected area.

Due to the higher humidity, ensure proper ventilation for indoor plants by keeping doors and windows open.

It was all about monsoon season for plants.

=======================

Follow our Social media channel:


1. Voice of Plant – YouTube Channel

2. Voice of Plant Facebook Page

3. Instagram Voice of Plant Channel

Enjoy the Monsoon!

grow bags for gardening

Benefits of Using Grow Bags in Gardening

Benefits of Grow Bags in Gardening


If you are exploring container gardening and considering various types of pots such as cement, plastic, clay, or ceramic, it is also crucial to understand the concept of grow bags. 

grow bags for gardening

Grow bags offer a flexible and efficient solution to your gardening needs. But, are grow bags truly good for gardening? Let’s dive deep into this topic and discover the myriad benefits these unassuming containers offer.

What Are Grow Bags?


Grow bags are a type of container used for planting, typically made from breathable materials such as fabric. Grow bags typically come in a cylindrical shape with a solid base at the bottom, which provides stability and prevents them from rolling or tipping over.

grow bags

They are commonly made of HDPE (High-Density Polyethylene) plastic, which offers several advantages. Unlike traditional plastic pots, HDPE grow bags don’t absorb as much heat during hot weather, especially in the scorching months of May and June.

This helps maintain a cooler environment for plant roots, preventing overheating and potential damage. When selecting plastic grow bags, it is crucial to opt for those made from HDPE to ensure adequate insulation against external heat.

Additionally, another important factor to consider is the GSM (Grams per Square Meter) rating.

  • The higher the GSM, the sturdier the grow bag tends to be, ensuring its longevity and durability.
  • GSM values are typically indicated on each type of grow bag, whether it’s made of plastic, jute, or cloth, making it easier to choose the right one for your needs.

Unlike traditional pots, grow bags allow for superior aeration and drainage, which can significantly benefit plant health. They come in various sizes and materials, each suited to different types of plants and gardening setups.

Benefits of Using Grow Bags


Improved Root Health


grow bags for gardening


One of the standout benefits of grow bags is their impact on root health.

  • The breathable fabric allows for air pruning, where roots are naturally pruned by exposure to air.
  • This prevents root circling and encourages a more fibrous root system, enhancing nutrient uptake and overall plant vitality.

Better Aeration


The porous nature of grow bags ensures that the soil remains well-aerated.

  • This means oxygen can reach the roots more efficiently, promoting healthier and faster growth.

Enhanced Drainage


grow bag drainage

Overwatering is a common problem in traditional pots, leading to root rot and other issues.

  • Grow bags excel in drainage, preventing water from pooling at the bottom and ensuring a healthier root environment.

Portability and Versatility


Grow bags are lightweight and easy to move, making them perfect for gardeners who like to rearrange their plants or those who have limited space. Their flexibility also means they can be used in a variety of settings, from balconies to backyards.

Types of Grow Bags


Fabric Grow Bags


These are the most common and popular type of grow bags. Made from breathable fabric, they provide excellent aeration and drainage.

Plastic Grow Bags


plastic grow bags

Though less common, plastic grow bags are durable and can be a more affordable option. They typically have drainage holes to prevent waterlogging.

Biodegradable Grow Bags


For the eco-conscious gardener, biodegradable grow bags offer an environmentally friendly option. These bags decompose over time, enriching the soil as they break down.

Comparing Grow Bags to Traditional Pots


Durability:


Grow bags are made from tough materials, making them resistant to breaking.

  • Unlike clay or cement pots that can shatter or plastic pots that can crack, grow bags stay strong for years.

Low Maintenance:


With proper care, grow bags can last 4-5 years without tearing.

  • They do not need repainting like some pots and maintain their look over time. Just handle them gently to avoid damage.

Mobility:


Grow bags are easier to move around, making them ideal for urban gardens or spaces where flexibility is key.

Reusability:


Grow bags can be reused multiple times.

  • After a plant is done growing, simply empty, clean, and reuse the bag for another plant. This makes them a sustainable and cost-effective option.

Quality and Sizes:


Grow bags come in various materials like jute, plastic, and cloth, and they offer many sizes from small to large.

  • Special designs are available for specific crops, and their foldable nature makes storage easy.

Lightweight:


Grow bags are much lighter than traditional pots, making them ideal for rooftops and balconies.

  • They do not put extra strain on structures and are easy to move around.

Setting Up Your Grow Bag Garden


Selecting the Right Location


Place your grow bags in a location that receives adequate sunlight and has good air circulation.

Create holes for drainage


When using plastic grow bags, it is important to create holes for drainage.

  • However, avoid making holes at the very bottom. Instead, make holes around the bottom edge of the grow bags.
  • This prevents soil from spilling out and keeps the bags lightweight, avoiding the need for heavy materials to cover bottom holes.

To make the holes, use a lit incense stick. This method creates neat, symmetrical holes and reduces the risk of tearing the grow bags. Avoid using sharp tools, as they can damage the bags.

Preparing the Grow Bags


grow bags for radish

Fill the grow bags with high-quality soil mixed with compost.

  • Ensure the soil is loose and well-draining.

Use a mix of organic compost and potting soil. Supplement with slow-release fertilizers to provide essential nutrients over time.

Planting in Grow Bags


Which types of plants are suitable for Grow Bags


Tomato plant in grow bag

Vegetables such as: Tomatoes, Brinjal, Capsicum, Peppers, herbs, and root vegetables like carrots and potatoes thrive in grow bags.

  • Choose plants based on the size of your bags and your climate.

While traditional clay pots have their charm, grow bags offer a practical, durable, and flexible alternative for modern gardening.

Happy Gardening!

self watering system

Self Watering System for Plants

Advantages of Self Watering System for Plants


Plants require water to thrive, and in our busy lives, it is not always feasible to be there consistently for watering. The basic necessity of water for plants can not be ignored. In today’s hectic scenario, where everyone has their own tasks and travels, it becomes essential to find alternatives to ensure that plants do not suffer in our absence.

self watering system

A practical solution is the widespread use of “self-watering systems”, which can be installed in every garden, addressing the issue of inadequate watering when humans aren’t available.

Self Watering System for Plants

Well! This system operates using a timer set for a specific duration at fixed daily intervals.

  • For instance, if the timer is configured for 6 o’clock in the morning for a duration of 15 minutes every day, the system will consistently water your plants at the designated time and for the specified duration.

Parts of the System – This system comprises two units:

1. Timer Machine

Timer Machine

The timer machine is installed on the tap, allowing you to set the desired time and frequency for water flow.

tap machine

  • This system is priced approximately Rs. 2600 and comes in two variants: the standard version and another option that includes a rain detection feature, preventing it from starting automatically when it’s raining. You can easily find it online.

2. Drip System

The second component of this system is a network of pipes.

network of pipes

  • It includes a main water-supplying pipe that branches out into various pipes called feeder pipes, each leading to different plants. This setup ensures the efficient distribution of water to multiple plants in your garden.
  • The cost of this system is approximately Rs. 1800, and it is available in configurations for different numbers of plants, such as 20, 30, 50, and so on.
  • Each variant comes with the required length of feeder pipe to cater to the specific needs of your garden.

Installation of Machine

Insert the battery cell into the machine and configure the timings according to your preference.

Schedule multiple watering sessions in a single day

Timer setting

  • If you wish to schedule multiple watering sessions in a single day, especially during extreme summers, opt for the P1, P2, and P3 options.
  • Alternatively, if you prefer setting up watering days, choose Day 1, Day 2, and so forth. The user manual provides detailed instructions for adjusting these settings.

You can set watering duration

On the machine’s display, there’s a tap button for setting the watering duration.

  • If, at some time, you have watered your plants before the scheduled machine time, it is important to close the tap button to prevent the system from overwatering when it runs again at the preset time.
  • This ensures that your plants receive the right amount of water without the risk of excess.

Machine is equipped with two nozzles

The machine is equipped with two nozzles—one for the tap (water source) and another for pipe fitting.

tap with two outlets,

  • Opt for the tap with two outlets, allowing you to use one for regular watering and the other for connecting the pipe.
  • This dual-outlet feature provides flexibility in managing your watering setup.
  • Secure the machine onto the tap by screwing it in securely.

Installation of Drip System

The drip system includes a main pipe, feeder pipes, screws, and nuts for installation.

  • Connect one end of the main pipe to the timer machine to receive water.
  • Then, secure the main pipe along the garden boundaries using zip cables.
  • Seal the other end of the main pipe to prevent water leakage.
  • Puncture holes in the main pipe where feeder pipes are needed, using the provided yellow-pointed screws.
  • Cut the feeder pipes to the required length, matching the distance between the main pipe and the plants.
  • Connect the main pipe to feeder pipes using the included connectors, ensuring a secure fit to prevent leaks.
  • At the end of each feeder pipe, attach an arrow and regulator. The regulator, available in two varieties—one with a normal outlet and another with a fountain outlet—helps control water flow.
  • Dig the arrows inside the soil to anchor the pipes and prevent them from shifting.

Precautions and Tips

1. Cell Quality

  • Choosing high-quality pencil cells is essential. With good-quality cells, the system can run autonomously for a duration of 6-7 months, ensuring reliable and sustained operation.

2. Expandable System

This system offers easy expandability. If you plan to increase the number of plants, it can be effortlessly expanded by extending the length of both the main pipe and feeder pipes.

  • This flexibility allows you to adapt the system to the evolving needs of your garden.

3. Water Pressure

Maintaining high water pressure is crucial for optimal performance.

  • Adequate pressure ensures efficient water distribution to all feeder pipes.
  • If the pressure is low, it may hinder the optimal flow of water, affecting the effectiveness of the system.

4. Equal Distribution

Ensuring equal water distribution in the soil is crucial, especially in larger pots.

  • To address this, consider installing more than one feeder pipe based on the specific requirements or size of the pot. This customization helps maintain a balanced and uniform watering system for your plants.

Rainwater Sensor

Having a rainwater sensor in this machine is a great feature. It automatically switches off when it detects rain.

However, in a scenario where the rain stops before the scheduled watering time and the sensor dries up, the machine might initiate watering again.

  • While you can manually turn it off if you’re at home, it could be a challenge if you are away.
  • It is a reminder that even with automation, a touch of human supervision is sometimes irreplaceable.

Use Main Pipe to Expand

When expanding the system, it is essential not to substitute the main pipes with lower-quality alternatives.

  • Using different pipes may lead to the growth of algae, and these substitutes might struggle to maintain the necessary pressure for efficient water distribution. Sticking to the original main pipes ensures the continued effectiveness of the system.

Pot size

Maintaining a uniform pot size is beneficial to ensure consistency in watering.

  • If pots vary significantly in size, smaller pots may struggle to accommodate feeder pipes, and the watering duration needed for larger pots might not be suitable for smaller ones.
  • To overcome this challenge, consider standardizing your pot sizes to a medium size. This helps create a more balanced and efficient watering system for all your plants.

Proper Planning

If you plan to remove a pot from a particular spot, ensure that you replace it with another pot of the same size.

  • This strategy helps prevent water wastage, ensuring that every designated area receives the necessary hydration.

Recheck all the settings before moving out

Absolutely, it is crucial to double-check the entire system’s functionality at least two days before leaving home. Look out for any potential leaks.

  • For hanging plants, placing them in tubs and fixing the feeder pipes into the tubs can be a practical solution.
  • This way, plants can absorb water from the bottom, ensuring they receive the proper hydration in your absence.

Saves Water

This system effectively prevents water wastage by directing water straight into the pots.

  • Unlike watering with a mug, there are no chances of water spilling.
  • It is a more precise and efficient way to ensure that every drop of water serves its purpose without unnecessary waste.

It saves time

Well! This system not only saves you time but also relieves you from the extra burden of manual watering. It is an efficient way to free up your time, allowing you to invest it in other enjoyable gardening activities.

For plant lovers with numerous plants, incorporating this system into your garden should be a top priority. It is a smart investment for a lush and thriving garden with minimal effort.

Happy Gardening!!

best houseplants for living room

10 Best Houseplants for Your Living Room

Spruce up your living room with some greenery! Houseplants not only add a touch of nature to your home but also improve air quality and bring a sense of calm into your space. They can make any living room feel more vibrant and alive.

10 Best Houseplants for Your Living Room

1. Monstera Deliciosa

2. Fiddle Leaf Fig

3. Snake Plant

4. Pothos (Money Plant)

5. ZZ Plant

6. Aloe Vera

7. Rubber Plant

8. Areca Palm

9. Spider Plant

10. Aglaonema (Chinese Evergreen)

Let’s dive in and explore the best houseplants for your home!

1. Monstera Deliciosa


Monstera Deliciosa
Monstera Deliciosa

Monsteras thrive in bright, indirect light.

  • Direct sunlight can scorch their leaves, so a spot near a window with a curtain works well.

2. Fiddle Leaf Fig


Fiddle Leaf Fig
Fiddle Leaf Fig

Fiddle leaf figs have big, gorgeous leaves that make any space look lush and vibrant.

  • Place them near a window where they get filtered light. Too much direct sun can scorch their leaves.

3. Snake Plant


snake plant
Snake plant

Snake plants are easy to care for and perfect for living rooms.

  • They thrive in low light, so you don’t need a bright, sunny room for these beauties.

How to Grow and Care Snake Plant

4. Pothos (Money Plant)


Pothos in bottle home
Pothos

Pothos are super adaptable and can handle low light conditions, making them perfect for those not-so-sunny corners of your home.

  • Just keep them away from direct sunlight to avoid leaf burn.

Money Plant Care Tips: Complete Guide

5. ZZ Plant


zz plant
ZZ plant

ZZ plants are perfect for anyone who wants a low-maintenance plant with a sleek look.

  • Known for their shiny, waxy leaves, they can add a touch of elegance to any living room.
  • They tolerate low light conditions, so you don’t have to place them directly by a window.

How to Grow and Care for ZZ Indoor Plants

6. Aloe Vera


aloe-vera
Aloe-vera

Aloe Vera is not just beautiful, but also super handy.

  • You can use the gel from its leaves to soothe burns or cuts.
  • This plant loves the sun, so place it in a sunny spot, like a south or west-facing window.

How to Grow and Care for Aloe Vera Plant

7. Rubber Plant


rubber plant
Rubber plant

With its broad, glossy leaves, the rubber plant not only looks elegant but also helps purify the air by removing toxins like formaldehyde.

  • It does well in bright, indirect light but can adapt to lower light conditions too.

8. Areca Palm


areca palm light
Areca Palm

Areca palms are another great addition to your living room, offering a tropical feel with their feathery fronds.

  • They thrive in bright, indirect light and can help create a lively, refreshing atmosphere in your home.

Areca Palm Plant Complete Care


9. Spider Plant


spider plant
Spider plant

Spider plants are excellent for beginners.

  • They thrive in bright, indirect light and can even tolerate low light conditions.
  • Their arching leaves and baby plantlets make them a charming addition to any living room.

10. Aglaonema (Chinese Evergreen)


AGLAONEMA
Aglaonema Plant


Aglaonemas are known for their beautiful, patterned leaves and are very easy to care for.

  • They can tolerate low light conditions and are perfect for adding a pop of color to your living room without demanding too much attention.

These houseplants can transform your living room into a lush, vibrant space.

Happy planting!

croton plant care

How to Care Croton Plant in Summer

Caring for your croton plant in summer is crucial to keep its vibrant foliage looking its best. Croton plant is known for their bold, colorful leaves, crotons add a tropical touch to any space. However, summer’s heat can be challenging for these beauties, so it is important to understand their needs to keep them healthy and thriving.

Croton plant
Croton plant

Understanding Croton Plant Needs


1. Sunlight requirements for Croton plant


Croton plants thrive in bright, indirect sunlight.

  • During the summer, it is crucial to provide them with adequate light without exposing them to direct sunlight.
  • However, remember that crotons cannot tolerate intense heat and sun. Intense afternoon sunlight can cause sunburn, dry out the soil, and dehydrate the plant.

If kept outdoors, ensure they are in a shaded area with dappled sunlight.

croton sunlight

If keeping Croton indoor –

Find a spot in your home that receives the most light throughout the day.

  • Avoid placing your croton in low-light conditions, as this will stunt its growth.

2. Watering tips for Croton plant


In the summer, Croton plant require consistent watering to maintain their vibrant foliage. The soil should be kept moist but not waterlogged.

  • Water the plant thoroughly until water drains out from the bottom of the pot.
  • However, they dislike sitting in water. Therefore, check the soil moisture with your finger before watering your croton.
  • Water your Croton only when the top half-inch of the soil has dried out.

Signs of Overwatering and Underwatering

  • Overwatering can lead to root rot, evident by yellowing leaves and a soggy base.
  • Underwatering, on the other hand, results in dry, crispy leaves and leaf drop.

Note:

  • Water early in the morning or late in the evening to minimize evaporation.
  • Use room-temperature water and avoid splashing the leaves to prevent fungal issues.

3. Ideal Soil Mix for Croton plant


An ideal soil mix for crotons should be loose, lightweight, and well-draining.

  • It is important to use soil that supports fast drainage, allowing excess water to flow out and preventing sogginess.
  • When preparing potting soil for your croton, include elements like coco peat or perlite, sand and compost to enhance drainage.

4. Fertilizer Routine


During the active growing season in summer, Croton plants benefit from regular fertilization.

  • Use a balanced, water-soluble fertilizer every two to four weeks.
  • Organic fertilizers such as vermicompost, cow dung liquid compost, seaweed fertilizer can also be beneficial.

5. Avoid giving heavy fertilizer during extreme summer


During the extreme summer months, it is crucial to avoid heavy fertilization of your Croton plants.

  • High temperatures can stress the plant, and applying too much fertilizer can further exacerbate this stress.

6. Pest Control


Summer can bring an influx of pests such as spider mites, aphids, and mealybugs.

  • Regularly inspect your Croton plant for any signs of pest infestations.
  • Use insecticidal soap or neem oil to treat affected plants.

Signs of Stress and How to Address Them


1. Leaf Drop


If your Croton plant is experiencing leaf drop, it could be due to inconsistent watering, low humidity, or temperature fluctuations.

  • Adjust your care routine by ensuring regular watering, increasing humidity, and stabilizing temperatures around the plant.

2. Leaf Curling


Leaf curling can be a sign of underwatering or too much direct sunlight.

  • Ensure the plant is getting adequate water and move it to a spot with bright, indirect light.

3. Yellowing Leaves


Yellowing leaves often indicate overwatering or poor drainage.

  • Check the soil moisture and drainage conditions and adjust watering practices accordingly.

Dealing with Summer Stress


1. Remove Yellow or Dead Leaves


Remove any dead or yellowing leaves to encourage new growth and improve air circulation. Prune leggy stems to promote a bushier appearance.

2. Leaf Care


To maintain the vibrant colors of Croton leaves, regularly clean the leaves with a damp cloth to remove dust and enhance photosynthesis.

  • Avoid using leaf shine products as they can clog pores and damage the leaves.

3. Hydration and Moisture


Apart from regular watering, ensure that the soil remains consistently moist but not soggy.

  • Using a mulch layer can help retain soil moisture and reduce water evaporation.

By following these detailed care instructions, you can ensure that your Croton plant remains healthy, vibrant, and thriving throughout the summer. Proper attention to watering, light, soil, and pest control will allow your Croton to flourish and bring a burst of color to your home or garden.

Happy Gardening!

Care plant in extreme summer

How to Care Plants in Summer

Plant Care Summer Tips


Plants, like all living beings, need appropriate care to survive the scorching weather. Generally, plants rooted in the ground handle heat better than those in containers, which can suffer significantly when temperatures rise above their comfort zone of 15-35℃, often reaching 41 – 43℃ or higher. 

zz plant leaves yellow

The health of plants can suffer significantly in extreme heat. They often dry up, their leaves turn yellow, the soil becomes parched, and the leaves can get scorched, leading to overall plant burn.

How to Care Plants in Summer


plant yellow leaves

Many gardeners struggle to save their plants because they lack the knowledge to properly care for them during intense heat. Some people fail to water correctly, while others apply too much fertilizer. Here are some common tips to help gardeners protect their plants in extreme heat:

1. Positioning of the Plant

2. Covering the Plants

3. Watering During Summers

4. Avoid Pruning in Summer

5. Avoid Repotting

6. Avoid giving heavy fertilizer

7. Water Spray

8. Soil Care

9. Mulching

10. Prevent Pest Attack

11. Avoid Growing New Plants

12. Monitoring plants

12 Essential Tips for Thriving Plants This Summer


Check essential care tips for plants in summer to ensure they thrive in the scorching heat.

1. Positioning of the Plant


Morning sunlight from 7 am – 10:30 am benefits plants, while the midday sun from 11 am-4 pm can be harsh.

(i) Move summer plants like Hibiscus, Tulsi (Holy basil), Shami, Aprajita (Clitoria), Night Jasmine (Parijat), Curry leaf plant, etc. to areas with morning sun.

plants in shade

(ii) Place winter plants like Rose, Marigold, Calendula, Chrysanthemum, etc. under green shades to catch evening light, and bring delicate plants indoors.

  • Arrange plants near walls, balconies, or corners to shield them from the harsh midday sun.

2. Covering the Plants


plants under green shade

Use a green net to cover balconies, terraces, or garden areas, which can be found at hardware stores.

  • If unavailable, use cloth, sarees, or dhoti-type fabrics as alternatives. These coverings not only protect plants but also help maintain home temperatures by blocking direct sunlight.

3. Watering During Summers


watering to plants

Regular watering is crucial during extreme summer. 

(i) Early Morning or Late Evening:

Water your plants early in the morning or late in the evening to minimize evaporation and allow the plants to absorb moisture.

(ii) Deep Watering:

Water deeply and infrequently to encourage deep root growth. Shallow watering can lead to shallow roots, making plants more vulnerable to heat.

Avoid Midday Watering:

Avoid watering during the hottest part of the day, as most water will evaporate before reaching the roots.

4. Avoid Pruning in Summer


Hard Pruning


Avoid unnecessary cutting, shaping, and pruning, which can lead to fungal infections.

Only cut to remove pests or yellow leaves, and deadhead flowers as needed.

rose flower pruning

Avoid planting cuttings, as they require humidity and favorable conditions not present in summer.

5. Avoid Repotting


repotting plant

Do not repot your plants in the middle of summer, especially during the hottest part of the day. It can stress them out.

Repotting in extreme heat can cause significant stress to the plants, making them more vulnerable to wilting and damage.

  • If repotting is necessary, try to do it during cooler parts of the day during late evening, to minimize the stress on your plants.

6. Avoid giving heavy Fertilizer


High temperatures slow down plant chemical reactions, so avoid heavy fertilizers like chemical urea, NPK, TAP, mustard cake, and groundnut cake.

liquid fertilizer

Use diluted liquid fertilizers like cow dung liquid fertilizer, vermicompost tea, banana peel liquid fertilizer, seaweed liquid fertilizer, kitchen compost tea, and onion peel liquid fertilizer once in a month.

7. Water Spray


Spray water on plants in the morning or evening to avoid the intense midday sun. This helps remove dust, cool the leaves, and increase humidity.

neem pesticide spray

  • Regular spraying also allows for monitoring plant health and identifying diseases. Aim to spray plants daily in summer, or at least once or twice a week.

8. Soil Care


(i) Well-Draining Soil:

Ensure your soil is well-draining to prevent waterlogging, which can be as harmful as drought.

soil mix 2

(ii) Organic Matter:

Add organic matter such as compost to improve soil structure and water-holding capacity.

9. Mulching


mulching soil

Apply a layer of mulch around the base of your plants to help retain moisture, regulate soil temperature, and reduce weed growth.

10. Preventing Pest Attacks


Summer can increase pest vulnerability. Use neem leaf solutions to spray plants, and for severe infestations, use organic plant protectors made from natural ingredients.

Regular applications can prevent and treat pests like aphids, mealybugs, and mites.


11. Avoid Growing New Plants in Summer


Avoid planting new seeds or buying new plants from nurseries during the peak heat of 40°C.

Seeds require milder weather for germination, and new plants may not thrive.

  • Wait until the rainy season to repot existing plants.

12. Regular Monitoring Maintaining Plant Health 


With proper care and attention, plants can thrive even in the scorching summer heat.

Regular watering, careful positioning, and protective measures can ensure your plants remain healthy and vibrant throughout the season.

Jade plant bushy

5 Best Tips to Make Jade Plant Bushy

5 Best Tips to Make Jade Plant Bushy


A jade plant (Crassula ovata) is a popular succulent admired for its thick, glossy leaves and resilience. Originating from South Africa, this charming plant is often considered a symbol of good luck and prosperity.


jade plant bushy

Many plant enthusiasts seek ways to make their jade plants bushy and robust, enhancing their aesthetic appeal and vitality. This guide will delve into effective strategies for cultivating a lush, bushy jade plant, ensuring it thrives in your home or garden.

Understanding the Jade Plant


The jade plant is known for its fleshy, oval-shaped leaves that store water. These plants can grow up to three feet tall and even taller in their natural habitat. Their thick, woody stems and branches give them a miniature tree-like appearance, making them a favorite for bonsai enthusiasts.

Benefits of Growing Jade Plants


Jade plants are not only attractive but also relatively easy to care for, making them suitable for both novice and experienced gardeners.

5 Best Tips to Make Jade Plant Bushy
Jade Plant Bushy

They are known for their air-purifying qualities, removing toxins from the environment. Additionally, their ability to store water makes them drought-resistant, reducing the frequency of watering needed.

5 Best Tips to Make Jade Plant Bushy


Effective Pruning Techniques for a Bushy Jade Plant


Actively pruning your jade plant is the best and most effective way to make it bushy. However, it is crucial to prune correctly to ensure optimal growth.

Jade pruning

Prune your jade plant right above the leaf scar or rings on the stem. This technique tricks the plant into growing two more branches from the cut portion, resulting in more leaves and a bushier appearance.

  • Avoid snipping more than 15-20% of the plant at a time and leave the branches you want to mature intact.

Bonus Tip:

  • If your jade plant has become leggy due to insufficient light, cut back the weak portions and place the plant in a bright spot. It will perk up soon.

Best Time to Prune


The ideal time to prune a jade plant is during the active growing season, typically in spring or early summer.

  • This allows the plant to recover and produce new growth more efficiently.

Optimal Positioning for Growth


Proper placement is key to a bushy jade plant. If the plant is kept in a dark area, the stems will stretch in search of sunlight, leading to leggy growth.

Jade plant outdoor sun


To encourage bushiness, place the plant where it receives direct bright sunlight for 5-6 hours a day. This amount of light will work wonders for its growth.

Bonus Tip:

  • Ensure your jade plant gets ample direct sunlight by placing it in the correct position.

Correct Watering Practices


For a bushier jade plant, it is essential to avoid growing it in moist soil. Overhead watering should also be avoided.  Water only when the top inch of soil feels dry to the touch.

watering jade plant

Bonus Tip: The most important thing is to keep the plant on the drier side rather than watering it frequently.

  • During the growing season (spring and summer), water the plant thoroughly but infrequently.
  • In the dormant period (fall and winter), reduce watering significantly.

Check here – Best Way to Water Jade Plant 

Planting Multiple Jade Plants Together


An easy and quick way to make your jade plant look bushier is to grow multiple plants in one pot. Planting 2-3 jade plants together will give the appearance of a bushier plant.

  • Alternatively, you can group 2-3 small pots together to create the impression of a larger, bushier jade plant.

Bonus Tip:

  • Grouping multiple jade plants together can enhance their bushy appearance.

Soil and Potting Needs


soil mix 2

Jade plant prefer well-draining soil, such as a succulent or cactus mix.

  • You can also create a suitable mix by combining regular potting soil with sand or perlite.

Bonus Tip:

  • Ensure the pot has drainage holes to prevent water from accumulating at the bottom, which can lead to root rot.

By following these tips, you can successfully cultivate a lush, bushy jade plant that will be a stunning addition to your indoor or outdoor garden.

Check here – How to make the Best Soil Mixture for Jade Plant

Fertilization Practices


Fertilize your jade plant during the growing season with a balanced, water-soluble fertilizer diluted to half strength. Feeding once a month is generally sufficient.

  • Avoid fertilizing during the dormant period to prevent nutrient buildup in the soil.

Dealing with Leggy Growth


Jade leggy

Leggy growth occurs when a jade plant does not receive enough light, causing it to stretch towards the light source.

  • To rectify this, ensure the plant gets adequate sunlight and prune back the leggy stems to encourage bushier growth.

Conclusion


Cultivating a bushy jade plant requires patience, proper care, and regular maintenance. By understanding the plant’s needs, implementing effective pruning techniques, and providing optimal growing conditions, you can enjoy a lush, vibrant jade plant that enhances your living space.

Whether you are a seasoned gardener or a novice, these tips will help you achieve a beautiful and healthy jade plant.


Follow our Social media channel:


1. Voice of Plant – YouTube Channel

2. Voice of Plant Facebook Page

3. Instagram Voice of Plant Channel


Happy Gardening!

how to water plants

How to water plants? Do’s and Don’ts

As we all know, for sustainability water is a vital need of every living creature. Water is life-giving for everyone, be it humans or plants. Without water, where humans become victims of dehydration, while trees and plants die or become weak due to lack of water.

watering tulsi plant

We often have to face such problems; when our plants do not grow properly despite providing all the essential care and nutrients on time.

1. What could be the reason?

2. Where are we all lacking?

3. Do you know that this can happen even by giving water improperly? Yes, water could be the reason for the malfunctioning of your plants.

4. Are you following the correct method of watering?

5. What is the right way to water plants?

So, in this article, we will discuss some basic tips and methods to water plants.

“There is a big misconception among some people that if they keep watering the plants as much as they want, plants will grow and not have any problems.”

water plants

Importance of Watering for the Plants


Water is absolutely essential for plants. All the activities of plant life are driven by water. Let’s understand more from the following points:

1. Water helps plants to grow:

1. Lots of things like compost, seaweed, minerals, fertilizers, NPK, and many more are added to the soil but plants do not absorb them directly.

compost

2. When water is added to the soil, all these nutrients get dissolved into the water and the roots of the plants absorb them plus deliver them to other parts of the plants.

3. So, despite the fact that much fertilizer and nutrients are added to the soil, the plant would not grow without water.

2. Water is necessary for photosynthesis


1. Water also plays a big role in the process of photosynthesis.

2. Plants cannot survive without photosynthesis hence plants would not last for a longer duration without water.

3. Leaves get proper structure and become tight if watering is regular.

4. Without water, the leaves of the plant start to bend down and become loose or weak.

3. The right time to water the plants


The moisture of the soil, coco peat, or whatever is surrounding the roots should be maintained. It should neither be too wet nor dry. Must follow the below steps to water the plants:

1. The basic tip to water the plants is to first check the soil of the pot

  • When the topmost layer of the soil is dry, it means plants need water. Loose the soil and give water.
  • Otherwise, water the next day.; or if you have checked in the morning, then you can give water in the evening.
  • Sometimes just seeing it is not possible for us to judge whether the plant needs water or not. So, in such a case, it is better to check the top layer of the soil by touching it with a hand.
  • For this, dip your finger 1-2 inches in the soil to see if the soil is moist or not, this will give you an idea of how much moisture is.
  • If soil is sticking to the finger, water is not required at that moment. If it is not sticking and completely dry then gradually give water to the plant.

2. Give water before the soil gets dry


watering Shami plant


  • The topmost layer of the soil is exposed to air and sun which makes it dry. If the top layer is dry then the inner soil also tends to dry soon.
  • So, before the core soil gets dry plants need to be watered.

3. Do not overwater

overwatering
overwatering

If the topsoil is wet and more water is given at the same time then the core soil will become muddier because of over watering and plants will get damaged. Some of the harmful effects on the plants, due to overwatering are mentioned below:

  • The roots of the plants are delicate and weak, overwatering might cause root rot. Due to this plants will catch fungus, infections, and insects.
  • The soil becomes sticky and soggy, which can hinder plant growth.
  • Leaves start falling from the plant.
  • The leaves of the plants start turning yellow.
  • The leaves are not dark green in color.

Note:

  • “Give water according to the condition of the soil not by the myth that plants need water daily”.
  • It can be done once in 2-3 days or twice a day also.

4. The correct way of watering


1. Gardening in the ground: For ground gardening, use pipes to give water to your plants.

2. Container gardening: If you are doing container gardening then always use any mug, jug, can, or utensils to give water to your plants.

Note:

  • Using pipes for pots is not a good option as water comes with force, it affects the soil binding the root of the plants.
  • The placement of the soil gets disturbed and sometimes it becomes messy also.

3. Give water in parts: Always give water in parts (especially in pots).

  • When soil absorbs the provided water completely then only add leftover water.
  • Keep on adding water till the point it starts coming out from the bottom hole of the pot.

4. Give water according to the size of the pot: The main roots of the plants lie at the bottom of the pot, so the amount of water required also depends on the size of the pot.

correct way of watering

  • Big size pots need more water to reach down to the roots and small size pots need less water to meet the main roots.
  • If roots would not get water then the requirements of nutrients also would not get fulfilled.
  • When the plant is transplanted from a small pot to a big pot, at that time also more water would be required to maintain the moisture of the soil.
  • When roots will grow towards the bottom they would need moisture, not dry soil to grow properly.

Note:

  • Leave the monotonous habit of giving one mug of water to the plants, and keep watering till the point water comes out from the bottom of the pot.
  • It will keep the soil moist for a longer duration.

5. Water Requirements for Succulents and Bulbs


Succulents, Cactus, Bulbs, Xerophytes, and such plants need very little water to grow.

watering

  • Plants like Aloe vera, Jade, Sansevieria (Snake Plant), and many others, already have water stored in their leaves.
  • In fact, if the core soil of these plants gets dried up a bit then also it would not affect the growth of the plant.
  • Plants with bulbs like Caladium, Peace lily, ZZ plant, and many other bulb plants might start decaying due to overwatering.

All these plants also need very less water. Hence, we should not give water to these plants on a daily basis but on a weekly or in a gap of 10 to 15 days.

Other factors to maintain the soil moisture


1. Soil Composition:

  • If the soil has coco peat and compost mixed in it then it remains wet for a longer duration.

2. Type of Pot:

type of pots

  • The soil in the clay pots dries out quickly whereas in cement pots the process of drying out soil gets slow.
  • In ceramic and plastic pots soil stays wet for a longer duration in comparison to clay or cement pots.
  • Suppose the same plant is planted in different types of pots then the water requirements of the same plants would be differing.

3. Season and Weather

  • In winter and rainy seasons, plants need less water because the soil remains wet for a longer duration during these seasons.
  • In summer, plants might need water 2-3 times per day.

4. Location of the plants

  • Plants kept on the terrace need water very often because plants are exposed to continuous sunlight for 8-10 hours and the soil gets dry quickly there.
  • Plants placed on the balcony get exposed to sunlight for 3-4 hours, their soil can lock moisture for 1-2 days.
  • Indoor plants get bright light, they do not get direct wind or sun exposure. They stay wet for a longer duration

“Preferably water the plants during morning time”.

Love your plants!

Shower them regularly with your love and yes with water also.

Happy Gardening!