Monthly Archives: April 2024

How to give fertilizers to plants? Basic Tips

Giving fertilizers to plants is an important aspect of gardening that provides the essential nutrients required for healthy plant growth. Just as humans and other animals require food for survival and growth, plants also require nutrients for growth and production. In the absence of these nutrients, the growth of plants stops and the yield decreases.

For proper nourishment and growth, plants require soil, water, sunlight, fertilizers, as well as human love and care. It’s essential to use these resources effectively and efficiently. This article will address four essential questions (3 W and 1 H- Why, What, When and How) related to feeding your plants:

1. Why should you feed your plants?

2. What should you feed them?

3. When should you feed them?

4. How should you feed them?

Classification of fertilizers for Outdoor plants

Organic fertilizers are rich in organic matter, which helps to improve soil structure, retain moisture, and promote the growth of beneficial microorganisms in the soil. They also release nutrients slowly, providing a steady supply of nutrients to the plants over time.

Some of the fertilizers are mentioned below:

  • Compost
  • Neem cake
  • Mustard cake
  • Epsom salt
  • Banana peel liquid fertilizer
  • Cow dung liquid fertilizer
  • Seaweed fertilizer

1. Compost for Outdoor plants

  • When making a soil mixture for outdoor plants, compost is a preferred ingredient.
  • Compost is a natural fertilizer that is rich in nutrients and can be used to improve soil health.
  • It makes the soil porous and also retains water for a longer duration.
  • If the soil in existing plants is becoming clayey or tight, adding compost can help to improve the soil quality.
  • You can use any type of compost, including cow dung, vermicompost, leaf compost, or kitchen compost.

2. Neem Cake fertilizer for outdoor plants 

  • Neem cake, a byproduct of neem seed oil extraction, can be used as a natural pesticide and fungicide to prevent attacks by insects, viruses, bacteria, or fungi in soil.
  • It helps to improve soil quality by adding essential nutrients, enhancing soil structure, and increasing water retention.
  • It can be added to the soil mixture in small amounts as it is very potent.

We can add neem cake powder to the soil mixture as well as we can make neem cake liquid fertilizers and give them once a month.

You can read the detailed article here:

Neem Cake Fertilizer at Home


3. Mustard cake fertilizer 

  • The mustard cake fertilizer is a very strong fertilizer and should be used with caution.
  • It is recommended to apply it during the winter season when the weather is cooler and the soil is more receptive to nutrients.
  • However, it can also be used during summers, but it is not recommended during extremely hot weather when the temperature is near 40 ℃.
  • We can add a little bit of mustard cake powder in soil-mixture as well as we can give mustard cake liquid fertilizer to plants once a month.
  • It is important to dilute mustard cake properly in a handsome amount of water before applying it to plants, as it can be too strong for plants if used directly.

You can read the detailed article here:

Mustard Cake Fertilizer


4. Epsom Salt (Magnesium Sulfate) for outdoor plants

  • In cases where plants are not growing properly despite receiving adequate fertilizers, water, and sunlight, Epsom salt can be considered as a good supplement.
  • We can either directly add Epsom salt to the soil or make a dilute solution and give it in the soil or can make a foliar spray.
  • We have to give Epsom salt only when it is needed.

It is important to use Epsom salt in moderation and always maintain a gap of at least 10 -12 days between the two fertilizers to avoid over-nutrients to the plants.

  • This will allow the plants to absorb the nutrients from each fertilizer effectively and prevent any negative effects on plant growth.

You can read the detailed article here:

Epsom Salt for plants: benefits & uses

5. Banana Peel fertilizer for outdoor plants


  • Banana peel fertilizer can act as a catalyst for plants during the flowering or fruiting stage, or in cases where the plant is not blooming.
  • The high levels of Potassium and Phosphorus in banana peels can help to promote the growth and development of flowers and fruits, while also providing other essential nutrients to the plants.
  • The best is to make Banana peel liquid fertilizer and give it to the soil. Otherwise, you can add Banana peel to the Kitchen compost as raw banana peels may attract pests and insects.
  • Banana peel liquid fertilizer should be given once every fifteen days.

Must read article on 
Banana Peel Liquid Fertilizer

6. Cow dung liquid fertilizer 

  • Cow Dung liquid fertilizer is a widely used and popular form of organic fertilizer.
  • It is rich in nutrients like Nitrogen, Phosphorus, and Potassium, which are essential for plant growth. Additionally, it contains microorganisms that help in the breakdown of organic matter in the soil and improve soil fertility.
  • It can be given to any outdoor as well as indoor plants once a month.

It is important to ensure that the cow dung compost tea has been properly aged or composted before using it, as fresh cow manure can contain high levels of ammonia that can harm plants.

You can read the detailed article here:

How to make Cow dung fertilizer for plants

7. Seaweed fertilizer

  • Seaweed fertilizer is a natural and organic fertilizer made from seaweed extract.
  • It is rich in micro and macronutrients.
  • Seaweed fertilizer can be used on a wide range of plants, including vegetables, fruits, herbs, flowers, indoor plants, plant cuttings in water, etc.
  • It can be applied in the form of granules as well as liquid fertilizer.
  • We can do foliar spray, soil drench, or add directly to the growing medium of plants.
  • It can be given to any outdoor plants once a month.

You can read the detailed article here:

Seaweed Fertilizer: Benefits and Uses

Important points to note:

1. All the liquid fertilizers are endowed with balanced nutrients like NPK, Magnesium, Zinc, Calcium, and all other nutrients.

2. Rotation of the above-mentioned fertilizers is recommended every 20-25 days.

3. A deficiency of nutrients can be recovered in the plants but excess nutrition will damage the plant. So, even if you are giving any tonic or any supplement to plants always maintain the suggested time gap of at least 10-15 days.

4. Vegetable plants such as tomatoes, green chilies, brinjal, cabbage, bitter gourd, etc. should be fertilized with liquid fertilizers every 20 days.

5. For other outdoor plants, including both flowering and non-flowering ones like Tulsi (Holy basil) and Curry tree, etc. and Hibiscus, liquid fertilizer should be applied every 25 days.

Fertilizers for Indoor Plants 

  • It is important to select an appropriate fertilizer for indoor plants, as they have specific nutritional needs. A balanced fertilizer with equal amounts of Nitrogen, phosphorus, and Potassium as well as micronutrients is often recommended for indoor plants.
  • Indoor plants such as ZZ plants, Areca Palms, Syngoniums, Money plants, Anthurium, Snake plants, Peace lilies, etc. require nutrients approximately once every two months during their active growth period, typically in the spring and summer months.
  • Giving fertilizers to these plants during the dormant period in winter is generally not recommended, as they require less water and nutrients during this time.

Fertilizers:

  • Cow Dung fertilizer is the most suitable fertilizer for this category.
  • Mustard cake fertilizer can also be given to them once a year.
  • Seaweed fertilizer (granules/liquid fertilizer) can be given once in a 2 months gap.

Vegetable plants need water, sunlight, fertilizer, and everything in a maximal amount whereas indoor plants need minimal of everything.

Prioritize your plants and pick suitable fertilizer to nourish them.

Happy Gardening !!

organic neem pesticide

How to make Neem Pesticide at home

When we do gardening and grow plants, we always need to take some precautions so that we get healthy plants. Sometimes even after taking all the safety measures, we find pests and diseases in our plants.

pest attack in plant

Pests and diseases have always been a major challenge for gardeners. Chemical pest control is still a major method of pest control today, although due to its long-term side effects, attention has been paid to conventional and biological pest control in the late 20th century.

Today it has been proved that the use of chemicals in gardening and farming is very harmful to the plants, soil, and environment. An organic pesticide method to control pests and diseases can be both safe and effective for our plants.

Key note:
“Neem liquid pesticide is one of the best organic solutions for both outdoor and indoor plants.”

So, let’s discuss how to make organic neem pesticides for plants at home.

What is neem pesticide?

AZADIRACHTIN INDICA is the scientific name of the neem plant. Neem has been used in Ayurvedic medicines for centuries. It is specifically used to make various insecticides and also to control pests and diseases on the plant.

neem leaves used for ayurveda medicine

According to the research, it has been found that when some Indian scientists sprayed the diluted neem pesticide on different plants, the plants did not get harmed by the locust pests which were present on the surface of the plants.

Therefore, we should spray neem pesticide on our plants in the gap of every 7 days which will reduce the pest’s attack on the plant.

Note:

Sometimes our indoor and outdoor plants get affected by pest attacks like

  1. Aphids
  2. Whiteflies
  3. Mealybugs
  4. Leafhoppers
  5. Spider mites

To remove and control such pest attacks we can use neem liquid pesticides.

  • This neem liquid pesticide is easily available in the market, also you can make it at home very easily, which is very effective and beneficial for our plants.

Tips to make Neem Pesticide at home

neem pesticide
neem pesticide

To make neem oil, we need to extract it from neem seeds, a process that is not feasible at home. So, let’s start with the simplest method of preparing effective neem pesticide at home.

1. Pluck neem leaves: First of all, pluck the neem leaves and wash them properly to remove all dust and dirt.

wash neem leaves
wash neem leaves

2. Boil the leaves:  In the next step, boil the leaves in 1 liter of water for approximately 20 minutes.

boiled neem leaves
boiled neem leaves
  • After 20 minutes, about one-fourth of the water will remain, and the color of the water will have changed to dark green.
  • Allow it to cool to room temperature, and then strain the water.

3. Dilute the solution: This solution is quite potent, so it should not be directly sprayed on the plants.

neem solution
neem solution
  • First, dilute this solution with water.
  • Add 10 tablespoons of this neem liquid to 1 liter of regular water.

Now, you can apply this diluted neem water to your plants and leaves. It’s a 100% pure organic neem liquid pesticide.

neem pesticide spray in plant

One of the best qualities of neem liquid pesticide is that it is harmless to insects like bees and earthworms which are very helpful to our plants.

It was all about homemade neem pesticides.

Happy gardening!

gardening mistakes

6 Common Mistakes to avoid in Gardening

While doing gardening, we often make some mistakes, which we should not do. Due to this, our plants are not able to grow that well. Whether you are experienced or a beginner, you should know these few things which I am going to tell you through this article.

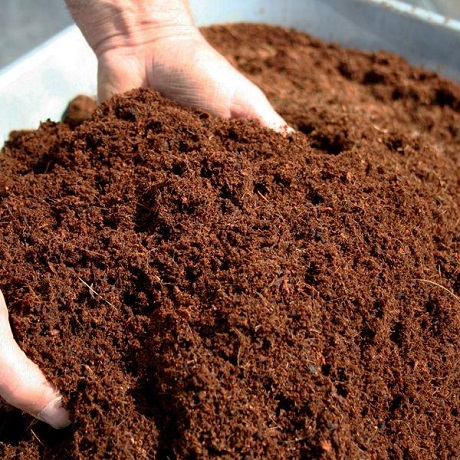
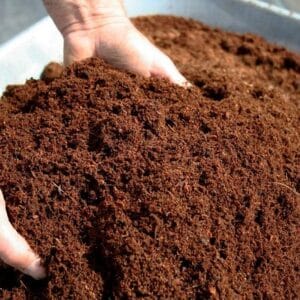
1 – Do not ignore “Tilling of Soil”

Soil tilling

Generally, people make lots of efforts for the growth of their plants like giving fertilizers on time, feeding humic acid or bio enzymes, pruning at regular intervals, and many more things but they do not give much importance to the basics of gardening that is doing “tilling of the soil”.

The tilling process is important for various reasons-

  • It makes the soil soft.
  • Soil nutrients get shuffled up and down.
  • It maintains good aeration.
  • Roots become strong and healthy.

Once a week, tilling of the soil should be done for the optimal growth of the plants.

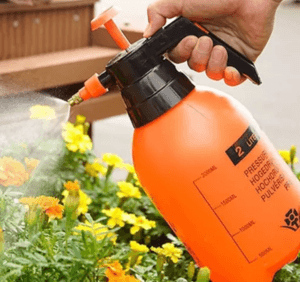
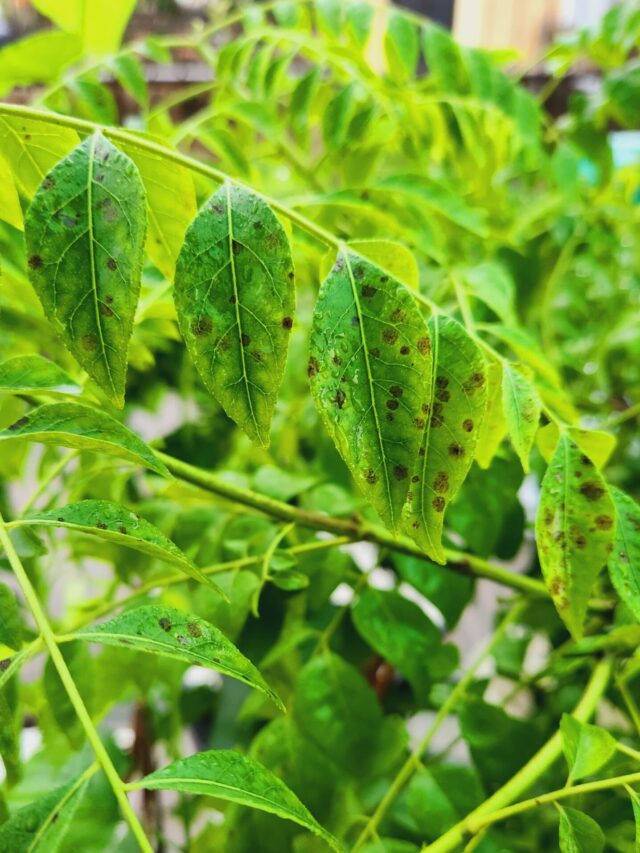
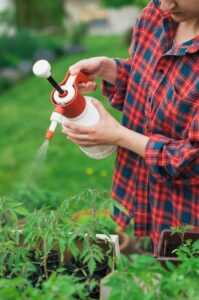
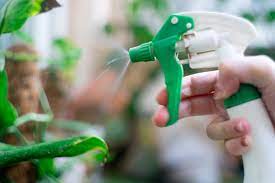
2 – Not using the proper technique of spraying pesticides

Pests attack is very common in plants and in particular season insects like mealy bugs, aphids, ants, spider mites plus many others start growing.

Pesticide spray
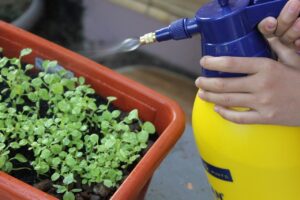
  • To get rid of them various pesticide solutions are available and prepared. To refrain from insects proper process of spraying needs to be followed.
  • First of all remove all the insects from affected plants by using cotton buds, tissue paper, or any cotton cloth. Clean all the leaves, branches, and all the parts of the plants.
  • After that, spray the solution on each and every part of the plants, the side of the leaves, all the branches, on buds or flowers. If even a single insect remains on the plant then there would be a pest attack again and questions will arise on the effectiveness of the solution.
  • So, here solution would not be a culprit but proper methodology needs to be followed.
  • Follow the treatment on every alternate day until the plant is pest-free.

neem pesticide spray

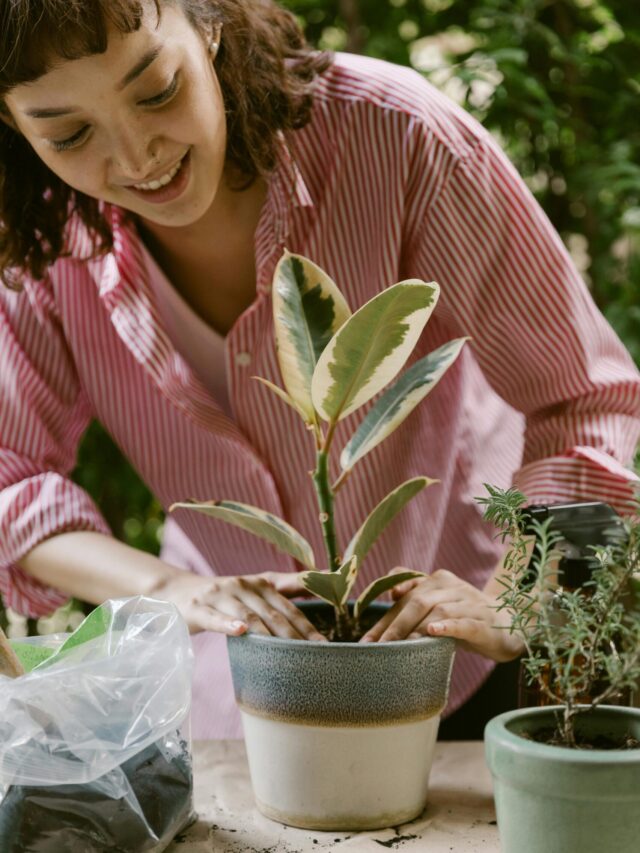
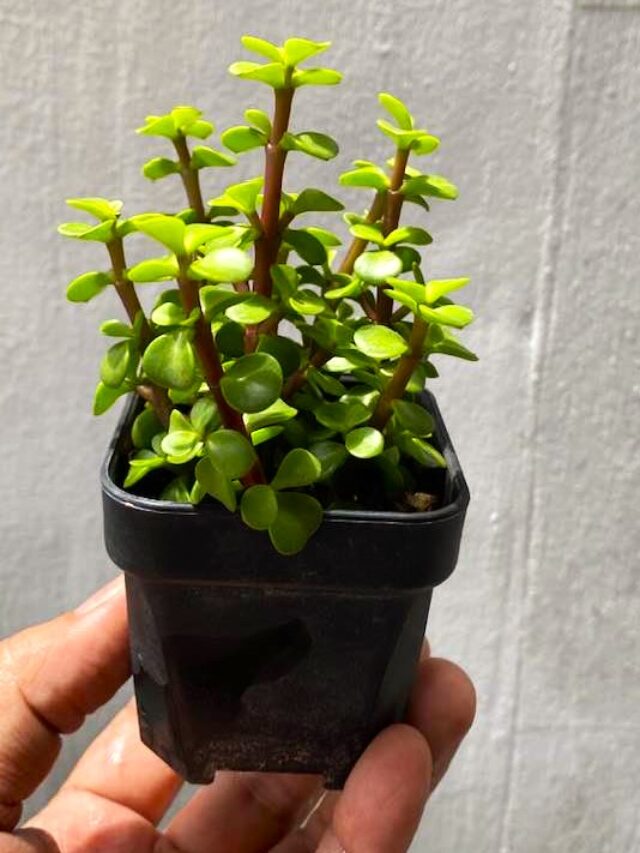
3 – Selecting the wrong Pots Structure

Despite the material, the structure of the pot matters a lot.

  • Avoid narrow pots because, at the time of tilling, repotting, giving compost or fertilizer, and removing weeds, space is needed to loosen the soil. In narrow pots, we do not get proper space, either the pot will break or the plant will get damaged.
  • Be it, ceramic, plastic, or cement but opt for broad-size pots. Soil would get enough sunlight, tilling can be done easily and the aeration process would be maintained in broad-size pots.

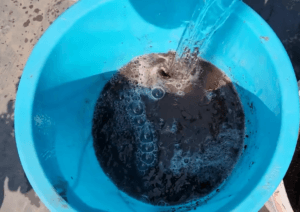
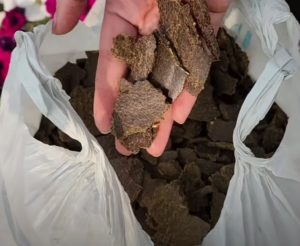
4 – Adding chemicals to compost

kitchen waste


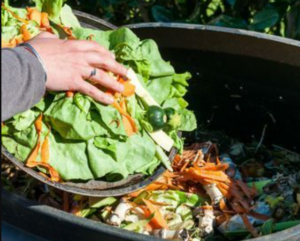
When composts are made at home (any compost – leaf compost, kitchen or cow dung compost), naturally it takes 2 and 2.5 months to make. All the material gets decomposed in the presence of bacteria and fungus which is a slow process.

  • Some people are accelerating this process by adding chemicals to it and compost gets ready in 7-10 days, which is not the correct method.
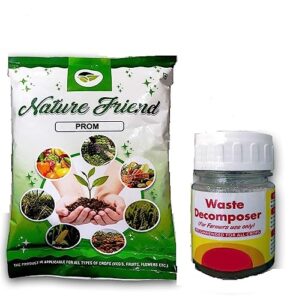
  • No chemicals should be added to get pure organic compost, moreover, if anything chemically manifested things (compost) is added to the plant then it will deplete the nutrition level of the soil.
  • Fruits, flowers, or vegetables grown by adding this compost would not be organic hence they would be chemically injected which is not good for health.
  • To fasten the process of compost making, add organic or natural; things like buttermilk, vermicompost, sour curd, or worms. All these things will accelerate the process of decaying material.

5 – Not feeding Fertilizers to the plant

Heavy feeder plants like flowering, fruiting, and vegetable plants need fertilizers at regular intervals. They will look beautiful and tempting at nurseries because proper care of them is taken there but after getting them at home, many of them would stop growing.

  • These plants need fertilizer every 20-25 days.
  • NPK, micronutrients, or any other organic fertilizer should be given to the plant to meet the nutrient level of the soil for the booming growth of the plant.

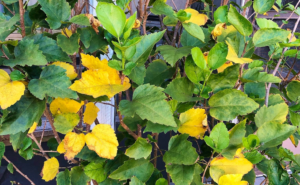
6 – Incorrect way of using Neem Oil

Neem oil is an organic oil and the best pesticide but many people complain that after using neem oil their plants get burnt. Well, the problem is not the neem oil here but the problem is how it is used.

  • Neem oil is strong so when applied to the leaves, the pores of the leaves get blocked and the process of photosynthesis gets seized.
  • To refrain from this, always spray neem oil in the evening and keep the plant for the night as it is. The next day, in the morning before sunrise, wash the plant properly with ample water.
  • Neem oil will do its work at night so make sure leaves with neem oil do not get exposed to sun. While washing, oil might fall in the soil but that is ok.

Happy Gardening!!

How to use Neem Oil to Protect Plants from Pest Attacks

Neem oil is indeed known for its versatility in gardening. It is considered relatively safe for plants when used appropriately, and it is often used in organic gardening.

It serves as a natural pesticide, helping to repel various insects such as mealybug, aphids, spider mites, whiteflies, leaf miners, beetles, etc. Additionally, neem oil is effective in treating fungal infections in plants.

neem pesticide

The oil, derived from the neem tree’s seeds (Azadirachta indica), is recognized for its organic insect-repellent properties and antifungal characteristics. Furthermore, it acts as a natural fertilizer, promoting healthy plant growth. It is important to follow recommended application guidelines to ensure its effectiveness without causing harm.

In this article, we explore how neem oil can do many helpful things when mixed with different ingredients.

What is Neem Oil?

Neem oil is produced by crushing the kernels found within the seeds commonly referred to as “nibor”, of the bitter neem tree.

neem kernel

  • The byproduct, neem cake, is also obtained during this process and is used in gardening. It is true that the neem oil produced through this method is considered pure and potent, but it should not be applied directly to plants undiluted as its strength may harm them.
  • Neem oil produced by companies is often formulated with emulsifiers to make it water-soluble and suitable for plant application.

Why Neem Oil is preferred as Insect Repellent?

When it comes to keeping insects away, there are many insect-killing products available in the market, nursery, and online, but not all of them are safe for edible plants like tomatoes, coriander, curry leaf, tulsi, etc. Treating these plants with regular insect killers may make them unsafe to eat.

On the other hand, neem oil is organic and safe for plants. It doesn’t pose a risk of contaminating the vegetables you plan to eat.

Always use Water-Soluble Neem Oil

When using neem oil for plants, it’s important to ensure that you’re using a water-soluble formulation. Here are some key points to consider:

1. Water-Soluble Neem Oil:

  • Look for neem oil products that are specifically labeled as water-soluble. These formulations are designed to easily mix with water, ensuring proper dispersion and effectiveness when applied to plants.

2. Ease of Application:

  • Water-soluble neem oil can be conveniently mixed with water in a sprayer or watering can, making it easy to apply to plants as a foliar spray or soil drench. 

3. Reduced Residue:

  • Water-soluble neem oil leaves minimal residue on plant surfaces, reducing the risk of buildup and potential phytotoxicity. This ensures that plants remain healthy and free from unsightly residues.

How to use Neem oil in gardening?

spray bottle

For the best results, it is recommended to spray neem oil in the evening. This is to avoid potential leaf burn because some plants treated with neem oil can be sensitive to sunlight.

In the daytime, plants use sunlight for photosynthesis to make their food. Neem oil can block the pores of leaves, which might interfere with this process.

Additionally, it’s a good idea to thoroughly wash your plants with water the next day before exposing them to sunlight.

“So, always spray neem oil during the evening to ensure it works effectively without harming your plants.”

Benefits and Uses of Neem Oil for Plants

1. As a Safeguard

  • Even if you don’t see any visible insects on your plants, you can use neem oil preventively once a month.
  • Mix 2.5 ml of neem oil with 1 liter of water and thoroughly spray the solution on the plants. This acts as a safeguard against potential pest issues.

2. As an Insect Repellent

a. Heavy Infestation of Insects:

  • If your plant is heavily infested with insects, consider relocating it to prevent the potential impact on nearby plants.
  • Conduct a thorough hard pruning by removing all infected branches.
  • Keep the plant in the shade and then spray neem oil as a protective measure.

b. Mild Attack of Insects:

  • When insects mildly infest leaves, buds, or branches, isolate the affected plant from others.
  • Promptly remove any visible insects, wash the plant thoroughly with clean water to eliminate remaining insects or their eggs, and remove dust from the plant.
  • Ensure a clean surface before applying neem oil, as it may not be as effective on plants covered with dust.

How to use Neem Oil to protect Plants from Pest Attacks

1. For the Insect-Infested Plant:

  • Dilute 5 ml of neem oil in one liter of water and spray it on all parts of the plant.

2. Follow this schedule for effective insect removal:

    • Day 1: In the evening, spray the prepared solution on the plant.
    • Day 2: In the morning, wash the plant properly with clean water, and in the evening, spray neem oil again following the same procedure as Day 1.
    • Day 3: Wash the plant again with clean water and observe whether the plant’s condition is improving or not.

Now, according to the prevailing situation, follow the steps:


1. STEP 1: 5 ml Neem oil in 1 liter of water

  • If the situation improves, continue with the same process for 8 days alternatively.

2. STEP 2: 5 ml Neem oil in 1 liter of water + 2.5 ml of Dishwasher

  • If the situation doesn’t improve, consider adjusting the spray solution. Dilute the mixture with a dishwasher or liquid hand wash (using half the quantity of neem oil).
  • Create a solution by mixing 5 ml of neem oil, 2.5 ml of dishwasher, and 1 liter of water.
  • Continue with the same application routine, spraying in the evening and washing in the morning on alternate days for 8-10 days.

3. STEP 3: 5 ml Neem oil in 1 liter of water + 2.5 ml of Dishwasher + 2 spoons of Garlic Water

If the hand wash solution proves ineffective, incorporating garlic water can be the next step.

  • To prepare garlic water, grind a few cloves of garlic thoroughly, boil them in 1 liter of water, and strain the mixture when it cools down.
  • Add 2 spoons of garlic water to the neem oil solution.
  • Apply this combined solution on alternate days for 10 days, spraying in the evening and washing the plant in the morning. This approach should contribute to the recovery of your plant within the specified timeframe.

Following the outlined methods should effectively eliminate the insects, but exercise caution for the next 15 days. Maintain careful observation of the plant and keep it in isolation to ensure sustained recovery and prevent any potential re-infestation. Spray neem oil again if there is any visibility of insects.

3. As a Disease Antidote:

When plants fall victim to diseases like leaf curl or exhibit signs of distress such as turning red, swift action is key.

  • Prune away the affected portions of the plant and follow up with a neem oil spray. If caught in the early stages, this approach can lead to a prompt recovery for the plant.

At last:

By following specific application steps, one can harness the full potential of neem oil to protect and revive plants in a natural and sustainable manner.

Happy Gardening!

How to grow Ajwain Plant at home

The Ajwain plant is also known as Mexican mint or Indian Borage. The Ajwain plant has the same aroma and taste as carom seeds. In fact, by touching only one can sense that it is an oregano plant.

The green leaves of the Ajwain plant are called oregano and it is also used in pizza. Most people know it just like that, but these leaves have many benefits. This also gives flavor and a different taste to the food. You can also make oregano at home by drying Ajwain plant leaves. But for this, first of all, know that if you want to plant an Ajwain plant in the house, then what do you have to do for this?

In this post, we will discuss some important points which will help you to grow an Ajwain plant at your home.

Best season for Ajwain Plant

    • It blooms more in the summer as it is a summer plant.
    • Sunlight required for this plant is 1-4 hours maximum, not more than that. Otherwise, it will not flourish accordingly.
    • During winters, it grows at a slow pace and needs to be covered to prevent it from the craggy cold.
    • The duration of February to October is the best for the growth of this plant.

Water requirement for Ajwain Plant

    • It is a succulent plant. Hence, it needs less water.
    • Give water when the soil looks dry.
    • Do not over-water.

Best Soil Mixture for Ajwain Plant

1. Garden soil

    • Always take soil that is available in your area.
    • Plants grow healthy in environment-friendly soil.

2. Compost (half of the garden soil)

    • If the soil lacks any nutrients, compost is required to meet the particular level of nutrients and minerals.
    • The quantity of the compost (vermicompost or cow-dung compost or kitchen compost) should be half of the garden soil.

3. Sand (half of the compost)

    • Take river sand which is available near your area or any construction site.
    • Sand is an essential component because it prevents the soil from becoming hard like stone.

4. Cocopeat

    • Cocopeat holds the moisture for a longer duration.
    • The quantity of cocopeat should be the same as sand if sunlight comes to your area for 3 to 4 hours.

note: the quantity of cocopeat should be half of the sand if the exposure to the sunlight is for 1 to 2 hours.

5. Neem Khali (neem cake)

    • Despite all these products neem Khali (neem cake) can also be added in small quantities.
    • Mix all the material properly and it is a perfect soil mixture for the Ajwain plant.

Best pots for Ajwain plant

  • Clay pots are the best pots for the Ajwain plant, an approximately 10-12 inch pot is sufficient for terrace or balcony gardening.

From where to purchase the Ajwain plant

  • This plant is easily available in all the nurseries by the name of “ajwain plant” and can be bought at the price of Rs 40-50.

How to plant Ajwain plant in the soil?

    • First step: Fill the pot with soil and give water, so, that the soil settles down easily.
    • Second step: Create some space in the soil and place the cutting inside the soil.
    • Third step: Water the soil slowly. Give water from a spray bottle, so that the soil of the pot becomes wet. Water again for the second time till the water comes out of the bottom hole.
    • Fourth step: Keep the pot in a shaded area where there is no direct sunlight.
    • It will start growing in a few days.

Important points to keep in mind

To grow the Ajwain plant in a pot, it is important to keep some points in mind:


    • Plant Ajwain plant in the summer season.
    • Avoid over-watering.
    • Fertilize the plants every 25 days.
    • The pot should be wide, but the height should not be high. This makes it difficult for plants to grow.
    • Mix vermicompost and cocopeat in the soil.

Medicinal use of Ajwain plant

The Ajwain plant is rich in many nutrients such as protein, carbohydrates, fiber, sodium, potassium, calcium, phosphorus, iron, and thiamine, due to which it is used as a medicinal plant.

    • It gives relief from knee pain.
    • It also helps in gastric pain and acidity problems.
    • Consumption of 2-3 leaves in a day is enough for the pioneered problems.

Kitchen’s king ingredient

    • These leaves can be used in making vegetables and snacks.
    • To prepare different dips.
    • In Italian dishes also, it adds flavor.

Best fertilizers for Ajwain plant

    • Ajwain plant does not undergo the process of flowering and fruiting hence any heavy fertilizer like chemicals, DAP, or NPK is not required. Organic fertilizers are always preferred.

Suggested fertilizers are-

1. Kitchen Compost Tea

    • In the process of making kitchen compost, the liquid residual is obtained called kitchen compost tea.
    • It acts as a very healthy tonic for the optimum growth of the plant. Dilute it with double the quantity of water and give it to the plant every month.
vermicompost tea
vermicompost tea

2. Vermicompost Tea

    • Dilute one spatula of vermicompost with 1 liter water and keep it aside for 24 hours.
    • After 24 hours, take the upper water (leave the settled compost behind) and mix it with 4 liters of water. Pamper the Mexican mint with this tea every 30 days.

3. Mustard Cake Liquid Fertiliser can also be given thrice ( February, August, and November) in a year when the weather is not very humid.

Cutting & pruning of Ajwain plant

    • 3-4 times pruning of the leaves and branches in a week is suggested for the booming growth of the plant.
    • These branches can be used as a cutting for the growth of new plants.

Pesticides

    • Generally, it does not get attacked by any pests. Still, once in 3-4 months neem spray can be done to it.

It was all about the Ajwain plant.

Watch the below video to know detailed information on “Ajwain plant”

Keep Planting !!

Leaf miner in tomato plant

Leaf Miner in Tomato Plant: Treatment & Cure

How to Treat Leaf Miner in Tomato Plant?

Leaf miners pose a significant threat to the health and yield of tomato plant. These tiny pests, typically the larvae of moths, flies, or beetles, tunnel into the leaves, leaving behind distinctive serpentine patterns that hinder the plant’s ability to photosynthesize.

leaf miner on tomato leaves

If left unchecked, leaf miner infestations can severely compromise the overall health and productivity of your tomato plants.

Young saplings are particularly vulnerable and can die from severe infestations. Even if a mature plant survives heavy larval infestation, its growth will be stunted, and it may never reach its full potential unless treated promptly.

Moreover, fully grown healthy plants will suffer too, experiencing decreased flower and fruit yields due to severe infestations. Additionally, the openings created by leaf miners provide entry points for fungi and bacteria, causing leaves to yellow and eventually fall off the plant.

tomato

Furthermore, such infestations render green leafy edible plants unfit for consumption. However, with proactive management strategies, you can effectively control and minimize the impact of these pests. 

Key steps to treat Leaf Miner from Tomato Plant

1. Vigilant Monitoring
Regularly inspect your tomato plants for any signs of leaf miner damage.

  • Look for winding, white or brown trails on the leaves, as well as the presence of small, whitish maggots near the tunnels. Early detection is crucial for effective management.

2. Prune and Dispose 

Pruning leaf miner infected leaves (1)

Immediately remove and dispose of any infested leaves to reduce the population of leaf miners.

  • Be sure to dispose of the affected foliage away from your garden to prevent the larvae from completing their life cycle and re-infesting your plants.

3. Using Neem Oil as Organic Pest Control for Treating Leaf Miners

Neem oil is a popular organic pest control method for managing leaf miners in tomato plants. Here’s how to use it effectively:

1. Dilution:

  • Mix neem oil with water according to the manufacturer’s instructions. Typically, you can use around 2 to 4 tablespoons of neem oil per liter of water.

neem oil treatment to cure Leaf miner

2. Application:

  • Use a spray bottle or garden sprayer to apply the neem oil solution to the affected plants.
  • Make sure to cover both the upper and lower surfaces of the leaves, as leaf miners can be present on either side.

3. Frequency:

  • Apply the neem oil solution every 3 to 5 days. Consistent application is crucial to disrupt the life cycle of leaf miners.

4. Timing:

  • Apply neem oil in the evening only to avoid exposing plants to direct sunlight, which can cause leaf burn.

5. Clean leaves with fresh water

  • On the next day, clean the leaves with fresh water using a spray bottle every morning. 

6. Repeat:

  • Continue applying neem oil until the leaf miner infestation is under control. Be patient, as it may take several applications to see significant results.

6. Prevention:

  • To prevent future infestations, continue using neem oil as a regular part of your pest management routine, especially during periods of high leaf miner activity.

Also, read:

How to Grow Tomatoes at Home from Seeds in Pot

How to Prevent Leaf Miners

tomato plant

Prevention is the most effective method for controlling leaf miners. Here are some suggestions:

1. Regularly inspect plants:

  • Check the leaves of susceptible plants and young seedlings frequently for any signs of damage. Leaf miners tend to target the first set of true leaves.

2. Examine new plants:

  • Leaf miners can enter home gardens via new plants. When purchasing plants from a nursery or garden center, carefully examine the leaves for any signs of leaf miner infestation.
  • Keep monitoring the plants for 2 to 3 weeks after bringing them home, as this is the typical life cycle of leaf miner larvae.

3. Maintain plant health:

  • Healthy plants have better resistance against pests and diseases.

4. Keep garden areas clean:

  • Certain weeds like chickweed, lamb’s quarters, and pigweed are favored by leaf miners, especially in the fall when other plants have become dormant.
  • Removing these weeds can help reduce leaf miner populations.

Also, read:

Leaf Curl in Tomato Plant – How to Treat Leaf Curl Disease?

In conclusion, managing leaf miner infestations in tomato plants requires a multifaceted approach that combines vigilant monitoring, proactive measures, and environmentally friendly pest control methods. By adopting these strategies, you can effectively safeguard your tomato plants and ensure a healthy and productive harvest.

Happy Gardening!

Make Your Own Garden!

Hibiscus in pot

गुड़हल में ये खाद डालने से आएंगे फूल ही फूल

गुड़हल में ये खाद डालने से आएंगे फूल ही फूल


कई बागवानों को अक्सर इस समस्या का सामना करना पड़ता है कि उनके स्वस्थ गुड़हल  (हिबिस्कस) पौधे अच्छी स्थिति में होने के बावजूद फूल नहीं दे रहे हैं।

परिणामस्वरूप, वे अनजाने में पौधे को गलत खादों से उपचारित करते हैं, जिससे नुकसान होता है।

एक ऐसे गुड़हल (हिबिस्कस) के लिए जो स्वस्थ है लेकिन खिलता नहीं है, इसमें कई कारक शामिल हो सकते हैं। सही खाद का चयन महत्वपूर्ण अंतर ला सकता है और फूल आने को बढ़ावा दे सकता है।

गुड़हल के फूल के लिए सर्वोत्तम खाद


अतः, ऐसा क्यों हो रहा है और इसके पीछे क्या कारण हैं? आइए उन परेशानियों की एक सूची की समीक्षा करें जो आपके गुड़हल का पौधा सामना  कर रहा है, यदि इसमें नहीं आ रहे हैं:

1. कलियाँ नहीं खिल रही:


Hibiscus buds

  • मिट्टी में फास्फोरस की कमी से फूलों के उत्पादन में बाधा आ सकती है, इसलिए खिलने को बढ़ावा देने के लिए ऐसे उर्वरक की तलाश करना महत्वपूर्ण है जिसमें फास्फोरस हो।


2. पौधा स्वस्थ लेकिन फूल नहीं:


    • कभी-कभी, गुड़हल के पौधे फूलों के बजाय पत्ते उगाने पर फोकस करते हैं।
    • समग्र पौधों के स्वास्थ्य और फूलों के उत्पादन को प्रोत्साहित करने के लिए समान एन-पी-के अनुपात वाले संतुलित उर्वरक का विकल्प चुनें।


3. पीली पत्तियाँ:


hibiscus yellow leaves

    • पीली पत्तियाँ नाइट्रोजन की कमी का संकेत दे सकती हैं।
    • नाइट्रोजन की कमी को दूर करने और हरी पत्तियों को बढ़ावा देने के लिए उच्च नाइट्रोजन वाला खाद चुनें।


4. कलियाँ परिपक्व नहीं:


    • यदि गुड़हल (हिबिस्कस) कलियों को पर्याप्त पोटेशियम नहीं मिल रहा है तो वे परिपक्व होने में विफल हो सकती हैं।
    • कली के विकास और परिपक्वता में सहायता के लिए उच्च पोटेशियम वाले उर्वरक की तलाश करें।


5. कलियों का गिरना:

hibiscus bud falling

    • जड़ के खराब विकास या तनाव के कारण कलियाँ समय से पहले गिर सकती हैं।
    • जड़ों के स्वास्थ्य और लचीलेपन में सुधार के लिए मैग्नीशियम और आयरन जैसे सूक्ष्म पोषक तत्वों वाले उर्वरक पर विचार करें।


गुड़हल के पौधे पर फूल क्यों नहीं आ रहे हैं?


गुड़हल के पौधों में फूल न आने का मुख्य कारण अक्सर पोषक तत्वों की कमी होती है। इसका श्रेय दो कारकों को दिया जा सकता है:


1. पौधों के विभिन्न भागों में अकुशल पोषक तत्व वितरण


जब जड़ों को उर्वरक प्रदान किया जाता है, तो यह पौधे के अन्य भागों, जैसे तना, पत्तियों, शाखाओं या कलियों तक कुशलतापूर्वक वितरित नहीं होता है।


2. पौधों की जड़ों तक स्टार्च-आधारित भोजन का सीमित वितरण


इसके अतिरिक्त, जहाँ पौधे अपने पत्तों में स्टार्च के रूप में अपना भोजन उत्पन्न करते हैं, यह संभव है कि भोजन पत्तियों में ही रहे और पौधे की जड़ों के अन्य भागों में वितरित न हो।


नोट: 

  • स्टार्च पौधों, विशेषकर उनकी जड़ों को प्रतिरक्षा प्रदान करने में महत्वपूर्ण भूमिका निभाता है।

उपरोक्त दो कारकों से संकेत मिलता है कि पौधों की “परिवहन प्रणाली” अच्छी तरह से काम नहीं कर रही है जिसे पोटेशियम की कमी के लिए जिम्मेदार ठहराया जा सकता है।

सौभाग्य से, केले और केले के छिलके में पोटेशियम अत्यधिक उपलब्ध होता है और इसका उपयोग पौधे की परिवहन प्रणाली को बेहतर बनाने के लिए किया जा सकता है।

  • यदि इस स्थिति में पौधे को केले के छिलके की खाद खिला दी जाए तो समस्या का समाधान हो जाएगा।

3. केले के छिलके की पोषक तत्वों से भरपूर संरचना


banana peel fertilizer

न केवल पोटेशियम बल्कि केले के छिलके में कैल्शियम, मैग्नीशियम, सल्फर और फास्फोरस जैसे कई अन्य पोषक तत्व होते हैं, जो पौधों की वृद्धि और विकास के लिए आवश्यक हैं।


4. केले के छिलके में सूक्ष्म पोषक तत्व की मात्रा


इसके अतिरिक्त, केले के छिलके में जिंक, तांबा और आयरन जैसे अन्य सूक्ष्म पोषक तत्व होते हैं, जो पौधों के स्वास्थ्य के लिए महत्वपूर्ण हैं।

केले के छिलके की खाद कब दें?

banana peel


1. छोटे पौधों को केले के छिलके की खाद न दें


उन पौधों पर केले के छिलके के उर्वरक का उपयोग करने से बचें जो अभी छोटे हैं या बढ़ने की अवस्था में हैं क्योंकि उस समय उन्हें नाइट्रोजन, फास्फोरस और पोटेशियम (एनपीके) की समान मात्रा की आवश्यकता होती है।

केले की खाद में नाइट्रोजन की मात्रा बहुत कम होती है. इससे पोषक तत्वों का असंतुलन हो जाएगा और नाइट्रोजन की कमी के कारण पौधे मर सकते हैं।


2. फूल आने या फल लगने की अवस्था के दौरान केले के छिलके की खाद डालें

केले की खाद हमेशा तब दें, जब पौधा फूल या फल लगने की अवस्था में हो।

3. केले के छिलके के उर्वरक को अन्य उर्वरकों के साथ संतुलित करना


जबकि केले के छिलके के उर्वरक का उपयोग सभी पौधों पर किया जा सकता है, पोषक तत्वों का संतुलन बनाए रखने के लिए इसे अन्य उर्वरकों के साथ बदलना महत्वपूर्ण है।

  • केले के छिलके की खाद डालने के बाद, अन्य खाद जैसे गोबर तरल खाद या किसी अन्य का उपयोग करने से पहले कम से कम 10 से 15 दिन तक प्रतीक्षा करें।

4.  प्याज के छिलके की तरल खाद


onion peel liquid

केले के छिलके की खाद के बाद, 10 से 15 दिनों तक प्रतीक्षा करें और फिर पौधे को प्याज के छिलके की तरल खाद दें।

  • यह उर्वरक फूलों के खिलने को भी बढ़ावा देता है, और आप कुछ ही दिनों में नई कलियाँ दिखने की उम्मीद कर सकते हैं।

नोट:

  • ऐसे मामलों में जहां खिलते पौधे की पत्तियां पीली हो जाती हैं, यह अधिक पोषक तत्वों की आवश्यकता का संकेत है।

5.  गाय के गोबर का तरल उर्वरक


cow dung decompose

  • प्याज के छिलके की खाद डालने के 10 दिन बाद पौधे को गाय के गोबर से बनी तरल खाद दें।

हर 10 दिनों में अलग-अलग तरल उर्वरक लगाने के इस शेड्यूल का पालन करके, आप अपने गुड़हल में लगातार फूल खिलने को प्रोत्साहित कर सकते हैं।

पौधों को स्वस्थ विकास के लिए सूरज की रोशनी, पानी, हवा और पोषक तत्वों की आवश्यकता होती है। इन आवश्यकताओं की सावधानीपूर्वक निगरानी करें और उन्हें पूरा करें। फूल खिलते समय, अधिक पोषण से बचने के लिए खाद कम दें। उपचार लागू करने से पहले चेकलिस्ट का पालन करें।

शुभ बागवानी!

How to care for Hibiscus Plant

Hibiscus is a tropical plant known for its big, colorful flowers. They love warm temperatures and usually need to be protected during cold weather. They have woody stems and grow close to the ground. The flowers of this plant are very big in size and are of different colors like red, peach, yellow, orange, and purple.

  • What if your hibiscus plant is not giving flowers?
  • What if your hibiscus buds are falling regularly?
  • The leaves of the plants are turning yellow and pests are attacking the plant.
hibiscus flower
hibiscus flower

In this article, we are going to provide the solutions for all of these problems.

Hibiscus is a perennial plant, if you will take proper care of it then it can survive for many years with you. Generally, hibiscus should be grown in the ground but with proper technique and care, we can grow it inside the pot also.

1. Sunlight for Hibiscus plant

sunlight for hibiscus plant
  • Hibiscus plants grow in direct sunlight, the best place for hibiscus is a place that gets 6 to 8 hours of direct sunlight in a day.
  • The ideal temperature for this plant to grow is 15℃-35℃.
  • If the temperature goes beyond the range then keep the plant in the shade otherwise leaves might get burnt.
  • You need to save this plant from extreme cold and winter dew also.

2. Pot size for Hibiscus plant

pot size for hibiscus plant
  • Choose the pot very wisely because they prefer root bound also.
  • The roots of this plant are bigger in size, so you need a big pot for them at least 12 inches.
  • When you buy this plant from a nursery, do not shift them into another pot immediately.
  • In fact, even if your plant is 2-3 years old and doing well in the current pot then also do not shift it because this plant gets transplant shock very easily.
  • If you think that plant has grown up very well and your current pot size is small according to the plant then you can shift it to a bigger pot.
  • The best pots are clay pots but you can choose as per your convenience. You can take cement, ceramic, or any pot.

                Do it with all care to prevent transplant shock.

3. How to Water Hibiscus Plant

watering plants

  • Hibiscus needs balanced water, over-watering leads to fungus and pests in the plants. It will stop the growth of the plant, leaves will start turning yellow, and buds will get weaker and start falling down.
  • At first, go give water nicely and after that check the top soil of the pot.
  • If the soil is dry, then lose the soil with any tool and check if the soil is completely dry or sticking to the hands.
  • If it is wet do not give water. In winter, do not give water daily.

4. Pesticide for Hibiscus Plant

Pest attacks, fungi, mealybugs, and all are very common problems with hibiscus plants.

mealybug
mealybug on hibiscus plant
  • To prevent it, first of all, avoid overwatering.
  • If you have more than one hibiscus then keep this plant at different places with gaps otherwise all of them would get pest attacks at the same time.
  • You can do neem spray weekly on this plant.
  • If you want to prevent your plant from pest attack then check your plant every third day.
  • Observe the stems, branches, flowers, and both sides of the leaves properly, if you have even a minor doubt of a pest attack then spray insecticide on it immediately.

ACTARA insecticide is good for the removal of pests and safe for plants, you can use this insecticide.

5. Pruning of Hibiscus Plant

pruning
pruning

If you want so many flowers in your plant, then you need to be regular in pruning. We need to do the pruning of the leaves, stems, branches, and flowers.

  • Remove all the yellow leaves, and spotted leaves otherwise the plant will waste its energy on these leaves.
  • You can remove the leaves from the bottom of the plant also because they do not play any role in photosynthesis.
  • Bottom leaves cover the soil which is not good for the plant and fungus also spreads through these leaves.
  • We should not do over-pruning of leaves otherwise the process of photosynthesis would get disturbed.
  • Always do the pruning of the plant in the growing season, not during winter seasons because at that time growth of the plant stops.

6. Best Fertilizer for Hibiscus Plant

  • Hibiscus is a heavy feeder plant, it needs fertilizer every 15 days.
fertilizer
fertilizer
  • You can give any fertilizer like cow dung, mustard cake, vermicompost, or any other which is available.
  • You can give banana peel fertilizer also because the banana peel contains high potassium, and potassium is very important for the biological and chemical growth of the plant.

Hibiscus is a very beautiful plant.

Enjoy the beauty of this plant!!

coco peat

How to use Coco Peat for Plants?

The powder of coconut husks is called coco peat. It provides a magnificent and unique combination of moisture, drainage, and aeration which is required by the plants, and is known as the best-growing medium for plants, crops, and seeds germination.

In the process of planting, the growing medium matters a lot.

Now, what is the growing medium?

When you grow any plant in soil, the soil is the growing medium for that plant. We have various growing mediums like water, sand, coco peat, vermiculite, and many more. In this article, we will study the “COCO PEAT”.

What is Coco peat?

In factories, we dry coconut husk powder and compress it in the form of bricks. This is easily available in the market in the form of bricks. You can buy it from any nursery or online. Originally, this brick is hard but when you soak it in water, it will expand and become very soft.

How to use Coco Peat for plants?

Coco peat can be used for planting in pots, do not use it for ground gardening.

Follow the below steps:

Before using it for planting, add water to the coco peat brick and it will become powder in some time. It will absorb all the water and expand 2-3 times in quantity. Now, you can use this coco peat powder directly for planting. You can store leftover quantities in any storage bag also.

Facts about Coco Peat

  • Coco peat does not have any nutrients in it like potassium, nitrogen, or phosphorus. It has only a small amount of salt in it.
  • It is very light in weight in comparison to soil. Plus, it does not become muddy and is very easy to handle.

  • It absorbs water very quickly and that is why it is used in gardening very often.
  • It becomes very soft after adding water and provides a perfect growing medium for planting.
  • It is natural and organic.

Uses of Coco peat in gardening

1. Coco peat is mainly used for the germination of seeds and bulbs.

If you are sowing your seeds in soil for germination and they are not germinating, then try coco peat this time. We need to maintain the moisture of the growing medium for seed germination and coco peat does it well.

coco peat

When plants try to come out from the surface after germination, it needs a soft medium.

Coco peat is very soft, that’s why coco peat is recommended for the seed’s germination.

2. Secondly, coco peat is used in potting mix.

Generally, we should grow plants in the ground but when we plant them in a pot we need to be very careful over various aspects. We need to provide perfect drainage, fertilizers, insecticides, growing medium, and many more things. To provide all these things we prepare a mixture of various things which is also called potting mix.

To prepare potting mix, we can mix soil and cocopeat in a 4:1 ratio (soil: cocopeat) with many other things.

  • If we use this mixture, it gives us various benefits.
  • Sometimes we face the issue of over-watering, in that case, coco peat will absorb extra water from the soil and protect the plant from over-watering.
  • If due to any reason you have not watered your plant then also this mixture can save your plant. Plants can absorb some water from the soil as well as some from coco peat.

Drawbacks of Coco Peat

  • The growing medium should provide enough anchorage or support to hold the plant but coco peat is very soft.
  • It cannot give structure to big plants like tulsi, hibiscus, curry plant, etc.
  • If you give water to your plants on a daily basis then do not add coco peat.
  • If we are using coco peat then, always check if the top surface is dry. If there is over-watering in coco peat then, it will take around 1 month to dry completely.

It was all about “COCO PEAT”.

Happy Planting!!!