Monthly Archives: April 2024

Money plant care tips

Money Plant Care Tips: Complete Guide

Money Plant Care Tips


Money plants, also known as Pothos are available in so many colors and different varieties rule the world by distinct names. This plant flourishes in almost every second home.

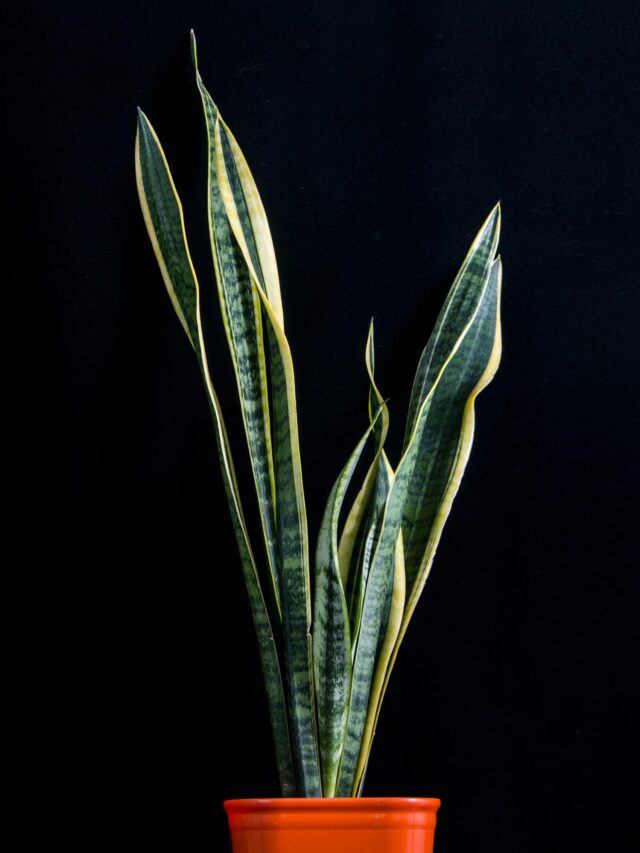
Beautiful, shiny, big green leaves of the money plant always magnify the beauty of every garden. Its leaves are typically green and variegated and can grow to be several feet long.

A money plant is considered to be:

  • a hardy,
  • low-maintenance plant
  • that is easy to care for and
  • also purifies the air.
Money Plant Care Tips
Money plant

Some people keep money plants inside the house and some people keep these plants outside the house. If properly cared for, this plant can easily thrive in both indoor and outdoor environments.

Money plant Care tips


In this complete guide article, we will discuss:

  • best season,
  • from where to get,
  • propagation & care.
  • light requirements,
  • pot size,
  • soil mixture,
  • watering,
  • moss stick,
  • pruning and
  • fertilizer’s for money plant.

1. Best season for money plant


(i) It is a summer plant.
  • It grows best during the interval of February- October.
(ii) Monsoon is the best season for money plants.
  • During rain, both the plant and cutting of the money plant grow at a faster pace.
(iii) During winters, it slows down its growing speed.
  • Whereas, the leaves of the money plant also start turning yellow or black and should be kept in a warm place (during winter).

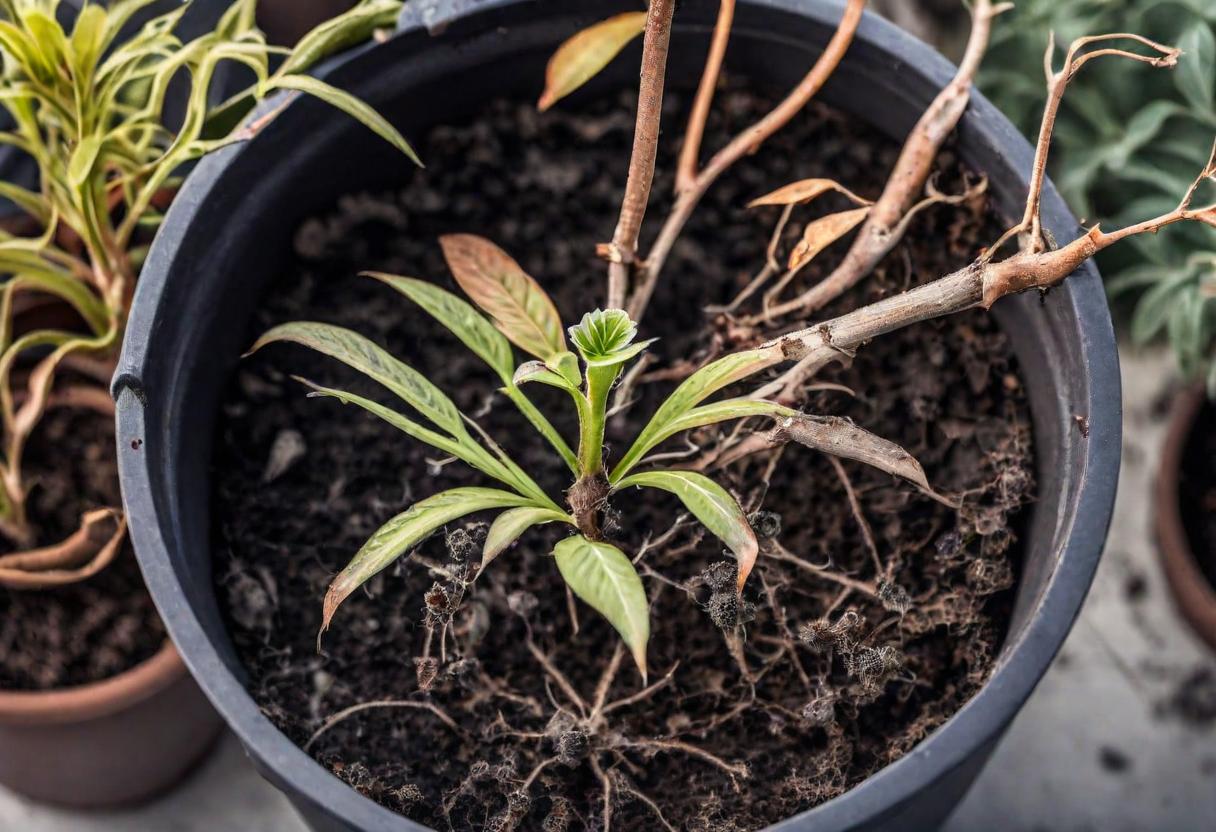
2. How to get a Money plant?


(i) Get it from Nursery
  • Money plants are easily available in nurseries.
  • At the nursery, it would be available in pots or in polybags.
  • Do not repot it, if it is available in the pot. Let it get settled at your place for some time.
  • If it comes in a polybag then also wait for 7-8 days for the repotting process.
  • Shift the money plant in the pot when it is out of stress.
(ii) From the Cutting


  • Money plant cutting can be borrowed from anywhere.
  • Borrowed cuttings of money plants can be used to turn into a full-fledged highly dense money plant.
  • Always take cuttings from healthy money plants.
  • Make sure the chosen branch has at least 3-4 nodes in it.
  • Money plants always grow from nodes or aerial roots, not from the leaves.


Important note:

  • Do the repotting of the money plant in the evening only.
  • While repotting, the moss stick of the money plant and the roots should not be disturbed.

3. Propagation & Care for Money plant


Indeed, you can also cultivate money plants from cuttings.

  • Taking cuttings represents a simple and efficient method for propagating money plants, allowing you to generate new plants at no cost.
  • These cuttings can be cultivated in various mediums such as water, soil, LECA balls, coco peat, sand, and more.

4. Light requirements for Money plant


  • Avoid placing money plants in strong direct sunlight.
  • Money plants thrive best in indirect light, both bright and medium.
  • You can keep money plants either indoors or outdoors, but avoid exposing them to strong sunlight.
  • Consider placing them on a roof or balcony covered by a green net or other shade.
  • It’s not recommended to frequently move the plant.
  • Allow it to settle in one place; avoid excessive relocation.

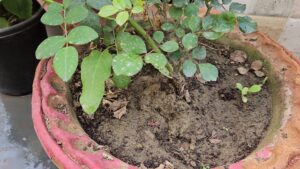
5. Pot size for Money plant


  • Ideally, an 8-10 inch-sized pot is sufficient for a money plant, but it can also thrive in smaller pots.
  • Hanging pots are another option for growing money plants.
  • Do not repot them until and unless the roots of the plant start coming out from the pot.
  • Moreover, they show some signals also if there is a need to change the pot.

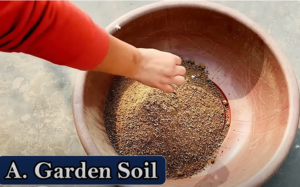
5. Best soil mixture for Money plant


  • The soil should be well-drained, which means the drainage system of the soil should be very good.
  • The soil should quickly absorb water when you provide it, and it should not stagnate on the top.

6. Watering tips for Money plant


  • Money plants require humus, water, and moisture in their soil to bloom properly, whether they are kept indoors or outdoors. Its soil should not dry up.
  • Give water properly whenever it seems that the soil is getting dry and hard.
  • Spray some water on the moss stick also (if it is there).
  • Always clean the leaves of money plants by spraying some water to get rid of dust and also this process will enhance the process of photosynthesis.

watering tips to money plant

  • All the above steps will uplift the growth of the money plant.

7. Moss stick support for Money plant


  • If you want your money plant to be very dense, then first of all you need to support it.
  • You can use sticks for support like moss sticks, jute sticks, or any other stick covered with cloth.
  • Moss sticks are the most preferred and inexpensive option (easily available at all nurseries).
  • Wrap the branches of the plant across the stick keeping in mind that aerial nodes get directly in touch with sticks.

moss stick for money plants

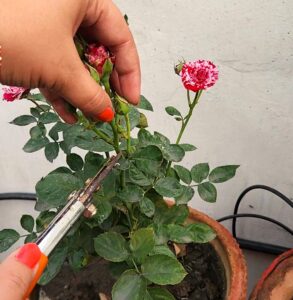
6. Pruning of Money plant


You should prune the money plant at regular intervals to achieve a bushy and dense appearance.


  • Pruning of yellow and damaged leaves is very essential for the healthy growth of money plants.
  • Always use sharp and clean tools for pruning.
  • The more you prune it, the denser it will become.

“It is important not to over-prune your money plant, as this can slow its growth and decrease its overall health.

Pruning should be done sparingly and only when necessary.”

7. Fertilizer for Money plant


Money plants can benefit from occasional fertilization, especially during the growing season (spring to fall). Moreover, different nutrients should be provided at the gap of 20 days. To begin, use cow dung liquid fertilizer (with high NPK), and then switch to seaweed fertilizer.

  • Always remember to feed your plant with diluted fertilizer, with a higher proportion of water compared to the fertilizer.

Click here to read: 5 Tips to Care Money Plant in Winter Season

====================

It was all about the “Money Plant”.

Make your own garden!

Follow our Social media channel:

2. Voice of Plant Facebook Page

3. Instagram Voice of Plant Channel

Happy Gardening!

How Aloe Vera Inspires Us to Stand Tall in All Odds

Aloe Vera Inspiring Story

I am Aloe Vera, a standout in the botanical world.

While my appearance may not be the most striking, my versatile nature and healing properties make me a cherished addition to any home or garden.

With minimal care and abundant benefits, I am nature’s gift wrapped in green.

My life story will inspire you to stand tall and face life’s challenges with strength and grace.

Let’s explore how qualities of Aloe Vera can empower us to overcome adversity and thrive in every aspect of  lives.

Aloe Vera Stand Tall in All Odds

Aloe vera

Unassuming Beauty with Healing Grace


Aloe vera may not be the most attractive plant in the garden, but it has a unique beauty that goes beyond mere aesthetics.

cropped-aloe-vera-thumbnail.png

Its healing powers are its true charm, reminding us that true strength often lies not in beauty but within ourselves.


 Self-care and compassion


Aloe Vera’s healing properties remind us of the power of self-care and compassion.

Slice Aloe Vera very useful herbal medicine for skin and hair.

In times of struggle, we can draw strength from Aloe Vera’s nurturing nature, practicing kindness towards ourselves and others.

By prioritizing our well-being and offering support to those in need, we create a nurturing environment that fosters growth and healing.


Adaptability and Growth


Aloe Vera’s ability to thrive in diverse environments highlights the importance of adaptability and growth.

Aloe Vera plant


Just as Aloe Vera adjusts to changing conditions, we can learn to embrace change and seize opportunities for personal and professional development.


Its ability to thrive with minimal care is a lesson in endurance and perseverance, urging us to stay grounded and weather life’s storms with grace.

Holistic Wellness and Balance


Aloe Vera promotes holistic wellness by addressing both physical and emotional needs.

Aloe-Vera-Plants

Similarly, we can strive for balance in all aspects of our lives, nurturing our body, mind, and spirit.

By prioritizing self-care, maintaining healthy relationships, and pursuing our passions, we create a harmonious lifestyle that promotes overall well-being.

Resilience and self-sufficiency


Aloe Vera requires minimal care, teaching us the value of resilience and self-sufficiency.

Aloe Vera plant

It encourages us to flourish and grow in life with modest expectations, emphasizing the beauty of simplicity and inner strength.

Shining Bright in Any Light


Bright light or dim, Aloe Vera remains content and vibrant.

Aloe Vera

Its unwavering energy serves as a reminder to stay positive and maintain our inner light, even when faced with darkness.

Aloe Vera has several admirable qualities:


1. Easy to care for: Aloe Vera needs little attention, thriving with occasional watering and sunlight.

2. Low maintenance: Resilient Aloe Vera requires infrequent care, tolerating various conditions without fuss.

3. Hardy plant: It withstands summer heat, monsoon rains, and winter cold with ease.

4. Healing properties: Aloe’s gel soothes skin irritations, burns, and cuts, aiding in healing.

5. Easily propagated: It readily produces offsets for simple and quick propagation.

6. Drought-tolerant: Can withstand periods of dryness.

7. Pest-resistant: Generally not susceptible to common garden pests.

8. Air-purifying: Helps to clean indoor air by removing pollutants.

9. Versatile: Can be used both indoors as a decorative plant and outdoors in gardens.

10. Nutrient-rich: Contains vitamins, minerals, and antioxidants beneficial for skin and health.

11. Multipurpose: Used in various skincare products, medicines, and home remedies.

12. Long-lasting: Can live for many years with proper care.

13. Aesthetic appeal: Its unique appearance adds a touch of greenery and elegance to any space.

Conclusion


In conclusion, Aloe Vera serves as a powerful symbol of resilience, healing, and strength.

By embodying the inspiring qualities of Aloe Vera, we can stand tall in all odds, overcome adversity, and live our lives with courage, compassion, and grace.

aloe vera propagation

How to Propagate Aloe Vera

Aloe Vera is not just good for your skin; it is a plant that you can easily grow and share with others. Whether you are a pro at gardening or just starting out, growing Aloe Vera can be fun and satisfying. It has become a favorite in gardens and homes globally.

How to Propagate Aloe Vera: Tips

In this article, we will explore how to grow Aloe Vera, make it healthier. Let’s jump into the simple steps to propagate Aloe Vera.

Why Propagate Aloe Vera?

Although it is common to purchase mature Aloe Vera plants, there is a joy in watching new shoots emerge from the roots, forming clusters of vibrant, green offspring.

Propagation not only expands your Aloe Vera family but also allows you to share this resilient plant with friends and family. Additionally, propagating Aloe Vera is a great way to breathe life back into stressed or aging plants, ensuring a continuous cycle of growth and rejuvenation.

Setting the Stage: Planting Aloe Vera

The journey begins with a careful selection of pots and soil, creating an environment conducive to Aloe Vera’s preferences. 

Follow below steps, 

1. Selecting a Pot:

    • Choose a broad-sized pot with drainage holes at the bottom.

well-draining soil mix


2. Preparing the Pot:

    • Cover the bottom hole with newspaper to prevent soil from washing out.
    • Fill the pot with a well-draining soil mixture.

3. Planting the Main Aloe Vera:

  • Plant the main Aloe Vera in a slightly tilted position at the corner of the pot.
  • Fill the soil around the plant for support.
  • Water the soil until water drains out from the bottom hole.

4. Adding Pups:

  • Once the main plant is established, place pups in the soil at an appropriate distance.
  • Ensure the soil is well-moisturized before adding pups.
  • Do not water again after placing the pups.

Important note:

1. First, make sure the soil is wet enough by giving it a good amount of water.

  • It is important to water until you see water coming out from the bottom of the pot.

2. After that, you can place the baby plants (pups).

  • But here is the trick – don’t water again right away.
  • Succulents like Aloe Vera or Snake plant have small roots, and giving them too much water can be harmful. They might not like it, and their roots can get messed up.

3. So, the rule is to wet the soil well first, put in the baby plants, and then hold off on more water.

  • Let the soil dry out a bit before watering again.

This way, your aloe vera and similar plants can stay happy and healthy.

Propagation of the Pups & Repotting

1. Pup Propagation:

    • Wait for the pups to grow into small plants.

2. Precautions for Repotting:

    • Ensure the mother plant is healthy before repotting.
    • Gently remove pups with some soil to avoid damaging roots.

3. Repotting Process:

    • Place pups in separate pots, ensuring leaves do not touch wet soil.
    • Cover wet soil with dry soil and set the pups.
    • Always do the repotting in the evening.

4. Acclimating to Sunlight:

    • Initially, place repotted plants in indirect sunlight.
    • After 2 days, expose them to sunlight for 2-3 hours.
    • Monitor for signs of stress; if observed, wait a few more days before introducing direct sunlight.

5. Repeat Propagation:

    • After 2 months, new pups will appear, and the repotting process can be repeated for further propagation.

Reviving Stressed Aloe Vera:

1. Identifying Stress Signs:

    • Yellowing with black spots on dried leaves indicates stress.

black spot on aloe vera

2. Reviving Process:

    • Remove all damaged leaves, roots, and branches.
    • Repot the plant following the above-mentioned steps.

3. Survival Period Without Soil and Water:

    • Uprooted Aloe Vera plants can survive for 6-7 days without soil and water.
    • Repot within this timeframe to ensure survival.

By following these steps, you can successfully propagate, care for, and revive Aloe Vera plants.

Must read:

Aloe Vera Care: Pest Attack & Black Spot

Happy Gardening!!

rose-3703471_1280

गर्मी के मौसम में गुलाब के पौधे की देखभाल कैसे करें

गुलाब सर्दियों में पनपते हैं, अक्टूबर से मार्च तक (भारत में) खूबसूरती से खिलते हैं। फिर भी, वे गर्मी के महीनों के दौरान संघर्ष करते हैं। उच्च तापमान उन्हें सुस्त बना देता है, जिससे विकास की गति धीमी हो जाती है और फूल भी कम आते हैं।

गर्मी के मौसम में गुलाब के पौधे की देखभाल करना उनके स्वास्थ्य को बनाए रखने और यह सुनिश्चित करने के लिए महत्वपूर्ण है कि वे बाद में खूबसूरती से खिलें। गुलाब को मौसम के आधार पर अलग-अलग देखभाल की आवश्यकता होती है। आइये जानते है गर्मी के मौसम में गुलाब की देख भाल कैसे की जाए-

rose flower
rose flower

गर्मी के मौसम में गुलाब के पौधे की देखभाल कैसे करें?


1. जड़ और पत्ती के स्वास्थ्य को बढ़ावा देना


चूँकि गर्म तापमान के दौरान गुलाब में फूल कम आते हैं, इसलिए जड़ों और पत्तियों के पोषण को प्राथमिकता दें। स्वस्थ हरी पत्तियाँ गर्मी को बेहतर ढंग से सहन कर सकती हैं और बाद के मौसम में मजबूत फूलों का पोषण करेंगी।

rose flower pruning

  • पौधे को अपनी ऊर्जा को खिलने में लगाने से रोकने के लिए, जो भी कलियाँ या फूल उगने लगें उन्हें हटा दें, जो संपूर्ण पौधे को कमजोर कर सकता है।

2. धूप और उच्च तापमान से बचाएं


इस समय तापमान और सूर्य की गर्मी दोनों अपने चरम पर होती हैं। गर्मी के दिनों में इस पौधे को खराब करने में इन दोनों का ही अग्रणी हाथ है।

Dry soil of rose plant

  • अगर तापमान और धूप को कुछ हद तक नियंत्रित कर लिया जाए तो पौधे काफी हद तक ठीक हो जाएंगे।

(i) गुलाब के पौधों को सीधी धूप से बचाएं

दिन के सबसे गर्म हिस्सों के दौरान गुलाब के पौधों को सीधी धूप से बचाएं।

  • तेज़ धूप के संपर्क को कम करने के लिए उन्हें छायादार क्षेत्र में या हरे जाल के नीचे रखें।


(ii) ऊष्मा के स्थानांतरण को रोकें:

उच्च तापमान के कारण गमलों के नीचे का फर्श गर्म हो सकता है, जिससे पौधों में ऊष्मा स्थानांतरित हो सकती है।

  • फर्श पर जूट के थैले रखें और गर्म फर्श और गमलों के बीच अवरोध पैदा करने के लिए उन्हें पानी से गीला करें। यह जड़ों के आसपास के तापमान को नियंत्रित करने में मदद करता है।

(iii) पौधे पर जल छिड़काव

इस धारणा के विपरीत कि जल छिड़काव से फंगल समस्याएं हो सकती हैं, गर्म मौसम के दौरान गुलाब के पौधों की पत्तियों को हल्के से गीला करना फायदेमंद हो सकता है।

  • यह पौधे को ठंडा करने में मदद करता है और वाष्पीकरण के माध्यम से अत्यधिक पानी की हानि को रोकता है।
  • यह पत्तियों से धूल हटाने में भी मदद करता है, बेहतर प्रकाश संश्लेषण को बढ़ावा देता है।

3. पानी देने के टिप्स


watering rose plant 1

पानी देना गुलाब के पौधों की देखभाल का एक महत्वपूर्ण पहलू है, खासकर अत्यधिक गर्मी के महीनों के दौरान।

  • यह सुनिश्चित करने के लिए यहां कुछ आवश्यक सुझाव दिए गए हैं कि आपके गुलाबों को सही मात्रा में पानी मिले और इष्टतम नमी का स्तर बना रहे:

(i) मिट्टी की नमी की निगरानी करें:

अपने गुलाब के पौधों के आसपास की मिट्टी की नमी के स्तर पर नज़र रखें।

  • शाखाओं को झुकने और सूखने से बचाने के लिए मिट्टी में हमेशा थोड़ी मात्रा में नमी बरकरार रखनी चाहिए।
  • खासकर गर्मी के समय सुनिश्चित करें कि मिट्टी पूरी तरह से सूख न जाए।

(ii) पानी देने का समय:

अपने गुलाब के पौधों को सुबह या शाम को पानी दें। सुबह पानी उपलब्ध कराने से प्रकाश संश्लेषण की प्रक्रिया शुरू करने में मदद मिलती है, क्योंकि यह सूर्य के प्रकाश की उपस्थिति में होता है।

  • सुबह का पानी दिन की गर्मी के दौरान खोई हुई नमी को फिर से भरने में भी मदद करता है। यदि आवश्यक हो, तो आप शाम को भी पानी दे सकते हैं, लेकिन हमेशा पहले मिट्टी की नमी के स्तर की जाँच करें।

(iii) सामान्य तापमान वाले पानी का प्रयोग करें:

watering rose plant

अपने गुलाब के पौधों को पानी देने के लिए हमेशा सामान्य तापमान पर पानी का उपयोग करें।

  • गर्म पानी का उपयोग करने से बचें, क्योंकि इससे पौधों को झटका लग सकता है और नुकसान हो सकता है।
  • सिंचाई के लिए उपयोग करने से पहले सुनिश्चित करें कि पानी की टंकियों का पानी बहुत गर्म न हो। इसके अतिरिक्त, स्प्रे का उपयोग करते समय, सुनिश्चित करें कि पानी सामान्य तापमान पर हो।

(iv) अत्यधिक पानी देने से बचें:

हालाँकि गर्मियों के दौरान गुलाब को अधिक बार पानी देने की आवश्यकता हो सकती है, लेकिन सावधान रहें कि अधिक पानी न दें।

Avoid overwatering

  • अधिक पानी देने से जड़ सड़न और फफूंद संबंधी समस्याएं हो सकती हैं। बार-बार पानी देने के बजाय एक बार गहरा पानी देना बेहतर है।
  • यह मिट्टी को लंबे समय तक नमी बनाए रखने की अनुमति देकर जड़ सड़न को रोकने में मदद करता है।

4. मिट्टी को लम्बे समय तक नम कैसे रखें?


Moist soil of rose plant


अपने गुलाब के पौधों के आसपास की मिट्टी को लंबे समय तक नम रखने के लिए, आप निम्नलिखित तकनीकों का उपयोग कर सकते हैं:

(i) मिट्टी में पोटिंग मिश्रण मिलाना:

खाद और कोको पीट को बराबर भागों में, एक चौथाई भाग रेत और गुलाब-फूल उर्वरक के साथ मिलाकर एक पॉटिंग मिश्रण बनाएं। सभी घटकों का पूरी तरह से मिश्रण सुनिश्चित करें।


पौधे के चारों ओर मौजूदा मिट्टी को ढीला करें और ऊपरी परत को हटा दें।

  • तैयार पॉटिंग मिश्रण को मिट्टी में मिला दें। खाद और कोको पीट दोनों में उत्कृष्ट जल धारण गुण होते हैं, जो प्रभावी रूप से लंबे समय तक मिट्टी के भीतर नमी को बनाए रखते हैं।

(ii) मल्चिंग:

मल्चिंग में मिट्टी की सतह को ऐसी सामग्रियों से ढंकना शामिल है जो पानी को अवशोषित करती हैं और बनाए रखती हैं, जिससे सूरज की रोशनी के सीधे संपर्क में आने से रोका जा सकता है।

  • मल्चिंग के लिए विभिन्न सामग्रियों का उपयोग किया जा सकता है, जैसे सूखी पत्तियां, चावल की भूसी, पानी सोखने वाला कपड़ा, पानी सोखने वाला कैरी बैग, या यहां तक कि हरा जाल भी। ये सामग्रियां मिट्टी को नम रखते हुए हवा को गुजरने देती हैं।

मल्चिंग करने के टिप्स:

  • हमेशा की तरह मिट्टी को अपनी चुनी हुई मल्चिंग सामग्री और पानी से ढक दें। गीली घास वाष्पीकरण को धीमा करने में मदद करती है, जिससे यह सुनिश्चित होता है कि मिट्टी लंबे समय तक नम रहती है।
  • जब उर्वरक लगाने का समय हो, तो बस गीली घास को हटा दें, उर्वरक लगाएं और फिर गीली घास को बदल दें।
  • इसके अतिरिक्त, मल्चिंग से खरपतवार की वृद्धि को दबाने में मदद मिलती है।

5. गुलाब की पत्तियों पर काला धब्बा


कभी-कभी, गुलाब की पत्तियों पर काले धब्बे विकसित हो सकते हैं या क्षति के लक्षण दिखाई दे सकते हैं, पीले हो सकते हैं, जो अक्सर फंगल संक्रमण के कारण होते हैं। 

black spot in rose

  • फंगल संक्रमण के कारण होने वाले काले धब्बों और पीलेपन को रोकने के लिए मासिक रूप से फफूंदनाशक लगाएं। 5 लीटर पानी में 2-3 चुटकी फफूंदनाशक मिलाकर पौधे पर लगाएं।

6. गुलाब के पौधे पर कीट का हमला


गर्मियों के दौरान, नीम स्प्रे से गुलाब को माइलबग जैसे कीटों से बचाएं।

  • नीम की पत्तियों को उबालें, उसका काढ़ा पतला करें और साप्ताहिक रूप से लगाएं। यदि नीम की पत्तियाँ उपलब्ध नहीं हैं तो नीम के तेल का स्प्रे एक विकल्प है।

इन उपायों को अपनाने से चुनौतीपूर्ण गर्मी के मौसम में गुलाब के पौधों को सुरक्षित रखने में मदद मिलती है। तीव्र गर्मी की इस अवधि के दौरान पौधों की देखभाल और ध्यान देना महत्वपूर्ण है, प्रचुर मात्रा में फूल आने की उम्मीद करने के बजाय उनकी स्थिरता पर ध्यान केंद्रित करना चाहिए।

शुभ बागवानी!

Soil

How to Recharge Old Soil for Healthy Plant Growth

Soil is an important component of the ecosystem, and our survival depends heavily on it. In container gardening, every resource is valued, and soil is no exception. Rather than throwing it away, gardeners often opt to reuse soil. It is common for soil to accumulate over time. This soil may have previously been used for various plants, but is now neglected or lacking in nutrients.

This article aims to emphasize the potential of revitalizing such soil, regardless of its condition, by adding the essential materials. By doing so, we can organically recharge the soil, making it suitable for nurturing new plant growth.


How to Recharge Old Soil for Healthy Plant Growth

As you journey through this article, you will find answers to common queries about soil:

garden Soil

  • What characterizes healthy soil?
  • What constitutes the ideal soil texture?
  • What are the causes of soil contamination or degradation?
  • What measures can be taken to prevent soil degradation?
  • How can poor soil quality be improved to become fertile?


Why does soil degrade and require rejuvenation? 

There are several reasons, let’s delve into them and explore potential solutions.


When growing vegetables or flowers in containers, the plants continuously extract nutrients from the soil. It is crucial to regularly replenish these nutrients by fertilizing the plants at least once a month. This prevents soil depletion and maintains its fertility.


Leaving the soil without moisture for long period

garden Soil


Occasionally, plants wither or die, leaving the soil exposed and without water for prolonged periods. Without moisture, the soil loses its vitality, and essential organisms like earthworms perish.


To remedy this, ensure consistent watering and apply mulch. Mulching involves covering the soil with dry leaves, which helps retain moisture and preserves soil quality for several months. Place containers in shaded areas to prevent direct sunlight exposure.

Excessive use of chemical fertilizers


The excessive use of chemical fertilizers such as Urea and DAP initially enhances plant growth and yield. However, these chemicals harm the beneficial microorganisms in the soil that are essential for fertility.


Over time, the soil becomes depleted and less productive. To address this issue, adopt organic practices by utilizing alternatives such as neem cake powder, cow dung compost, leaf-compost, vermicompost, groundnut cake fertilizer, onion peel liquid fertilizer, banana peel liquid fertilizer, mustard cake fertilizer, or seaweed fertilizer, etc. By reducing reliance on chemicals, we can preserve soil health and fertility.


Making Barren Soil Fertile 

Let’s proceed with the process of transforming degraded soil into fertile soil step by step.


1. Collect old soil

Garden area soil
Garden area soil

Collect all the old soil, ensuring it is cleaned thoroughly to remove any debris or old roots.

  • Aim to collect approximately 10kg to 20kg of soil, and remember to wear gloves as a precautionary measure.

2. Expose the soil in sunlight for a day


Remove any pebbles present in the soil and expose it to sunlight for a day.

  • This exposure helps eliminate unwanted  insects or bacteria present in the soil.

3. Add Compost in the soil

Compost
Compost

Next, add compost into the soil for two primary reasons:

(i) Compost enhances soil texture, keeping it soft and aiding in water absorption, thus maintaining moisture for extended periods.

(ii) Compost enriches the soil with humus, which fosters the growth of beneficial microorganisms like bacteria, fungi, insects, and earthworms. These organisms play a crucial role in soil fertility.

Note:

  • You can add any types of compost, such as leaf compost, vermicompost (produced by worms or earthworms), cow dung compost, and kitchen compost (derived from decomposing kitchen scraps), contribute to the soil’s vitality.
  • While horn meal or bone meal can also be added to boost soil fertility, they do not improve soil texture. For texture enhancement, compost is the preferred option.

Note:

  • Add compost in a 1:2 ratio into the soil.
  • For instance, if the soil quantity is 10kg, add 5kg of compost.
  • Vermicompost is highly recommended for this purpose.

4. Add Cocopeat in the soil

Coco peat
Coco peat

Now, let’s incorporate cocopeat to enhance soil texture plus to make soil soft  which additionally promotes optimal root growth.

Cocopeat’s ability to retain water for extended periods is particularly beneficial for terrace gardening, where sunlight exposure is high and soil tends to dry quickly.

  • Additionally, adding cocopeat reduces soil volume, making pots lighter due to its lightweight nature.

Note:

  • For every 5 kg of compost added, mix in 2.5kg of cocopeat into the soil in a 1:2 ratio.

5. Add Neem Cake Powder in the soil


Next, add neem cake powder into the soil.

  • Good quality neem cake powder often possesses a potent odor, which can occasionally be difficult to find locally.

However, it is available for purchase through select online retailers or nearby stores specializing in neem oil products.

Incorporating neem cake is crucial as it acts as a preventive measure against potential diseases or insect infestations near the roots, which may otherwise go undetected. Besides functioning as a natural pesticide, neem cake also enhances soil nutrition.

Note:

  • Around 200 grams of neem cake powder is sufficient for every 10 kg of soil.

6. Add Cinnamon powder in the soil

cinnamon powder

Cinnamon powder serves as a natural fungicide and is highly recommended for organic gardening to maintain healthy roots.

  • It acts as a root promoter, enhancing root development.

Note:

  • Add 50 grams of pure cinnamon powder into every 10 kg of soil for optimal results.

7. Add Sand in the soil

River sand
River sand

If your soil is sandy, there is no need to add more sand to it.

Perform this test:

(i) Take a handful of soil and squeeze it in your hand. If the soil remains loose and doesn’t bind together, there’s no need to add sand.

(ii) However, if the soil binds together and feels sticky, it indicates a need for sand.

(iii) Gradually add sand to the soil while continuously testing its texture.

(iv) Use a spatula to mix the sand, and assess the soil’s consistency after each addition.

  • The aim is to add just enough sand to loosen the soil without making it overly compacted.
  • Avoid adding too much sand, as it shouldn’t be visibly distinct in the soil mixture, maintaining its natural texture and color.

8. Add Seaweed Granules in the soil

Seaweed granules are beneficial for enhancing humus content and providing micronutrients to the soil, particularly recommended for vegetable and fruit gardening, though not mandatory.

Note:

  • Add seaweed granules in the same quantity as neem cake powder.
  • Since 200 grams of neem cake powder was used, 200 grams of seaweed granules will suffice.

Now, mix all the ingredients properly and uniformly.

Soil mix


Once the soil mixture is prepared, store it in a container or grow bag, ensuring it is covered and placed in a shaded area.

  • Avoid direct sunlight exposure, as it may degrade the humus content.

Note:

This soil can be used for transplanting plants and for existing plants as well.

    • For existing plants, remove the upper layer of soil and add this potting mixture.
    • This potting mixture is very light in weight, it can retain water for a longer span, it has all the nutrition plus it will keep your plant pest free.

Following these steps, barren soil can be transformed into fertile soil, ready for planting and cultivation.

Happy Gardening!

plant in stress

Why Are My Container Plants Dying? 7 Reasons + Tips & FAQS

My Container Plants Are Not Thriving

Are your container plants showing signs of distress? It is crucial to pinpoint the root cause. Many gardeners, especially beginners and working professionals, often find themselves frustrated when their plants fail to thrive, showing poor growth and ultimately dying prematurely.

Also, many plant enthusiasts encounter this problem, often wondering what went wrong. Let’s explore effective ways to address this issue and ensure your plants flourish.

Common Causes of Container Plants Failing to Thrive


1. Lack of Water

Insufficient hydration can lead to wilting and eventual death.

  • It is essential to water container plants regularly, especially during hot and dry periods.


2. Overwatering

Conversely, overwatering can suffocate the roots, causing root rot and depriving the plant of oxygen.

  • Finding the right balance is crucial for plant health.


3. Not Using Good Soil Mixture

Soil mixture

The soil in containers can deteriorate over time, leading to nutrient deficiencies and drainage issues.

  • Choosing a high-quality potting mix is vital for plant growth.

Must read

How to prepare perfect Soil Mix for plants

4. Lack of Sunlight

Plants need adequate sunlight to photosynthesize and thrive.

  • Insufficient light can weaken plants, making them more susceptible to diseases and pests.


5. Pests and Diseases

pest attack in plant

Insects, fungi, and bacterial infections can wreak havoc on container plants, causing damage to leaves, stems, and roots.

  • Regular monitoring and prompt intervention are necessary to prevent infestations.


6. Not giving adequate fertilizers to plants

fertilizer
fertilizer

Plants require essential nutrients for healthy growth, and without proper fertilization, they may struggle to thrive.

  • Consider adding a balanced fertilizer to replenish the nutrients in the soil and support your plants’ growth and vitality.

Must read

How to give fertilizers to plants


7. Signs of Plant Stress

Identifying the early signs of plant stress can help prevent further damage.

  • Look out for yellowing leaves, drooping stems, and stunted growth, indicating that the plant is struggling to survive.


Ways to Avoid Container Plant Loss

To ensure the health and longevity of your container plants, follow these essential guidelines:


 1. Proper Watering Techniques

watering rose plant

Water plants thoroughly, allowing excess water to drain freely from the bottom of the container.

  • Avoid overwatering by checking the soil moisture level before watering.


2. Choosing the Right Soil Mix

Soil mix

Use a well-draining potting mix tailored to the specific needs of your plants.

  • Consider adding sand, cocopeat to improve drainage and aeration.

3. Providing Adequate Sunlight

sunlight for hibiscus plant

Place container plants in a location where they can receive the appropriate amount of sunlight for their species.

  • Monitor changes in sunlight throughout the day and adjust placement accordingly.

4. Regular Pest and Disease Management

Neem oil on tomatoes

Inspect plants regularly for signs of pests or diseases, such as chewed leaves or unusual spots.

  • Treat infestations promptly using organic or chemical control methods.

Tips for Reviving Dying Container Plants

plant in pot

If you notice your container plants showing signs of distress, take immediate action to revive them:

1. Assess the Plant’s Condition

Examine the roots, stems, and leaves for any signs of damage or disease.

  • Trim away dead or infected parts to promote new growth.

2. Adjust Watering and Sunlight

Determine if the plant is receiving adequate water and sunlight.

  • Adjust watering frequency and placement to meet the plant’s needs.


3. Pruning Dead or Damaged Parts


Remove dead or damaged leaves, stems, and flowers to encourage healthy growth.

  • Use clean, sharp pruning tools to prevent further injury to the plant.

4. Fertilizing if Necessary

If the plant is lacking essential nutrients, consider fertilizing with a balanced fertilizer to promote growth and recovery. 

Conclusion

In conclusion, understanding the common reasons for container plant spoil and implementing effective care practices can help you maintain healthy and thriving plants.

  • By providing adequate water, sunlight, and nutrients, and promptly addressing any issues that arise, you can enjoy the beauty of container gardening for years to come.

FAQs on How to Save Container Plants


1. How often should I water my container plants?


Ans: The frequency of watering depends on factors such as plant species, container size, and environmental conditions.

  • Generally, it is best to water when the top inch of soil feels dry to the touch.


2. What should I do if my container plants are infested with pests?


Ans: Remove affected leaves or stems, and treat the plants with an appropriate insecticide or pesticide.

  • Consider using natural remedies or beneficial insects to control pests.

3. Can I use regular garden soil for container plants?

Ans: Garden soil is not recommended for container plants as it can become compacted and hinder drainage.

  • Opt for a well-draining potting mix formulated for container gardening.

4. How much sunlight do container plants need?


Ans: Most container plants require at least six hours of sunlight per day to thrive. However, the specific light requirements may vary depending on the plant species.

Thanks

Happy gardening!

rose plant

How to Care Rose Plant in Summer Season

Roses thrive in winter, blooming beautifully from October to March (in India). However, they struggle during the summer months. High temperatures make them sluggish, causing slow growth with little blooming.

rose-3703471_1280

Caring for rose plant during the summer season is crucial for maintaining their health and ensuring they bloom beautifully later on. Roses require different care depending on the season. Let’s discuss how to treat them during the summer.

How to Care Rose Plant in Summer Season

1. Promote Root and Leaf Health

Since roses tend to produce fewer flowers during hot temperatures, prioritize nurturing the roots and leaves. Healthy green leaves can withstand heat better and will support robust flowering later in the season.

pruning rose plant
pruning of buds & flowers
  • Remove any buds or flowers that start to grow to prevent the plant from channeling its energy into blooming, which can weaken the overall plant.

2. Protect from Sun and High Temperatures

Temperature and Sun heat both are at their top during this time. Both of them have a leading hand in spoiling this plant during summer.

  • If temperature and sunlight are controlled to some extent then plants would recover to a great extent.

(i) Avoid Direct Sunlight:

Dry soil of rose plant
Avoid direct sunlight

Shield rose plants from direct sunlight during the hottest parts of the day. Place them in a shaded area or under a green net to reduce exposure to intense sunlight.

(ii) Prevent Heat Transfer:

High temperatures can cause the floor beneath the pots to become hot, transferring heat to the plants.

  • Place jute bags on the floor and wet them with water to create a barrier between the hot floor and the pots. This helps regulate the temperature around the roots.

(iii) Misting On Plant

Contrary to the belief that misting can lead to fungal issues, lightly misting the leaves of rose plants can be beneficial during hot weather.

  • This helps cool down the plant and prevents excessive water loss through evaporation. It also helps remove dust from the leaves, promoting better photosynthesis.

3. Watering Tips

Watering is a critical aspect of caring for rose plants, particularly during the hot summer months. Here are some essential tips to ensure your roses receive the right amount of water and maintain optimal moisture levels:

watering rose plant 1

(i) Monitor Soil Moisture:

Keep a close eye on the moisture level of the soil around your rose plants. The soil should always retain a slight amount of moisture to prevent the branches from bending and withering. Ensure that the soil doesn’t dry out completely, especially during the summer heat.

(ii) Timing of Watering:

Water your rose plants either in the morning or evening. Providing water in the morning helps kickstart the process of photosynthesis, as it occurs in the presence of sunlight.

  • Morning watering also helps replenish moisture lost during the heat of the day. If necessary, you can water in the evening as well, but always check the soil’s moisture level first.

(iii) Use Normal Temperature Water:

watering rose plant
watering rose plant

Always use water at normal temperature for watering your rose plants. Avoid using warm or hot water, as it can shock the plants and cause damage.

  • Ensure that water from water tanks is not too hot before using it for watering. Additionally, when using sprays, ensure the water is at a normal temperature.

(iv) Avoid Overwatering:

Avoid overwatering
overwatering in rose plant

While roses may require more frequent watering during the summer, be cautious not to overwater.

  • Overwatering can lead to root rot and fungal issues. It’s better to water deeply once rather than multiple shallow waterings. This helps prevent root rot by allowing the soil to retain moisture for a longer duration.

4. How to Keep soil moist for a longer duration?

moist soil of rose plant

To keep the soil around your rose plants moist for an extended period, you can employ the following techniques:

(i) Adding Potting Mixture to the Soil:

Create a potting mixture by combining compost and coco peat in equal parts, along with a quarter portion of sand and rose-bloom fertilizer. Ensure thorough mixing of all components.

Loosen the existing soil around the plant and remove the top layer.

  • Incorporate the prepared potting mixture into the soil. Both compost and coco peat have excellent water retention properties, effectively locking moisture within the soil for a longer duration.

(ii) Mulching:

Mulching involves covering the soil surface with materials that absorb and retain water, preventing direct exposure to sunlight.

  • Various materials can be used for mulching, such as dry leaves, rice husks, water-absorbing fabric, water-absorbing carry bags, or even a green net. These materials allow air to pass through while keeping the soil moist.

Tips to do mulching:

  • Cover the soil with your chosen mulching material and water as usual. The mulch helps slow down evaporation, ensuring the soil stays moist for longer periods.
  • When it’s time to apply fertilizer, simply remove the mulch, apply the fertilizer, and then replace the mulch.
  • Additionally, mulching helps suppress weed growth.

5. Black Spot on Rose leaves

black spot on rose leaves

Sometimes, rose leaves may develop black spots or show signs of damage, turning yellow, which are often caused by fungal infections. 

  • Apply fungicide monthly to prevent black spots and yellowing caused by fungal infections. Mix 2-3 pinches of fungicide in 5 liters of water and apply to the plant.

6. Pest Attack on Rose Plant

During summer, protect roses from pests like mealybugs with neem spray.

  • Boil neem leaves, dilute the decoction, and apply weekly. Neem oil spray is an alternative if neem leaves aren’t available.

Taking these measures helps safeguard rose plants during the challenging summer season. It’s crucial to show care and attention to the plants during this period of intense heat, focusing on their sustainability rather than expecting abundant flowering.

Happy Gardening !!

Jade plant

12 Reasons Why You Should Keep Jade Plant At Home

The Jade plant is incredibly simple and low-maintenance, making it an easy-to-care-for option for beginners as well as working professionals.

12 Reasons Why You Should Keep Jade Plant At Home

As per my gardening experience, I recommend the Jade plant because it brings positive energy, good luck, and always stays green. It is like a little bundle of joy for your home!

12 Reasons Why You Should Keep Jade Plant At Home

jade plant pot 1

1. Brings Luck and Positive Energy:


According to folklore and feng shui principles, Jade Plant believed to attract prosperity and good fortune to their owners.

  • By having one in your home, you invite an aura of positivity and abundance into your living space.

2. Low Maintenance, Hardy Plant:


Busy schedules often leave little time for extensive plant care. Fortunately, Jade plant thrive on neglect, requiring minimal attention and maintenance.

  • With its sturdy nature, even novice gardeners can enjoy the beauty of a thriving indoor garden effortlessly.

Must read:

How to care Jade Plant


3. Water-Wise Wonder:


Jade plant pot

Say goodbye to constant watering woes. Jade plant, being succulent, store water in their leaves, making them incredibly drought-tolerant.

  • Their water-efficient nature not only saves time but also conserves precious resources, making them an eco-friendly choice for sustainable living.

4. Versatile in Size and Style:


Jade plants

Whether you have limited space or room to spare, Jade plant fit seamlessly into any setting.

  • From compact pots on windowsills to larger arrangements as focal points, their adaptability makes them suitable for any interior design scheme.

5. Perennial Plant:


Unlike seasonal blooms that come and go, Jade plant is perennial, offering enduring beauty year-round.

  • Their timeless appeal ensures they remain a cherished part of your home décor for years to come.

6. Thrives in Varied Climates:


Jade plant in clay pot

From scorching summers to chilly winters, Jade plant is resilient survivors, capable of thriving in diverse climates.

  • Their ability to withstand extreme temperatures makes them ideal companions for homes across the globe.

7. Pest-Free Peace of Mind:


Jade plant possess natural defenses that make them resistant to common garden nuisances, allowing you to enjoy their lush foliage without worrying about unwanted visitors.

8. Adaptable to Any Soil Type:


Whether it is sandy, loamy, or clayey, Jade plant can be grown in any soil.

  • Their adaptable nature means you can plant them in a variety of potting mixes, ensuring they flourish no matter the conditions.

Best Soil Mixture for Jade Plant


9. Flexible Growing Mediums:


Explore creative planting options with Jade plant. From traditional soil to unconventional mediums like water, lecca balls, or coco peat, the possibilities are endless.

  • Let your imagination run wild and watch your Jade thrive in any environment.

10. Simple Propagation:


jade cutting


Expand your indoor garden effortlessly with Jade plant. Propagating them from cuttings is a breeze, allowing you to share the green goodness with friends and family or create new arrangements for your home.

Must read:

How to Propagate Jade Plant from Cuttings


11. Bonsai Beauty:


jade plant bonsai
pic credit: Pinterest

Unleash your inner artist and craft stunning bonsai creations with Jade plant. Their pliable stems and vibrant foliage make them perfect candidates for bonsai cultivation, adding an exquisite touch of elegance to your living space.

12. Elevated Décor with Hanging Pots:


Jade plant

Transform ordinary spaces into extraordinary showcases with Jade plant in hanging pots. Suspended from ceilings or displayed on shelves, these cascading beauties add vertical dimension and visual interest to any room.

In conclusion, the Jade Plant stands as a beacon of natural beauty and tranquility, offering a multitude of benefits that enrich both our homes and lives.

Embrace the green charm of the Jade Plant, and let its presence breathe new life and vitality into your home sanctuary.

Thanks

Happy gardening!

Follow our Social media channel:


1. Voice of Plant – YouTube Channel

2. Voice of Plant Facebook Page

3. Instagram Voice of Plant Channel

How to give fertilizers to plants? Basic Tips

Giving fertilizers to plants is an important aspect of gardening that provides the essential nutrients required for healthy plant growth. Just as humans and other animals require food for survival and growth, plants also require nutrients for growth and production. In the absence of these nutrients, the growth of plants stops and the yield decreases.

For proper nourishment and growth, plants require soil, water, sunlight, fertilizers, as well as human love and care. It’s essential to use these resources effectively and efficiently. This article will address four essential questions (3 W and 1 H- Why, What, When and How) related to feeding your plants:

1. Why should you feed your plants?

2. What should you feed them?

3. When should you feed them?

4. How should you feed them?

Classification of fertilizers for Outdoor plants

Organic fertilizers are rich in organic matter, which helps to improve soil structure, retain moisture, and promote the growth of beneficial microorganisms in the soil. They also release nutrients slowly, providing a steady supply of nutrients to the plants over time.

Some of the fertilizers are mentioned below:

  • Compost
  • Neem cake
  • Mustard cake
  • Epsom salt
  • Banana peel liquid fertilizer
  • Cow dung liquid fertilizer
  • Seaweed fertilizer

1. Compost for Outdoor plants

  • When making a soil mixture for outdoor plants, compost is a preferred ingredient.
  • Compost is a natural fertilizer that is rich in nutrients and can be used to improve soil health.
  • It makes the soil porous and also retains water for a longer duration.
  • If the soil in existing plants is becoming clayey or tight, adding compost can help to improve the soil quality.
  • You can use any type of compost, including cow dung, vermicompost, leaf compost, or kitchen compost.

2. Neem Cake fertilizer for outdoor plants 

  • Neem cake, a byproduct of neem seed oil extraction, can be used as a natural pesticide and fungicide to prevent attacks by insects, viruses, bacteria, or fungi in soil.
  • It helps to improve soil quality by adding essential nutrients, enhancing soil structure, and increasing water retention.
  • It can be added to the soil mixture in small amounts as it is very potent.

We can add neem cake powder to the soil mixture as well as we can make neem cake liquid fertilizers and give them once a month.

You can read the detailed article here:

Neem Cake Fertilizer at Home


3. Mustard cake fertilizer 

  • The mustard cake fertilizer is a very strong fertilizer and should be used with caution.
  • It is recommended to apply it during the winter season when the weather is cooler and the soil is more receptive to nutrients.
  • However, it can also be used during summers, but it is not recommended during extremely hot weather when the temperature is near 40 ℃.
  • We can add a little bit of mustard cake powder in soil-mixture as well as we can give mustard cake liquid fertilizer to plants once a month.
  • It is important to dilute mustard cake properly in a handsome amount of water before applying it to plants, as it can be too strong for plants if used directly.

You can read the detailed article here:

Mustard Cake Fertilizer


4. Epsom Salt (Magnesium Sulfate) for outdoor plants

  • In cases where plants are not growing properly despite receiving adequate fertilizers, water, and sunlight, Epsom salt can be considered as a good supplement.
  • We can either directly add Epsom salt to the soil or make a dilute solution and give it in the soil or can make a foliar spray.
  • We have to give Epsom salt only when it is needed.

It is important to use Epsom salt in moderation and always maintain a gap of at least 10 -12 days between the two fertilizers to avoid over-nutrients to the plants.

  • This will allow the plants to absorb the nutrients from each fertilizer effectively and prevent any negative effects on plant growth.

You can read the detailed article here:

Epsom Salt for plants: benefits & uses

5. Banana Peel fertilizer for outdoor plants


  • Banana peel fertilizer can act as a catalyst for plants during the flowering or fruiting stage, or in cases where the plant is not blooming.
  • The high levels of Potassium and Phosphorus in banana peels can help to promote the growth and development of flowers and fruits, while also providing other essential nutrients to the plants.
  • The best is to make Banana peel liquid fertilizer and give it to the soil. Otherwise, you can add Banana peel to the Kitchen compost as raw banana peels may attract pests and insects.
  • Banana peel liquid fertilizer should be given once every fifteen days.

Must read article on 
Banana Peel Liquid Fertilizer

6. Cow dung liquid fertilizer 

  • Cow Dung liquid fertilizer is a widely used and popular form of organic fertilizer.
  • It is rich in nutrients like Nitrogen, Phosphorus, and Potassium, which are essential for plant growth. Additionally, it contains microorganisms that help in the breakdown of organic matter in the soil and improve soil fertility.
  • It can be given to any outdoor as well as indoor plants once a month.

It is important to ensure that the cow dung compost tea has been properly aged or composted before using it, as fresh cow manure can contain high levels of ammonia that can harm plants.

You can read the detailed article here:

How to make Cow dung fertilizer for plants

7. Seaweed fertilizer

  • Seaweed fertilizer is a natural and organic fertilizer made from seaweed extract.
  • It is rich in micro and macronutrients.
  • Seaweed fertilizer can be used on a wide range of plants, including vegetables, fruits, herbs, flowers, indoor plants, plant cuttings in water, etc.
  • It can be applied in the form of granules as well as liquid fertilizer.
  • We can do foliar spray, soil drench, or add directly to the growing medium of plants.
  • It can be given to any outdoor plants once a month.

You can read the detailed article here:

Seaweed Fertilizer: Benefits and Uses

Important points to note:

1. All the liquid fertilizers are endowed with balanced nutrients like NPK, Magnesium, Zinc, Calcium, and all other nutrients.

2. Rotation of the above-mentioned fertilizers is recommended every 20-25 days.

3. A deficiency of nutrients can be recovered in the plants but excess nutrition will damage the plant. So, even if you are giving any tonic or any supplement to plants always maintain the suggested time gap of at least 10-15 days.

4. Vegetable plants such as tomatoes, green chilies, brinjal, cabbage, bitter gourd, etc. should be fertilized with liquid fertilizers every 20 days.

5. For other outdoor plants, including both flowering and non-flowering ones like Tulsi (Holy basil) and Curry tree, etc. and Hibiscus, liquid fertilizer should be applied every 25 days.

Fertilizers for Indoor Plants 

  • It is important to select an appropriate fertilizer for indoor plants, as they have specific nutritional needs. A balanced fertilizer with equal amounts of Nitrogen, phosphorus, and Potassium as well as micronutrients is often recommended for indoor plants.
  • Indoor plants such as ZZ plants, Areca Palms, Syngoniums, Money plants, Anthurium, Snake plants, Peace lilies, etc. require nutrients approximately once every two months during their active growth period, typically in the spring and summer months.
  • Giving fertilizers to these plants during the dormant period in winter is generally not recommended, as they require less water and nutrients during this time.

Fertilizers:

  • Cow Dung fertilizer is the most suitable fertilizer for this category.
  • Mustard cake fertilizer can also be given to them once a year.
  • Seaweed fertilizer (granules/liquid fertilizer) can be given once in a 2 months gap.

Vegetable plants need water, sunlight, fertilizer, and everything in a maximal amount whereas indoor plants need minimal of everything.

Prioritize your plants and pick suitable fertilizer to nourish them.

Happy Gardening !!

organic neem pesticide

How to make Neem Pesticide at home

When we do gardening and grow plants, we always need to take some precautions so that we get healthy plants. Sometimes even after taking all the safety measures, we find pests and diseases in our plants.

pest attack in plant

Pests and diseases have always been a major challenge for gardeners. Chemical pest control is still a major method of pest control today, although due to its long-term side effects, attention has been paid to conventional and biological pest control in the late 20th century.

Today it has been proved that the use of chemicals in gardening and farming is very harmful to the plants, soil, and environment. An organic pesticide method to control pests and diseases can be both safe and effective for our plants.

Key note:
“Neem liquid pesticide is one of the best organic solutions for both outdoor and indoor plants.”

So, let’s discuss how to make organic neem pesticides for plants at home.

What is neem pesticide?

AZADIRACHTIN INDICA is the scientific name of the neem plant. Neem has been used in Ayurvedic medicines for centuries. It is specifically used to make various insecticides and also to control pests and diseases on the plant.

neem leaves used for ayurveda medicine

According to the research, it has been found that when some Indian scientists sprayed the diluted neem pesticide on different plants, the plants did not get harmed by the locust pests which were present on the surface of the plants.

Therefore, we should spray neem pesticide on our plants in the gap of every 7 days which will reduce the pest’s attack on the plant.

Note:

Sometimes our indoor and outdoor plants get affected by pest attacks like

  1. Aphids
  2. Whiteflies
  3. Mealybugs
  4. Leafhoppers
  5. Spider mites

To remove and control such pest attacks we can use neem liquid pesticides.

  • This neem liquid pesticide is easily available in the market, also you can make it at home very easily, which is very effective and beneficial for our plants.

Tips to make Neem Pesticide at home

neem pesticide
neem pesticide

To make neem oil, we need to extract it from neem seeds, a process that is not feasible at home. So, let’s start with the simplest method of preparing effective neem pesticide at home.

1. Pluck neem leaves: First of all, pluck the neem leaves and wash them properly to remove all dust and dirt.

wash neem leaves
wash neem leaves

2. Boil the leaves:  In the next step, boil the leaves in 1 liter of water for approximately 20 minutes.

boiled neem leaves
boiled neem leaves
  • After 20 minutes, about one-fourth of the water will remain, and the color of the water will have changed to dark green.
  • Allow it to cool to room temperature, and then strain the water.

3. Dilute the solution: This solution is quite potent, so it should not be directly sprayed on the plants.

neem solution
neem solution
  • First, dilute this solution with water.
  • Add 10 tablespoons of this neem liquid to 1 liter of regular water.

Now, you can apply this diluted neem water to your plants and leaves. It’s a 100% pure organic neem liquid pesticide.

neem pesticide spray in plant

One of the best qualities of neem liquid pesticide is that it is harmless to insects like bees and earthworms which are very helpful to our plants.

It was all about homemade neem pesticides.

Happy gardening!