Monthly Archives: December 2023

Leca balls in gardening

Benefits and Uses of Leca Balls in Gardening

LECA stands for Lightweight Expanded Clay Aggregate”, widely used in gardening nowadays.

LECA balls, made of clay, are small, lightweight, and hollow. They are heated at high temperatures, causing the clay to expand and all moisture to evaporate. This process results in lightweight yet very strong and slightly expanded balls.

Leca Balls

  • They won’t break when falling, nor will they swell or melt when dipped in water.
  • These balls have small pores that allow air to pass through, and water is also retained in these small holes.

LECA balls provide a solution by maintaining aeration and preventing soil compaction. Their lightweight and porous structure create an environment where roots can thrive, promoting healthier and more robust plant growth.

Benefits and Uses of Leca Balls in Gardening

The use of LECA balls in gardening is versatile and offers several benefits in different applications:

1. Hydroponics: LECA balls are preferred by those practicing aquatic gardening in hydroponic systems.

2. Hanging Plants: They serve as a lightweight alternative to soil for hanging pots.

Plant cuttting in leca balls

3. Growing Cuttings: Soft plant cuttings, such as monstera, money plant (pothos), snake plant, syngonium, and more, thrive in LECA balls.

Plant cuttting in leca balls


  • The porous structure promotes aeration, preventing root rot.

4. Container/Pot/Vessels/Bottle: Unlike water propagation, where a bottle is required, LECA balls can be used in any vessel or pot.

5. Probability of Root Rotting: LECA balls address the issue of root rot by providing aeration, preventing waterlogged roots. The porous nature allows good air circulation.

6. Ease of Transplanting: Transplanting cuttings grown in LECA balls to soil is less disruptive, as the sturdier roots are better adapted to a non-water environment.

Plant cuttting in leca balls

7. Growing Medium for Medium Size Plants: LECA balls serve as a versatile growing medium for medium-sized plants like Areca Palm or Moss Chara.

8. Ingredients in Soil Mixture: They are commonly incorporated into soil mixtures to enhance soil quality.

9. Maintaining Drainage System in Pots: Placing LECA balls beneath the bottom layer of soil inside pots helps retain moisture while allowing excess water to drain away, maintaining the pot’s drainage system.

10. Mulching: During extreme summers, LECA balls can be used for mulching instead of dry leaves or rice husks.

Remember:

  • Availability: LECA balls are readily available online in different sizes.
  • Preparation: Always wash or sterilize them before use to remove any unwanted dirt or dust.
  • Sterilization: To sterilize, boil them in water for 10 minutes and then wash with clean water.

How to Use Leca Balls in Gardening!

Propagating Cuttings

1. Container Selection:

    • Fill a decorative container or pot with LECA balls.
    • Place the cuttings into the filled container.

2. Additional LECA Balls:

    • Add more LECA balls to secure the cuttings.

3. Moisture Control:

    • Pour water to retain moisture, but be cautious of excess water, as it may lead to cutting rot. Maintain the water level up to a certain point.

4. Monitoring and Watering:

    • Keep an eye on the moisture level in the LECA balls.
    • When the balls appear dry, add a small amount of water.
    • Frequency depends on weather conditions; in summer, it may be every 5 days, and during the rainy season, it could extend to 15-20 days.

5. Water Change:

    • Change the water when cuttings show significant growth, and roots have spread extensively (if you prefer not to change the growing medium).

6. Transplanting:

    • Transplant the cuttings into a different growing medium once the roots have reached a noticeable level of growth.

Nutrients in LECA Balls:

LECA balls contain fewer nutrients compared to soil.

1. For cuttings in LECA balls, additional fertilizer or tonic is not required, as the water inherently contains sufficient minerals.

2. For plants in LECA balls, it is recommended to provide liquid fertilizer once a month.

  • Options include seaweed, micronutrients, pheromones, or epsom salt.
  • Avoid teas made from cow dung compost, vermicompost, mustard cake, or kitchen compost, as they can cause stagnant water, unpleasant odors, and clog the pores of the LECA balls.

Reuse of LECA Balls:

LECA balls are reusable and can be employed for propagating additional cuttings or as a growing medium for any plant.

In summary, using LECA balls is a simple and easy method suitable for everyone in gardening.

Happy Gardening !!

How to make Banana Peel Fertilizer: Benefits & Uses

Benefits & Uses of Banana Peel Fertilizer for Plants


If you are fond of gardening, then banana peels will be of great use to your plants. The banana peel fertilizer is an excellent source of organic manure that can be easily made at home. It is a natural and cost-effective way to provide plants with the essential nutrients they need to grow and thrive.


Many people complain that despite taking all necessary care and measures for the plant, there are still irregularities in its growth. My plants are not flowering or the plant is healthy but flowers or fruits are not coming.

    • So, why is it happening, and what are the reasons behind this?
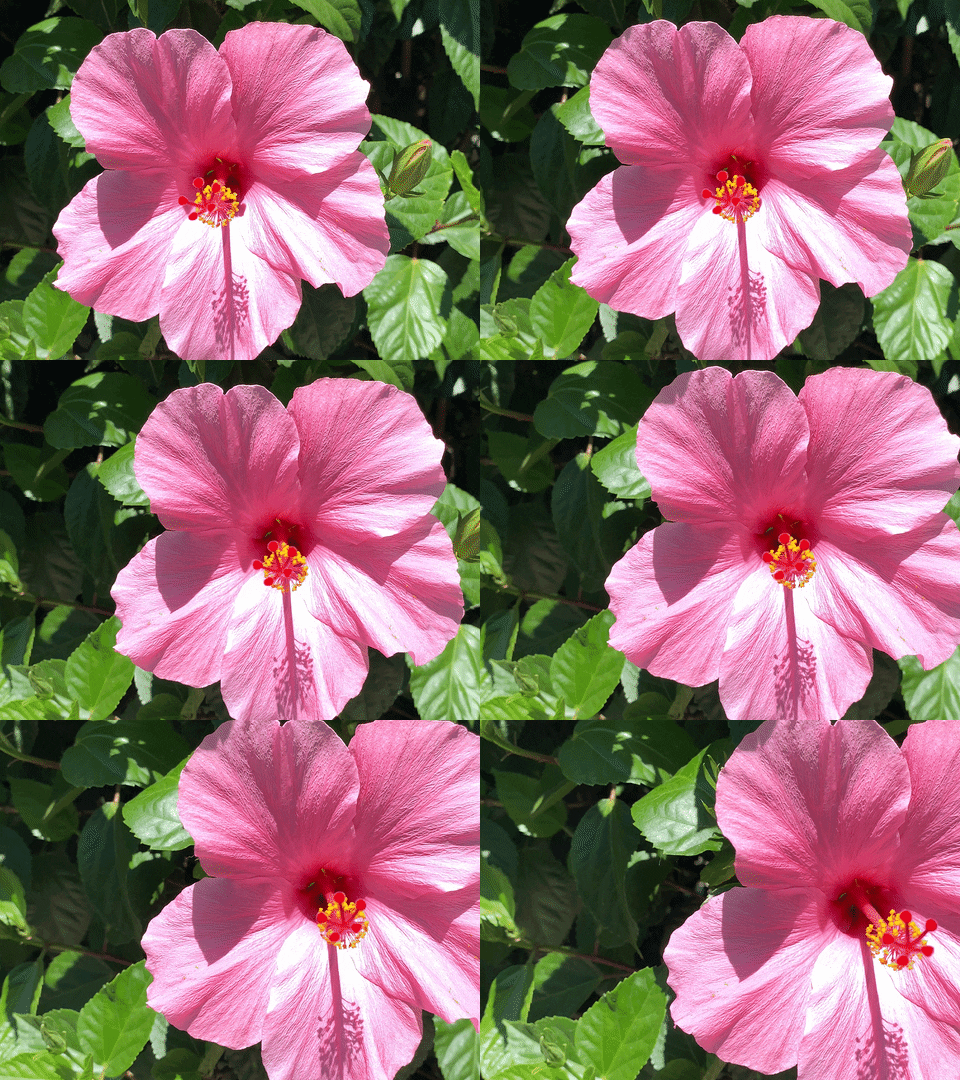
Hibiscus flower

The main reason for this is the lack of nutrients in your plant. This indicates two factors:

1. When fertilizer is provided to the roots, it is not efficiently distributed to other parts of the plant, such as the stem, leaves, branches, or buds.

2. Additionally, while plants produce their food in the form of starch in their leaves, it is possible for the food to remain in the leaves and not be distributed to other parts of the roots of the plant.

Note: Starch plays a crucial role in providing immunity to plants, especially for their roots.

The above two factors indicate that the “transportation system” of the plant is not working well which can be attributed to a lack of potassium.

  • Luckily, potassium is highly available in bananas and banana peels and can be used to improve the transportation system of the plant.
  • If in this condition, the plant is fed by banana peel fertilizer, then the problem would be resolved.
bananas rich source of potassium

Note:

    • Not only potassium but banana peels contain many other nutrients like calcium, magnesium, sulfur, and phosphorus, all of which are essential for plant growth and development.
    • Additionally, banana peels contain other micronutrients, such as zinc, copper, and iron, which are important for plant health.

How to make Banana peel fertilizer at home? 

There are many ways to make banana manure at home. Some of them are detailed here:

Method – 1

1. Chop the banana peels into small pieces.

small pieces of banana peels


2. Place them in a clean utensil and fill the water. Make sure the peels are properly dipped in the water.

banana peels in fresh water in bowl

3. Cover the container and keep it in a shaded area for 8-10 hours.

4. During this process, the remains of the banana pulp dissolve in the water.

5. After 10 hours, strain the water and dilute it with more water (using 7-8 times more water than the amount of fertilizer produced). Then, use the diluted mixture to feed your plants.

strain the banana pulp water


6. It is essential to sieve and dilute the fertilizer before using it on plants. Otherwise, the quantity of potassium would be much higher than the requirement, which can prevent the plant from absorbing other nutrients.

banana peel liquid fertilizer

Method – 2 (Banana peel fertilizer powder)

1. Cut the banana peels and dry them in the sun.

banana peels pieces

2. After 4 days, the peels will be completely dry, black, and crispy.

dry banana peel

3. Grind the dried peels into a fine powder and store it in a container.

banana peel powder

4. When required, dissolve the powder in water and use it to feed your plants.

5. Alternatively, you can sprinkle the banana peel powder on the top layer of soil and water the plant.

sprinkle the banana peel powder on the soil

6. The banana manure will decompose slowly in the soil, so avoid adding too much water. This method provides a slow-release fertilizer for your plants.

Method – 3

1. Take a banana peel and bury it in the soil of a potted plant.

banana peel in the soil

2. Do not add any additional water or moisture to the soil.

3. Over time, the banana peel will decompose and release its nutrients into the soil, making it more fertile for the plant to grow.

This method is a natural way to provide nutrients to your plants, but it may take longer for the banana peel to decompose and release its nutrients compared to other methods.

When to give Banana peel fertilizer?


1. Avoid using banana peel fertilizer on plants that are still small or in the growing stage because they require equal amounts of nitrogen, phosphorus, and potassium (NPK) at that time.

In banana manure, the quantity of nitrogen is very low. It will lead to nutrient imbalance and plants might die due to a deficiency of nitrogen.

2. Always, give banana manure, when the plant is at the stage of flowering or fruiting.


3. While banana peel fertilizer can be used on all plants, it is important to rotate it with other fertilizers to maintain nutrient balance.

  • After applying banana peel fertilizer, wait for at least 20 days before using other fertilizers such as mustard cake or any other.
  • This will help ensure that the plants receive a balanced mix of nutrients to support their growth and development.

Important note:

1. Overwatering can spoil the plant, so it is important to only fertilize when the soil is completely dry. In addition, after fertilizing, water should only be given when the soil appears to be dry.


2. There are 17 essential nutrients that plants require for healthy growth. Supplements like potassium, nitrogen, and phosphorus i.e. NPK are needed in ample quantities to fulfill all the nutrient requirements.


So, fertilizers play a crucial role in the acute growth of plants.

==============================

So, get bananas, eat them to stay healthy, and use their peels to make organic fertilizer for your plants. This way, you can ensure that your plants get the nutrients they need to grow strong and healthy. By following the above important tips, you can help your plants thrive and enjoy the benefits of homegrown produce.

Happy gardening!!

marigold

गेंदे (Marigold) को कैसे उगाएं और देखभाल कैसे करें

गेंदा सुंदरता, शुभता और पारंपरिक आकर्षण का प्रतीक है। अपने चमकीले फूलों और देखभाल में आसान प्रकृति के कारण, गेंदा उद्यान प्रेमियों का एक पसंदीदा फूल है। आइए सामान्य जानकारी, देखभाल युक्तियाँ और अपने बगीचे में गेंदे की खेती के असंख्य लाभों का पता लगाएं।

मैरीगोल्ड्स (Marigold) जिन्हें वैज्ञानिक रूप से टैगेट्स के नाम से जाना जाता है, विभिन्न प्रजातियों में आते हैं, जिनमें से सबसे सामान्य निम्न हैं:

  • टैगेट्स इरेक्टा (अफ्रीकन मैरीगोल्ड),

marigold flowers

  • टैगेट्स पटुला (फ्रेंच मैरीगोल्ड) और

french-marigold

  • टैगेट्स टेनुइफोलिया (सिग्नेट मैरीगोल्ड)

Tagetes tenuifolia (Signet marigold)

अपने चमकीले और सुनहरे रंगों – पीले, नारंगी और लाल रंग – के लिए जाना जाने वाला गेंदा बगीचों में मुख्य रूप से, खासकर त्योहारों और शुभ अवसरों के दौरान पाया जाता है।

मैरीगोल्ड्स अपनी कम रखरखाव वाली प्रकृति के लिए प्रसिद्ध हैं, जो उन्हें अनुभवी माली और शुरुआती दोनों के लिए आदर्श बनाता है। स्वस्थ और जीवंत गेंदे के पौधों के पोषण के लिए यहां कुछ देखभाल युक्तियाँ दी गई हैं:

गेंदे को कैसे उगाएं और देखभाल कैसे करें (How to Grow and Care for Marigold)

1. सही स्थान के चुनाव के साथ शुरुआत करें:

गेंदा वास्तव में सूरज की रोशनी का आनंद लेता है, इसलिए जब आप अपने बगीचे में उनके लिए जगह चुन रहे हैं, तो ऐसी जगह का लक्ष्य रखें जहां हर दिन अच्छी मात्रा में सूरज की रोशनी आती हो।

  • आदर्श रूप से, वे उन स्थानों पर पनपते हैं जहां प्रतिदिन कम से कम 5-6 घंटे धूप मिलती है। अतः, अपने गेंदे के फूलों को खुश और जीवंत बनाने के लिए अपने बगीचे में एक धूप वाला कोना की तलाश करें!

2. गेंदे के फूल के लिए गमले का आकार

pot size for marigold

गेंदे के लिए गमला चुनते समय, ऐसे आकार पर विचार करें जो उनकी जड़ों को फैलने के लिए पर्याप्त स्थान प्रदान करे।

  • गेंदा उगाने के लिए आमतौर पर 08, 10 से 12 इंच का मध्यम आकार का गमला उपयुक्त होता है। यह आकार उचित जल निकासी को सुगम बनाता है और पौधों को बढ़ने और फलने-फूलने के लिए पर्याप्त जगह देता है।
  • यदि आप एक ही कंटेनर में कई गेंदे के पौधे लगा रहे हैं, तो सुनिश्चित करें कि स्वस्थ विकास को बढ़ावा देने के लिए उनके बीच पर्याप्त दूरी हो।

3. गेंदे के फूल के लिए मिट्टी का मिश्रण

soil mixture
soil mixture

मैरीगोल्ड्स ऐसी मिट्टी पसंद करते हैं जिसमें अच्छी जल निकासी हो, यानी पानी उनकी जड़ों के आसपास न रुके।

  • यह सुनिश्चित करना आवश्यक है कि मिट्टी पानी को आसानी से गुजरने दे।
  • इसलिए, गेंदे के पौधे लगाते समय, ऐसी मिट्टी चुनें जो पानी को रोक न सके, जिससे उन्हें स्वस्थ और खुश रखने में मदद मिलेगी।

4. गेंदे को पानी देने के टिप्स

watering tips to marigold

जब गेंदे को पानी देने की बात आती है, तो इसे संयमित ढंग से करें। पानी देने के सत्रों के बीच मिट्टी को थोड़ा सूखने दें।

  • उन्हें बहुत अधिक पानी देने से बचें, और अगले पानी देने से पहले मिट्टी को थोड़ा सूखने दें। यह आपके गेंदे को अच्छे आकार में रखने में मदद करता है।

5. गेंदा के लिए उर्वरक देने के टिप्स

उस समय जब आपके गेंदे बढ़ रहे हों, संतुलित, सर्वउपयोगी उर्वरक का प्रयोग करें। इससे उन्हें पनपने के लिए आवश्यक पोषक तत्व मिलेंगे।

  • इसके अतिरिक्त, मिट्टी में खाद का उपयोग करना एक अच्छा विचार है – यह मिट्टी की उर्वरता को बढ़ाकर आपके गेंदे के फूलों के लिए इसे और भी बेहतर बनाने में मदद करता है। आप वर्मीकम्पोस्ट, गोबर खाद, पत्ती खाद आदि का उपयोग कर सकते हैं।
  • अतः, अपने गेंदे को मजबूत और जीवंत बनाने में मदद करने के लिए अच्छी चीजें दें!

6. गेंदे की छंटाई के लिए टिप्स

आपके गेंदे को बेहतरीन बनाए रखने के लिए, यहां छंटाई के कुछ टिप्स दी गई हैं:

(i) सूखे फूलों को नियमित रूप से छंटाई करते रहे. इससे पौधे को नए फूल पैदा करते रहने में मदद मिलती है, जिससे आपके गेंदे रंगीन और सुंदर बने रहते हैं।

(ii)  यदि आपको कोई पत्तियाँ दिखाई दें जो पीली हो गई हैं या मर गई हैं, तो उन्हें हटा दें। इससे न केवल आपके गेंदे साफ-सुथरे दिखते हैं बल्कि पौधा भी स्वस्थ रहता है।

7. अपने गेंदे के लिए कीटों से निपटना? चिंता न करें!

हालाँकि गेंदा कीटों का प्रतिरोध करने में बहुत अच्छे होते हैं, फिर भी आपको समय-समय पर एफिड्स या माइलबग्स जैसे कुछ कीड़े दिखाई दे सकते हैं। कभी-कभी हल्का फंगस भी दिखाई दे सकता है।

प्राकृतिक समाधान अपनाएं!

  • जब अपने पौधों से कीटों को दूर रखने की बात आती है, तो आप नीम का तेल या नीम-आधारित कीटनाशक का उपयोग कर सकते हैं।
  • दोनों विकल्प कीटों को नियंत्रित करने में अच्छा काम करते हैं, और उन्हें प्राकृतिक और पर्यावरण-अनुकूल माना जाता है।
  • नीम का तेल अक्सर निवारक उपाय के रूप में उपयोग किया जाता है, जबकि यदि आपको संक्रमण दिखाई दे तो नीम कीटनाशक लगाया जा सकता है। बस उत्पाद पर दिए गए निर्देशों का पालन करें, और आपके पौधे स्वस्थ और कीट-मुक्त रहेंगे।

अतः, इन प्राकृतिक उपचारों से, आप कुछ ही समय में उन खतरनाक कीटों पर नियंत्रण पा लेंगे!

8. साथी रोपण

गेंदे के फूल बगीचे में शानदार साथी बनते हैं!

वे सुपरहीरो की तरह हैं जो नेमाटोड और कुछ कीटों को आसपास के अन्य पौधों से दूर रखने में मदद करते हैं।

marigold + Tomato

यहाँ एक अच्छा आईडिया है:

  • टमाटर, बीन्स और अन्य सब्जियों जैसी पौधों के ठीक बगल में गेंदे के पौधे लगाएं।
  • यह आपके बगीचे में एक प्राकृतिक कीट विकर्षक होने जैसा है।

“गेंदा सुरक्षात्मक मित्र के रूप में कार्य करता है, जो आपकी सब्जियों को और भी अधिक खुशहाल और स्वास्थ्यवर्धक बनाता है।”

गेंदा के फायदे और उपयोग

गेंदा उगाने के अनेक लाभ हैं:

1. सौन्दर्यात्मक आकर्षण – गेंदे के फूल बगीचों, बालकनियों और सार्वजनिक स्थानों पर रंग भर देते हैं, जिससे सब कुछ और अधिक सुंदर दिखने लगता है।

2. त्यौहार की सजावट गेंदे के फूल त्योहारों और समारोहों में प्रमुख हैं, उत्सवों के दौरान घरों, मंदिरों और सार्वजनिक स्थानों की शोभा बढ़ाते हैं।

3. कीट निवारक गेंदे की विशिष्ट खुशबू एक प्राकृतिक कीट विकर्षक के रूप में काम करती है, जो उन्हें बगीचों के लिए पर्यावरण-अनुकूल विकल्प बनाती है।

4. औषधीय गुणपारंपरिक चिकित्सा में, गेंदे के फूल के अर्क का उपयोग उनके सूजन-रोधी और एंटीसेप्टिक गुणों के लिए किया जाता है।

5. साथी रोपण लाभ सब्जियों के साथ-साथ गेंदे के पौधे लगाकर, आप प्राकृतिक रूप से कीटों को नियंत्रित कर सकते हैं, जिससे रासायनिक कीटनाशकों की आवश्यकता कम हो जाती है।

6. सांस्कृतिक महत्व गेंदे का सांस्कृतिक और धार्मिक महत्व है, जिसका उपयोग अक्सर मालाओं, प्रसाद और धार्मिक अनुष्ठानों में किया जाता है।

गेंदा, अपने चमकीले और प्रसन्न फूलों और सांस्कृतिक महत्व के साथ, दुनिया भर में बगीचों और समारोहों में खुशी फैलाता है। चाहे आप एक अनुभवी माली हों या अभी शुरुआत कर रहे हों, गेंदा उगाना वास्तव में एक फायदेमंद अनुभव हो सकता है। गेंदे के फूलों के आकर्षण को अपनाएं, उनकी खिलती हुई सुंदरता को देखें, और उनकी जीवंत उपस्थिति को अपने बगीचे और सांस्कृतिक उत्सव दोनों को बढ़ाने दें।

शुभ बागवानी!

groundnut cake fertilizer

Groundnut Fertilizer: Strongest Fertilizer for Plants

What is Groundnut Organic Fertilizer?

Groundnut cake is an organic fertilizer derived from the byproduct of the groundnut oil extraction process. During the extraction of cooking oil from groundnuts using machines, the residual cake is obtained. This cake, free from any chemicals, serves as an excellent organic fertilizer, enriched with nutrients beneficial for plant growth.

groundnut fertilizer

The composition of groundnut cake includes essential elements such as nitrogen (N), phosphorus (P), and potassium (K), commonly referred to as NPK, along with fibers and proteins. It is important to note that groundnut cake lacks certain micronutrients.

Nutritional value of Groundnut Cake:

  • Nitrogen: 7.3
  • Phosphorous: 3
  • Potassium: 2.2

By incorporating groundnut cake into soil, gardeners and farmers can provide plants with a natural and organic source of nutrients, promoting healthy and robust growth.

Benefits of Groundnut Cake as a Fertilizer:

groundnut cake fertilizer
groundnut cake

When applied at the appropriate time, groundnut cake significantly enhances overall plant growth, stimulating the development of new leaves and branches. This organic fertilizer, enriched with nitrogen, effectively addresses the problem of yellowing leaves in plants, providing a valuable solution when leaf discoloration occurs. Furthermore, groundnut cake expedites the process of photosynthesis in plants, contributing to a more vibrant and lush garden.

In essence, it is a potent fertilizer with essential NPK components that visibly improves the overall health and growth of plants.

Groundnut Fertilizer: Strongest Fertilizer for Plants

1. Where to obtain Groundnut Fertilizer

Groundnut cake can be easily obtained from nearby factories where the extraction of ground oil takes place.

  • Additionally, it is readily available online, with approximately Rs 300 per kilogram.

2. Process of Applying Groundnut Cake to Plants:

Groundnut cake can be incorporated into plant care through three methods:

1. Soil Mixture Addition:

    • Grind the obtained groundnut cake pieces into a fine powder using a mortar.
  • groundnut cake fertilizer in soil
    adding groundnut cake fertilizer in soi-mix
    • Mix this powder into a prepared soil mixture, adding a handful of the fertilizer powder to approximately 5 kg of the soil blend.

2. Adding in Pot Soil:

    • When preparing soil mixtures repeatedly is not feasible due to time constraints, directly add groundnut cake powder to the pot soil.
  • adding in pot soil - groundnut cake fertilizer
    adding in pot soil – groundnut cake fertilizer
    • For a 12-inch pot used for a plant, incorporate 2 tablespoons of groundnut cake powder.
    • Ensure that you loosen the soil before adding the powder, then water the plant after application.

3. Making Liquid Fertilizer:

    • Dilute approximately 100 grams of groundnut cake in 4-4.5 liters of water to create a liquid tonic. This quantity is suitable for approximately 300 plants.
    • Be vigilant for any insects in the cake that may emerge after dilution, and remove them.
    • Keep the solution covered in an area with no direct sunlight exposure.
    • Allow it to ferment for at least 2 days for the cake to dissolve properly in water. This process is best practiced during winter.
    • If left for more than 4 days, it may attract insects and fungus, so it’s advisable to keep it for 2-3 days only.
    • Dilute this tonic with a significant amount of water; for example, add 2 mugs of this solution to 40 liters of water.
    • The final solution’s consistency should be very thin, not resembling a thick paste, as it is enriched with a large quantity of nitrogen and has a warm nature that could potentially harm the plant.
groundnut cake liquid fertilizer

Note:

  • For a small garden with around 20 plants, take 2 small pieces of groundnut cake, dissolve them in 1 liter of water, and allow the mixture to dissolve for 2 days.
  • After 2-3 days, dilute it with 8-10 times the amount of water before applying it to the plants.

The efficiency of the liquid tonic in boosting the growth of plants is much higher compared to the first two methods.

Precautions to take while using Groundnut Cake Fertilizer:

1. Temperature Considerations:

    • Avoid using this fertilizer in hot weather with temperatures above 30-32°C, as it can warm the soil and potentially harm the roots, causing them to burn.

2. Plant Compatibility:

    • While suitable for all types of plants, including outdoor, indoor, flowering, or fruiting plants, refrain from using it on decorative succulents.

3. Timing of Application:

    • In cold weather, apply the fertilizer at any time of the day. As temperatures rise, especially in March, administer the fertilizer during the coolest parts of the day, such as early morning or evening after sunset.

4. Soil Moisture:

    • Ensure that the soil is neither too dry nor too wet before application.
    • If the soil is dry, moisten it with water before adding the fertilizer. If the soil is too wet, adding fertilizer may lead to fungus growth and root rot. Maintain consistently moist soil.

5. Application Method:

    • Feed the plant with the well-diluted solution until it starts draining out from the bottom hole of the pot.
    • The diluted solution should not have adverse effects on the plant at this point.

6. Application Cycle for Different Plants:

    • For leafy outdoor plants (e.g., tulsi, curry patta, and coriander), administer the fertilizer once a month.
    • Avoid using other potent fertilizers during the application month.
    • For heavy feeder plants (e.g., hibiscus and lemon), apply the fertilizer every 20 days.
    • Avoid using the fertilizer during flowering and fruiting stages.

7. Specific Application Situations:

    • Apply the fertilizer when the plant becomes nutrient-deficient, showing yellowing leaves after growing numerous branches and flowers.
    • After hard pruning, wait for 15 days before applying the liquid fertilizer to stimulate new branch growth and enhance overall plant health.

8. Seedlings and Micronutrients:

    • Never feed this fertilizer to seedlings.
    • If necessary, provide micronutrients instead.

9. Compatibility and Neem Oil:

    • Do not mix this fertilizer with any other and avoid applying additional fertilizers for at least 15 days after use.
    • Neem oil can be sprayed while using this fertilizer.

10. Application Method:

  • Never use this fertilizer as a foliar spray; always apply it through the soil.
  • Prepare the required quantity as it cannot be stored due to the risk of attracting fungus and insects.

Limitations of Groundnut Cake Fertilizer:

1. Seasonal Application:

Groundnut cake fertilizer is season-oriented and should not be used in summer.

It is best applied to plants during the period from October to March. Therefore, an alternative fertilizer may be required for the rest of the growing season.

2. Micronutrient Deficiency:

    • Lacks Micronutrients: This fertilizer lacks micronutrients.
    • To meet the required nutrient levels for heavy feeder plants, additional micronutrients should be applied after 15 days of using groundnut cake fertilizer.

In conclusion, while groundnut cake fertilizer has its limitations, it remains an essential addition to your gardening supplies. It significantly enhances the growth of heavy feeder plants to remarkable levels when used appropriately.

Also read:

Mustard Cake Fertilizer Benefits and Uses

Happy Gardening!!

Artificial grow lights thumbnail

पौधों की वृद्धि के लिए Artificial Grow Lights

क्या पौधे Artificial Grow Lights में विकसित हो सकते हैं?

दुनिया भर के विशाल और विविध परिदृश्यों में, जहां सूरज की रोशनी विभिन्न क्षेत्रों और मौसमों में भिन्न होती है, आर्टिफीसियल ग्रो लाइट का उपयोग पौधों के प्रति उत्साही लोगों के लिए गेम चेंजर बन गया है।

चाहे आप अनुभवी माली हों या बागवानी करना अभी शुरू किया है, घर के अंदर पौधों के पोषण के लिए कृत्रिम रोशनी की गतिशीलता को समझना महत्वपूर्ण है। आइए कृत्रिम ग्रो लाइट की अवधारणा और बागवानी में उनकी प्रासंगिकता का पता लगाते हैं।

पौधों के लिए आर्टिफीसियल ग्रो लाइट्स क्या है?

कृत्रिम ग्रो लाइट्स विद्युत लैंप हैं जिन्हें प्राकृतिक सूर्य के प्रकाश स्पेक्ट्रम का नकल करने वाले प्रकाश का उत्सर्जन करके पौधों के विकास को प्रोत्साहित करने के लिए डिज़ाइन किया गया है।

  • जहाँ सूर्य का प्रकाश पौधों के लिए ऊर्जा का सबसे अच्छा स्रोत बना हुआ है, कृत्रिम प्रकाश उन स्थितियों में आवश्यक हो जाता है जहां प्राकृतिक सूरज का प्रकाश अपर्याप्त है, खासकर इनडोर बागवानी सेटअप में।

आर्टिफीसियल ग्रो लाइट्स के प्रकार:

आर्टिफिशियल ग्रो लाइट्स विभिन्न प्रकार की होती हैं, जिनकी सूची नीचे दी गई है:

1. फ्लोरोसेंट लाइट्स:

  • लागत प्रभावी और ऊर्जा कुशल।
  • छोटे और कोमल पौधों और कम रोशनी वाले पौधों के लिए उपयुक्त।
  • दो मुख्य प्रकारों में उपलब्ध है: कॉम्पैक्ट फ्लोरोसेंट लाइट्स (सीएफएल) और ट्यूब फ्लोरोसेंट लाइट्स (टीएफएल)।

2. एलईडी लाइट्स:

  • ऊर्जा-कुशल और लंबे समय तक चलने वाला।
  • यह विभिन्न विकास चरणों के लिए उपयुक्त प्रकाश का स्पेक्ट्रम प्रदान करता है।
  • कम गर्मी छोड़ते हैं, जिससे वे इनडोर बागवानी के लिए उपयुक्त हो जाते हैं।

3. हाई-इंटेंसिटी डिस्चार्ज (HID) लाइट्स:

  • सभी विकास चरणों के लिए उपयुक्त, तीव्र प्रकाश उत्पन्न करता है।
  • अधिक गर्मी पैदा करता है और अतिरिक्त वेंटिलेशन की आवश्यकता हो सकती है।

पौधों के लिए कृत्रिम प्रकाश का उपयोग क्यों करना चाहिए?

ऐसे कई कारण हैं जिनकी वजह से हमें कृत्रिम प्रकाश का उपयोग करना चाहिए। उनमें से कुछ नीचे सूचीबद्ध हैं:

1. अपर्याप्त धूप:

  • सीमित सूर्य के प्रकाश में या कुछ मौसमों के दौरान, कृत्रिम रोशनी पौधों के विकास के लिए एक सतत प्रकाश स्रोत सुनिश्चित करती है।

2. इनडोर बागवानी:

  • जिन लोगों के पास बाहर जा कर बागवानी करने का विकल्प नहीं है, उनके लिए कृत्रिम ग्रो लाइट्स इनडोर बागवानी को सक्षम बनाती हैं, जिससे बागवानी का शौक रखने वाले लोगों के को पूरे वर्ष पौधे उगाने का अवसर मिलता है।

3. बीज आरंभ:

  • कृत्रिम प्रकाश बीज के अंकुरण और अंकुरों के शुरुआती विकास में सहायता करती है, जिससे स्वस्थ विकास के लिए आवश्यक प्रकाश मिलता है।

4. उगाने का विस्तारित मौसम:

  • कृत्रिम रोशनी के साथ, आप लगातार फसल सुनिश्चित करते हुए, उगाने के मौसम को सामान्य धूप के घंटों से आगे बढ़ा सकते हैं।

पौधों के लिए सही आर्टिफिशियल ग्रो लाइट्स का चयन कैसे करें

सही आर्टिफिशियल ग्रो लाइट्स चुनते समय निम्नलिखित कारकों से सावधान रहना चाहिए:

1. प्रकाश स्पेक्ट्रम:

  • अधिकतम वृद्धि के लिए विभिन्न पौधों को अलग-अलग प्रकाश स्पेक्ट्रम की आवश्यकता होती है।
  • पूर्ण-स्पेक्ट्रम रोशनी जो प्राकृतिक सूर्य के प्रकाश के तरह होती हैं, अधिकांश पौधों के लिए उपयुक्त होती हैं।

2. तीव्रता और अवधि:

  • अपने पौधों की विशिष्ट आवश्यकताओं के आधार पर प्रकाश की तीव्रता को नियंत्रित करें।
  • कुछ को विकास के दौरान अधिक प्रकाश की आवश्यकता हो सकती है, जबकि अन्य को फूल आने के दौरान कम प्रकाश की आवश्यकता होती है।

3. ऊर्जा दक्षता:

  • एलईडी लाइटें सबसे अधिक ऊर्जा-कुशल विकल्प हैं, बिजली की खपत कम करती हैं और कम गर्मी उत्सर्जित करती हैं।

4. लागत संबंधी विचार:

  • प्रकाश की प्रारंभिक लागत, परिचालन लागत और जीवनकाल पर विचार करें।
  • हालांकि एलईडी लाइटें पहले से महंगी हो सकती हैं, लेकिन उनकी लंबी उम्र और ऊर्जा दक्षता के परिणामस्वरूप समय के साथ लागत में बचत हो सकती है।

पौधों के लिए कृत्रिम ग्रो लाइट्स का उपयोग करने की युक्तियाँ

आर्टिफिशियल ग्रो लाइट्स का उपयोग करने के लिए निम्नलिखित युक्तियाँ को अपनाया जा सकता है:

1. सही दूरी बनाए रखें:

  • पौधों से इष्टतम दूरी बनाए रखने के लिए रोशनी की ऊंचाई को समायोजित करें, जिससे उन्हें बहुत अधिक या बहुत कम रोशनी मिलने से रोका जा सके।

2. प्रकाश चक्र का पालन करें:

  • विकास चरण के दौरान अधिकांश पौधों के लिए लगभग 12-16 घंटे और फूल आने के चरण के दौरान 8-12 घंटे प्रकाश प्रदान करके प्राकृतिक प्रकाश चक्र की नकल की जा सकती।

3. पौधों को घुमाएँ:

  • यदि स्थिर प्रकाश का उपयोग कर रहे हैं, तो यह सुनिश्चित करने के लिए कि सभी भागों को पर्याप्त रोशनी मिले, पौधों को नियमित रूप से घुमाएँ।

निष्कर्ष:

आर्टिफीसियल ग्रो लाइट्स पौधों का शौक रखने वाले लोगों के लिए आवश्यक उपकरण हैं। वे आपको घर के अंदर पौधे उगाने में मदद करते हैं, भले ही आपके पास पर्याप्त धूप न हो। चाहे आप बीज बो रहे हों, बालकनी पर जड़ी-बूटियाँ उगा रहे हों, या एक इनडोर गार्डन रख रहे हों, पौधों के सफल विकास के लिए विभिन्न प्रकार की आर्टिफीसियल लाइट्स और उनका उपयोग करने के तरीके के बारे में जानना आवश्यक है। तो, अपने पौधों को रोशन करें, उन्हें फलने-फूलने दें, और बागवानी की सुंदरता का आनंद लें!

शुभ बागवानी !!

tulsi plant

Tulsi Plant Care in Winter Season: 10 Tips

Tulsi, cherished for its perennial nature, sacred aura, and aromatic allure, is a beloved presence in countless homes. This remarkable plant has the capacity to thrive for numerous years without the need for seasonal replacements.

Despite its resilience, many individuals are unaware of the proper care essential for sustaining the vitality of the Tulsi (Holy basil) plant, which can lead to its demise within a single season.

This comprehensive article identifies common mistakes that, with careful attention, can be addressed to extend the lifespan of your Tulsi plant. Now, let’s explore some common mistakes that, when addressed with care and attention, can significantly extend the lifespan of your cherished Tulsi plant.

Tulsi Plant Care in Winter Season: 10 mistakes to avoid

1. Not Following Perfect Growing Season – Summer Season:

Many folks are still unfamiliar with the optimal growing season for the Tulsi plant. They often plant it haphazardly and then wonder why it’s not thriving. The issues can be categorized into three main mistakes:

  • Planting Tulsi cuttings at the wrong time.
  • Sowing Tulsi seeds in the soil at an inappropriate time.
  • Purchasing Tulsi from a nursery at the wrong season.

 Avoid buying or cultivating Tulsi plant during winters

  • Tulsi is essentially a summer plant  and in regions where warmth persists throughout the year, there’s no cause for concern. 
  • However, during the cold season, it requires special care. 
  • The season significantly influences the plant’s growth, so it is crucial to avoid buying or cultivating it during winters; otherwise, it may wither or experience stunted growth.

2. Not following proper technique of watering:

If the tulsi plant does not receive adequate water, it may show initial growth but eventually dry up. Striking a balance between not underwatering and avoiding overwatering is crucial for its well-being.

Watering tips

  • Ensure you water the plant when the top layer of soil is dry and provide a sufficient amount so it reaches the plant’s roots.
  • Avoid giving small amounts that don’t penetrate the bottom layers of the soil.

Avoid watering daily to Tulsi (holy basil) plant

It’s essential to dispel the myth of daily watering for tulsi.

Watering daily, especially when the soil is already moist, can lead to root rot. 

  • During summers, be extra cautious. Water the plant promptly when the soil dries and continue until water starts draining out from the bottom hole of the pot.

3. Not Grown in healthy soil:

The ideal soil is crucial for the fruitful growth of any plant. Well! After taking proper soil mixture also, there can be chances  where the quality soil is not promoting the abundant growth of the plant. Prevailing reasons for that could be any of them stated below. Like- 

  • Soil is clayey, too sticky, too hard. 
  • Soil gets cracks in it easily after some days.
  • Soil might be infected with insects or termites.

Enhance the soil

To address these issues, enhance the soil with compost, such as cow dung manure and sand, to make it soft, nutrient-rich plus porous.

  • A healthy soil composition facilitates easy root spread and encourages the overall flourishing of the plant.

A well-draining soil mix is essential for Tulsi plants!

While plants in open lands may require less care but those planted in  pots or containers demand more attention to ensure the soil is appropriately enriched for optimal growth.

4. Not picking perfect pot:

avoid fancy pots
avoid fancy pots


Despite the variety of attractive pots available  in the market designed specifically for Tulsi plant, such as small square ceramic pots, these pots may pose a challenge over time.

Tulsi plants thrive when they can spread their roots and the limited space in these small pots can lead to suffocation.

For optimal growth, it is recommended to choose – a clay pot with a size of 10-12 inches 

12 inch clay pot
12 inch clay pot
  • The porous nature of a clay pot provides the necessary space for tulsi roots to expand. 
  • Opting for a clay pot can significantly extend the plant’s lifespan, adding an extra 1 or 2 years to its vitality.

5. Not doing tilling at time:

Sometime different situations prevails like- 

  • Formation of algae on the top of soil
  • Appearing of cracks on the soil
  • Plant is not growing up to the remarkable level.

Well ! The simple reason for all these issues could be neglecting the essential practice of soil tilling.

Tilling of soil
Tilling of soil

In container gardening, soil tilling holds utmost importance. Loosening the soil before watering allows for better water absorption. This, in turn, facilitates the effective shuffling of nutrients and expedites the process of soil aeration. 

Despite its simplicity, the act of tilling has a significant impact on the overall growth of the plant.

6. Not doing regular pruning:

Well! Big myth prevails in the society that pruning of Tulsi plants should not be practised but in reality, pruning plays a vital role in promoting its growth.

“Proper pruning results in a bushier plant with healthy, elongated stems or branches”.

Pruning, when done with the right methodology, is a crucial aspect of plant care.

  • You can use your hands for pruning, ensuring that basil leaves are plucked by pinching from the tip. This technique encourages the emergence of more branches.

Regular removal of manjaris (flowers of the tulsi)

Pruning of Manjaris
Pruning of Manjaris
  • It’s essential to regularly remove the manjaris (flowers of the tulsi) because, once dried, they turn into seeds that can adversely affect the parent plant’s growth.
  • Timely removal of these flowers is crucial to prevent the plant from drying up.

7. Not feeding fertilizers:

Many visible changes in the plant  give signals that it need fertilizers like-

  • Whitening of leaves
  • Colour change of leaves
  • Plant is bending
  • Plant not becoming bushy
  • Plants is not showing any growth

Well! With the change of time the nutrition level of everything is getting depleted , hence for the soil also. So nowadays, it is a compulsive act that the plants are fed with required fertilizers at regular intervals of time without any compromise.

  • So, if there is not any concerned issue with the plant then any fertilizer like cow dung fertilizer fed once in a month is sufficient for the Tulsi plant.

Rotation of different organic fertilizers can be given here like –

  • In the first cycle if cow dung fertiliser is given then
  • Next month other fertilisers like vermicompost can be given after doing proper tilling of the soil
  • In the similar manner, next month any other fertiliser like mustard cake or any other liquid fertiliser (neem tonic) can be used.

Plants get weaker , leaves start shrinking due to lack of nutrients, hence fertilizers are important to meet the desired nutrients levels of soil.

8. Not protecting from pests attack:

Indeed, prevention is more effective than cure when it comes to safeguarding your plants from pests. 

  • Establish a routine of spraying neem leaf concoction on the plants either weekly or every 15 days. 
  • Alternatively, neem oil spray can be utilized as a preventive measure against pest attacks.

Unfortunately, some individuals neglect pest protection and only address the issue after an attack has occurred.

Treating the plants with various remedies at that point adds additional stress to the plants already dealing with the aftermath of a pest attack. 

It is more beneficial to proactively protect plants to avoid such stress and damage.

9. Not providing adequate sunlight:

Absolutely, Tulsi plant is an outdoor plant that requires –

  • a minimum of 4-5 hours of direct sunlight and exposure to fresh, open air.

Placing it indoors where sunlight is scarce will only sustain its well-being for a few days, after which it will weaken and eventually wither.

10. Not caring in winter:

Being a summer plant, it demands additional attention during the winter season. Avoid exposing it directly to dew, cold winds or rainwater. 

  • Opt for a sheltered spot under a net where it can still receive sunlight but remains shielded from the harsh winter elements.
  • For added protection, cover the plants with plastic polythene in the evenings to guard against the cold winds, removing it the next morning when the sun is out. 
cover your tulsi plant with polythene
cover your tulsi plant with polythene in winter season during evening
  • Refrain from applying excessive fertilizer during winters, instead, use mustard cake fertiliser only at the beginning of November. 
  • Additionally, avoid using cold water for watering the Tulsi plants in winter.

Conclusion

Refrain from doing all these ten mistakes with the tulsi plant ,you ensure the longevity and well-being of your Tulsi plant.

Also read:

Grow Tulsi Plant from Seeds

Happy gardening!!

indoor plants

हवा को शुद्ध करने वाले 10 इनडोर पौधे

हवा को शुद्ध बनाते हैं ये 10 पौधे

वायु प्रदूषण का स्वास्थ्य पर महत्वपूर्ण प्रभाव पड़ता है, जिससे आंखों में जलन और गले में खराश जैसी विभिन्न समस्याएं पैदा होती हैं। ये स्वास्थ्य संबंधी चिंताएँ विशेष रूप से असुरक्षित आबादी के बीच व्याप्त हैं, जिनमें वरिष्ठ नागरिक और अस्थमा जैसी पहले से मौजूद स्थितियों वाले व्यक्ति शामिल हैं।

युवा आबादी भी वायु प्रदूषण के कारण होने वाली गंभीर समस्याओं से जूझ रही है। यह एक प्रमुख मुद्दा है जिस पर ध्यान देने की आवश्यकता है क्योंकि प्रत्येक व्यक्ति का स्वास्थ्य प्राथमिकता है।

प्रकृति वास्तव में हमारी कई चुनौतियों का समाधान प्रदान करती है, और इनडोर पौधे प्राकृतिक वायु शोधक के रूप में काम करते हैं।

जहाँ आजकल मानव निर्मित वायु शोधक कार्यालयों, स्कूलों और घरों जैसी विभिन्न सेटिंग्स में व्यापक रूप से उपयोग किए जाते हैं।

क्या आप जानते हैं?

ऐसे पौधे भी हैं जो जहरीली गैसों और रसायनों को अवशोषित करते हैं और आसपास की हवा को शुद्ध करने में योगदान देते हैं.

साथ ही, इन्हें घर के अंदर, शयनकक्ष, रसोई या अध्ययन मेज सहित विभिन्न स्थानों पर आसानी से रखा जा सकता है। तो आइए वायु-शुद्ध करने का गुण रखने वाले इनडोर पौधों की खोज शुरू करते हुए, आइए अध्ययन पर ध्यान दें।

हवा शुद्ध करने वाले 10 प्रमुख इनडोर प्लांट (पौधे)

  • एग्लोनेमा (AGLAONEMA)
  • सिंगोनियम (SYNGONIUM)
  • रबड़ का पौधा (RUBBER PLANT)
  • गोल्डन पोथोस (GOLDEN POTHOS)
  • स्पाइडर प्लांट (SPIDER PLANT)
  • पीस लिली (PEACE LILY)
  • एलोवेरा घृत कुमारी (ALOE VERA)
  • एरेका पाम (Areca Palm)
  • ZZ का पौधा (ZZ plant)
  • स्नेक प्लांट (Snake plant)

हवा को शुद्ध करने वाले 10 इनडोर पौधे

10. एग्लोनेमा (Aglaonema)

aglaonema

एग्लोनेमा, जिसे आमतौर पर लिपस्टिक या चाइनीज़ एवरग्रीन के नाम से जाना जाता है, हवा को शुद्ध करने वाले पौधे के लिए जाना जाता है जो न केवल हवा को साफ करता है बल्कि आपके घर में जादुई रंग भी लाता है।

  • यह विभिन्न किस्मों और रंगों में उपलब्ध है जैसे लाल, हरा, गुलाबी, हल्का सिल्वर हरा, आदि।

प्रकाश की आवश्यकता

  • घर के अंदर, इसे तेज़ या मध्यम धूप में रखें; हालाँकि यह घर के अंदर नहीं खिलेगा लेकिन फिर भी यह अच्छी तरह से पनपेगा।
  • सूर्य के प्रकाश के संपर्क में आने पर, इसमें आनंददायक सफेद फूल उगते हैं।
  • सुनिश्चित करें कि मिट्टी अच्छी जल निकासी वाली हो, जिससे पानी जमा न हो पाए।

AGLAONEMA

गमले का आकार

  • छोटी जगहों के लिए आदर्श, यह 4-8 इंच के गमले में बिल्कुल फिट बैठता है।
  • इसे स्टडी टेबल पर, फ्रिज के ऊपर, खिड़की के पास या सेंटर टेबल पर रखें।

AGLAONEMA

पानी डालने के टिप्स

  • अपने एग्लोनिमा पौधे को तब पानी दें जब मिट्टी का ऊपरी भाग सूख जाए।
  • जब पौधे को पानी की आवश्यकता होगी तो पत्तियां मुरझाने के लक्षण दिखाएंगी।
  • जब तक गमले के जल निकासी छेद से पानी निकलना शुरू न हो जाए, तब तक पूरी तरह से पानी देना सुनिश्चित करें, लेकिन अत्यधिक पानी भरने से बचने के लिए सावधान रहें।

यह कोमल पौधा शांति, जीवंतता, सुंदरता और प्रेम का प्रतीक है।

9. सिनगोनियम (Syngonium)

Syngonium

आजकल एक और लोकप्रिय और परेशानी मुक्त हवा को शुद्ध करने वाला पौधा चलन में है, वह है सिन्गोनियम।

रंग

  • हरे, सफेद, पीले, काले और बेबी गुलाबी जैसी विभिन्न किस्मों में उपलब्ध है।
  • इस लता को पानी या नियमित गमलों में कटिंग लगाकर आसानी से उगाया जा सकता है और यह गमले लटकाने के लिए भी उपयुक्त है।

SYNGONIUM

प्रकाश की आवश्यकता  

  • यह लचीला पौधा तेज, मध्यम या कम रोशनी की स्थिति में पनपता है।
  • कम रोशनी में, यह लंबा हो सकता है, लेकिन यह सहन करेगा और जीवित रहेगा।

SYNGONIUM

पानी डालने की टिप्स

  • जब भी जरूरत हो पानी दें।
  • अधिक पानी न डालें

सिंगोनियम बिना ज्यादा परवाह किए अपने दम पर प्रथम आने वाली सभी दौड़ जीतता है, यह अपने आप बढ़ेगा और उल्लेखनीय स्तर पर हवा को शुद्ध करेगा।

8. रबड़ का पौधा (Rubber plant)

rubber plant

रबर प्लांट वायु शुद्धिकरण में महत्वपूर्ण भूमिका निभाता है, अपने आसपास से जहरीली गैसों और रसायनों को प्रभावी ढंग से हटाता है।

रंग:

  • यह विभिन्न रंगों और किस्मों में उपलब्ध होता है जैसे हल्का हरा, गहरा हरा, ग्रे, गुलाबी और रंग-बिरंगा।
  • इसमें एक ही तना होता है जिसमें चौड़ी, अनोखी, चमकदार और चिकनी पत्तियाँ लगातार निकलती रहती हैं।

rubber plant golden

गमले का आकार:

  • इसके बड़े होने की विशेषता को देखते हुए, इसके लिए 8-10 इंच का गमला चुनने की सलाह दी जाती है।
  • सोफे, फ्रिज के बगल में या किसी भी कोने में रखने के लिए उपयुक्त होता है।

पानी डालने की टिप्स

  • मिट्टी के सूख जाने पर इसे पानी दें।

प्रकाश की आवश्यकता

  • हालाँकि यह आम तौर पर एक बाहरी पौधा है, यह मध्यम, अप्रत्यक्ष या उज्ज्वल प्रकाश के साथ इनडोर सेटिंग्स के लिए अच्छी तरह से अनुकूल होता है।
  • सर्दियों के दौरान, जब प्रदूषण और ओस का स्तर बढ़ता है, तो इस पौधे को घर के अंदर रखने की सलाह दी जाती है।

7. GOLDEN POTHOS गोल्डन पोथोस (मनी प्लांट)

pothos money plant

यह एक मनी प्लांट प्रकार है जो हल्के रंग का होता है, जो सुनहरे या हल्के हरे रंग को दर्शाता है। इसकी पत्तियाँ आकार में तुलनात्मक रूप से छोटी होती हैं लेकिन अन्य पौधों जैसे एरेका पाम या जेडजेड पौधे की तुलना में तेज़ गति से बढ़ती हैं।

  • मनी प्लांट (पोथोस) एक उत्कृष्ट वायु शुद्ध करने वाला पौधा है जिसे शयनकक्ष के अंदर भी रखा जा सकता है।

मनी प्लांट वायु शुद्ध करने वाले प्रमुख 10 इनडोर पौधों में भी शीर्ष स्थान हासिल करता है।

गमले का आकर:

  • इसे बहुत बड़े बर्तन में रखने की जरूरत नहीं है.
  • छोटे और मध्यम आकार के बर्तन इसके लिए पर्याप्त हैं, जब यह घना हो जाए तो इसे छांट लें लेकिन बर्तन को न बदलें।

pothos money plant

प्रकाश की आवश्यकता

  • तेज या मध्यम प्रकाश की स्थिति इसके लिए उपयुक्त है।

पानी देने की टिप्स

  • यह कम पानी में अच्छी तरह पनपेगा लेकिन अगर ज्यादा पानी देंगे तो पत्तियां पीली पड़ने लगेंगी और पौधा खराब हो जाएगा, इसलिए जब मिट्टी पूरी तरह सूख जाए तब पानी दें।

6. स्पाइडर प्लांट (Spider plant)

spider plant

अपने अनोखे मकड़ी जैसे फैलाव के कारण इस विशिष्ट पौधे का नाम “स्पाइडर” पड़ा। हालाँकि, इसका आपके घर में वास्तविक मकड़ियों को आमंत्रित करने से कोई संबंध नहीं है।

  • सर्वोत्तम इनडोर पौधों में शुमार, यह शयनकक्षों के लिए बिल्कुल उपयुक्त है, हवा को शुद्ध करने और ताज़ा वातावरण में योगदान देता है।

रंग:

  • मकड़ी के पौधे विभिन्न रंगों में उपलब्ध हैं, जिनमें पत्तियों पर सफेद या क्रीम धारियों वाली हरी और विभिन्न प्रकार की किस्में शामिल हैं

गमले का आकर:

  • एक छोटा से मध्यम आकार का बर्तन पर्याप्त है, बड़े बर्तन अनावश्यक हैं।
  • प्लेसमेंट में बहुमुखी, यह फ्रिज, डाइनिंग टेबल, ऑफिस डेस्क या सेंटर टेबल के शीर्ष को सजा सकता है।

प्रकाश की आश्यकता

  • तेज और मध्यम प्रकाश दोनों में पनपने के कारण, यह विभिन्न प्रकाश स्थितियों के लिए अच्छी तरह से अनुकूल हो जाता है।

पानी देने की टिप्स

  • स्पाइडर प्लांट को मध्यम पानी देना पसंद करते हैं।
  • दोबारा पानी देने से पहले मिट्टी के ऊपरी भाग को सूखने दें।
  • पत्तों पर नजर रखें। यदि वे गिरने लगते हैं, तो यह संकेत है कि पौधे को पानी की आवश्यकता है।

यह खूबसूरत पौधा अपने विस्तारित पंखों के साथ सकारात्मक ऊर्जा फैलाता है।

5. पीस लिली (Peace Lily)

peace-lilies

पीस लिली हवा को शुद्ध करने वाला एक एक प्रसिद्ध फूल वाला इनडोर पौधा है जो अपने परिवेश में विभिन्न जहरीली गैसों और हानिकारक रसायनों को अवशोषित करने में माहिर है।

प्रकाश की आवश्यकता

  • बाहर सीधी धूप में रखने पर यह खूबसूरती से खिलता है, लेकिन तेज या मध्यम रोशनी में रखने पर इसमें फूल आना बंद हो जाता है, हालांकि यह फिर भी पनपता है।

गमले का आकार:

  • छोटे तने और बड़ी पत्तियों वाला यह पौधा छोटे से मध्यम आकार के गमलों के लिए उपयुक्त है। हालाँकि, अगर इसे जमीन में लगाया जाए, तो यह बढ़ी हुई ऊंचाई के साथ एक बड़े पौधे के रूप में विकसित हो सकता है।

peace lily

पानी देने की टिप्स

  • पानी तभी दें जब मिट्टी पूरी तरह सूखी हो।
  • जाँच करने के लिए, मिट्टी में एक छड़ी डालें; यदि यह सूखा निकलता है, तो पानी देने का समय आ गया है।
  • अत्यधिक पानी और कम पानी दोनों से बचना महत्वपूर्ण है, क्योंकि पानी की कमी के कारण पौधा कमजोर हो सकता है और संकट के लक्षण दिखा सकता है, जैसे कि पत्तियां का झुकना।
  • पीस लिली थोड़ी मांग वाली हो सकती है, लेकिन उचित ध्यान देने पर, यह किसी भी इनडोर स्थान में सुंदरता का स्पर्श जोड़ देती है।

4. एलोवेरा (Aloe Vera)

Aloe-Vera-Plants

एलोवेरा का परिचय, एक अत्यधिक प्रशंसित रसीला और जेरोफाइटिक पौधा जो अपनी वायु-शुद्ध करने की क्षमताओं और रात के दौरान ऑक्सीजन छोड़ने की अनूठी विशेषता के लिए प्रसिद्ध है।

  • यह कठोर आउटडोर पौधा शयनकक्ष सहित विभिन्न वातावरणों के लिए सहजता से अनुकूल हो जाता है, जिससे यह एक बहुमुखी विकल्प बन जाता है।
  • बढ़ते प्रदूषण की अवधि के दौरान, वायु शुद्धिकरण में योगदान देने के लिए इसे घर के अंदर भी लाया जा सकता है।

औषधीय लाभ

  • एलोवेरा न सिर्फ चेहरे को खूबसूरत बनाता है, बल्कि यह एक औषधीय पावरहाउस भी है। इसकी पत्तियों से प्राप्त जेल को जले हुए स्थान पर लगाने से तुरंत राहत मिलती है।

Slice Aloe Vera very useful herbal medicine for skin and hair.

प्रकाश की आवश्यकता

  • यह लचीला पौधा उज्ज्वल, सीधी, मध्यम या कम रोशनी में पनपता है, केवल अंधेरे क्षेत्रों से दूर रहता है।

पानी देने की टिप्स

  • एलोवेरा को बहुत कम पानी की आवश्यकता होती है; अगर इसे घर के अंदर रखा जाए तो महीने में एक या दो बार पानी देना पर्याप्त होगा।

अपने टिकाऊपन और लागत प्रभावशीलता के लिए जाना जाने वाला एलोवेरा एक कम रखरखाव वाला पौधा है, जिसके कई फायदे हैं, जो इसे किसी भी स्थान के लिए एक मूल्यवान बनाता है।

3. एरेका पाम (Areca Palm)

areca palm

  • एरेका पाम एक व्यापक रूप से प्रशंसित और आश्चर्यजनक इनडोर पौधा है जो हवा को शुद्ध करने वाले अपने गुणों के लिए जाना जाता है।
  • इसका सौंदर्य आकर्षण इसे किसी भी घर के लिए एक अनूठा जोड़ बनाता है, इसके प्रभावशाली आकार के साथ सजावट को बढ़ाता है जो आसानी से किसी भी कोने में फिट बैठता है।

एरेका पाम हवा को शुद्ध करने वाले प्रमुख 10 इनडोर पौधों में भी शीर्ष स्थान का दावा करता है।

प्रकाश की आवश्यकता

  • इष्टतम विकास सुनिश्चित करने के लिए, एरेका पाम को सीधी धूप से बचाकर, तेज रोशनी में रखें।

पानी देने की टिप्स

  • पानी देना आसान है – जब ऊपरी परत सूख जाए तो बस मिट्टी को गीला कर दें।

गमले का आकार

  • उसके आयामों को समायोजित करने के लिए 10-12 इंच के पौधे का चयन करें, हालाँकि पढ़ने वाले मेज के लिए छोटे विकल्प भी उपलब्ध होते हैं।
  • यह पौधा वेंटिलेशन चाहता है, इसलिए ताजी हवा के निरंतर प्रवाह को आने देने के लिए रणनीतिक रूप से इसे खिड़कियों या दरवाजों पर रखें।

हालाँकि एरेका पाम सीधा-सादा लग सकता है लेकिन इसे पनपने के लिए कुछ विशेष देखभाल और ध्यान देने की आवश्यकता होती है। अपने घर में इस खूबसूरत हरे साथी की देखभाल करने के अवसर का लाभ उठाएँ।

2. ZZ (ज़मीओकुलकस ज़मीफोलिया) प्लांट

zz plant

ZZ प्लांट एक रमणीय और अपनाने वाला हरा साथी जो न केवल ऑक्सीजन की आपूर्ति को बढ़ाता है बल्कि विषाक्त तत्वों को हटाकर हवा को भी साफ करता है। अपनी चमकीली और चमकदार पत्तियों के साथ, यह पौधा सहजता से किसी भी स्थान पर हरियाली का स्पर्श लाता है।

  • ZZ प्लांट दो किस्मों में आता है: हरा और काला, जो विभिन्न प्राथमिकताओं के अनुरूप विकल्प प्रदान करता है।

black zz plant

प्रकाश की आवश्यकता

  • यह उज्ज्वल या मध्यम प्रकाश में पनपता है, जो इसके समग्र लचीलेपन में योगदान देता है।

पानी डालने के टिप्स

  • जब पानी देने की बात आती है, तो कम अधिक होता है—इसे अच्छी तरह से भिगो दें, फिर छोड़ दें।
  • अत्यधिक पानी देने से इसके बल्ब सड़ सकते हैं जो आलू जैसी संरचना वाले होते हैं।
  • यदि यह सड़ना शुरू हो जाए, तो इसके परिणामस्वरूप पूरा पौधा खराब हो सकता है।

गमले का आकार:

  • यह कठोर पौधा अनावश्यक पॉट शिफ्टिंग को पसंद नहीं करता है।
  • एक मानक दिशानिर्देश ऐसे गमले का उपयोग करना है जिसका व्यास मौजूदा गमले से 1-2 इंच बड़ा हो।

ZZ प्लांट लचीलेपन का प्रमाण है, पानी देने की कला में निपुण बनिए और यह सभी परिस्थितियों में फलेगा-फूलेगा, आपके परिवेश में हरित जीवंतता का एक निरंतर स्रोत बन जाएगा।

1. स्नेक प्लांट (Snake Plant)

snake plant

संसेविया या मदर-इन-लॉ प्लांट के रूप में भी जाना जाने वाला स्नेक प्लांट अपनी विशिष्ट संरचना के कारण यह नाम अर्जित करता है।

  • हवा शुद्ध करने वाले 10 प्रमुख इनडोर पौधों में स्नेक प्लांट शीर्ष स्थान पर है।

रंग:

  • साँप के पौधे आमतौर पर हरे रंग के विभिन्न रंगों में उपलब्ध होते हैं।
  • जबकि पारंपरिक किस्म में पीले किनारों के साथ गहरे हरे रंग की पत्तियां प्रदर्शित होती हैं, वहीं विभिन्न पैटर्न और रंगों वाली किस्में भी होती हैं, जैसे हल्का हरा या पत्ती के किनारों में भिन्नता।

snake plant

गमले का आकार:

  • स्नेक प्लांट छोटे गमलों में पनपते हैं, क्योंकि उनकी जड़ें छोटे गमलों में अच्छी तरह से फैलती हैं, जिससे बार-बार पप उत्पन्न होते हैं और घने रूप में दिखाई देते हैं।
  • जब स्थानांतरण की आवश्यकता हो, तो थोड़ा बड़ा गमला ही चुनें।

प्रकाश की आवश्यकता

  • ये लचीले पौधे तेज, मध्यम या कम रोशनी में पनप सकते हैं, लेकिन सर्वोत्तम परिणामों के लिए, उन्हें तेज धूप के क्षेत्र में रखें।

snake plant

पानी देने के टिप्स

  • पानी देने में धैर्य रखें-जब आपको लगे कि समय आ गया है, तो पानी देने से पहले 2 दिन अतिरिक्त प्रतीक्षा करें।
  • अत्यधिक पानी देने से पौधे सड़ सकते हैं।
  • रसीले पौधों के रूप में, पानी देने का अंतराल स्थापित करें, आदर्श रूप से हर 10 दिनों में एक बार।

स्नेक प्लांट एक मजबूत उत्तरजीवी के रूप में माना जाता है, जो किसी भी स्थिति में सकारात्मक ऊर्जा प्रसारित करता है, जिससे यह आपके स्थान के लिए एक लचीला और आकर्षक संयोजन बन जाता है।

हवा को शुद्ध करने वाले ये प्रमुख 10 इनडोर पौधे वायु शुद्ध करने में उत्कृष्ट हैं और इन्हें आपके पूरे घर में रखा जा सकता है, जिससे प्रदूषण मुक्त वातावरण बनता है। उन्हें रोपें, उनका पालन-पोषण करें और बदले में वे आपकी देखभाल करेंगे।

शुभ बागवानी!

tulsi plant

FAQs on How to Water Tulsi (Holy Basil) Plant

Growing a healthy Tulsi plant involves mastering the art of watering. In this post, we will cover some frequently asked questions (FAQ) about watering Tulsi (Holy basil) plants along with their answers.

Whether you’re a seasoned gardener or a beginner, these practical tips will help you nurture a vibrant Tulsi plant at home.

FAQs on Watering Your Tulsi (Basil) Plant

Ques 1: How often should I water my Tulsi plant?

Ans: Tulsi plants prefer slightly moist soil.

  • Water the plant when the top inch of the soil feels dry.
  • Depending on the climate and season, this could range from once every 2-3 days.

Ques 2: Is it better to water Tulsi in the morning or evening?

Ans: It is generally better to water Tulsi plants in the morning but you can also give water in the evening as well. 

  • This allows the plant to absorb the water throughout the day and reduces the risk of fungal diseases that can develop in cool, damp conditions at night.

Ques 3: How much water does a Tulsi plant need?

Ans: Water the tulsi plant thoroughly until water seeps out from the bottom of the pot.

  • Ensure good drainage to prevent waterlogged soil, which can lead to root rot.

Ques 4: Can I use a spray bottle to water my tulsi plant?

Ans: While a spray bottle can be used for misting, it is not the best for watering.

watering can

  • Use a watering can or directly pour water onto the soil to ensure the roots receive an adequate amount of moisture.

Ques 5: What should I do if the leaves are turning yellow?

Ans: Yellowing leaves may indicate overwatering or poor drainage.

  • Allow the soil to dry out a bit between waterings, and ensure the pot has drainage holes.
  • Yellowing could also result from nutrient deficiencies; consider using a balanced fertilizer.

Ques 6: How can I check if my Tulsi plant needs water?

Ans: Insert your finger into the soil up to the first knuckle.

  • If it feels dry at that depth, it is time to water. If it still feels moist, wait a day or two before checking again.

Ques 7: Should I water my tulsi plant during winter?

Ans: During the winter, Tulsi plants are generally dormant and require less water.

  • Water sparingly, allowing the soil to partially dry between waterings. Be cautious not to overwater in colder months.

Remember, the specific watering needs may vary based on factors like the type of soil, climate, and the size of the pot. Observing your plant and adjusting watering accordingly is key to its well-being.

Also read:

Grow Tulsi (Holy Basil) from Seeds

Happy reading!

top 6 less water requirements plants (2)

06 Best Plants That Need Less Water

Welcome to the world of low-maintenance greenery! In this article, we will explore a great range of plants that do not require a lot of water. Whether you’re a seasoned plant lover or just starting your indoor garden, these plants are the perfect companion.

From the sturdy snake plant to the stylish jade plant, let’s discover the top 06 plants that thrive on less water, making them ideal for those who want lush, vibrant greenery without the constant watering routine.

Here is the list of 06 best plants that need less water

1. Snake Plant

2. ZZ Plant

3. Echeveria

4. Aloe Vera

5. Cactus

6. Jade Plant

06 Best Plants That Need Less Water

1. Snake Plant

snake plant

Snake plant is one of the best and hardy indoor plant which requires less water. The Snake plant, being a succulent, has unique needs compared to other plants.

watering snake plant

  • With moisture is already stored in its leaves, frequent watering is not necessary.
  • Watering every 15 to 20 days, when the soil appears completely dry, is sufficient.
  • The primary factors leading to the plant’s failure are either overwatering or underwatering.

Snake Plants is a great option for those people who may forget to water their plants regularly.

Special feature

  • The Snake plant can grow well even in low light conditions and is also known for its air-purifying properties.

2. ZZ Plant

zz plant

The ZZ Plant is a popular indoor plant known for its resilience and low-maintenance care requirements.

ZZ plant green

The ZZ plant has thick rhizomes that store water, which helps the plant stay healthy even if you forget to water it for a week. 

  • When it comes to watering, it is important to let the soil dry out completely.
  • As overwatering can lead to root rot.
  • Generally, a thorough watering every 2-3 weeks is sufficient.
  • Reduce watering frequency during the winter months or if the plant is placed in low-light conditions.

As a result, the ZZ Plant is an excellent choice for busy working professionals or those who travel most of the time. 

Special feature

  • The ZZ plant grows well in low to bright indirect light and is also known for its air-purifying qualities which can be kept inside the bedroom also.

3. Echeveria

Echeveria

Echeveria is indeed a low-maintenance plant, known for its striking rosette-shaped leaves and resilience.

Echeveria

Echeverias are succulents, and like many succulent plants, they have low water requirements. Give water in the gap of  15 to 20 days.

  • Before watering to this plant, allow the soil to dry out completely to prevent overwatering, which can lead to root rot.
  • Water sparingly, and ensure that the pot has good drainage to prevent waterlogged soil.

Key to successful Echeveria care is a well-draining soil mix, proper watering practices, and providing adequate light.

Special feature

  • Echeverias thrive in bright, indirect light. Like all plants, they can help improve air quality by absorbing carbon dioxide and releasing oxygen.

4. Aloe Vera

Aloe-Vera-Plants

Aloe Vera is a versatile and easy-to-care-for succulent with not only cosmetic and medicinal uses but also some positive effects on indoor air quality.

  • Aloe Vera’s water requirements are minimal; if kept indoors, watering once or twice a month will suffice.
  • Overwatering can lead to root rot, so it’s crucial to let the soil dry before adding more water.

Slice Aloe Vera very useful herbal medicine for skin and hair.

Special feature

  • Aloe Vera, not just a pretty face, is also a medicinal powerhouse. The gel derived from its leaves provides instant relief when applied to burnt areas.

5. Cactus

cactus

Cacti are fascinating and resilient plants with unique adaptations that make them well-suited for arid environments.

cactus

Cacti are adapted to store water in their thick stems, allowing them to survive extended periods (1 month) without rainfall. Cacti prefer infrequent but deep watering.

  • Allow the soil to dry out completely between waterings.
  • Overwatering is a common issue, so it’s crucial to err on the side of underwatering.
  • Avoid overwatering, especially during dormant periods, to prevent root rot.
  • Rotate indoor cacti periodically to ensure even exposure to sunlight.

Special feature

Unlike most plants, cacti carry out photosynthesis at night to minimize water loss during the day, a feature known as Crassulacean Acid Metabolism (CAM).

  • While many cacti are outdoor plants, some smaller varieties can adapt to indoor conditions with bright, indirect light.

6. Jade Plant

Jade plant

Jade plant popularly known as “lucky plant” and is cherished for its attractive, fleshy green leaves and its reputation for bringing good fortune.

watering a jade plant

Jade plants, being succulents, have lower water requirements. Give water in the gap of 7 to 10 days.

  • If you touch the soil and it feels damp, then the plant does not require additional watering.

  • Conversely, if you observe the leaves wilting, it signals that your plant is not getting enough water.
  • In such instances, water the plant when the topsoil has completely dried out.
  • During winter seasons, Jade plants require less water than usual, so always check the soil before deciding to water.

Special feature

  • Jade Plants thrive in bright, indirect light. While they can tolerate some direct sunlight also. 

———————————-

Also read:

Best Indoor Air Purifier Plants

Embrace the beauty of low-maintenance plants that thrive with minimal water, allowing you to indulge in the joy of gardening effortlessly while balancing your work. These resilient plants not only bring greenery into your space but also add a touch of nature’s tranquility to your busy life.

Happy reading!

world soil day

World Soil Day 2023: 5 December 2023

World Soil Day (WSD) is held annually on 5 December as a means to focus attention on the importance of healthy soil and advocating for the sustainable management of soil resources.

Theme of the year

“Soil and water, a source of life” is the theme of the World Soil Day 2023. 

world soil day

Our planet’s survival depends on the precious link between soil and water.

Did you know?

“Over 95 percent of our food originates from these two fundamental resources.”

Soil water, vital for nutrient absorption by plants, binds our ecosystems together. This symbiotic relationship is the foundation of our agricultural systems.

  • However, in the face of climate change and human activity, our soils are being degraded, putting excessive pressure on our water resources.
  • Erosion disrupts the natural balance, reducing water infiltration and availability for all forms of life.

Sustainable soil management practices, such as

  • minimum tillage,
  • crop rotation,
  • organic matter addition, and
  • cover cropping,
  • improve soil health, reduce erosion and pollution, and enhance water infiltration and storage.

These practices also preserve soil biodiversity, improve fertility, and contribute to carbon sequestration, playing a crucial role in the fight against climate change.

The World Soil Day 2023 (WSD) and its campaign aim to raise awareness on the importance and relationship between soil and water in achieving sustainable and resilient agri-food systems.

soil mixture

“WSD is a unique global platform that not only celebrates soils but also empowers and engages citizens around the world to improve soil health.”

World Soil Day 2023: Key Messages:

📌 Soil and water provide the foundation for food production, ecosystems, and human well-being. Recognizing their invaluable roles, we can take proactive measures to safeguard these resources for future generations;

📌 Soil and water are the medium in which plants grow and obtain essential nutrients;

📌 Rainfed agriculture systems account for 80 percent of croplands, contributing to 60 percent of the global food production. These systems rely heavily on effective soil moisture management practices.

📌Irrigated agriculture systems withdraw 70% of the world’s freshwater and account for 20 percent of croplands.

📌 The health of the soil and the quality and availability of water are interconnected;

📌 Healthy soils, enriched with organic matter, play a crucial role in regulating water retention and availability;

📌 Improved soil and water management improves the land’s capacity to withstand extreme climate events such as droughts, floods and sand/dust storms;

📌 Healthy soils act as a carbon sink, by sequestering carbon from the atmosphere, thus contributing to both climate change adaptation and mitigation efforts.

Source: un.org

Happy Gardening!