Category Archives: Outdoor plants

Find tips here for caring for outdoor plants, including guidance on watering, soil mixture, fertilizers, and more.

Harsringar flowering

My Harsringar (Parijat) Started Flowering on 1st October: Expert Tips for Healthy Blooms

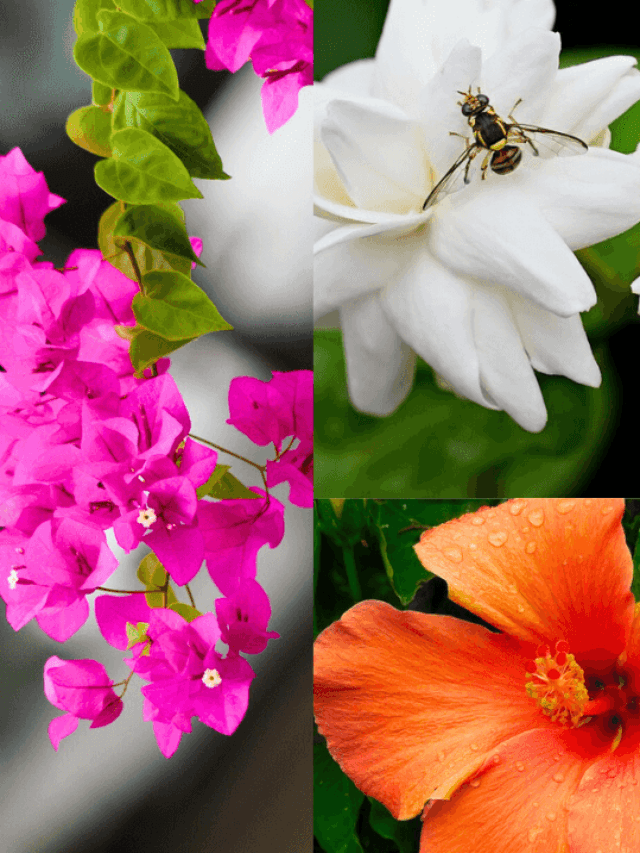
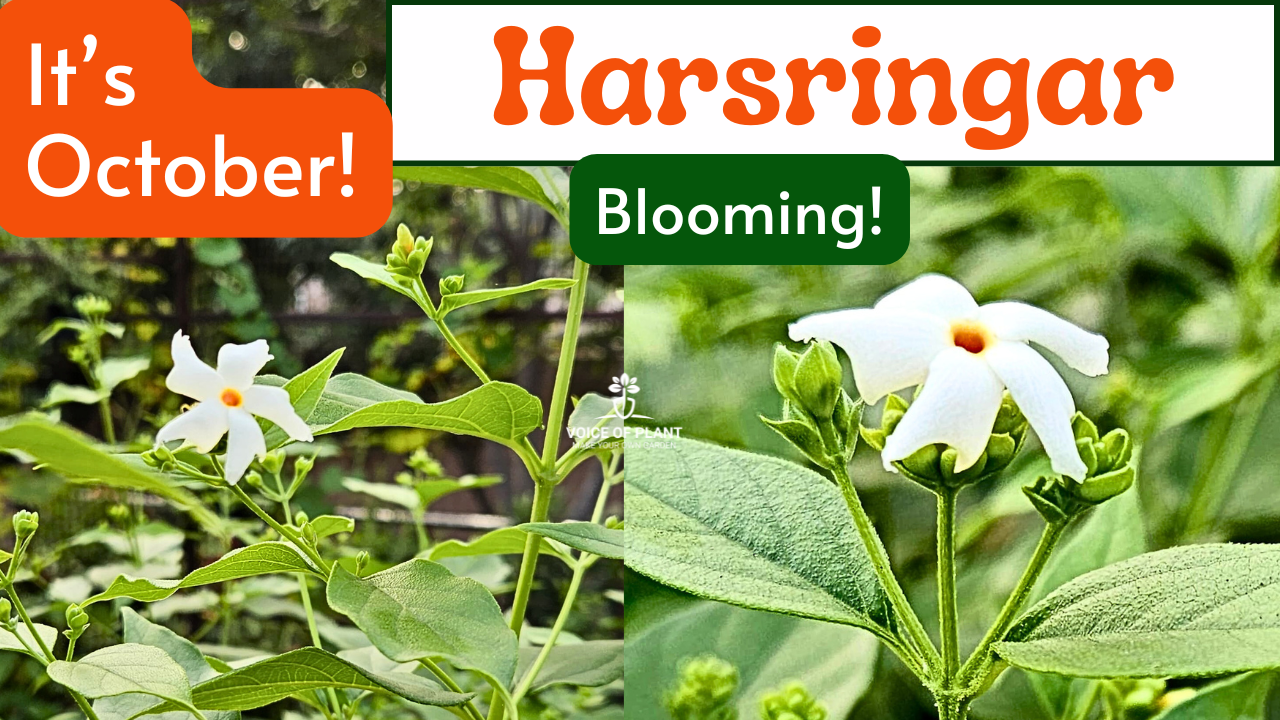
Harsringar (Parijat) Flowering Tips


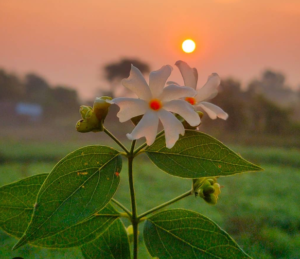
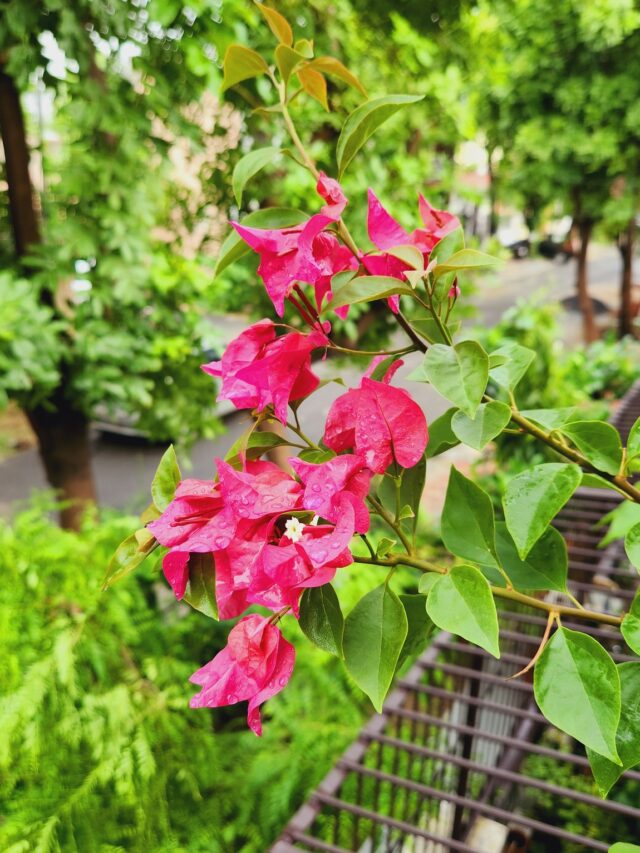
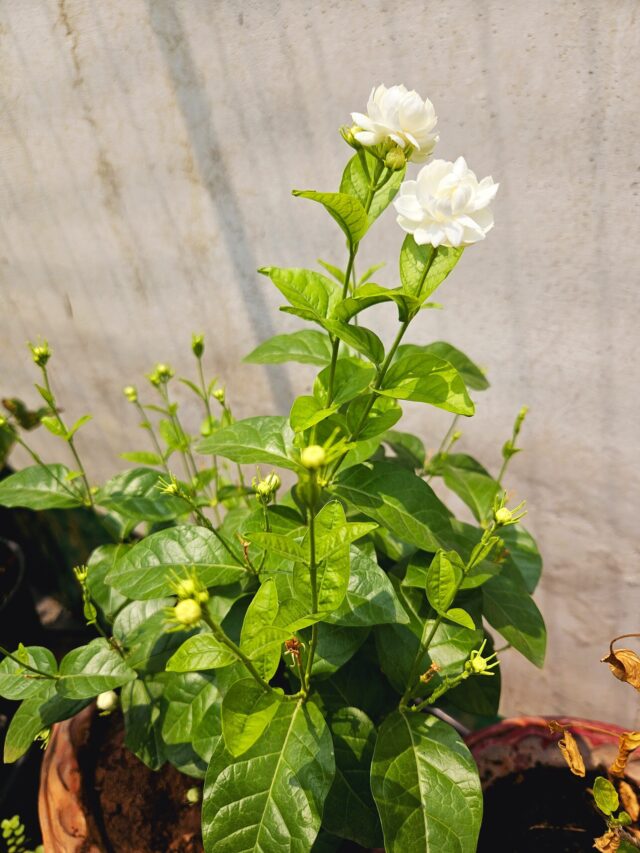
I’m excited to share that my beloved Harsringar, also known as Parijat or Night-blooming Jasmine, has finally started flowering today, on 1st October.

This plant is special to me, not just for its beauty but because it has a fascinating blooming cycle. For nine months of the year, the Harsringar waits patiently, and as soon as October arrives, it bursts into bloom almost as if on cue. It’s no wonder we sometimes call it the “October Plant.”

Harsringar flowering

The flowers of Harsringar are also deeply rooted in tradition and culture. These flowers are often used in worship during Durga Puja and Navratri celebrations, making them sacred to many.

But what do you do if your plant isn’t flowering? Don’t worry! Below, I’m sharing Harsringar (Parijat) flowering tips that can help encourage your Parijat to bloom.

Expert Tips to Make Your Parijat Bloom
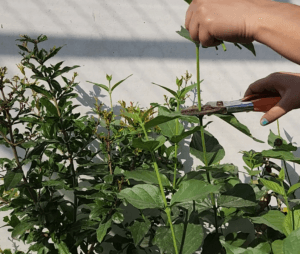
 

1. Do Light Pruning


Pruning harsringar

If your Harsringar is not flowering, light pruning is one of the first steps you should take.

Pruning encourages the plant to focus its energy on new growth and flower production.

  • Trim away dead or old branches to stimulate fresh blooms. Just be careful not to overdo it—light, precise pruning works best!

2. Use Banana Peel Liquid Fertilizer


The right nutrients can make a world of difference for your Harsringar. One effective, natural fertilizer is banana peel liquid fertilizer.

Banana peels are packed with potassium, which helps with flower production.

Note:

  • To make it, simply soak banana peels in water for a few days and use the liquid to feed your plant.
  • This can boost flowering and improve the overall health of the plant.

Click here to read: How to make & use Banana Peel Fertilizer on Plants


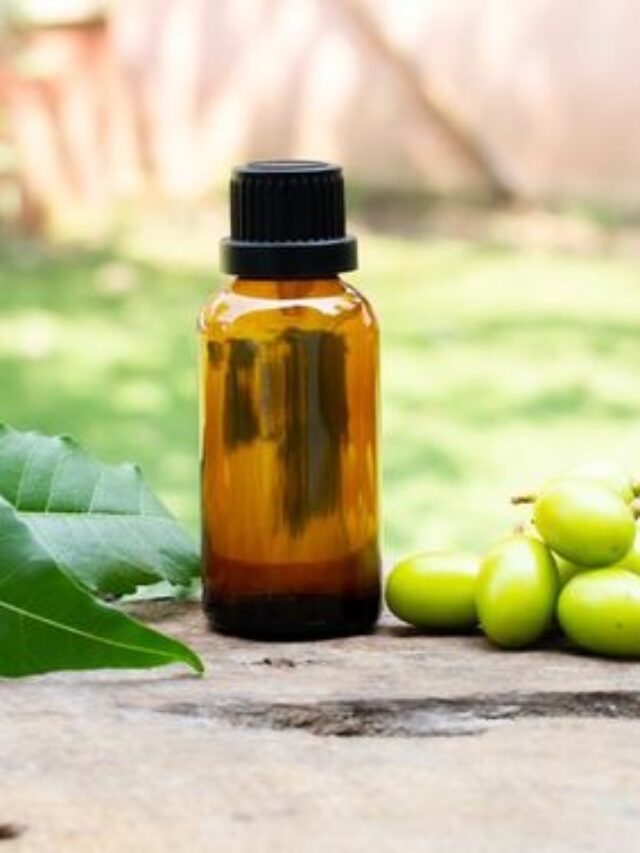
3. Spray Seaweed Liquid Fertilizer


Seaweed liquid fertilizer is another great option to help your Harsringar bloom.

  • Rich in trace minerals and essential plant growth hormones, it promotes healthier growth and helps plants recover from stress.
  • A light spray every few weeks can do wonders for your Parijat, especially if it’s struggling to produce flowers.

Click here to read: Seaweed Fertilizer Benefits & Uses


4. Water Regularly


After pruning and fertilizing, it’s crucial to water your plant regularly.

While Harsringar doesn’t need to be waterlogged, it does appreciate consistent moisture.

  • Aim for even watering without letting the soil dry out completely.
  • Too much or too little water can both prevent flowering, so keep the balance right.

Click here to read: Harsringar Plant Complete Care Tips


5. Ensure Proper Sunlight Exposure


One of the most important factors in encouraging blooms on your Harsringar is adequate sunlight.

This plant thrive in sunlight and need about 3 to 4 hours of direct light each day.

  • If your plant is not flowering, it could be because it’s not getting enough light.
  • Consider moving it to a sunnier spot to ensure it’s receiving enough rays to encourage flowering.

Enrich the Soil with Organic Compost


A plant is only as healthy as the soil it’s growing in. Harsringar needs soil that is rich in organic matter.

  • Adding compost to your plant’s soil ensures it has all the nutrients it needs to produce flowers.
  • Organic compost improves soil texture, provides essential nutrients, and enhances moisture retention, all of which are beneficial for flowering.

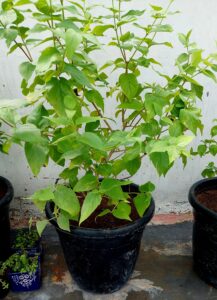
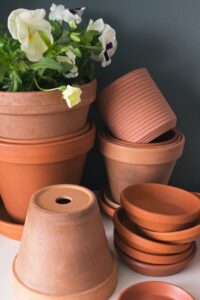
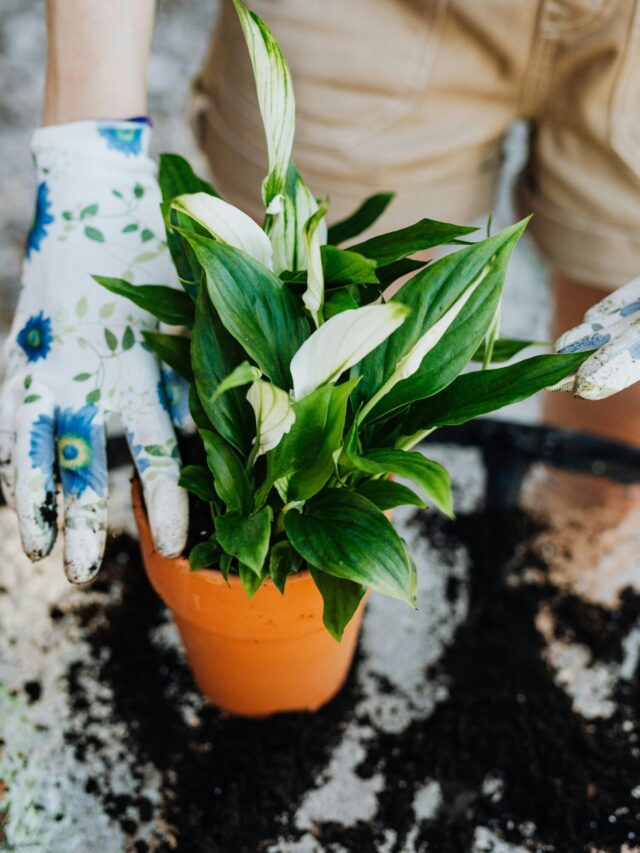
Check the Pot Size and Drainage


Sometimes, plants can stop flowering if they’re root-bound or if there’s poor drainage in their pot.

If your Harsringar has been in the same pot for a long time, consider repotting it into a larger container with good drainage holes.

  • This will give the roots more room to grow and prevent water from stagnating, which can cause root rot.

Conclusion

Seeing my Harsringar burst into bloom every October is a joyful reminder of the beauty of nature and the reward of patient gardening. If your plant isn’t flowering, don’t despair—just follow these expert tips! With a little care and attention, your Parijat will soon be blooming and filling your space with its delightful fragrance.


Follow our Social media channel:

2. Voice of Plant Facebook Page

3. Instagram Voice of Plant Channel

Happy gardening!

Night Blooming Jasmine (Harshringar) Plant Complete Care

Night Blooming Jasmine (Harshringar) Plant Complete Care


Harshringar, known by various names such as Parijata, Night-flowering Jasmine, Shiuli, or Shefali, is a tree that produces appealing flowers in orange and white colors. It can be grown in medium-sized pots to yield beautiful and aromatic blooms.

Night Blooming Jasmine (Harshringar) Plant complete care

Harshringar is considered a holy plant with numerous benefits. People worship this plant and offer it to gods. Additionally, it possesses various medicinal and health benefits. The leaves of this plant have the potential to cure fever, sciatica, and knee pain, and different medicines are processed from these leaves. The flowers can be used to add natural food color to various dishes, and dried flowers can be used as a substitute for saffron.

This perennial plant is very hardy and easy to care for. Once established, it can thrive for up to 100 years. This write-up will detail all aspects of the Night Jasmine (Harshringar) plant’s complete care to foster a better understanding for everyone interested in cultivating it.

Best Season for Night Blooming Jasmine (Harshringar) Plant 


night jasmine

The Night Jasmine (Harshringar) plant has distinct phases throughout the year:

1. Growing Season: Harshringar thrives as a typical summer plant, exhibiting vigorous growth for 8 months, from February to September. During this period, new branches and leaves emerge at a remarkable pace.

2. Blooming Season: The plant produces flowers during the autumn season, specifically from October to December.

3. Relaxing Period: Winter serves as the dormancy period for this plant. Particularly in North India, from the end of December until January, the plant undergoes a period of stress.

To maintain its health and encourage a continuous cycle of growth, blooming, and dormancy, it is advisable to perform pruning in February.

Propagation of Night Blooming Jasmine (Harshringar) Plant


1. Propagation from Cuttings:

    • Night Jasmine can be easily propagated from cuttings.
    • The optimal time for this method is in February.

2. Propagation from Seeds:

    • Growing the plant from seeds is another viable option.
    • February is considered the best time for seed germination.

3. Nursery Purchase:

    • Alternatively, Night Jasmine plants are available for purchase at nurseries.
    • The ideal time to acquire them from nurseries is from the end of March to April.

How to Identify Night Blooming Jasmine (Parijat) if buying from nurseries?


night jasmine leaves


Since the plant might not have flowers initially, focus on the leaves for identification:

Leaf Characteristics:

    • Leaves are slightly pointed with a rough texture, discernible by rubbing them with your hand.
    • The leaves have a matte finish on the outer surface, not shiny in appearance.
    • When touched, the leaves feel dry, exhibiting a slight dryness when folded with your hand.

Pot size for Night Blooming Jasmine (Parijat) plant


night jasmine in old pot

1. Preferred Pot Type: Large-sized clay or plastic pots are generally recommended.

2. Available Sizes: Opt for pots of various sizes, such as 12 inches, 16 inches, 18 inches, or 21 inches.

night jasmine in new pot

3. Transplanting: Shift the plant to a new, larger pot when it becomes sizable or when roots become bound.

Best Soil Mixture for Night Blooming Jasmine plant


Desired Soil Characteristics: The soil should be soft and friable. Avoid clayey and hard soil as these conditions are unfavorable for plant survival.

  • Soil Preparation:
    1. Take local soil and clean it thoroughly.
    2. Mix sand in half the quantity of soil.
    3. Add compost (preferably Cow dung compost) in half the quantity of sand.
    4. Ensure a thorough and even mixture of all components.

Important Note:

  • Hard or clayey soil, an inappropriate pot (it is recommended to use a clay pot for at least the first season), and over-watering can negatively impact the plant’s growth.
  • After transplanting the plant, follow additional measures to encourage bushier growth until it begins flowering.

Sunlight Requirement for Harshringar plant

Once the plant has settled after shifting, place it in an area with maximum sunlight.

  • Ensure a minimum of 4 hours of sunlight daily.

Pruning of Night Jasmine (Harshringar) plant


pruning night jasmine

To encourage new growth, prune the plant by cutting the tips of all branches just above the nodes.

  • Approximately 25 days later, new branches will emerge from the points where tips were removed.

Watering tips to Night Blooming Jasmine plant


Unlike many plants, Harshringar does not thrive in consistently moist soil. Follow these guidelines:

1. Initially, water the plant thoroughly in intervals until water drains from the bottom hole.

2. Subsequently, check the soil’s moisture level. If dry from the inside, water again.

3. Avoid watering if the soil is still wet. Harshringar is more prone to issues from overwatering than underwatering.

How to give Fertilizers to Night Blooning Jasmine plant


February to September:

  • Use Cow Dung Liquid Fertilizer once a month at a fixed date.
  • Alternatively, vermicompost tea can also be used during this period.

October to January:

  • Use liquid fertilizer made from mustard cake for these four months.

Additional Micronutrient Tonic:

  • During this period, provide a liquid tonic containing micronutrients such as Onion peel, Epsom salt, or Banana peel every 15 days.

Flowering Period:

  • Autumn is the flowering season for Night Jasmine. To support abundant blooming, provide appropriate fertilizers.

Unique Flowering Routine:

  • Night Jasmine follows a distinctive flowering routine. Flowers bloom during autumn nights and naturally fall the next morning. The blooming period lasts for around 1.5 months, followed by the dormancy period in winter.

=============================


Ensure the health of your Night Jasmine plant by following these fertilizer guidelines and enjoy a bountiful harvest of its beautiful flowers.

Also, read:

Night Jasmine Plant: Problems & Solutions

Follow our Social media channel:

1. Voice of Plant – YouTube Channel

2. Voice of Plant Facebook Page

3. Instagram Voice of Plant Channel

Happy Gardening!

How to Care Rose Plant? Check 11 Best Tips

How to care Rose Plant


Roses are attention-seeker and cautious plants. They love to be loved and pampered throughout the year. Being delicate flowers it is essential to understand their behavior and requirements before planting them at home.

So, before planting, let’s first understand how to care rose plant after getting them from the nursery. What are the necessities and preferences of the rose plant?

How to care Rose Plant

All the important points are detailed here to maintain the plant’s health because it will flower automatically if it is healthy.


Tips to care Rose plant


1. Do not remove new buds & flowers of the Rose plant


  • After fetching from the nursery, do not remove any buds or flowers from the plant.
  • Once the flowers start fading, remove them by cutting from the top of the node.
How to care Rose plant
rose flower and buds
  • At the flowering stage, plants shed all their energy into the flowers, and the rest of the plant’s growth gets hampered.
  • So, if the flowers are mature enough to be plucked, remove them, and the plant will use its energy to bloom more new flowers.
  • This is also called a process of pruning. It promotes the growth of the plant, and new branches and flowers will originate from the point where the old flowers were removed.

2. Remove all the unwanted weeds of the Rose plant


  • Whenever unwanted weeds appear, remove them immediately to prevent them from growing bigger.
weeds in pot

Why should we remove weeds from the rose plant?

  • Weeds take up all the energy and nutrients of the main plant which is required for growth.
  • They spread so fast, that there would be hardly any space left for tilling of the soil.  Also, they block air and sunlight from reaching the soil.
  • Moreover, it spreads downwards and absorbs a significant amount of moisture from the water. Additionally, it invites fungus, ants, and pests.

Important note:

  • The soil of the rose plant should be kept clean and free from fungus or pests.

3. Pruning and deadheading of the Rose plant


deadheading of roses
  • If the pruning is not done correctly and at the right time then the rose plant will become dense and it will not bloom.
  • Hence, pruning is a mandatory in gardening.

4. Feeding Fertilizers to the Rose plant


Fertilizers the rose plant
  • After pruning, hoe the soil and provide it with high NPK fertilizer. Any strong fertilizer, like cow dung compost, vermicompost, or kitchen waste compost is recommended here.
  • Mustard cake fertilizer can also be one good option.

5. Rose plant follows a specific pattern to grow


pink rose
  • Rose plant follows a specific pattern of growth and dormancy.
  • It follows a structured growth cycle that includes growth, pruning, fertilization, and harvesting.
  • After the flowers are harvested, rose plants enter a dormant phase approximately for 20 to 25 days before blooming again.

6. Give liquid tonic to the Rose plant


    • It is very important to give liquid tonic to the rose plant when it is about to bloom and after the formation of buds.

Suggested liquid tonics are –

  • Onion peel fertilizer
  • Banana peel fertilizer
  • Epsom salt
  • Vermicompost tea
  • Seaweed fertilizer
  • Mustard cake fertilizer

Important note:

  • Liquid tonics enhance the size and health of the flowers and also accelerate the growth of the rose plant. 

Read article:

Best Fertilizers for Rose plant

7. Best Season for the Rose plant


  • Rose plants are typically known as autumn-season plants and can be obtained from the nursery from October to March.

FACT

  • Native roses are only red or white in color and have fragrance while hybrid roses are available in different colors and varieties but generally do not have any fragrance.

8. Pot Specifications for the Rose plant


type of pots

  • Earthen pots are the most suitable pots for rose plants. Avoid using cement, ceramic, or plastic pots.
  • Choose those pots that are 10 to 12 inches.
  • Roses also have thorns, so if a small pot is taken, the thorns can harm the gardener’s hands during transplanting into a larger pot.
  • In small pots, the thorns take up a lot of space, making it challenging to transfer the plant to a new pot with the thorns intact.

9. Soil Mixture for the Rose plant


  • Creating the right soil mixture for rose plants is essential for their health and growth. Rose plant prefer well-drained soil that is rich in organic matter.

For the perfect soil mixture follow the given steps:

  • Soil – Take local area soil and clean it to remove all the debris, glass, and plastic pieces.
  • Vermicompost – It should be half the quantity of the soil.
  • Sand – Rose grows best in sandy soil. So, use an equal amount of sand as vermicompost.
  • Coco peat – To balance the moisture level of the soil add cocopeat 1/4th of the sand.
  • Neem Cake powder – To prevent insects, add a little bit of neem cake powder.
  • Bone meal: You can also consider adding a bone meal if you wish.

Read article on:

How to prepare soil mix for rose plants


10. Watering the Rose plant


  • When the soil around the roots dries up, the leaves turn yellow and begin to dry out.
  • If the soil around the roots is too wet, black spots start to appear on the leaves. These black spots can be seen all over the plant.
  • Monitor the soil very carefully and water when it becomes slightly moist, as it will dry out in the next stage.
  • Check the soil with your hand, and if it begins to drain, water it accordingly.

11. Sunlight for Rose plant


  • Roses love sunlight, so give this plant as much sunlight as possible.
  • Flowers require at least 4 hours of sunlight to bloom.

Last but not least is to take care of it properly otherwise do not buy this plant.

————————–

Follow our Social media channel:

1. Voice of Plant – YouTube Channel

2. Voice of Plant Facebook Page

3. Instagram Voice of Plant Channel

Happy Gardening!!

How to Control Pest Attack in the Rose Plant

How to Control Pest Attack in the Rose Plant


Roses are susceptible to a variety of pests, including mealybug, aphids, spider mites, and black spot

Signs of Pest Infestation


Early detection is key to preventing serious damage to your rose plants. Look out for signs such as distorted or yellowing leaves, wilting, sticky residue (honeydew), or visible pests on the leaves and stems.

how to control pest attack in the Rose Plant
mealybugs in the rose plant

Preventive measures


The best way to prevent pest attacks is to keep your roses healthy and vigorous. This means providing them with the proper amount of water, fertilizer, and sunlight. You should also inspect your roses regularly for signs of pests. Prune regularly to remove dead or diseased plant material and improve air circulation.

black spot in rose
black spot in rose

How to Control Pest Attack in the Rose Plant

If you do find pests on your roses, there are a number of things you can do to control them:

1. One option is to use insecticidal soap or neem oil.

  • These products are natural and effective against a variety of pests. 
neem oil
neem oil

2. Second option – If your plant is infested with insects and pests, follow these steps:

1. Take 8-10 garlic cloves and grind them using a food processor, blender, or mortar and pestle.

2. Boil the ground garlic in half a liter of water for 5-10 minutes, then sieve the mixture to obtain a liquid solution.

3. In a separate 1-liter container, combine 2 teaspoons of the garlic water, 1 teaspoon of neem oil, and a few drops of hand wash water solution.

4. Thoroughly spray this mixture on the entire plant, ensuring that all parts are adequately covered. It’s best to do this spray in the evening to avoid direct sunlight.

5. The next morning, rinse the plant thoroughly with clean water.

spray water to rose plant

6. Repeat this process for 2-3 days, and you should notice the insects and pests disappearing from the plant.

Must read:

Best Soil Mixture for Rose Plant

Here are some additional tips for preventing and controlling pests on roses:

1. Remove dead and diseased leaves and stems:

deadheading of roses
  • This is essential as it prevents pests and diseases from proliferating in the garden. Timely removal of such plant parts helps in maintaining overall plant health.

2. Encourage beneficial insects:

ladybugs
ladybugs
  • Beneficial insects, such as ladybugs and lacewings, prey on pests.
  • You can encourage beneficial insects by planting a variety of flowers and plants in your garden.

3. Space your roses properly:

  • Proper spacing between rose plants is crucial for good air circulation.
  • This improved airflow can reduce the risk of pests and diseases taking hold in your rose garden, as it creates a less favorable environment for them to thrive.

These tips can be very effective in keeping your roses healthy and pest-free.

Must read:

Rose Plant Complete Care


Follow our Social media channel:

1. Voice of Plant – YouTube Channel

2. Voice of Plant Facebook Page

3. Instagram Voice of Plant Channel

Thanks

Make Your Own Garden!

Where to Place a Jade Plant in Home: A Guide for New Gardeners

Where to Place a Jade Plant in Home: A Guide for New Gardeners


Choosing the right location for your jade plant is crucial for its health and growth. Here’s what you need to know about finding the perfect spot for this popular succulent.

Where to Place a Jade Plant in Home

Where to Place a Jade Plant in Home


1. Light Requirements


Jade plants thrive in direct sunlight.

Sunlight is their primary energy source, fueling their growth and vitality.

  • Adequate sunlight exposure promotes sturdy stems and lush leaf growth, enhancing the plant’s overall appearance and health.
  • It also influences the production of pigments, contributing to the vibrant green coloration of the leaves.

Where to place it:

Position your jade plant in a spot where it can receive direct sunlight for several hours a day.

  • The best spot is an open balcony or terrace.

2. Can we keep a Jade plant Indoors?


No, do not place your plant indoor.

  • The growth of jade plant will stop after sometime and plant will die.
  • They are better suited to outdoor environments where they can receive direct sunlight.


3. The Role of Sunlight in Jade Plant Growth


jade in sunny area


Sunlight is essential for the healthy growth of a jade plant.

  • It not only fuels photosynthesis but also contributes to the development of strong stems and vibrant leaves.
  • Ensuring your jade plant gets enough sunlight will help it grow into a robust and attractive plant.

Key Points to Remember:

1. Position your jade plant where it can get abundant sunlight throughout the day.

2. Direct, bright sunlight is ideal for promoting healthy growth and maintaining the plant’s vibrant green color.

3. If possible, place your jade plant outdoors during warmer months to maximize its exposure to natural light.

Must read:

5 Best Tips to Make Jade Plant Bushy


FAQs About Jade Plant Placement


Q1: Can a jade plant survive in low light?

Ans: Jade plants prefer direct and bright light and may not thrive in low-light conditions.

  • While they can tolerate lower light levels for short periods, prolonged exposure to inadequate light can lead to weak stems and pale leaves.

Q2: How often should I move my jade plant to ensure it gets enough sunlight?

Ans: It’s best to find a suitable location with consistent sunlight and avoid moving the plant frequently.

  • Moving the plant too often can stress it and disrupt its growth.

Q: Can I place my jade plant in direct sunlight?

Ans: Yes, for better growth place your jade plants in direct sunligh.

  • Sudden exposure to intense sunlight can cause sunburn on the leaves, so introduce direct sunlight gradually if your plant has been kept in lower light.

By choosing the right spot and providing adequate sunlight, your jade plant will thrive and add a touch of natural beauty to your home.


Follow our Social media channel:

1. Voice of Plant – YouTube Channel

2. Voice of Plant Facebook Page

3. Instagram Voice of Plant Channel

Happy gardening!

Top Low Maintenance Plants for Beginners & Busy People

Top Low Maintenance Plants for Beginners and Busy People

Top Low Maintenance Plants for Beginners and Busy People


Are you a beginner gardener looking for plants that can survive almost anything? Whether you are new to gardening or just too busy to care for high-maintenance plants, we have got you covered.

Top Low Maintenance Plants for Beginners and Busy People
Balcony garden

Here is a list of  top low maintenance plants for beginners and busy people. 

Top Low Maintenance Plants for Beginners and Busy People


1. Devil’s Backbone (Euphorbia tithymaloides)


Devil's Backbone 1
Devil’s Backbone

Devil’s Backbone plant is drought-tolerant and can handle neglect. It is a great option for busy plant owners or those who often forget to water.

1. Light: Prefers direct, bright light conditions.

2. Water: Water sparingly. Allow the soil to dry out between watering.

3. Location: Keep this plant in an outdoor location like balcony or terrace for better growth.

4. Bonus: It is also known for its unique zig-zag stems, adding an interesting look to your space.

2. Dracaena (Song of India)


Dracaena
Dracaena

Dracaena is extremely resilient and can handle neglect. This plant requires very little attention, making it perfect for beginners and busy plant owners, or even those who often travel.

1. Light: Thrives in direct, bright light conditions.

2. Water: Water when the top inch of soil is dry. 

3. Location: Keep this plant in an outdoor location like balcony or terrace for better growth.

4. Bonus: This plant is resistant to pests and diseases, making it ideal for beginners.

3. Aloe Vera 


Aloe vera
Aloe Vera

Aloe Vera is a magical and very famous low – maintenance plant. This plant thrives in dry conditions and requires very little attention, making it perfect for beginners, busy plant owners

1. Light: Prefers bright, direct sunlight but can adapt to partial shade.

2. Water: Aloe Vera’s water requirements are minimal; if kept indoors, watering once or twice a month will suffice.

3. Location: This hardy outdoor plant seamlessly adapts to various environments, including bedrooms, making it a versatile choice.

4. Bonus: The gel inside the leaves has healing properties and can be used for burns, cuts, and skincare.

Must read:

Tips to Care Aloe Vera Plant


4. Purple Heart (Tradescantia pallida)


Purple Heart
Purple Heart

Purple Heart (Tradescantia pallida) is one of the hardiest flowering plants, making it an excellent choice for office-goers and beginner gardeners. Its vibrant purple leaves and delicate flowers add a pop of color, while its low-maintenance nature makes it easy to care for.


1. Light: Enjoys direct and bright light conditions.

2. Water: Water when the top of the soil feels dry, but avoid overwatering.

3. Location: Place it in a sunny location. Perfect for outdoor environments, making it a good addition for balcony or terrace garden.

4. Bonus:  It’s a fast grower plant. You can grow more plants from it’s cutting. Prune occasionally to maintain shape and promote new growth.

5. Jade Plant


Jade plant in pot
Jade Plant

The  Jade plant is a popular  succulent plant known for its hardiness and low maintenance requirements. 

1. Light: Jade plant is sun worshippers, requiring at least 4-5 hours of direct sunlight daily.

2. Water: Water when the soil is completely dry. Overwatering can cause root rot.

3. Location: Place it in a sunny location. Perfect for outdoor environments, making it a good addition for balcony or terrace garden.

4. Bonus: Jade plants are considered to bring good luck and prosperity, making them a popular choice for home decor.

Must read:

Jade Plant Care Complete Guide


6. Sadabahar (Periwinkle / Vinca)


periwinkle
Sadabahar (Periwinkle)


Periwinkle (Vinca) is another great option for those seeking an easy-care plant. It’s also resistant to pests and diseases, making it ideal for beginners.

1. Light: It’s incredibly hardy and can tolerate a range of conditions, from full sun to partial shade.

Watering: Periwinkle requires minimal watering once established and can thrive in both garden beds and containers.

3. Location: Perfect for outdoor environments, making it a good addition for balcony or terrace garden.

4. Bonus: Its vibrant flowers bloom continuously, adding color to your garden with very little effort.


General Care Tips for Hardy Plants


1. Use well-draining soil to prevent root rot.

2. Avoid overwatering. Most hardy plants prefer their soil to dry out between watering.

3. Occasional pruning can encourage new growth and maintain the plant’s shape.

4. Fertilize sparingly, as these plants don’t need heavy feeding.

With these easy-care tips, your hardy plants will not only survive but thrive, even if you’re new to gardening or have a busy schedule!

———————————-

Follow our Social media channel:

1. Voice of Plant – YouTube Channel

2. Voice of Plant Facebook Page

3. Instagram Voice of Plant Channel

Happy Gardening!

How to Treat & Prevent Mildew on Tulsi (Holy basil) leaves

How to Treat Powdery Mildew on Tulsi (Holy basil) leaves: Check these 8 Best Tips

How to Treat Powdery Mildew on Tulsi (Holy basil) leaves


Many gardeners often complain about white fungal disease appearing on the leaves of Tulsi and other plants. Without proper knowledge of this disease, they attempt to treat their plants, which can sometimes lead to further damage.

How to Treat Powdery Mildew on Tulsi (Holy basil) leaves
Powdery Mildew on Tulsi (Holy basil) leaves

Powdery mildew is a common fungal infection that affects a wide range of plants. On Tulsi (holy basil) leaves, this issue often arises during the humid monsoon season. It is easily identified by the presence of light grey or white powdery spots that form on the affected leaves.

Do not worry, we are here to help you! Here are some effective ways to treat and prevent mildew on Tulsi (Holy basil) leaves:

Powdery Mildew on Tulsi (Holy basil) leaves


1. Remove Affected Leaves


Carefully remove the leaves that show signs of mildew.

  • This prevents the spread of the fungus to other parts of the plant.

2. Improve Air Circulation


Ensure the Tulsi (holy basil) plant is in a well-ventilated area.

  • Good air circulation helps prevent fungal growth. If the plant is indoors, consider moving it to a spot where it can get some fresh air.

3. Reduce Humidity


Avoid overhead watering, as wet leaves encourage mildew.

  • Water the plant at the base, and do so early in the morning so that any moisture on the leaves dries quickly.

4. Neem Oil Spray


Mix 1 teaspoon of neem oil with 1 liter of water and add a few drops of mild liquid soap.

  • Spray this mixture on the affected leaves.
  • Neem oil is a natural fungicide and can help control mildew.

Must read:

Use of Neem Oil Spray to protect plants from pests


5. Baking Soda Solution


Mix 1 teaspoon of baking soda with 1 liter of water and add a few drops of liquid soap.

  • Spray this solution on the leaves.
  • Baking soda alters the pH on the leaf surface, making it inhospitable for mildew.

6. Use Organic Fungicides


Organic fungicides like sulfur-based sprays or cinnamon powder can be used to treat mildew.

  • Always follow the instructions on the label for safe application.

7. Avoid Overcrowding


Ensure that your Tulsi (holy basil) plant is spaced adequately.

  • Overcrowded plants can trap moisture and restrict airflow, creating a perfect environment for mildew.

Must read:

How to avoid overwatering on plants


8. Monitor and Repeat Treatment


Regularly check your plant for any new signs of mildew.

  • Repeat the treatment as necessary until the problem is resolved.

Following these steps should help you manage and eliminate mildew on your Tulsi (holy basil) leaves, keeping your plant healthy and thriving.

Must read:

Tips to care Tulsi plant: Complete Guide


Follow our Social media channel:

1. Voice of Plant – YouTube Channel

2. Voice of Plant Facebook Page

3. Instagram Voice of Plant Channel

Happy gardening!

Happy gardening!

Aprajita blue flowers tea benefits

This blue flower is a magical flower, Unbelievable Health Benefits of This Flower

This blue flower is a magical flower,

Unbelievable Health Benefits of This Flower


This is a very special and magical flower. It is not only admired for its beauty but is also renowned for its significant health benefits. The tea made from this flower has gained popularity due to its numerous medicinal properties, providing natural benefits to the body.

This blue flower is a magical flower, Unbelievable Health Benefits of This Flower

Specialty of the Aprajita Blue Flower


Aprajita blue flower

This blue flower is known for its unique blue colour. This flower attracts the attention of gardening lovers with its vibrant colour and attractive appearance.

  • Not only is it used for decorative purposes in gardens, but it is also valuable due to its medicinal properties.

We are talking about the Aparajita flower


Aprajita blue flower

Blue flower of Aparajita (Clitoria ternatea), also commonly known as Blue Butterfly Pea or Blue Clitoria. The Aparajita plant is commonly called Vishnukanta or Shankarpushpi.

Health Benefits of Aprajita Flower Tea


Aprajita tea
Aprajita blue flower tea

The tea made from Aparajita’s blue flower is highly beneficial for health.

  • It is prepared by boiling the flowers in water or soaking them in hot water.
  • The tea has a deep blue color and a unique taste.

It contains various antioxidants and nutrients that are beneficial for the body.

1. Good for Brain Health

The antioxidants and flavonoids present in Aparajita flowers help keep the brain active and healthy. This tea enhances brain function and reduces mental fatigue. Regular consumption can also improve focus and memory.

2. Reduces Stress and Anxiety

Aparajita tea has antidepressant properties, which help reduce stress and anxiety. It keeps you mentally calm and improves the quality of sleep.

3. Beneficial for Skin and Hair

Aparajita flowers are rich in antioxidants, which help maintain healthy and radiant skin. It is also beneficial for hair health as it strengthens the roots and reduces hair fall.

Check this:

Know the Medicinal Benefits of Night Jasmine (Parijat)


4. Boosts Immunity

The flavonoids and antioxidants in Aparajita tea help boost the body’s immune system. Regular consumption may protect against common illnesses like colds and coughs.

5. Detoxification

Aparajita tea helps in detoxifying the body by removing harmful toxins. It is also beneficial for the health of the kidneys and liver.

6. How to Make Aparajita Tea

Making Aparajita tea is very simple. Take a few fresh or dried blue flowers and put them in a cup of hot water. Let it steep for a few minutes, then strain and drink. You can add honey and lemon to enhance its flavor.

Conclusion:

Aparajita’s blue flower is not only beautiful to look at but also packed with medicinal properties. Its tea is highly beneficial for health, helping maintain brain function, skin, hair, and immune health.


Follow our Social media channel:

1. Voice of Plant – YouTube Channel

2. Voice of Plant Facebook Page

3. Instagram Voice of Plant Channel


Happy Gardening!

Is Rubber Plant an Indoor or Outdoor Plant?

Is Rubber Plant an Indoor or Outdoor Plant?

Is Rubber Plant an Indoor or Outdoor Plant?


Rubber plants (Ficus elastica) are among the most popular houseplants due to their stunning, glossy leaves and easy-to-manage nature.

Often people get confused about whether it is more appropriate to keep it indoors or outdoors for better growth.

Is Rubber Plant an Indoor or Outdoor Plant?
Rubber plant outdoor placement – Pic credit: Pinterest

This article explores whether rubber plants should be grown indoors or outdoors, how to care for them in different settings, and the benefits and challenges of both approaches.

Ideal Conditions for Rubber plant


1. Temperature:


The Rubber Plant is a typical summer plant that thrives in temperatures ranging from 20-30℃.

Note:

  • While it can handle high temperatures if kept in the shade, it experiences stress when temperatures drop in winter.
  • Protect your rubber plant from cold.

2. Placement & Sunlight requirement of the Rubber plant 


Rubber plant in bright light area


The Rubber plant can be grown both indoors and outdoors.

Indoor placement:


rubber plant
Rubber plant in bright light area

Rubber plants are ideally suited for indoor growth. They prefer bright, indirect sunlight but can tolerate lower light levels.

  • If you prefer to keep Rubber plant indoor, ensure it receives ample bright light.
  • Placing it near a window where it can receive about half an hour of direct sunlight is ideal.
  • However, if the plant is kept in low or medium light conditions, it may struggle to thrive.

Best Indoor care tips for Rubber plant

rubber plant indoor
Rubber plant near window Pic credit: Pinterest
  • Place them near windows or doors with bright, indirect light.
  • Water them when the top inch of soil feels dry.
  • Wipe the leaves occasionally to remove dust and maintain their shine.

Can Rubber Plants Grow Outdoors?


rubber plant
Rubber plant in bright light outdoor

Ideal outdoor growing conditions:


When kept outdoors, avoid exposing it to the direct, scorching heat of the sun for extended periods.

  • Instead, provide 2-3 hours of mild sunlight in the morning and evening. 
  • During the afternoon, keep the plant in the shade.

Best outdoor care tips for Rubber plant

  • Place them in a shade. 
  • Avoid placing them in a direct sunlight.
  • Water them when the top inch of soil feels dry.
  • Wipe the leaves occasionally to remove dust and maintain their shine.

Comparing Indoor & Outdoor Rubber plant care


Differences in Light Requirements


Indoors, rubber plant need bright but indirect light. Outdoors, they can tolerate some direct sunlight, especially in the morning, but too much can scorch their leaves.

Watering Needs: Indoors vs. Outdoors


Indoor rubber plants need to be watered moderately, while outdoor plants might require more frequent watering, especially in hot or dry climates.

Click here to read:

9 Tips to care Rubber plant


Best places to keep a Rubber plant indoors


Rubber plant indoor home
Rubber plant indoor placement

Rubber plants thrive in well-lit indoor spaces. They are perfect for:

1. Living Rooms: Bright and spacious areas.

2. Office Spaces: Their air-purifying qualities can improve air quality and create a calm atmosphere.

3. Bedrooms: These rooms offer high humidity levels, which rubber plants love.


Are Rubber Plants Safe for Pets Indoors?


Rubber plants can be toxic to pets if ingested, causing irritation to the mouth and stomach.

  • It is best to keep the plant out of reach of curious cats or dogs.

Ideal Soil – Mix for Rubber Plants


Soil mixture

Rubber plants do best in loose, well-drained soil.

  • Enrich the soil with organic compost to promote healthy root development.

Check this article:

How to make Soil – mixture for plants


Conclusion

In summary, rubber plants can thrive both indoors and outdoors, depending on your climate and care. Understanding their needs in each environment will help ensure they stay healthy and vibrant.


Follow our Social media channel:


1. Voice of Plant – YouTube Channel

2. Voice of Plant Facebook Page

3. Instagram Voice of Plant Channel


Happy Gardening!

aloe vera thumbnail

Aloe Vera Plant Care: Pest Attack and Black Spot

The Aloe Vera plant is famous for being good for your health and easy to take care of. Many people like having Aloe Vera in their homes. While Aloe Vera is generally hardy and resilient, there are still specific care guidelines to follow in order to ensure its optimal growth and well-being.

In this article, we will explore essential tips for tending to your Aloe Vera, including addressing rare

  • pest attacks,
  • dealing with black spots on leaves, and
  • managing issues such as brown tips.

Aloe Vera plant care

1. Pest Attack on Aloe Vera plant

pest attack on aloe vera plant

    • It is true that Aloe Vera plants are relatively resistant to pests, but they can still be susceptible to issues like aphids and mealybugs.
    • These pests may not always be visible to the naked eye, but you can usually identify their presence by the damage they cause.
    • Using organic pesticides or neem oil is a good way to manage these pests.
    • You can also physically remove them with a soft brush or cloth.

2. Black spots on Aloe Vera plant

black spot on aloe vera

    • Black spots on Aloe Vera leaves can indeed be caused by overwatering and the resulting fungal growth.
    • It is important to let the soil dry out between waterings to prevent this issue.
  • aloe vera watering
    • Root rot can also lead to black spots on the leaves.
    • If root rot is suspected, it’s essential to inspect the roots and trim away any damaged or rotting sections before repotting the plant in fresh, well-draining soil.
  • inspect root for root bound of aloe vera
    • Removing affected leaves, as mentioned, is a good practice to prevent the spread of the fungus.

Note:

  • Fungus may impact the plant’s chlorophyll, which is responsible for food production through photosynthesis.
  • When the fungus damages the chlorophyll, the plant can’t produce enough food.

As a result of the nutrient deficiency, the aloe vera plant weakens, and its growth slows down, leading to the appearance of unhealthy black spots on its leaves.

Therefore, it is crucial to effectively manage pests to prevent the development of black spots on Aloe Vera plants. A robust pest control process can help keep this harmful fungus away.

3. Brown tips on Aloe Vera plant

brown tips of aloe vera plant

    • Brown tips on Aloe Vera leaves can indeed be a result of water imbalance, as well as other factors like too much direct sunlight.
    • Adjusting the watering schedule based on the specific needs of your plant and considering the environmental conditions is essential.

4. Repotting Aloe Vera plant

pot size and soil mix for aloe vera plant

    • The advice to repot the Aloe Vera plant in new soil if root rot is suspected is sound. Make sure to choose a well-draining soil mix suitable for succulents, and ensure the new pot has proper drainage to prevent waterlogging.

In addition to these care tips, it is important to provide your Aloe Vera plant with well-draining soil, adequate sunlight (indirect or filtered sunlight is best), and a proper pot with drainage holes. Regular monitoring of the plant’s health and adjusting care practices accordingly is essential for its well-being.

Aloe-Vera-Plants


Happy Gardening!