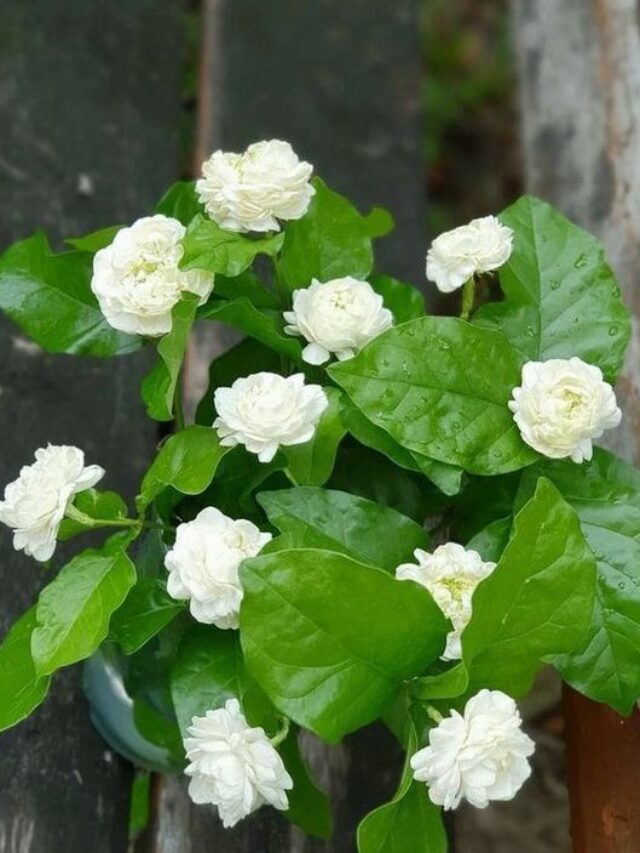
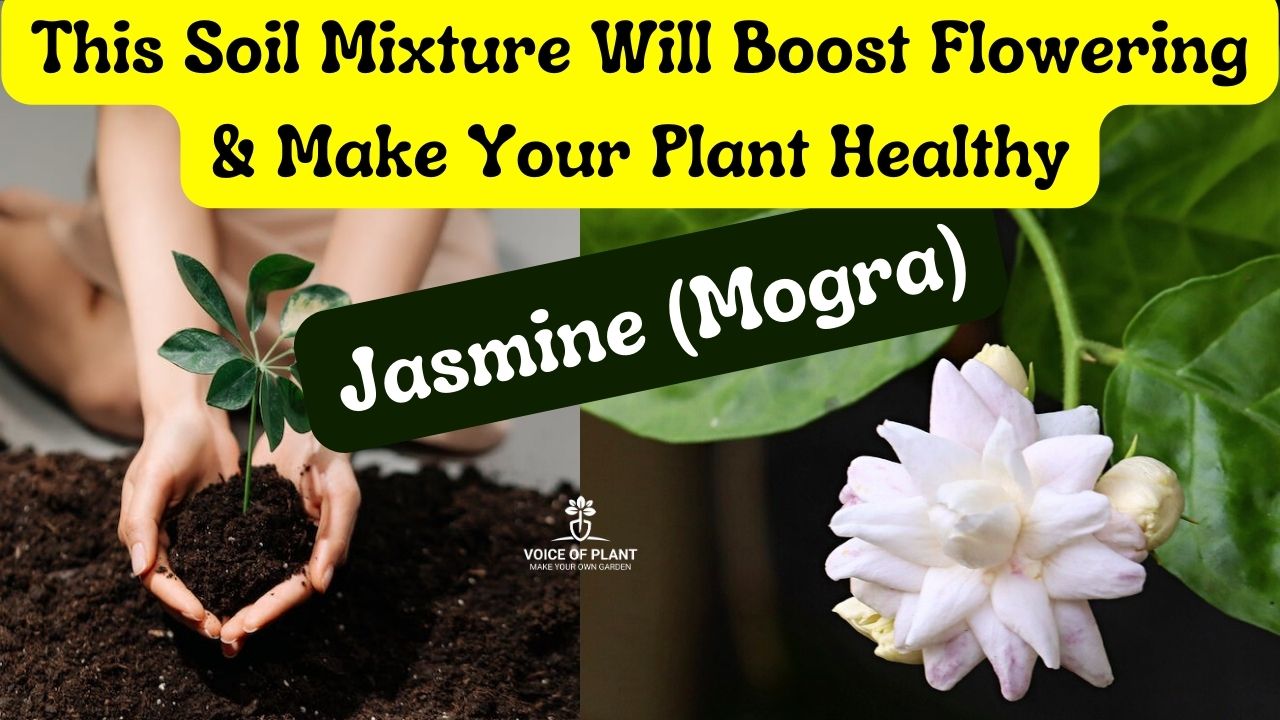
Jasmine, commonly known as Mogra is a fragrant flowering plant that thrives in well-draining, nutrient-rich soil. To ensure healthy growth, abundant blooming, and strong root development, you need to prepare a balanced soil mixture. The ideal soil should be moist yet well-aerated, allowing roots to spread freely.
Soil Mix for Jasmine plant
How to make perfect soil – mixture for Jasmine plant: Follow key steps and process
Best Soil Mixture for Jasmine Plant (Mogra)
Essential Ingredients for Jasmine Soil Mix
1. Normal Soil (Garden or Local Soil) – Base Component
Use garden or local soil as the base.
Provides essential minerals and natural microorganisms that support plant health.
Should be loose, well-aerated, and free from debris or large stones.
2. Compost (Slightly More Than Half the Quantity of Soil)
Enriches the soil with organic matter and nutrients.
Improves soil texture, making it fluffy and moisture-retentive.
Promotes microbial activity, which is crucial for nutrient breakdown and absorption.
3. Construction Sand (Half the Quantity of Compost)
Enhances drainage, preventing waterlogging.
Keeps the soil light and airy, which is essential for root health.
Helps in preventing root rot, a common problem in poorly drained soils.
4. Coco Peat (Same Quantity as Sand)
Improves moisture retention without making the soil soggy.
Helps in temperature regulation, keeping roots cool in summer and warm in winter.
Enhances soil structure, making it more crumbly and easy to work with.
5. Mustard Cake Powder (A Handful)
Acts as a natural organic fertilizer rich in nitrogen.
Enhances microbial activity, improving soil structure and fertility.
Promotes strong root development and overall plant health.
6. Neem Cake Powder (A Handful)
Prevents pests and fungal infections in the soil.
Acts as a natural insect repellent, keeping soil-borne diseases at bay.
Provides slow-releasing nutrients, making it an excellent organic amendment.
7. Optional Additives
Fungicide or Cinnamon Powder – Helps in preventing fungal attacks, especially during the monsoon season.
8. Mix All Components
Mix everything well until you get a light, crumbly, and well-balanced soil mixture.
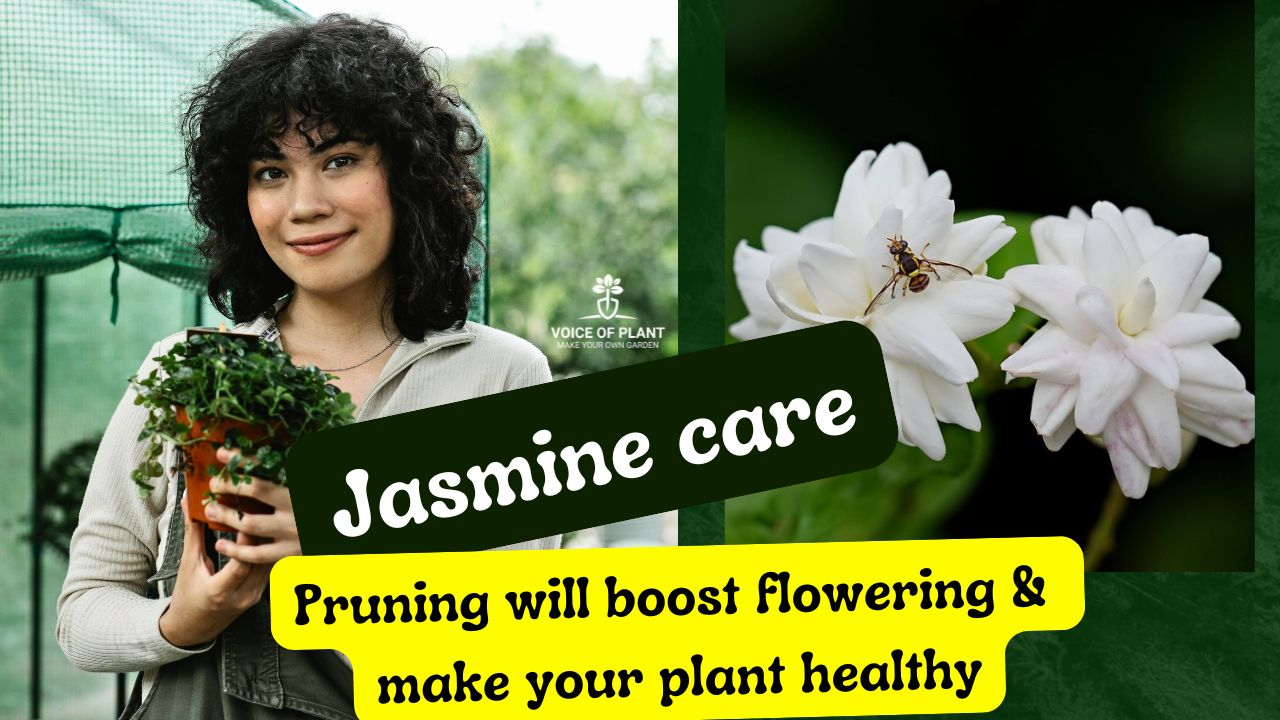
Is your jasmine plant not flowering, or has it become lifeless? Then it is time to prune the plant. To keep them healthy and encourage abundant blooming, proper pruning in the spring is essential. This process not only helps maintain the plant’s shape but also removes old and dead growth, making room for fresh, vigorous shoots.
Jasmine flower
If you want your jasmine to stay vibrant and full of fragrance, knowing when and how to prune is key.
Pruning of Jasmine Plant in Spring Season
Why Prune Jasmine in Spring?
Spring is the perfect time to prune jasmine as the plant is emerging from dormancy and entering an active growth phase. Pruning during this period offers several benefits:
1. Encourages More Flowers – Removing old, unproductive stems stimulates new flower-bearing shoots.
2. Enhances Plant Health – Cutting away diseased or dead branches prevents the spread of infections.
3. Controls Growth and Shape – Jasmine vines can become tangled and messy; pruning keeps them neat.
4. Improves Sunlight and Airflow – Proper trimming ensures that all parts of the plant get enough light and air, promoting even growth.
How to Prune Jasmine in Spring?
1. Identify and Remove Unwanted Branches
Cut off dry, damaged, or diseased stems to prevent the spread of infections.
Trim weak, tangled, or overcrowded growth to encourage strong new shoots.
If the plant is too large, remove about one-third of the total growth to maintain balance.
2. Make Clean Cuts
Cut branches at a 45-degree angle, just above a healthy bud.
Avoid leaving long stubs, as they can delay healing.
Remove small suckers (shoots growing from the base) to direct energy toward stronger growth.
Throughout the season, deadhead faded flowers to encourage continuous blooming.
Remove unwanted new growth that disrupts the plant’s shape.
Conclusion
Pruning your jasmine plant in spring is the key to a healthier, more vibrant, and flower-filled plant. By following these simple steps, you can ensure your jasmine thrives and fills your garden with its delightful fragrance all season long. So, grab your pruning shears and give your jasmine the care it deserves!
February is a make-or-break month for rose lovers. After months of dormancy, your roses need some attention to wake up and bloom beautifully in spring. If you ignore them now, they might struggle, bloom weakly, or even fail to thrive.
Many gardeners assume that roses will take care of themselves once winter ends, but that’s not the case. Proper pruning, feeding, watering, and pest control in February will ensure that your roses return with full, vibrant blooms.
So, what exactly should you do this month to guarantee a stunning rose garden? Let’s dive into the essential tasks.
Rose Red Flowers
Understanding Rose Dormancy
Before jumping into rose care, it’s important to understand what happens to them during winter.
Why Do Roses Go Dormant?
Dormancy is nature’s way of protecting roses from the harsh winter cold. When temperatures drop, roses stop growing, lose their leaves, and appear lifeless. However, they are still very much alive beneath the surface, conserving energy for spring growth.
Signs Your Roses Are Waking Up
By February, roses begin to show signs of coming out of dormancy. Look for these indicators:
Swelling buds on stems
Small green shoots appearing
Slight softening of branches
When you notice these signs, it’s time to start your February rose care routine.
Rose Flowering Care and Tips in February
Rose Will Bloom Again If You Do This Task in February Now
1. Pruning: The First Step to Revival
Pruning is the most important task you must do in February. It encourages new growth, removes dead or diseased branches, and improves air circulation.
How to Prune Roses Correctly:
✅ Use sharp, clean pruning shears. ✅ Cut at a 45-degree angle, about ¼ inch above an outward-facing bud. ✅ Remove dead, weak, or inward-growing branches.
2. Cleaning Up the Rose Bed
A clean rose bed is essential for preventing diseases and ensuring healthy soil.
Steps to Clean Your Rose Bed:
Remove fallen leaves, as they can harbor pests and fungi.
Pull out any weeds that might compete for nutrients.
Loosen compacted soil to improve drainage.
Cleanliness reduces the risk of black spot and powdery mildew, two common rose diseases.
3. Feeding Your Roses with the Right Nutrients
Roses are heavy feeders, and after winter, they need a boost.
Best Fertilizers for February:
Organic: Compost, bone meal, banana peels (for potassium).
Feed your roses at the base, avoiding the leaves to prevent burns.
4. Watering Wisely After Winter
Roses don’t need a lot of water in winter, but as they wake up, they need a steady supply.
Watering Tips for February:
Water deeply but less frequently.
Avoid watering leaves to prevent fungal infections.
Test the soil—if it’s dry an inch below the surface, it’s time to water.
5. Checking for Pests and Diseases
Early spring brings pests like aphids and fungal diseases.
Preventing Pests:
Use neem oil or insecticidal soap.
Introduce ladybugs (natural aphid predators).
Preventing Diseases:
Keep good airflow by proper pruning.
Avoid overhead watering.
Apply a preventive fungicide if needed.
Conclusion
If you take care of your roses in February, you’ll be rewarded with an explosion of blooms in spring. Prune, feed, water, and protect your roses, and they’ll return healthier and more beautiful than ever.
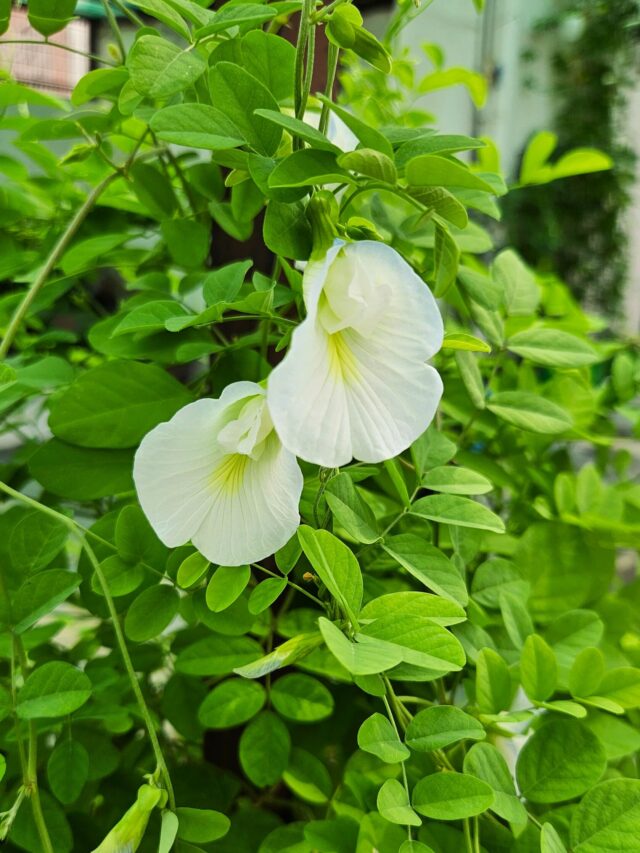
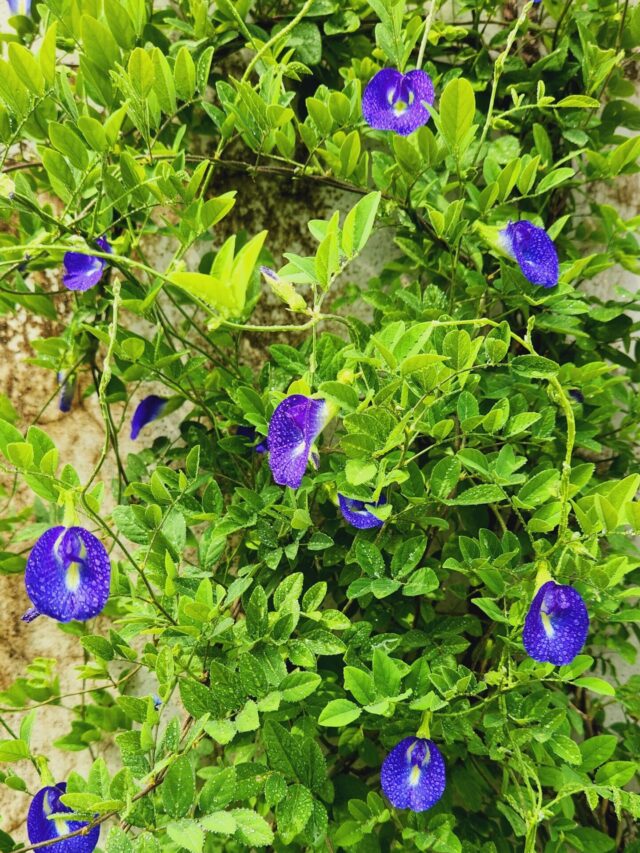
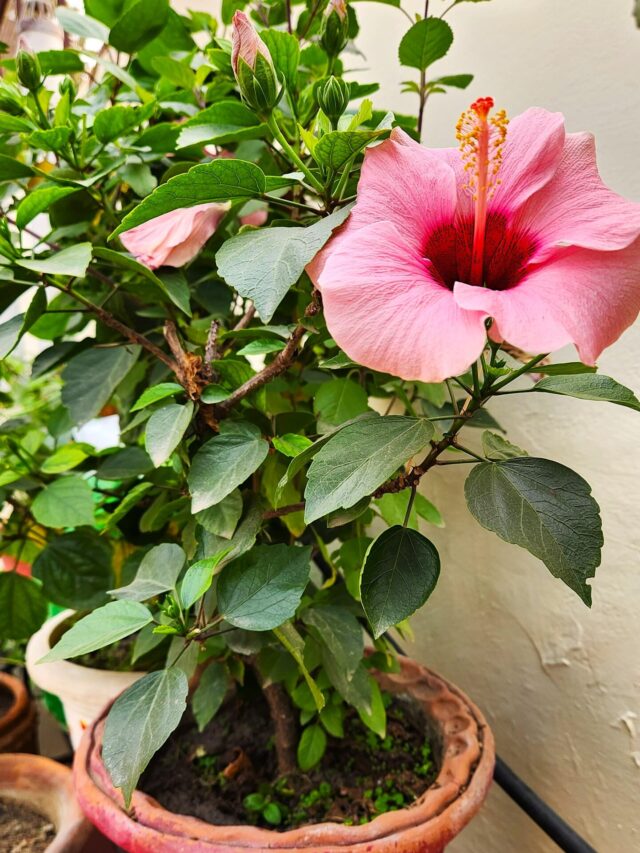
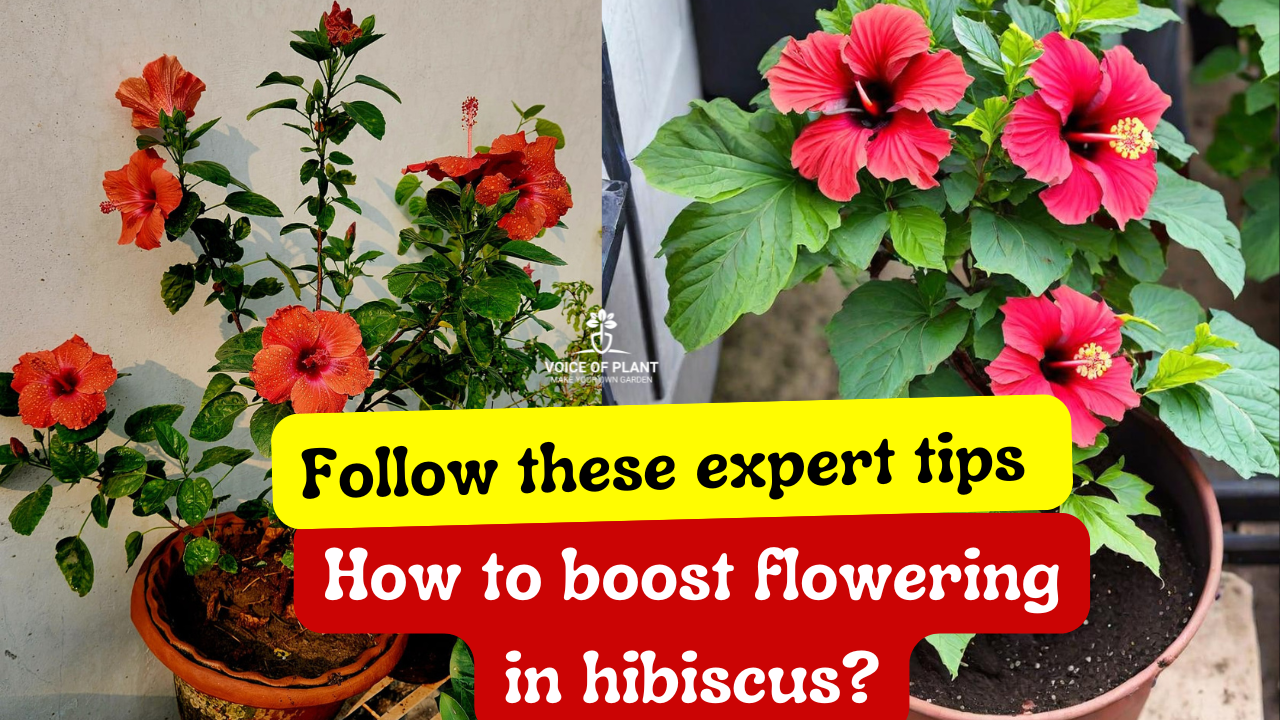
Every flowering plant naturally tends to bloom, and if a hibiscus fails to do so for 2-3 months, it becomes a cause for concern. Typically, an underlying problem or issue is responsible for the lack of blooming. Therefore, the primary focus should be on identifying the problem before applying any treatment to the plant. Always refer to the checklist below to ensure all the plant’s requirements are being met.
Hibiscus flower plant
How to Get Maximum Flowering in Hibiscus
Sunlight requirement
Hibiscus, renowned for its large flowers, necessitates a minimum of 5-6 hours of direct sunlight to promote blooming on all pruned branches.
This plant requires a substantial amount of energy to bloom, and if it receives only 1-2 hours of sunlight exposure, successful blooming may be hindered.
Soil composition
The primary requirement for the growth of any plant is suitable soil.
It is crucial that the soil is not clayey, and any signs of algae formation should be addressed by tilling it.
To enhance the soil’s nutritional content and promote a looser texture, incorporate vermicompost.
For strong root development, the soil should possess an effective drainage system and not be compacted.
Water requirement
Excessive watering in hibiscus can result in root rot and hinder flower blooming.
If overwatered, buds may form but will ultimately drop without blossoming.
Conversely, insufficient wateringcan lead to the plant’s demise, with no chance of blooming and eventual withering.
“It is crucial to provide a balanced water supply for hibiscus—water when the soil is dry and ensure watering until excess water drains out from the bottom of the pot.”
Pest attack in Hibiscus plant
Examine the plant for potential insect infestations, as hibiscus plants are susceptible to attacks from pests such as aphids, mealybugs, and other insects.
These dense plants may conceal pests, making early detection challenging.
Use of Neem Oil
Inspect for leaf miners and other pests, and be vigilant for potential soil issues such as fungal infections or diseases. Safeguard against these pest attacks by thoroughly spraying the entire plant with neem oil.
To address soil diseases, if present, create a mixture of neem oil and a small amount of cinnamon powder in water and administer it to the soil.
Pot Size for Hibiscus plant
While hibiscus typically thrives in a 10-12 inch pot, if, despite addressing the previously mentioned considerations, the plant fails to bloom, it is crucial to thoroughly inspect the pot for potential root binding.
Although hibiscus tends to appreciate being slightly root-bound, excessive binding can induce stress.
To assess this, carefully remove the plant from its pot, examine the roots, and if necessary, engage in root pruning.
Transplant the hibiscus into a larger pot to provide ample space, fostering optimal growth conditions. It will start flourishing again.
Soft pruning of Hibiscus plant
Generally, it is advised to conduct hard pruning on hibiscus in February, while soft pruning can be carried out year-round, excluding the harsh winter months.
If your hibiscus is not producing blooms, consider soft pruning and follow up with a diluted mustard cake liquid fertilizer to replenish soil nutrients to promote the development of new branches.
“It is important to refrain from giving the mustard cake liquid fertilizer during extremely hot summers.”
The diluted form of mustard cake liquid fertilizer is recommended due to its potency.
When pruning is performed, hormones are released at the pruned tips, stimulating the growth of fresh branches.
Lack of Nutrients
If, despite pruning, your hibiscus is not blooming as expected, it likely indicates a nutrient deficiency. To address this, apply Epsom salt to the entire plant.
Banana peel fertilizer:
After 10 days of the Epsom salt treatment, nourish the plant with a liquid fertilizer madefrom banana peel fertilizer. This particular fertilizer enhances the flowering process, and you will likely notice the emergence of new buds shortly after application.
By adhering to this schedule of applying different liquid fertilizers every 10 days, you can stimulate consistent blooming in your hibiscus.
Increase the dosage of fertilizer after thoroughly inspecting all the concerns mentioned above. To cure the main problem is necessary to promote the blooming in plants rather than applying random theories of experiments.
As living entities, plants require a well-balanced diet consisting of sunlight, water, air, and essential nutrients. It is crucial to meticulously monitor and fulfill each of these requirements to ensure the effective growth and flourishing of the plant.
Once the plant is blooming at the anticipated rate, reduce the fertilizer dosage, as an excessive amount may adversely affect the plant. It is advisable to adhere to the hierarchical checklist mentioned earlier before administering any remedies to the plant.
Fertilizers are essential for providing the necessary nutrients to the soil and plants to support optimal growth. When plants require fertilizers, they exhibit various symptoms, including:
1. Dull, faded, or curled leaves.
2. Stagnant or limited plant growth.
3. Withered or deteriorating plant condition.
4. Failure to form buds.
5. Bud formation without subsequent flower development.
6. Blooming flowers that lack fragrance.
Jasmine Flower
For Jasmine plants, regular pruning is recommended to encourage the growth of branches, buds, and flowers. To ensure the plant’s growth aligns with the desired pace, it’s important to match the nutrient requirements. Adjusting the dosage of different fertilizers based on the plant’s various growth phases is a key practice.
When and How to Give Fertilizer to Jasmine Plant
During Growing phase of the plant
During Flowering Phase of the Plant
A. Growing phase of the plant:
1. Mustard Cake Fertilizer:
This is a favored fertilizer for Jasmine (Mogra) plants during the initial growth stage.
Apply it once a month to promote the development of a robust and healthy plant.
It is advisable to skip this fertilizer during extreme summers, replacing it with alternatives like neem cake powder.
While liquid fertilizers are rich in essential nutrients like nitrogen, phosphorus, and potassium (NPK), they might lack sufficient micronutrients.
Every two months, address potential micronutrient deficiencies to prevent issues like faded leaves or a lack of fragrance in flowers.
Liquid micronutrients are effective for Jasmine (mogra) plants; dilute 3 ml in 1 liter of water and spray it on the leaves and soil during the evening.
Feromones micronutrients also available in sticks can be used here.
B. Flowering Phase of the Plant:
1. Enhanced Frequency:
As the plant enters the flowering phase with visible branches, increase the frequency of fertilizer.
Alongside the regular fertilizers, introduce additional ones like onion peel or banana peel fertilizer once a month. This adjustment reduces the interval between fertilizations to 15 days.
2. Pruning and Flowering:
Pruning is particularly crucial during the flowering phase to encourage lateral growth.
Given the simultaneous demand for nutrients during pruning and flowering, maintaining a consistent and nutrient-rich fertilizer schedule becomes vital.
General Tips:
The dosage of different fertilizers should be adjusted according to the different phases of the plant. This is a good practice, as the nutritional needs of the plant can vary during different stages of growth, such as the growing phase and flowering phase.
Rather than increasing concentrations, adjust the frequency of fertilizer. Always dilute fertilizers with sufficient water before applying to prevent any adverse effects on the plant.
By following these guidelines, anyone can cultivate a thriving Jasmine (Mogra) plant at home.
Oh! So, you are worried about garden waste such as fallen leaves cluttering your garden? Are you wondering, “What can I do with all these leaves—should I throw them away or burn them?” We get it; dried leaves scattered across your garden can make it look messy. But here’s the secret: there’s no such thing as waste in the garden!
Fallen leaves in garden
Did you know these leaves can be one of the most beneficial things for your garden?
Instead of throwing or burning them, which harms the environment, you can turn them into leaf compost, a nutrient-rich treasure for your plants and soil.Leaf compost not only improves soil health but also enhances your plants’ growth naturally.
Introduction of Leaf Compost
Leaf compost is a nutrient-rich organic material derived from decomposed leaves. It’s one of the easiest and most natural ways to recycle garden waste (leaves) into a valuable organic compost for our plants.
Essentially, leaf composting transforms fallen leaves into a crumbly, dark material that resembles soil, packed with nutrients to enrich your garden.
What is Leaf Compost?
Leaf compost is created when leaves break down through natural decomposition.
Through the natural process of breakdown by microorganisms, leaves are transformed into a dark, crumbly, soil-like substance. It’s packed with nutrients like potassium, phosphorus, and trace minerals that plants love.
The beauty of leaf compost is its simplicity. It doesn’t require fancy equipment or special skills—just patience and a little effort. Plus, it’s entirely free, making it one of the most cost-effective ways to improve your garden’s soil.
So instead of disposing of leaves, why not transform them into something your garden will thank you for?
How to Make Leaf Compost at Home
If you’ve been wondering how to get started with leaf composting, don’t worry—it’s easier than you think! All it takes is a little organization, some time, and an understanding of the process. Here’s a simple step-by-step guide.
1. Collect the Leaves
Start by gathering the fallen leaves in your garden.
You can use a rake, a blower, or even your hands if you have a small area.
Make sure to remove any debris like rocks, plastic, or sticks.
Also, avoid leaves treated with pesticides, as they can hinder the composting process.
2. Use any bucket or container and Make holes
You can use a large container, bucket, durable poly bag, or any type of bag that suits your needs.
For leaf compost opt for a larger, deeper container based on the amount of waste you plan to compost. You can choose a clay pot or a plastic container (such as a bucket).
Make holes
Ensure there are enough holes around the container for air circulation.
Oxygen is vital for the decomposition process, as it supports the activity of beneficial microorganisms that break down organic material.
3. Shred the Leaves
Shredding the leaves into smaller pieces helps them break down faster.
You can do this by running over them with a lawnmower or using a garden shredder.
If you don’t have these tools, you can still compost whole leaves—it will just take a little longer.
4. Make a Layer
Once you’ve collected the leaves, it’s time to layer them properly. Layering is essential for an efficient composting process. Here’s how to do it:
1. Add a Base Layer:
Begin by adding a layer of garden soil or compost at the bottom of the container. You can use ready-made compost like vermicompost or even kitchen waste compost for this purpose.
2. Add the Leaves: Place a layer of garden leaves over the soil or compost.
This balance is essential for microbial activity, which drives the decomposition process.
3. Moisture Matters: Sprinkle some water on the leaves to maintain the right moisture level. The pile should be damp but not soaking wet.
Maintain Moisture
If it’s too dry, decomposition slows down; if it’s too wet, it can become smelly and compacted.
5. Cover the Container
Ensure that the container, bucket, or bag is properly covered to retain moisture and heat, which speeds up the composting process.
You can use a lid, cloth, or plastic sheet to cover it securely.
However, do not seal it completely—proper ventilation is crucial for decomposition.
6. Maintenance and Aeration
To keep the composting process active and effective, regular maintenance is necessary:
(i) Check Every 15 Days: Open the container once every two weeks to check the moisture levels. Add water if the compost feels dry.
(ii) Turn the Compost: Aerate the pile by using a pitchfork, shovel, or any long tool to turn the contents. This helps oxygen circulate, prevents odors, and accelerates the breakdown process.
Wait and Watch
With the right balance of materials, moisture, and aeration, you’ll have rich, dark, and crumbly leaf compost in a few months. If you’re using a cold composting method, it might take a bit longer—but patience pays off in the end.
Why is Leaf Compost Beneficial for Your Garden?
Leaf compost is a gardener’s best friend. It improves the health of your soil, saves money, and benefits the environment. Let’s dig a little deeper into its benefits.
1. Enriches Soil Nutrients
Packed with nutrients like potassium and magnesium, leaf compost naturally feeds your soil, promoting healthier plant growth.
2. Improves Soil Structure
It enhances soil texture by improving moisture retention, drainage, and preventing compaction, making it easier for roots to thrive.
3. Boosts Microbial Activity
Leaf compost supports beneficial microbes and earthworms, creating a fertile, thriving soil ecosystem.
4. Reduces Garden Waste
Instead of throwing away leaves, composting transforms them into a valuable resource, cutting down landfill contributions.
5. Saves Money
Leaf compost eliminates the need for expensive fertilizers or soil conditioners, offering a cost-free, sustainable alternative.
6. Eco-Friendly
Composting leaves reduces pollution, minimizes garden waste, and limits reliance on harmful synthetic fertilizers.
Where Can You Use Leaf Compost?
(i) Vegetable Gardens: Mix leaf compost with garden soil to provide essential nutrients for your veggies.
(ii) Flower Beds: Use it as mulch to keep flower beds weed-free and retain moisture.
(iii) Lawns: Spread a thin layer of leaf compost over your lawn to enrich the soil and promote healthy grass growth.
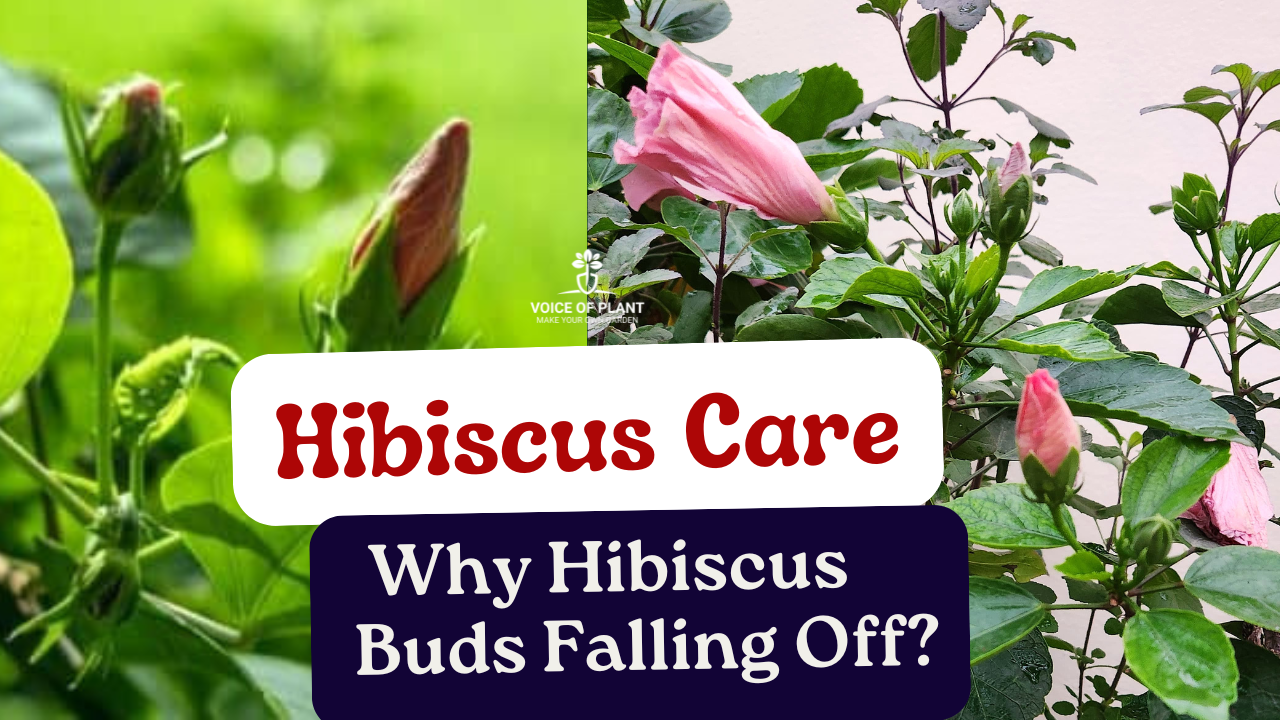
Hibiscus plants are known for their vibrant flowers, but when the buds drop before blooming, it can be disheartening for plant lovers. Certain environmental and care factors might cause this issue. Here’s how to address it:
Common Reasons for Hibiscus Bud Drop and How to Address Them
1. Temperature Sensitivity
Cause: Hibiscus plants are sensitive to sudden temperature fluctuations.
If the weather is too cold or there’s a sharp drop in nighttime temperatures, buds may fall off.
Solution: Place the plant in a location where it is protected from cold winds.
If temperatures are consistently low, keep your plant in shaded area or cover it with a breathable fabric at night.
2. Watering Issues
Cause: Overwatering or underwatering can stress the plant, leading to bud drop.
In cooler months, hibiscus plants require less water.
Solution: Check the soil before watering.
Only water when the top 1-2 inches of soil feel dry. Avoid letting the soil stay soggy.
3. Nutrient Deficiency
Hibiscus flower plant
Cause: Lack of essential nutrients like phosphorus and potassiumcan weaken the plant, preventing buds from fully developing.
Solution: Use a balanced fertilizer, preferably one high in phosphorus and potassium like Banana Peel Fertilizer, to support flowering.
Avoid over-fertilizing, as too much nitrogen can lead to excessive leaf growth at the expense of flowers.
Cause: Pests like aphids, spider mites, or whiteflies can weaken the buds and cause them to drop.
Solution: Inspect the plant for signs of pests. Use neem oil or an organic insecticidal soap to control infestations.
6. Humidity and Dry Air
Cause: Hibiscus plants thrive in humid conditions.
Dry air or low outdoor humidity can cause stress and bud drop.
Solution: Increase humidity around the plant by misting it or placing a tray of water nearby.
Avoid misting in late evenings to prevent fungal infections.
7. Pruning and Deadheading
Cause: Lack of regular pruning can lead to weak branches that may not support budding flowers.
Solution: Lightly prune the plant to remove weak or dead branches. This encourages healthier growth and flower production.
Final Tips
1. Ensure the pot has proper drainage to avoid waterlogging.
2. Regularly clean the leaves to keep them dust-free and healthy.
3. Monitor the plant closely during seasonal transitions and adjust care routines as needed.
By addressing these common issues, your hibiscus plant should thrive and bloom beautifully. With a little extra care and attention, those falling buds can turn into vibrant flowers in no time!
The rose plant is known for its beautiful flowers. If the rose plant does not bloom, we start worrying. During winter, special care is required to get maximum flowers from the plant. Many times, the plant develops buds but they do not bloom, plant does not look healthy.
Rose plants are heavy feeders and need a balanced supply of nutrients to thrive. To grow healthy and vibrant roses, providing the right fertilizers is essential. Here, we are sharing some fertilizers that can help keep your plant healthy and strong as well as produce beautiful flowers.
1. Groundnut Fertilizer
2. Tea Leaves + Seaweed Granules
3. Mustard Cake Fertilizer
4. Rose Tonic – Rose Radiant Organic Fertilizer
Best Fertilizers for Rose Plants
1. Groundnut Liquid Fertilizer
Groundnut liquid fertilizer is an excellent organic option for roses.
How to use:
Soak the groundnut cake in water overnight.
Dilute the liquid mixture in the ratio 1:4 (groundnut liquid: water) and apply it to the soil once every 15-20 days.
Benefits:
The composition of groundnut cake includes essential elements such as nitrogen (N), phosphorus (P), and potassium (K), commonly referred to as NPK, along with fibers and proteins.
Rich in nitrogen, it supports lush green foliage and healthy plant growth.
Encourages root development.
Improves soil fertility.
Boosts flowering and helps the plant grow strong and healthy.
This organic fertilizer, enriched with nitrogen, effectively addresses the problem of yellowing leaves in plants, providing a valuable solution when leaf discoloration occurs.
A combination of tea leaves + seaweed granules is a powerhouse of nutrients.
How to use:
Mix two teaspoons each of used tea leaves and seaweed granules and add this mixture to the soil.
Ensure that you loosen the soil before adding the powder, then water the plant after application.
Benefits:
Tea leaves provide nitrogen and improve soil structure.
Seaweed granules are rich in potassium and trace elements, promoting better flowering and overall plant health.
This organic mix not only boosts flower production but also improves the plant’s resistance to stress.
3. Mustard Cake Fertilizer
Mustard cake fertilizer is a fantastic natural choice for roses. Derived from mustard seeds, it is packed with essential nutrients like nitrogen, phosphorus, and potassium.
How to Use:
Soak the mustard cake in water overnight.
Dilute the mixture with 5 times more water, which means mixing 1 part of mustard cake liquid fertilizer with 5 parts of water.
Feed the plant with this when the soil is dry.
Apply it to the soil once every 15-20 days.
It will show results after 4-5 days on the plants and would last for a longer duration.
Benefits:
This fertilizer encourages root development.
It improves soil fertility.
It boosts flowering and helps the plant grow strong and healthy.
This cost-effective fertilizer is perfect for all types of roses and complements other fertilizers for balanced nutrition.
Roses thrive on the right combination of nutrients, and fertilizers play a vital role in their growth. Groundnut fertilizer, tea leaves with seaweed granules, mustard cake fertilizer, and the Rose Radiant Organic Fertilizer are some of the best options for ensuring healthy and blooming rose plants. With regular feeding and proper care, you can enjoy vibrant roses in your garden throughout the year.
Marigolds are loved by gardeners for their bright colors, easy care, and versatility. They are perfect for adding a splash of color to balconies, terraces, and containers, making them a great choice for urban gardeners who may not have big garden spaces. However, marigolds can sometimes get diseases that affect their growth, flowering, and health.
For those growing marigolds in pots or small spaces, learning about common plant diseases and how to prevent them is important. This guide covers the main diseases affecting marigolds and offers simple tips to keep your plants healthy and blooming all season.
Common Diseases in Marigold and Prevention Tips
1. Fungal Diseases
(i) Leaf Spot and Fungus Infestation: Fungal spots on leaves can weaken the plant and spread quickly.
Prevention:
Remove infected leaves and ensure good air circulation by planting at proper distances.
Apply fungicides like Mancozeb or Carbendazim.
Ensure good soil drainage and avoid overwatering.
Organic fungicides, such as Trichoderma, can also help control the fungus.
Trichoderma Fungicide
(ii) Powdery Mildew: This white powdery fungal growth can cover leaves and stems, affecting plant health.
Powdery mildew on marigold
Prevention:
Use sulfur-based fungicides for control.
Regularly inspect plants to catch early signs and treat them immediately.
(iii) Root Rot: Excess moisture can lead to fungal root rot, harming the plant from below.
Prevention:
Maintain adequate spacing between plants to enhance air circulation.
Remove and discard affected plant parts.
Use botrytis-control agents like Chlorothalonil to prevent further spread.
(i) Mosaic Virus: This virus spreads through insects like aphids and whiteflies, causing light and dark green patches on leaves. It weakens the plant and reduces growth.
Prevention:
Remove infected plants to prevent further spread.
Control insect vectors, like whiteflies and aphids, by using appropriate insecticides and natural pest control methods.
3. Bacterial Diseases
Root Rot and Leaf Bacterial Infections: Although bacterial infections are less common in marigolds, they can occasionally cause root rot or leaf spots.
Prevention:
Remove infected plants immediately to protect healthy ones nearby.
Practice crop rotation and use disease-free soil for new plantings.
By following these expert tips, gardeners and farmers can enjoy a healthy and profitable marigold crop, making their flower farming venture successful.
गेंदे (Marigold) के पौधे की पिचिंग (Pruning) जिससे मिलते हैं अधिक फूल और घना पौधा
गेंदे के पौधे में अधिक फूल और शाखाएं पाने के लिए पिचिंग (pruning) एक बहुत ही उपयोगी तकनीक है। इस प्रक्रिया में पौधे के मुख्य तने को हल्का काटा जाता है, जिससे उसमें कई नई शाखाएं निकलने लगती हैं। आइए समझते हैं कि पिचिंग क्यों की जाती है और इसे कैसे सही तरीके से किया जाए।
गेंदे (Marigold) के पौधे की पिचिंग
गेंदे (Marigold) की पिचिंग क्यों करें? Pruning of Marigold
✅ अधिक फूलों के लिए
पिचिंग करने से पौधे में अधिक शाखाएं निकलती हैं, और हर शाखा पर एक फूल आता है। इससे पौधे पर फूलों की संख्या बढ़ जाती है, और यह अधिक आकर्षक लगता है।
✅ लंबे समय तक पौधा घना बना रहे
पिचिंग से पौधा घना और फैलावदार हो जाता है, जिससे बगीचे में वह और भी सुंदर दिखता है। इसका घना रूप इसे अधिक मजबूत और स्वस्थ भी बनाता है।
जब गेंदे का पौधा लगभग 6-8 इंच का हो जाए, तो उसे पिचिंग के लिए तैयार माना जाता है। इस ऊंचाई पर पौधा पर्याप्त मजबूत हो जाता है, जिससे उसमें नई शाखाएं निकलने की संभावना बढ़ जाती है।
✅ गेंदे (Marigold) के पौधे की पिचिंग की विधि
Pinching of Marigold
पौधे के मुख्य तने को उस स्थान से काटें, जहाँ से नई शाखाएं निकलना शुरू हो रही हों।
इस प्रक्रिया में आप एक तेज और साफ चाकू या कैंची का उपयोग कर सकते हैं।
इस बात का ध्यान रखें कि कटाई साफ-सुथरी हो ताकि पौधे को नुकसान न पहुंचे और नए अंकुर जल्दी निकलें।
गेंदे के पौधे में पिचिंग की इस तकनीक को अपनाकर आप अपने बगीचे में फूलों की संख्या और पौधे की खूबसूरती दोनों बढ़ा सकते हैं।