Category Archives: Blog

Rose Flowering Care & Tips in February

Rose Flowering Care and Tips in February – Rose Will Bloom Again If You Do This Task in February Now

Rose Flowering Care and Tips in February

February is a make-or-break month for rose lovers. After months of dormancy, your roses need some attention to wake up and bloom beautifully in spring. If you ignore them now, they might struggle, bloom weakly, or even fail to thrive.

Many gardeners assume that roses will take care of themselves once winter ends, but that’s not the case. Proper pruning, feeding, watering, and pest control in February will ensure that your roses return with full, vibrant blooms.

So, what exactly should you do this month to guarantee a stunning rose garden? Let’s dive into the essential tasks.

Rose Flowering Care and Tips in February
Rose Red Flowers

Understanding Rose Dormancy


Before jumping into rose care, it’s important to understand what happens to them during winter.

Why Do Roses Go Dormant?


Dormancy is nature’s way of protecting roses from the harsh winter cold. When temperatures drop, roses stop growing, lose their leaves, and appear lifeless. However, they are still very much alive beneath the surface, conserving energy for spring growth.

Signs Your Roses Are Waking Up


By February, roses begin to show signs of coming out of dormancy. Look for these indicators:

  • Swelling buds on stems
  • Small green shoots appearing
  • Slight softening of branches

When you notice these signs, it’s time to start your February rose care routine.


Rose Flowering Care and Tips in February


Rose Will Bloom Again If You Do This Task in February Now


1. Pruning: The First Step to Revival


Pruning is the most important task you must do in February. It encourages new growth, removes dead or diseased branches, and improves air circulation.

How to Prune Roses Correctly:

Use sharp, clean pruning shears.
✅ Cut at a 45-degree angle, about ¼ inch above an outward-facing bud.
✅ Remove dead, weak, or inward-growing branches.

2. Cleaning Up the Rose Bed


A clean rose bed is essential for preventing diseases and ensuring healthy soil.

Steps to Clean Your Rose Bed:


  • Remove fallen leaves, as they can harbor pests and fungi.
  • Pull out any weeds that might compete for nutrients.
  • Loosen compacted soil to improve drainage.

Cleanliness reduces the risk of black spot and powdery mildew, two common rose diseases.

3. Feeding Your Roses with the Right Nutrients


Roses are heavy feeders, and after winter, they need a boost.

Best Fertilizers for February:

  • Organic: Compost, bone meal, banana peels (for potassium).

Feed your roses at the base, avoiding the leaves to prevent burns.


4. Watering Wisely After Winter

Roses don’t need a lot of water in winter, but as they wake up, they need a steady supply.

Watering Tips for February:

  • Water deeply but less frequently.
  • Avoid watering leaves to prevent fungal infections.
  • Test the soil—if it’s dry an inch below the surface, it’s time to water.

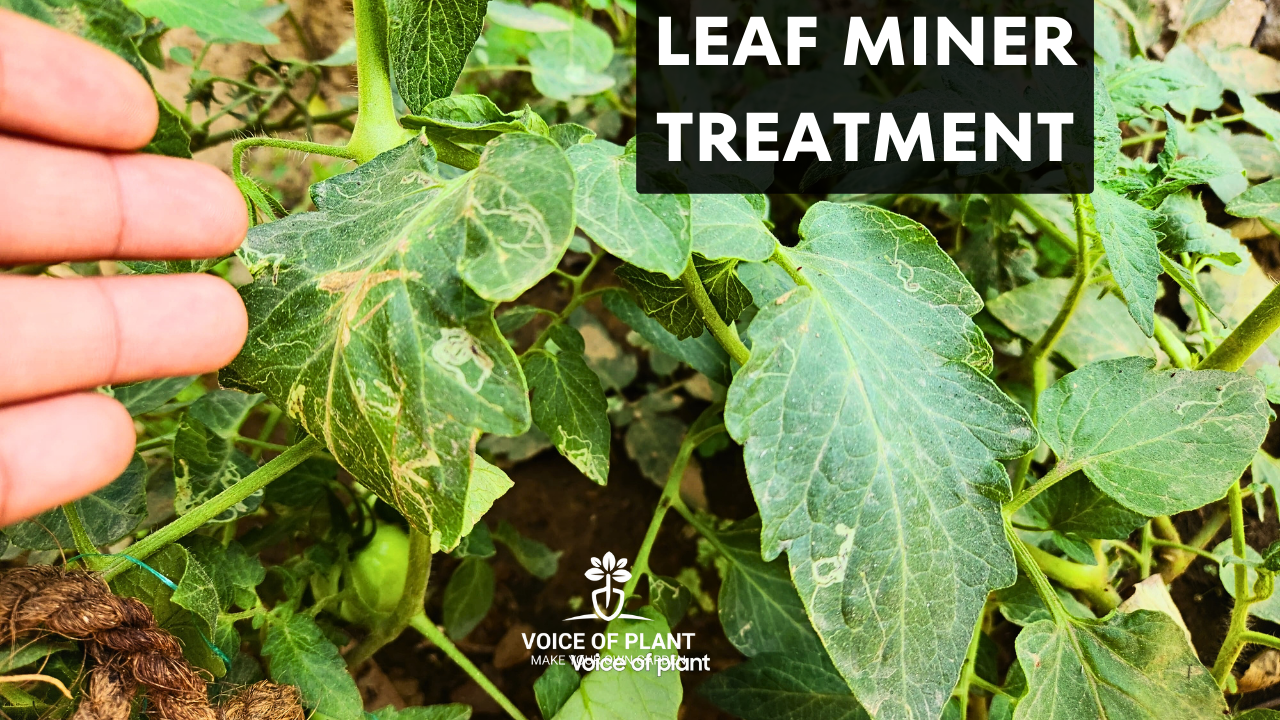
5. Checking for Pests and Diseases


Early spring brings pests like aphids and fungal diseases.

Preventing Pests:

  • Use neem oil or insecticidal soap.
  • Introduce ladybugs (natural aphid predators).

Preventing Diseases:

  • Keep good airflow by proper pruning.
  • Avoid overhead watering.
  • Apply a preventive fungicide if needed.

Conclusion

If you take care of your roses in February, you’ll be rewarded with an explosion of blooms in spring. Prune, feed, water, and protect your roses, and they’ll return healthier and more beautiful than ever.

Check this – Best Fertilizers for Rose Flowering


Follow our Social media channel:

1. Voice of Plant – YouTube Channel

2. Voice of Plant Facebook Page

3. Instagram Voice of Plant Channel

Happy Gardening !!

Money plant with big leaves

How to Make Money Plant Grow Bigger Leaves? Try These Effective Tips

How to Make Money Plant Grow Bigger Leaves


Money plants thrive beautifully wherever they are planted, adding charm to the entire space. Everyone desires to see their money plant grow with large, lush, and beautiful leaves.

How to Make Money Plant Grow Bigger Leaves
Money plant with big leaves

How to Make Money Plant Grow Bigger Leaves


Money plants are one of the most loved indoor plants found in almost every home. After planting a money plant, most people wish for it to stay green and grow quickly. A healthy, green plant means large, lush leaves and good overall growth. To achieve this, it’s crucial to understand what you can do to help your money plant grow broad and beautiful leaves.

Tips to Grow Large Leaves on Money Plants


To grow broader leaves on your money plant, pay attention to two key factors:

1. Use a Bigger Pot: Transfer your money plant to a larger pot, as this provides the plant more space to grow, leading to bigger leaves.

  • Ideally, an 8-10 inch-sized pot is sufficient for a money plant, but it can also thrive in smaller pots.

2. Provide Proper Nourishment: Feed your money plant with used tea leaves. The nutrients in tea leaves aid in leaf growth, making them larger and more attractive.

Use Tea Leaves as Fertilizer for Money Plants


Adding tea leaves as a fertilizer to money plants enhances their growth.

  • When you mix used tea leaves into the soil, they naturally release nitrogen, which helps balance any carbon-rich material already present in the soil.
  • Tea leaves also improve soil drainage and structure, promoting better plant growth.
  • As a result, the leaves of the money plant grow larger and appear more attractive.

Mustard Cake Fertilizer for Money Plants


Mustard cake fertilizer is a natural fertilizer, which is prepared from the cake left after extracting mustard oil. It is rich in nutrients like nitrogen, phosphorus and potassium, which are essential for the growth and greenery of plants.

How to make mustard cake liquid fertilizer for Money plants

  • Take 2-3 pieces of mustard cake.
  • Add them in 1 liter of water and soak them for 24 hours.
  • Filter it after 24 hours and use the water as fertilizer.
How to use liquid fertilizer
 
  • Pour this liquid fertilizer into the soil of the money plant once every 15 days.
  • Be careful not to add too much as it can harm plants.
Add water after applying fertilizer
– After adding liquid fertilizer, make sure to water the plants.
Keep in mind:
  • This fertilizer should not be used in extreme heat. It should be used only in cold weather.
  • Use this fertilizer today and fill your money plant with new shine and freshness!

Click here to read: Money Plant Complete Care Guide

How to Keep Money Plants Healthy and Green?


To ensure your money plant stays lush and green, follow these steps:

  • Use NPK fertilizer to boost the plant’s growth.
  • Add compost or organic fertilizer to the soil, water the plant, and provide sufficient sunlight.
  • Avoid placing money plants in strong direct sunlight.
  • Money plants thrive best in indirect light, both bright and medium.
  • You can keep money plants either indoors or outdoors, but avoid exposing them to strong sunlight.
  • You should prune the money plant at regular intervals to achieve a bushy and dense appearance.

These simple tips will ensure that your money plant flourishes with vibrant, broad leaves, enhancing the beauty of your indoor space.

Follow our Social media channel:

2. Voice of Plant Facebook Page

3. Instagram Voice of Plant Channel

Happy Gardening!

Leaf miner in tomato plant

Leaf Miner in Tomato Plant: Treatment & Cure

How to Treat Leaf Miner in Tomato Plant


Leaf miners pose a significant threat to the health and yield of tomato plant. These tiny pests, typically the larvae of moths, flies, or beetles, tunnel into the leaves, leaving behind distinctive serpentine patterns that hinder the plant’s ability to photosynthesize.

leaf miner on tomato leaves

If left unchecked, leaf miner infestations can severely compromise the overall health and productivity of your tomato plants.

Young saplings are particularly vulnerable and can die from severe infestations. Even if a mature plant survives heavy larval infestation, its growth will be stunted, and it may never reach its full potential unless treated promptly.

Moreover, fully grown healthy plants will suffer too, experiencing decreased flower and fruit yields due to severe infestations. Additionally, the openings created by leaf miners provide entry points for fungi and bacteria, causing leaves to yellow and eventually fall off the plant.

tomato

Furthermore, such infestations render green leafy edible plants unfit for consumption. However, with proactive management strategies, you can effectively control and minimize the impact of these pests. 

Leaf Miner in Tomato Plant


Key steps to treat Leaf Miner from Tomato Plant

1. Vigilant Monitoring
Regularly inspect your tomato plants for any signs of leaf miner damage.

  • Look for winding, white or brown trails on the leaves, as well as the presence of small, whitish maggots near the tunnels. Early detection is crucial for effective management.

2. Prune and Dispose 

Pruning leaf miner infected leaves (1)

Immediately remove and dispose of any infested leaves to reduce the population of leaf miners.

  • Be sure to dispose of the affected foliage away from your garden to prevent the larvae from completing their life cycle and re-infesting your plants.

3. Using Neem Oil as Organic Pest Control for Treating Leaf Miners

Neem oil is a popular organic pest control method for managing leaf miners in tomato plants. Here’s how to use it effectively:

1. Dilution:

  • Mix neem oil with water according to the manufacturer’s instructions. Typically, you can use around 2 to 4 tablespoons of neem oil per liter of water.

neem oil treatment to cure Leaf miner

2. Application:

  • Use a spray bottle or garden sprayer to apply the neem oil solution to the affected plants.
  • Make sure to cover both the upper and lower surfaces of the leaves, as leaf miners can be present on either side.

3. Frequency:

  • Apply the neem oil solution every 3 to 5 days. Consistent application is crucial to disrupt the life cycle of leaf miners.

4. Timing:

  • Apply neem oil in the evening only to avoid exposing plants to direct sunlight, which can cause leaf burn.

5. Clean leaves with fresh water

  • On the next day, clean the leaves with fresh water using a spray bottle every morning. 

6. Repeat:

  • Continue applying neem oil until the leaf miner infestation is under control. Be patient, as it may take several applications to see significant results.

6. Prevention:

  • To prevent future infestations, continue using neem oil as a regular part of your pest management routine, especially during periods of high leaf miner activity.

Also, read:

How to Grow Tomatoes at Home from Seeds in Pot

How to Prevent Leaf Miner in Tomato Plant


tomato plant

Prevention is the most effective method for controlling leaf miners. Here are some suggestions:

1. Regularly inspect plants:

  • Check the leaves of susceptible plants and young seedlings frequently for any signs of damage. Leaf miners tend to target the first set of true leaves.

2. Examine new plants:

  • Leaf miners can enter home gardens via new plants. When purchasing plants from a nursery or garden center, carefully examine the leaves for any signs of leaf miner infestation.
  • Keep monitoring the plants for 2 to 3 weeks after bringing them home, as this is the typical life cycle of leaf miner larvae.

3. Maintain plant health:

  • Healthy plants have better resistance against pests and diseases.

4. Keep garden areas clean:

  • Certain weeds like chickweed, lamb’s quarters, and pigweed are favored by leaf miners, especially in the fall when other plants have become dormant.
  • Removing these weeds can help reduce leaf miner populations.

Also, read:

Leaf Curl in Tomato Plant – How to Treat Leaf Curl Disease?

In conclusion, managing leaf miner infestations in tomato plants requires a multifaceted approach that combines vigilant monitoring, proactive measures, and environmentally friendly pest control methods. By adopting these strategies, you can effectively safeguard your tomato plants and ensure a healthy and productive harvest.

Follow our Social media channel:

1. Voice of Plant – YouTube Channel

2. Voice of Plant Facebook Page

3. Instagram Voice of Plant Channel

Happy Gardening!

hibiscus flowering

How to Get Maximum Flowering in Hibiscus

How to Get Maximum Flowering in Hibiscus


Every flowering plant naturally tends to bloom, and if a hibiscus fails to do so for 2-3 months, it becomes a cause for concern. Typically, an underlying problem or issue is responsible for the lack of blooming. Therefore, the primary focus should be on identifying the problem before applying any treatment to the plant. Always refer to the checklist below to ensure all the plant’s requirements are being met.

How to Get Maximum Flowering in Hibiscus
Hibiscus flower plant

How to Get Maximum Flowering in Hibiscus


Sunlight requirement


Hibiscus, renowned for its large flowers, necessitates a minimum of 5-6 hours of direct sunlight to promote blooming on all pruned branches.

  • This plant requires a substantial amount of energy to bloom, and if it receives only 1-2 hours of sunlight exposure, successful blooming may be hindered.

Soil composition


Soil mixture

The primary requirement for the growth of any plant is suitable soil.

  • It is crucial that the soil is not clayey, and any signs of algae formation should be addressed by tilling it.
  • To enhance the soil’s nutritional content and promote a looser texture, incorporate vermicompost.
  • For strong root development, the soil should possess an effective drainage system and not be compacted.

Water requirement


Excessive watering in hibiscus can result in root rot and hinder flower blooming.

  • If overwatered, buds may form but will ultimately drop without blossoming.
  • Conversely, insufficient watering can lead to the plant’s demise, with no chance of blooming and eventual withering.

“It is crucial to provide a balanced water supply for hibiscus—water when the soil is dry and ensure watering until excess water drains out from the bottom of the pot.”

Pest attack in Hibiscus plant


Examine the plant for potential insect infestations, as hibiscus plants are susceptible to attacks from pests such as aphids, mealybugs, and other insects.

  • These dense plants may conceal pests, making early detection challenging.

Use of Neem Oil


Inspect for leaf miners and other pests, and be vigilant for potential soil issues such as fungal infections or diseases. Safeguard against these pest attacks by thoroughly spraying the entire plant with neem oil.

  • To address soil diseases, if present, create a mixture of neem oil and a small amount of cinnamon powder in water and administer it to the soil.

Pot Size for Hibiscus plant


While hibiscus typically thrives in a 10-12 inch pot, if, despite addressing the previously mentioned considerations, the plant fails to bloom, it is crucial to thoroughly inspect the pot for potential root binding.

  • Although hibiscus tends to appreciate being slightly root-bound, excessive binding can induce stress.
  • To assess this, carefully remove the plant from its pot, examine the roots, and if necessary, engage in root pruning.
  • Transplant the hibiscus into a larger pot to provide ample space, fostering optimal growth conditions. It will start flourishing again.


Soft pruning of Hibiscus plant


Generally, it is advised to conduct hard pruning on hibiscus in February, while soft pruning can be carried out year-round, excluding the harsh winter months.

If your hibiscus is not producing blooms, consider soft pruning and follow up with a diluted mustard cake liquid fertilizer to replenish soil nutrients to promote the development of new branches.

“It is important to refrain from giving the mustard cake liquid fertilizer during extremely hot summers.”

  • The diluted form of mustard cake liquid fertilizer is recommended due to its potency.
  • When pruning is performed, hormones are released at the pruned tips, stimulating the growth of fresh branches.

Lack of Nutrients


If, despite pruning, your hibiscus is not blooming as expected, it likely indicates a nutrient deficiency. To address this, apply Epsom salt to the entire plant.

Banana peel fertilizer:


After 10 days of the Epsom salt treatment, nourish the plant with a liquid fertilizer made from banana peel fertilizer. This particular fertilizer enhances the flowering process, and you will likely notice the emergence of new buds shortly after application.

Read article on:

How to make Banana peel fertilizer


Onion peel liquid fertilizer:

Following the banana peel fertilizer, wait for another 10 days and then give onion peel liquid fertilizer to the plant.

  • This fertilizer also promotes flower blooming, and you can expect to see new buds appearing within a few days.

Note:

  • In instances where the leaves of the blooming plant turn yellow, it is an indication of a need for more nutrients.

Cow dung liquid fertilizer


  • After 10 days of the onion peel fertilizer, provide the plant with a liquid fertilizer made from cow dung.

Read article on:

How to make Cow dung fertilizer

Note:

  • By adhering to this schedule of applying different liquid fertilizers every 10 days, you can stimulate consistent blooming in your hibiscus.

Increase the dosage of fertilizer after thoroughly inspecting all the concerns mentioned above. To cure the main problem is necessary to promote the blooming in plants rather than applying random theories of experiments.

As living entities, plants require a well-balanced diet consisting of sunlight, water, air, and essential nutrients. It is crucial to meticulously monitor and fulfill each of these requirements to ensure the effective growth and flourishing of the plant.

Once the plant is blooming at the anticipated rate, reduce the fertilizer dosage, as an excessive amount may adversely affect the plant. It is advisable to adhere to the hierarchical checklist mentioned earlier before administering any remedies to the plant.

Follow our Social media channel:

1. Voice of Plant – YouTube Channel

2. Voice of Plant Facebook Page

3. Instagram Voice of Plant Channel


Happy Gardening!!

NPK Fertilizer for plants

What is NPK Fertilizer? How and When to Use NPK Fertilizer

What is NPK Fertilizer? How and When to Use NPK Fertilizer


What is NPK Fertilizer?


The term “NPK” represents the chemical symbols for nitrogen (N), phosphorus (P), and potassium (K).

These are the three primary macronutrients that plants need in significant amounts. These elements are essential for the healthy growth of plants and are often found in fertilizers to boost plant productivity and yield.

Nitrogen (N): Promotes leafy and vegetative growth.

  • It’s crucial for photosynthesis and is responsible for the lush green color of plants.

Phosphorus (P): Encourages root development and flowering.

  • It helps transfer energy throughout the plant and is vital during the plant’s early stages of growth.

Potassium (K):   Enhances overall plant health, improves disease resistance, and supports fruit and flower formation.

NPK Fertilizer
coleus plants indoor


What is NPK Fertilizer? How and When to Use NPK Fertilizer


The Role of Nitrogen, Phosphorus, and Potassium in Plant Growth


Each component plays a unique role in a plant’s life cycle.

  • For example, nitrogen drives photosynthesis, which fuels plant growth.
  • Phosphorus aids in energy storage and root development, while potassium ensures plants can withstand environmental stressors like drought or cold weather.

Together, these nutrients work harmoniously to maximize growth, improve yields, and enhance the overall health of plants.


Types of NPK Fertilizers


1. Organic vs. Synthetic NPK Fertilizers


NPK fertilizers are categorized into two types: organic and synthetic.

Organic Fertilizers:

  • Derived from natural sources such as compost, manure, bone meal, and seaweed.
  • These fertilizers release nutrients slowly, improving soil structure and microbial activity.

Synthetic Fertilizers:

  • Manufactured using chemical processes.
  • These fertilizers provide quick nutrient availability and are often preferred for immediate results but may lack long-term soil benefits.
2. Granular vs. Liquid NPK Fertilizers


Granular Fertilizers: Sold in solid form, these are easy to store and can be applied directly to the soil. They offer slow, controlled nutrient release over time.

Liquid Fertilizers: Dissolved in water, they provide nutrients rapidly to plants. These are ideal for foliar feeding and are often used in hydroponics or for quick nutrient fixes.

Must read: Best Organic Liquid Fertilizers for Plants


Benefits of Using NPK Fertilizers


NPK fertilizer

Balanced Nutrition for Plants


NPK fertilizers ensure that plants receive all three macronutrients in a balanced ratio.

  • This balance promotes steady growth, strong roots, healthy leaves, and robust flowering or fruiting.
Increased Yield and Quality


Using NPK fertilizers effectively leads to higher crop yields, better fruit size, improved flower quality, and healthier plants.

  • They also enhance the taste, color, and nutritional value of fruits and vegetables.

How to Use NPK Fertilizer Effectively


Choosing the Right NPK Ratio for Your Plants


Understanding the needs of your plants is key to selecting the right NPK fertilizer.

Different stages of plant growth and various plant species require specific nutrient ratios.

Understanding NPK Ratios (e.g., 10-10-10)


NPK ratios indicate the percentage of nitrogen, phosphorus, and potassium in the fertilizer.

  • For example, a 10-10-10 fertilizer contains 10% nitrogen, 10% phosphorus, and 10% potassium. This ratio is suitable for general gardening needs, providing balanced nutrition for most plants.

Matching NPK Fertilizers to Plant Needs


Different plants thrive on varying ratios. For instance:

1. Leafy Vegetables (e.g., spinach, lettuce): Prefer nitrogen-rich fertilizers for vibrant green leaves.

2. Flowering Plants (e.g., roses, hibiscus): Require phosphorus-heavy fertilizers to boost blooms.

3. Root Crops (e.g., carrots, potatoes): Benefit from potassium-dominant fertilizers for strong, healthy roots.


Dos and Don’ts of Using NPK Fertilizers


Do: Follow label instructions carefully to avoid over-fertilizing, which can harm plants and soil.

Don’t: Apply fertilizers during the hottest part of the day, as this can lead to nutrient loss through evaporation.

Do: Water the soil after application to help the nutrients seep into the ground.

Don’t: Use too much nitrogen for flowering plants, as it may hinder bloom production.


When to Use NPK Fertilizers


Timing is critical for effective fertilizer use. Different plants and growth stages require fertilization at specific intervals.

1. During Planting


When preparing your soil, incorporate a balanced NPK fertilizer to give plants a healthy start.

  • This ensures the roots establish well in nutrient-rich soil.
2. During Active Growth


As plants grow and develop leaves, stems, and flowers, they require consistent feeding.

  • A nitrogen-heavy fertilizer is often used at this stage for optimal vegetative growth.
3.  Before Flowering or Fruiting


Switch to phosphorus and potassium-rich fertilizers during the flowering or fruiting phase. This promotes better blooms, fruits, and overall plant health.

4. Seasonal Considerations


Fertilizer application should also align with seasonal changes:

  • Spring: Ideal for most plants, as they emerge from dormancy.
  • Fall: Suitable for preparing perennials and trees for winter dormancy.

Conclusion


NPK fertilizers play an essential role in modern gardening and agriculture. By understanding the importance of nitrogen, phosphorus, and potassium and choosing the right fertilizer for your plants, you can maximize growth, boost yields, and ensure a thriving garden or farm. 

Follow our Social media channel:

1. Voice of Plant – YouTube Channel

2. Voice of Plant Facebook Page

3. Instagram Voice of Plant Channel


Happy Gardening!

jade lucky plant

Does Jade Plant Really Bring Good Luck?

Does Jade Plant Really Bring Good Luck?

The Jade Plant, also known as the Lucky Plant, is widely known for its association with good fortune and prosperity. It is believed that keeping this plant in your home brings good luck, happiness, and an increase in wealth. But is there something truly special about this plant that can bring positive changes to our lives? Let’s explore this in detail.

Does Jade Plant Really Bring Good Luck?
Jade Plant

Does Jade Plant Really Bring Good Luck?

The Jade Plant and Its Importance in Feng Shui


In Feng Shui, the Jade Plant symbolizes wealth and prosperity.

  • It is recommended to place it in directions that attract positive energy, such as the southeast direction.
  • This plant is believed to create an atmosphere of peace and happiness in the place it is kept.

Does the Jade Plant Really Enhance Luck?


The belief that the Jade Plant boosts luck and prosperity is prevalent across various cultures and civilizations.

  • Its presence fosters a positive environment and provides mental peace.
  • Many people keep it in their homes, hoping that good fortune stays with them.

Benefits of Keeping a Jade Plant


1. Mental Peace: The greenery of this plant brings mental peace and helps reduce stress.

2. Wealth Growth: Keeping it in homes or commercial spaces is said to enhance wealth and prosperity.


Where Should You Place the Jade Plant?


  • Place it in the southeast direction of your home, as this direction is associated with wealth.
  • In offices, keep it on your work desk to maintain positive energy around your workspace.

How to Care for a Jade Plant?


1. Watering: Water it only when soil looks completely dry.

  • Overwatering can lead to root rot.

2. Sunlight: Ensure the plant gets adequate sunlight for healthy growth.

3. Placement: Keep your Jade plant outdoor in sunny spot.

Must read: Where to Keep Jade Plant for Healthy Growth


Common Problems in Jade Plants


1. Yellow Leaves: This may occur due to overwatering.

2. Root Rot: Excess water can cause the roots to rot, which is harmful to the plant.


Can Jade Plants Be Gifted?


The Jade Plant makes an excellent gift, symbolizing friendship and good wishes. It is a perfect gift for occasions like housewarming or starting a new business.


Conclusion


The Jade Plant is not just a beautiful houseplant; it also brings positivity, prosperity, and happiness to your home. By placing it in the right direction and caring for it properly, it can not only enhance the aesthetic appeal of your space but also bring good fortune into your life.

Follow our Social media channel:

1. Voice of Plant – YouTube Channel

2. Voice of Plant Facebook Page

3. Instagram Voice of Plant Channel


Thank you!

Happy Gardening!

When and How to Give Fertilizer to Jasmine Plant for Maximum Flowering

When and How to Give Fertilizer to Jasmine Plant


Fertilizers are essential for providing the necessary nutrients to the soil and plants to support optimal growth. When plants require fertilizers, they exhibit various symptoms, including:

1. Dull, faded, or curled leaves.

2. Stagnant or limited plant growth.

3. Withered or deteriorating plant condition.

4. Failure to form buds.

5. Bud formation without subsequent flower development.

6. Blooming flowers that lack fragrance.

When and How to Give Fertilizer to Jasmine Plant
Jasmine Flower

For Jasmine plants, regular pruning is recommended to encourage the growth of branches, buds, and flowers. To ensure the plant’s growth aligns with the desired pace, it’s important to match the nutrient requirements. Adjusting the dosage of different fertilizers based on the plant’s various growth phases is a key practice.

When and How to Give Fertilizer to Jasmine Plant


  • During Growing phase of the plant
  • During Flowering Phase of the Plant

A. Growing phase of the plant:

Jasmine plant

1. Mustard Cake Fertilizer:

  • This is a favored fertilizer for Jasmine (Mogra) plants during the initial growth stage.
  • Apply it once a month to promote the development of a robust and healthy plant.
  • It is advisable to skip this fertilizer during extreme summers, replacing it with alternatives like neem cake powder.


Read article on: Mustard Cake Fertilizer

2. Liquid Fertilizers:

  • Apart from Mustard Cake Fertilizer, you can use vermicompost tea, cow dung fertilizer, or kitchen compost tea during the growing phase.
  • You can give liquid fertilizers once a month to maintain a nutrient-rich soil environment.


Read article on:

1.  Vermicompost tea

2. Cow Dung Fertilizer

3. Micronutrients:

  • While liquid fertilizers are rich in essential nutrients like nitrogen, phosphorus, and potassium (NPK), they might lack sufficient micronutrients.
  • Every two months, address potential micronutrient deficiencies to prevent issues like faded leaves or a lack of fragrance in flowers.
  • Liquid micronutrients are effective for Jasmine (mogra) plants; dilute 3 ml in 1 liter of water and spray it on the leaves and soil during the evening.
  • Feromones micronutrients also available in sticks can be used here.

B. Flowering Phase of the Plant:


1. Enhanced Frequency:

  • As the plant enters the flowering phase with visible branches, increase the frequency of fertilizer.
  • Alongside the regular fertilizers, introduce additional ones like onion peel or banana peel fertilizer once a month. This adjustment reduces the interval between fertilizations to 15 days.

2. Pruning and Flowering:


  • Pruning is particularly crucial during the flowering phase to encourage lateral growth.
  • Given the simultaneous demand for nutrients during pruning and flowering, maintaining a consistent and nutrient-rich fertilizer schedule becomes vital.

General Tips:

  • The dosage of different fertilizers should be adjusted according to the different phases of the plant. This is a good practice, as the nutritional needs of the plant can vary during different stages of growth, such as the growing phase and flowering phase.
  • Rather than increasing concentrations, adjust the frequency of fertilizer. Always dilute fertilizers with sufficient water before applying to prevent any adverse effects on the plant.

By following these guidelines, anyone can cultivate a thriving Jasmine (Mogra) plant at home. 

Also read:

How to Grow and Care Jasmine Plant


Follow our Social media channel:

1. Voice of Plant – YouTube Channel

2. Voice of Plant Facebook Page

3. Instagram Voice of Plant Channel

Happy Gardening !!

How to Get More Pups in Aloe Vera Plant

How to Get More Pups in Aloe Vera Plant

How to Get More Pups in Aloe Vera Plant

Introduction


Aloe vera is a household favorite, cherished for its soothing gel and low-maintenance nature. But did you know that your aloe plant can become a propagation powerhouse? By nurturing your aloe vera properly, you can encourage it to produce more pups—miniature versions of the parent plant. These pups are a great way to expand your plant family or gift loved ones a piece of your green haven.

How to Get More Pups in Aloe Vera Plant
Aloe Vera pups

Understanding Aloe Vera Pups


What Are Aloe Vera Pups?


Aloe vera pups, also known as offsets, are small, identical clones of the parent plant that grow from the base. They share the same root system until they’re mature enough to be separated and planted individually.

Why Do Aloe Vera Plants Produce Pups?


In nature, pups are the aloe plant’s way of spreading and reproducing. When the plant is thriving, it directs energy into creating these offspring to ensure survival in its environment.


How to Get More Pups in Aloe Vera Plant

Choosing the Right Aloe Vera Plant


1. Healthy Parent Plant is Key


For a plant to produce pups, it needs to be healthy and thriving. Look for a mature aloe vera with thick, fleshy leaves and a robust root system.

Signs of a Pup-Ready Aloe Vera


Aloe vera plants typically start producing pups when they’re about 1-2 years old. You may notice small green shoots emerging from the soil near the base of the plant.


Best Growing Conditions for Aloe Vera


1. Soil Requirements


Aloe vera thrives in well-draining soil. Use a cactus or succulent mix, or prepare your own blend with sand, perlite, and potting soil.

2. Sunlight Needs


Place your aloe vera in bright sunlight. While it can tolerate direct sun, too much exposure can stress the plant and inhibit pup production.

3. Watering Practices


Water your aloe vera deeply but infrequently. Allow the soil to dry out completely between waterings to mimic its natural desert habitat.


Techniques to Encourage Pup Growth


1. Providing Adequate Space


Overcrowded pots can hinder pup growth. Ensure your aloe vera has enough room to expand its root system.

2. Fertilizing the Plant


Aloe vera doesn’t need much fertilizer, but a light feeding of a balanced, organic fertilizer during the growing season can encourage pups.

3. Stressing the Plant Slightly


Mild stress, such as reducing water frequency or sunlight slightly, can sometimes trigger the plant to produce pups as a survival mechanism.

Common Mistakes to Avoid


  • Overwatering: Too much water can cause root rot and harm both the parent plant and pups.
  • Neglecting Soil Quality: Poor soil drainage can stunt growth and pup production.

Best Times of Year for Pup Growth


Spring and summer are the best seasons for aloe vera to produce pups, as the plant is actively growing.

Aloe vera pups are nature’s gift to plant lovers, offering a simple way to propagate this amazing plant. With the right care and techniques, you can encourage your aloe vera to produce plenty of pups, turning one plant into a thriving collection.

Check this out – Aloe Vera Plant Complete Care


Follow our Social media channel:

1. Voice of Plant – YouTube Channel

2. Voice of Plant Facebook Page

3. Instagram Voice of Plant Channel

Happy gardening!

aloe vera thumbnail

How to Grow Aloe Vera Plant

How to Grow Aloe Vera Plant


In today’s world, almost everyone is aware of the benefits and uses of Aloe Vera, particularly its ability to thrive and propagate easily. However, to make the most of its benefits, it is important to know how to care for it properly. In this article, we will discuss several tips to help you maintain healthy and lush Aloe Vera plants.


Tip 1: Healthy roots are essential for a thriving and robust Aloe Vera plant


Aloe Vera

To strengthen the roots:

1. Ensure the soil mixture is optimal.

  • A well-draining soil mix, such as a cactus or succulent potting mix, promotes healthy root growth.

2. Maintain balanced watering practices.

aloe vera watering

  • Overwatering can cause fungal infections, attract insects, and promote bacterial growth in the roots.
  • It may also lead to root decay.
  • Allow the soil to dry out completely between waterings to prevent these issues.

Tip 2: Sometimes, ignorance is bliss when it comes to caring for Aloe Vera plants


This resilient plant does not demand excessive attention or care.

  • Once you have ensured it receives adequate sunlight, water, and well-draining soil, you can largely leave it to thrive on its own.
  • Aloe Vera plants typically produce pups, or offsets, which can be planted separately.
  • After planting, minimal intervention is needed; the plant will flourish and eventually bloom without the need for fertilizers or frequent repotting.

Tip 3: Choose Broad Pots for Aloe Vera Planting


When selecting pots for your Aloe Vera, opt for broad containers rather than deep ones.

  • Aloe Vera plants require ample space to spread out and thrive.
  • Consider using a pot that is approximately 6 inches deep and 14 inches wide, or any rectangular-shaped container that provides sufficient room for the plant to expand its roots and grow comfortably.

Tip 4: Optimal Sunlight Exposure for Aloe Vera


While Aloe Vera can tolerate bright indoor light, placing it on a work desk indoors might hinder its growth potential.

For optimal and healthy growth, it is best to expose your Aloe Vera plant to direct sunlight.

  • Aim to provide as much sunlight as possible to promote its magnificent growth.

However, be mindful to protect the plant from scorching heat.

If temperatures soar to extreme levels, consider relocating the plant to a shaded area to prevent damage.

  • Balancing ample sunlight with protection from excessive heat ensures the best conditions for your Aloe Vera’s thriving growth.

You may also read:

Aloe Vera Plant Care: Pest Attack and Black Spot

Tip 5: Optimal Growing Season for Aloe Vera


The ideal growing season for Aloe Vera is from late September to late November, which coincides with autumn.

  • During this period, Aloe Vera exhibits maximum growth potential.
  • To ensure robust and blooming growth, it is advisable to prepare the plant beforehand.

Before September arrives, take all necessary measures to prepare the soil, apply fertilizer, and address any other requirements to facilitate optimal growth during the upcoming season.

  • By preparing in advance, you can set the stage for your Aloe Vera plant to thrive and flourish during its peak growing period.

Tip 6: Pruning


Remove any dead or damaged leaves regularly to encourage new growth.

  • Use clean, sharp scissors or pruning shears to avoid damaging the plant.

Tip 7: Fertilizer


Aloe Vera plants are not heavy feeders. Fertilize sparingly, using a balanced fertilizer diluted to half strength, only during the growing season (spring and summer).

Tip 8: Pests and Diseases:


Aloe Vera plants are relatively pest-resistant, but they can occasionally attract mealybugs or aphids. Treat infestations promptly with insecticidal soap or neem oil.

Tip 9: Propagation:


Aloe vera pot


Aloe Vera plants can be easily propagated by removing offsets (pups) that grow around the base of the plant.

You may also read:

How to Propagate Aloe Vera

Follow our Social media channel:

1. Voice of Plant – YouTube Channel

2. Voice of Plant Facebook Page

3. Instagram Voice of Plant Channel

Happy gardening!!

leaf miner

What is Leaf Miner How to control and treat Leaf Miner

What is Leaf Miner How to control and treat Leaf Miner


Leaf miners, those tiny but troublesome pests, can wreak havoc in your garden if left unaddressed. In this comprehensive guide, we will delve into the world of leaf miners, exploring their life cycle, impact on plants, and effective strategies for prevention and removal. Let’s embark on a journey to safeguard your garden from these pesky intruders.


What is Leaf Miner How to control and treat Leaf Miner


Leaf miners are insects whose larvae feed on the internal tissues of plant leaves, creating distinctive patterns or mines. These pests encompass various species, each with its unique characteristics and preferences.

Read this article to learn about What is Leaf Miner? How to control and treat Leaf Miner. Check steps to prevent leaf miner.
leaf miner on tomato leaves

Understanding the significance of leaf miners is crucial for gardeners. The damage inflicted by these pests can compromise the overall health of plants, leading to economic consequences and diminished aesthetic appeal in gardens.

Identification of Leaf Miner Infestation


Signs and Symptoms


Detecting leaf miner infestations early is essential. Look for telltale signs such as discolored or distorted leaves, and the presence of winding trails or blotches on foliage.

Affected Plants


Leaf miners are not picky eaters. They target a wide range of plants, from vegetables and ornamentals to fruit-bearing trees. Identifying the affected plants is key to implementing effective control measures.

Life Cycle of Leaf Miner


Eggs and Larvae


Leaf miners undergo a fascinating life cycle, starting with eggs laid on the undersides of leaves. The hatching larvae then burrow into the leaf tissue, feeding as they grow.

Pupae Stage


As the larvae complete their feeding phase, they enter the pupae stage within the leaf. This transformation prepares them for adulthood.

Adult Stage


The emergence of adult leaf miners signifies the completion of their life cycle. Understanding this process aids in devising timely control strategies.

Impact on Plants


Damage to Foliage


Leaf miners compromise plant health by tunneling through leaves, disrupting the normal functioning of chlorophyll and hindering photosynthesis.

Reduction in Plant Health


Repeated infestations can lead to weakened plants, making them more susceptible to other diseases and environmental stressors.

Economic Consequences


In agricultural settings, leaf miner damage can have severe economic implications, affecting crop yields and quality.

Common Types of Leaf Miners


Blotch Miners

leaf miner Blotch Miners

Blotch miners create large, irregular mines on leaves, causing significant damage.

Serpentine Miners


Serpentine Miners

Serpentine miners leave distinctive, winding trails on leaves as they feed.

Needle Miners


Needle Miners

Needle miners target coniferous trees, causing needle discoloration and loss.

Prevention Strategies


Proper Plant Care


Maintaining optimal plant health through proper watering, fertilization, and pruning is a fundamental preventive measure.

Crop Rotation


Rotating crops helps disrupt the life cycle of leaf miners, reducing the likelihood of infestations.

Natural Predators


Encourage the presence of natural predators, such as parasitic wasps and predatory beetles, to keep leaf miner populations in check.

Click here to read: Leaf Miner in Tomato Plant: Treatment & Cure

What is Leaf Miner How to control and treat Leaf Miner


Organic Control Methods


Neem Oil


Neem oil acts as a natural insecticide, disrupting the feeding and reproductive processes of leaf miners.

Beneficial Insects


Introducing beneficial insects like ladybugs can help control leaf miner populations without resorting to chemical solutions.

Chemical Control Options


Insecticides


Selecting and applying insecticides with precision is crucial for effective leaf miner control.

Systemic Treatments


Systemic treatments, such as soil-applied insecticides, provide long-lasting protection against leaf miners.

Timing of Application


Applying control measures at the right stage of the leaf miner life cycle maximizes their effectiveness.

Cultural Practices for Leaf Miner Management


Regular Pruning


Pruning affected leaves helps remove larvae and minimizes the spread of infestations.

Removing Infested Leaves


Promptly removing infested leaves prevents the further development and spread of leaf miners.

Maintaining Soil Health


Healthy soil contributes to strong plant growth, making them more resilient to leaf miner attacks.

DIY Remedies


Homemade Insecticidal Soap

A simple mixture of soap and water can be an effective and eco-friendly solution for controlling leaf miners.

Garlic Spray

Garlic’s natural insect-repelling properties make it a valuable ingredient in homemade sprays.

Sticky Traps

Placing sticky traps around affected plants captures adult leaf miners, disrupting their reproductive cycle.

Importance of Early Detection


Monitoring Techniques


Regularly inspecting leaves and using sticky traps helps detect leaf miners in their early stages.

Regular Inspection


Routine checks on your garden ensure timely identification and intervention, preventing severe infestations.

Follow our Social media channel:

1. Voice of Plant – YouTube Channel

2. Voice of Plant Facebook Page

3. Instagram Voice of Plant Channel

Happy Gardening!