Snake plant requires very little care in maintenance. This is the reason why people easily plant it at home.
The snake plant is a flexible, hardy plant and can survive in relatively dry environments both indoors and outdoors.
If you plan to plant a snake plant in your home, then it is important for you to take care of some things.
Watering Snake plant
How & When to Water Snake Plant
Now, let’s discuss some important tips to care for the Snake plant:
Watering for Snake plant
Often people do not know when and how to water the snake plants. So, let’s discuss some of the important points on “how to water snake plants”.
The snake plant is a succulent and its requirements are a little different from any other plant. Its leaves already have moisture locked in so, it does not require much water.
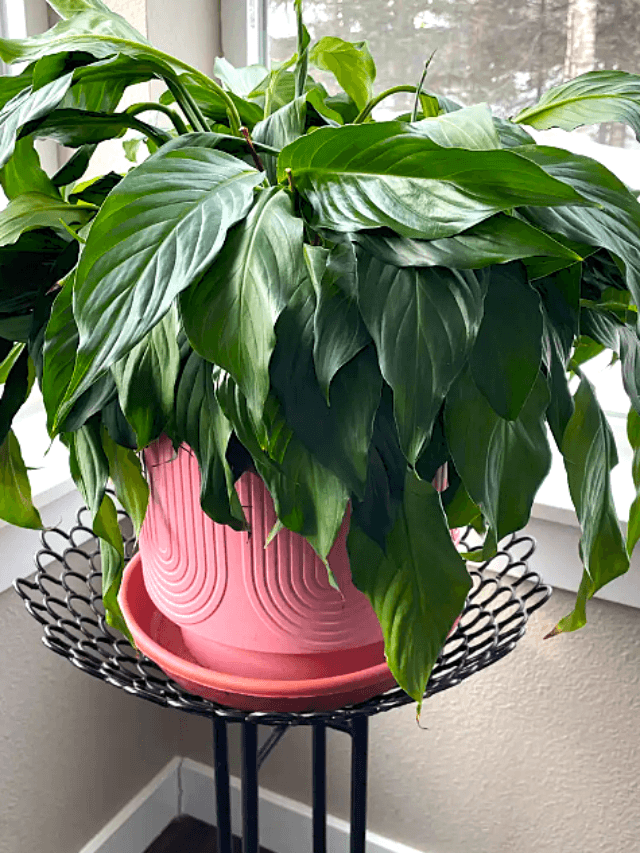
The biggest reason for the failure of this plant is overwatering or underwatering.
Before watering to Snake plant, follow the below steps:
Give water only, when the soil is completely dries
Water the snake plant only when the soil is completely dry.
Dig the top layer of soil at least for 2-3 inches not only the topmost layer, if it is dry till 2-3 inches then only give water.
When giving water, give it properly because the next watering might be done after 10-15 or 20 days.
Always give water at regular intervals
It should not be like that in the first go, your plant was watered at the gap of 4 days, and in the next round break of 20 days was taken.
The plant would start decaying in that case.
Always maintain the frequency of a 7-8 days gap.
During winter, it would need less water.
Important note:
Clean the leaves twice a month with a wet wipe or tissue paper.
Water should not get stagnant on the leaves, leaves might rot out.
Too much water can rot the roots of this plant.
Rainwater is good for Snake plant
Rainwater is good for this plant but not rain showers.
Store the rainwater in a bucket and give it to them (it works as a tonic for this plant).
Whenever it rains, shift them to shaded areas where rainwater would not fall directly.
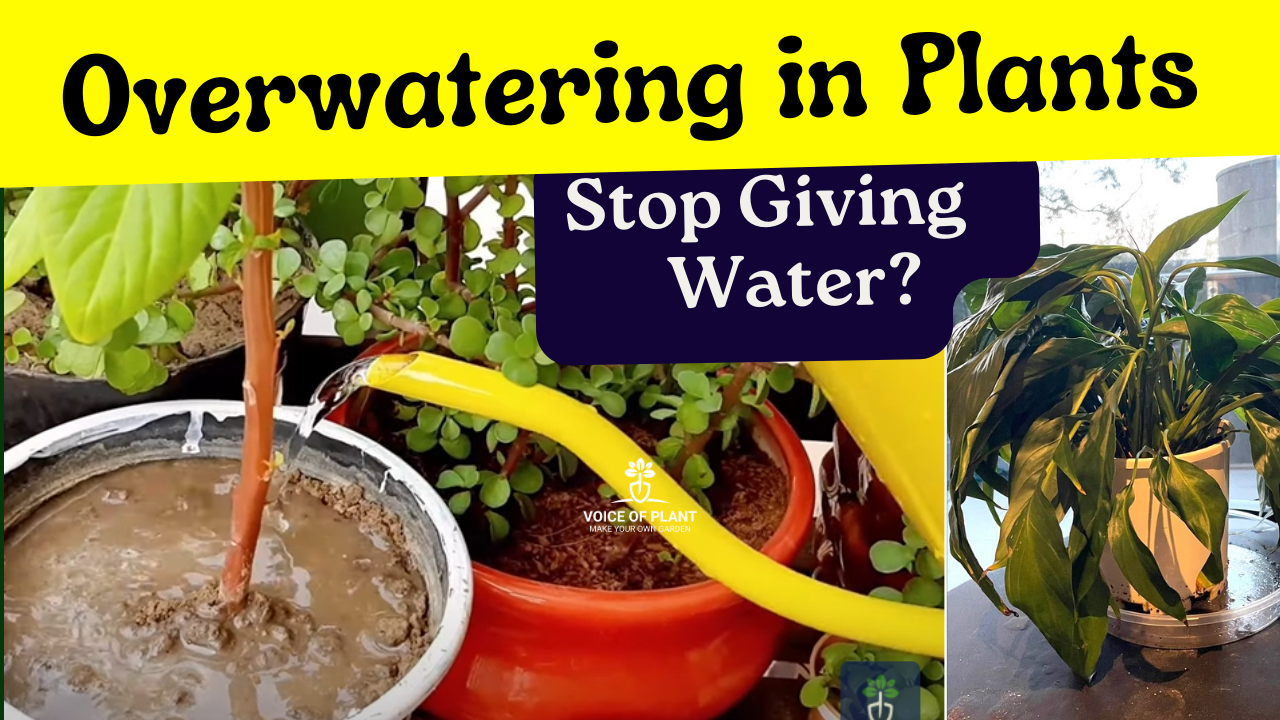
Taking care of plants is both an art and a science, and knowing how much water your plant needs is essential. While we often think more water is better, overwatering is one of the most common mistakes plant owners make.
It’s important to recognize the signs of overwatering before it’s too late. This article will help you identify the symptoms of overwatering and offer solutions to fix the problem.
What is Overwatering?
Overwatering in Portulaca plant
Overwatering occurs when plants receive more water than they can absorb.
This leads to waterlogged soil and deprives the roots of the oxygen they need to thrive.
Without proper oxygen, plants can suffocate, leading to serious health problems or even death.
Understanding how to avoid overwatering is key to maintaining healthy, vibrant plants.
How to Save Overwatering in Plants
Key Signs of Overwatering in Plants
Yellowing Leaves
One of the earliest signs of overwatering is yellowing leaves.
If your plant’s leaves start turning yellow, especially the lower ones, it may be an indication that it’s getting too much water.
Wilting, Even with Wet Soil
It’s counterintuitive, but a plant that wilts despite having moist soil is likely suffering from overwatering.
Overwatered roots struggle to function properly, causing the plant to droop.
Mushy or Soft Stems
Plants with soft or mushy stems are often experiencing root rot, a common consequence of overwatering.
This typically happens when excess water creates an environment conducive to fungal growth, which attacks the roots.
Root Rot
Root rot is one of the most severe signs of overwatering.
When roots remain submerged in water, they become blackened and mushy, eventually dying off. This condition is dangerous and difficult to reverse if not caught early.
Dropping Leaves
Another sign of overwatering is when a plant starts dropping its leaves, especially green or new ones.
This occurs because the plant is stressed and struggling to maintain its health.
Stunted Growth
Plants that are overwatered often show signs of stunted growth.
This happens because the roots aren’t able to absorb nutrients efficiently, causing the plant’s overall growth to slow down.
How to Check for Overwatering in Plants
To determine if your plant is overwatered, check the soil moisture by sticking your finger about an inch into the soil.
If the soil is still wet or soggy, overwatering is likely.
You can also examine the plant’s pot for drainage holes, as insufficient drainage exacerbates the issue.
Differences Between Overwatering and Underwatering
It’s easy to confuse overwatering with underwatering since both can cause wilting and yellowing leaves.
However, in underwatering, the soil will be dry, and the plant’s leaves may appear crispy or shriveled.
Overwatering, on the other hand, leads to soggy soil and soft, limp leaves.
How to Fix Overwatered Plants
Stop Watering Immediately
The first step to fix an overwatered plant is to stop watering it until the soil dries out.
Allow the plant to recover by withholding additional water.
Improve Drainage
Ensure that your plant’s pot has drainage holes to allow excess water to escape. If it doesn’t, consider transferring your plant to a container with better drainage.
Prune Damaged Roots
If root rot has set in, you’ll need to trim away the affected roots. Remove the plant from its pot, carefully cut away the mushy, discolored roots, and replant it in fresh soil.
Repotting the Plant
If your plant’s soil is severely waterlogged, repotting might be necessary. Gently remove the plant from its current pot, shake off the wet soil, and place it in a new pot with fresh, well-draining soil.
Prevention Tips for Overwatering
To avoid overwatering, make sure you’re using the correct watering techniques. Water your plants less frequently but deeply, ensuring the soil has time to dry out between waterings. Choose the right soil type and pot with good drainage, and monitor moisture levels using a moisture meter or the finger test.
Roses are the crown jewel of any garden, but keeping them healthy and vibrant is no easy task. From fungal diseases to sneaky pests, roses are vulnerable to various problems that can hinder their beauty and growth. In this guide, we’ll explore seven major problems that can seriously harm your roses and provide actionable solutions to tackle them.
Rose Problem & Care
1. Powdery Mildew
Powdery mildew is a common fungal disease that plagues roses, especially in warm, humid conditions. It’s characterized by a white, powdery coating on the leaves, stems, and even flower buds. This disease can stunt growth and weaken your plant over time.
Causes and Contributing Factors: Powdery mildew thrives in environments with poor air circulation and high humidity. Overwatering and overhead watering can also increase the risk.
Prevention and Treatment:
Ensure proper spacing between rose plants for better air circulation.
Use fungicides designed to combat powdery mildew.
Prune infected parts immediately and dispose of them to prevent further spread.
Avoid wetting the foliage during watering.
2. Black Spot
Black spot is another notorious fungal disease that manifests as dark, circular spots on rose leaves. These spots are often surrounded by a yellow halo, and as the disease progresses, affected leaves fall off, weakening the plant.
Causes: Black spot thrives in wet and humid conditions, especially when water splashes onto leaves.
Prevention and Treatment:
Water roses at the base to avoid wetting leaves.
Apply fungicides regularly during the growing season.
Remove and destroy infected leaves promptly.
Mulch around the base of the plant to prevent fungal spores from splashing onto the foliage.
Aphids are small, pear-shaped insects that suck the sap from rose stems, leaves, and buds. They can multiply rapidly, weakening your roses and causing distorted growth.
Recognizing Aphid Infestations: Look for clusters of tiny green, yellow, or black insects on new growth. Sticky residue or a sooty mold may also appear due to their secretions.
Control Methods:
Use a strong jet of water to dislodge aphids from your plants.
Introduce beneficial insects like ladybugs and lacewings, which prey on aphids.
Apply insecticidal soaps or neem oil as needed.
4. Spider Mites disease in Rose plant
Spider mites are minuscule pests that can wreak havoc on your roses, causing yellowing, stippling, and webbing on the leaves. These pests are especially problematic during hot, dry weather.
Detection: Inspect the undersides of leaves for tiny red or green mites and fine webbing.
Control Options:
Increase humidity around your roses to deter spider mites.
Spray the plant with a mixture of water and insecticidal soap.
In severe cases, use miticides specifically formulated for spider mites.
5. Rose Thrips problem
Thrips are tiny, slender insects that feed on rose buds and flowers, causing discolored, distorted blooms. Their feeding can also leave behind silvery streaks on petals.
Spotting Thrips Damage: Look for buds that fail to open properly or flowers with brown edges and discolored petals.
Management Strategies:
Remove and discard heavily infested buds and flowers.
Use sticky traps to monitor and reduce thrips populations.
Apply insecticides like spinosad or neem oil if necessary.
6. Rose Dieback problem
Dieback is a condition where rose canes gradually wither and die back from the tips. It’s often caused by improper pruning, fungal infections, or environmental stress.
Symptoms: Brown or blackened stems that appear brittle and lifeless.
Prevention and Treatment:
Always use clean, sharp tools when pruning.
Seal pruning cuts with a pruning sealer to prevent infections.
Remove and dispose of affected canes.
Keep roses well-watered and fertilized to maintain their health.
Leaf curl can result from various issues, including pest infestations, nutrient deficiencies, or viral infections. Curled, distorted leaves are often the first sign of trouble.
Causes: Common culprits include aphids, fungal diseases, or poor watering practices.
Solutions:
Address pest issues promptly by using insecticidal soaps or natural predators.
Ensure your roses receive adequate nutrients by fertilizing regularly.
Avoid overwatering or underwatering, as both can stress the plant and lead to leaf curl.
Conclusion
Roses are undoubtedly worth the effort, but they demand attention and care to thrive. By identifying these seven common problems—powdery mildew, black spot, aphids, spider mites, thrips, dieback, and leaf curl—you can take proactive steps to keep your roses healthy and flourishing. Regular inspection, proper watering, and timely treatment will ensure your garden remains a vibrant oasis of roses.
Growing plants faster is not just about luck; it’s about understanding what plants need and providing them with the right conditions to thrive.
Syngonium Plant
Whether you are a gardening novice or an experienced green thumb, this guide will equip you with actionable tips to speed up plant growth while keeping them healthy. Let’s dive right in!
How to Make Plants Grow Faster
Understanding Plant Growth Basics
The Science of Plant Growth
Plant growth depends on the process of photosynthesis, where plants convert sunlight, water, and carbon dioxide into energy.
Nutrient uptake from the soil complements this process by supplying essential minerals like nitrogen, phosphorus, and potassium.
These elements form the building blocks for healthy growth and development.
Factors Influencing Growth Rate
Several factors directly impact how quickly a plant grows:
1. Light: The right amount of sunlight fuels photosynthesis.
2. Water: Hydration is crucial for nutrient transport within plants.
3. Soil: Healthy soil provides nutrients and anchorage.
By mastering these fundamentals, you set the stage for faster plant growth.
1. Optimizing Soil for Faster Growth
1. Importance of Soil Quality
Healthy soil is the foundation of plant growth.
The ideal soil should be well-draining, rich in organic matter, and have a balanced pH (6.0 to 7.0 for most plants).
Poor-quality soil can stunt growth, even if other conditions are perfect.
2. Amending Soil with Organic Matter
Incorporating organic matter like compost, fertilizer, or aged manure into your soil enriches it with nutrients.
These materials also improve soil structure, making it easier for roots to penetrate and absorb nutrients.
Benefits of Adding Compost in Soil
When added to soil, compost improves its quality by providing essential nutrients and enhancing its texture.
The organic matter in compost undergoes decomposition, releasing nutrients like nitrogen, phosphorus, and potassium, which are vital for plant growth.
It also boosts the soil’s ability to retain moisture and support healthy root development.
Compost introduces beneficial microorganisms into the soil, such as bacteria and fungi. These microbes break down organic matter further and make nutrients more accessible to plants.
Compost acts like a sponge, helping the soil retain moisture.
2. Providing Adequate Watering
How Much Water Do Plants Need?
The key to successful watering lies in consistency.
Overwatering can suffocate roots, while underwatering deprives them of essential hydration.
Most plants thrive when the soil remains consistently moist but not soggy.
Tips for Efficient Watering
1. Water in the Morning: Early watering allows plants to absorb moisture before the sun evaporates it.
2. Use Drip Irrigation: This method delivers water directly to the roots, reducing waste.
3. Check Soil Moisture: Use your finger or a moisture meter to ensure you’re watering appropriately.
Check the soil before watering.
A thoughtful watering schedule can significantly enhance plant growth rates.
Sunlight is essential for photosynthesis. Ensure your plants receive the appropriate amount:
Full Sun Plants: Require 6–8 hours of sunlight daily (e.g., Tulsi, Curry leaf, Hibiscus, Roses, Marigolds, etc).
Partial Shade Plants: Thrive in bright and indirect light or 4–6 hours of morning sunlight (e.g., Peace Lily, Money plant (pothos), ferns, Aglaonema, etc.).
4. Nutrient Boosters for Plants
Choosing the Right Fertilizer
A balanced fertilizer with equal parts nitrogen, phosphorus, and potassium (e.g., 10-10-10) can work wonders. However, some plants have specific needs—for example, flowering plants benefit from phosphorus-rich formulas.
For Outdoor Plants: Apply organic fertilizers like cow dung compost, vermicompost or any other liquid fertilizer every 15–20 days.
For Indoor Plants: Feed them less frequently, about once every 45 days.
Using organic options ensures sustainable growth without harming the environment.
Unwanted visitors like mealybugs, aphids, spider mites, and whiteflies can wreak havoc on your plants. These pests often feed on sap, weakening the plant and slowing its growth. Signs of infestation include yellowing leaves, holes, and sticky residue on the foliage.
Natural Pest Control Methods
You don’t need harsh chemicals to protect your plants. Try these natural solutions:
Neem Oil: A natural pesticide that disrupts pest lifecycles.
Soap Spray: Mix mild dish soap with water to suffocate small pests.
These methods are not only effective but also eco-friendly.
7. Preventing Fungal Diseases
Fungal diseases like powdery mildew and root rot can stunt plant growth. To prevent them:
Avoid overwatering, as excessive moisture creates a breeding ground for fungi.
Ensure proper air circulation around your plants by spacing them adequately.
Treat affected plants with a baking soda solution (1 teaspoon per gallon of water).
8. Avoiding Common Mistakes
Over-Fertilization Dangers
More fertilizer doesn’t always mean faster growth. Over-fertilizing can burn your plant’s roots and even kill it. Stick to recommended amounts, and opt for slow-release formulas to avoid overwhelming your plants.
Ignoring Plant-Specific Needs
Every plant is unique. While general tips work for most, it’s crucial to tailor care to each plant’s specific requirements.
For instance, succulents need well-draining soil and minimal water, while tropical plants thrive in high humidity and rich organic soil.
Conclusion
Helping plants grow faster is all about providing the right balance of light, water, nutrients, and care. By optimizing these conditions and avoiding common mistakes, you can speed up growth while ensuring your plants stay healthy and vibrant. Remember, patience and consistency are key—your plants will thank you for the effort!
How Much Water Do Succulents Need for Healthy Growth?
Succulents are some of the most low-maintenance plants you can grow, but their watering needs require a bit of precision. These drought-tolerant plants have adapted to store water in their thick leaves, stems, or roots, allowing them to thrive in arid conditions. However, overwatering or underwatering can affect their health and growth. Let’s dive into everything you need to know about how much water succulents need to grow beautifully and stay healthy.
How Much Water Do Succulents Need for Healthy Growth?
Understanding Succulents and Their Water Needs
Why Succulents Require Minimal Water
Succulents are native to regions with scarce rainfall, like deserts and dry landscapes.
Their fleshy leaves are designed to retain water for extended periods.
This ability allows them to survive for weeks, even months, without water.
Unlike tropical plants, succulents don’t need constant hydration and prefer their soil to dry out between waterings.
Common Types of Succulents and Their Water Storage
Popular succulents like Aloe Vera, Jade Plant, and Snake Plant are perfect examples of plants that store water in their leaves.
Others, like Echeveria and Haworthia, use their roots and stems to store moisture.
This built-in reservoir helps them weather periods of drought but makes them prone to root rot if overwatered.
How Much Water Do Succulents Need for Healthy Growth?
The Risks of Overwatering Succulents
How Overwatering Can Damage Succulents
While succulents love dry conditions, excessive watering can be fatal.
Overwatering saturates the soil, causing roots to suffocate and decay.
Once the roots rot, the plant’s ability to absorb water and nutrients is compromised, leading to wilting and eventual death.
Signs of Overwatered Succulents
Spotting an overwatered succulent early can save it. Common signs include:
Mushy or translucent leaves.
Yellowing of the plant.
Moldy soil or an unpleasant smell.
Dropping leaves or a generally wilted appearance.
Ideal Watering Schedule for Succulents
General Watering Guidelines
The golden rule for succulents is simple: water only when the soil is completely dry. Depending on the season and climate, this could range from once a week to once every two weeks.
Seasonal Watering Adjustments
Summer Watering Needs
In the hot months, succulents dry out faster due to increased evaporation.
Watering once a week, or even twice if the plant is outdoors, is usually necessary.
Winter and Rainy Season Adjustments
During colder months or rainy seasons, succulents enter a dormant phase.
They consume less water, and overwatering during these times can cause root rot.
Water them sparingly—about once every 3-4 weeks.
Location of Succulents
Outdoor (Terrace or Garden) Plants
Succulents on terraces or gardens face prolonged sunlight exposure and dry out quicker. These may need water every few days, especially in summer.
Indoor and Balcony Placement
Indoor succulents stay moist longer due to limited sun and wind exposure. Watering every 10-15 days is usually enough.
Balcony succulents, receiving partial sun, need slightly more frequent watering than indoor ones.
Step-by-Step Guide to Watering Succulents Correctly
Checking Soil Moisture Levels
Always test the soil before watering.
Stick your finger about an inch deep into the soil.
If it feels dry, it’s time to water.
The Soak-and-Dry Method
This method is highly effective for succulents.
Drench the soil completely until water drains out of the pot, then allow it to dry thoroughly before watering again.
Tools to Help You Water Succulents Properly
Using tools like moisture meters can help monitor soil dampness.
Watering cans with narrow spouts or syringes are perfect for targeted watering.
Special Care for Other Xerophytes and Bulbous Plants
Understanding the Water Needs of Cacti
Cacti, another xerophyte, need even less water than succulents.
They thrive on deep but infrequent watering, often needing water only once a month in colder seasons.
Watering Plants with Bulbs (Peace Lily, ZZ Plant)
Bulbous plants like the Peace Lily and ZZ Plant can easily rot if overwatered. Water only when their topsoil feels dry, roughly every 10-15 days.
Common Mistakes in Watering Succulents
Overwatering Due to Poor Drainage
Using pots without drainage holes or soil that doesn’t drain well is a major mistake. This traps water and leads to root rot.
Neglecting Seasonal and Location Factors
Not adjusting the watering schedule based on seasons or where the succulent is kept can harm the plant. Always consider the plant’s environment.
Oh! So, you are worried about garden waste such as fallen leaves cluttering your garden? Are you wondering, “What can I do with all these leaves—should I throw them away or burn them?” We get it; dried leaves scattered across your garden can make it look messy. But here’s the secret: there’s no such thing as waste in the garden!
Fallen leaves in garden
Did you know these leaves can be one of the most beneficial things for your garden?
Instead of throwing or burning them, which harms the environment, you can turn them into leaf compost, a nutrient-rich treasure for your plants and soil.Leaf compost not only improves soil health but also enhances your plants’ growth naturally.
Introduction of Leaf Compost
Leaf compost is a nutrient-rich organic material derived from decomposed leaves. It’s one of the easiest and most natural ways to recycle garden waste (leaves) into a valuable organic compost for our plants.
Essentially, leaf composting transforms fallen leaves into a crumbly, dark material that resembles soil, packed with nutrients to enrich your garden.
What is Leaf Compost?
Leaf compost is created when leaves break down through natural decomposition.
Through the natural process of breakdown by microorganisms, leaves are transformed into a dark, crumbly, soil-like substance. It’s packed with nutrients like potassium, phosphorus, and trace minerals that plants love.
The beauty of leaf compost is its simplicity. It doesn’t require fancy equipment or special skills—just patience and a little effort. Plus, it’s entirely free, making it one of the most cost-effective ways to improve your garden’s soil.
So instead of disposing of leaves, why not transform them into something your garden will thank you for?
How to Make Leaf Compost at Home
If you’ve been wondering how to get started with leaf composting, don’t worry—it’s easier than you think! All it takes is a little organization, some time, and an understanding of the process. Here’s a simple step-by-step guide.
1. Collect the Leaves
Start by gathering the fallen leaves in your garden.
You can use a rake, a blower, or even your hands if you have a small area.
Make sure to remove any debris like rocks, plastic, or sticks.
Also, avoid leaves treated with pesticides, as they can hinder the composting process.
2. Use any bucket or container and Make holes
You can use a large container, bucket, durable poly bag, or any type of bag that suits your needs.
For leaf compost opt for a larger, deeper container based on the amount of waste you plan to compost. You can choose a clay pot or a plastic container (such as a bucket).
Make holes
Ensure there are enough holes around the container for air circulation.
Oxygen is vital for the decomposition process, as it supports the activity of beneficial microorganisms that break down organic material.
3. Shred the Leaves
Shredding the leaves into smaller pieces helps them break down faster.
You can do this by running over them with a lawnmower or using a garden shredder.
If you don’t have these tools, you can still compost whole leaves—it will just take a little longer.
4. Make a Layer
Once you’ve collected the leaves, it’s time to layer them properly. Layering is essential for an efficient composting process. Here’s how to do it:
1. Add a Base Layer:
Begin by adding a layer of garden soil or compost at the bottom of the container. You can use ready-made compost like vermicompost or even kitchen waste compost for this purpose.
2. Add the Leaves: Place a layer of garden leaves over the soil or compost.
This balance is essential for microbial activity, which drives the decomposition process.
3. Moisture Matters: Sprinkle some water on the leaves to maintain the right moisture level. The pile should be damp but not soaking wet.
Maintain Moisture
If it’s too dry, decomposition slows down; if it’s too wet, it can become smelly and compacted.
5. Cover the Container
Ensure that the container, bucket, or bag is properly covered to retain moisture and heat, which speeds up the composting process.
You can use a lid, cloth, or plastic sheet to cover it securely.
However, do not seal it completely—proper ventilation is crucial for decomposition.
6. Maintenance and Aeration
To keep the composting process active and effective, regular maintenance is necessary:
(i) Check Every 15 Days: Open the container once every two weeks to check the moisture levels. Add water if the compost feels dry.
(ii) Turn the Compost: Aerate the pile by using a pitchfork, shovel, or any long tool to turn the contents. This helps oxygen circulate, prevents odors, and accelerates the breakdown process.
Wait and Watch
With the right balance of materials, moisture, and aeration, you’ll have rich, dark, and crumbly leaf compost in a few months. If you’re using a cold composting method, it might take a bit longer—but patience pays off in the end.
Why is Leaf Compost Beneficial for Your Garden?
Leaf compost is a gardener’s best friend. It improves the health of your soil, saves money, and benefits the environment. Let’s dig a little deeper into its benefits.
1. Enriches Soil Nutrients
Packed with nutrients like potassium and magnesium, leaf compost naturally feeds your soil, promoting healthier plant growth.
2. Improves Soil Structure
It enhances soil texture by improving moisture retention, drainage, and preventing compaction, making it easier for roots to thrive.
3. Boosts Microbial Activity
Leaf compost supports beneficial microbes and earthworms, creating a fertile, thriving soil ecosystem.
4. Reduces Garden Waste
Instead of throwing away leaves, composting transforms them into a valuable resource, cutting down landfill contributions.
5. Saves Money
Leaf compost eliminates the need for expensive fertilizers or soil conditioners, offering a cost-free, sustainable alternative.
6. Eco-Friendly
Composting leaves reduces pollution, minimizes garden waste, and limits reliance on harmful synthetic fertilizers.
Where Can You Use Leaf Compost?
(i) Vegetable Gardens: Mix leaf compost with garden soil to provide essential nutrients for your veggies.
(ii) Flower Beds: Use it as mulch to keep flower beds weed-free and retain moisture.
(iii) Lawns: Spread a thin layer of leaf compost over your lawn to enrich the soil and promote healthy grass growth.
Succulents are beloved for their unique appearance and low-maintenance nature, making them a popular choice among plant enthusiasts. However, achieving bushy and healthy succulents requires attention to a few key factors, including the size of the pot, soil, and overall care. Here’s a guide to help your succulents thrive and grow dense, lush foliage.
Succulents Bushy and Healthy
How to Make Succulents Bushy and Healthy
The Importance of Pot Size
The size of the pot plays a critical role in the growth of succulents. Planting your succulent in a pot that is too small can restrict its root system, limiting its ability to grow and preventing it from developing full, healthy foliage.
To encourage robust and bushy growth, opt for a larger pot, ideally one with a diameter of 6 to 8 inches. A larger pot provides ample space for the roots to spread and supports the plant’s growth above the soil.
Choosing the Right Pot
When selecting a pot for your succulent, both material and functionality matter.
Plastic and ceramic pots are excellent choices as they help retain the right amount of moisture while offering aesthetic appeal.
However, it is essential to ensure that the pot has a drainage hole at the bottom. Proper drainage prevents water from accumulating in the soil, which can lead to root rot—a common issue for succulents.
Soil and Watering Tips
In addition to the pot size and type, the soil plays a vital role in your succulent’s health. Use well-draining soil specifically designed for succulents and cacti to prevent water from sitting in the roots. When watering, follow the “soak and dry” method: water the soil thoroughly, then allow it to dry out completely before watering again. Overwatering can harm the plant and impede its growth.
Additional Tips for Bushier Succulents
1. Pruning:
Regularly prune your succulents to remove dead or damaged leaves. This helps the plant focus its energy on new, healthy growth.
2. Sunlight:
Place your succulents in a location where they can receive bright, indirect sunlight for at least 4-6 hours a day. Adequate sunlight promotes compact and dense growth.
3. Fertilization:
Feed your succulents with a balanced, diluted fertilizer once a month during the growing season (spring and summer) to encourage lush foliage.
By choosing the right pot size, ensuring proper drainage, and providing appropriate care, you can help your succulents grow bushy and healthy. Remember, succulents thrive when given the space to spread their roots and the right conditions to flourish. With a little attention and care, your succulents will reward you with vibrant, dense growth that adds charm to your indoor or outdoor spaces.
Groundnut cake is an organic fertilizer derived from the byproduct of the groundnut oil extraction process. During the extraction of cooking oil from groundnuts using machines, the residual cake is obtained. This cake, free from any chemicals, serves as an excellent organic fertilizer, enriched with nutrients beneficial for plant growth.
The composition of groundnut cake includes essential elements such as nitrogen (N), phosphorus (P), and potassium (K), commonly referred to as NPK, along with fibers and proteins. It is important to note that groundnut cake lacks certain micronutrients.
Nutritional value of Groundnut Cake:
Nitrogen: 7.3
Phosphorous: 3
Potassium: 2.2
By incorporating groundnut cake into soil, gardeners and farmers can provide plants with a natural and organic source of nutrients, promoting healthy and robust growth.
Benefits of Groundnut Fertilizer
groundnut cake
When applied at the appropriate time, groundnut cake significantly enhances overall plant growth, stimulating the development of new leaves and branches. This organic fertilizer, enriched with nitrogen, effectively addresses the problem of yellowing leaves in plants, providing a valuable solution when leaf discoloration occurs. Furthermore, groundnut cake expedites the process of photosynthesis in plants, contributing to a more vibrant and lush garden.
In essence, it is a potent fertilizer with essential NPK components that visibly improves the overall health and growth of plants.
Groundnut Fertilizer: Strongest Fertilizer for Plants
1. Where to obtain Groundnut Fertilizer
Groundnut cake can be easily obtained from nearby factories where the extraction of ground oil takes place.
Additionally, it is readily available online, with approximately Rs 300 per kilogram.
2. Process of Applying Groundnut Cake to Plants:
Groundnut cake can be incorporated into plant care through three methods:
1. Soil Mixture Addition:
Grind the obtained groundnut cake pieces into a fine powder using a mortar.
adding groundnut cake fertilizer in soi-mix
Mix this powder into a prepared soil mixture, adding a handful of the fertilizer powder to approximately 5 kg of the soil blend.
2. Adding in Pot Soil:
When preparing soil mixtures repeatedly is not feasible due to time constraints, directly add groundnut cake powder to the pot soil.
adding in pot soil – groundnut cake fertilizer
For a 12-inch pot used for a plant, incorporate 2 tablespoons of groundnut cake powder.
Ensure that you loosen the soil before adding the powder, then water the plant after application.
3. Making Liquid Fertilizer:
Dilute approximately 100 grams of groundnut cake in 4-4.5 liters of water to create a liquid tonic. This quantity is suitable for approximately 300 plants.
Be vigilant for any insects in the cake that may emerge after dilution, and remove them.
Keep the solution covered in an area with no direct sunlight exposure.
Allow it to ferment for at least 2 days for the cake to dissolve properly in water. This process is best practiced during winter.
If left for more than 4 days, it may attract insects and fungus, so it’s advisable to keep it for 2-3 days only.
Dilute this tonic with a significant amount of water; for example, add 2 mugs of this solution to 40 liters of water.
The final solution’s consistency should be very thin, not resembling a thick paste, as it is enriched with a large quantity of nitrogen and has a warm nature that could potentially harm the plant.
groundnut cake liquid fertilizer
Note:
For a small garden with around 20 plants, take 2 small pieces of groundnut cake, dissolve them in 1 liter of water, and allow the mixture to dissolve for 2 days.
After 2-3 days, dilute it with 8-10 times the amount of water before applying it to the plants.
The efficiency of the liquid tonic in boosting the growth of plants is much higher compared to the first two methods.
Precautions to take while using Groundnut Cake Fertilizer:
1. Temperature Considerations:
Avoid using this fertilizer in hot weather with temperatures above 30-32°C, as it can warm the soil and potentially harm the roots, causing them to burn.
2. Plant Compatibility:
While suitable for all types of plants, including outdoor, indoor, flowering, or fruiting plants, refrain from using it on decorative succulents.
3. Timing of Application:
In cold weather, apply the fertilizer at any time of the day. As temperatures rise, especially in March, administer the fertilizer during the coolest parts of the day, such as early morning or evening after sunset.
4. Soil Moisture:
Ensure that the soil is neither too dry nor too wet before application.
If the soil is dry, moisten it with water before adding the fertilizer. If the soil is too wet, adding fertilizer may lead to fungus growth and root rot. Maintain consistently moist soil.
5. Application Method:
Feed the plant with the well-diluted solution until it starts draining out from the bottom hole of the pot.
The diluted solution should not have adverse effects on the plant at this point.
6. Application Cycle for Different Plants:
For leafy outdoor plants (e.g., tulsi, curry patta, and coriander), administer the fertilizer once a month.
Avoid using other potent fertilizers during the application month.
For heavy feeder plants (e.g., hibiscus and lemon), apply the fertilizer every 20 days.
Avoid using the fertilizer during flowering and fruiting stages.
7. Specific Application Situations:
Apply the fertilizer when the plant becomes nutrient-deficient, showing yellowing leaves after growing numerous branches and flowers.
After hard pruning, wait for 15 days before applying the liquid fertilizer to stimulate new branch growth and enhance overall plant health.
8. Seedlings and Micronutrients:
Never feed this fertilizer to seedlings.
If necessary, provide micronutrients instead.
9. Compatibility and Neem Oil:
Do not mix this fertilizer with any other and avoid applying additional fertilizers for at least 15 days after use.
Neem oil can be sprayed while using this fertilizer.
10. Application Method:
Never use this fertilizer as a foliar spray; always apply it through the soil.
Prepare the required quantity as it cannot be stored due to the risk of attracting fungus and insects.
Limitations of Groundnut Cake Fertilizer:
1. Seasonal Application:
Groundnut cake fertilizer is season-oriented and should not be used in summer.
It is best applied to plants during the period from October to March. Therefore, an alternative fertilizer may be required for the rest of the growing season.
2. Micronutrient Deficiency:
Lacks Micronutrients: This fertilizer lacks micronutrients.
To meet the required nutrient levels for heavy feeder plants, additional micronutrients should be applied after 15 days of using groundnut cake fertilizer.
In conclusion, while groundnut cake fertilizer has its limitations, it remains an essential addition to your gardening supplies. It significantly enhances the growth of heavy feeder plants to remarkable levels when used appropriately.
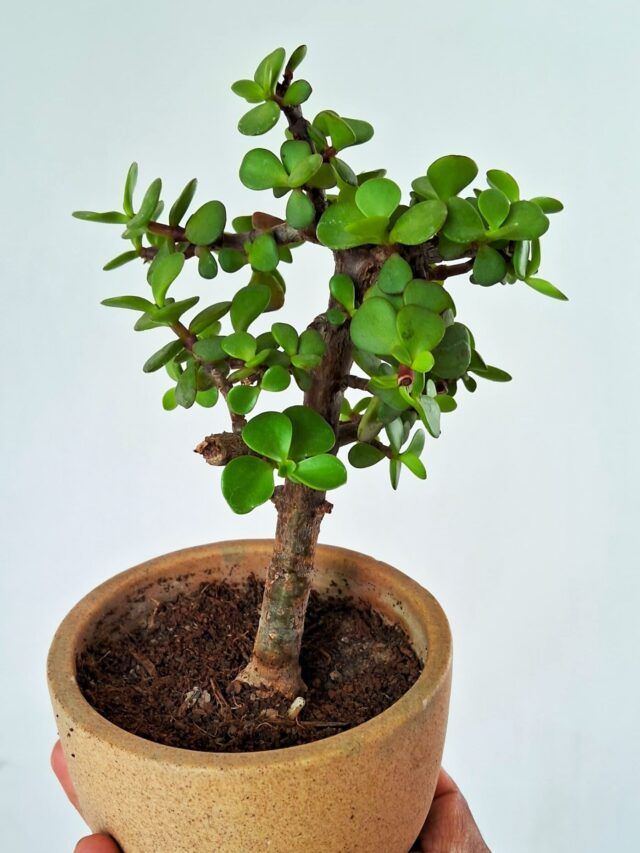
During winter or in cold regions where natural light is insufficient, grow lights are the perfect solution for providing the necessary light to Jade plants.
Jade Plant under grow lights
Can Jade Plants Thrive Under Grow Lights?
Here are some key points to consider:
1. Light Requirements for Jade Plant
Jade plants thrive in direct and in bright sunlight.
If natural light is insufficient, full-spectrum LED grow lights can provide the necessary light for healthy growth.
Aim for 12-14 hours of light per day, simulating daylight conditions.
फूल वाले पौधों के लिए सबसे अच्छी खाद (Best Fertilizers for Flowering Plant)
फूल वाले पौधों के लिए सही खाद और उर्वरक का चुनाव बेहद महत्वपूर्ण है। यह पौधों की बेहतर वृद्धि और अधिक फूल लाने में मदद करता है।
इस आर्टिकल में, हम जानेंगे कि फूल वाले पौधों के लिए कौन-कौन से खाद और उर्वरक सबसे अच्छे हैं, इनका उपयोग कैसे करें, और पौधों की देखभाल में किन बातों का ध्यान रखना चाहिए।
Organic Liquid Fertilizers
इसके अलावा, यह भी समझेंगे कि पौधों में अधिक खाद डालने के क्या नुकसान हो सकते हैं। यदि आप इन सभी जानकारियों को विस्तार से जानना चाहते हैं, तो इस आर्टिकल को अंत तक ज़रूर पढ़ें।
फूल वाले पौधों के लिए खाद का महत्व
फूल वाले पौधों को स्वस्थ और सुंदर बनाए रखने के लिए पोषक तत्वों की जरूरत होती है। इनमें मुख्य रूप से नाइट्रोजन (N), फास्फोरस (P), और पोटैशियम (K) का सही संतुलन बहुत महत्वपूर्ण है। इन तीनों पोषक तत्वों को मिलाकर एनपीके (NPK) उर्वरक कहा जाता है। आइए समझते हैं कि इनका पौधों पर क्या प्रभाव पड़ता है:
1. नाइट्रोजन (Nitrogen)
पौधों की पत्तियों और तनों की वृद्धि में सहायक।
पौधे की हरियाली बनाए रखता है।
नाइट्रोजन की कमी से पत्तियां पीली पड़ने लगती हैं।
2. फास्फोरस (Phosphorus)
नई जड़ों के विकास में मदद करता है।
फूलों के विकास को प्रोत्साहित करता है।
फास्फोरस की कमी से फूलों की संख्या कम हो सकती है।
3. पोटैशियम (Potassium)
पौधों की प्रतिरक्षा प्रणाली को मजबूत बनाता है।
कीट और रोगों से पौधों की रक्षा करता है।
फूल वाले पौधों के लिए सर्वश्रेष्ठ खाद और उर्वरक – Best Fertilizers for Flowering Plant
1. केले के छिलके की खाद (Banana Peel Fertilizer)
Banana Peel Fertilizer
केले के छिलकों में पोटैशियम और फास्फोरस प्रचुर मात्रा में पाया जाता है।
इसे पौधों की मिट्टी में मिलाने से फूलों की संख्या बढ़ती है।
ऐसे स्थान पर रखें जहां पर्याप्त सूर्य का प्रकाश पहुंचे।
2. मिट्टी का सही चुनाव
पौधों के लिए उपजाऊ और भुरभुरी मिट्टी का उपयोग करें।
मिट्टी में अच्छी जल निकासी होनी चाहिए।
3. सिंचाई का सही तरीका
पौधों को तभी पानी दें जब मिट्टी सूखी लगे।
अधिक पानी देने से जड़ों में सड़न हो सकती है।
4. प्रूनिंग (छंटाई) करें
समय-समय पर पौधों की सूखी और मरी हुई शाखाओं को हटा दें।
प्रूनिंग से पौधे में नई शाखाएं और फूल आने लगते हैं।
ज्यादा खाद डालने के नुकसान
अगर पौधों को आवश्यकता से अधिक खाद दी जाए तो:
पौधों की जड़ें कमजोर हो सकती हैं।
मिट्टी में लवणता बढ़ सकती है, जिससे पौधों की वृद्धि रुक जाती है।
फूलों की संख्या कम हो सकती है।
निष्कर्ष
फूल वाले पौधों को स्वस्थ और सुंदर बनाए रखने के लिए सही खाद और उर्वरक का उपयोग करना बेहद जरूरी है। केले के छिलके, गोबर की खाद, वर्मीकंपोस्ट, और सरसों खली जैसे जैविक खाद पौधों के लिए सबसे अच्छे विकल्प हैं। इसके साथ ही, पौधों को सही मात्रा में धूप, पानी और समय-समय पर छंटाई की आवश्यकता होती है।
यदि आप इन सभी बातों का ध्यान रखेंगे, तो आपके पौधे हरे-भरे रहेंगे और उनमें अधिक फूल खिलेंगे। 🌸