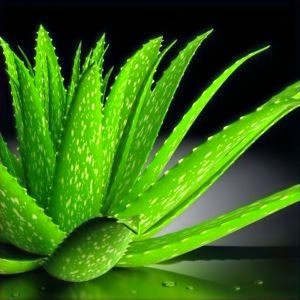
The Aloe Vera plant is famous for being good for your health and easy to take care of. Many people like having Aloe Vera in their homes. While Aloe Vera is generally hardy and resilient, there are still specific care guidelines to follow in order to ensure its optimal growth and well-being.
In this article, we will explore essential tips for tending to your Aloe Vera, including addressing rare
pest attacks,
dealing with black spots on leaves, and
managing issues such as brown tips.
Aloe Vera plant care
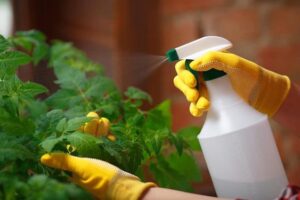
1. Pest Attack on Aloe Vera plant
It is true that Aloe Vera plants are relatively resistant to pests, but they can still be susceptible to issues like aphids and mealybugs.
These pests may not always be visible to the naked eye, but you can usually identify their presence by the damage they cause.
Using organic pesticides or neem oil is a good way to manage these pests.
You can also physically remove them with a soft brush or cloth.
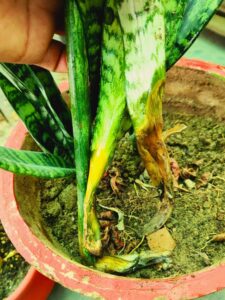
2. Black spots on Aloe Vera plant
Black spots on Aloe Vera leaves can indeed be caused by overwatering and the resulting fungal growth.
It is important to let the soil dry out between waterings to prevent this issue.
Root rot can also lead to black spots on the leaves.
If root rot is suspected, it’s essential to inspect the roots and trim away any damaged or rotting sections before repotting the plant in fresh, well-draining soil.
Removing affected leaves, as mentioned, is a good practice to prevent the spread of the fungus.
Note:
Fungus may impact the plant’s chlorophyll, which is responsible for food production through photosynthesis.
When the fungus damages the chlorophyll, the plant can’t produce enough food.
As a result of the nutrient deficiency, the aloe vera plant weakens, and its growth slows down, leading to the appearance of unhealthy black spots on its leaves.
Therefore, it is crucial to effectively manage pests to prevent the development of black spots on Aloe Vera plants. A robust pest control process can help keep this harmful fungus away.
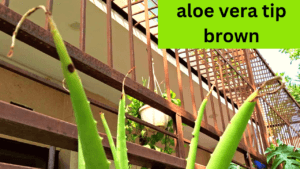
3. Brown tips on Aloe Vera plant
Brown tips on Aloe Vera leaves can indeed be a result of water imbalance,as well as other factors like too much direct sunlight.
Adjusting the watering schedule based on the specific needs of your plant and considering the environmental conditions is essential.
4. Repotting Aloe Vera plant
The advice to repot the Aloe Vera plant in new soil if root rot is suspected is sound. Make sure to choose a well-draining soil mix suitable for succulents, and ensure the new pot has proper drainage to prevent waterlogging.
In addition to these care tips, it is important to provide your Aloe Vera plant with well-draining soil, adequate sunlight(indirect or filtered sunlight is best), and a proper pot with drainage holes. Regular monitoring of the plant’s health and adjusting care practices accordingly is essential for its well-being.
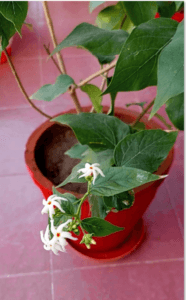
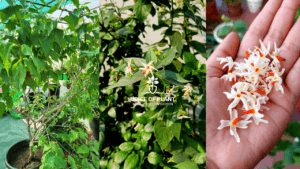
Night Jasmine, also known as Parijat, Harsingar, Shuiliis a delicate and fragrant flowering plant. It is also commonly recognized under the scientific name Nyctanthes Arbor-tristis.
Its small, star-shaped white flowers with orange centers bloom at night, spreading a sweet, heady fragrance. Although this plant is relatively easy to grow, it can encounter some common problems.
In this article, we will discuss some issues and provide effective solutions for nurturing a healthy Night Jasmine plant (Parijat/Harsingar).
Night Jasmine (Parijat) Plant Care
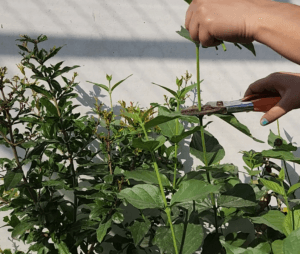
Problem 1:Not pruned regularly:
pruning night jasmine
Night Jasmine can become leggy and unruly if not pruned regularly.
Solution:
Prune your Night Jasmine in the early spring to remove dead or overgrown branches and encourage bushier growth.
This also promotes better air circulation and blooming.
Hard Pruning:
Perform a hard pruning of the plant after winter to stimulate new growth.
One of the most common mistakes made when caring for Night Jasmine is overwatering.
This plant prefers well-draining soil and doesn’t tolerate waterlogged conditions.
Solution:
Allow the top inch of soil to dry out before watering.
Be sure the pot or planting area has good drainage, and consider using a well-draining potting mix.
Reduce watering during the winter months when the plant is dormant.
Problem 3:Chlorosis Treatment
If the leaves of the plant begin turning white instead of green, it’s a sign of chlorosis. This occurs when chlorophyll is not forming properly in the leaves due to stress.
chlorosis in leaves
Solution:
To treat chlorosis follow the tips:
Mix 1 teaspoon of Epsom saltin 5 liters of water.
Spray the solution on the plant twice, with a 15-day gap between applications.
Remove the white leaves.
Place the plant in direct sunlight for a maximum of 1 hour.
Over time, the plant will recover, and new green leaves will grow.
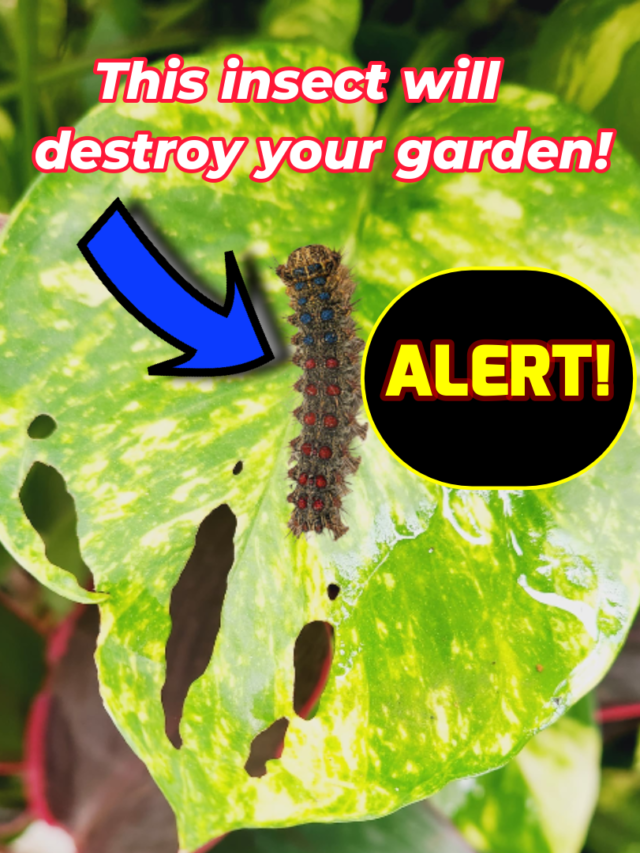
Problem 4: Pests
mealybug in plant
Night Jasmine can be vulnerable to common pests such as aphids, mealybugs, and spider mites.
Solution:
Regularly inspect your plant for signs of pests, including yellowing leaves or tiny insects.
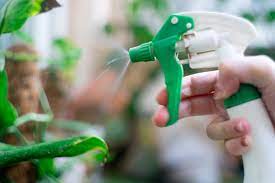
You can use neem oil or insecticidal soap to treat the infestation.
neem oil spray
In severe cases, consider moving the plant outdoors temporarily to allow natural predators like ladybugs to assist in pest control.
Problem 5: Yellowing Leaves
yellow leaves night jasmine
Yellowing leaves are often a sign of nutrient deficiencies or stress in Night Jasmine plants.
Solution:
Feed your plant with a balanced, water-soluble fertilizer every 4-6 weeks during the growing season (spring and summer).
Problem 6: Insufficient Light
Night Jasmine thrives in full sunlight.
Insufficient light can lead to leggy growth and reduced blooming.
Solution:
Place your Night Jasmine in a location where it receives at least 6-8 hours of direct sunlight daily.
Problem 7: Root Bound Issue
night jasmine in old pot
In the initial years, the plant may do well in the same pot, but after 2-3 years, it may become root-bound.
When this happens, the plant may show signs of stress, such as bent leaves, despite receiving adequate fertilizer and water.
Roots might even start emerging from the bottom hole or appearing at the top of the soil.
This is an indication that the current pot is no longer suitable for the plant.
root bound night in jasmine plant
Solution:
To address this problem, you have two options:
Option 1: Change the pot and shift the plant into a larger pot
new pot
Gently remove the plant from the old pot.
Consider using a plastic pot as larger clay pots are not available.
If using a plastic pot, make sure to create drainage holes at the bottom to prevent water stagnation.
night jasmine in new pot
Add a small amount of fungicide (less than a teaspoon) and incorporate cocopeat (half of the compost) into the soil mixture.
fungicide in soil mixture
Larger pots can dry out quickly, especially if exposed to high levels of sunlight, so cocopeat helps retain moisture.
Fill the new pot with the soil mixture and place the old plant in it without disturbing the soil and roots.
soil mixture
Follow the same pruning process to encourage bushier growth.
Maintain the watering and fertilizing routine to support the plant’s growth for the next 3-4 years in the new pot.
watering night jasmine plant
Option 2: Root Pruning
Remove the plant from the pot, and trim the side roots without disturbing the main root.
Then, repot the plant in the same pot with fresh soil.
Occasionally, seed pods may develop at the tip of the plant, containing Parijat seeds.
These seed pods should be removed to prevent overcrowding, as excessive seed production can harm the plant.
In conclusion, Night Jasmine (Parijat) is a lovely plant with a wonderful fragrance. By taking care of it and solving the problems we discussed, you can enjoy its beautiful flowers and delightful scent for a long time. Just remember, it needs patience and regular care to grow well.
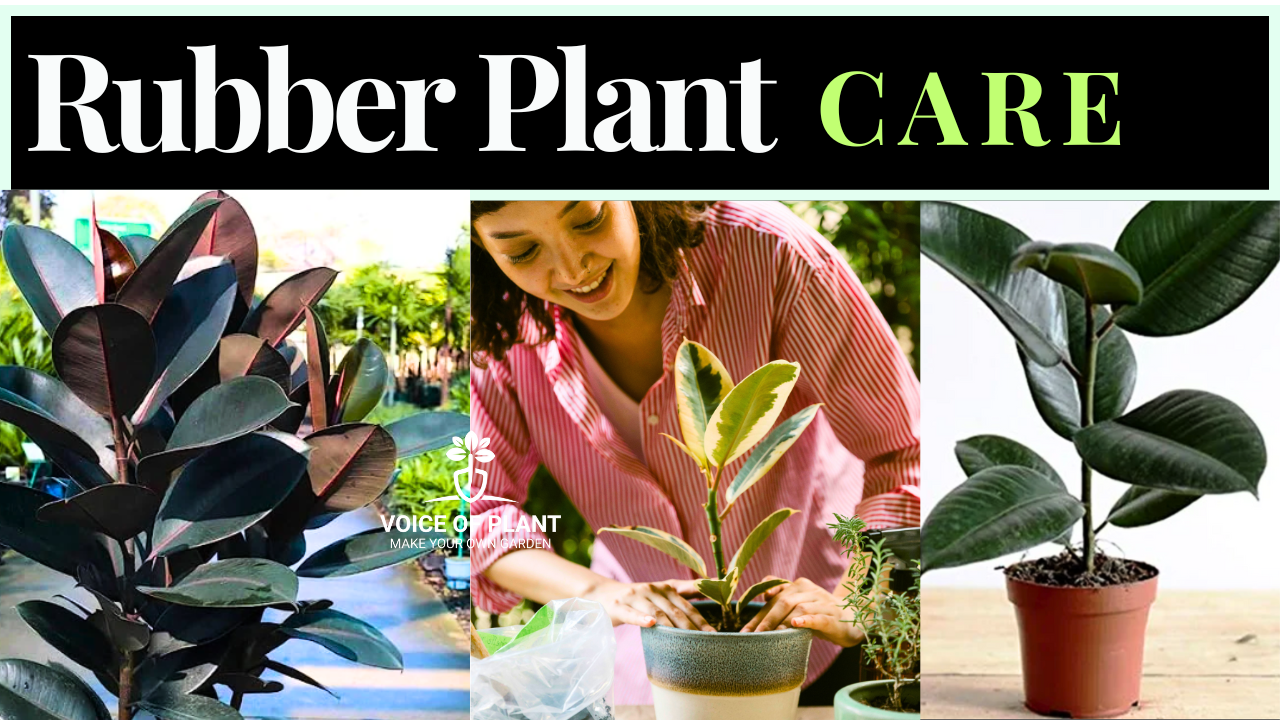
The Ficus Elastica, commonly known as the Rubber Plant is a popular indoor and outdoor plant, known for its air-purifying qualities and aesthetic appeal. However, caring for it can raise several questions, such as:
people wonder whether it is best suited as an indoor or outdoor plant,
why its leaves turn yellow,
why it sometimes shows no growth for 8-9 months,
concerns also include why the plant grows tall,
what to do if leaves start falling,
whether it can be propagated through leaves and
the best way to clean its leaves.
This article aims to address all these questions and many more queries related to rubber plant:
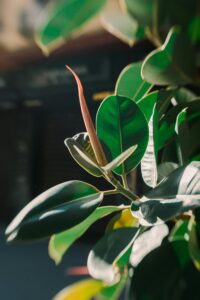
1. Understanding the Rubber plant
(i) Perennial plant: A long-lasting plant that can thrive for years.
(ii) Oxygen-Giving plant: Ideal for indoors due to its air-purifying qualities.
(iii) Aesthetic Appeal: Features glossy, dark green leaves that enhance any space.
(iv) Toxic Leaves: Be cautious when pruning; the latex can be harmful. Keep away from pets and children.
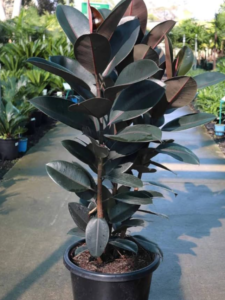
2. Rubber plant comes in different varieties
The Rubber Plant is available in 12-13 varieties, showcasing different colours and combinations like dark black, dark green and light green, dark green, red, and light green mix.
Variegated Rubber plant
If you’re purchasing a Rubber plant for the first time, it is advisable to choose the dark green or dark black varieties.
3. Ideal Conditions for Rubber plant
1. Temperature:
The Rubber Plant is a typical summer plant that thrives in temperatures ranging from 20-30℃.
Note:
While it can handle high temperatures if kept in the shade, it experiences stress when temperatures drop in winter. Protect from cold.
2. Placement & Sunlight requirement of the Rubber plant
rubber plant in bright light
The Rubber plant can be grown both indoors and outdoors.
Indoor placement –
If you prefer to keep Rubber plant indoor, ensure it receives ample bright light.
Placing it near a window where it can receive about half an hour of direct sunlight is ideal.
However, if the plant is kept in low or medium light conditions, it may struggle to thrive.
Clean and smooth leaves provide two benefits: they enhance the plant’s appearance and encourage its growth.
To clean the leaves, you can either spray them with water or use a damp cloth to wipe them down.
8. Propagation of Rubber plant
Rubber plants can be propagated using leaves.
You can bury the leaf in soil or place it in water for a few days until roots begin to develop. Additionally, propagation is possible through stems, cuttings, or branches.
9. Fertilizers for Rubber plant
The Rubber plant does not require heavy feeding; however, providing some fertilizer can promote growth and help prevent problems.
Every three months, mix compost into the soil after loosening it. Additionally, use a liquid tonic.
Avoid feeding during winter.
(i) For indoor plants, apply the liquid tonic every two months, but avoid doing so in winter.
(ii) For outdoor plants, apply the liquid tonic every month, also avoiding winter applications.
Recommended liquid fertilizers for the Rubber Plant include:
Areca Palms are fantastic at cleaning the air and giving off oxygen, making them a wonderful addition to your indoor spaces for a breath of fresh air.
Many gardeners often worry about white patches on their Areca Palm and, without fully understanding the issue, apply treatments that can harm the plant.
There is no need to worry; we have identified the cause and will provide the correct treatment to resolve the problem. Follow our guidance to ensure your Areca Palm stays healthy and vibrant.
White patches on Areca palm
White patches on Areca Palm leaves can be caused by several factors, including fungal infections, pest infestations, or mineral deposits. Here’s how you can treat them:
5 Expert Tips to treat White Patches on Areca Palm Leaves
1. Identify the Cause
(1) Fungal Infection:
If the white patches are powdery and spread across the leaves, it might be a fungal issue like powdery mildew.
(2) Pests:
White patches could also be due to pests like spider mites or mealybugs.
(3) Mineral Deposits:
Sometimes, hard water can leave mineral deposits on the leaves, creating white patches.
2. Treatment for Fungal Infection
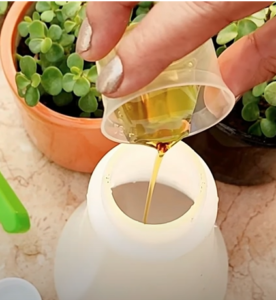
(1) Neem Oil:
Mix neem oil with water and spray it on the affected leaves. Neem oil has antifungal properties.
(2) Fungicide:
To treat fungal infection on areca palm plant, you can use neem oil solution, neem soap solution and cinnamon liquid solution.
You can boil small amount of cinnamon powder in water, let the solution cool down, add 1 litre of water and then spray it on the leaves.
You can add small amount of fungicide in 1 litre of water and then spray it on the leaves.
Note:
Spray your plants with a neem solution weekly to protect them from fungus and pest attacks.
(3) Improve Air Circulation:
Ensure the plant has good air circulation to prevent the spread of the fungus.
3. Treatment for Pests
(i) Soap Spray:
Mix a few drops of mild liquid soap in water and spray it on the leaves. This can help eliminate pests like mealybugs and spider mites.
(2) Rubbing Alcohol:
Dab a cotton swab in rubbing alcohol and apply it directly to the pests. This is particularly effective against mealybugs.
(3) Neem Oil:
Mix neem oil with water and spray it on the affected leaves.
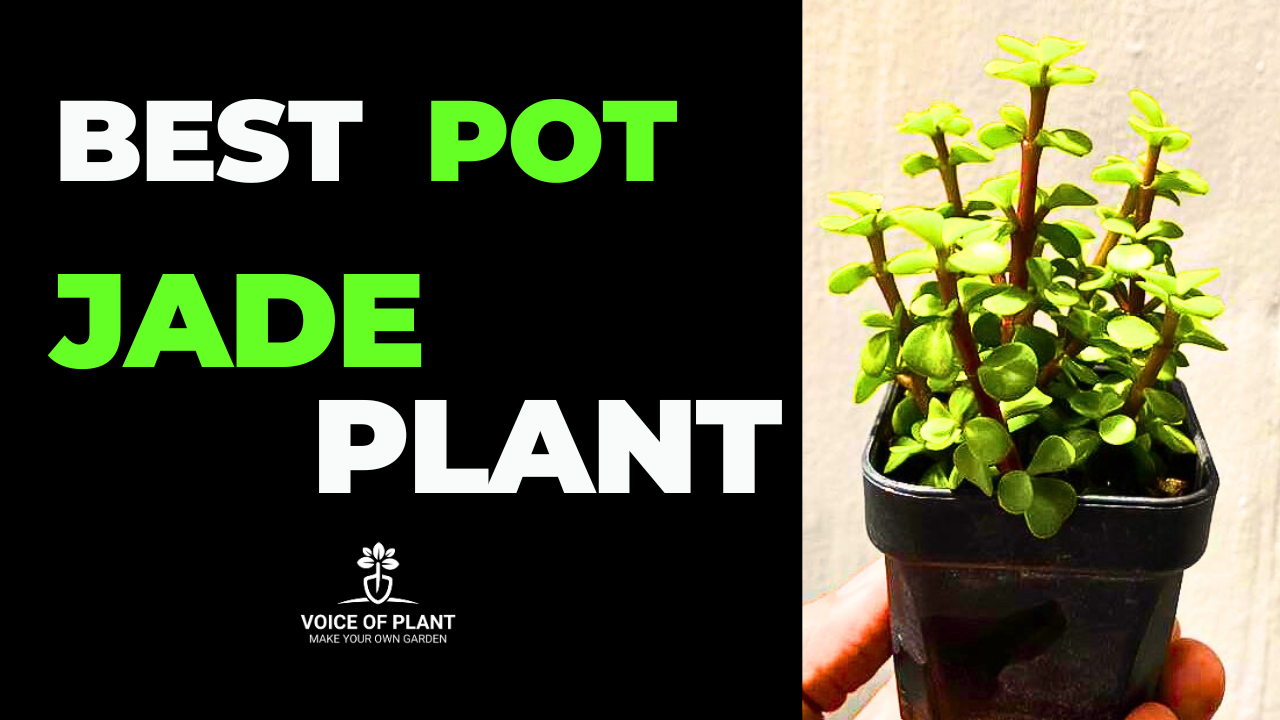
Does Your Jade Plant Need a Large Pot for Healthy Growth?
Jade plants are popular succulents that are easy to care for and make beautiful additions to your garden area.
One of the key factors in maintaining a healthy jade plant is selecting the right pot size. But does your jade plant really need a large pot for optimal growth? Let’s dive into the specifics.
Best Pot Size for Jade Plant
Understanding Jade Plant Growth
Jade plant in small pot
Before we discuss pot size, it is important to understand how jade plant grow.
Slow growth
These succulents have a slow to moderate growth rate and prefer well-draining soil.
They do not require deep pots to thrive
Their root systems are relatively shallow, which means they do not require deep pots to thrive.
Why Pot Size Matters
The size of the pot you choose can significantly impact the health and growth of your jade plant. Here’s how:
1. Drainage:
Jade plant is susceptible to root rot if left in waterlogged soil.
A pot that is too large may hold excess moisture, increasing the risk of rot.
It is essential to choose a pot with good drainage holes to prevent this issue.
2. Root Development:
While it might seem like giving your jade plant more space to grow is beneficial, a pot that’s too large can actually hinder root development.
In a large pot, the soil may stay moist for too long, which can lead to root rot before the plant has a chance to establish itself.
3. Stability:
Jade plants are known for their thick, woody stems and heavy leaves.
A pot that is too small might not provide enough stability, causing the plant to topple over as it grows.
On the other hand, a pot that is too large might make it difficult for the plant to anchor itself securely.
Choosing the Right Pot Size for Jade Plant
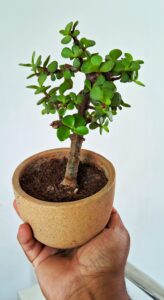
Healthy Jade plant in ceramic pot
So, what is the best pot size for a jade plant?
1. Small to Medium Pots:
Generally, jade plant do well in small to medium-sized pots, depending on their size.
For a young jade plant, a pot that is 2-4 inches larger in diameter than the plant’s root ball is ideal.
Young Jade plant in small pot
As the plant grows, you can gradually move it to a slightly larger pot, but avoid jumping to a pot that is too large too quickly.
Every 2-3 years is usually sufficient, and when you do repot, only increase the pot size by a couple of inches.
This allows the plant to grow steadily without overwhelming its root system.
Pot Material Considerations
The material of the pot can also affect the health of your jade plant:
1. Terracotta Pots:
These are excellent for jade plants because they are porous and allow the soil to dry out between waterings, reducing the risk of root rot.
2. Plastic Pots:
While lightweight and affordable, plastic pots retain moisture longer, which may not be ideal for jade plants.
If using a plastic pot, ensure it has adequate drainage holes and monitor soil moisture closely.
3. Ceramic Pots:
Healthy Jade plant in ceramic pot
Glazed ceramic pots can also be a good choice, but like plastic, they hold moisture longer.
Just make sure they have good drainage.
Signs Your Jade Plant Needs a New Pot
healthy jade plant
How do you know when it’s time to repot your jade plant? Here are some signs to look out for:
Roots Growing Out of the Drainage Holes: If you notice roots coming out of the bottom of the pot, it’s time to move your jade plant to a slightly larger pot.
Stunted Growth: If your jade plant has stopped growing and looks cramped, it may need more space.
Frequent Wilting: If your plant wilts frequently even though you’re watering it properly, the roots may be overcrowded.
Conclusion
In conclusion, jade plant do not need a large pot for healthy growth. In fact, smaller pots are often better suited to their shallow root systems and preference for well-drained soil.
Choosing the right pot size and material can help ensure your jade plant thrives, offering you beautiful greenery for years to come. When in doubt, opt for a pot that’s just slightly larger than the plant’s root ball and ensure it has good drainage to prevent waterlogging.
By following these guidelines, you can enjoy a healthy and vibrant jade plant in your home or garden.
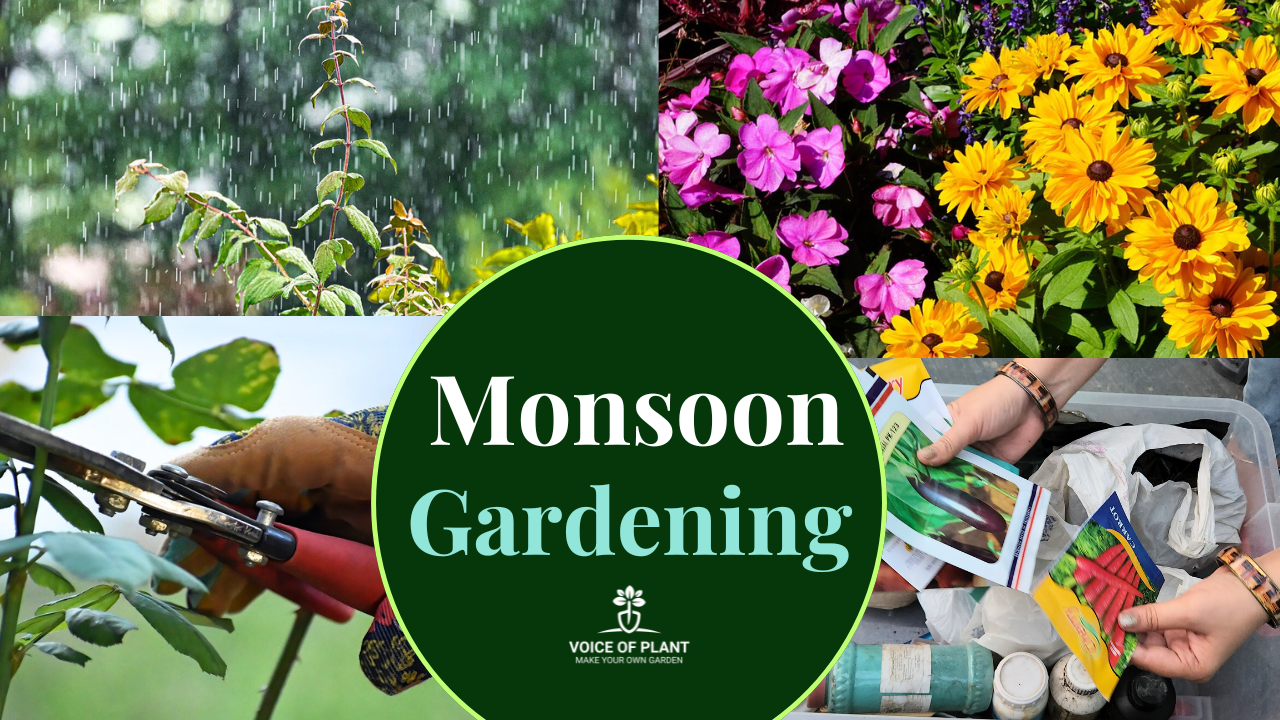
The monsoon season brings much-needed relief to plants after the intense summer heat, but it also presents unique challenges. Prolonged wet conditions can last for 2 to 2.5 months, increasing the risk of root rot, especially in indoor plants.
Monsoon season
Garden plants with many flowers are also prone to damage, and pests thrive during this period. It is crucial to take special precautions and understand which plants, vegetables, cuttings, or fruits are best suited for this time. This guide will cover all aspects of monsoon gardening, starting with the necessary precautions.
16 Tips for Monsoon Gardening
1. Remove all damaged and spoiled plants
After a harsh summer, many plants may wither or become damaged. While it is normal for seasonal plants to decline, even hardy plants can succumb to extreme temperatures.
After the rains begin, give your plants a week to recover. If they don’t bounce back, it’s time to remove them from your garden. Collect any empty pots to assess how many new plants you can add.
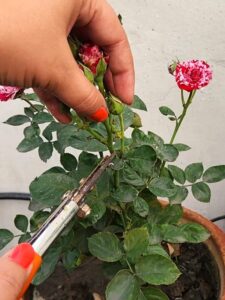
2. Pruning of plants
Pruning is essential to make plants denser and healthier.
As the monsoon season starts, remove yellow leaves and dead stems of indoor, outdoor, winter, or summer plants.
Avoid hard pruning during this time; focus on light pinching instead. This helps control stem elongation and ensures plants stay bushy, with healthy leaves and flowers.
3. Soil care during monsoon season
During summer, mulching with cocopeat is common, but loosening the soil is difficult. Now is the time to care for your soil.
Remove unwanted weeds, loosen the soil to improve its texture, and add necessary fertilizers.
Pruning the grass reduces the chances of fungal attacks and prevents the formation of green algae on the soil’s surface.
Loosen the soil weekly to promote healthy plant growth.
4. Maintaining garden cleanliness
The monsoon season demands extra attention to garden cleanliness:
1. Keep all dry items, like leaves, fertilizer packets, and soil bags, covered to prevent them from getting wet and attracting insects.
2. Prevent water stagnation around your garden area, which can attract mosquitoes and cause drainage issues. Regularly check and clear any debris that may clog the drainage system.
3. Dispose of any garbage promptly to avoid creating a problematic situation.
5. Selecting seeds for monsoon gardening
Choosing the right seeds is crucial during the monsoon:
1. Vegetables: Pumpkin, bottle gourd, bitter gourd, ridge gourd, lady finger, tomatoes, eggplants, chilli, coriander, and mint are ideal for planting.
2. Flowers: Petunia, hybrid vinca, and sunflowers can be planted now, regardless of their typical season. Most flowers thrive during the rainy season.
3. Avoid: Winter vegetables and capsicum during this season.
6. Protect delicate plants
Some plants do not thrive in excessive water and need protection from direct rain. Here’s how to manage them:
1. Succulents and Hardy Plants: Keep them away from direct rain.
Examples include Echeveria, Crassula ovata, Aloe vera, Coleus, Hybrid vinca, Kalanchoe pinnata, and Dumb cane, etc.
2. Limited Rain Exposure: Croton, Rose, Chrysanthemum, Aglaonema, Areca palm, and Adenium can handle rain occasionally but should be moved to the shade afterward.
3. Outdoor Plants Tolerant of Rain: Tulsi, Curry leaf plant, Hibiscus, Gandhraj (Cape jasmine), Madhukamini (Orange Jasmine), and Madhumalti (Rangoon creeper) can generally withstand rain and thrive with proper care.
7. Rainwater Harvesting
Pic credit: Pinterest
Rainwater is excellent for plants, so collect it in containers.
Use this water for plants that typically don’t like direct rain exposure.
Indoor plants that are not kept directly in the rain can also benefit from this natural water.
Monsoon season is prime time for pests. Protect your plants with neem oil spray, or if needed, switch to a plant protector:
Plant Protector: Mix 2 ml with 1 litre of water and apply every 3 days.
This organic solution prevents and treats various pest infestations, including snails, aphids, spider mites, and mealybugs, without any harmful side effects.
10. Plant propagation
Monsoon is ideal for propagating plants from cuttings:
1. Soft Cuttings: Plants like Money plant, Portulaca, Mint, Syngonium, Monstera, and ZZ plant can be propagated in water.
Ensure the container is clean, change the water regularly, and avoid direct sunlight.
2. Hard Cuttings: Rose, Bougainvillea, Hibiscus, Mogra, and Aprajita plant cuttings can be propagated in moist sand.
Keep them in a shaded area, maintain moisture, and avoid disturbing them.
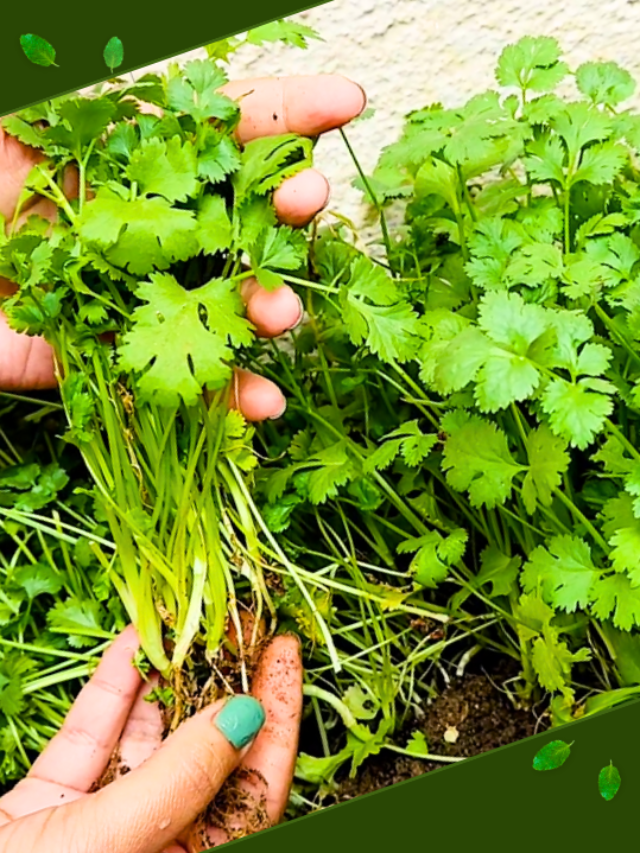
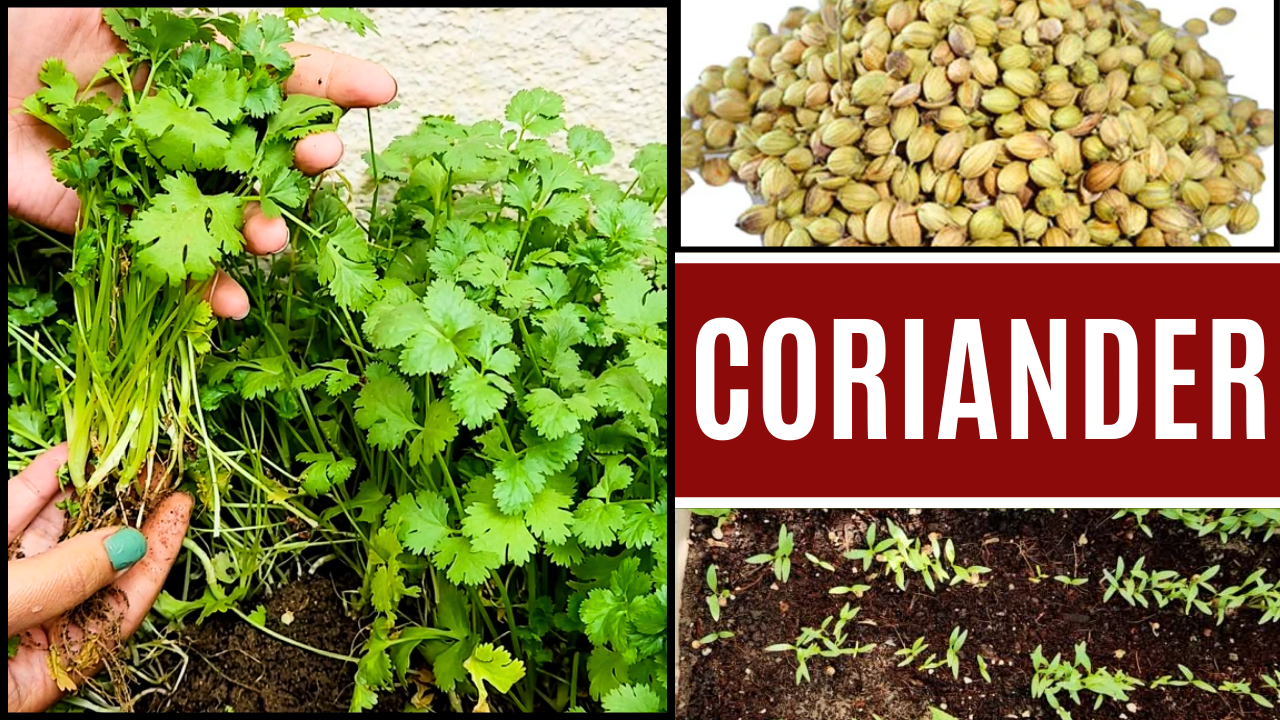
Coriander is always in demand to garnish food or to satisfy the taste buds with its aromatic healthy taste. Consuming coriander is also beneficial for health.
It can be effective in increasing digestive power, maintaining cholesterol levels, diabetes, kidney, and many other diseases. It contains proteins, fats, fibers, carbohydrates, and minerals which make it a powerful food.
Apart from this, calcium, phosphorus, iron, carotene, thiamin, potassium, and vitamin C are also found in green coriander.
Coriander from seeds in pot
The method of growing coriander in the ground or pot is quite easy. With a little care, you can consistently have fresh coriander to eat. It is easily available in the market or can be grown at home also by following some simple but proper techniques. All the easy-to-do modes are explained here which are followed by experts to grow healthy coriander. So, let’s start.
Coriander
Coriander is a small plant of 6-10 inches, it is very easy to grow and take care of. It takes a total of 25-30 days from sowing the seeds to making the coriander plant ready for consumption.
Tips to grow Coriander from seeds
1. Soil for Coriander
Soil should be soft and porous to grow coriander. In compacted soil, coriander seeds may sprout initially, but they will eventually become buried within the soil.
It’s crucial for the soil to have effective drainage.
Coriander plants don’t like waterlogged soil, so a mix that allows excess water to drain away is crucial.
Coriander does not grow well in hard soil.
Tips to prepare soil mixture for coriander:
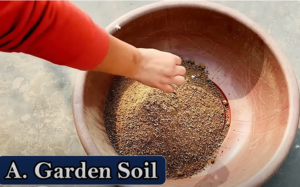
1. Take garden area soil
Garden area soil
You can take soil from your garden or any other nearby location and ensure it is free from debris such as plastic, glass, or any other unwanted material by cleaning and sieving it.
However, it’s essential to note that the quality of your garden soil matters.
If it’s too heavy or clayey, it might be better to use a mix of potting soil or garden soil with added compost to improve drainage.
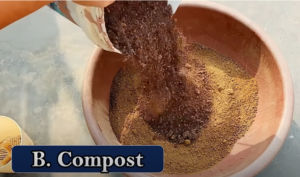
2. Take compost
Compost
Using compost is excellent for adding nutrients to the soil.
The quantity of compost should be half the amount of soil taken.
You can take any compost like – vermicompost, cow compost, kitchen compost, leaf compost, or any other.
3. River sand
River sand
River sand is an excellent choice for improving drainage in soil.
If the soil is not sandy, you should take comparatively in little less quantity of compost.
However, if the soil is already sandy, then there is no need to add sand.
4. Coco peat
Coco peat
Cocopeat helps retain moisture in the soil and is a good addition.
To prepare the soil, you should add coco peat in an amount equivalent to half of the quantity of sand you have taken.
5. Neem cake powder
adding neem cake powder
Adding neem cake powder in soil is beneficial for pest control.
Additionally, you can add a small amount of neem cake powder to the mixture, if available with you.
Mix all the ingredients properly and this is the perfect soil mixture for “coriander”.
Pot shape & size for coriander
For growing coriander, it is recommended to use rectangular pots with a depth of 6 inches and holes at the bottom for drainage.
You can cover the holes with either clay pieces or newspaper.
Fill the pot with the prepared soil mixture and water it sufficiently to make it moist.
Note:
You have to give water to the soil before adding the seeds into the soil, otherwise, the seeds might get displaced from their place.
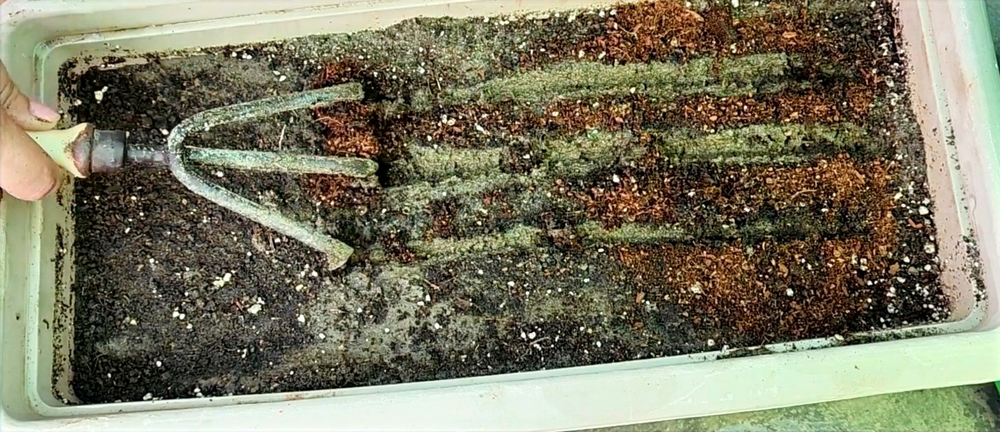
Make lines on the surface
You can use a trowel or any other tool to create lines on the surface of the soil mixture.
Then, fill these lines with coco peat, as this material can help seeds germinate more quickly.
Use high-quality coriander seeds
coriander seeds
To grow coriander, it is recommended to purchase fresh Coriander (Dhani) seeds from near seed store or nursery or a reputable online seller.
Avoid using seeds from your kitchen, as they may be old and less likely to germinate successfully.
“Dhani” seeds are inexpensive and easily available.
Temperature required for growing coriander seeds
The ideal temperature for growing coriander is during the period from October to March, which corresponds to the mild and cool seasons.
While coriander can be cultivated year-round by experts, it may suffer from scorching during extreme summer heat.
The growth rate of coriander is low in extreme winter conditions.
How to sow coriander seeds in pot
After creating the coco peat lines, place the coriander seeds on the surface and cover them again with the cocopeat.
sowing coriander seeds in pot
To maintain the moisture level in the soil, spray some water from the top.
Avoid using a mug, glass, or pipe to water the seeds, as this may displace them.
watering tips to coriander seeds
Note:
Always maintain moisture otherwise seeds will not germinate.
Always use a spray bottle to moisten the top layer.
Sunlight requirement for coriander seeds
Seeds can germinate in the absence of direct sunlight, but for optimal growth, especially after germination, it is essential to place coriander pot (in which we have sow the seeds) in an area where they can receive 3-4 hours of sunlight.
Sunlight is crucial for the overall growth of the plant.
Coriander seeds germination till harvesting
On the 6th day after planting the seeds, small leaves will begin to emerge as the seeds germinate.
coriander seeds growing
By the 10th or 11th day, there is a possibility that all the seeds will have germinated.
coriander seeds germinated
To maintain the moisture level of the coco peat, spray some water on it whenever it seems dry.
By the 16th or 17th day, the coriander plant should be bushy but not too dense.
coriander plant bushy
Approximately on the 25th to 28th day, the coriander plant should be fully grown and dense enough for harvesting.
When you need to use coriander, simply cut the plant from the top.
Watering tips for coriander
It is important to avoid pouring water from the top, as it may cause the coriander leaves to become enfolded.
watering coriander
Instead, water the plant from one corner of the pot, which will help to spread the water evenly throughout the soil.
Fertilizer for coriander
First harvesting: To start, the first harvesting, cut only the top half of the coriander plant.
Next, provide essential nutrients by using Mustard cake liquid fertilizer.
Second harvesting: After giving the fertilizer, the coriander will start growing again in about a week, and it will be time for the second harvesting.
fertilizer for coriander
During the third harvesting, you can harvest the entire coriander plant.
harvesting coriander
After harvesting, add some compost to the same soil and sow new seeds to grow coriander again.
use this soil again
It is a very easy process to grow organic and aromatic coriander at home.
If you also want to taste the real taste of coriander, then definitely try planting coriander in your home. If you like this article on how to grow coriander and the benefits of coriander, then do share and forward it to your friends.
The first and crucial step in growing plants is seed germination. Many plants can be cultivated at home, including tulsi (holy basil), marigolds, capsicum, tomatoes, spinach, coriander, and more. You can obtain seeds for these plants from both the market and the vegetables you use in your daily cooking.
This article includes:
How to checkgood quality seeds
Perfect growing medium
Temperature required
How to place seeds
How to water
How to protect from birds and ants
Duration of seed germination
What if your seeds do not germinate?
10 Best Flowering Plants to Grow at Home
10 Best Houseplants for Your Living Room
10 Flowers That Bloom in Summer Season
10 Reasons – Why You Must Keep Pothos (Money Plant) At Home
10 Reasons Why You Should Have Tulsi (Holy Basil) Plant At Home
Yes, it can be frustrating when seeds do not germinate despite your efforts, and it can be a waste of time and resources. However, there are several measures and key points that you can follow to increase your chances of successful germination.
How to Germinate Seeds Successfully
Here are some tips to help you germinate seeds successfully:
1. Take good quality seeds:
1. Check the seed packets for the expiration date
Even after taking all the necessary measures, old or poor-quality seeds may not germinate. Hence, Check the seed packets for the expiration date and use them before the date has passed.
2. Perform a water test
To determine the quality of your seeds, you can perform a water test. Simply soak the seeds in a bowl of water for 10-15 hours.
The seeds that sink to the bottom of the bowl are typically of good quality, while the seeds that float at the top are typically of poor quality.
Therefore, it’s recommended to use the seeds that settle at the bottom of the bowl for planting.
2. Use the right growing medium for seed germination:
coco peat
The choice of growing medium is crucial as seedlings are very soft and delicate. You can sow seed in the soil or in a coco peat.
If the soil is dry and hard, the seedlings may have trouble emerging after germination. Therefore, it’s important to ensure that the soil is not compact and hard if you are adding your seeds to it directly.
Alternatively, coco peat can be used as a growing medium as it is soft and gentle.
However, coco peat lacks nutrients, so after 10-15 days, the saplings may become weak and dull due to a lack of sufficient nutrients.
To address this issue, there are two potential solutions:
1. You could add manure or liquid tonics after 15 days to provide nutrients.
2. Alternatively, you could create a soil mixture consisting of regular garden soil, sand, and compost (you can refer to a soil mixture article for the exact ratio).
Firstly, add the soil mixture to the pot, then on top, add a layer of coco peat approximately 1-1.5 inches thick, and finally add the seeds.
This method ensures that when the seedlings’ roots grow down into the soil, they will absorb sufficient nutrients.
Additionally, this method promotes fast germination due to the presence of coco peat.
As a result, your seedlings will be healthy, and there will be no need to transfer them to other pots for some days.
3. Temperature required for seed germination
Typically, seeds will germinate within a temperature range of 15℃ to 25℃.
seeds growing
The best seasons for the germination of your seeds are the Spring and Autumn seasons.
However, the germination of seeds gets stopped in extreme summers and winters.
4. Correct way to place the seeds in the growing medium/soil/pot
1. Step 1 – To germinate the seeds, start by placing the fresh seeds or soaked seeds at a distance on top of the coco peat without pressing or burying them.
This will provide enough space for the seeds to germinate properly and make it easier for you to transfer them later.
seedling tray
2. Step 2 – Next, cover the seeds with a thin layer of coco peat and gently spray water over the top.
Avoid using a mug or pipe as this can disturb the seeds and can rot the seeds.
watering tips to seedlings
Note:
If you don’t have a spray bottle, you can place the pot in a container filled with water, and the soil will absorb water through the drainage hole at the bottom as required.
5. Location of the pot
Sunlight is not necessary for the germination of seeds.
This can be illustrated by the example of making chickpea sprouts at home, where they are kept in a wet cloth for a few hours and sprouts emerge without sunlight. Therefore, the pot can be placed in a shaded area without sunlight.
sprouts in wet cloth
However, if the pot is kept outside on a balcony in the sunlight, the topsoil can become dry and hot, potentially damaging the seeds.
To avoid this, it is better to grow seeds during spring and autumn when the weather is more suitable.
To ensure the successful germination of seeds, it is important to keep the soil moist.
Moist the soil as soon as you notice that the top layer is drying out.
Remember not to let the soil get completely dry, as this may hinder germination.
However, be careful not to overwater the soil, as this can create conditions favorable for the growth of fungus.
Using coco peat can help maintain the moisture level in the soil and keep it well moisturized.
It is recommended to use a spray bottle to water the seeds, as using a mug or a pipe can disturb the seeds.
7. Duration of seed germination
The duration of germination may vary from three to ten days, and it is important to be patient and wait for at least ten days for the seeds to germinate.
If the seeds do not germinate even after ten days, the chances of them germinating are very less.
Therefore, it is crucial to consider all the above-mentioned factors carefully to ensure successful germination.
From where to buy good quality seeds
1. Nurseries or from good seed stores:
Buying seeds from nurseries or from good seed stores is a pocket-friendly and convenient option.
It is advisable to check the manufacturing and expiry dates before buying the seeds.
2. Buy Online:
You can also purchase seeds online, but make sure to check the reviews and manufacturing and expiry dates before making the purchase.
3. Kitchen Vegetables:
If you have large-sized vegetables that are overripe or rotten, you can take the seeds out from them and use them for growing plants.
The mature seeds of such vegetables can be easily grown into plants.
It is important to note that seeds available in the market are often chemically treated to prevent fungus and pests and also germinate faster compared to seeds taken from vegetables.
Follow the above tips and make your gardening exciting!!!
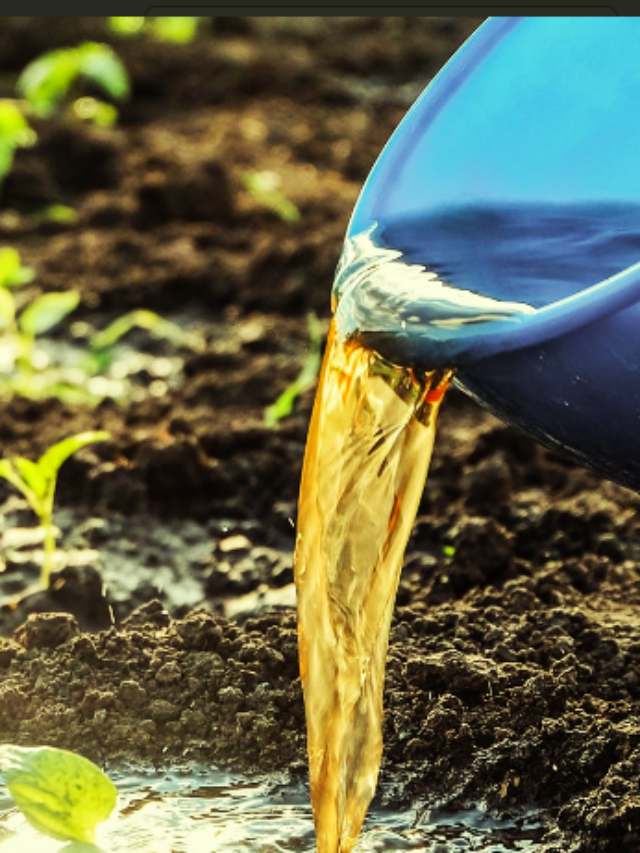
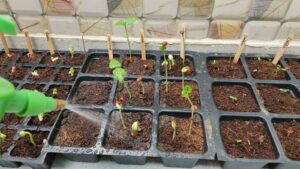
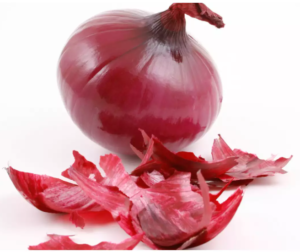
Making an organic homemade fertilizer with onion peels is easy and odor-free. It is easy to store and works well on all types of plants weather it is outdoor, indoor or vegetable plants. It has no adverse effects when applied correctly.
Answers to common questions about suitability, growth, side effects, application, and the creation process are covered in this article.
What is Onion Peel Fertilizer?
Onion Peel Fertilizer is a natural and organic fertilizer made from onion peels. This homemade fertilizer is created by utilizing the nutrient-rich properties found in onion skins.
The process involves extracting beneficial compounds from the peels to formulate a solution that can enhance plant growth and health.
How to make Onion Peel Fertilizer at Home
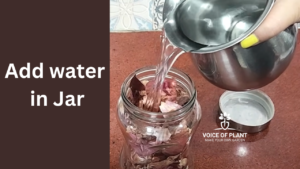
1. Container: Use a plastic, glass, or jug. Fill it with dry onion peels, avoiding wet pulp to prevent odor and fungus.
Note 1:
Do not use wet pulp of onions because it has the potential to rot, emit unpleasant odours, and may attract fungus.
Additionally, a tonic made with wet pulp cannot be stored effectively.
Note 2:
Choosing dry peels ensures that the tonic avoids problems like attracting ants or introducing fungus to the soil when applied later on.
2. Soaking: Add water to soak the peels. Cover and place it in a cool area (not in direct sunlight) for 24 hours.
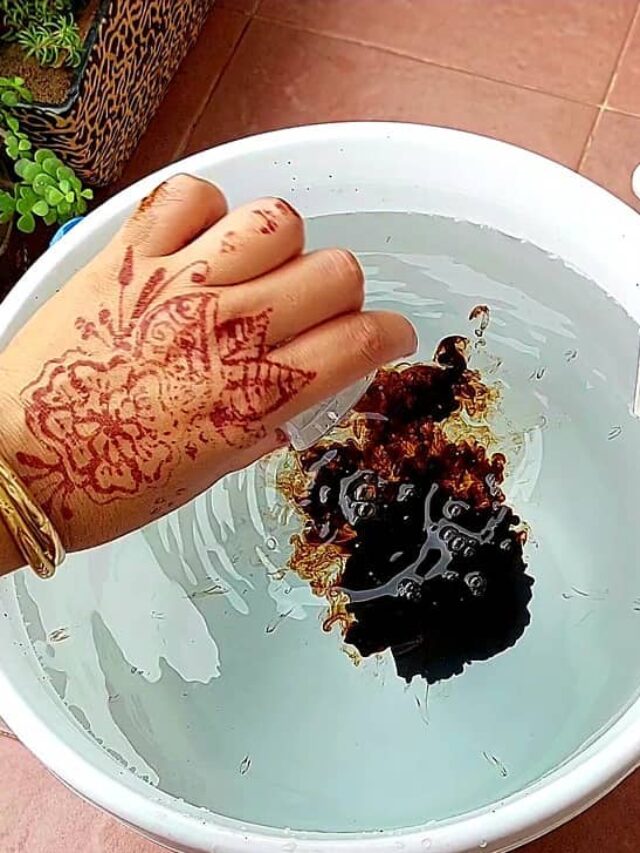
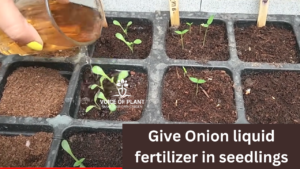
3. Purple Solution: After 24 hours, a purple solution forms, suitable for seedlings. Mix 2-3 spoons with water and apply to seedlings.
Onion Peel Liquid Fertilizer
4. Stir daily for 4 days: Stir daily for 4 days to create a dark tonic for leafy plants.
After leaving it for 4 days and stirring every day, you will have a strong, dark tonic ready for leafy plants.
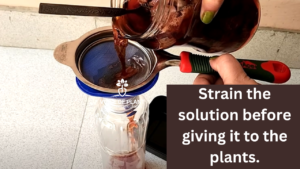
Strain it if necessary and mix it with three times its volume in water before giving it to the plants.
5. Soaking the pulp in water for 7 days: Soak pulp for 7 days for a dark brown tonic.
After 7 days, strain it well and do not keep it for more days.
Mix the strained tonic with three times the amount of clean water and use it to feed fruiting and flowering plants.
Precautions need to be followed before giving fertilizer
1. Strain Properly: Make sure no onion pulp gets into the soil.
Always strain the solution well before giving it to the plant.
2. Hoe Soil: Before applying the onion peel tonic, make sure to thoroughly hoe the soil.
3. Do not give fertilizer in wet Soil: Ensure that the soil is dry before applying any liquid fertilizer, as excessively wet soil may hinder absorption.
4. Avoid giving during extreme temperature: Give the tonic in the early morning or evening.
Avoid giving it during sun exposure or in the afternoon.
Providing fertilizer to hot soil during sunny periods can scorch the plants.
When to Use Onion Peel Fertilizer
You can use the onion peel tonic in every season—summer, winter, or monsoon, but avoid giving it during the plant’s dormant period.
1. Summer Dormancy: Some plants like Tulsi (holy basil), curry leaves, hibiscus, mint, and Mexican mint, etc. thrive in summer but experience dormancy in winter.
Don’t use onion tonic on these plants during winter.
2. Winter Dormancy: During peak summer, plants like roses and chrysanthemums, usually associated with winter, may go in dormancy period.
Avoid using onion peel fertilizer on them in summer.
3. Year-round Use: Besides specific dormancy periods, you can give onion peel to plants year-round, whether indoors or outdoors plants.
How to use Onion Peel Liquid Fertilizer
1. Outdoor Plants: Give once in a month.
For flowering or fruiting plants in their peak stages (e.g., roses in winter or hibiscus in summer), use it twice a month.
2. Indoor Plants: Feed once every 2 months with onion peel fertilizer.
3. Spraying Option: Dilute the tonic with four times water and spray on plants every 15 days.
While the visible difference might not be huge, there are no side effects.
Note:
While onion peel provides nutrients, it is good to use other fertilizers for a balanced nutrient profile. Avoid using other fertilizers, Epsom salt, tonic, seaweed, banana peel, or similar substances 10 days before or after giving onion peel fertilizer.
How to store the Onion peel tonic
1. Use an Airtight Container: Put any leftover tonic in a sealed container and keep it in a cool place, away from bright sunlight. But don’t store it in the fridge.
2. Shelf Life: Since it is homemade without preservatives, how long it lasts depends on the temperature and weather.
In hot conditions, it might last 3-4 days; in colder weather, it can last 10-15 days. On average, expect about 7-8 days.
3. Check Regularly: Every 2-3 days, open the container and give it a shake.
Before using it, give it a sniff. If it smells bad, don’t use it. If it is odorless, it’s safe for your plants.
Well! Adding Onion Peel liquid fertilizer in your gardening routine can yield noticeable improvements. Explore the positive effects and admire the positive changes in your plants.
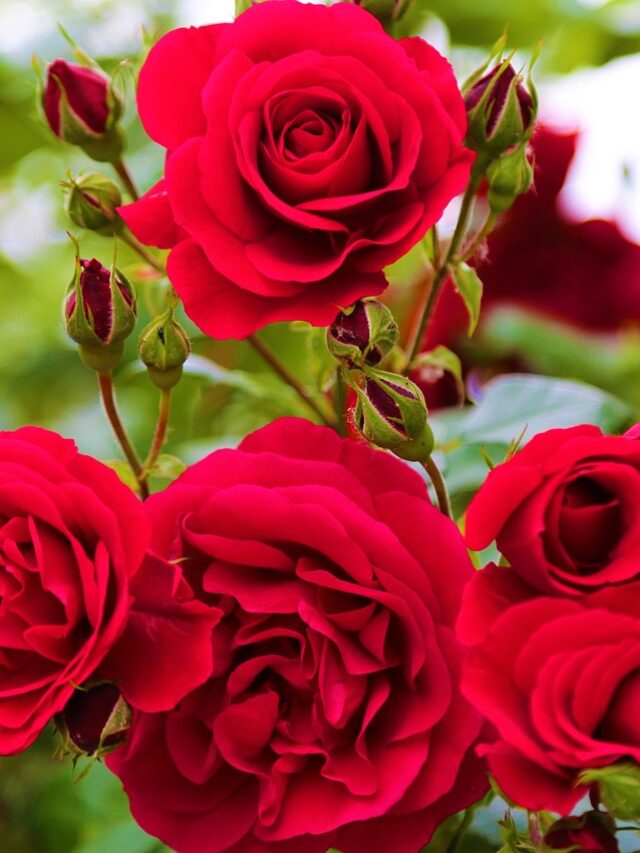
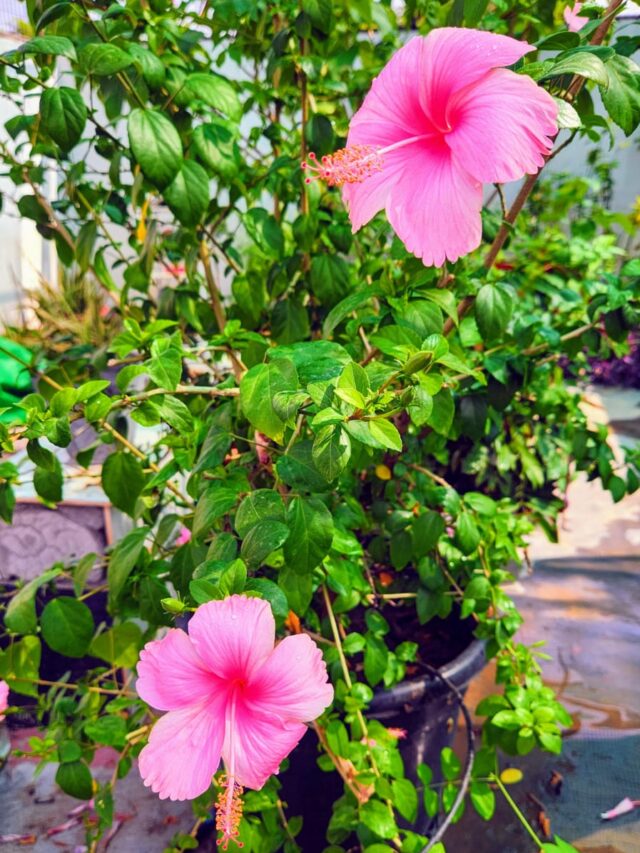
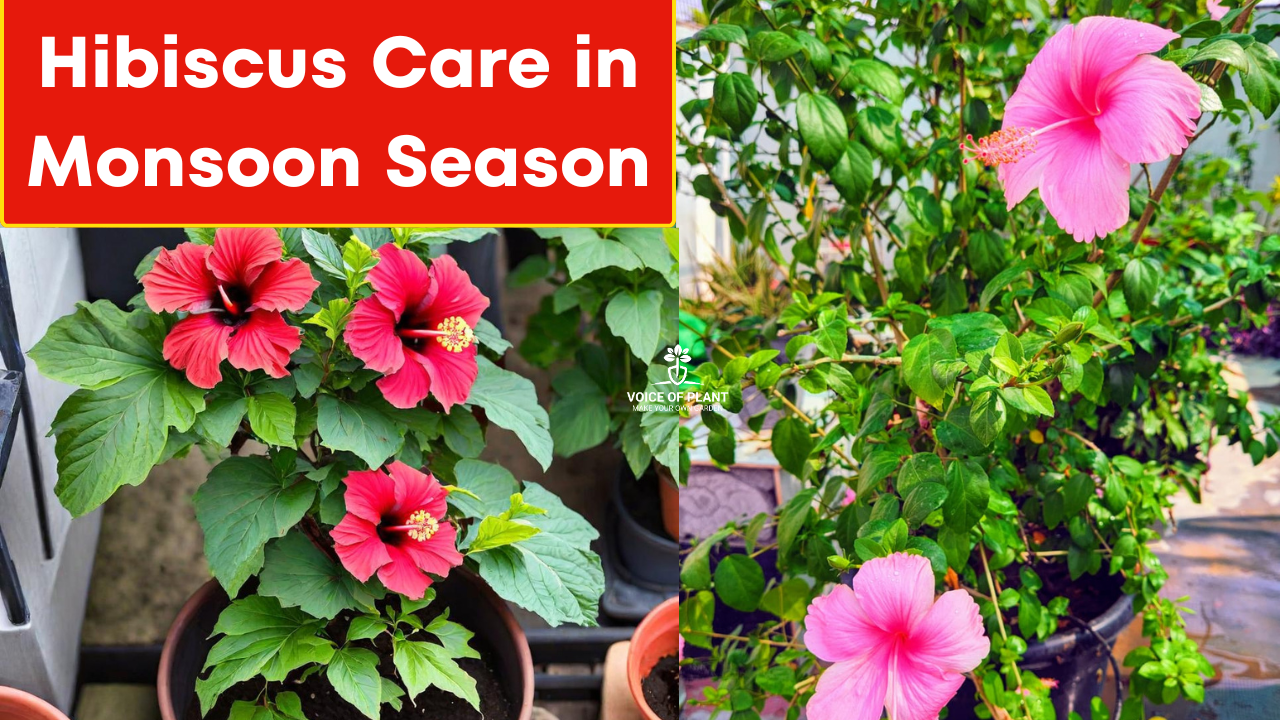
10 Best Tips for Hibiscus Care in Monsoon to Boost Flowering
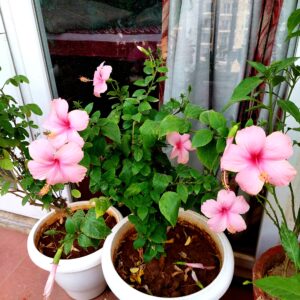
Caring for hibiscus plant during the rainy season can be both challenging and rewarding. The increased moisture and cooler temperatures provide an excellent environment for these vibrant flowers to thrive, but they also introduce a higher risk of pests and fungal diseases.
Pink Hibiscus flowering
To ensure your hibiscus plant bloom to their fullest potential, here are ten essential care tips that will help you navigate the monsoon season effectively.
10 Best Flowering Plants to Grow at Home
10 Best Houseplants for Your Living Room
10 Flowers That Bloom in Summer Season
10 Reasons – Why You Must Keep Pothos (Money Plant) At Home
10 Reasons Why You Should Have Tulsi (Holy Basil) Plant At Home
Tilling the soil around your hibiscus plants improves aeration, which is vital for root health.
Well-aerated soil allows roots to absorb nutrients and water more efficiently.
Additionally, incorporating neem cake powder into the soil can prevent pest and fungal attacks, enhancing the soil’s fertility.
Steps for Effective Tilling:
Loosen the topsoil gently without damaging the roots.
Mix in neem cake powder for added pest protection.
Ensure the soil remains loose and well-drained.
4. Give Fungicide Water in Soil
Fungal infections are common during the rainy season due to the high humidity and moisture levels.
Using a fungicide solution or cinnamon powder in the soil can help prevent fungal attacks.
Fungicides help protect the roots and lower stems from rot and other fungal diseases.
5. Onion Peel Fertilizer
Onion peel fertilizer is an excellent natural nutrient source for hibiscus plants. Rich in potassium, phosphorus, and calcium, it promotes overall plant health and boosts flowering. This simple, homemade fertilizer is easy to prepare and highly beneficial for your plants.
Preparation and Application:
Collect onion peels and soak them in water overnight.
Strain the liquid and use it to water your hibiscus plants.
Apply this fertilizer once a week for best results.
Good drainage is essential for hibiscus plants, especially during the rainy season.
Poor drainage can lead to waterlogged soil, which causes root rot and other issues.
Ensure your pots have drainage holes and that they are not blocked.
10. Sunlight for Hibiscus Plant
Hibiscus plants thrive with 5-6 hours of direct sunlight each day.
During the rainy season, cloudy days can reduce sunlight exposure.
Ensure your plants receive adequate light by placing them in the sunniest spot available.
Conclusion
Caring for hibiscus plants during the rainy season requires attention to detail and proactive measures. By following these ten tips, you can ensure your hibiscus plants remain healthy and vibrant, maximizing their flowering potential.