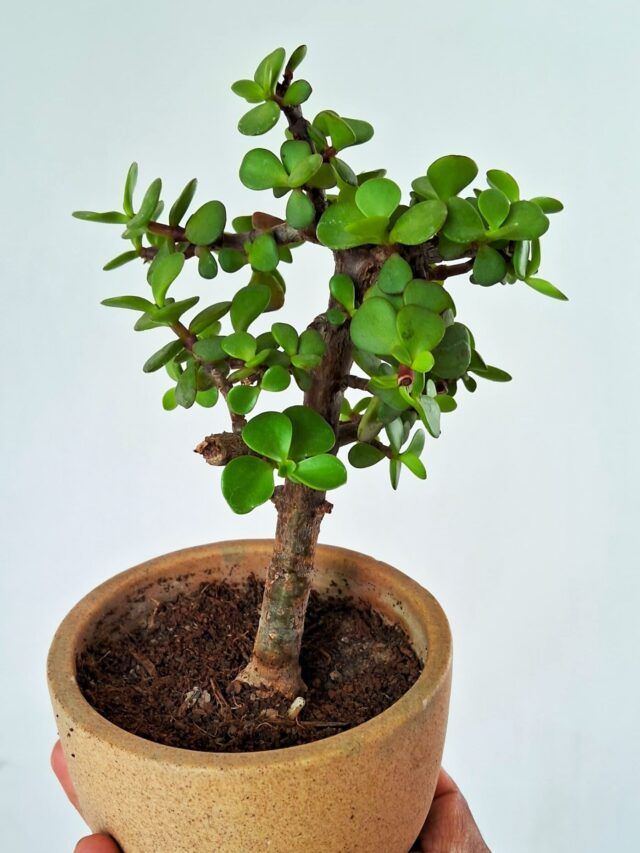
Repotting is the process of transplanting a plant from one pot to another.
Why should you repot a rose plant?
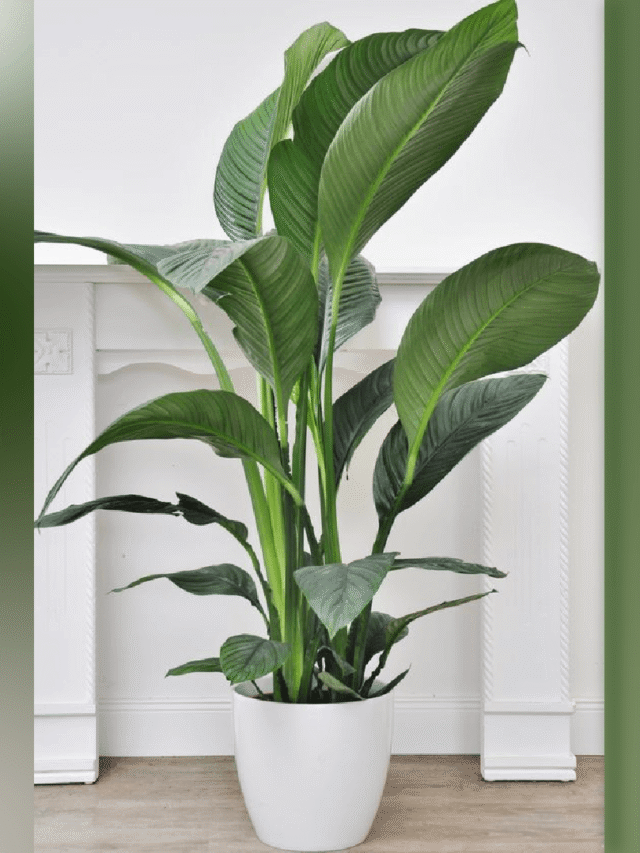
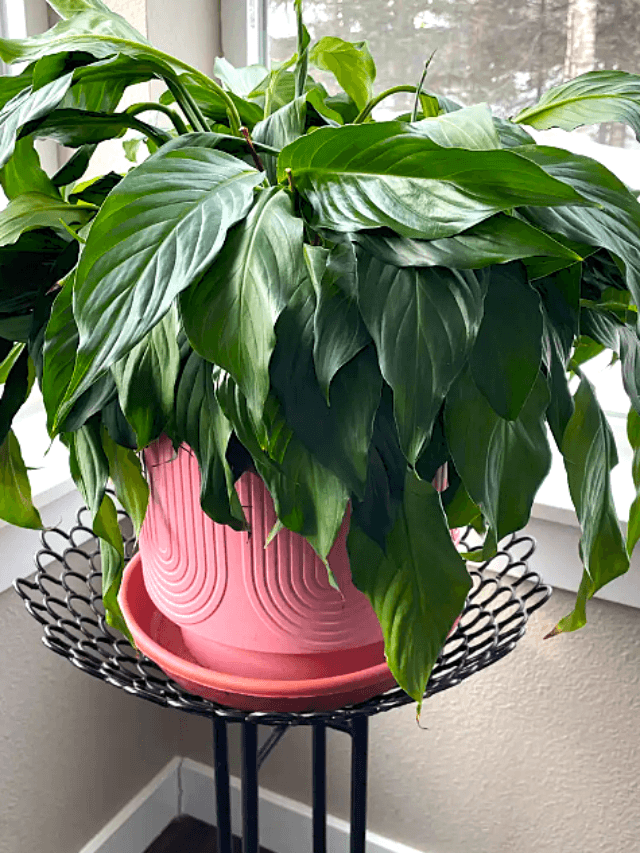
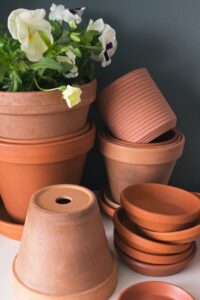
rose plant
The main objective behind repotting the plant is:
to provide more space to grow,
to avoid root-bound,
to provide better soil conditions,
to provide adequate supply of nutrients for healthy growth,
to ensure the plant’s continued health and well-being.
In this article, we will guide you through the process of repotting new rose plant, ensuring that it thrives in its new pot.
When to repot a rose plant?
rose plant in pot
The best time to repot your new rose plant to a bigger pot is in early autumn during October month. If you received a potted rose as a gift or you bought one, and its roots are coming out of the pot or it feels unstable, it is time to repot it.
Steps to follow before repotting a rose plant
rose plant in clay pot
1. When you bring the plant home, don’t put it in direct sunlight for the first two daysto prevent it from getting sunburned.
2. Make sure it is not kept in a dark place, look for a bright place to keep it.
3. After two days, if the plant looks healthy, you can place it in the sunand water it when the top soil dries.
4. If the plant still looks good after five days, it’s ready for a new pot.
5. Only transplant your rose plant in the evening.
6. Rosesdon’t like clayey soil, so use the right soil mixture.
What is needed for repotting?
1. New pot: Select a pot that is at least 2-3 inches larger in diameter than the current pot. Ensure it has drainage holes at the bottom.
2. Fresh soil mixture: Use good soil mixture which is prepared for roses or other flowering plants.
3. Gloves: Rose plants have thorns, so protect your hands with gloves.
4. Watering can: To water the plant once it is in its new pot.
5. Pruner: To trim roots and prune the leaves of the plant if needed.
Steps to repot rose plant:
1. Remove the plastic: If the plant is in plastic bag, first, remove the plastic covering and soil from the roots.
or
1.Remove the rose plant from its current pot: If the plant is in old pot, gently tap the pot to loosen the root ball.
2. Immerse the roots of the rose in water: After removing, immerse the roots of the rose in water, so that the remaining soil also gets removed in the water.
3. Trim if needed: Check the roots for any damaged parts and trim them if needed to help the roots grow well.
4. Fill new pot with soil: Always use clay pot. Fill the new pot with the right soil mixture, after covering the bottom hole with any newspaper.
soil mix
5. Place the rose in the new pot: Put the plant in the new pot and press the soil gently so it stays in place. Add more soil, pressing it down gently to remove air gaps.
6. Water thoroughly: Water it well but in installments, until you see water draining from the bottom hole.
watering to rose plant
7. Keep rose plant in a shade: Now, keep the plant in the shade for two more days.
Repotting your rose plant is important to help it stay healthy and beautiful. With the right tools and a little care, you can give your rose the space it needs to grow and thrive. Doing this regularly, along with proper care, will reward you with a beautiful, fragrant rose that will brighten your garden for years to come.
Many of us might already be acquainted with the practice of soaking in an Epsom salt bath to relieve sore muscles. Surprisingly, this can also benefit your indoor plants!
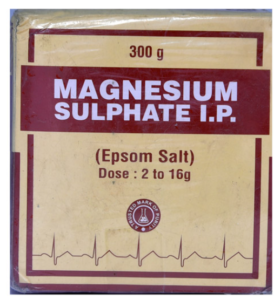
Epsom salt, chemically known as magnesium sulfate, is a versatile compound with numerous benefits for indoor plants. It has long been used by gardeners and plant enthusiasts as a natural remedy to enhance plant growth and overall health.
What is Epsom Salt?
Epsom salt
Epsom salt is a crystalline substance comprised of magnesium, sulfur, and oxygen. It derives its name from the town of Epsom in Surrey, England, where it was first discovered in natural springs. Its molecular structure enables it to easily dissolve in water, making it readily available for plant uptake.
Composition of Epsom Salt
Magnesium and sulfur are essential nutrients for plant growth.
Magnesium plays a crucial role in chlorophyll production,photosynthesis, and the activation of enzymes involved in plant metabolism.
Sulfur is a component of amino acids and vitamins essential for plant development.
How Does Epsom Salt Benefit Indoor Plants?
1. Nutrient Absorption Enhancement:
Epsom salt helps improve the uptake of essential nutrients such as nitrogen, phosphorus, and potassium, promoting vigorous growth and lush foliage.
2. Boost their growth
Epsom salt can promote lush foliage and vibrant green color in indoor foliage plants like ferns and philodendrons, ZZ plant, Aglaonema, Syngonium, Areca Palm, Spider plant, Pothos (Money plant), etc.
How to Apply Epsom Salt to Indoor Plants
There are two methods to provide Epsom Salt to your plants:
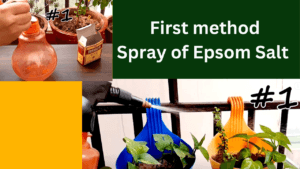
1. First Method:
Dissolve 1 tablespoon of Epsom Salt in 1 liter of water. Then, spray this solution on the plant leaves. Through this method, Epsom Salt will enter the plant via the leaf pores.
2. Second Method:
Loosen the soil around the plant and dig a little. Place Epsom Salt into the soil. For larger pots, use 1 tablespoon, and for smaller pots, use ½ tablespoon of Epsom Salt. Cover it with soil and mix thoroughly. Then, water the plant.
Note
After this procedure, wait for 8-10 days as it works slowly and gradually. It is not a magical solution that yields instant results.
So, after applying Epsom Salt for the first time, repeat the same process after 8-10 days.
You will notice visible changes in your plant’s growth.
Precautions and Considerations
1. Dosage:
Excess use of Epsom Salt, like with anything, can be harmful. Epsom Salt is not a fertilizer, so it should not be used repeatedly on plants.
As excessive application can lead to magnesium toxicity.
2. Frequency of Application:
Apply Epsom salt to indoor plants every 6-8 weeks during the growing season.
3. Signs of Overuse:
Monitor plants for signs of yellowing leaves or stunted growth, which may indicate overuse of Epsom salt.
Conclusion
In conclusion, Epsom salt offers numerous benefits for indoor plants, ranging from improved nutrient absorption to pest deterrence. When used judiciously and in conjunction with proper plant care practices, it can contribute to the health and vitality of indoor greenery.
Money plants also known as Pothos, can benefit significantly from occasional fertilization, especially during their active growing season, which typically spans from spring to fall.Proper fertilization provides them with essential nutrients to promote vigorous growth and lush foliage.
In this article, we will take an in-depth look at the importance of fertilizing your money plant and provide valuable information on how to do it effectively.
Understanding the need for Fertilizer
Fertilizing your Money plant serves several crucial purposes:
1. Nutrient Enrichment:
Money plants require essential nutrients for their growth.
In their natural habitat, these nutrients are drawn from the soil. However, when cultivated indoors in pots, they depend on you to supply these nutrients.
2. Vigorous Growth:
Regular fertilization ensures your Money plant has an abundant supply of vital nutrients, promoting robust growth and lush foliage.
Proper nourishment can lead to more extensive vines and larger, more vibrant leaves.
3. Soil Rejuvenation:
Over time, the potting soil your Money plant resides in may become depleted of nutrients.
Fertilizing helps rejuvenate the soil, making it more conducive to sustained plant health and vitality.
4. Enhanced Aesthetic Appeal:
Well-fed Money plants are more likely to exhibit the attractive variegation and lushness that makes them so appealing.
Proper fertilization can contribute to the plant’s visual charm, making it a stunning addition to your home decor.
Choosing the Right Fertilizer
The choice of fertilizer is crucial. It is advisable to alternate between fertilizers with different formulations to ensure your Money plant receives a balanced supply of nutrients.
High NPK (nitrogen, phosphorus, potassium) fertilizers are suitable choices, but also consider using micronutrient-rich options to provide a comprehensive nutrient profile.
Maintaining the health of your Money plant can be challenging when it becomes densely vegetated, making it difficult to change the soil or add additional substrates like cocopeat.
In such situations, liquid fertilizer can serve as an effective solution, as it can be easily applied to the plant without disturbing the root system.
When to give Fertilizer to Money Plant
When it comes to fertilizing your Money plant, it is important to establish a regular schedule. Fertilizing every 25 days can be a useful guideline, but the specific timing may vary based on factors such as the type of fertilizer used, environmental conditions, and the growth rate of your plant.
Here’s a suggested schedule for fertilizing your Money plant:
1. Start with a Cow dung liquid fertilizer (with high NPK) and apply it every 25 days.
Cow dung liquid fertilizer
2. After the next 25-days interval, switch to Seaweed fertilizerto provide additional micronutrients.
Seaweed liquid fertilizer
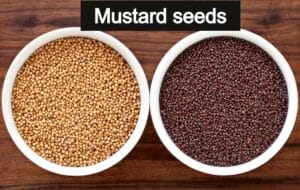
3. Follow this sequence with Mustard cake fertilizer, also at 25-day intervals.
Important note:
Avoid using mustard cake fertilizer in extreme temperature, during hot weather.
mustard cake liquid fertilizer
4. Subsequently, use Epsom salt as a magnesium source, followed by neem cake fertilizer,and continue with other nutrient sources in a similar pattern.
Epsom salt
Important note:
When applying fertilizer, remember to dilute it properly by using more water and less fertilizer in the mixture.
This helps prevent over-fertilization, which can lead to issues such as yellowing leaves and stunted growth.
Reduce fertilizer during winter season
One important thing to note is that money plant growth slows down during the winter months.
As a result, it is advisable to reduce or even stop fertilization during this period to avoid overstimulating the plant when it is not actively growing.
Avoid using strong liquid fertilizers
Lastly, avoid using strong liquid fertilizers, as they can potentially harm your Money plant.
Over-fertilization should always be avoided, as it can lead to a range of problems, including yellowing leaves, stunted growth, and other issues.
In summary, the key to giving fertilizer to the money plant is to keep it simple, provide balanced nutrients during the growing season, and reduce or eliminate fertilization during the winter months. It is essential to monitor your plant’s condition and adjust your care routine as needed.
Epsom salt can work wonders for your plants when used wisely, aiding in providing proper nutrients and promoting full growth. It is rich in magnesium and sulfur.
“Magnesium sulfate increases the amount of chlorophyll and keeps the plants green. It can be used for all crops like cereals, pulses, oilseeds, fruits and vegetables, cotton, sugarcane, etc.”
In this blog, we are going to discuss-:
various facts about Epsom salt.
Why should we use Epsom Salt?
What is Epsom salt?
How to use Epsom salt?
Have you ever noticed that despite providing everything necessary for healthy plant growth—such as the right soil, suitable pots, adequate sunlight, optimal temperature, quality water, fertilizer, and pest control—your plants still fail to thrive as expected? That’s where Epsom salt can work its magic!
But what exactly is Epsom salt? Is it the same as table salt, rock salt, or the kind used during fasting? Let’s delve into this topic in detail.”
About EPSOM SALT
If you search on Google for information on Epsom salt, you may come across results suggesting that it is “sendha namak” or rock salt (NaCl – Sodium Chloride),which is entirely incorrect.
NaCl, or table salt, is indeed edible, whereas Epsom salt is not.
Important note:
It is crucial to avoid using edible salt in the planting process, as it could potentially harm your plants, leading to adverse outcomes.
Epsom salt, scientifically known as Magnesium Sulphate
Epsom salt, scientifically known as Magnesium Sulphate (MgSO₄), serves as a beneficial supplement for plants. You can easily purchase Epsom salt online, from nurseries, or any medical store.
Additionally, Epsom salt is sometimes recommended by doctors for its therapeutic properties, such as for relieving swelling, through methods like Epsom salt fomentation.
Myth about Epsom Salt
There is a common misconception that Epsom salt purchased from medical stores may not be as effective for plants, but this notion is entirely misleading.
Whether you buy Epsom salt from nurseries, online markets, or medical stores, the properties of the salt remain consistent.
All varieties of Epsom salt will perform the same function for plants, regardless of where you purchase them.
Why do we need EPSOM salt for the plants?
Generally, plants need seventeen essential nutrients for maintaining their health, some of them are Nitrogen, Potassium, Phosphorus, Magnesium, Zinc, Sulphur, etc.
The Importance of Magnesium and Sulfur for Plant Health
1. If plants lack Magnesium, then their chlorophyll level will get affected negatively, which in turn will hamper the process of photosynthesis and it might weaken the particular plant and its growth.
Moreover, if plants will not produce chlorophyll, the natural green color of leaves will be affected.
2. As our body requires proteins and fats, similarly plants also require fats and proteins for optimal growth and lack of magnesium stops the formation of proteins and fats in plants.
3. Now, the next important nutrient is Sulfur, which is very essential to maintain the green color of leaves.
Lack of Sulfur in plants is the cause of leaves starting to turn yellow and plus it stops cell division also, hence, no new growth in the plants.
Your plant will have no new leaves, no new branches, no flowers, no new buds, no fruits, and absolutely nothing.
4. But, Epsom salt is full of Magnesium and Sulfur both. So, if you use Epsom Salt for plants, then it will boost their growth and the green color of the leaves will be maintained.
5. Generally, sometimes you might have noticed that the growth of Curry plants gets hampered even after taking tremendous care of the plant.
In that condition, try the Epsom salt once and you will notice visible changes in the growth of the plant.
Plus, you will find that new leaves are coming and the size has also broadened.
How to use Epsom Salt for plants?
There are two ways in which you can provide Epsom Salt to your plants:
1. First Method – Dissolve 1 tablespoon (tbsp) Epsom Salt in 1 Liter water. Now, spray this solution on plant leaves. In this procedure, Epsom Salt will enter the plant through the pores of leaves.
2. Second Method – Loosen your soil, and dig it a little. After that, put Epsom Salt in the soil.
In case you have a big pot use 1 tablespoon (tbsp) and use ½ tablespoon (tbsp) Epsom Salt in case you have a smaller pot.
Again, cover it up with soil and mix it generously. After that, give water to the plant.
In these two methods, the second method is relatively more effective because when roots absorb Epsom Salt, it will be equally distributed throughout the plant.
1.In the first method, i.e. using the leaf spray method, in spite of many spray hits not every leaf will receive the solution, plus there is a possibility of getting the solution wasted.
2. One more thing you can follow both the process parallelly also. If you want, you can put some Epsom Salt in the soil and you can spray it on the leaves.
After this procedure, wait for 8-10 days, as it will work slowly and gradually. It is not magic that will show results instantly.
So, after giving Epsom Salt for the first time, repeat the same procedure after 8-10 days again. And you will see visible changes in the growth of your plant.
Excess of everything is bad and the same is the case here also. Epsom Salt is not a fertilizer. Hence, it must not be used repeatedly in plants.
Important points
1. When given repeatedly, it might increase the concentration levels of Magnesium Sulphate and the balance of other nutrients might be affected which will worsen the condition of your plant.
2. You should use Epsom Salt only when your plant needs it.
3. If your plant is looking dull and its growth is totally hampered then first you should give fertilizers to the plant and check for pest attacks.
4. If everything is fine with your plant and still its growth is hampered then you can use Epsom Salt for your plant without any fear.
5. Epsom Salt can be used for your indoor, outdoor, flowering, non-flowering, vegetable, and any other kind of plant. People often use it for their money plants and curry leaves plants.
To prevent common problems such as pest attacks, fungus, and mealybugsin your plants, it is crucial to start by avoiding overwatering.
overwatering
Gardening tips: How to avoid overwatering
Overwatering can lead to various issues that harm your plants such as;
yellowing leaves
pest attack
wilting of leaves
fungal diseases
root rot
stunted growth
mold and mildew growth
To maintain healthy plants, it is essential to avoid overwatering and provide the right amount of moisture based on the specific needs of each plant type.
Some key steps to avoid overwatering in your plants:
1. Know your plants:
plants
Different plants have different water requirements.
Understand the specific needs of each plant in your garden or home.
2. Use Well-Draining Soil to avoid overwatering
well drained soil mixture
Ensure that your plants are potted in soil that allows excess water to drain away. This prevents water from accumulating around the roots.
3. Watering schedule:
Establish a consistent watering schedule.
Water when the top inch or so of the soil is dry.
Stick your finger into the soilto check the moisture level.
4. Water at the right time:
watering plants
Water your plants in the morning or in the evening.
Watering in the morning allows the plants to absorb moisture and nutrients during the day. This can help them withstand the heat and stress of the afternoon sun.
Watering in the evening can be beneficial because it provides plants with moisture overnight.
5. Proper drainage to avoid overwatering
Ensure that your pots have drainage holes.
This helps excess water escape, reducing the risk of root rot and fungal issues.
6. Monitor weather conditions:
Adjust your watering schedule based on weather conditions.
Plants may need more water during hot and dry spells but less during cool and rainy periods.
7. Use a saucer:
If you have indoor potted plants, use a saucer to catch excess water.
Empty it regularly to prevent the plant from sitting in standing water.
8. Inspect your plant regularly:
inspect your plant
Keep an eye on your plants for any signs of overwatering, such as wilting, yellowing leaves, or a foul odor from the soil.
Adjust your watering habits accordingly.
By avoiding overwatering and following these guidelines, you can significantly reduce the risk of pests, fungus, and mealybug infestations, keeping your plants healthier and more vibrant.
Mustard Cake Liquid Fertilizer is like a magic potion for your plants, which is made from the leftover material while making mustard oil. It is completely natural and very helpful in growing healthy plants.
Benefits of Mustard Cake Liquid Fertilizer
1. Boosts Growth: Helps plants grow bigger and stronger.
2. Nutrient-Rich: Packed with all the good stuff plants need to thrive.
3.Soil Friendly: Makes soil healthier and better for plants to grow in.
4.Green Pest Repellent: Keeps away pesky bugs without harsh chemicals.
5.Easy to Use: Just mix it with water and pour it around your plants.
6.Environmentally Friendly: Does not harm the environment like synthetic fertilizers do.
Here are some frequently asked questions (FAQs) about Mustard Cake Liquid Fertilizer for plants:
Q. 1. What is Mustard Cake Liquid Fertilizer?
Ans:Mustard Cake Liquid Fertilizer is a natural fertilizer derived from mustard cake, a by-product of mustard oil extraction from mustard seeds. It is made by soaking the mustard cake in water to create a nutrient-rich liquid fertilizer.
Q.2. How is Mustard Cake Liquid Fertilizer made?
Ans: Mustard Cake Liquid Fertilizer is made by soaking mustard cake (the residue left after mustard seeds are crushed for oil extraction) in water for a specific period. This allows the nutrients present in the cake to leach into the water, creating a nutrient-rich liquid fertilizer.
Q.3. What are the benefits of using a Mustard Cake Liquid Fertilizer?
Ans: Mustard Cake Liquid Fertilizer provides various benefits to plants, including:
Rich in nutrients like nitrogen, phosphorus, potassium, and micronutrients.
Improves soil fertility and structure.
Enhances plant growth and development.
Boosts flowering and fruiting.
Acts as a natural pest repellent and soil conditioner.
Q. 4. How do I use Mustard Cake Liquid Fertilizer?
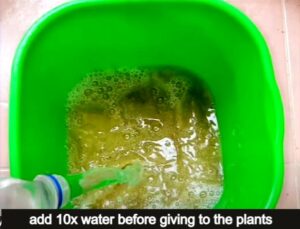
Ans: Mustard Cake Liquid Fertilizer can be used by diluting it with water and then applying it to the soil around plants.
The exact dilution ratio may vary depending on the specific needs of your plants and the concentration of the fertilizer. Generally, a dilution of 1:10 (one part fertilizer to ten parts water) is recommended.
Q. 5. Is Mustard Cake Liquid Fertilizer safe for all plants? Ans: Mustard Cake Liquid Fertilizer is generally safe for most plants when used in appropriate dilutions. However, it is always a good idea to test it on a small area of your plants before applying it extensively, especially for sensitive plants.
Q. 6. Can I make Mustard Cake Liquid Fertilizer at home? Ans: Yes, Mustard Cake Liquid Fertilizer can be made at home by soaking mustard cake in water. However, it’s essential to ensure that the cake is sourced from organic, chemical-free sources to avoid any contaminants in the fertilizer.
Q. 7. How often should I apply Mustard Cake Liquid Fertilizer? Ans: The frequency of application depends on various factors such as plant type, soil condition, and growth stage.
In general, it is recommended to apply Mustard Cake Liquid Fertilizer once every 2-4 weeks during the growing season.
Adjust the frequency based on the response of your plants and any specific recommendations for the plants you are growing.
Q. 8. Can Mustard Cake Liquid Fertilizer be used as a foliar spray? Ans: No, do not spray mustard cake liquid fertilizer on the leaves, recommended only for the soil.
Q. 9. When should I give Mustard Cake Liquid fertilizer to plants? Ans: Give Mustard Cake Liquid fertilizer to plants when the soil is dry, as it helps retain moisture in the soil.
Q. 10. When should one avoid using mustard cake liquid fertilizer on plants?
Ans: Mustard cake liquid fertilizer should be avoided during the summer months, especially in hot, dry weather, as it can potentially burn the plants.
Q.11. What precautions should be taken if used during hot, dry weather?
Ans: If it needs to be used during such conditions, it should be diluted with additional water in its solution to prevent damage to the plants.
Q.12. Can a mustard cake be used in powder form, and how can it be prepared for application?
Ans: Yes, mustard cake can be used in powder form.
To prepare it, grind the mustard cake into a powder using a grinder. Then, in the pot, remove the top layer of soil, sprinkle the mustard cake powder evenly, and water the soil to allow the nutrients to penetrate and benefit the plants.
Q.13. How should the mustard cake be stored, and why is it important to store it in this manner?
Ans: The mustard cake should be stored in a cool, dry place away from direct sunlight. This storage method is crucial to preserve the nutrients in the cake and prevent it from becoming rancid.
Q.14. Where can I purchase Mustard Cake Liquid Fertilizer Ans: Mustard Cake Liquid Fertilizer may be available at garden centers, nurseries, or online retailers that specialize in organic gardening products. Additionally, you can make it at home if you have access to mustard cake and water.
Healthy plants start with the right foundation – the soil. One crucial aspect of soil health is drainage. In this article, we will explore the ins and outs of creating well-drained soil for your plants, ensuring they thrive in optimal conditions.
Understanding Well-Drained Soil
Before diving into the practical steps, let’s understand what well-drained soil means.
Essentially, well-drained soil allows water to move freely, preventing waterlogged conditions that can harm plant roots.
Poorly drained soil, on the other hand, can lead to root rot and other plant diseases.
To assess whether your soil needs improvement, conduct a simple DIY soil drainage test.
soggy soil
First of all, check whether the soil is well-drained or not.
Give water to the soil slowly.
If the soil promptly absorbs the water, it indicates good drainage.
If water accumulates on the soil’s surface, measures should be taken to improve its drainage.
Look out for signs like wilting plants, standing water after rain, or a foul odor, which can indicate poor drainage.
Improving Drainage for potted plants during rainy season
In situations of heavy rainfall where moving our plants indoors is not feasible, there is a risk of overwatering and subsequently damaging our plants if the soil in their pots becomes too soggy.
Steps to make Soggy soil into Well-drained Soil
To improve drainage and prevent this, carefully loosen the soil inside the pot as deeply as possible without disturbing the plants and their roots.
Remove this loosened soil from the pot and add sand to it.
Test the soil consistency by attempting to form it into a ball with your hand. If the soil still sticks together, continue adding sand until it reaches a point where it does not adhere to your hand and gains a slippery texture.
Check the bottom hole of the pot
If water fails to drain from the bottom of the pot, the advantages of having well-drained soil are nullified.
water flows out from the bottom hole
It is essential to ensure that the bottom hole is functioning correctly; sometimes, roots or other debris may block these holes, preventing proper drainage. Continue watering your plant until water flows out from the bottom hole.
This process effectively transforms clay soil into well-drained soil.”
How to make Well Drained Soil for Plants
Ingredients for Well-Drained Soil
Creating well-drained soil involves selecting the right ingredients.
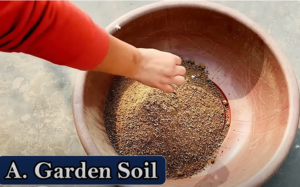
1. Garden Soil:
Opt for high-quality garden soil as the foundation of your mixture. Ensure it possesses a loamy texture and promotes good drainage. Avoid using dense clay soils.
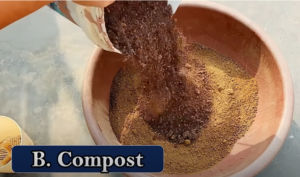
2. Add Compost for Increased Organic Matter:
Boost the organic content of your soil mixture by introducing compost. Consider adding either cow dung compost or vermicompost.
Compost enriches the soil with essential nutrients and enhances its overall structure, creating an ideal environment for rose growth.
3. Add Sand for Enhanced Drainage:
River sand
If your soil exhibits poor drainage due to its heavy consistency, introduce sand to facilitate better drainage.
Steps to make well-drained soil for plants
1. Prepare Garden Soil:
Before creating the soil mixture for your plants, ensure your garden soil is thoroughly cleaned. Remove any debris, as well as glass or plastic fragments that could impede the plants’ growth.
2. Combine ingredients in the following ratios:
Compost: Incorporate vermicompost or cow-dung compost, comprising half the quantity of the garden soil.
Sand: Add one-fourth of the garden soil.
Coco Peat: Include coco peat in a proportion equivalent to one-fourth of the garden soil.
Note:
You can add Neem Cake Powder and Fungicide to the soil as well:
Introduce a small amountof neem cake powder into the mixture.
Optionally, add a minimal amount, approximately 3-4 grams, of fungicide to the soil mixture.
Blend all the components thoroughly to achieve well-drained soil. It is advisable to periodically enrich the soil with compost and other organic materials to uphold its fertility and structure.
Benefits of Well-Drained Soil
The advantages of well-drained soil are numerous.
Enhanced root development, disease prevention, and improved nutrient absorption are just a few benefits that contribute to overall plant health.
Conclusion
Creating well-drained soil is a fundamental step towards nurturing thriving plants. By understanding the importance of proper drainage, choosing the right ingredients, and following practical steps, you can establish an environment where plants flourish. Take the time to tailor your soil to the specific needs of your plants, and you will reap the rewards of a vibrant and healthy garden.
Just as plants need fertilizer and water from time to time, pruning is also necessary to ensure their health and vitality. Pruning involves selectively removing parts of a plant such as branches, buds, or roots to promote growth, improve structure, and enhance overall health.
The timing of pruning depends on the specific plant species and its growth cycle. Generally, the best time for pruning is during the dormant season, typically in late winter or early spring before new growth begins. However, some plants may require pruning at different times of the year to achieve specific goals.
There are so many reasons for the pruning and it depends on different parts of the plants. In this article, we will know why, when, and how we should do pruning of different parts of plants. Also, we will discuss some of the most commonly asked questions on pruning which are as follows;
1. What is the pruning of the plants?
2. What is the right time to do the pruning of the plants?
3. Why do we need to do the pruning of the plants?
4. What are the right techniques to do the pruning?
What is Pruning?
When we cut the leaves, stems, branches, roots, flowers, or any part of the plant to give it a shape and for the growth of the plant, that process is called pruning.
It is the process of selectively removing parts of plants to control plant growth and development in a particular pattern.
Pruning is one of the main contributing factors to keeping garden plants healthy, and beautiful and producing more vegetables, fruits, and flowers.
Purpose of pruning of plants
1. Sunlight Access:
Pruning creates space within the plant canopy, allowing sunlight to penetrate deeper and reach the lower leaves and roots, promoting overall photosynthesis and plant health.
2. Strength and Structure:
By selectively removing weak, damaged, or overcrowded branches, pruning strengthens the plant’s structure, reducing the risk of breakage and promoting better air circulation.
3. Aesthetic Appeal:
Pruning enhances the visual appeal of plants by maintaining their shape, removing unsightly or overgrown parts, and promoting symmetry and balance in their appearance.
4. Fruit Production:
Pruning stimulates the growth of new fruit-bearing branches and encourages the development of larger, healthier fruits by redirecting the plant’s energy towards fruit production.
5. Increased Yield:
Proper pruning techniques can increase the yield of vegetables, fruits, and flowers by optimizing the plant’s resources and maximizing the production of desirable parts.
Methods of pruning in plants
Before embarking on pruning, a thorough inspection of the plant is crucial to determine which parts need attention and where cuts should be made. Careful consideration must be given to avoid causing harm to the plant.
Here are some important methods of pruning in plants:
1. Pruning of leaves
(i) When leaves start turning yellow or brown:
It is essential to prune leaves when they start turning yellow or brown. This action should be taken promptly to maintain the overall health of the plant.
Removing these diseased or dying leaves prevents the spread of infection and redirects the plant’s resources towards healthier growth.
(ii) In case of infection:
If any leaves show signs of infection, such as discoloration, spots, or mold, immediate pruning is necessary.
This prevents the spread of disease to other parts of the plant and promotes faster recovery.
(iii) Remove bottom leaves:
Pruning the bottom leaves of the plant is beneficial for several reasons. These lower leaves often retain moisture, creating a favorable environment for pests and fungal diseases.
Additionally, since these leaves receive less sunlight, they contribute less to the photosynthesis process.
By removing them, the plant can allocate its energy more efficiently to the upper, healthier leaves.
It is important to prune the damaged leaves of the plant because once the leaf is damaged it won’t get recovered for sure.
Moreover, damaged leaves consume the plant’s resources without contributing significantly to its growth. By removing them, the plant can focus its energy on producing new, healthy foliage, ultimately promoting its overall vigor and vitality.
2. Pruning of branches and stems
Timing of Pruning:
It is advisable to prune stems and branches when the plant is young and still relatively small in size.
Pruning at this stage encourages the plant to develop a healthier and denser growth pattern.
Starting pruning early helps shape the plant effectively and prevents it from growing spindly or overly tall without branching out.
Why pruning of stems and branches is important?
Pruning branches and stems is crucial for several reasons.
“Plants produce auxin hormone primarily at the tips of their stems and branches, which promotes vertical growth.”
By selectively pruning these tips, the plant’s energy is redirected, stimulating the growth of lateral branches. This lateral growth leads to a bushier and more compact plant structure, enhancing its overall health and aesthetic appeal.
Note:
Pruning can be done by pinching off excess growth, but it’s crucial to make precise cuts just above the node—the point where leaves or branches connect to the stem.
This strategic pruning promotes new growth at the desired location, contributing to a more balanced and attractive plant shape.
Note: Sanitization of Tools:
Before pruning, it is essential to sanitize all pruning tools, such as scissors or pruners, using disinfectants like Dettol or soap.
This precaution helps prevent the transfer of infections from one plant to another, safeguarding the overall health of your garden.
3. Pruning of Flowers
Removing Spent Flowers:
Once flowers have bloomed and started to fade, it’s essential to remove them promptly.
Flowers typically do not bloom again from the same bud, so by removing spent flowers, the plant can redirect its energy towards producing new blooms or other growth.
For example, in the case of jasmine plants, removing the entire branch on which flowers have bloomed stimulates the plant to produce flowers on other branches, promoting continuous blooming.
Completion of Life Cycle:
Remove Manjaris in Tulsi plant
In the case of the Tulsi plant (Holy Basil), when flowers have matured and developed into seeds, it indicates the completion of the plant’s life cycle.
At this stage, the plant’s focus shifts from flowering to seed production, and its vitality may decline.
To maintain the health and bushiness of the Tulsi plant, it is advisable to remove the flowers once they have matured into seeds.
This encourages the plant to channel its energy towards producing new foliage and promotes a more robust growth habit.
Regular pruning of flowers ensures that plants allocate their resources efficiently, resulting in continuous flowering and overall plant vigor.
4. Pruning of Roots
As plants grow, their root systems also expand. However, excessive root growth can lead to a condition known as root bound, where the roots become tightly packed within the container. To address this issue, there are two primary methods of root pruning:
(i) Repotting into a Larger Container:
If the plant’s roots have outgrown its current container, one option is to transplant it into a larger pot. This provides the roots with more space to spread out and grow without becoming constricted.
When repotting, it is important to choose a pot that is one size larger than the current one and to use well-draining soil to promote healthy root development.
(ii) Root Trimming:
root bound in ZZ plant
Alternatively, root pruning involves periodically trimming the roots of the plant to prevent them from becoming root-bound. This process typically occurs once a year.
To perform root pruning, carefully remove the plant from its pot, trim away any circling or overly long roots, and refresh the soil.
Additionally, adding fertilizers during this process can provide essential nutrients to support new root growth.
After root pruning, the plant can be placed back into the same pot with fresh soil, allowing the roots to continue growing healthily without becoming bound.
5. Pruning for shape
Plants can lose their natural shape due to various factors such as growth patterns, environmental conditions, or lack of maintenance.
Pruning for shape involves selectively removing branches and foliage to achieve a desired form or structure. This practice is particularly common in ornamental plants and trees to enhance their aesthetic appeal and promote balanced growth.
For example, when shaping a Christmas tree, regular pruning is essential to maintain its classic conical form.
This may involve trimming the branches to create even layers, removing any dead or overgrown branches, and shaping the overall silhouette of the tree.
By pruning for shape, gardeners can transform unruly or shapeless plants into visually appealing specimens that enhance the beauty of their garden or landscape.
6. Pruning to control pest attack
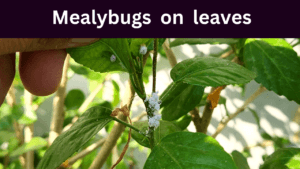
Mealybugs on Hibiscus plant leaves
When plants are affected by pest infestations, pruning can be an effective method to manage and mitigate the damage caused by these pests. Here’s how pruning can help control pest attacks:
(i) Early intervention:
If you notice signs of pest infestation, such as chewed leaves or insect activity, it’s crucial to take action promptly.
Initially, you can try using natural remedies like neem oil or insecticidal soaps to address the infestation. However, if the infestation has spread significantly or if the affected branches are severely damaged, pruning may be necessary.
(ii) Removing infested branches:
Pruning allows you to remove the affected branches or parts of the plant where the pests are concentrated.
By cutting away these infested areas, you can prevent the pests from spreading to other parts of the plant or neighboring plants.
(iii) Preventing further spread:
Broken or damaged branches can attract pests and provide entry points for diseases.
By properly pruning these damaged areas, you can reduce the risk of fungal infections or secondary pest infestations.
7. Timing of Pruning:
Pruning should ideally be done during the plant’s active growing period. Additionally, pruning winter plants during the winter season and summer plants during the summer season can minimize stress on the plant and promote optimal growth.
Conclusion
It is important to note that while pruning can help control pest attacks, it should be done judiciously to avoid causing further harm to the plant. Using sharp, clean pruning tools and making proper cuts can minimize the risk of infection and ensure the best outcomes for plant health and pest management. Regular monitoring and maintenance practices, including pruning, are essential components of integrated pest management strategies to keep plants healthy and thriving.
By reading this you will understand why pruning is important. It was all about pruning.
If you are gardening in pots or grow bags, it is essential to take meticulous care of your plants. Aphids, though initially difficult to detect, can significantly impact your plants. These pests tend to congregate in groups and can cause substantial damage. In this article, we’ll delve into what aphids are and how to effectively remove them from your plants.
What are Aphids?
Aphids, also known as black bugs, are minute, soft-bodied insects that infest the leaves, flowers, and stems of plants. These pests feed on the sap of the plant, weakening it over time and stunting its growth. Consequently, affected plants may wither or die.
“One of the challenges with aphids is their rapid proliferation and their ability to spread quickly, making it challenging to pinpoint their source.”
Aphids reproduce at a rapid pace, underscoring the importance of controlling their population before it spirals out of control. They typically target the undersides of leaves, making them difficult to spot from above. Addressing aphids early on is crucial, as they can wreak havoc on your plants if left unchecked.
How to get rid of aphids on plants
There are several methods for effectively removing aphids (black bugs) from plants and safeguarding them without resorting to harmful chemicals or pesticides. Following the correct procedure is crucial to prevent further damage to the plant. While aphids pose a threat to plants, they do not harm humans, and manual intervention can be effective in controlling their population.
Here are the steps to remove aphids from plants:
1. Identify and cut the affected parts
Upon discovering aphids on your plant, the initial step is to separate the affected parts from the rest of the plant.
2. Assess Plant’s Condition
After isolation, thoroughly inspect the plant to determine the extent of infestation.
As aphids tend to inhabit various parts of the plant, such as the undersides of leaves, branches, or flowers, all affected areas must be identified and addressed.
3. Cover the pot and soil with plastic
It is essential to cover both the pot and the soil with plastic after inspecting the plant.
This precautionary measure prevents any aphids dislodged during treatment from re-infesting the plant by falling onto the soil.
4. Protect Soil from Insects
While treating the plant, tilt its branches outward over the pot and place a bucket underneath to catch any dislodged pests, ensuring they do not fall onto the soil or surrounding ground.
The primary objective is to prevent soil contamination by these insects.
5. Wash the infected leaves from the water
Proceed to remove aphids from all leaves and wash them thoroughly with water.
Pay special attention to cleaning the undersides of leaves where aphids often cluster.
Spray bottles or watering cans can facilitate this process.
6. Prepare organic pesticide
For an effective treatment solution:
Grind 8-10 cloves of garlic to make a paste.
Boil the paste in 1 glass of water for 5 minutes, then strain it.
Transfer the solution to a ½ liter bottle and add 1 tablespoon of neem oil, and ½ tablespoon of liquid hand soap, and fill the rest with water.
Note:
Aphids are repelled by garlic, making it a key ingredient in this solution.
Neem oil serves as an organic pesticide, while the soap helps in insect removal.
By following these steps diligently, you can effectively eliminate aphids from your plants while ensuring their continued health and vitality.
7. Spray Neem oil solution on every part of the plant
Once the neem oil solution is prepared, evenly spray it on every part of the plant, including branches, leaves, and flowers.
Note:
It is advisable to carry out this process in the evening to avoid interfering with the plant’s photosynthesis, which primarily occurs during the daytime.
Evening is ideal as plants undergo rest and respiration, minimizing any adverse effects on growth.
8. Rinse Plant with water again
The following morning, cover the pot and soil with plastic as before. Thoroughly wash the entire plant with water.
You’ll likely notice a significant reduction in aphid population, with approximately 80% eradicated. Repeat steps 7 and 8.
Reapply the neem oil solution in the evening for the next 2-3 days consecutively, and rinse the plant with water in the morning.
By consistently following this regimen, all aphids should be eliminated from the plant.
9. Monitor and Maintain
Regularly inspect the plant for any signs of pest resurgence.
If aphids reappear, repeat the entire process to ensure the continued health of your plant.
Remember, vigilance and proactive maintenance are key to maintaining a pest-free and healthy garden.
Garden soil plays a crucial role in plant health and overall garden success. Recognizing signs that indicate your soil may need improvement is essential. Here’s a guide to help you identify when your garden soil requires attention:
Check 10 Signs of Poor Garden Soil Health
1. Water Drainage Issues:
Signs: Water pooling on the surface, slow absorption.
Reason: Poor drainage, possibly due to compacted soil.
Solution: Address soil compaction, enhance drainage with amendments.
2. Soil Compaction:
Signs: Hard, compacted soil.
Reason: Restricts root growth and water penetration.
Solution: Loosen soil through aeration, add organic matter.
3. Poor Plant Growth:
Signs: Stunted or slow growth.
Reason: Nutrient deficiencies or imbalances.
Solution: Test soil for nutrients, amend accordingly with fertilizers or organic matter.
4. Yellowing Leaves:
Signs: Yellow leaves, especially in younger growth.
Reason: Lack of essential nutrients, such as nitrogen.
Solution: Supplement nutrients through fertilization.
5. Wilting Plants:
Signs: Persistent wilting even with adequate watering.
Reason: Soil challenges affecting water absorption.
Regular soil testing and observation are key to understanding your garden’s soil needs. Implementing appropriate amendments based on these signs will contribute to a healthier and more productive garden.