Category Archives: Blog

Snake plant thumbnail

How to Grow and Care Snake Plant

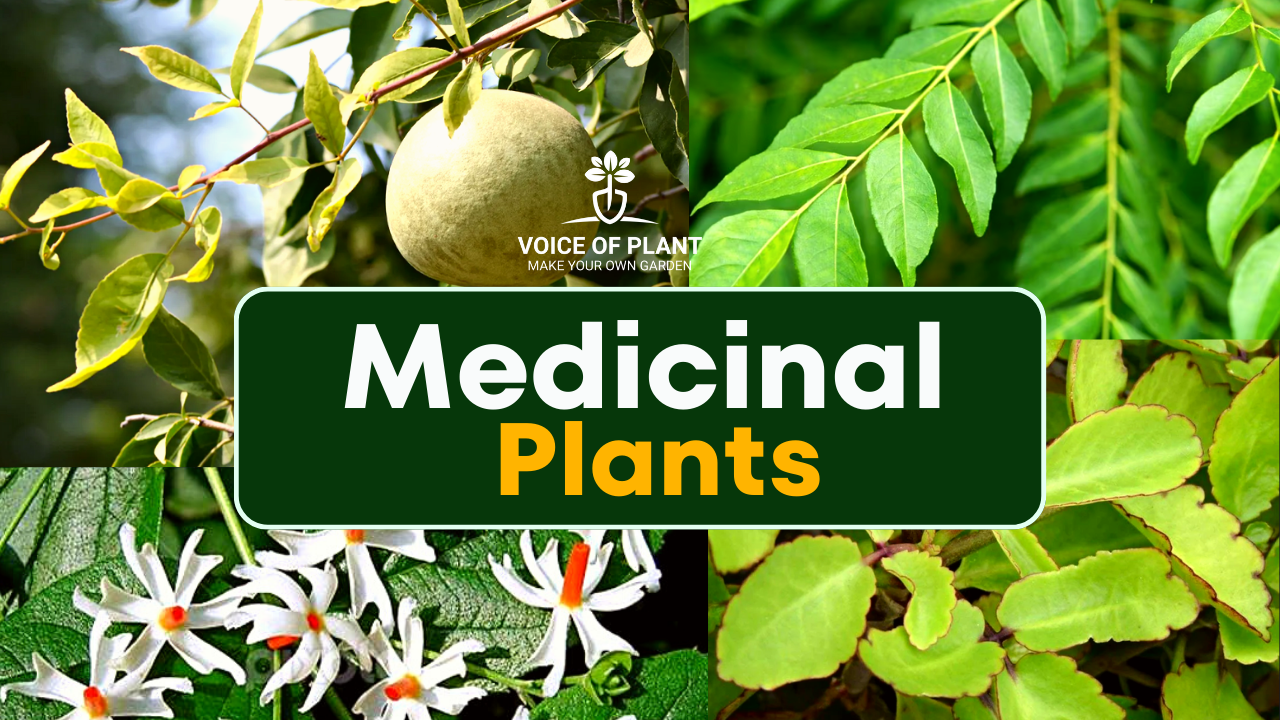
Nowadays there is a lot of trend for indoor plants. People like to have indoor plants in their homes and offices. This not only increases the beauty of the homes and offices but also brings positive energy along with it.

snake plant

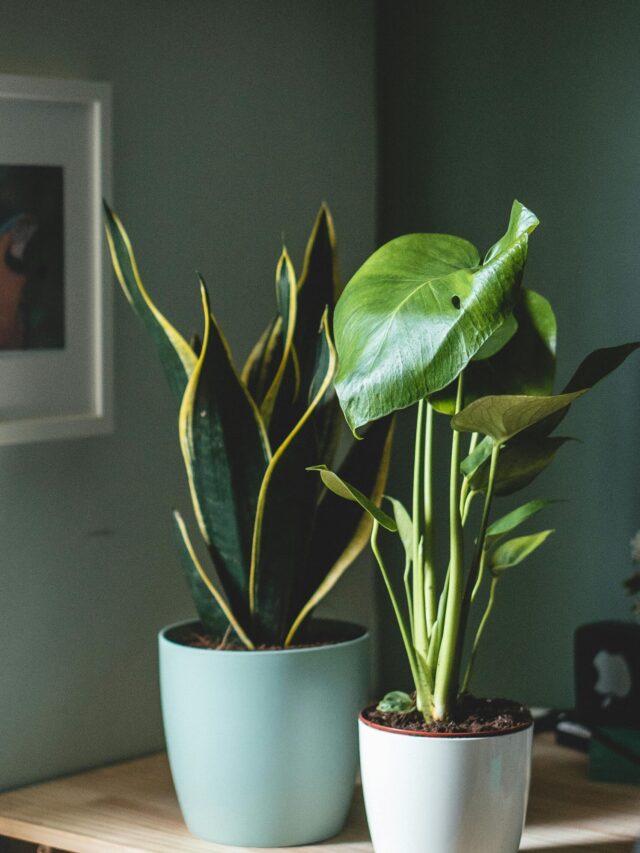
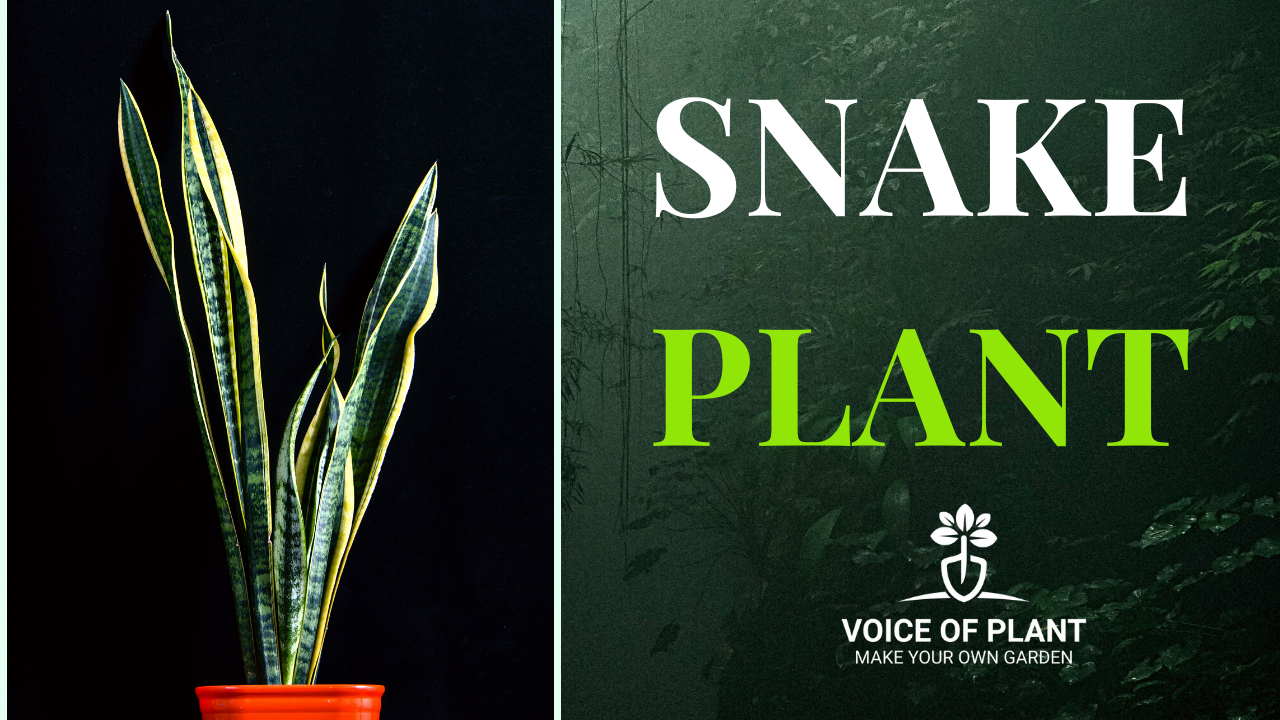
One of the most commonly grown indoor plants, the “Snake plant” has gained popularity due to its hardiness and ease of growing and air-detoxifying properties. Snake plants are often used as home decorations, as they are very attractive to look at. They can be seen in almost all places.

In this article, we will discuss complete care and tips on Snake plant such as;

  • watering tips for snake plant,
  • sunlight for snake plant,
  • fertilizers for snake plant,
  • soil mixture for snake plant,
  • propagation for snake plant,
  • repoting tips for snake plant, and many more.

Snake plants are recognized for their evergreen-looking sword-shaped leaves. Its leaves grow upwards and look like a sword.

Snake plant is also known as “mother-in-law’s tongue”, “St George’s sword” or “viper’s bowstring hemp”, as it is one of the sources of plant fibers used to make bowstrings.

snake plant care

Features of Snake plant

Common name: Snake plant, mother-in-law’s tongue

Scientific Name: Dracaena trifasciata (formerly Sansevieria trifasciata)

Maintenance: Low-maintenance

Water: When the soil dries completely

Sunlight: Bright/Medium Light

Snake plant is a life-giving plant

    • The snake plant is a life-giving plant as it increases the level of oxygen in the atmosphere to a remarkable level.
    • It is also known for its ability to help remove toxic air pollutants.
    • It purifies the air and maintains the freshness in the room.
snake plant in pot


Why is it called a Snake plant?


It has leaves with a snake-like texture and from the top, it looks like a snake’s hood. This plant does not attract any snakes toward it. It is just the physical appearance of the plant which gave it the name “Snake plant”.

Snake plant care tips


Snake plant requires very little care in maintenance. This is the reason why people easily plant it at home.

  • The snake plant is a flexible, hardy plant and can survive in relatively dry environments both indoors and outdoors.
  • If you plan to plant a snake plant in your home, then it is important for you to take care of some things.

Now, let’s discuss some important tips to care for the Snake plant:

1. Watering for Snake plant


Often people do not know when and how to water the snake plants. So, let’s discuss some of the important points on “how to water snake plants”.

watering tips for snake plant


The snake plant is a succulent and its requirements are a little different from any other plant. Its leaves already have moisture locked in so, it does not require much water. The biggest reason for the failure of this plant is overwatering or underwatering.

Before watering to Snake plant, follow the below steps:


Give water only, when the soil is completely dries

    • Water the snake plant only when the soil is completely dry.
    • Dig the top layer of soil at least for 2-3 inches not only the topmost layer, if it is dry till 2-3 inches then only give water.
    • When giving water, give it properly because the next watering might be done after 10-15 or 20 days.
best soil for snake plant


Always give water at regular intervals

    • It should not be like that in the first go, your plant was watered at the gap of 4 days, and in the next round break of 20 days was taken.
    • The plant would start decaying in that case.
    • Always maintain the frequency of a 7-8 days gap.
    • During winter, it would need less water.

Important note:


snake plant cleaning
    • Clean the leaves twice a month with a wet wipe or tissue paper.
    • Water should not get stagnant on the leaves, leaves might rot out.
    • Too much water can rot the roots of this plant.

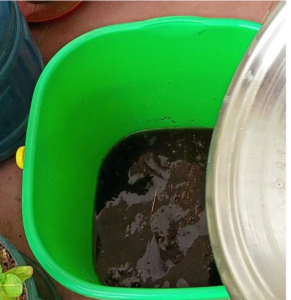
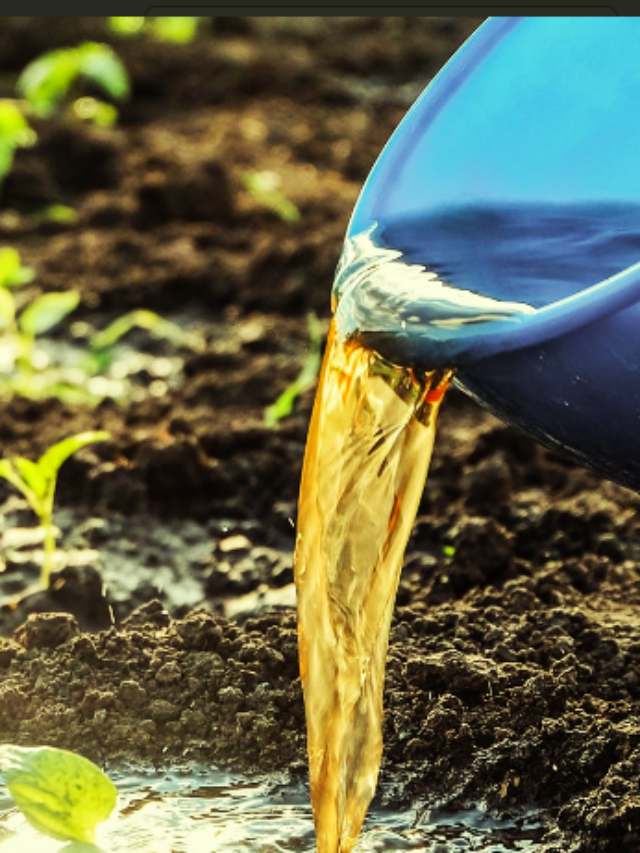
Rainwater is good for Snake plant

    • Rainwater is good for this plant but not rain showers.
    • Store the rainwater in a bucket and give it to them (it works as a tonic for this plant).
    • Whenever it rains, shift them to shaded areas where rainwater would not fall directly.

2. Sunlight for Snake plant


Never keep snake plants in direct sunlight. Indirect sunlight is best for a snake plant. Bright light and medium light areas are the best for snake plants.

snake plant in indirect light

The ideal temperature for a Snake plant:

    • This plant grows well throughout the year, and may slow down for some time but does not stop growing.
    • The perfect temperature for this is 15-35℃.
    • During very high temperatures it slows down its growing speed.
    • In the course of extreme cold, it should be kept inside.
    • Save it from direct dew. Otherwise, it might start decaying but it will recover also as soon as the weather changes.
snake plant leaves sunburned


Important note:

  • Never beautify the corner (where there is no light) of your home with a snake plant because it would not survive in darkness. Snake plants would not hold on in darkness or dark areas.

3. Fertilizers for Snake plant


Snake plants are never fed by strong fertilizers because they do not give any fruits, flowers, or dense leaves.

  • It is just that the right fertilizer at the right time is the key followed by this plant for fruitful growth.

Fertilizers thrice a year is the agenda here.

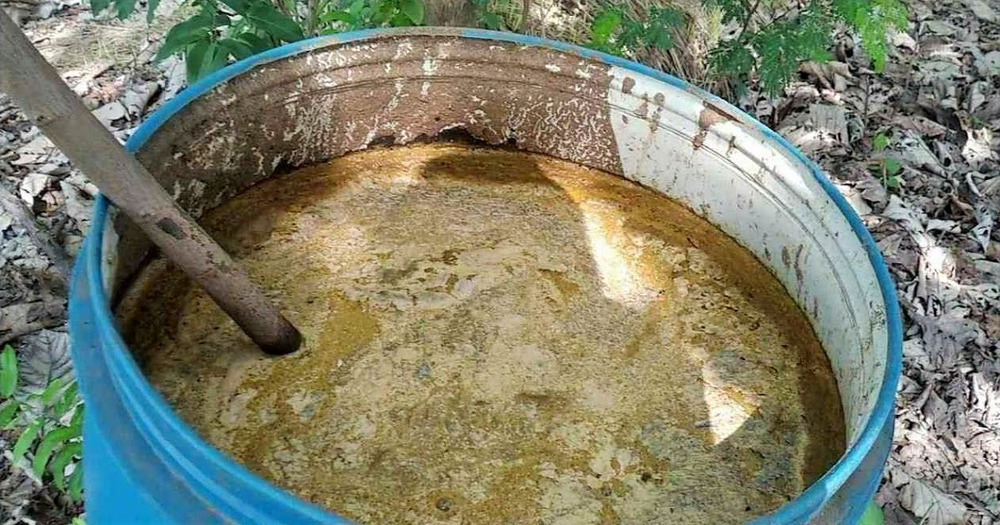
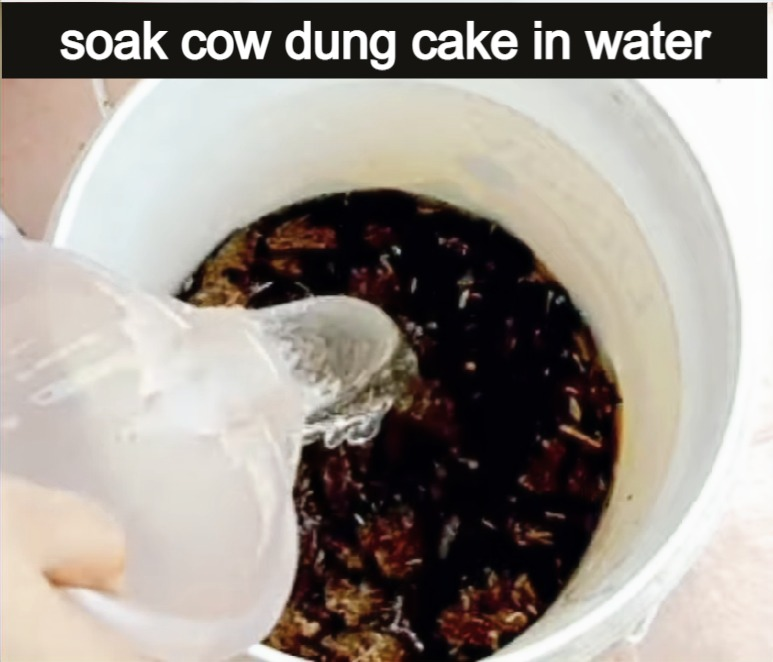
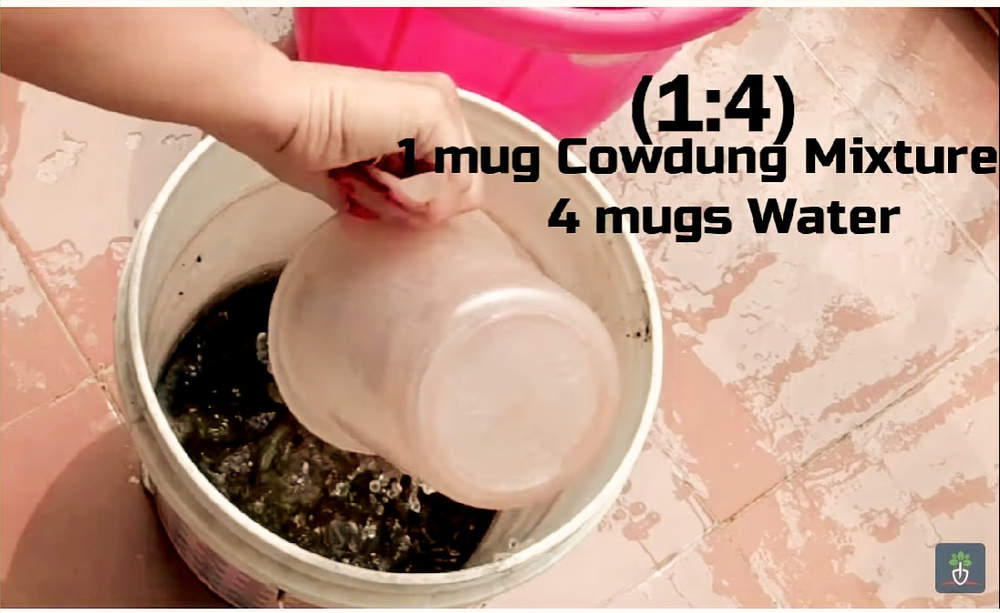
  • Once in February, preferably cow dung fertilizer.
  • Next in July end, vermicompost tea can be given at this time.
  • After that, at the start of November, – you can use Mustard cake liquid fertilizer.
  • Mustard cake fertilizer is warm in nature and at this time winter starts, so it will help the soil to maintain its temperature.
  • Moreover, stored rainwater also acts as a tonic for it. Keep on giving that also whenever it rains.

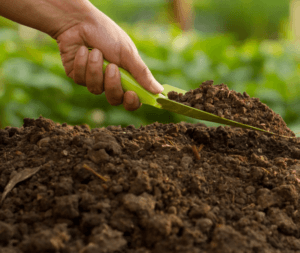
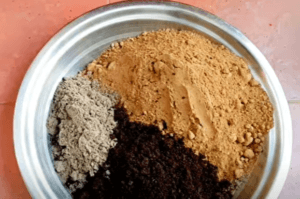
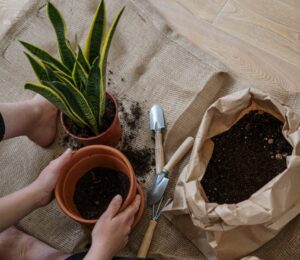
4. Soil mixture for Snake plant


The soil of a snake plant is different from other plants because it is succulent.

  • Never go for clay soil.
  • Always go for a sandy mixture soil.

Follow the below steps to make the best soil mixture for snake plants:

1. Take river sand which should be 50% of the total mixture.

2. Take local soil (available in your area) which should be 25% of the total mixture.

3. Take compost which should be 25% of the total mixture.

soil mixture for snake plant
How to make the best soil mixture for snake plants:

1. Take the local soil (available in your area).

2. Sieve it and clean it properly.

3. There should not be any plastic, glass pieces, termite, or insects in it.

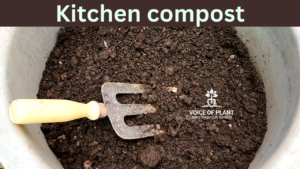
4. Any compost can be taken like vermicompost, leave compost, cow dung, and kitchen compost.

5. Mix the proposed quantity of each ingredient properly.

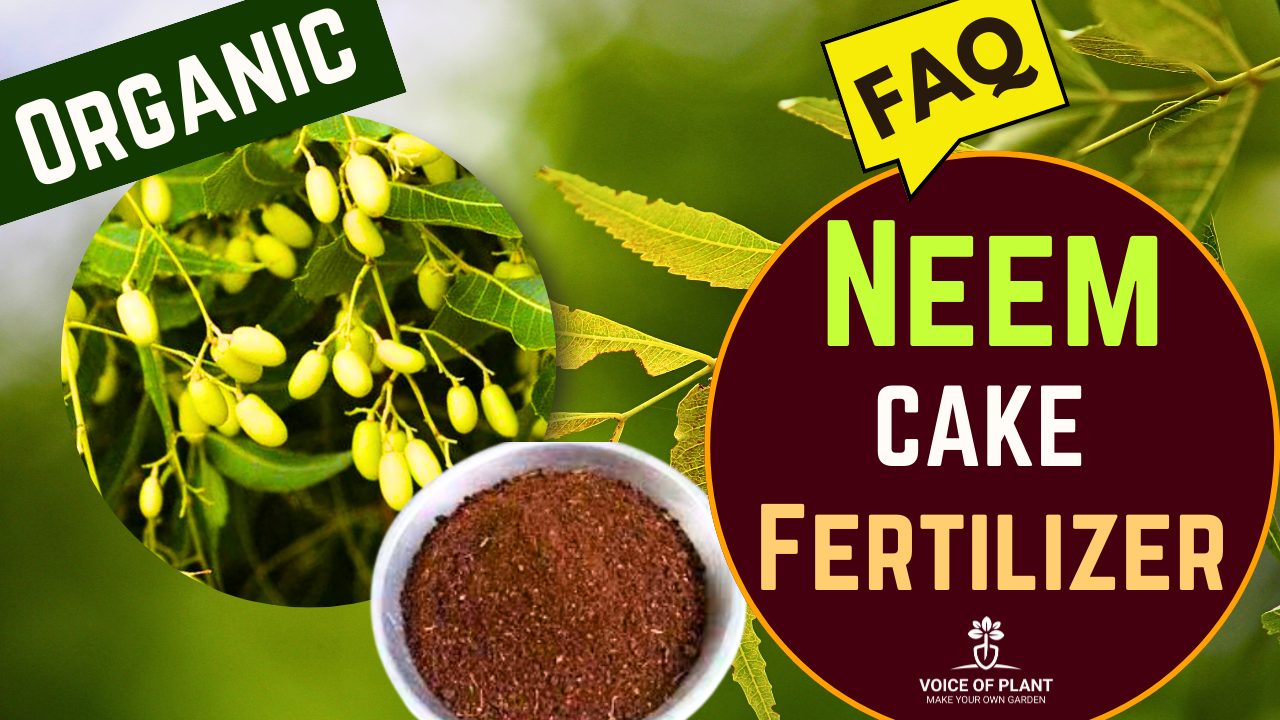
6. A very little quantity of neem cake can be added to prevent fungus and insects.

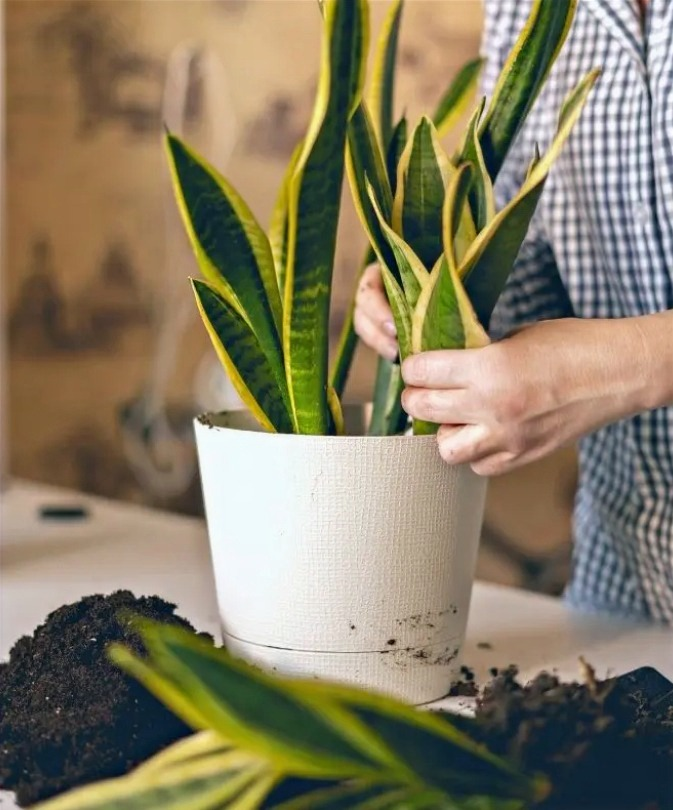
5. How to propagate the Snake plant?


snake plant propagation


1. Select a small pot with a proper drainage hole at the bottom.

2. Fill the pot with the prepared mixture and pour some water.

3. Now, remove the plant from the existing pot by loosening the soil. Do it very carefully.

4. The roots of this plant are very small. Divide the plant into different parts by cutting it from the main root(called naadi).

5. Now, take one divided plant and place it inside the soil by making holes in the soil.

6. Cover the roots properly with soil. Do not give water now, as it was already given before placing the plant.

7. Place the pot where there is light but not direct sunlight.

8. Keep them undisturbed for a few days, and pour water when the soil gets dry.

9. They will bloom and flourish in heavy dense plants sometimes.

snake plant repotting

6. When to repot the Snake plant?


    • This plant is always available in pots, not in polybags.
    • Do not transfer it unnecessarily, give time to get it settled at your place.
    • Report it when it is required as this plant does not like unnecessary disturbance.
    • Shift this plant when the existing pot gets full by small -small baby plants.
    • Take one size bigger pot from the existing pot.
    • Do not go for a very big pot.
snake plant repotting tips


Important note:

    • Always prefer small pots for Snake plants.
    • It loves root bound. This plant loves roots bound and small – small pups propagate in these bounded roots.
    • If it is grown in a big pot, then its roots will take more time to spread and more time for the propagation of pups.
    • Hence, more time will take to grow and become dense.

7. How to deal with rotten Snake plants?


    • If you have a snake plant whose leaves started decaying then first of all cut out all the leaves which are rotting.
    • Now, keep it in any corner where there is a medium or bright light (not in direct sunlight).
    • Do not feed any fertilizer or water.
    • Just keep it for some days undisturbed and it will start recovering on its own.

8. Best time to purchase & grow


    • March-October is the best time to buy snake plants.
    • Always prefer dense snake plants with 2-3 pups while buying them from the nursery.

9. Availability, Cost, and Varieties of Snake Plants


  • Snake plants are easily available at all nurseries and can be bought for Rs 100-200.
  • Approximately it has 60-70 varieties in it but 10-12 categories are the most common and easily available.
  • Some are very long, some can be short, and denser, and some are in different colors.
  • For indoors, long ones are not preferred. Opt for the more dense plant to keep indoors as they look more beautiful.

So, this was all about “SNAKE PLANT”.

Happy Gardening!

Make Your Own Garden!

medicinal plants thumbnail

Medicinal Plants: Benefits and Uses (II)

Medicinal plants are nature’s remedies. They are special plants that have the power to heal and improve our health. These plants have been used for centuries to treat various illnesses and ailments. 

In this article, let’s explore more medicinal plants you can grow at home and discover how they can benefit us.

4. Curry Leaf

It is also known as ‘Meetha Neem’ or ‘Dr. Sensitive.’

  • Curry leaves possess numerous healthful properties that aid in the treatment of various health conditions.
  • Nowadays, dried curry leaves are available in the market and are primarily used as spices in the kitchen.

Medicinal benefits of Curry leaves

Many medicinal properties are found in curry leaves which are as follows:

curry leaves

  • Consuming curry leaves is beneficial for diseases related to the liver and heart.

  • They reduce the risk of anemia and help control blood sugar levels in the body.

  • Curry leaves are also effective in treating skin conditions, including spots and pimples. 

  • The antioxidants in curry leaves contribute to heart health by reducing bad cholesterol and increasing the levels of good cholesterol.

  • They can also be consumed to alleviate sinus infections, coughs, and colds.

  • It is suggested to incorporate a daily routine of consuming 6-8 leaves on an empty stomach as a potential solution for the mentioned health issues.

“High levels of vitamins A and C are found in the curry leaves.”

5. Patharchatta Plant (kalanchoe Pinnata)

Pattharchatta is an Ayurvedic plant with numerous medicinal properties.

  • It is commonly used to address various health-related issues at home.
  • The healing properties found in Pattharchatta are beneficial in treating a wide range of diseases.

Patharchatta


Medicinal benefits of Patharchatta

The significant health benefits derived from the use of this potent and evergreen plant include the following:

1. If you have kidney stone problems, Pattharchatta is a natural remedy for your health.

2. The juice extracted from Pattharchatta leaves contains special elements that help control blood pressure levels.

3. Stonecrop leaves contain specific compounds that accelerate the wound-healing process.

4. Additionally, its anti-inflammatory properties can alleviate symptoms such as swelling, redness, and irritation.

How to use Patharchatta as a medicine?

1. Take 2-3 leaves, grind them, and mix the paste with honey.

2. Consume this mixture on an empty stomach with lukewarm water daily to treat kidney stones.

3. It can also provide relief from stomach aches.

“Patharchatta plant can be easily grown from a single leaf cutting.”

6. Night Jasmine (Parijat) 

The Parijat plant, also known as Night Jasmine, Harsingar, is renowned for its abundant medicinal properties, which make it effective in treating various diseases.

  • These small-petaled, white Harsingar flowers are highly fragrant and bloom only at night, earning them the names ‘Night Blooming Jasmine’ or ‘Queen of the Night.
  • Parijat is rich in antioxidants, anti-inflammatory, and antibacterial properties, making it valuable in combating a wide range of illnesses.”

Night jasmine

Medicinal benefits of Parijat (Night Jasmine)

The leaves, flowers, and bark of this plant contain medicinal properties.

1. It is highly effective for arthritis patients.

2. Its leaves can be used to treat colds, flu, and to expel stomach worms.

3. It aids in healing various types of wounds.

4. It is beneficial for individuals with diabetes.

5. It provides benefits for eye diseases.

6. It is also used to treat fever.

7. The properties of Parijat can be useful in managing ringworm.

8. Pile disease can be treated by consuming one seed of Parijat daily.

9. The juice of its flowers is considered effective for heart health and may help prevent heart disease.

How to prepare Parijat for the treatment?

1. Take 6-7 leaves of Parijat.

2. Wash them with water.

3. Boil them in half a liter of water until the quantity reduces to one-fourth.

4. Strain the liquid and consume it with sugar candy.

How to apply it on the wounds?
  • Sometimes wounds take time to heal.
  • To expedite the healing process, apply a paste of Parijat leaves to the wounds.
  • Parijat has antifungal and antibacterial properties, which help prevent the wound from spreading.

7. Bael Plant (Stone Apple)

Bael, also known as the stone apple, is a significant medicinal plant.

Bael plant

  • Ayurveda mentions many of its benefits. The fruit has a tough outer shell, but the inside is soft, pulpy, and contains seeds.
  • Bael is used in the preparation of various medicines, and it also features prominently in many delicious dishes.

“Bael (stone apple) is rich in protein, beta-carotene, thiamin, riboflavin, and vitamin C.”

Medicinal benefits of Bael plant

bael juice

1. Bael fruit can be used to alleviate diarrhea and dysentery.

2. Bael juice is employed to purify the blood.

3. It also enhances the functioning of the kidneys.

4. Consuming Bael fruit aids in the effective removal of impurities from the body.

5. In cases of cholera, consuming Bael juice and Belpatra powder with water provides relief.

How to consume Bael?

1. To treat the above-mentioned ailments, consume the leaves with salt.

2. To prevent heat stroke, it is advisable to drink Bael juice because it has cooling properties. When going out, drinking Bael juice can help keep your body cool and prevent heat stroke.

3. Extracting the juice from Bael leaves and consuming it with black pepper can provide relief from jaundice and chronic constipation.

Bael plants are generally grown in the ground, but they can also be grown in a 12-14 inch pot.

Must read:

Medicinal Plants: Benefits and Uses (Part 1)

Happy Gardening!

Medicinal Plants: Benefits and Uses (Part 1)

Nature has bestowed upon us countless wonderful plants. The more you acquaint yourself with them, the more they will amaze you. These plants are not only a source of fruits, flowers, leaves, vegetables, and oxygen but also a treasure trove of Ayurvedic medicines.

Ayurveda incorporates certain medicinal plants and herbs that can effectively treat or cure many health problems, contributing to our overall well-being. These plants have been an integral part of Indian tradition, serving various medicinal purposes since ancient times.

Let’s explore medicinal plants that you can cultivate at home to alleviate a wide range of health issues.

1. Tulsi (Holy Basil)

tulsi plant
Tulsi plant

Tulsi is a sacred plant blessed with numerous medicinal properties, and it is almost found in every home.

  • Tulsi has therapeutic qualities for many ailments and discomforts.
  • Holy Basil also serves as a natural mouth freshener.

Medicinal benefits of Tulsi (Holy Basil)

  • Cough, cold, sore throat, headache, congestion, psychological stress, and many other discomforts can be treated by drinking a decoction made from the leaves of this mystical plant.
  • These leaves can be added to tea or consumed in liquid form.
How to make a decoction of Tulsi?
  • Take some leaves and 1 liter of water in a pan.
  • Let it boil till the quantity of water reduces to half.
  • Sieve it and drink it empty stomach.

2. Giloy

Giloy, also known as Tinospora cordifolia, is commonly referred to as the heart-leaved moonseed.

Giloy has been used as a medicine in Ayurveda for centuries and has provided significant assistance during the Covid-19 pandemic.

  • It is also known as Amrita and is believed to have the extraordinary power to cure all three doshas – Vata, Pitta, and Kapha.
giloy
Giloy

Giloy requires support to grow and naturally wraps itself around different trees as it climbs.

  • In this process, it acquires some of the beneficial traits of the supporting plants as well. That’s why Giloy climbing on a Neem tree is considered the best.

giloy plant

Medicinal benefits of Giloy

  • Fever, jaundice, acidity, indigestion, asthma, cough, and many cases of flu can be alleviated by Giloy.
  • While all parts of this plant, including the leaves, bark, stems, and roots, can be used for medicinal purposes, the stems have gained the most popularity.”
How to use Giloy as a medicine?
  • Take a stick, whether it’s soft or hard, that’s about an inch long.
  • Cut it and crush it thoroughly.
  • Boil it in half a liter of water until the water reduces to half its original quantity.
  • Sip it with sugar candy (mishri) after the temperature comes down to a drinkable state

3. Aloe Vera

Aloe Vera stores water in its fleshy leaves, which is why it can thrive even in very dry conditions.

  • Due to its numerous benefits, it is used in almost every household.
  • This succulent plant offers a variety of cosmetic benefits, and many major brands profit from it by creating cosmetic and beauty products.

Aloe-Vera-Plants

Medicinal benefits of Aloe vera

When discussing the medicinal properties of aloe vera, it is notable for its antiseptic, antibacterial, anti-inflammatory, and various other properties.

  • Additionally, it contains essential nutrients such as vitamin A and folic acid.
  • Aloe vera adds a natural glow to the skin and shine to the hair.
  • Aloe vera gel can be directly applied to the body for moisturization.
  • It also has cooling effects and can be applied to the body to relieve sun tanning and prevent heat strokes.
  • Aloe vera acts as an ointment for burnt skin, aiding in the healing of burned areas without leaving marks or scars.
  • Some people drink aloe vera to purify the blood on a daily basis

Continue reading Medicinal Plants: Benefits and Uses (Part 1)

seaweed fertilizer FAQs

10 FAQs on Seaweed Fertilizer

Seaweed fertilizer is considered to be one of the best fertilizers in gardening. It contains various micronutrients like nitrogen, phosphorus, and potassium, making it a valuable addition to fertilizers and plant nutrition.

FAQs on Seaweed Fertilizer

In this comprehensive guide, we aim to answer some most common frequently asked questions (FAQs) and provide you with a better understanding of how seaweed fertilizers can enhance your gardening and plant care efforts.

Frequently Asked Questions (FAQs) on Seaweed Fertilizer

Qs: 1 What is seaweed fertilizer?


Ans: Seaweed fertilizer is a natural plant nutrient derived from various types of seaweed or algae.

  • It is used to enhance plant growth, improve soil health, and provide essential nutrients to plants.

Qs: 2 What are the benefits of using seaweed fertilizer for plants?


seaweed liquid fertilizer

Ans: Seaweed fertilizer offers numerous benefits, including improved plant growth, increased yield, enhanced resistance to stress and disease, and better nutrient absorption.

  • It also enriches the soil with essential elements.

Qs: 3 How often can we give seaweed fertilizer?


Ans: The frequency of applying seaweed fertilizer depends on the product and plant type.

  • Typically, it can be used every 2-4 weeks during the growing season.

Qs: 4 Can we give seaweed fertilizer to all types of plants?


all plants indoor

Ans: Yes. Seaweed fertilizer is suitable for most types of plants outdoor and indoor plants, including flowers, vegetables, fruits, and ornamental plants. 

Qs: 5 Can we give seaweed fertilizer in all seasons? 


Ans: Seaweed fertilizer is effective in most seasons.

  • It can be used year-round, but adjustments in application frequency may be needed based on plant growth and seasonal changes.

Qs: 6 Is seaweed fertilizer environment friendly? 


green chili leaves

Ans: Yes, seaweed fertilizer is considered environmentally friendly.

  • It is a natural and sustainable product that doesn’t harm the environment, making it a responsible choice for gardeners.

Qs: 7 What are the two main forms of seaweed fertilizer available in the market?


Ans: The two primary forms of seaweed fertilizer are liquid seaweed extracts and seaweed granules.

seaweed fertilizer

  • Seaweed Liquid extracts are mixed with water and applied as a solution, while
  • Seaweed granules are typically spread directly in the soil.

Qs: 8 Is seaweed fertilizer easily absorbed by plants?


seaweed liquid fertilizer

Ans: Yes, seaweed fertilizer is known for its high bioavailability, meaning that plants can easily absorb and utilize the nutrients it provides.

Qs: 9 Is seaweed granules good for plants?


Seaweed Granules
Seaweed Granules

Ans: Yes, seaweed granules are beneficial for plants.

  • They slowly release nutrients into the soil, providing a consistent source of nourishment and improving soil structure.

Qs: 10 Can we give seaweed granules directly in the soil?


Seaweed Granules

Ans: Yes, you can apply seaweed granules directly to the soil. Simply follow the recommended application rates provided on the product label and mix them into the soil during planting or sprinkle them on the soil surface.

Must read more about seaweed fertilizer:

Seaweed Fertilizer: Benefits and How to Use

Happy Gardening!

FAQs on Cow Dung Fertilizer

Cow dung fertilizer, also known as cow manure, holds a special place in gardening due to its rich nutrient content and soil-enhancing properties.

In this guide, we will address some frequently asked questions and provide insightful answers to help you make the most of this natural, eco-friendly fertilizer in your gardening endeavors.

Qs: 1 What is cow dung fertilizer?

Ans: Cow dung fertilizer, also known as cow manure or cow dung compost, is a natural and organic fertilizer made from cow excrement.

Qs: 2 What are the benefits of using cow dung fertilizer for plants?

Ans: It is beneficial for plants because it is rich in nutrients such as nitrogen, phosphorus, and potassium.

It also improves

  • soil structure,
  • water retention, and
  • microbial activity,
  • plant growth and health.

Qs: 3 Can I use raw cow dung as a fertilizer?

cow-dung
raw cow-dung

Ans: No. Cow dung contains high levels of ammonia and salt, which can cause soil heating.

Qs: 4 Can I use fresh cow dung as a fertilizer?

Ans: Fresh cow dung can be too high in ammonia and harmful to plants if used directly.

    • It is best to decompose completely before applying it to your garden.

Qs: 5 Why should we decompose cow dung before giving it to plants?

cow dung decompose

Ans: Decomposing cow dung can reduce the risk of harmful bacteria and parasites that may be present in fresh dung. 

Qs: 6 Why is it important to dilute the liquid cow dung fertilizer before giving it to plants?

Ans: Diluting liquid cow dung fertilizer before application is essential to prevent nutrient imbalances, maintain plant health, reduce environmental impacts, and support soil microbial activity.

Qs: 7 How often can we give liquid cow dung fertilizer?

Ans: The frequency of application depends on the plant’s needs. 

  • During the growing season, you can give the solution twice a month at the gap of 15 days.
  • However, the specific frequency and amount of fertilizer you should apply may vary based on the type of plants, soil conditions, and the type of fertilizer being used.

Qs: 8 Can we give cow dung fertilizer to all types of plants?

hibiscus flower

Ans: Cow dung fertilizer is generally suitable for a wide range of plants, including vegetables, fruits, flowers, and ornamental plants.

  • However, it may not be ideal for plants that prefer acidic soil, as cow dung tends to raise soil pH. In such cases, you may need to mix it with other organic matter or use alternative fertilizers.

Qs: 9 Can we use cow dung fertilizers in all seasons? 

Ans: Yes. Cow dung fertilizers can be used in all seasons as it’s considered one of the best organic fertilizers.

Qs: 10 Can we store cow dung liquid fertilizer for a long time? 

Ans: Yes, you can generally store cow dung liquid fertilizer for up to 6 months if it’s stored properly in suitable conditions.

Qs: 11 From where can I collect cow dung for fertilizer?

cows in dairy farm

Ans: You can collect cow dung from a local dairy farm or from your own livestock if you have cows. 

Must read this article:

How to make Cow dung fertilizer at home?

Happy Gardening!

How to Make Cow Dung Fertilizer for Plants

Plants are fed with different fertilizers to maintain the soil’s nutrients and minerals level. After a certain time, when the crop has grown suitably the quality and nutrient level of the soil starts depleting. By adding fertilizers, the productivity of crops can be increased and improved.

cow

In this article, we will discuss:

  • benefits of cow dung fertilizer,
  • why we should decompose cow dung fertilizer,
  • how to make cow dung fertilizer at home,
  • what precautions should be taken before using cow dung fertilizer.

Cow dung fertilizer is a type of organic fertilizer that can be easily made at home. It contains all the essential nutrients required by plants to grow and thrive. By using cow dung fertilizer, the soil’s quality can be maintained, and plant growth can be enhanced. The organic nature of cow dung fertilizer also makes it a safe and environmentally-friendly option for giving fertilizer to plants.

cow dung cake

Important note:

Do not add raw cow dung directly to the soil plants.

  • As cow dung contains high levels of ammonia and salt, which can cause soil heating.
  • Additionally, wet cow dung should also not be added directly, as it can lead to the growth of harmful bacteria in the soil, potentially harming the plant.

Benefits of Cow dung fertilizer

Cow dung fertilizer is rich in organic matter that helps in improving aeration and breaking down compacted soil.

All the elements like

  • nitrogen,
  • potassium,
  • phosphorus,
  • calcium,
  • magnesium,
  • sulfur,
  • iron,
  • manganese,
  • copper and
  • zinc, etc. are found in small amounts in cow dung fertilizer.

All these ingredients are key for the full-fledged growth of the plants.

cow dung fertilizer
    • This fertilizer maintains the soil moisture accurately and it is a habitat for earthworms also.
    • Earthworms do the loosening of the soil without affecting the plant and its growth.
    • In 1 gram of cow dung fertilizer, 300-500 crore microorganisms are present which makes the soil fertile.
    • It increases the water holding and water absorption capacity of the soil.
    • It improves the structure of heavy clay soils and light sandy soils.

Why should we decompose Cow dung/Cow dung cake?

Cow dung or cow dung cake needs to be decomposed completely before adding it to the soil. Decomposing cow dung has several benefits.

cow dung liquid fertilizer in process

When cows eat grass, chapattis, or anything else, it has carbohydrates, proteins, vitamins, fibers, or fats. All these nutrients go inside the stomach of cows, some of them get digested by the intestine but some of them do not get digested completely and come out as it is along with dung.

1. Fresh cow dung contains high levels of nitrogen and other nutrients, which can be too strong for some plants and can burn their roots.

2. Decomposition allows the nitrogen to break down into forms that are more easily absorbed by plants, making it a milder and more effective fertilizer.

3. Additionally, decomposing cow dung can reduce the risk of harmful bacteria and parasites that may be present in fresh dung.

Overall, decomposing cow dung before using it as fertilizer can result in more effective and safer use.

Let us start with the process of making cow dung fertilizer

How to make Cow dung liquid fertilizer at home?

cow dung liquid fertilizer

Here are the steps to make liquid cow dung fertilizer at home:

Step 1: Break down the cow dung cake into small pieces.

cow dung cake

Step 2: Soak the cow dung cake in water until it is completely submerged. Mix it well with a stick.

adding water in cow dung cake

Step 3: Cover the container and place it in a shaded area.

Step 4: After 3 days, the solution will turn into a dark brown color.

  • Mix it again with a stick.
  • You can add mustard cake as an optional ingredient.
cow dung liquid fertilizer
    • Stir the mixture with a stick every 3 days for the next 2 months.

Step 5: After 2 months, the solution will be fully fermented and turn into a dark brown color. Initially, it may have a strong odor, but this will disappear in the final product.

cow dung liquid fertilizer after 2 months

The liquid cow dung fertilizer is now ready, but it is a potent solution and needs to be diluted before application.

Step 6: Dilute one mug of cow dung solution with four mugs of water (1:4, cow dung solution: water) to make liquid cow dung fertilizer.

final result of cow dung liquid fertilizer

The solution can be stored for up to 6 months.

Precautions should be taken before giving liquid fertilizer to plants

    • Apply the liquid fertilizer only when the soil is dry.
    • Ensure that the solution is not applied too close to the stem, as it may damage the plant.
    • Use a light solution and apply it twice a month.
    • For small pots, use one mug of solution, and for larger pots, use two mugs.

This was all about “Liquid Cow Dung Fertilizer”.

Enjoy Planting !!

gardening

Gardening on a Budget: Thrifty Tips from a Self-Taught Gardener

Gardening is a wonderful hobby that allows you to connect with nature, enhance your surroundings, and grow your produce. However, there is a  perception that gardening can be an expensive pursuit. The truth is with a bit of ingenuity, resourcefulness, and a willingness to learn, you can cultivate a thriving garden without emptying your wallet.

indoor gardening

Let’s explore some practical tips for budget-friendly gardening inspired by my experiences as a self-taught gardener including:

  • starting with seeds,
  • creating DIY compost,
  • embracing container gardening,
  • selecting native plants,
  • reusing and upcycling materials,
  • implementing rainwater harvesting,
  • mastering plant propagation,
  • leveraging community and online resources,
  • practicing selective pest control, and
  • remembering the importance of patience and perseverance.

Start with seeds

To kickstart your garden without a hefty price tag, begin with seeds.

“Seeds are more affordable than seedlings or mature plants and offer the joy of nurturing a plant from its beginning.”

  • You will get a variety of economical seeds for flowers, vegetables, and herbs.
  • You can easily source these from local nurseries, online marketplaces, or through seed swaps with fellow gardeners.
  • You can buy packets of seeds instead of buying ready-to-plant seedlings of your favourite vegetables, like tomatoes, capsicum, bell peppers, etc. 

vegetables

DIY Compost

Compost is the lifeblood of a garden, but you don’t have to buy it.

  • Create your compost bin using kitchen scraps such as fruit and vegetable peels, coffee grounds, and eggshells. Mix in dry leaves and a bit of soil.

kitchen waste

Creating homemade compost, such as cow dung compost and leaf compost, is not only cost-effective but also highly beneficial for plant growth.

  • Cow dung compost is rich in nutrients like nitrogen and serves as an excellent organic fertilizer. 
  • Leaf compost, on the other hand, is an eco-friendly way to recycle fallen leaves from your garden or yard.
compost
kitchen compost

“By creating composts at home, you not only reduce waste but also play a crucial role in ensuring that your plants receive the best nutrition while minimizing your environmental impact.”

Container Gardening

When you are short on space or looking to keep costs low, container gardening is an excellent solution.

container gardening

  • Reuse containers like old buckets, plastic bottles, or wooden crates as planters.
  • An old wooden crate can become a charming herb garden, and repurposed plastic bottles with the tops cut off can serve as ideal containers for growing herbs like mint and basil.

Container gardening allows you to control your soil quality, ensuring optimal growing conditions without the expense of buying pots.”

Local and Indigenous Plants

Select plants native to your region or well-suited to your local climate.

  • These plants are generally robust, requiring less maintenance and fewer interventions like pesticides or excessive watering. By choosing native varieties, you are saving money and promoting biodiversity.

bougainvillea

  • For instance, if you live in a hot and arid area you might choose drought-resistant plants like Bougainvillea, Desert Marigold, Aloe Vera, Agave, Date Palm, etc. These plants require less water and care, reducing your gardening expenses.

Aloe vera pot


Reuse and Upcycle

Get creative with your garden decor.

  • Old tires can become colorful flower beds, discarded wooden pallets can transform into vertical gardens, and even broken teacups can serve as charming plant containers.
  • Look around your home for items that can be upcycled into the garden decor, saving you money and reducing waste.

Rainwater Harvesting

rain water

Water is often a precious resource in India, and implementing a rainwater harvesting system can conserve both water and money.

  • Use collected rainwater for watering your plants, and you’ll notice significant cost savings over time.

Plant Propagation

plant from cutting

Learn the art of plant propagation.

  • Many plants can be multiplied from cuttings or by dividing established plants.
  • It eliminates the need to buy new plants and allows you to share your garden’s bounty with friends and family.
  • For example, a single healthy rose cutting can lead to the growth of a new rose bush with beautiful blooms. Other examples include the money plant, jade plant, and many more.

Community and Online Resources

Join local gardening groups or forums, both in your neighborhood and online.

gardener

  • Gardeners are usually generous with advice, seeds, and even plant cuttings. This sense of community can be a valuable resource for budget-conscious gardeners.

Selective Pest Control

neem pesticide

Rather than reaching for expensive chemical pesticides, try exploring natural and homemade pest control methods.

  • Neem oil, garlic spray, and marigold companion planting can help protect your plants without harming your budget or the environment.

Patience and Perseverance

Remember that gardening is a journey that takes time. Plants need time to grow and flourish. Be patient, learn from your successes and failures, and gradually invest in tools and materials as your gardening skills develop.

Conclusion

butterfly in garden

In conclusion, gardening on a budget is not only possible; it can also be incredibly fulfilling. By starting with seeds, creating your compost, embracing container gardening, and tapping into local resources you can nurture a thriving garden without burning a hole in the pocket. Along the way, you will enjoy the beauty of nature and deepen your connection with the environment and your community.

“So, roll up your sleeves, get your hands dirty, and watch your budget-friendly garden bloom and flourish.”

Happy gardening!

What is potting mix and how is it different from garden soil?

Understanding Potting Mix: A Gardener’s Guide

In gardening, deciding between potting mix and garden soil can determine whether your plants grow well or not. Let’s explore what potting mix is and how it’s different from garden soil.

“Healthy soil is the foundation of healthy plants and a healthy environment.”

Potting Mix vs. Garden Soil: Unveiling the Differences

1. The Composition

soil mixture
potting mix

Potting mix, often referred to as potting soil (soil mix), is a specialized mixture prepared for container gardening. It is prepared by gardening experts to provide an ideal environment for potted plants. Unlike garden soil, which is found naturally in your outdoor space, potting mix is a man-made soil-mixture customize to the specific needs of potted plants. 

2. Key ingredients

Potting mix typically comprises a combination of organic and inorganic materials. These ingredients may include:

  • compost – (cow dung compost, vermicompost, leaf compost)
  • sand
  • coco peat
  • neem cake powder
  • bone meal
  • vermiculite
  • perlite
  • fungicide

3. Drainage and Aeration

potting mix provides good drainage system

A big difference between potting mix and garden soil is how well they let water and air move around.

  • Potting mix is made to let water drain well and give plant roots plenty of air. This helps roots grow strong and avoids them sitting in water.
  • Garden soil might not let water drain as well, so it is not the best choice for potted plants.

4. Nutrient levels

garden soil
plant growing in garden soil

“Garden soil typically has plenty of nutrients due to natural processes over time.”

  • On the other hand, potting mix is purposefully designed to provide a steady release of necessary nutrients over time to ensure that your potted plants get the nutrition they require.

5. Pest and disease resistance

plants in pot
plants in pot

Potting mix is good because it is less likely to have pests and plant diseases compared to garden soil. Garden soil can sometimes have harmful things that can harm your plants, but potting mix is treated to lower the chances of that happening.

Making the right choice for your garden

Now that you understand the fundamental differences between potting mix and garden soil, it is time to make an informed decision for your gardening endeavors. Here are some quick tips:

Consider mixing both

Garden area soil
garden soil

Mixing both potting mix and garden soil can be beneficial in certain situations. This combination offers the advantages of both, providing your plants with necessary nutrients and good drainage. It is a balanced approach to support healthy plant growth.

1. Use potting mix for container gardening

soil mixture
potting mix

If you are planning to grow plants in pots, containers, or indoor settings, opt for potting mix. It is superior drainage, aeration, and reduced risk of pests make it the perfect choice for container gardening.

Container gardening
container gardening

2. Stick to garden soil for outdoor gardening

outdoor gardening
outdoor gardening

For outdoor garden beds or in-ground planting, garden soil is the natural choice. It is rich in nutrients and provides a suitable environment for your garden plants to thrive.

Conclusion

In conclusion, knowing how potting mix and garden soil are different is really important for your gardening success. So, choose the one that fits your needs best, and you will be on your way to growing a healthy and thriving garden.

Read here:

How to make best soil-mixture for plants

Happy Gardening

neem cake powde

FAQs on Neem Cake Fertilizer

Neem cake organic fertilizer has emerged as a remarkable, all-natural solution for nourishing plants and enriching the soil. But what exactly is Neem Cake organic fertilizer, and how can it benefit your garden?

In this article, we will provide some frequently asked questions (FAQs) about Neem Cake Organic Fertilizer:

Ques 1. What is neem cake fertilizer?

Ans: Neem cake fertilizer is a type of organic fertilizer obtained from the residue left after extracting oil from the kernels inside Neem seeds (Azadirachta indica).

neem kernel
neem kernel

Ques 2. How is Neem Cake Organic Fertilizer made?

Ans: The neem cake is made by crushing the kernels which are present inside the neem seeds and extracting the oil.

neem cake powder
neem cake powder
  • After the oil is removed, the remaining seed residue is dried and ground into a fine powder, which is then used as a fertilizer.

Ques 3. What are the benefits of neem cake fertilizer?

Ans: The followings are the benefits of neem cake fertilizer:-

    • It is completely organic and free of chemicals.
    • It acts as both a fertilizer and a pesticide.
    • It improves soil texture and quality.
    • It can be used for all types of plants.
    • It is non-toxic to bees and useful insects.
    • It boosts plant immunity.

Ques 4. How does neem cake fertilizer act as a pesticide or insecticide?

Ans: The primary active ingredient responsible for the pesticidal and insecticidal properties of neem cake fertilizer is ‘Azadirachtin,’ a bioactive compound found in neem seeds.

  • When neem cake is mixed with soil, it acts as a protective shield for plant roots, safeguarding them against harmful bacteria, diseases, fungi, and insects.

Ques 5. Is neem cake fertilizer easy to prepare and use?

Ans: Yes, neem cake fertilizer is easy to make and use. It does not require a long decomposition period.

  • Neem cake can be incorporated directly into the soil or can be fermented with water and subsequently added to the mixture.

Ques 6. Can neem cake fertilizer be used for all types of plants?

outdoor plant
outdoor plant

Ans: Yes, neem cake fertilizer can be used for both outdoor and indoor plants, including flowering and non-flowering plants.

Ques 7. Does neem cake fertilizer harm bees and beneficial insects?

butterfly in garden
butterfly in garden

Ans: Neem cake fertilizer is organic and does not harm bees, butterflies, caterpillars, or earthworms, among others.

  • It remains safe for these beneficial insects as long as it is used in accordance with recommended guidelines and in limited quantities.

Ques 8. What happens when neem cake fertilizer is added to the soil?

Ans: Neem cake fertilizer eliminates hidden insects and fungi in the soil and protects plant roots from damage caused by these organisms.

Ques 9. How to use dry neem cake fertilizer directly in the soil?

Adding neem cake powder in soil

Ans: There are two methods for using dry neem cake fertilizer directly in the soil:

1. Mix neem cake fertilizer with the soil, along with sand and compost, during soil preparation. Add a small quantity and stop when a mild odor is noticeable.

2. Prior to applying neem cake, till the soil by digging or loosening the surface with a garden fork or tiller. This allows for the addition of neem cake fertilizer in small quantities, followed by watering.

Ques 10. How should neem cake liquid fertilizer be used?

neem cake liquid fertilizer

Ans: Neem cake liquid fertilizer is prepared by mixing neem cake with water and allowing it to ferment for 24-48 hours, during which a mild odor may develop.

  • Before applying it to plants, it should be diluted in a 1:10 ratio with water.
  • If the neem cake liquid fertilizer is left to ferment for more than 48 hours, for example, a week, it’s important to check for the presence of fungus in the liquid fertilizer.
  • If fungus is present, the fertilizer should not be used.

Ques 11. How often should neem cake fertilizer be given to outdoor plants?

Ans: Neem cake fertilizer can be given once a month to outdoor plants, especially before the rainy season to prevent insect, bacterial, and fungal problems.

Ques 12. How often should neem cake fertilizer be given to indoor plants?

Ans: Neem cake fertilizer can be given to Indoor plants once a year in the spring season or before the rainy season in a very limited quantity.

  • It is important to note that proper dosage and application techniques are crucial for indoor plants since it requires less quantity of water.

Note:

  • Avoid giving heavy quantities of fertilizer, as it can lead to nutrient imbalances or salt buildup in the soil.

Ques 13. Can neem cake fertilizer be used in any season?

Ans: The best time to use neem cake fertilizer is in the spring season or in the rainy season in limited quantities.

  • In spring, when plants are entering their active growth phase, it is a suitable time to apply neem cake fertilizer.
  • This can provide a nutrient boost to support vigorous growth, enhance root development, and improve overall plant health by protecting from bacteria, diseases, fungus, and harmful insects. 

Ques 14. Where can we purchase Neem Cake Organic Fertilizer?

neem cake powder
neem cake powder

Ans: Neem cake fertilizer is easily available at nurseries or can be purchased online. Pure neem fertilizer has a mild smell, which can be used to check its purity.

————————————-

Happy Gardening!

good and bad insects

Good and Bad Insects in the Garden

In your garden, insects are more than just tiny creatures. While gardening, we often come across insects on plant leaves or in the soil. It is crucial to distinguish between the helpful and harmful ones because killing beneficial insects can result in losses for both us and our garden.

pest attack on plant

Some insects help by pollinating plants and keeping pests away, while others can harm our plants. It’s crucial to know which insects are helpful and which ones are harmful to have a healthy garden.

In this article, we will explore the importance of insects in your garden and help you distinguish between the good and insects. 

We will talk about,

good insects for your garden

  • Ladybugs,
  • Butterflies,
  • Dragonflies
  • Bees and
  • Praying mantis 

bad insects for your garden

  • Aphids,
  • Whiteflies,
  • Mealybugs, 
  • Caterpillars,
  • Cutworms and
  • Spider mites.

Role of insects in our garden

Your garden is a microcosm of the natural world, and insects are the unsung heroes of this intricate ecosystem. Here are some key reasons why insects are of utmost importance in your garden:

1. Pollination Partners: Bees, butterflies, and other pollinators help your plants produce fruits and seeds.

  • Without them, your garden would struggle to yield the bountiful harvest you desire.

2. Natural Pest Control: Predatory insects like ladybugs and lacewings serve as nature’s pest control squad, keeping harmful insects like aphids and caterpillars in check without the need for chemical pesticides.

3. Soil Enrichment: Insects like earthworms aerate and enrich the soil as they burrow, promoting better root growth and nutrient absorption for your plants.

4. Decomposers: Insects like beetles and ants assist in breaking down organic matter, which is essential for recycling nutrients and maintaining healthy soil.

Distinguishing between Good and Bad insects

Not all insects are created equal when it comes to your garden. Learning to identify the beneficial insects from the harmful ones can make a world of difference in your gardening success. Here’s a quick overview:

Good insects – Nature’s Unsung Heroes:

ladybug
Ladybug

1. Ladybugs:

  • Ladybugs, with their charming spots and vibrant colours, are nature’s garden warriors. These pint-sized predators feast on aphids, scale insects, and other sap-sucking pests that can wreak havoc on plants.
  • A single ladybug can devour hundreds of aphids within a day, making them a valuable ally in keeping your garden pest-free.

2. Butterflies:

butterfly in garden
Butterfly in garden
  • Beyond their mesmerizing beauty, butterflies are essential pollinators. As they flit from flower to flower, they transfer pollen, aiding in the reproduction of plants.
  • By attracting butterflies to your garden with nectar-rich blooms, you contribute to the growth and diversity of your plant population.

3. Dragonflies:

dragonfly
Dragonfly insect on plant
  • Dragonflies have a captivating flight and are voracious predators, feeding on mosquitoes, flies, and other small insects.
  • Having a thriving population of dragonflies in your garden helps keep pesky flying insects in check, making outdoor activities more enjoyable.

4. Bees:

bees on flower
Bees on flower
  • Bees are renowned pollinators, ensuring the reproduction of many plant species. They diligently collect nectar and pollen while visiting flowers, facilitating the transfer of pollen between blooms.
  • A garden frequented by bees yields better fruit production and supports biodiversity.

5. Praying Mantis

praying mantis insect on plant
Praying mantis insect on plant
  • Praying Mantis are formidable predators that feed on a range of garden pests. They have excellent camouflage and patiently wait for their prey to approach. These fascinating insects are beneficial for pest control and add a touch of intrigue to your garden.

Bad insects: Notorious Pests:

1. Aphids:

aphids on leaves
Aphids on leaves
  • Aphids, tiny but troublesome, multiply quickly and suck sap from plants, leading to stunted growth and distorted leaves.
  • They can also transmit plant viruses. Their rapid reproduction can result in severe infestations if left unchecked.

2. Whiteflies:

whiteflies on leaf
Whiteflies on leaf
  • Whiteflies, resembling tiny moths, congregate on the undersides of leaves, sucking out plant juices and excreting sticky honeydew.
  • These can lead to leaf yellowing, reduced plant vigor, and the growth of sooty mold.

3. Mealybugs: 

mealybug
Mealybugs in hibiscus plant
  • Mealybugs are harmful to a wide range of plants by extracting sap from them, potentially leading to plant weakness, damage, or inhibited growth.

4. Caterpillars:

caterpillars
Caterpillar on leaf
  • Caterpillars, the larvae of butterflies and moths, can defoliate plants by consuming leaves, buds, and fruits.
  • Some caterpillars are known to devour entire plants in a matter of days, causing significant damage.

5. Cutworms:

cutworms
Cutworms
  • Cutworms are sneaky pests that cut through young plant stems, causing seedlings to plummet. They are most active at night and can decimate rows of young plants.

6. Spider Mites:

spider mites
Spider mites
  • Spider mites grow in hot and dry conditions. They pierce plant cells to feed on sap, causing stippling, leaf discoloration, and overall weakening of plants.

Conclusion:

To keep your garden in good health, it is essential to educate yourself and become skilled at identifying common “problem insects.” Make a habit of regularly checking your garden for problems. The sooner you identify a pest, the easier it will be to deal with it using environmentally friendly methods.

Maintain a garden free of insects!

Happy gardening!