All posts by Neeraj

What is Hard Pruning? When and Why should we do Hard Pruning of Plants?

Introduction

When we cut the leaves, stems, branches, roots, flowers, or any part of the plant to give it a shape and for the growth of the plant, that process is called pruning. It is the process of selectively removing parts of plants to control plant growth and development in a particular pattern.

Generally, we do two types of pruning in gardening;

1. Light Pruning 

Light pruning of plant

In light pruning we cut the small parts of the plant, its spent flowers, yellow or dead leaves to maintain plant shape, encourage growth, and keep the plant healthy.

  • It is done regularly during the growing season without removing large portions of the plant.

2. Hard Pruning 

Hard Pruning of plant
Performing hard pruning of plant

In hard pruning we cut the maximum part of the plant, its large branches, stems to rejuvenate overgrown plants or control size.

  • It is done annually (once in a year) during the beginning of the growing season of the plant. 

Understanding Hard Pruning

Hard Pruning is an important task in gardening for plant growth and flowering. It is like giving your plants a big haircut! Instead of just cutting here and there, you cut them back a lot, usually close to the ground or the main stem.

Pruning of stems
Pruning of stems
  • It is like hitting the reset button for your plants. Instead of just making them look neat, hard pruning makes them grow back stronger and healthier.

  Here, we have the answers for all the queries:

  • Why should we do Hard Pruning of Plants?
  • Which plants should be Hard Pruned?
  • When to do Hard Pruning of Plants?
  • What are the effects of hard pruning on the plant?

Why should we do Hard Pruning of Plants?

Hard pruning is typically necessary in situations where a plant has become overgrown, stopped growing, damaged, or unmanageable.

Hard pruning of rose plant

Consider a plant with long, thin stems.

  • Although it may still produce leaves and flowers, they might be sparse and undersized. However, by performing hard pruning—cutting the stems close to the base—we stimulate the growth of new, thicker stems. These fresh stems sprout healthy branches, sizable leaves, and profuse blossoms.
  • Moreover, hard pruning encourages the emergence of multiple stems with numerous branches, resulting in a denser plant.
Hard pruning of plant
Plant is growing upward direction

Conversely, if we prune the stems from the tip, the plant’s growth becomes upward-oriented, leading to elongated, thin stems and sparse foliage. This undermines the plant’s density and overall health.

Which plants should be Hard Pruned?

hibiscus flower

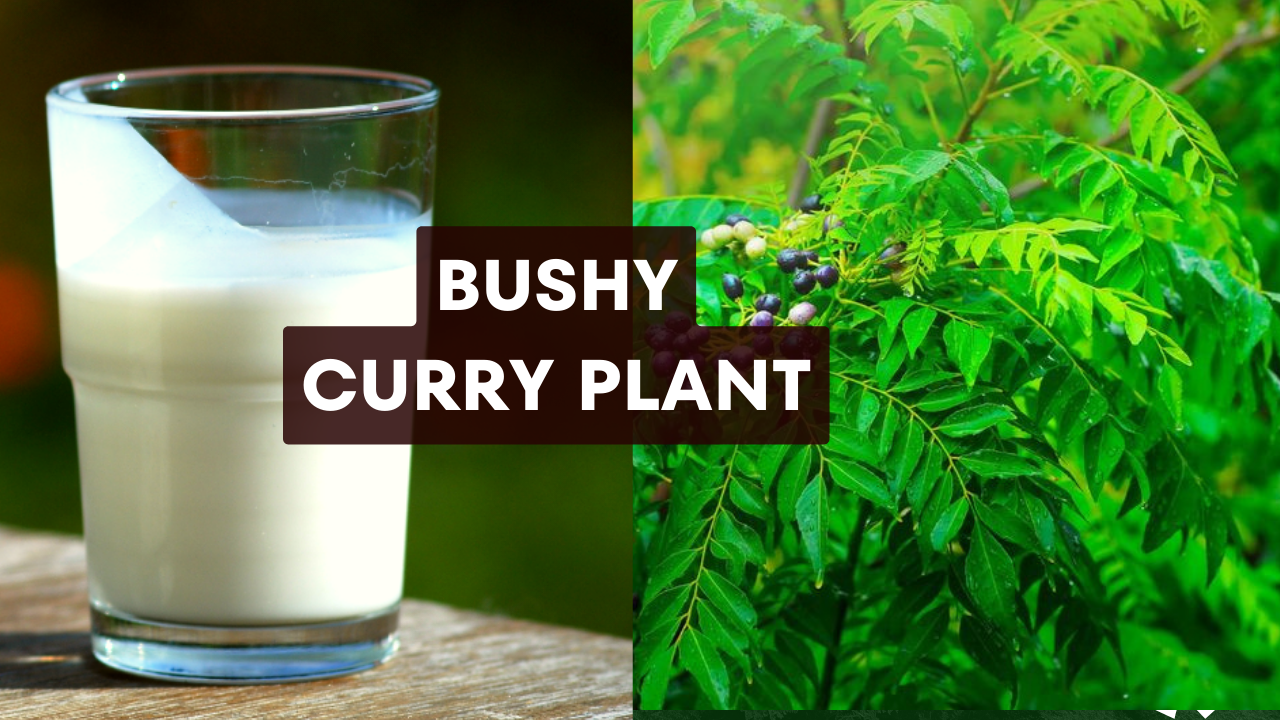
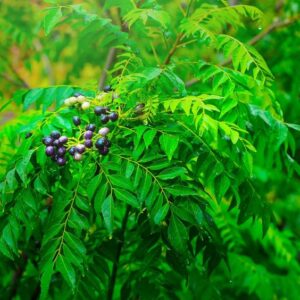
Hard pruning is typically performed on perennial plants with typical stems and numerous branches.

Examples include Tulsi, Curry plant, Hibiscus, Lemon plant, Mango plant, Night Jasmine (Parijat), Aprajita, and Rose plants, etc.

Seasonal plants like annual flowers (Marigold, Petunia, Dahlia, etc.) or vegetables (Tomato, Eggplant, etc.) do not require hard pruning as they complete their life cycle within a single growing season.

Timing of Hard Pruning is crucial

1. Duration: Once in a year

Hard pruning of a plant should ideally be conducted once a year.

  • This frequency is recommended because hard pruning involves major cutting, which can be stressful for plants.

2. When to do Hard Pruning of plants?

We should do hard pruning at the beginning of the growing season of the plant.

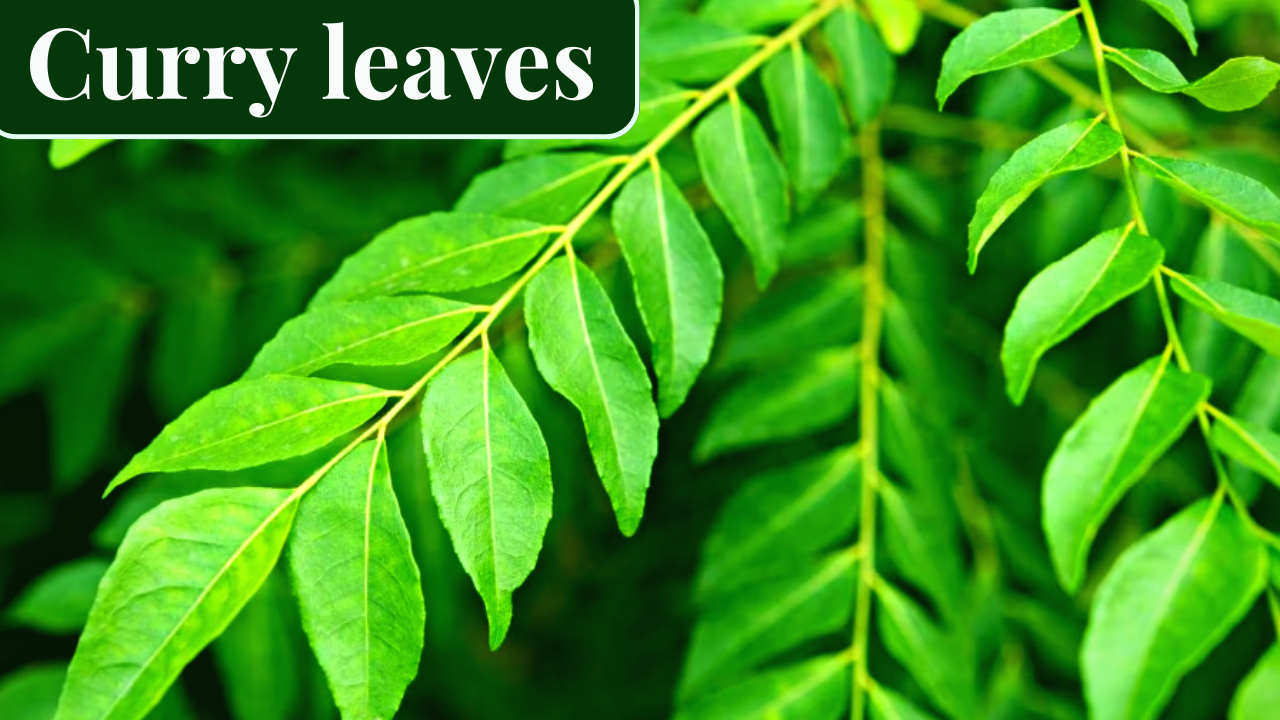
For summer and winter plants such as Curry leaves, Tulsi (Holy basil), Night  Jasmine (Parijaat), Roses, etc., it is advisable to perform hard pruning in early spring season.

What are the effects of hard pruning on the plant?

1. Stimulation of Growth: One of the primary effects of hard pruning is the stimulation of new growth.
2. Increased Flowering and Fruit Production: In many cases, hard pruning can lead to increased flowering and fruit production.
3. Structural Strength: Hard pruning can also enhance the structural strength of a plant by promoting the growth of sturdy, well-branched stems and branches.

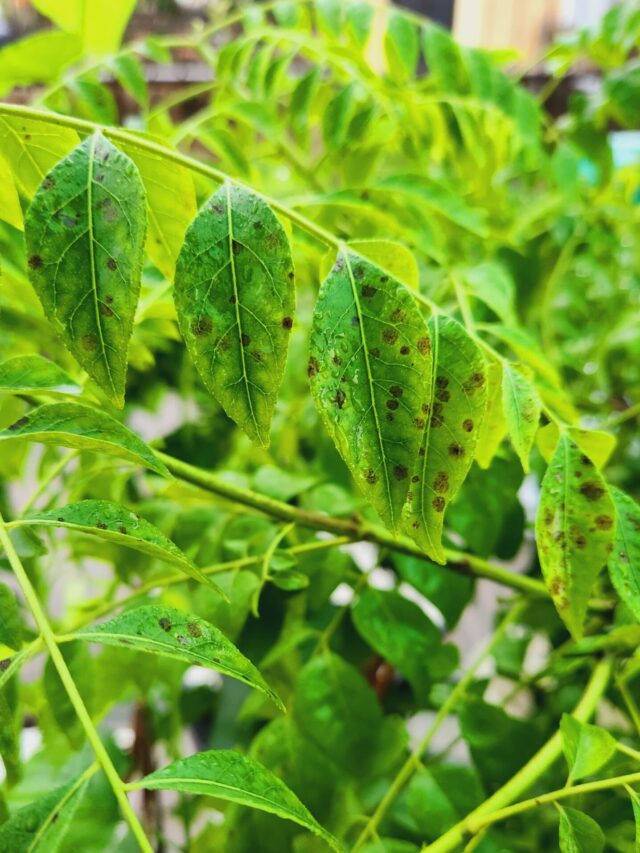
4. Disease Prevention: By removing diseased or infected wood, hard pruning can help prevent the spread of pathogens and diseases within the plant.

5. Enhanced Aesthetic Appeal: In addition to its practical benefits, hard pruning can also improve the aesthetic appeal of a plant by shaping it into a more attractive form.

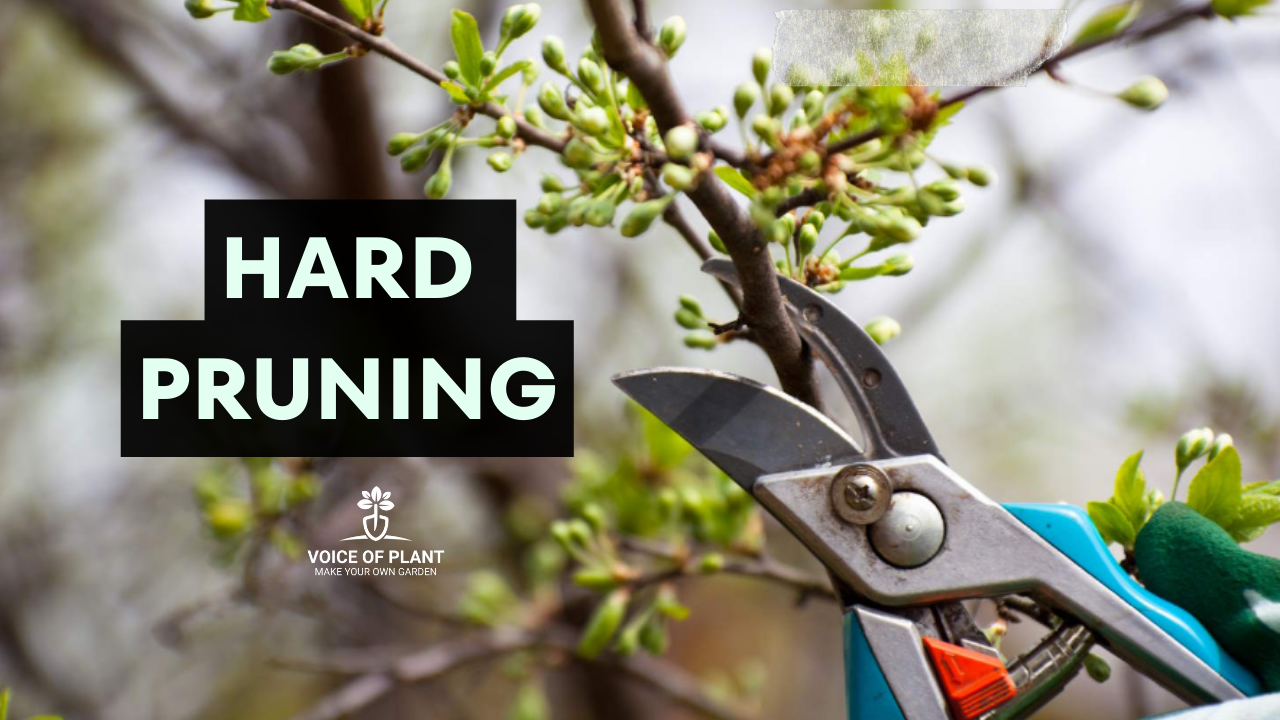
Proper Tools and Equipment

pruning

Using the proper tools and equipment is essential for successful hard pruning.

  • Sharp, clean pruning shears or saws should be used to make clean cuts and minimize damage to the plant.
  • It is also essential to wear protective gear, such as gloves and safety goggles, to prevent injury while pruning.

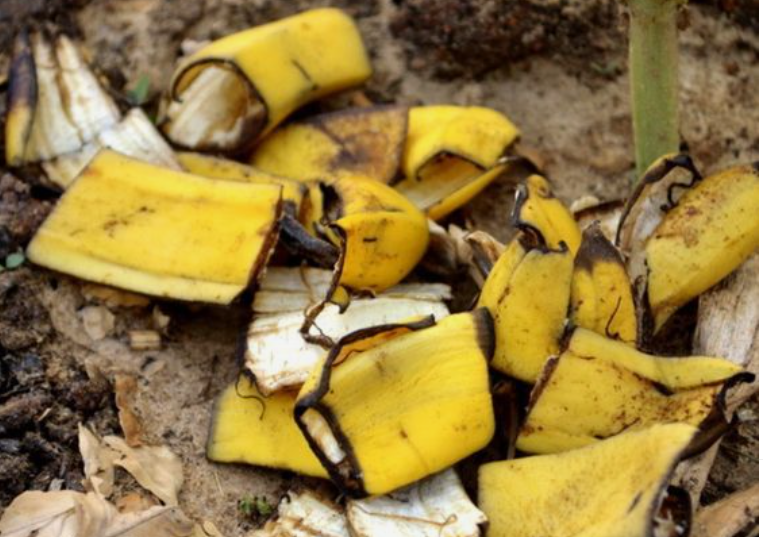
Fertilizers after Hard Pruning

Fertilizer after hard pruning
Add Fertilizer after hard pruning

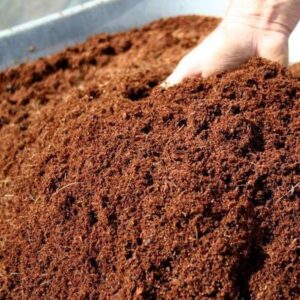
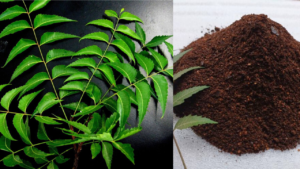
After hard pruning, loosen the soil and apply a light, healthy fertilizer to your plant. You can use mustard cake, neem cake, vermicompost, or any other suitable fertilizer.

This was all about “HARD PRUNING”.

Make Your Own Garden!

bushy curry plant

How to make Curry Plant Bushy & Healthy

During the winter season, our curry plant enters a dormancy period, causing its leaves to wither and turn yellow. They do not receive adequate sunlight and warmth to grow well.

Now that spring has arrived, it is time to care for your curry plant to make it bushy and healthy. 

Ideal conditions for Curry plants

curry leaf in pot


To encourage your curry plant to grow bushy, recreate its natural environment.

  • Use soil that drains well, ensure it gets plenty of sunlight, and water it moderately.
  • It is also important to keep humidity levels just right, especially if you live in a dry area.

Common issues hindering bushiness

There are a few common problems that can stop your curry plant from growing bushy. These include

  • not enough sunlight,
  • soil that does not drain well, and
  • not enough nutrients in the soil.

It is important to spot these problems early and fix them to help your plant grow bushy.

Methods to Encourage Bushiness

curry leaf bushy

1. Pruning Techniques

  • Regular pruning is crucial for shaping your curry plant and encouraging new growth. 

Curry leaf plant primarily grows from its tips, so pruning or plucking from the tip stimulates the emergence of 2-3 new shoots, leading to the development of new branches and leaves.

pruning curry leaves

Important Note:

  • When harvesting leaves for use, prioritize plucking leaves from the bottom of the plant.  Leaves at the top are still in the growth phase and should be allowed to mature.
  • Additionally, when you are harvesting leaves for use, it is advisable to remove entire branches rather than just individual leaves.

If your plant is relatively new, around 6 or 3 months old, it’s best to stick to light pruning.

  • From February to October, regular light pruning can be performed to encourage new branch growth, but avoid harsh pruning.
  • After new stems emerge, wait until they reach a length of 5-6 inches before further pruning.
  • Hard pruning of curry plant should be reserved for the month of February (during spring season).

For plants that are one or two years old, hard pruning can be quite beneficial.

  • By removing yellow leaves, dead, or leggy stems, you encourage the plant to grow more branches and denser foliage. This type of pruning helps maintain the plant’s shape and promotes healthier growth overall.
  • After hard pruning, add vermicompost into the soil. Avoid using heavy fertilizers as the plants are currently leafless.

Important note:

  • Perform hard pruning of your plant only in the evening and keep it shaded for at least 7 days until new leaves emerge. This will assist the plant in adapting to its new environment more effectively.

2. Change pot and add compost in the soil 

(i) For plants that are one or two years old, it’s advisable to consider changing the pot if the roots are bound. Till the soil and add compost to promote improved growth.

(ii) However, if your plant is relatively new, around 6 or 3 months old, there’s no need to change the pot. Simply tilling the soil and adding compost will suffice to promote healthy growth.

Important note:

  • Only repot your plant in the evening and keep it shaded for 3 to 4 days afterward as it may experience stress. This will help the plant adjust to its new environment more easily.

3. Sunlight for Curry Plant

Now that spring has arrived, it is time to focus on sunlight and temperature for your curry plant.

  • Curry plants love full sunlight, needing at least 5 to 6 hours of direct sunlight each day.
  • Place your plant in a sunny area with good air flow. Keep temperatures above 60°F (15°C) to avoid cold stress.

4. Best Fertilizers for Curry Plant

Just like other leafy plants, curry leaf plants need essential nutrients to grow well, including a balanced supply of Nitrogen (N), Phosphorus (P), and Potassium (K).

  • However, they especially benefit from a higher amount of nitrogen in their fertilizer mix.
  • Nitrogen is essential for encouraging lush foliage growth, which is a key characteristic of healthy curry leaf plants.

Use of Buttermilk to make Curry Plant Bushy

Buttermilk is an excellent tonic for promoting healthy and bushy foliage in curry plants.

  • To use buttermilk effectively, mix one-fourth glass of buttermilk with one litre of water for an 8-inch pot, and water the soil with this mixture.
  • Make sure the buttermilk is not too sour and is still suitable for drinking.

Curry plants belong to the citrus family, so they thrive in acidic soil conditions.

  • After applying any fertilizer, wait for at least 10 days before giving this tonic or Epsom salt to the plant.

5. Watering and Drainage:

Maintain a proper balance between watering and drainage.

  • Overwatering can lead to root rot, while underwatering can cause stunted growth.
  • Make sure there is adequate drainage to avoid waterlogging, especially for plants grown in containers.

Must read:

How to Grow & Care Curry Leaf Plant in Pot

Conclusion:

In conclusion, turning your curry plant into a bushy beauty is completely possible with the proper knowledge and care. By using pruning methods, ensuring ideal growing conditions, and addressing problems promptly, you will see your curry plant flourish.

Happy Gardening!

Make Your Own Garden!

curry leaves

How to Grow and Care Curry Leaf Plant in Pot

Curry leaves or Curry Patta plant, cherished for their magical aroma, are an essential addition to any household. Though this outdoor plant is sensitive to grow, the results are remarkable when nurtured properly.

Let’s delve into its fundamental characteristics, needs, and how it responds to various conditions and environments. In this article, we will discuss important points on how we can grow Curry leaf plant at home.

1. Best season for Curry leaf plant

2. Ideal Temperature for Curry leaf plant

3. Sunlight Requirement for Curry leaf plant

4. Preferred Pot types for Curry leaf plant

5. Soil Mixture for Curry leaf plant

6. Watering tips for Curry leaf plant

7. Fertilizers for Curry leaf plant

8. Pesticides for Curry leaf plant

Curry Leaf Plant is a Perennial Plant

Curry leaves, being perennial plants, have the potential to thrive for many years if nurtured diligently and grown to their full potential.

How to Grow and Care Curry Leaf Plant in Pot

curry leaves


1. How to get Curry leaf plant?

  • Purchase from nursery: Curry leaf plants can be bought from nurseries.
  • Seeds: Alternatively, seeds can be used to grow this plant.
  • Cuttings: It can also be propagated through cuttings.
  • Self-Propagation: Sometimes new curry leaves start germinating on their own from the existing plant through its roots.

2. Best season for Curry leaf plant

curry plant 1
curry leaves plant in pot (pic credit: Pinterest)

The ideal time to purchase curry plants from a nursery is during the spring season, typically from February to March. As a summer plant, it flourishes well until October.

Dormancy Period: During the winter season, the curry leaf plant enters a period of dormancy, and the growth of the plant becomes slow. Leaves start turning yellow and wither.

2. Ideal Temperature for Curry leaf plant

The ideal temperature for curry leaf growth is 18-35 degrees Celsius. Beyond this range, the plant struggles to survive, with leaves turning black or brown and drying out.

  • Providing shade during intense heat and covering the plant in winters when temperatures drop to 8-10 degrees Celsius helps protect it.

3. Sunlight Requirement for Curry leaf plant

When grown in pots, curry leaf plants require at least 4 to 5 hours of direct sunlight for robust growth.

Also read:

How to Grow & Care Tulsi Plant

4. Pot types for Curry leaf plant

curry leaves plant in pot
curry leaves plant in pot (pic credit: Pinterest)

Curry leaves can be grown in various containers such as fabric bags, plastic buckets, clay pots, ceramic pots, cement pots, plastic pots, or grow bags. For beginners, it’s recommended to start with a clay pot.

  • Choosing a minimum 10-inch pot is advisable.

5. Soil Mixture for Curry leaf plant

Soil mixture

A well-draining soil mix is best for curry leaf plants.

  • This mix typically includes garden soil, compost (vermicompost or leaf compost or cow dung compost), sand for improved drainage, and optionally, cocopeat for moisture retention. Thoroughly blending these components creates an ideal growing medium for curry leaf plants.

6. Watering tips for Curry leaf plant

watering can

Water the curry leaf plant only when the soil is completely dry, as overwatering can lead to root rot.

  • Ensure that water flows out from the bottom hole of the pot to prevent waterlogging. Adjust the watering schedule based on factors such as climate, humidity, and pot size to maintain optimal soil moisture levels.

7. Fertilizers for Curry leaf plant

curry leaves

Just like other leafy plants, curry leaf plants require essential nutrients to thrive, with a balanced supply of Nitrogen (N), Phosphorus (P), and Potassium (K).

  • However, they particularly benefit from a higher proportion of nitrogen in their fertilizer mix. Nitrogen is crucial for promoting lush foliage growth, which is characteristic of healthy curry leaf plants. 

8. Pesticides for Curry leaf plant

To prevent potential attacks by pests and diseases, it’s advisable to take proactive measures to protect your curry leaf plant.

  • One effective method is to regularly spray a neem water solution on the leaves.
  • Additionally, adding neem solution to the soil once a week can further enhance the plant’s resilience against pests and diseases.  

In conclusion, growing and caring for a curry leaf plant in a pot requires attention to detail and adherence to specific conditions. By following these guidelines, you can enjoy the delightful aroma and flavor of freshly picked curry leaves right from your own home garden.

Happy Gardening!

Make Your Own Garden!

banana peel fertilizer

केले के छिलके की खाद कैसे बनाएं: लाभ और उपयोग

पौधों के लिए केले के छिलके की खाद के लाभ और उपयोग

अगर आपको बागवानी का शौक है तो केले के छिलके आपके पौधों के लिए बहुत काम आएंगे। केले के छिलके की खाद जैविक खाद का एक उत्कृष्ट स्रोत है जिसे आसानी से घर पर बनाया जा सकता है। यह पौधों को बढ़ने और पनपने के लिए जरूरी आवश्यक पोषक तत्व प्रदान करने का एक प्राकृतिक और लागत प्रभावी तरीका है।

कई लोगों की शिकायत होती है कि पौधे की सभी आवश्यक देखभाल और उपाय करने के बावजूद, इसके विकास में अभी भी अनियमितताएं हैं। मेरे पौधों में फूल नहीं आ रहे हैं या पौधा स्वस्थ है लेकिन फूल या फल नहीं आ रहे हैं।

  • तो, ऐसा क्यों हो रहा है और इसके पीछे क्या कारण हैं?
  • banana peel

इसका मुख्य कारण आपके पौधे में पोषक तत्वों की कमी है। यह दो कारकों को इंगित करता है:

  1. जब जड़ों में खाद डाला जाता है, तो यह पौधे के अन्य भागों, जैसे तना, पत्तियों, शाखाओं या कलियों तक कुशलतापूर्वक वितरित नहीं हो पाता है।
  2. इसके अतिरिक्त, जहाँ पौधे अपनी पत्तियों में स्टार्च के रूप में अपना भोजन बनाते हैं, यह संभव है कि भोजन पत्तियों में ही रह जाए और पौधे की जड़ों के अन्य भागों में वितरित न हो।

नोट: स्टार्च पौधों, विशेषकर उनकी जड़ों को प्रतिरक्षा प्रदान करने में महत्वपूर्ण भूमिका निभाता है।

उपरोक्त दो कारकों से संकेत मिलता है कि पौधों की “परिवहन प्रणाली” अच्छी तरह से काम नहीं कर रही है जिसके लिए पोटेशियम की कमी को जिम्मेदार ठहराया जा सकता है।

  • सौभाग्य से, केले और केले के छिलकों में पोटेशियम अत्यधिक मात्रा में उपलब्ध होता है और इसका उपयोग पौधे की परिवहन प्रणाली को बेहतर बनाने के लिए किया जा सकता है।
  • यदि इस स्थिति में पौधे में केले के छिलके की खाद डाली दी जाए तो समस्या का समाधान हो जाएगा।

नोट:

    • न केवल पोटेशियम बल्कि केले के छिलके में कैल्शियम, मैग्नीशियम, सल्फर और फास्फोरस जैसे कई अन्य पोषक तत्व होते हैं, जो पौधों की वृद्धि और विकास के लिए आवश्यक हैं।
    • इसके अतिरिक्त, केले के छिलके में अन्य सूक्ष्म पोषक तत्व, जैसे जस्ता, तांबा और लोहा पाए जाते हैं, जो पौधों के स्वास्थ्य के लिए महत्वपूर्ण हैं।

घर पर ही केले के छिलके की खाद कैसे बनाएं? 

घर पर केले की खाद बनाने के कई तरीके हैं। उनमें से कुछ का विवरण यहां दिया गया है:

तरीका – 1

  1. केले के छिलकों को छोटे-छोटे टुकड़ों में काट लीजिए।
  2. इन्हें एक साफ बर्तन में रखें और पानी भर दें. सुनिश्चित करें कि छिलके पानी में ठीक से डूबे हुए हैं।
  3. कन्टेनर को ढककर किसी छायादार जगह पर 8-10 घंटे के लिए रख दीजिए.
  4. इस प्रक्रिया के दौरान केले के गूदे के अवशेष पानी में घुल जाते हैं.
  5. 10 घंटे के बाद, पानी को छान लें और इसे अधिक पानी (उत्पादित खाद की मात्रा से 7-8 गुना अधिक पानी का उपयोग करके) के साथ पतला करें। उसके बाद, अपने पौधों को डालने के लिए पतला मिश्रण का उपयोग करें।
  6. पौधों पर प्रयोग करने से पहले खाद को छानकर पतला कर लेना आवश्यक है। अन्यथा, पोटेशियम की मात्रा आवश्यकता से बहुत अधिक होगी, जो पौधे को अन्य पोषक तत्वों को अवशोषित करने से रोक सकती है।

तरीका – 2 (केले के छिलके का पाउडर खाद)

  1. केले के छिलकों को काटकर धूप में सुखा लें.
  2. 4 दिन बाद छिलके पूरी तरह सूखे, काले और कुरकुरे हो जायेंगे.
  3. सूखे छिलकों को बारीक पीसकर एक कन्टेनर में भरकर रख लें।
  4. जब आवश्यकता हो, पाउडर को पानी में घोलें और इसका उपयोग अपने पौधों में डालने के लिए करें।
  5. वैकल्पिक रूप से, आप केले के छिलके के पाउडर को मिट्टी की ऊपरी परत पर छिड़क सकते हैं और पौधे को पानी दे सकते हैं।
  6. केले की खाद मिट्टी में धीरे-धीरे विघटित होगी, इसलिए बहुत अधिक पानी डालने से बचें। यह विधि आपके पौधों के लिए धीमी गति से रिलीज़ होने वाला खाद प्रदान करती है।

तरीका – 3

  1. केले का छिलका लें और इसे किसी गमले वाले पौधे की मिट्टी में दबा दें।
  2. मिट्टी में कोई अतिरिक्त पानी या नमी न डालें।
  3. समय के साथ, केले का छिलका विघटित हो जाएगा और अपने पोषक तत्वों को मिट्टी में छोड़ देगा, जिससे पौधे के बढ़ने के लिए यह अधिक उपजाऊ हो जाएगी।

यह विधि आपके पौधों को पोषक तत्व प्रदान करने का एक प्राकृतिक तरीका है, लेकिन केले के छिलके को विघटित होने और इसके पोषक तत्व जारी करने में अन्य तरीकों की तुलना में अधिक समय लग सकता है।

केले के छिलके की खाद कब देना चाहिए?

  1. उन पौधों पर केले के छिलके के उर्वरक का उपयोग करने से बचें जो अभी छोटे हैं या बढ़ने की अवस्था में हैं क्योंकि उस समय उन्हें नाइट्रोजन, फास्फोरस और पोटेशियम (एनपीके) की समान मात्रा की आवश्यकता होती है।

केले की खाद में नाइट्रोजन की मात्रा बहुत कम होती है। इससे पोषक तत्वों का असंतुलन हो जाएगा और नाइट्रोजन की कमी के कारण पौधे मर सकते हैं।

  1. केले की खाद हमेशा तब दें, जब पौधा फूल या फल लगने की अवस्था में हो।
  2. जहाँ केले के छिलके की खाद का उपयोग सभी पौधों पर किया जा सकता है, पोषक तत्वों का संतुलन बनाए रखने के लिए इसे अन्य खादों के साथ बदलना महत्वपूर्ण है।
  • केले के छिलके की खाद डालने के बाद, अन्य खाद जैसे सरसों की खली या किसी अन्य खाद का उपयोग करने से पहले कम से कम 20 दिन तक प्रतीक्षा करें।
  • इससे यह सुनिश्चित करने में मदद मिलेगी कि पौधों को उनकी वृद्धि और विकास में सहायता के लिए पोषक तत्वों का संतुलित मिश्रण प्राप्त हो।

महत्वपूर्ण बिंदु:

  1. अधिक पानी देने से पौधा खराब हो सकता है, इसलिए यह महत्वपूर्ण है कि खाद तभी डालें जब मिट्टी पूरी तरह से सूख जाए। इसके अलावा, खाद डालने के बाद पानी तभी देना चाहिए जब मिट्टी सूखी दिखाई दे।
  2. 17 आवश्यक पोषक तत्व हैं, पौधों को स्वस्थ वृद्धि के लिए जिनकी आवश्यकता होती है। सभी पोषक तत्वों की आवश्यकताओं को पूरा करने के लिए पोटेशियम, नाइट्रोजन और फास्फोरस यानी एनपीके जैसे पूरकों की पर्याप्त मात्रा में आवश्यकता होती है।

इसलिए, खाद पौधों की तीव्र वृद्धि में महत्वपूर्ण भूमिका निभाते हैं।

अतः, केले लीजिए, स्वस्थ रहने के लिए उन्हें खाइए और उनके छिलकों का उपयोग अपने पौधों के लिए जैविक खाद बनाने में कीजिए। इस तरह, आप यह सुनिश्चित कर सकते हैं कि आपके पौधों को मजबूत और स्वस्थ रूप से विकसित होने के लिए आवश्यक पोषक तत्व मिलें। उपरोक्त महत्वपूर्ण सुझावों का पालन करके, आप अपने पौधों को पनपने में मदद कर सकते हैं और घरेलू उत्पाद के लाभों का आनंद ले सकते हैं।

शुभ बागवानी!!

curry leaves

गमले में करी पत्ता का पौधा कैसे उगाएं और उसकी देखभाल कैसे करें 

करी पत्ता का पौधा, जो अपनी जादुई सुगंध के लिए जाना जाता है, किसी भी घर के लिए एक आवश्यक पौधा है। हालाँकि यह बाहरी पौधा बढ़ने में काफी संवेदनशील होता है, लेकिन सही पोषण मिलने पर असाधारण परिणाम देते हैं।

आइए इसकी मूलभूत विशेषताओं, आवश्यकताओं और यह विभिन्न स्थितियों और वातावरणों पर कैसे प्रतिक्रिया करता है, इस पर गौर करें। इस लेख में हम महत्वपूर्ण बिंदुओं पर चर्चा करेंगे कि हम घर पर करी पत्ते का पौधा कैसे उगा सकते हैं।

  1. करी पत्ता के पौधे के लिए सबसे अच्छा मौसम
  2. करी पत्ता के पौधे के लिए आदर्श तापमान
  3. करी पत्ता के पौधे के लिए सूर्य के प्रकाश की आवश्यकता
  4. करी पत्ते के पौधे के लिए पसंदीदा गमले के प्रकार
  5. करी पत्ता के पौधे के लिए मिट्टी का मिश्रण
  6. करी पत्ता के पौधे में पानी देने के टिप्स
  7. करी पत्ता के पौधे के लिए जरुरी खाद
  8. करी पत्ता के पौधे के लिए कीटनाशक

करी पत्ता का पौधा एक बारहमासी पौधा है

करी पत्ता, बारहमासी पौधे होने के कारण, कई वर्षों तक  पनपने की क्षमता रखता है यदि लगन के साथ इसका पालन-पोषण किया जाता है और पूरी क्षमता विकसित किया जाता है।

गमले में करी पत्ता का पौधा कैसे उगाएं और उसकी देखभाल कैसे करें

1. करी पत्ता का पौधा कैसे प्राप्त करें?

  • नर्सरी से खरीदें: करी पत्ते के पौधे नर्सरी से खरीदे जा सकते हैं।
  • बीज: वैकल्पिक रूप से, इस पौधे को उगाने के लिए बीजों का उपयोग किया जा सकता है।
  • कटिंग: इसे कटिंग के माध्यम से भी उगाया किया जा सकता है।
  • स्व-प्रसरण: कभी-कभी नए करी पत्ते मौजूदा पौधे से उसकी जड़ों के माध्यम से अपने आप अंकुरित होने लगते हैं।

2. करी पत्ता के पौधे के लिए सबसे अच्छा मौसम

curry plant 1

नर्सरी से करी के पौधे खरीदने का आदर्श समय वसंत ऋतु के दौरान होता है, आमतौर पर फरवरी से मार्च तक। ग्रीष्मकालीन पौधे के रूप में, यह अक्टूबर तक अच्छी तरह फलता-फूलता है।

सुप्त अवधि: सर्दी के मौसम में करी पत्ता का पौधा सुप्त अवधि में प्रवेश करता है और पौधे की वृद्धि धीमी हो जाती है। पत्तियाँ पीली पड़ने लगती हैं और सूखने लगती हैं।

3. करी पत्ता के पौधे के लिए आदर्श तापमान

करी पत्ते की वृद्धि के लिए आदर्श तापमान 18-35 डिग्री सेल्सियस है। इस सीमा से परे, पौधा जीवित रहने के लिए संघर्ष करता है, पत्तियाँ काली या भूरी हो जाती हैं और सूख जाती हैं।

  • अत्यधिक गर्मी के दौरान छाया प्रदान करना और सर्दियों में जब तापमान 8-10 डिग्री सेल्सियस तक गिर जाता है तो पौधे को ढंकना इसकी सुरक्षा में मदद करता है।

4. करी पत्ता के पौधे के लिए सूर्य के प्रकाश की आवश्यकता

जब करी पत्ते के पौधों को गमलों में उगाया जाता है, तो उन्हें मजबूत विकास के लिए कम से कम 4 से 5 घंटे की सीधी धूप की आवश्यकता होती है।

5. करी पत्ता के पौधे के लिए गमले के प्रकार

curry leaves plant in pot

करी पत्ते को विभिन्न कंटेनरों जैसे कपड़े की थैलियों, प्लास्टिक की बाल्टी, मिट्टी के बर्तन, चीनी मिट्टी के बर्तन, सीमेंट के बर्तन, प्लास्टिक के बर्तन, या ग्रो बैग में उगाया जा सकता है। शुरुआती लोगों के लिए, मिट्टी के गमले से शुरुआत करने की सलाह दी जाती है।

  • कम से कम 10 इंच के गमले चुनने की सलाह दी जाती है।

6. करी पत्ता के पौधे के लिए मिट्टी का मिश्रण

Soil mix

करी पत्ता के पौधों के लिए अच्छी जल निकासी वाली मिट्टी का मिश्रण सबसे अच्छा होता है।

  • इस मिश्रण में आमतौर पर बगीचे की मिट्टी, खाद (वर्मीकम्पोस्ट या पत्ती की खाद या गाय के गोबर की खाद), बेहतर जल निकासी के लिए रेत, और वैकल्पिक रूप से, नमी बनाए रखने के लिए कोकोपीट शामिल होता है। इन घटकों को अच्छी तरह से मिश्रित करने से करी पत्ते के पौधों के लिए एक आदर्श विकास माध्यम बनता है।

7. करी पत्ते के पौधे के लिए पानी देने के टिप्स

करी पत्ते के पौधे को तभी पानी दें जब मिट्टी पूरी तरह से सूखी हो, क्योंकि अधिक पानी देने से जड़ सड़ सकती है।

  • सुनिश्चित करें कि जलभराव को रोकने के लिए पानी गमले के निचले छेद से बहता रहे। इष्टतम मिट्टी की नमी के स्तर को बनाए रखने के लिए जलवायु, आर्द्रता और बर्तन के आकार जैसे कारकों के आधार पर पानी देने के कार्यक्रम को समायोजित करें।

8. करी पत्ता के पौधे के लिए खाद

अन्य पत्तेदार पौधों की तरह, करी पत्ता के पौधों को भी नाइट्रोजन (एन), फास्फोरस (पी), और पोटेशियम (के) की संतुलित आपूर्ति के साथ आवश्यक पोषक तत्वों की आवश्यकता होती है।

  • हालाँकि, वे विशेष रूप से अपने उर्वरक मिश्रण में नाइट्रोजन के उच्च अनुपात से लाभान्वित होते हैं। हरे-भरे पत्ते के विकास को बढ़ावा देने के लिए नाइट्रोजन महत्वपूर्ण है, जो स्वस्थ करी पत्ते के पौधों की विशेषता है।

9. करी पत्ता के पौधे के लिए कीटनाशक

कीटों और बीमारियों के संभावित हमलों को रोकने के लिए, अपने करी पत्ते के पौधे की सुरक्षा के लिए सक्रिय उपाय करने की सलाह दी जाती है।

  • एक प्रभावी तरीका नियमित रूप से पत्तियों पर नीम के पानी के घोल का छिड़काव करना है।
  • इसके अतिरिक्त, सप्ताह में एक बार मिट्टी में नीम का घोल मिलाने से कीटों और बीमारियों के खिलाफ पौधे की प्रतिरोधक क्षमता में और वृद्धि हो सकती है।

निष्कर्षतः, गमले में करी पत्ते के पौधे को उगाने और उसकी देखभाल करने के लिए उपरोक्त जानकारी पर ध्यान देने और विशिष्ट परिस्थितियों के पालन की आवश्यकता होती है। इन दिशानिर्देशों का पालन करके, आप अपने घर के बगीचे से ही ताज़ी चुनी हुई करी पत्तियों की मनमोहक सुगंध और स्वाद का आनंद ले सकते हैं।

शुभ बागवानी!

अपना स्वयं का बगीचा बनाएं!

Fertilizer for Money Plant (Pothos)

Money plants also known as Pothos, can benefit significantly from occasional fertilization, especially during their active growing season, which typically spans from spring to fall. Proper fertilization provides them with essential nutrients to promote vigorous growth and lush foliage.

pothos money plant

In this article, we will take an in-depth look at the importance of fertilizing your money plant and provide valuable information on how to do it effectively.

Understanding the need for Fertilizer

fertilizer

Fertilizing your Money plant serves several crucial purposes:

1. Nutrient Enrichment:

  • Money plants require essential nutrients for their growth.
  • In their natural habitat, these nutrients are drawn from the soil. However, when cultivated indoors in pots, they depend on you to supply these nutrients.

2. Vigorous Growth:

  • Regular fertilization ensures your Money plant has an abundant supply of vital nutrients, promoting robust growth and lush foliage.
  • Proper nourishment can lead to more extensive vines and larger, more vibrant leaves.

money plant

3. Soil Rejuvenation:

  • Over time, the potting soil your Money plant resides in may become depleted of nutrients.
  • Fertilizing helps rejuvenate the soil, making it more conducive to sustained plant health and vitality.

4. Enhanced Aesthetic Appeal:

  • Well-fed Money plants are more likely to exhibit the attractive variegation and lushness that makes them so appealing.
  • Proper fertilization can contribute to the plant’s visual charm, making it a stunning addition to your home decor.

Choosing the Right Fertilizer

NPK fertilizer

The choice of fertilizer is crucial. It is advisable to alternate between fertilizers with different formulations to ensure your Money plant receives a balanced supply of nutrients.

  • High NPK (nitrogen, phosphorus, potassium) fertilizers are suitable choices, but also consider using micronutrient-rich options to provide a comprehensive nutrient profile.

Click here to read: Money Plant Complete Care Guide…

Maintaining the health of your Money plant can be challenging when it becomes densely vegetated, making it difficult to change the soil or add additional substrates like cocopeat.

dense money plant

  • In such situations, liquid fertilizer can serve as an effective solution, as it can be easily applied to the plant without disturbing the root system.

When to give Fertilizer to Money Plant

When it comes to fertilizing your Money plant, it is important to establish a regular schedule. Fertilizing every 25 days can be a useful guideline, but the specific timing may vary based on factors such as the type of fertilizer used, environmental conditions, and the growth rate of your plant.

Here’s a suggested schedule for fertilizing your Money plant:

1. Start with a Cow dung liquid fertilizer (with high NPK) and apply it every 25 days.

cow dung decompose
Cow dung liquid fertilizer

2. After the next 25-days interval, switch to Seaweed fertilizer to provide additional micronutrients.

seaweed liquid fertilizer
Seaweed liquid fertilizer

3. Follow this sequence with Mustard cake fertilizer, also at 25-day intervals.

Important note:

  • Avoid using mustard cake fertilizer in extreme temperature, during hot weather. 
mustard cake liquid fertilizer

4. Subsequently, use Epsom salt as a magnesium source, followed by neem cake fertilizer, and continue with other nutrient sources in a similar pattern.

epsom salt
Epsom salt

Important note:

  • When applying fertilizer, remember to dilute it properly by using more water and less fertilizer in the mixture.
  • This helps prevent over-fertilization, which can lead to issues such as yellowing leaves and stunted growth.

Reduce fertilizer during winter season

pothos money plant

One important thing to note is that money plant growth slows down during the winter months.

  • As a result, it is advisable to reduce or even stop fertilization during this period to avoid overstimulating the plant when it is not actively growing.

Avoid using strong liquid fertilizers

watering tips to money plant

Lastly, avoid using strong liquid fertilizers, as they can potentially harm your Money plant.

  • Over-fertilization should always be avoided, as it can lead to a range of problems, including yellowing leaves, stunted growth, and other issues.

In summary, the key to giving fertilizer to the money plant is to keep it simple, provide balanced nutrients during the growing season, and reduce or eliminate fertilization during the winter months. It is essential to monitor your plant’s condition and adjust your care routine as needed.

Happy Gardening!

overwatering

Gardening Tips: How To Avoid Overwatering in Plants

To prevent common problems such as pest attacks, fungus, and mealybugs in your plants, it is crucial to start by avoiding overwatering.

overwatering
overwatering

Gardening tips: How to avoid overwatering

Overwatering can lead to various issues that harm your plants such as;

  • yellowing leaves
  • pest attack
  • wilting of leaves
  • fungal diseases
  • root rot
  • stunted growth
  • mold and mildew growth 

To maintain healthy plants, it is essential to avoid overwatering and provide the right amount of moisture based on the specific needs of each plant type. 

Some key steps to avoid overwatering in your plants:

1. Know your plants:

plants
plants
  • Different plants have different water requirements.
  • Understand the specific needs of each plant in your garden or home.

2. Use Well-Draining Soil to avoid overwatering

soil mixture
well drained soil mixture
  • Ensure that your plants are potted in soil that allows excess water to drain away. This prevents water from accumulating around the roots.

3. Watering schedule:


  • Establish a consistent watering schedule.
  • Water when the top inch or so of the soil is dry.
  • Stick your finger into the soil to check the moisture level.

watering tips to money plant

4. Water at the right time:

watering plants
watering plants
  • Water your plants in the morning or in the evening.
  • Watering in the morning allows the plants to absorb moisture and nutrients during the day. This can help them withstand the heat and stress of the afternoon sun.
  • Watering in the evening can be beneficial because it provides plants with moisture overnight.

5. Proper drainage to avoid overwatering

type of pots

  • Ensure that your pots have drainage holes.
  • This helps excess water escape, reducing the risk of root rot and fungal issues.

6. Monitor weather conditions:

  • Adjust your watering schedule based on weather conditions.
  • Plants may need more water during hot and dry spells but less during cool and rainy periods.

7. Use a saucer:

indoor plants in pot

  • If you have indoor potted plants, use a saucer to catch excess water.
  • Empty it regularly to prevent the plant from sitting in standing water.

8. Inspect your plant regularly:

inspect your plant
inspect your plant
  • Keep an eye on your plants for any signs of overwatering, such as wilting, yellowing leaves, or a foul odor from the soil.
  • Adjust your watering habits accordingly.

By avoiding overwatering and following these guidelines, you can significantly reduce the risk of pests, fungus, and mealybug infestations, keeping your plants healthier and more vibrant.

Happy Gardening!

Hydroponic

हाइड्रोपोनिक्स क्या है और यह किस प्रकार काम करता है

हाइड्रोपोनिक्स रहस्योद्घाटन: बिना मिट्टी के पौधे उगाना 

कृषि की निरंतर विकसित हो रही दुनिया में, हाइड्रोपोनिक्स एक क्रांतिकारी तकनीक के रूप में उभरी है, जो पारंपरिक मिट्टी-आधारित खेती के तरीकों को चुनौती दे रही है। यह उन स्थानों के लिए विशेष रूप से प्रासंगिक है जहां कृषि योग्य भूमि कीमती है, और जल संसाधन तेजी से दुर्लभ होते जा रहे हैं।

हाइड्रोपोनिक्स संसाधन की कमी से जूझ रहे देश में फसलों की खेती के लिए एक स्थायी समाधान प्रदान करता है।

इस लेख में, हम हाइड्रोपोनिक्स की अवधारणा पर गहराई से चर्चा करेंगे और इसके अनुप्रयोग का पता लगाएंगे:

हाइड्रोपोनिक्स की समझ

हाइड्रोपोनिक्स मिट्टी के बिना पौधे उगाने की एक विधि है, जहां पोषक तत्वों से भरपूर पानी का घोल सीधे पौधों की जड़ों को पोषण देता है।

‘हाइड्रोपोनिक्स’ शब्द की उत्पत्ति ग्रीक शब्द ‘हाइड्रो’ (पानी) और ‘पोनोस’ (कार्य) से हुई है, जो इस नवीन खेती तकनीक का सार बताता है।

हाइड्रोपोनिक्स किस प्रकार काम करता है?

Hydroponic farming

पौधों को पोषक तत्व प्रदान करने के लिए मिट्टी पर निर्भर रहने के बजाय, हाइड्रोपोनिक सिस्टम पौधों की जड़ों को सहारा देने के लिए विभिन्न माध्यमों जैसे पेर्लाइट, वर्मीक्यूलाइट, कोको कॉयर या यहां तक कि अकेले पानी का उपयोग करते हैं। हाइड्रोपोनिक्स किस प्रकार काम करता है इसकी एक सरल व्याख्या यहां दी गई है:

  1. पोषक तत्व का घोल: पौधों को विकास के लिए आवश्यक पोषक तत्वों की आवश्यकता होती है।
  • हाइड्रोपोनिक्स में, इन पोषक तत्वों को सावधानीपूर्वक संतुलित पोषक घोल बनाने के लिए पानी में घोल दिया जाता है, जिससे पौधों को इष्टतम पोषण मिलता है।
  1. विकास का माध्यम: मिट्टी की अनुपस्थिति में, विकास का माध्यम पौधों की जड़ों के लिए एक सहायक संरचना के रूप में कार्य करता है।
  • यह माध्यम पौधे को अपनी जगह पर बनाए रखता है और जड़ों को पोषक तत्वों के घोल से पोषक तत्वों को अवशोषित करने में सक्षम बनाता है।
  1. जड़ें और ऑक्सीजन: हाइड्रोपोनिक प्रणालियों में पौधों की जड़ें या तो पानी में डूबी रहती हैं या समय-समय पर पोषक तत्व के घोल के संपर्क में रहती हैं।
  • जड़ों के लिए पर्याप्त ऑक्सीजन सुनिश्चित करना महत्वपूर्ण है और इसे पोषक तत्वों के घोल को ऑक्सीजन देने या वातित प्रणालियों का उपयोग करने जैसी तकनीकों के माध्यम से प्राप्त किया जा सकता है।
  1. नियंत्रित वातावरण: हाइड्रोपोनिक सेटअप अक्सर नियंत्रित वातावरण में काम करते हैं जहां तापमान, आर्द्रता और प्रकाश जैसे कारकों को पौधों के विकास के लिए अनुकूलित किया जा सकता है।
  • यह मौसमी विविधताओं पर काबू पाते हुए साल भर फसल उगाने के लिए विशेष रूप से फायदेमंद साबित होता है।
  • हाइड्रोपोनिक्स को अपनाकर, राष्ट्र अपनी कृषि पद्धतियों में क्रांति लाने, बहुमूल्य भूमि और जल संसाधनों को संरक्षित करते हुए अधिकतम उपज प्राप्त करने की क्षमता रखता है।
  • चूंकि देश जलवायु परिवर्तन और संसाधनों की कमी से संबंधित बढ़ती चुनौतियों का सामना कर रहा है, हाइड्रोपोनिक्स कृषि के भविष्य के लिए एक स्थायी और दूरदर्शी समाधान के रूप में सामने आया है।

हाइड्रोपोनिक सिस्टम के प्रकार

hydroponics

1. डीप वाटर कल्चर (Deep Water Culture): इस प्रणाली में, पौधे पोषक तत्वों के घोल पर तैरते हैं, उनकी जड़ें पानी में लटकी रहती हैं। घोल को ऑक्सीजनित करने के लिए वायु पत्थरों या पंपों का उपयोग किया जाता है, जिससे यह सुनिश्चित होता है कि जड़ों को ऑक्सीजन की पर्याप्त आपूर्ति मिले।

2. न्यूट्रीएंट फिल्म तकनीक (Nutrient Film Technique): पोषक तत्व घोल की एक पतली फिल्म पौधों की जड़ों पर बहती है, जो आवश्यक पोषक तत्व प्रदान करती है जबकि जड़ों को हवा से ऑक्सीजन तक पहुंचने की अनुमति देती है।

3. उतार और प्रवाह (Flood and Drain): इस प्रणाली में समय-समय पर पौधों में पोषक तत्वों का घोल डाला जाता है और फिर उसे सूखा दिया जाता है, जिससे एक चक्र बनता है जो पोषक तत्वों और ऑक्सीजन की निरंतर आपूर्ति सुनिश्चित करता है।

4. वर्तिका प्रणाली (Wick System): एक सरल और निष्क्रिय प्रणाली जो जलाशय से पौधों की जड़ों तक पोषक तत्व घोल खींचने के लिए बाती का उपयोग करती है।

हाइड्रोपोनिक्स के लाभ 

hydroponics

1. जल दक्षता (Water Efficiency): हाइड्रोपोनिक प्रणाली पारंपरिक खेती के तरीकों की तुलना में काफी कम पानी का उपयोग करती है, जो दुनिया भर में पानी की कमी वाले क्षेत्रों में एक महत्वपूर्ण लाभ है।

2. स्थान का उपयोग (Space Utilization): हाइड्रोपोनिक्स में ऊर्ध्वाधर खेती की जा सकती है और सीमित भूमि संसाधनों के उपयोग को अधिकतम करते हुए शहरी सेटिंग्स में इसका अभ्यास किया जा सकता है।

3. साल भर खेती (Year-round Cultivation): हाइड्रोपोनिक्स में नियंत्रित वातावरण साल भर खेती करने में सक्षम बनाता है, जिससे मौसमी फसलों पर निर्भरता कम हो जाती है।

4. उच्च पैदावार और तेज़ विकास ( Higher Yields and Faster Growth): इष्टतम परिस्थितियों में, हाइड्रोपोनिक प्रणालियों में पौधे अक्सर पारंपरिक तरीकों की तुलना में तेज़ विकास दर और उच्च पैदावार प्रदर्शित करते हैं।

5. कीटनाशकों का कम उपयोग (Reduced Pesticide Use): हाइड्रोपोनिक्स में नियंत्रित वातावरण कीटों और बीमारियों की घटनाओं को कम कर सकता है, जिससे रासायनिक कीटनाशकों की आवश्यकता कम हो जाती है।

हाइड्रोपोनिक्स दुनिया में टिकाऊ कृषि के लिए आशा की किरण प्रदान करता है, जिसमें दक्षता के साथ नवाचार का संयोजन शामिल है। मिट्टी की बाधाओं के बिना पौधों की खेती की पुनर्कल्पना करके, हाइड्रोपोनिक्स एक हरित कृषि भविष्य का मार्ग प्रशस्त करता है।

चूँकि दुनिया भूमि की कमी और पानी के तनाव जैसी चुनौतियों से जूझ रही है, हाइड्रोपोनिक्स जैसी तकनीकों को अपनाने से टिकाऊ खेती के एक नए युग की शुरुआत हो सकती है, जिससे बहुमूल्य प्राकृतिक संसाधनों को संरक्षित करते हुए खाद्य सुरक्षा सुनिश्चित की जा सकती है।

शुभ बागवानी!!

soil mix rose plants

How to Prepare Soil Mixture for Rose Plants?

How to Prepare Soil Mixture for Rose Plants?


When it comes to growing beautiful and healthy roses, the soil mixture you use is indeed one of the most crucial factors to consider.

Roses have specific soil requirements, and providing them with the ideal conditions will significantly impact their health and growth.

Why is the right soil mixture important for Roses?


Soil Mixture for Rose Plants
soil mixture

1. Roses thrive in well-drained soil


    • The first thing to understand about roses is that they prefer well-draining soil.
    • This means that excessive moisture can be harmful to their health.
    • Excessive moisture can lead to problems like waterlogged roots, which can in turn cause issues such as root rot and diseases.
    • Therefore, creating a soil mixture that promotes proper flow of water and prevents it from pooling around the plant’s roots is important for the well-being of rose plants.
rose plant in pot
rose plant in pot

Must read: Rose plant complete care guide


2. Soil mixture should be rich in organic matter


    • Roses also require a soil mixture that is rich in organic matter.
    • Organic matter provides essential nutrients, improves soil structure, and promotes beneficial microbial activity.
    • By incorporating organic matter into the soil mixture, you can enhance moisture retention, nutrient availability, and overall soil fertility, all of which contribute to healthy and vibrant roses.

Components of an ideal soil mixture for Rose plant


1. Garden Soil:
Use good quality garden soil as the base for your mixture. It should be loamy and well-draining. Avoid heavy clay soils.
garden soil
garden soil
2. Compost to increase the organic matter in the soil:

To increase the amount of organic matter in the soil mixture, it is highly recommended to add compost in the soil.

compost
compost
  • You can add cow dung compost or vermicompost.
  • Compost enriches the soil with nutrients and improves its structure, providing a favorable environment for the growth of roses.
3. Sand for drainage improvement:

If your soil is heavy and doesn’t drain well, you can add sand to improve drainage.

sand
sand
4. Coco peat for moisture retention:

It helps retain moisture in the soil and improves its texture.

    • Roses benefit from a soil mixture that can hold onto moisture without becoming overly soggy.
    • Adding coco peat into the soil helps maintain moisture levels, ensuring that the roses get the water they need while avoiding the possibility of root rot.

coco peat

5. Neem Cake powder:

Adding neem cake powder to your soil can be an effective natural way to help prevent soil-borne insects and pests.

neem cake powder
neem cake powder
6. Bone meal –

You can also add bone meal if you wish to.

  • Bone meal is a good source of phosphorus, which is beneficial for root development and flower production in roses.
  • It also contains calcium, which can help improve soil structure.
7. Fungicide –

You can add a fungicide to the soil to prevent fungal in plants.

Fungicide
Fungicide
Fungicide powder
Fungicide powder
  • When it comes to rose plant care, fungal issues, such as powdery mildew or black spot, can be a common concern.

Tips for preparing the soil mixture for rose plants


1. Clean Garden soil: 
garden soil
garden soil
  • Clean your garden soil before preparing soil mixture for rose plants. Remove all the debris, glass and plastic pieces that may hinder the proper growth of the plants.
2. Mix the ingredients in the following proportions:
  • Compost: Add vermicompost or cow-dung compost half the quantity of the garden soil. 
  • Sand: Add sand half the quantity of the garden soil means equal amount of compost.
  • Coco peat: It should be 1/4 of the sand. 
  • Neem Cake powder: Add little bit of neem cake powder in the mixture.
  • Fungicide: You can add very little amount of 3 -4  gm of fungicide in soil mixture. 
  • Bone meal: You can also consider adding a bone meal if you wish.

Thoroughly blend all the components together to create a uniform mixture.

soil mixture
soil mixture

Note:

  • It is a good practice to amend the soil with compost and other organic matter from time to time to maintain soil fertility and structure.
  • Additionally, monitor the performance of your roses and adjust the soil mix as needed to ensure their health and vitality.

rose flowers

Conclusion:

  • Preparing the correct soil for your rose plants is like giving them the perfect home.
  • When you blend soil that drains well with organic stuff, it’s like making a strong base for their growth and overall health.
  • Just keep in mind what your roses really like, mix the right amounts, and use good stuff. If you get the soil right, your roses will grow beautifully and give you pretty flowers with a lovely smell.

============

Follow our Social media channel:

1. Voice of Plant – YouTube Channel

2. Voice of Plant Facebook Page

3. Instagram Voice of Plant Channel

Happy gardening!!

plants at home

9 पौधे जिन्हें आपको घर पर उगाने चाहिए

विभिन्न प्रकार के लाभ प्रदान करने वाले पौधों के साथ एक विविधपूर्ण उद्यान बनाना आपके आउटडोर स्पेस की पारिस्थितिक समृद्धि में योगदान करने का एक शानदार तरीका है। अतः, यहां नौ आवश्यक पौधों की सूची दी गई है जो हर किसी के पास होनी चाहिए, जिनमें से प्रत्येक किसी भी बगीचे को समृद्ध और सुंदर बनाने के लिए कई लाभ प्रदान करता है।

  1. तुलसी का पौधा
  2. करी पत्ता
  3. अजवाईन का पौधा
  4. गिलोय
  5. एलो वेरा
  6. पथोस (मनी प्लांट)
  7. जेड पौधा
  8. गुड़हल का पौधा
  9. चमेली का पौधा

9 पौधे जिन्हें आपको घर पर उगाने चाहिए


1. तुलसी का पौधा (Holy basil)


tulsi plant

क्या आप अपनी बागवानी यात्रा शुरू कर रहे हैं? शुभ तुलसी के पौधे के लिए जगह बनाएं – यह घर में अवश्य होना चाहिए।

  • गर्मी को पसंद करने वाला यह पौधा फरवरी से अक्टूबर तक पनपता है, हालांकि सर्दियों में यह मुरझाना शुरू हो सकता है। उचित देखभाल से यह ठंड के मौसम के बाद ठीक हो सकता है।

सीधी धूप

  • इस बाहरी पौधे के लिए, सुनिश्चित करें कि इसे कम से कम 4-5 घंटे सीधी धूप मिले।

औषधीय लाभ

  • इस आयुर्वेदिक पौधे के कई औषधीय लाभ हैं और इसका उपयोग सर्दी, खांसी और कई अन्य समस्याओं के इलाज के लिए किया जाता है।

2. करी पत्ता (Curry Leaf)


curry leaves

करी पत्ता रसोई के लिए एक अतिरिक्त योग है क्योंकि इसकी खुशबू और स्वाद बहुत अच्छा होता है। यह एक उपयोगी जड़ी बूटी भी है और यह आपको कई घरों में मिल जाएगी।

ग्रीष्मकालीन पौधा  

  • यह एक ऐसा पौधा है जो गर्मियों को पसंद करता है, फरवरी से अक्टूबर तक अच्छी तरह से बढ़ता है।

सूरज की रौशनी

  • इस पौधे को बहुत सारी धूप पसंद है, दिन में लगभग 5-6 घंटे, लेकिन इसे बहुत अधिक पानी की आवश्यकता नहीं होती है।

करी पत्ता विभिन्न औषधीय लाभ प्रदान करता है:

  • करी पत्ता विटामिन A, B, E और E का अच्छा स्रोत है, जो समग्र स्वास्थ्य के लिए आवश्यक पोषक तत्व प्रदान करता है।
  • करी पत्ता एंटीऑक्सिडेंट का एक अच्छा स्रोत है, जो ऑक्सीडेटिव तनाव से निपटने और शरीर को नुकसान से बचाने में मदद करता है।
  • वे स्वस्थ कोलेस्ट्रॉल के स्तर को बनाए रखने, हृदय स्वास्थ्य का समर्थन करने में योगदान दे सकते हैं।

Read this article in English

9 Plants You Should Grow at Home

3. अजवाइन का पौधा (Ajwain Plant)


ajwain plant

मैक्सिकन मिन्ट, जिसे भारतीय बोरेज या अजवाइन के पौधे के रूप में भी जाना जाता है, आपके बगीचे के लिए एक बेहतर है, इसमें कैरम बीज की खुशबू आती है।

ग्रीष्मकालीन पौधा

  • यह ग्रीष्म-हार्डी पौधा है, गर्म महीनों में फलता-फूलता है लेकिन सर्दियों के मौसम में मुरझा सकते हैं।

सूरज की रौशनी

  • कम से कम 4-5 घंटे की सीधी धूप जरूरी है, लेकिन यदि आप अधिक दे सकते हैं, तो यह निश्चित रूप से अतिरिक्त धूप की सराहना करेगा।

औषधीय पौधे

  • औषधीय पौधा होने के कारण यह गैस्ट्रिक समस्याओं के इलाज में बहुत फायदेमंद है।
  • खाली पेट कुछ पत्तियां खाने से ही समस्या ठीक हो जाएगी। इसके अलावा, यह विभिन्न व्यंजनों में सुगंध को बढ़ाता है।

4. गिलोय (Giloy)


giloy plant

गिलोय एक महत्वपूर्ण पौधा है जो आपके घर में होना ही चाहिए। पौधे की विशेषता दिल के आकार की पत्तियां हैं, जो इसके सामान्य नाम, “हार्ट-लीव्ड मूनसीड” में परिलक्षित होती है।

ग्रीष्मकालीन पौधा

गिलोय एक ग्रीष्मकालीन पौधा है जो गर्म मौसम में पनपता है लेकिन सर्दियों में थोड़ा उदास हो जाता है, इसकी पत्तियाँ झड़ जाती हैं और केवल तना ही रह जाता है।

  • जब गर्मी वापस आती है तो यह फिर से बढ़ना शुरू हो जाता है, आमतौर पर सबसे गर्म महीनों में, फरवरी या मार्च में उतना नहीं बढ़ता है।

सूरज की रौशनी

  • अनुकूलतम विकास के लिए, प्रचुर मात्रा में धूप प्रदान करें। इसे अधिकतम धूप वाले क्षेत्र में रखें।

औषधीय लाभ

  • पारंपरिक चिकित्सा में, विशेष रूप से आयुर्वेद में, गिलोय (हार्ट-लीव्ड मूनसीड) को इसके औषधीय गुणों के लिए अत्यधिक महत्व दिया जाता है।
  • गिलोय का उपयोग अक्सर प्रतिरक्षा प्रणाली को बढ़ावा देने, दीर्घायु को बढ़ावा देने और समग्र स्वास्थ्य और कल्याण का समर्थन करने के लिए किया जाता है।
  • लोग गिलोय की छड़ियों का उपयोग एक विशेष पेय बनाने के लिए करते हैं जो बुखार और अन्य स्वास्थ्य समस्याओं में मदद करता है।

5. एलोवेरा (Aloe Vera)


Slice Aloe Vera very useful herbal medicine for skin and hair.

एलोवेरा सबसे महत्वपूर्ण पौधों में से एक है जिसे आपको अपने घर में रखना चाहिए। इसके कई फायदे हैं।

  • इस पौधे को अनदेखी पसंद है, समय-समय पर पानी देना पर्याप्त है, और इसे इष्टतम विकास के लिए व्यापक देखभाल की आवश्यकता नहीं है।

हर मौसम में फलता-फूलता है

  • एलोवेरा सभी मौसमों में फलता-फूलता है – गर्मी, सर्दी और बरसात।
  • यह सूर्य की रोशनी का भी शौकीन है और इसे अधिक समय तक धूप में रखना अच्छा रहता है।
  • हालाँकि, इसे चिलचिलाती धूप में रखने से बचें, सुबह और शाम की धूप सराहनीय है। इसके अलावा यह उज्ज्वल या मध्यम रोशनी में भी विकसित होगा।

औषधीय पौधा

  • एलोवेरा, एक औषधीय पौधा, अपने उपचार गुणों के लिए प्रसिद्ध है, जो जोड़ों के दर्द, पेट की परेशानी और माइग्रेन जैसी समस्याओं का समाधान करता है।
  • एलोवेरा से निकाला गया जेल कई उद्देश्यों को पूरा करता है और विभिन्न लाभ प्रदान करता है।
  • लोग इसके जेल को चेहरे और बालों पर लगाते हैं, इसके सुखदायक गुणों का उपयोग क्रमशः सनबर्न के इलाज और बालों के झड़ने से निपटने के लिए करते हैं।

6. पोथोस (मनी प्लांट)


pothos money plant

यहां एक और पौधा है जिसे आपको घर पर रखना चाहिए: पोथोस, जिसे मनी प्लांट के नाम से भी जाना जाता है।

  • यह एक लोकप्रिय इनडोर पौधा है जो अपनी आकर्षक लताओं और दिल के आकार की पत्तियों के लिए जाना जाता है। इसे आमतौर पर डेविल्स आइवी भी कहा जाता है।

ग्रीष्मकालीन पौधा

  • एक सामान्य ग्रीष्मकालीन पौधे के रूप में, यह पौधा अत्यधिक अनुकूलनीय है और विभिन्न परिस्थितियों में पनप सकता है, जो इसे शुरुआती और अनुभवी पौधे उत्साही दोनों के लिए उपयुक्त बनाता है।

प्रकाश आवश्यकताएँ:

  • पोथोस कम से लेकर उज्ज्वल, अप्रत्यक्ष प्रकाश तक, प्रकाश की एक विस्तृत श्रृंखला को सहन कर सकता है। हालाँकि, यह मध्यम, अप्रत्यक्ष प्रकाश में सबसे अच्छा काम करता है।

वायु-शुद्धिकरण गुण:

  • पोथोस अपनी वायु-शुद्ध करने की क्षमताओं के लिए जाना जाता है, जो सामान्य इनडोर प्रदूषकों को हटाने में मदद करता है।

7. जेड पौधा  (Jade plant)


Jade plant in clay pot

जेड पौधे अपनी कठोरता और अनुकूलनशीलता के लिए जाने जाते हैं। उचित देखभाल के साथ वे बाहरी वातावरण में भी पनप सकते हैं।

जेड प्लांट, जिसे लकी प्लांट के नाम से भी जाना जाता है, एक लोकप्रिय गुद्देदार पौधा है और आपके बगीचे की शोभा बढ़ाता है।

ग्रीष्मकालीन पौधा

हालाँकि यह एक सामान्य ग्रीष्मकालीन पौधा है।

  • यद्यपि इसकी वृद्धि धीमी हो सकती है, और पत्तियां सुंदर ढंग से निकल सकती हैं, उचित देखभाल के साथ, यह सर्दियों के महीनों में भी अपना हरा आकर्षण बरकरार रख सकता है।

पानी देने का तरीका

पौधे को न्यूनतम पानी की आवश्यकता होती है – बस यह सुनिश्चित करें कि पानी देने से पहले मिट्टी पूरी तरह से सूखी हो, यहां तक कि गहरे स्तर पर भी।

  • अधिक पानी देने से पत्तियों का झड़ना, काला पड़ना और अवांछित कीड़ों का आना जैसी समस्याएं हो सकती हैं।

अगर अच्छी तरह से देखभाल की जाए तो यह भाग्यशाली पौधा आपके बगीचे में चमक लाकर आपकी किस्मत चमका सकता है।

8. गुड़हल का पौधा (Hibiscus plant)

Hibiscus in pot

एक खिलता हुआ पौधा जो अपनी सुंदरता से बगीचे की सुदरता को बढ़ाता है।

ग्रीष्मकालीन पौधा

  • यह फूल वाला पौधा एक क्लासिक ग्रीष्मकालीन किस्म है जो सर्दियों में तनाव का अनुभव करता है।

सूरज की रौशनी

  • 5-6 घंटे धूप के संपर्क में रहने पर यह अच्छे से खिलेगा।

औषधीय लाभ

  • गुड़हल के फूलों से कई औषधियां और हेयर ऑयल बनाए जा रहे हैं।

9. चमेली का पौधा (Jasmine plant)

Jasmine flower

एक सुंदर सफेद फूल देने वाला पौधा, अपने जादुई सुगंधित फूलों से बगीचे की शोभा बढ़ाता है। यह पौधा या तो एक सुंदर लता बनने का विकल्प प्रदान कर सकता है या इसकी कटिंग को प्रचारित करके एक सामान्य पौधे के रूप में रखा जा सकता है।

  • फूलों के आभूषण जैसे गजरा आदि भी चमेली के फूलों से तैयार किए जाते हैं।

ग्रीष्मकालीन पौधा

  • एक पारंपरिक ग्रीष्मकालीन पौधा गर्मियों में अच्छी तरह से बढ़ता है, सर्दियों के दौरान विकास में बाधा आती है लेकिन परिपक्व पौधे पूरे वर्ष फूल देते रहेंगे।

सूरज की रौशनी

  • इसकी भरपूर वृद्धि के लिए 3-4 घंटे की मध्यम धूप पर्याप्त है।

औषधीय लाभ

  • यह औषधीय, सुगंधित, पवित्र और सुंदर पौधा इतना तनाव निवारक है कि हर किसी को इससे अपने बगीचे की शोभा बढ़ानी चाहिए।

इस लेख को पढ़ें:

हवा को शुद्ध करने वाले 10 इनडोर पौधे

पौधों की एक शानदार श्रृंखला की तरह लगता है! ऐसी विविधता का होना जो न केवल बगीचे की सुंदरता को बढ़ाती है बल्कि कई लाभ भी पहुंचाती है, फायदे का सौदा है। यह आपके घर के पीछे के आँगन में एक सामंजस्यपूर्ण और लाभकारी पारिस्थितिकी तंत्र बनाने जैसा है।

शुभ बागवानी!!