All posts by Neeraj

tomato

11 Mistakes to Avoid While Growing Tomatoes At Home

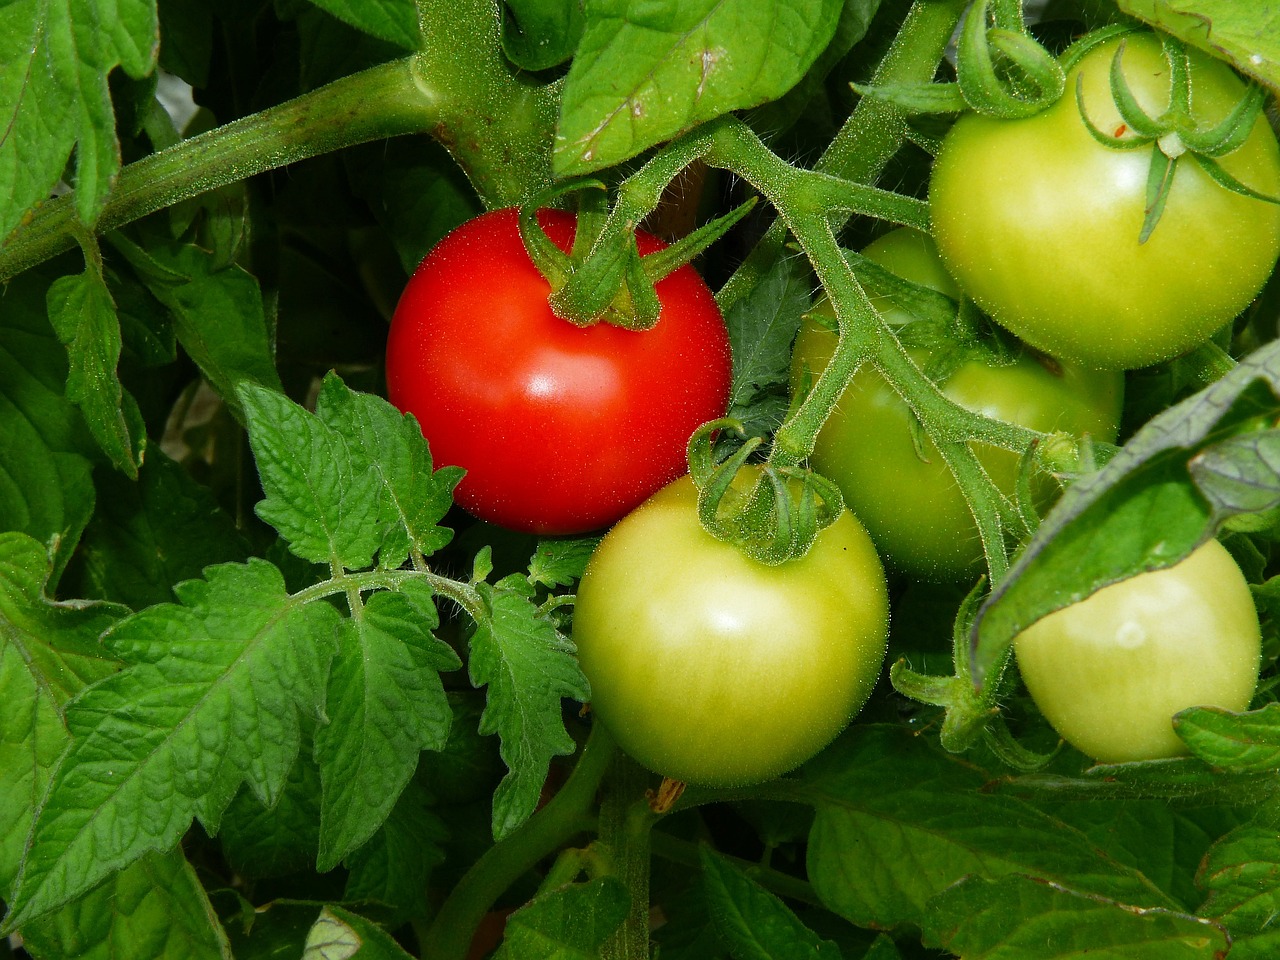
Growing tomatoes at home can be a rewarding experience, but it requires careful attention to detail to ensure a bountiful harvest. In this guide, we will explore some common mistakes that many gardeners make when cultivating tomatoes and provide practical tips on how to avoid them.

1. Poor Selection of Seeds

Choosing inferior seeds from nurseries or saving seeds from low-quality tomatoes and not adequately fertilizing with the necessary heavy fertilizers.

  • Opt for high-quality seeds from good seed shops to ensure healthy plants. 

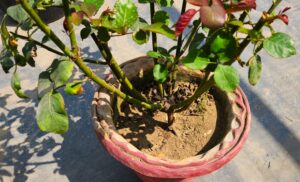
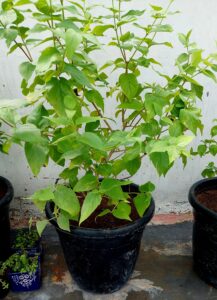
2. Wrong Pot Selection

grow bags for gardening

Selecting the appropriate containers for growing tomatoes is essential.

  • Instead of traditional pots, opt for grow bags that provide ample space for root growth.
  • Choose grow bags with a minimum size of 12 inches to accommodate the expansive root system of tomato plants.

3. Using Low Quality Soil

Soil mixture for radish (1)

The quality of the soil directly impacts the health and productivity of your tomato plants.

  • Invest in nutrient-rich soil that provides essential nutrients for robust growth.
  • Consider adding organic matter such as compost or manure to improve soil structure and fertility.

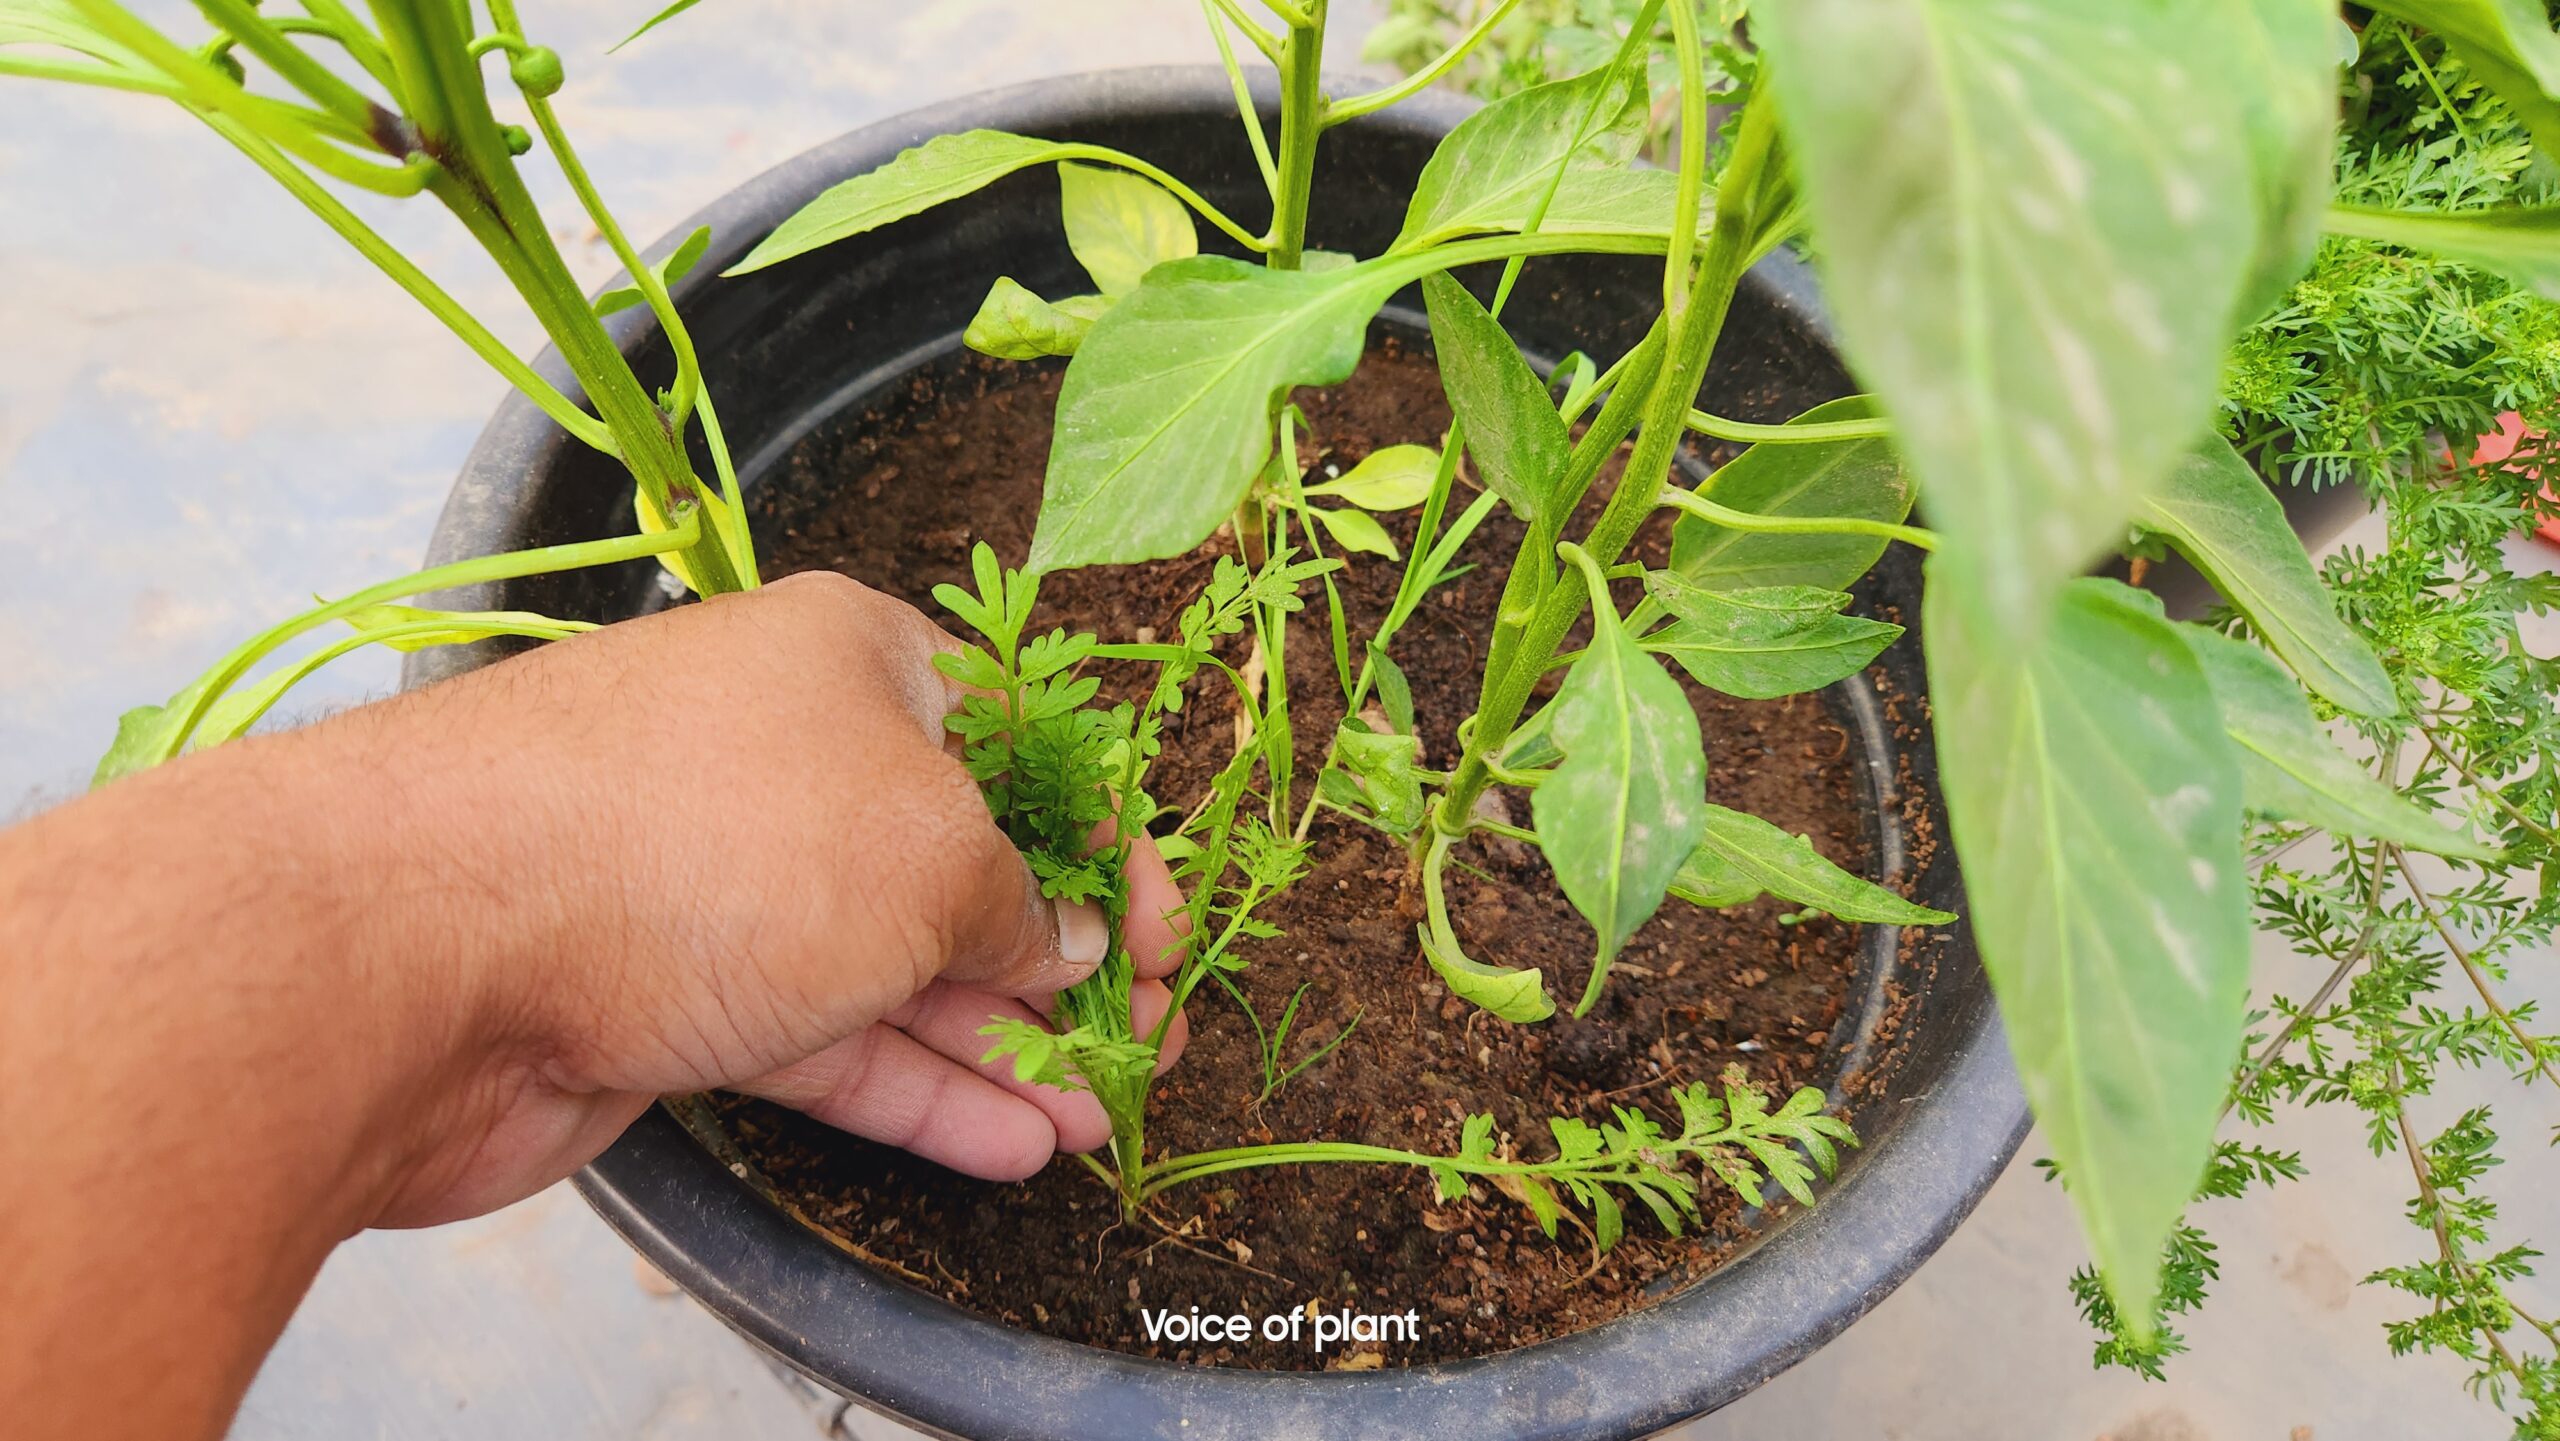
4. Planting Too Close

Tomato plant

Planting tomato seedlings too close together can lead to overcrowding, competition for resources, and increased susceptibility to diseases.

  • Follow spacing recommendations provided for each tomato variety to ensure adequate airflow and room for growth.

5. Neglecting to Harden Seedlings

Tomato seedlings
Tomato seedlings

Before transplanting seedlings into the garden, it’s essential to harden them off gradually. Exposing seedlings to outdoor conditions such as sunlight, wind, and fluctuating temperatures helps them acclimate to their new environment and reduces transplant shock.

6. Planting the Wrong Varieties

Not all tomato varieties are well-suited for every climate or growing conditions.

  • Research and select tomato varieties that are suitable for your region’s climate, soil type, and sunlight exposure.
  • Consider factors such as disease resistance, fruit size, and maturity date when choosing varieties.

Must read:

How to Grow Tomatoes at Home from Seeds

7. Planting Tomatoes in Shade

Tomatoes thrive in full sunlight, so planting them in shaded areas can hinder their growth and productivity.

  • Choose a location in your garden that receives at least 6-8 hours of direct sunlight daily for optimal results. Avoid planting tomatoes near tall trees or structures that may cast shade during peak sunlight hours.

8. Not Giving Heavy Fertilizer

Providing sufficient fertilizer is essential for the healthy growth of tomato plants.

  • Neglecting to provide adequate amounts of fertilizer can result in stunted growth and poor fruit development. Follow recommended fertilization guidelines and adjust based on the specific needs of your plants.

9. Over Fertilizer – Excess Nitrogen

While fertilizing is essential, overdoing it can have detrimental effects on tomato plants.

  • Excessive nitrogen in fertilizer can lead to lush foliage growth at the expense of fruit production.
  • Monitor the nitrogen levels in your soil and adjust fertilization accordingly to maintain a balanced nutrient profile.
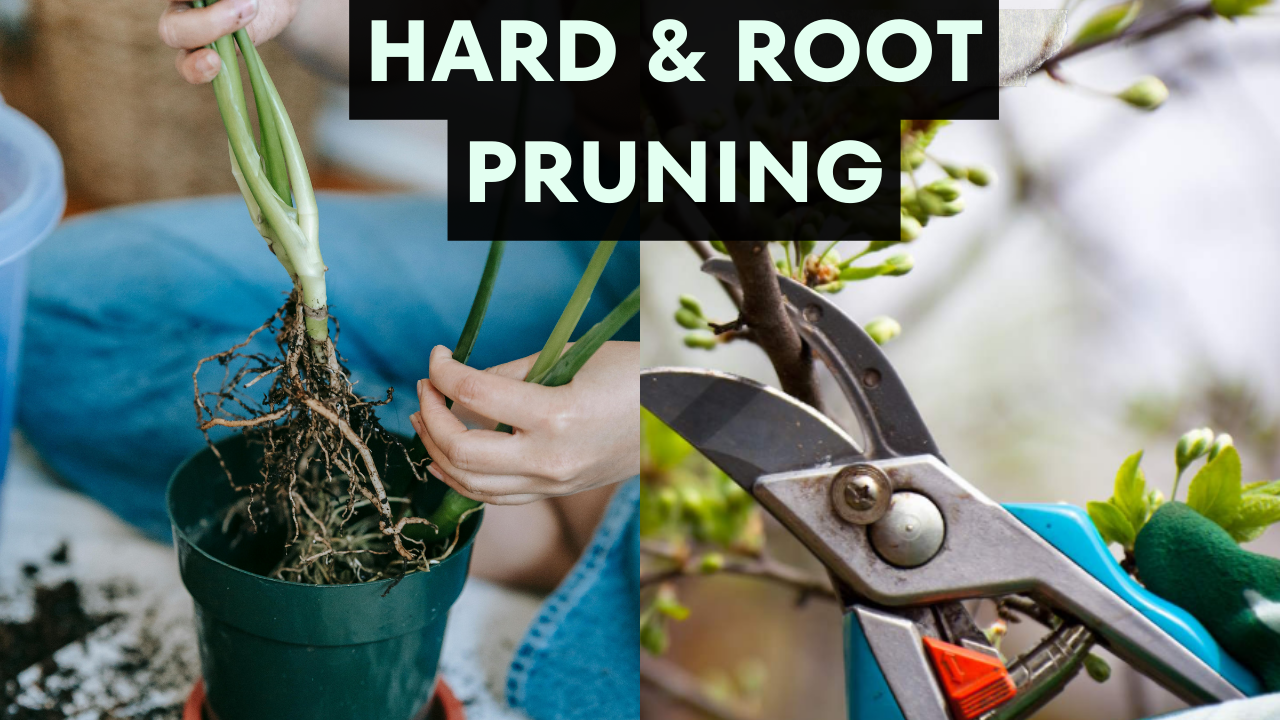
10. Not Pruning

Pruning tomato plants helps promote airflow, reduce disease risk, and focus energy on fruit production.

  • Neglecting to prune can result in overgrown, unruly plants that are more susceptible to pests and diseases. Regularly remove suckers and trim back excessive foliage to maintain healthy, productive plants.

11. Not Watering Enough

watering tomatoes

Proper watering is critical for the health and productivity of tomato plants.

  • Insufficient watering can lead to wilting, blossom-end rot, and reduced fruit production. Monitor soil moisture levels regularly and provide consistent watering, especially during hot and dry periods.

Conclusion

By avoiding these common mistakes and following best practices for growing tomatoes, you can enjoy a bountiful harvest of flavorful, homegrown tomatoes. Remember to select quality seeds, provide adequate space and sunlight, and maintain proper soil fertility to ensure healthy plant growth and abundant fruit production.

rose-3703471_1280

Watering Tips for Healthy Rose Plant

How to Water Rose Plant

Watering rose plants does not demand any extraordinary habits, but it does require attention to your plants. Many gardeners frequently make mistakes when watering their rose plants, which can negatively impact their health.

rose flowers plant

Some may overwater, while others may underwater, causing damage to the overall well-being of the plant. In this article, we will address this issue and provide guidance on how to properly water rose plants.

Watering Tips for Healthy Rose Plant

1. Deep, Infrequent Watering:

watering to rose plant

Roses benefit from deep watering rather than frequent shallow watering.

  • Aim to water deeply, ensuring the soil is moist but not waterlogged. This encourages robust root growth and resilience to drought conditions.

2. Regular Monitoring:
Check your roses regularly, especially during hot weather, to ensure they receive adequate water.

  • Adjust watering frequency based on weather conditions and soil moisture levels.

Must read:

How to Care Rose Plant

3. Signs of Watering Needs:
Monitor your rose plants for signs of insufficient water, such as wilting leaves, drooping stems, and dry soil.

  • Adjust watering accordingly to prevent stress and maintain plant health.

Important point to note:

Always plant roses in well-drained soil

soil mixture
Well drained soil mixture

Plant roses in well-drained soil to prevent waterlogging, which can lead to root rot and other issues.

  • Soil that allows water to move through easily promotes healthy root development and prevents water-related problems.

    Must read:

    Best Soil Mixture for Rose Plant

4. Morning Watering Preferred:

watering rose plant
watering rose plant

While both morning and evening are suitable for watering, morning watering is generally recommended.

  • It allows foliage to dry quickly, reducing the risk of fungal diseases. However, if morning watering is not feasible, evening watering is also acceptable, provided foliage has ample time to dry before nightfall.

5. Water Temperature:

Use normal temperature water for watering rose plants.

  • Avoid hot or chilled water, as extremes in temperature can stress the plants, especially during hot or cold weather.
  • Opting for water at room temperature ensures that your rose plants receive hydration without any adverse effects.

6. Avoid Overwatering:

Avoid overwatering
overwatering in rose plant

Overwatering can harm rose plants, resulting in root rot and other problems related to excessive moisture.

  • To avoid waterlogging, let the top layer of soil dry out between each watering session.

Query of a user –

Can I water my rose plants multiple times a day during summer?

Answer: In the summer, it’s tempting to water your rose plants often because of the heat. But be careful not to overdo it, as this can lead to root rot.

  • While it is okay to water them two or three times a day in hot weather, make sure not to waterlog the soil or drown the roots. Keep an eye on the soil moisture and adjust your watering schedule to keep your plants healthy.

7. Benefits of Moist Soil

Moist soil of rose plant

Moist soil is essential for rose plants because it promotes healthy flowering.

  • When the soil is moist, it provides the necessary hydration for the plant to produce blooms.
  • Additionally, moist soil supports proper nutrient uptake, encourages robust root development, and helps regulate the plant’s temperature, all of which contribute to the overall health and vitality of the rose plant.

Query of a user –

“I could not water my rose plant for a week. It seems to be dried.” What to do now?

Solution: If you have not watered your rose plant for a week and it appears dried out, it is essential to take immediate action.

  • Water the plant thoroughly, ensuring that the soil remains moist but not waterlogged.
  • If necessary, prune any dried stems directly from the base of the stem.
  • Additionally, consider relocating the plant to a spot with semi-shade to help it recover.
  • With proper care, there is hope that the rose plant will revive and regain its health.

8. Regular Soil Checks:

Dry soil of rose plant

Conduct regular soil moisture checks, especially during warmer months or in dry climates, to ensure your rose plants receive adequate hydration.

In conclusion, proper watering is essential for the health and vitality of rose plants. By following these watering tips, you can cultivate robust, beautiful roses that flourish in your garden for years to come.

Happy Gardening!

weed removing

FAQS on Removing Weeds from Soil

Weeds are plants that grow in places where we don’t want them to, like gardens or fields. They compete with the plants we want to grow for things like nutrients, sunlight, and water.

In this post, we will address some of the frequent asked questions on removing weeds form soil. 

weeds removing

FAQS on Removing Weeds from Soil

1. Are all weeds harmful to soil health?

Ans: Not all weeds are harmful, but many can compete with cultivated plants for resources and hinder their growth.

2. What is the best time to remove weeds from soil?

Ans: Weeds should be removed as soon as they are detected to prevent them from establishing and spreading.

3. Can weeds be beneficial in any way?

Ans: Some weeds may have medicinal or ecological value, but in agricultural settings, they are generally considered detrimental.

4. How can I prevent weeds from returning after removal?

Ans: Implementing cultural practices such as mulching, crop rotation, and proper irrigation can help prevent weed reinfestation.

5. Are there any alternatives to chemical herbicides for weed control?

Ans: Yes, organic methods such as tilling the soil, hand weeding, mulching, and cover cropping offer effective alternatives to chemical herbicides.

Must read:

Benefits of Removing Weeds form the Soil

Thanks

Make Your Own Garden!

hard and root pruning

Can We Do Hard Pruning and Root Pruning Together?

Hard Pruning and Root Pruning of Plants

Introduction

Pruning is a crucial aspect of plant care, promoting healthy growth and maintaining aesthetic appeal. Among various pruning techniques, hard pruning and root pruning are commonly employed to revitalize plants and enhance their overall health. But can these two pruning methods be executed simultaneously? Let’s delve into the details.

What is Hard Pruning and Root Pruning?

Hard pruning involves the significant removal of plant material, often cutting back branches or stems to encourage new growth and rejuvenation.

On the other hand, Root pruning targets the plant’s root system, trimming or cutting roots to stimulate growth, improve nutrient uptake, and prevent root-bound conditions.

Can Hard Pruning and Root Pruning Be Performed Together?

Yes, hard pruning and root pruning can indeed be conducted simultaneously.

This is because, during root pruning, plants are typically removed from their pots, providing an opportune moment for repotting or soil replacement.

  • Experienced gardeners often undertake both pruning tasks simultaneously to streamline the process and minimize plant disturbance.

The Process of Hard Pruning

Hard Pruning


Hard pruning involves several steps to ensure the plant’s health and vitality.

  • Firstly, assess the plant’s overall condition and identify areas requiring pruning.
  • Use sharp, clean tools to make precise cuts, removing dead or diseased branches, as well as any overgrown or unwanted foliage.
  • It is crucial to prune strategically, considering the plant’s growth habits and desired shape.

The Process of Root Pruning

root pruning


Root pruning, while equally important, focuses on the plant’s underground structure.

  • Begin by gently removing the plant from its container, taking care not to damage the roots.
  • Trim away any circling or congested roots, aiming to encourage outward growth and prevent root binding.
  • After root pruning, repot the plant in fresh, well-draining soil, ensuring proper anchorage and support.

Best Time for Pruning

The timing of pruning plays a significant role in its effectiveness. The early spring season is often considered the optimal time for both hard pruning and root pruning.

  • During this time, plants are typically dormant or just beginning to emerge from dormancy, making it an ideal period to prune without causing excessive stress or harm.
  • This timing allows plants to recover and regrow vigorously during the growing season ahead.

Important note:

Hard pruning is typically best done in the spring season when plants are actively growing and can recover more easily from the pruning stress.

On the other hand, root pruning can technically be done in any season.

  • However, it is generally recommended to perform root pruning during the dormant season or early spring for most plants. This timing minimizes stress on the plant and promotes successful recovery.

Must read:

All About Hard Pruning of Plants

Benefits of Simultaneous Pruning

Combining hard pruning and root pruning offers several advantages, including:

1. Minimizing plant stress by completing multiple tasks in one session.

2. Promoting balanced growth above and below the soil surface.

3. Enhancing overall plant health and vigor over time.

Considerations for Different Plant Types

Perennial plants may require both hard pruning and root pruning to prevent overcrowding and maintain healthy root systems.

Tools Needed for Pruning

Ensure you have the right tools for the job, including:

  • Sharp pruning shears for clean cuts.
  • Root pruning shears or a sharp knife for root trimming.
  • Potting soil or compost for repotting, if necessary.

Signs Your Plant Needs Pruning

It is essential to recognize when your plant requires pruning intervention. Signs that pruning may be necessary include:

  • Dead or diseased branches.
  • Excessive foliage blocking sunlight or airflow.
  • Stunted growth or poor flowering/fruiting.

Aftercare Following Pruning

After completing pruning activities, provide appropriate aftercare to support plant recovery and growth:

1. Water the plant thoroughly to reduce transplant shock and promote root establishment.

2. Apply a balanced fertilizer to replenish nutrients and encourage new growth.

3. Monitor the plant regularly for signs of stress or disease, addressing any issues promptly.

Conclusion

In conclusion, hard pruning and root pruning can indeed be performed together, offering an efficient way to promote plant health and vitality. By following proper techniques and precautions, gardeners can achieve successful pruning outcomes and enjoy flourishing, well-maintained plants throughout the growing season.

Make Your Own Garden!

Leaf Curl in Tomato Plant – How to Treat Leaf Curl Disease?

Leaf curl is a common disease often observed in tomato plants. It makes the leaves twist and become deformed, which can reduce the yield of tomatoes. This disease can be very harmful to plants and completely stop the production of fruit – especially if the plants become infected when they are young. It is important to deal with this problem quickly to stop it from spreading.

leaf curl in tomato plant

Many gardeners are concerned about how to overcome this disease. In this article, we will look at good ways to treat leaf curl disease. We will focus on natural remedies and things you can do to stop it from happening again, so your tomato plants stay healthy and give you lots of tomatoes.

Identifying Leaf Curl Disease Symptoms

(i) Early Signs

  • Early signs of leaf curl disease include slight curling or rolling of the leaves, along with discoloration and stunted growth.
  • These symptoms may initially go unnoticed but should be monitored closely to prevent the disease from progressing.

(ii) Advanced Symptoms

  • As the disease progresses, the leaves may become severely curled, brittle, and discolored. The plant may also exhibit signs of wilting and reduced fruit production, indicating a more advanced stage of infection.

Causes of Leaf Curl Disease

leaf curl tomato


1. Lack of Nutrients 

Nutrient deficiencies can also cause leaf curl disease in tomato plants.

  • When tomato plants lack essential nutrients, such as nitrogen, potassium, or magnesium, they may exhibit symptoms like leaf curling.

2. Pathogens

  • Pathogens such as viruses and bacteria can also cause leaf curl disease in tomato plants.
  • These pathogens can be introduced through contaminated soil, infected plant material, or insect vectors.
  • Implementing proper sanitation practices and using disease-resistant tomato varieties can help mitigate the risk of infection.

Importance of Addressing Leaf Curl Disease Early

Early intervention is crucial in treating leaf curl disease and preventing its spread to healthy plants. By identifying and addressing the disease at its early stages, you can minimize damage and preserve the overall health of your tomato crop.

Natural Methods to Treat Leaf Curl Disease

(i) Early Intervention Techniques

Addressing leaf curl disease early involves closely monitoring your plants for symptoms and taking immediate action upon detection.

  • Inspect your tomato plants regularly, and promptly remove any affected leaves or plant parts to prevent the spread of infection.

(ii) Micronutrient Application

Ensuring proper nutrient balance is essential for combating leaf curl disease.

  • Administering micronutrients such as zinc, magnesium, and iron can help strengthen the plant’s immune system and promote healthy leaf development.
  • Consider incorporating organic fertilizers or foliar sprays rich in micronutrients into your regular feeding regimen.

(iii) Pruning Affected Parts

Pruning of affected leaf curl part

Pruning is an effective method for controlling the spread of leaf curl disease within your tomato plants.

  • Remove any visibly infected leaves or branches using sterilized pruning shears, and dispose of the removed plant material properly to prevent recontamination.

(iv) Adding Neem Cake Powder in the Soil Mix

neem cake powder
Adding neem cake powder

Adding Neem cake powder to the soil mix is an effective method for preventing leaf curl disease in plants.

  • Neem cake powder has anti-fungal, anti-bacterial, and anti-inflammatory properties, which help in controlling diseases like leaf curl.
  • When incorporated into the soil mix, neem cake gradually releases beneficial nutrients and bioactive substances, promoting healthier root development and overall plant vigor.

(v) Neem Oil Spray

neem oil spray
neem oil spray

Using neem oil spray is an effective method to slow down the progression of leaf curl disease in plants.

  • Neem oil contains natural compounds that have anti-fungal and anti-bacterial properties, which help to combat the pathogens responsible for leaf curl.
  • To utilize neem oil effectively, spray the solution onto the affected plants twice a week. Additionally, it is essential to monitor your plants regularly to assess their health and the effectiveness of the treatment.

(vi) Buttermilk Solution Treatment

Buttermilk solution has been found to be effective in treating leaf curl disease in tomato plants.

  • The lactic acid present in buttermilk helps suppress fungal and bacterial growth while promoting plant health and vigor.

How to Prepare Buttermilk Solution

To prepare a buttermilk solution, mix one-fourth of buttermilk with 1 liter of water in a spray bottle or garden sprayer. Shake the mixture well to ensure thorough blending.

Application of Buttermilk Solution

The application of buttermilk solution offers dual benefits for treating plant issues. 

1. Pour the solution into the soil around the base of the plant:

  • When poured into the soil around the base of the plant, it provides direct access to the root system, allowing the plant to absorb nutrients and beneficial compounds.

2. Spray the solution onto affected leaves:

  • Spraying the solution onto affected leaves ensures that the active ingredients come into direct contact with the affected areas, effectively combating diseases or pests.
  • Using a fine mist setting on your sprayer ensures even distribution of the solution, minimizing wastage and maximizing its effectiveness.

Incorporating both methods of application can enhance the overall health and resilience of your plants, promoting vigorous growth and improved resistance to stressors.

Frequency of Buttermilk Solution Treatment

Repeat the buttermilk solution treatment every two days for a total of 2-3 treatments, or until symptoms improve. Monitor your plants closely throughout the treatment process, and discontinue if any adverse effects occur.

Other Preventive Measures

In addition to treatment, implementing preventative measures can help reduce the risk of leaf curl disease in your tomato plants.

Maintain proper spacing between plants to promote airflow, and avoid overhead watering to minimize moisture accumulation on the leaves.

  • Practice crop rotation and soil sterilization to prevent the buildup of pathogens in the soil.

Conclusion

Treating leaf curl disease in tomato plants requires a proactive approach and a combination of natural remedies and preventative measures. By addressing the disease early, administering micronutrients, pruning affected parts, and utilizing buttermilk solution treatment, you can effectively manage leaf curl disease and safeguard the health of your tomato crop.

tomatoes

How to Grow Tomatoes at Home from Seeds in Pot: Complete Guide

Tomatoes are highly demanded vegetables that many gardeners want to grow at home in their terrace or balcony gardens. While some are experienced gardeners who grow tomatoes every year but beginners often make mistakes that hinder tomato growth.

They commit following mistakes which are mentioned below:

1. Using small pots/grow bags.

2. Choosing inferior seeds from nurseries or saving seeds from low-quality tomatoes and not adequately fertilizing with the necessary heavy fertilizers.

3. Additionally, difficulties may arise in treating diseases such as leaf miners or mildew.

4. Challenges also arise with issues like sucker removal and pruning.

Despite being common, these problems are often overlooked, hindering tomato growth and productivity.

Let’s delve into both the typical and less typical characteristics of tomatoes to consider before starting their cultivation.

1. Tomato Plant Lifespan:

tomatoes plant

A tomato plant typically completes its life cycle within a single period, lasting around 5-6 months.

  • During this time, the plant will go through flowering, produce tomatoes, and eventually wither after the harvest.
  • It does not persist beyond this single growing season.

2. Growing Season:

tomato-7676653_1280

Tomatoes can be successfully seeded and grown during the spring (starting in February), monsoon (from mid-July onwards), and autumn (late September to mid-October) seasons.

  • However, cultivating tomatoes in summer can be challenging as they have a tendency to ripen prematurely. This results in small, immature fruits that may begin to turn red before reaching their full size.
  • Unfortunately, these prematurely ripened tomatoes often end up rotting during the hot summer months.

3. Process of Growing Tomatoes –  

Seedling tray
Seedling tray

1. Seedling Tray Preparation:

  • Use seedling trays to grow seeds and cover the bottom hole with the newspaper.
  • Fill sections with soil mixture and wet thoroughly with a spray bottle, adding a layer of wet coco peat on top.

2. Seed placing & Selection:

  • Place seeds on soil surface and again cover them with the same coco peat .
  • Prefer hybrid tomato seeds over cherry tomato seeds.

3. Use of Fertilizer:

  •  Use Onion peel liquid fertilizer once seeds start germinating, avoiding heavy fertilizers like NPK, Urea, or DAP because these are heavy fertilizer’s and seedling might die at this stage due to these heavy fertilizer’s. 

4. Mild sunlight exposure:

  • After 2-3 leaves appear, move trays to a location with mild sunlight exposure for 1-1.5 hours.

5. Transplant seedlings into a larger pot:

  • After about a month once the seedlings have strengthened transplant seedlings into larger pots, ensuring delicate roots remain protected.
  • Water seedlings immediately after transplantation. 
  • It is important to note, do the shifting in evening only. 

6. Monitoring seedlings health:

  • Over the next few days, monitor the health of the tomato seedlings closely, noting which ones are thriving and which ones are showing signs of stress.

7. Application of Peanut Cake Fertilizer:

  • Apply peanut cake fertilizer around 15 days after transplanting for increased growth.

8. Pinching 

  • Start doing pinching about 10-12 days after fertilization to encourage new stem growth, repeating every 8-10 days until small tomatoes appear.

4. Basic Requirements: 

1. Sunlight Requirement:

  • Tomato seedlings thrive best with a minimum of 5-6 hours of sunlight daily.

2. Ideal Grow Bag Size:

  • For optimal growth, choose a 12-inch by 12-inch grow bag for tomato plants, avoiding smaller or larger sizes.

3. Uniform Soil Mix:

  • Consistently use the same soil mixture for seedling trays, pots during transplantation, and in grow bags for tomato cultivation.

5. How to shift Plants into Grow Bags?

There are two methods for transplanting the plants.

1. First, fill the grow bags with the prepared soil mixture and water them properly to settle the soil and maintain moisture levels.

  • Carefully remove the plant from its pot and gently place it inside the grow bag. After planting, avoid overwatering; only provide enough water to moisten the roots.

2. Secondly, fill the grow bag with soil and place the plant without pre-watering.

  • After planting, water the plant generously to ensure ample moisture reaches the roots and the bottom soil gets properly wet.

Important note:

  • Each grow bag should accommodate only one plant.
  • Prune the bottom leaves of the plant near the soil to prevent contact with the ground, which can attract insects.
  • Additionally, insert support sticks to prevent the plant from leaning in one direction.
  • The next step should be to enhance the plant’s growth by making it strong, bushy, and dense.

6. Watering Techniques

(i) Normal Watering Routine:

  • Water the plant when the top layer of the soil is dry, avoiding overwatering to prevent fungal attacks.

(ii) Fruiting Stage:

  • Keep the soil consistently moist once tomatoes appear.
  • Water the plant when the soil is slightly dry but still retains moisture.
  • Avoid both overwatering and letting the soil dry out completely.

7. Removing Unwanted Byproducts:

(i) Weed Removal:

  • Remove surrounding weeds before watering to preserve nutrients for tomato growth.

(ii) Bud Removal:

  • Remove small buds along stems to prevent energy diversion from the plant and signal the end of its life cycle.

8. Fertilizer Cycle:

1. Early Stage:

Administer liquid fertilizer every 20 days until small tomatoes appear. Recommended options include

  • Vermicompost Tea,
  • Cow Dung Compost Tea,
  • Kitchen Compost Tea,
  • Groundnut Cake Fertilizer, and
  • Neem Cake Fertilizer.

Note:

  • Avoid Groundnut Cake and Mustard Cake Fertilizers in hot, humid summers, preferring them during the rainy season or winter.

2. Fruiting Stage:

Increase fertilizer dosage during flowering and fruiting, focusing on micronutrients.

  • Apply seaweed spray once tomatoes appear.
  • Adjust frequency to every 15 days, using Seaweed Liquid, Onion Peel Liquid, and Banana Peel Liquid in rotation.

Follow the schedule:

  • Groundnut Cake Liquid Fertilizer (1st of each month),
  • Seaweed Liquid Fertilizer (15th of the same month),
  • Cow Dung Compost Tea (30th of the same month),
  • Subsequently, after 14 or 15 days, switch to Onion Peel Fertilizer. 

Continuing to rotate with all other fertilizers to ensure the plant receives all necessary nutrients and energy.

Note:

  • Consistently remove bottom leaves, weeds, and stems to maintain soil visibility and accessibility.
  • Regularly remove yellowing and blackening leaves to promote plant health.
  • During the fruiting stage, eliminate all suckers, small buds located between stems, to prevent energy diversion and promote overall plant growth.

Common Issues and Solutions:

1. Leaf Miners:

leaf miner on tomato leaves
  • White lines on leaves signal insect infestation, damaging the plant. Remove affected leaves and apply a mixture of water-soluble neem oil and garlic water for 3-4 days to stop the spread and aid recovery.

2. Black Flies:

  • Tiny black flies trapped on branches can be eliminated by spraying with neem oil solution.

3. Leaf Curl:

Leaf curl in tomato

  • Address early to avoid chemical intervention.
  • Ensure timely administration of fertilizers, especially micronutrients.
  • Remove affected plant parts.
  • Dilute buttermilk with water and spray onto the plant twice, with a 2-day interval, for a total of 2-3 treatments.

5. Split Tomatoes:

  • Remove split tomatoes and spray with diluted raw milk.

6. Blackening Tomatoes:

  • Provide ample water and micronutrients with seaweed-based fertilizers.

7. Worm Infestation:

  • Treat with neem oil spray.

8. Tomato Ripening:

  • Use mustard cake fertilizer to aid ripening process.

Conclusion:

  • By following these guidelines, you can successfully grow tomatoes at home.

Enjoy the satisfaction of homegrown produce!

Make Your Own Garden!

weed removing

Benefits of Removing Weeds from Soil

Weeds are like annoying guests in our gardens and fields. They mess up the soil and stop our plants from growing well. It is super important to kick them out so our soil stays healthy and our plants can thrive.

Before we talk about why it’s important to get rid of weeds from soil, let’s first understand

  • what weeds are and
  • why keeping soil healthy is super important in gardening.

What are Weeds?

The definition of a weed is generally understood as unwanted plants that grow without being cultivated and can harm nearby plants, thus they are termed as weeds.

  • They absorb nutrients, sunlight, and water from the soil, which hampers the growth of main plants.

Why keeping soil healthy is super important in gardening

Maintaining soil health is essential for successful gardening, as it directly impacts plant growth, productivity, and resilience to environmental stresses.

soil quality

Negative Effects of Weeds on Soil health

Weeds can have several detrimental effects on soil health:

1. Suck nutrients of soil

Weeds compete with desirable plants for essential nutrients present in the soil, leading to stunted growth and reduced crop yield.

2. Block sunlight

The dense foliage of weeds can shade out crops, reducing the amount of sunlight available for photosynthesis and inhibiting their growth.

3. Impact on Soil Moisture

Weeds can extract large amounts of water from the soil, leaving less moisture available for cultivated plants and leading to drought stress.

Benefits of Removing Weeds from Soil

Removing weeds from soil offers numerous benefits:

1. It improves plant growth

By removing weeds from the soil, it improves plant growth by reducing competition for nutrients, sunlight, and water, allowing cultivated plants to thrive and produce higher yields.

plants soil

2. Prevention of Pest and Disease Spread

Weeds can harbor pests and diseases that can spread to nearby plants.

  • Removing weeds reduces the risk of infestations and infections.

3. Enhanced Soil Structure

Soil mixture

Weeds with deep taproots can break up compacted soil, improving aeration and water infiltration.

  • Removing weeds promotes better soil structure and drainage.

Methods of Weed Removal

Various methods can be implemented to remove weeds from soil:

1. Tilling of the Soil

weed removal

Tilling the soil regularly helps in removing weeds from the soil.

  • Tilling the soil regularly is an effective method for weed control as it disrupts the growth of weeds by uprooting them from the soil.
  • This process not only physically removes existing weeds but also disturbs their seeds, preventing them from germinating and further infesting the area.

2. Hand Weeding

weed removing

Manual removal, like hand weeding, involves physically pulling or uprooting weeds from the soil by hand or using hand tools.

  • Manual removal allows for precise targeting of weeds, ensuring that only unwanted plants are removed without harming desired vegetation. This method is particularly useful in gardens or fields with mixed plantings where selective weed control is necessary.

3. Mulching

Mulching with organic materials like compost or shredded leaves not only suppress weed growth but also improve soil fertility and structure as they decompose.

Preventing Weed Growth

Preventing weeds from establishing in the first place is key to maintaining weed-free soil:

1. Regular Monitoring

Regularly inspecting the garden or field for weeds allows for early detection and intervention before weed populations become established.

2. Proper Watering and Fertilization

Maintaining optimal soil moisture and nutrient levels for cultivated plants can help them outcompete weeds and reduce weed pressure.

Conclusion

In conclusion, the importance of removing weeds from soil cannot be overstated.

  • Weeds compete with desirable plants for resources, hinder crop growth, and degrade soil health. Employing effective weed control methods, whether through manual labor and organic practices, is essential for maintaining soil fertility, promoting sustainable agriculture, and ensuring food security.

Thanks

Make Your Garden!

jasmine plant

How to Grow and Care Jasmine Plant at Home

Jasmine, known by various names such as Jai, Jui, Chameli, Sayali, Kunda, Mallika, or Mogra, is an alluring and aromatic flowering plant that comes in different varieties, including single petal, double petal, and plants with round or thin leaves.

Jasmine (mogra)

The lush greenery of Jasmine (Mogra) not only enhances the beauty of the garden but also contributes to increased oxygen levels in the home. With both spiritual and medicinal significance, this versatile plant plays a vital role in various aspects of daily life.

The exquisite pearl-white flowers of Jasmine are commonly used to create appealing hair decorations known as Gajras.

jasmine gajra

Moreover, these ambrosial flowers find applications in the manufacturing of perfumes, scented waters, aroma sticks, room fresheners, hair oil, and various cosmetic products.

While caring for this plant may seem a bit different due to its unique qualities, it is surprisingly easy and simple to maintain.

It is important to note that each plant has distinct behaviors and needs, and Jasmine (Mogra) is no exception. Here are some key facts that can guide you in successfully growing Jasmine (Mogra) at home:

How to Grow and Care Jasmine Plant at Home

1. Best Season for Jasmine (Mogra) plant

Jasmine, a hardy and perennial summer plant, blooms continuously in regions where the warmth of the sun prevails.

  • Jasmine plant may slow down during the winter season but can be revitalized through hard pruning in the spring season.

jasmine (mogra)

While new or immature plants might face stress in extreme winters and scorching summers, old and mature plants tend to bloom well even in winter. With proper care, this plant can bloom heartily for years in every season.

2. Pot Size & type for Jasmine plant

For Jasmine, a 12-inch pot is ideal, although an 8 or 10-inch pot can also be used with caution to avoid root binding.

jasmine pot
jasmine in 8 inch pot
  • Beginners may prefer clay pots, while experienced gardeners can choose any type.

clay pots

Jasmine can be grown as shrubs or vines.

  • For vine growth, provide supports for the vine to climb.
  • For shrubs, maintain a normal plant shape by pruning extra branches.

3. Soil Mixture for Jasmine plant

jasmine soil mixture

Ensure that the soil for the Jasmine (Mogra) plant is not too tight. Follow the ingredient ratios below for a well-balanced soil mixture:

  • Normal soil – Use garden or local soil as the base.
  • Compost (slightly more than half the quantity of soil) – To increase the organic matter in the soil.
  • Construction Sand (half the quantity of compost) – To improve the drainage system in the soil.
  • Coco peat (same quantity as sand) – To retain moisture in the soil.
  • Mustard Cake Powder (a handful) – To improve soil structure, enhancing microbial activity, and promoting healthy root development in plants. 
  • Neem Cake Powder (a handful) – For pest prevention in the soil.
  • Optional: Fungicide or Cinnamon powder – To prevent fungal attacks in the soil.

Soil mixture

The increased quantity of compost, sand, and coco peat accommodates the plant’s year-round blooming and higher nutrient requirements. Blend all the ingredients in a container to prepare the mixture.

4. Location of the Jasmine plant

Jasmine (Mogra) plant thrives outdoors and requires sunlight and air.

  • Avoid exposing the plant to scorching heat; instead, place it in early morning or evening sunlight.
  • In summer, protect the plant from intense sunlight (12 noon to 4 pm) by using a green net or positioning it behind other pots.
  • A minimum of 3 hours of sunlight is essential but should not be too strong.

5. Watering tips to Jasmine plant

watering tips to jasmine plant

Maintain soil moisture by watering before it dries out. Water the plant in intervals until water drains from the bottom hole of the pot.

6. Pruning of Jasmine plant

Pruning is crucial for Jasmine (Mogra) plant, and the process may vary based on the plant’s condition and the current season.

pruning of jasmine plant

  • After winter, hard pruning is needed to encourage flower growth.

jasmine hard pruning

  • Buds usually form at the tips of branches; remove branches with blossomed buds or flowers to stimulate new growth.
  • Weekly pruning is recommended for abundant flowers.
  • Regular pruning maintains plant density and shape, allowing careful monitoring.

This was all about “How to Grow and Care Jasmine plant at home”. Hope you liked this article. 

Happy Gardening!

flowers

Best Permanent Flowers to Grow at Home in Pots

Today, we will explore some of the finest perennial flowers ideal for cultivating in home pots. Not only do these plants enhance the beauty of our living spaces, but they also impart a touch of elegance to their surroundings.

With proper care and maintenance, these plants can endure for extended periods. Let’s delve into a selection of robust flowering species that are essential for any home garden:

  • Perennials: Flourishing for years once established.
  • Aromatic Blooms: Offering delightful fragrances.
  • Medicinal Properties: Boasting health benefits.
  • Pollinator Attraction: Drawing beneficial insects.
  • Adding Beauty, Color, and Vitality: Elevating the ambiance of your surroundings.

Here is a list of super hardy plants that effortlessly elevate your garden to a next level status with minimal care and attention.

  • Hibiscus
  • Portulaca
  • Vinca (Sadabahar)
  • Bougainvillea
  • Jasmine (Mogra)
  • Clitoria (Aprajita)
  • Night Jasmine
  • Chrysanthemum (Guldaudi)
  • Rose

1. Hibiscus

Hibiscus in pot

Hibiscus is commonly grown outdoors and is often associated with the warmth of summer. It holds symbolic significance across various cultures, representing luck and auspiciousness.

Medicinal value:

  • Its flowers are prized for their medicinal properties, often dried for use in hair oil production.

Sunlight:

  • Hibiscus requires ample sunlight, at least 5-6 hours daily.

Care Tips:

  • Overwatering may hinder flowering and cause yellowing of leaves, while underwatering can also result in yellow leaves, hence a balanced watering approach is essential.

Attract pollinators

  • They attract pollinators such as birds, butterflies, and honeybees, contributing to the biodiversity of your surroundings.

Resilience:

  • Despite challenges, hibiscus plants are resilient, thriving for years with proper care.

Must read:

How to Grow & Care Hibiscus Plant

2. Portulaca

Portulaca

Portulaca, also known as “9 o’clock,” earns its nickname because it blooms around 8-9 o’clock in the morning and withers by evening. They are typically summer plants and are best obtained from nurseries during the summer months.

Appearance:

  • Portulaca plants have a grass-like appearance without stems or branches, adding to their beauty. 

Sunlight:

  • It thrives with at least 4-5 hours of sunlight and can endure extreme summer conditions. 

Care tips:

  • Portulaca has modest water needs and prefers watering in instalments, as it dislikes excessive moisture.

This plant is exceptionally hardy and requires minimal care, making it an excellent choice for any gardener.

3. Vinca 

Hybrid vinca

Vinca, also known as “Sada Bahar,” “Winka,” or Periwinkle, is a quintessential summer plant.  Desi varieties of Sada Bahar are available in nurseries year-round, while hybrid Vincas are typically found during winters. 

Medicinal value:

This plant also holds medicinal value, with its leaves being used in the manufacture of various medicines. 

Sunlight:

  • Provide at least 4-5 hours of sunlight daily by placing the plant in an open area. 

Care tips:

  • Watering should be done when the soil is dry, as Vinca is prone to fungus, overwatering and multiple exposure to rain water  should be avoided, limiting watering frequency. 

With its minimal care requirements and exquisite beauty, Vinca is a wonderful addition to any home garden.

Must read:

How to Grow & Care Vinca Plant

4. Bougainvillea

Bougainvillea is a remarkable and timeless flowering plant, renowned for producing an abundance of flowers that often outnumber its leaves. It is a outdoor summer plant that retains its blooms even in winter but  with reduced flowering.

Sunlight:

  • It thrives in maximum sunlight exposure, ideally receiving at least 6 hours of sunlight daily, although 8 to 10 hours is optimal for prolific flowering. 

Care tips:

  •  It requires minimal watering; only water when the soil is excessively dry. Regular pruning is essential to encourage flowering; otherwise, it may become a sprawling plant with only leaves and thorns. 

Bougainvillea can add a touch of elegance to any corner of your garden or balcony, enhancing its beauty and charm.

5. Jasmine (Mogra)

Jasmine flower

Jasmine is a fragrant plant with various medicinal and cosmetic uses, often employed in perfumery. Primarily a summer plant, it is commonly found in nurseries during the warmer months. 

Sunlight:

  • Jasmine thrives in good sunlight, preferably 3-4 hours a day, avoiding scorching conditions. 

Care tips:

  •  If the flowers lack fragrance, micronutrient-rich fertilizers like seaweed fertilizer, vermicompost tea, or onion peel liquid fertilizer can be applied.

 Considered auspicious and lucky, Jasmine is a revered plant known for creating a tranquil environment filled with peace and serenity.

Must read:

How to Grow & Care Jasmine Plant

6. Clitoria (Aprajita)

aprajita

Clitoria, also known as Aprajita, is a medicinal plant prized for its flowers, which are used to make tea and are appreciated by many. 

Sunlight:

  • It requires a minimum of 6 hours of sunlight daily; without direct sunlight exposure, it will produce leaves but not flowers. 

Care tips:

  • Water should be given when the soil is dry. 
  • When the flowers bloom, they give way to fruits, and once these fruits dry, seeds can be harvested from these fruits for planting in the spring, resulting in beautiful Clitoria climbers. 

This plant is easy to care for, requiring minimal fertilizers, pruning, and being less prone to pest attacks.

7. Night Jasmine (Parijat)

Night Jasmine, also known by numerous names such as Harshringar and Parijat holds significant value for religious ceremonies and is widely used in offerings to deities. 

Medicinal value:

  • It has various medicinal benefits. Its leaves concoction is particularly renowned for its ability to cure fever. 

Sunlight:

  • Adequate sunlight, ranging from 6 to 8 hours, is crucial for its growth. 

Blooming:

  • Blooming usually commences at the beginning of autumn. 

Care tips:

  • The soil should be soft, porous, and well-drained, as it cannot survive in clayey soil. 
  • Careful watering is essential for its well-being.

With its beauty, fragrance and cultural significance, Night Jasmine is indeed a plant that would enhance the ambiance of any home.

Must read:

How to Grow & Care Night Jasmine Plant

8. Chrysanthemum (Guldaudi)

chrysanthemum

Chrysanthemum, also known as Guldavari, is indeed a stunning plant with a wide array of colours and varieties.  It thrives as a winter plant, although it can survive for a year, its actual growth and flowering peak during the winter months.

Medicinal value:

  • This plant holds medicinal significance, making it an essential addition to any herbal garden. 

Sunlight:

  • Chrysanthemums require ample sunlight, ideally 4-5 hours a day, although they can tolerate more if available. 

Care tips:

  • During intense heat, it is advisable to provide shade or cover with a green net to prevent scorching.
  • However, the process of densifying the plant, such as repotting, pinching, and changing the soil, should ideally begin during the monsoon season to ensure optimal development.

With its vibrant blooms and cultural significance, Chrysanthemum is a delightful addition to any outdoor space.

Must read:

How to Grow & Care Chrysanthemum Plant

9. Rose

rose-3703471_1280

Roses, the epitome of beauty, indeed require regular care to flourish and they are available in two main categories: hybrid and native. 

  • Native roses are known for their aromatic fragrance and hardiness, typically found in red and white colours. 
  • On the other hand, hybrid roses come in numerous colours but often lack fragrance.

Medicinal value:

  • Rose petals have versatile uses, including making rose water, medicines, and gulkand, a sweet preserve. 

Sunlight:

  • Adequate sunlight is crucial for their growth, although they should be protected from extreme heat by providing shade.

Care tips:

  • During autumn, it is essential to ensure roses receive maximum sunlight to encourage flower production. 
  • The soil of rose plant should be moist but avoid overwatering.
  • As heavy feeders, roses require a consistent supply of nutrients and water. 

Must read:

How to Grow & Care Rose Plant

All of these nine plants can elevate the beauty of any garden to the next level and provide flowers for years to come. By incorporating these beautiful and hardy flowering plants into your garden, you can create a truly enchanting outdoor space.

Happy Gardening !

Make Your Own Garden!

Hard pruning of plant

Can we do Hard Pruning of all Plants?

One question that always arises in the mind of most gardeners is: Can we do Hard Pruning of all Plants?

The answer is No.

We cannot do hard pruning of all plants.

This technique is not suitable for all plants and should be approached with caution, as it can be stressful for the plant and may affect its growth and health if done improperly. However, when performed correctly, hard pruning can rejuvenate overgrown or neglected plants, promote vigorous growth, and improve overall plant health and appearance.

Which plants should be Hard Pruned?

Hard pruning of plant
Hard Pruning of Rose plant

When considering which plants to hard prune, it is important to select those that are capable of regenerating from severe pruning and have the potential to produce new growth from dormant buds or adventitious shoots.

Generally, hard pruning is most effective for perennial plants rather than annuals or biennials.

Perennial plants with typical stems and numerous branches are well-suited to hard pruning because they have the capacity to produce new growth from older wood.

What are Perennial plants?

night jasmine in new pot
Night Jasmine Plant (4 years old)

Perennial plants are plants that live for more than two years, unlike annuals, which complete their life cycle in just one year, or biennials, which live for two years.

  • Perennials have the ability to regrow from their roots year after year, often producing flowers and seeds repeatedly throughout their lifespan. These plants typically go through periods of dormancy during winter and then resume growth when conditions become favorable again.

Hard Pruning

Examples of some plants which are perennial:

Tulsi (Holy basil) plant, Curry plant, Hibiscus, Night Jasmine (Parijat), Clitoria (Aprajita), Bougainvillea, Rose plant, etc. 

Examples of some seasonal plants:

In contrast, seasonal plants such as annual flowers (Marigold, Pitunia, Dahlia, etc.) or vegetables (Bottle Gourd, Capsicum, Carrots, Beans, Tomato, Brinjal, etc.) do not require hard pruning as they complete their life cycle within a single growing season.

Tools and Equipment for Hard Pruning

pruning

When hard pruning plants, it is important to use sharp, clean pruning tools to make clean cuts and minimize the risk of disease transmission.

Timing of Pruning

Additionally, it is essential to consider the timing of pruning, as most hard pruning is best done in late winter or early spring before the plants break dormancy and begin actively growing again.

By selecting the right plants and timing the pruning correctly, gardeners can harness the benefits of hard pruning to rejuvenate and invigorate their landscape plants.

Happy Gardening!

Make Your Own Garden!