All posts by Neeraj

grow bags for gardening

Benefits of Using Grow Bags in Gardening

Benefits of Grow Bags in Gardening


If you are exploring container gardening and considering various types of pots such as cement, plastic, clay, or ceramic, it is also crucial to understand the concept of grow bags. 

grow bags for gardening

Grow bags offer a flexible and efficient solution to your gardening needs. But, are grow bags truly good for gardening? Let’s dive deep into this topic and discover the myriad benefits these unassuming containers offer.

What Are Grow Bags?


Grow bags are a type of container used for planting, typically made from breathable materials such as fabric. Grow bags typically come in a cylindrical shape with a solid base at the bottom, which provides stability and prevents them from rolling or tipping over.

grow bags

They are commonly made of HDPE (High-Density Polyethylene) plastic, which offers several advantages. Unlike traditional plastic pots, HDPE grow bags don’t absorb as much heat during hot weather, especially in the scorching months of May and June.

This helps maintain a cooler environment for plant roots, preventing overheating and potential damage. When selecting plastic grow bags, it is crucial to opt for those made from HDPE to ensure adequate insulation against external heat.

Additionally, another important factor to consider is the GSM (Grams per Square Meter) rating.

  • The higher the GSM, the sturdier the grow bag tends to be, ensuring its longevity and durability.
  • GSM values are typically indicated on each type of grow bag, whether it’s made of plastic, jute, or cloth, making it easier to choose the right one for your needs.

Unlike traditional pots, grow bags allow for superior aeration and drainage, which can significantly benefit plant health. They come in various sizes and materials, each suited to different types of plants and gardening setups.

Benefits of Using Grow Bags


Improved Root Health


grow bags for gardening


One of the standout benefits of grow bags is their impact on root health.

  • The breathable fabric allows for air pruning, where roots are naturally pruned by exposure to air.
  • This prevents root circling and encourages a more fibrous root system, enhancing nutrient uptake and overall plant vitality.

Better Aeration


The porous nature of grow bags ensures that the soil remains well-aerated.

  • This means oxygen can reach the roots more efficiently, promoting healthier and faster growth.

Enhanced Drainage


grow bag drainage

Overwatering is a common problem in traditional pots, leading to root rot and other issues.

  • Grow bags excel in drainage, preventing water from pooling at the bottom and ensuring a healthier root environment.

Portability and Versatility


Grow bags are lightweight and easy to move, making them perfect for gardeners who like to rearrange their plants or those who have limited space. Their flexibility also means they can be used in a variety of settings, from balconies to backyards.

Types of Grow Bags


Fabric Grow Bags


These are the most common and popular type of grow bags. Made from breathable fabric, they provide excellent aeration and drainage.

Plastic Grow Bags


plastic grow bags

Though less common, plastic grow bags are durable and can be a more affordable option. They typically have drainage holes to prevent waterlogging.

Biodegradable Grow Bags


For the eco-conscious gardener, biodegradable grow bags offer an environmentally friendly option. These bags decompose over time, enriching the soil as they break down.

Comparing Grow Bags to Traditional Pots


Durability:


Grow bags are made from tough materials, making them resistant to breaking.

  • Unlike clay or cement pots that can shatter or plastic pots that can crack, grow bags stay strong for years.

Low Maintenance:


With proper care, grow bags can last 4-5 years without tearing.

  • They do not need repainting like some pots and maintain their look over time. Just handle them gently to avoid damage.

Mobility:


Grow bags are easier to move around, making them ideal for urban gardens or spaces where flexibility is key.

Reusability:


Grow bags can be reused multiple times.

  • After a plant is done growing, simply empty, clean, and reuse the bag for another plant. This makes them a sustainable and cost-effective option.

Quality and Sizes:


Grow bags come in various materials like jute, plastic, and cloth, and they offer many sizes from small to large.

  • Special designs are available for specific crops, and their foldable nature makes storage easy.

Lightweight:


Grow bags are much lighter than traditional pots, making them ideal for rooftops and balconies.

  • They do not put extra strain on structures and are easy to move around.

Setting Up Your Grow Bag Garden


Selecting the Right Location


Place your grow bags in a location that receives adequate sunlight and has good air circulation.

Create holes for drainage


When using plastic grow bags, it is important to create holes for drainage.

  • However, avoid making holes at the very bottom. Instead, make holes around the bottom edge of the grow bags.
  • This prevents soil from spilling out and keeps the bags lightweight, avoiding the need for heavy materials to cover bottom holes.

To make the holes, use a lit incense stick. This method creates neat, symmetrical holes and reduces the risk of tearing the grow bags. Avoid using sharp tools, as they can damage the bags.

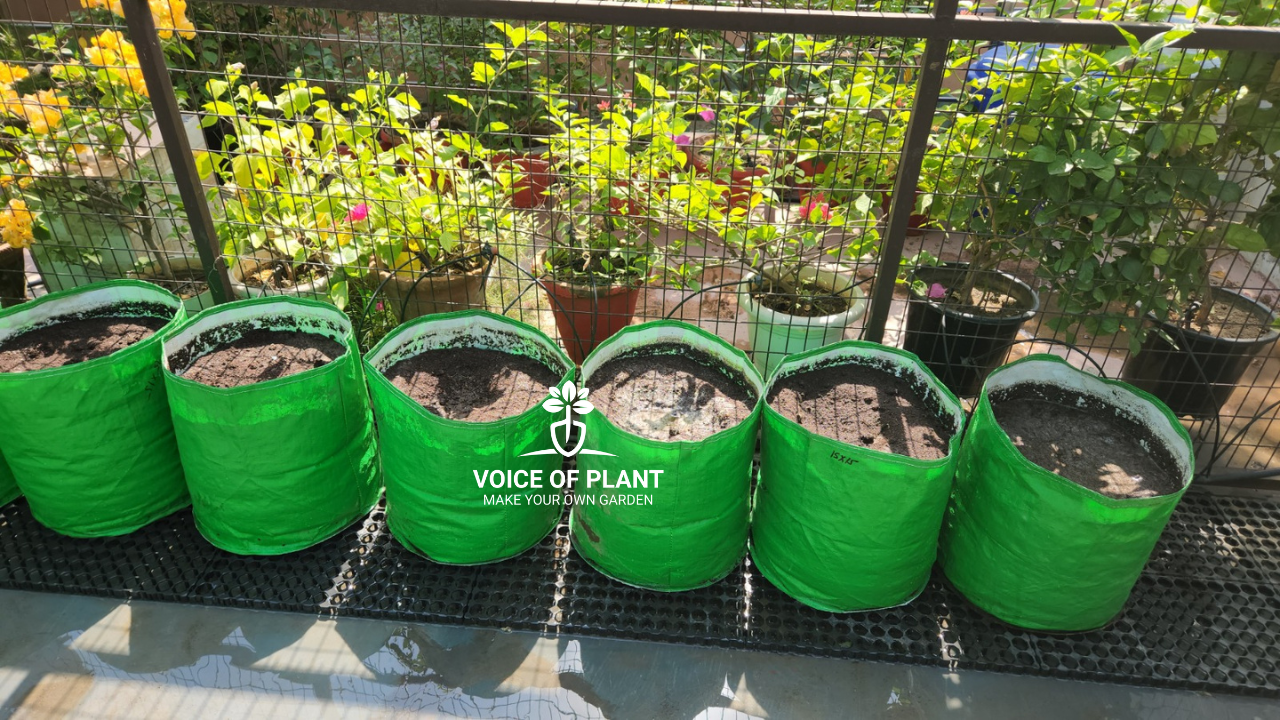
Preparing the Grow Bags


grow bags for radish

Fill the grow bags with high-quality soil mixed with compost.

  • Ensure the soil is loose and well-draining.

Use a mix of organic compost and potting soil. Supplement with slow-release fertilizers to provide essential nutrients over time.

Planting in Grow Bags


Which types of plants are suitable for Grow Bags


Tomato plant in grow bag

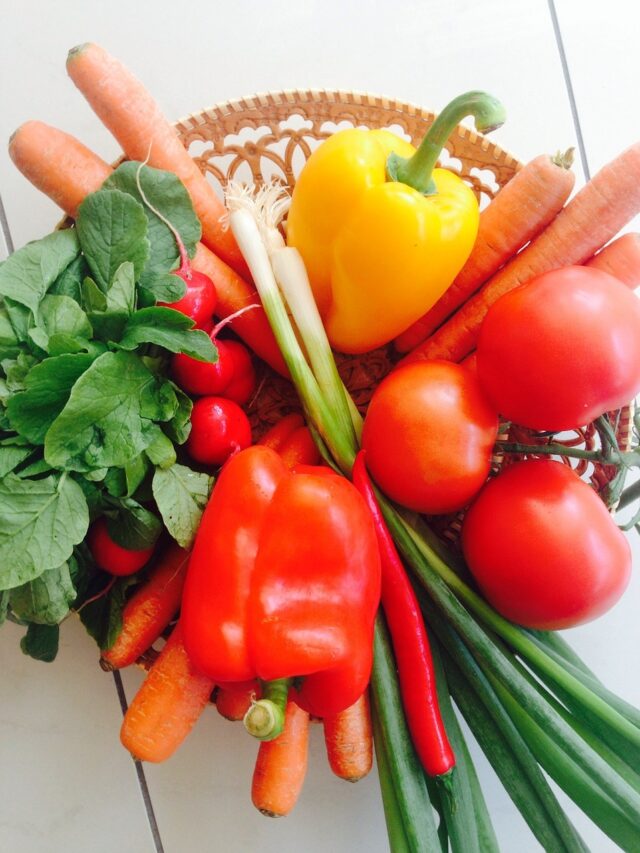
Vegetables such as: Tomatoes, Brinjal, Capsicum, Peppers, herbs, and root vegetables like carrots and potatoes thrive in grow bags.

  • Choose plants based on the size of your bags and your climate.

While traditional clay pots have their charm, grow bags offer a practical, durable, and flexible alternative for modern gardening.

Happy Gardening!

croton plant care

How to Care Croton Plant in Summer

Caring for your croton plant in summer is crucial to keep its vibrant foliage looking its best. Croton plant is known for their bold, colorful leaves, crotons add a tropical touch to any space. However, summer’s heat can be challenging for these beauties, so it is important to understand their needs to keep them healthy and thriving.

Croton plant
Croton plant

Understanding Croton Plant Needs


1. Sunlight requirements for Croton plant


Croton plants thrive in bright, indirect sunlight.

  • During the summer, it is crucial to provide them with adequate light without exposing them to direct sunlight.
  • However, remember that crotons cannot tolerate intense heat and sun. Intense afternoon sunlight can cause sunburn, dry out the soil, and dehydrate the plant.

If kept outdoors, ensure they are in a shaded area with dappled sunlight.

croton sunlight

If keeping Croton indoor –

Find a spot in your home that receives the most light throughout the day.

  • Avoid placing your croton in low-light conditions, as this will stunt its growth.

2. Watering tips for Croton plant


In the summer, Croton plant require consistent watering to maintain their vibrant foliage. The soil should be kept moist but not waterlogged.

  • Water the plant thoroughly until water drains out from the bottom of the pot.
  • However, they dislike sitting in water. Therefore, check the soil moisture with your finger before watering your croton.
  • Water your Croton only when the top half-inch of the soil has dried out.

Signs of Overwatering and Underwatering

  • Overwatering can lead to root rot, evident by yellowing leaves and a soggy base.
  • Underwatering, on the other hand, results in dry, crispy leaves and leaf drop.

Note:

  • Water early in the morning or late in the evening to minimize evaporation.
  • Use room-temperature water and avoid splashing the leaves to prevent fungal issues.

3. Ideal Soil Mix for Croton plant


An ideal soil mix for crotons should be loose, lightweight, and well-draining.

  • It is important to use soil that supports fast drainage, allowing excess water to flow out and preventing sogginess.
  • When preparing potting soil for your croton, include elements like coco peat or perlite, sand and compost to enhance drainage.

4. Fertilizer Routine


During the active growing season in summer, Croton plants benefit from regular fertilization.

  • Use a balanced, water-soluble fertilizer every two to four weeks.
  • Organic fertilizers such as vermicompost, cow dung liquid compost, seaweed fertilizer can also be beneficial.

5. Avoid giving heavy fertilizer during extreme summer


During the extreme summer months, it is crucial to avoid heavy fertilization of your Croton plants.

  • High temperatures can stress the plant, and applying too much fertilizer can further exacerbate this stress.

6. Pest Control


Summer can bring an influx of pests such as spider mites, aphids, and mealybugs.

  • Regularly inspect your Croton plant for any signs of pest infestations.
  • Use insecticidal soap or neem oil to treat affected plants.

Signs of Stress and How to Address Them


1. Leaf Drop


If your Croton plant is experiencing leaf drop, it could be due to inconsistent watering, low humidity, or temperature fluctuations.

  • Adjust your care routine by ensuring regular watering, increasing humidity, and stabilizing temperatures around the plant.

2. Leaf Curling


Leaf curling can be a sign of underwatering or too much direct sunlight.

  • Ensure the plant is getting adequate water and move it to a spot with bright, indirect light.

3. Yellowing Leaves


Yellowing leaves often indicate overwatering or poor drainage.

  • Check the soil moisture and drainage conditions and adjust watering practices accordingly.

Dealing with Summer Stress


1. Remove Yellow or Dead Leaves


Remove any dead or yellowing leaves to encourage new growth and improve air circulation. Prune leggy stems to promote a bushier appearance.

2. Leaf Care


To maintain the vibrant colors of Croton leaves, regularly clean the leaves with a damp cloth to remove dust and enhance photosynthesis.

  • Avoid using leaf shine products as they can clog pores and damage the leaves.

3. Hydration and Moisture


Apart from regular watering, ensure that the soil remains consistently moist but not soggy.

  • Using a mulch layer can help retain soil moisture and reduce water evaporation.

By following these detailed care instructions, you can ensure that your Croton plant remains healthy, vibrant, and thriving throughout the summer. Proper attention to watering, light, soil, and pest control will allow your Croton to flourish and bring a burst of color to your home or garden.

Happy Gardening!

Care plant in extreme summer

How to Care Plants in Summer

Plant Care Summer Tips


Plants, like all living beings, need appropriate care to survive the scorching weather. Generally, plants rooted in the ground handle heat better than those in containers, which can suffer significantly when temperatures rise above their comfort zone of 15-35℃, often reaching 41 – 43℃ or higher. 

zz plant leaves yellow

The health of plants can suffer significantly in extreme heat. They often dry up, their leaves turn yellow, the soil becomes parched, and the leaves can get scorched, leading to overall plant burn.

How to Care Plants in Summer


plant yellow leaves

Many gardeners struggle to save their plants because they lack the knowledge to properly care for them during intense heat. Some people fail to water correctly, while others apply too much fertilizer. Here are some common tips to help gardeners protect their plants in extreme heat:

1. Positioning of the Plant

2. Covering the Plants

3. Watering During Summers

4. Avoid Pruning in Summer

5. Avoid Repotting

6. Avoid giving heavy fertilizer

7. Water Spray

8. Soil Care

9. Mulching

10. Prevent Pest Attack

11. Avoid Growing New Plants

12. Monitoring plants

12 Essential Tips for Thriving Plants This Summer


Check essential care tips for plants in summer to ensure they thrive in the scorching heat.

1. Positioning of the Plant


Morning sunlight from 7 am – 10:30 am benefits plants, while the midday sun from 11 am-4 pm can be harsh.

(i) Move summer plants like Hibiscus, Tulsi (Holy basil), Shami, Aprajita (Clitoria), Night Jasmine (Parijat), Curry leaf plant, etc. to areas with morning sun.

plants in shade

(ii) Place winter plants like Rose, Marigold, Calendula, Chrysanthemum, etc. under green shades to catch evening light, and bring delicate plants indoors.

  • Arrange plants near walls, balconies, or corners to shield them from the harsh midday sun.

2. Covering the Plants


plants under green shade

Use a green net to cover balconies, terraces, or garden areas, which can be found at hardware stores.

  • If unavailable, use cloth, sarees, or dhoti-type fabrics as alternatives. These coverings not only protect plants but also help maintain home temperatures by blocking direct sunlight.

3. Watering During Summers


watering to plants

Regular watering is crucial during extreme summer. 

(i) Early Morning or Late Evening:

Water your plants early in the morning or late in the evening to minimize evaporation and allow the plants to absorb moisture.

(ii) Deep Watering:

Water deeply and infrequently to encourage deep root growth. Shallow watering can lead to shallow roots, making plants more vulnerable to heat.

Avoid Midday Watering:

Avoid watering during the hottest part of the day, as most water will evaporate before reaching the roots.

4. Avoid Pruning in Summer


Hard Pruning


Avoid unnecessary cutting, shaping, and pruning, which can lead to fungal infections.

Only cut to remove pests or yellow leaves, and deadhead flowers as needed.

rose flower pruning

Avoid planting cuttings, as they require humidity and favorable conditions not present in summer.

5. Avoid Repotting


repotting plant

Do not repot your plants in the middle of summer, especially during the hottest part of the day. It can stress them out.

Repotting in extreme heat can cause significant stress to the plants, making them more vulnerable to wilting and damage.

  • If repotting is necessary, try to do it during cooler parts of the day during late evening, to minimize the stress on your plants.

6. Avoid giving heavy Fertilizer


High temperatures slow down plant chemical reactions, so avoid heavy fertilizers like chemical urea, NPK, TAP, mustard cake, and groundnut cake.

liquid fertilizer

Use diluted liquid fertilizers like cow dung liquid fertilizer, vermicompost tea, banana peel liquid fertilizer, seaweed liquid fertilizer, kitchen compost tea, and onion peel liquid fertilizer once in a month.

7. Water Spray


Spray water on plants in the morning or evening to avoid the intense midday sun. This helps remove dust, cool the leaves, and increase humidity.

neem pesticide spray

  • Regular spraying also allows for monitoring plant health and identifying diseases. Aim to spray plants daily in summer, or at least once or twice a week.

8. Soil Care


(i) Well-Draining Soil:

Ensure your soil is well-draining to prevent waterlogging, which can be as harmful as drought.

soil mix 2

(ii) Organic Matter:

Add organic matter such as compost to improve soil structure and water-holding capacity.

9. Mulching


mulching soil

Apply a layer of mulch around the base of your plants to help retain moisture, regulate soil temperature, and reduce weed growth.

10. Preventing Pest Attacks


Summer can increase pest vulnerability. Use neem leaf solutions to spray plants, and for severe infestations, use organic plant protectors made from natural ingredients.

Regular applications can prevent and treat pests like aphids, mealybugs, and mites.


11. Avoid Growing New Plants in Summer


Avoid planting new seeds or buying new plants from nurseries during the peak heat of 40°C.

Seeds require milder weather for germination, and new plants may not thrive.

  • Wait until the rainy season to repot existing plants.

12. Regular Monitoring Maintaining Plant Health 


With proper care and attention, plants can thrive even in the scorching summer heat.

Regular watering, careful positioning, and protective measures can ensure your plants remain healthy and vibrant throughout the season.

Jade plant bushy

5 Best Tips to Make Jade Plant Bushy

5 Best Tips to Make Jade Plant Bushy


A jade plant (Crassula ovata) is a popular succulent admired for its thick, glossy leaves and resilience. Originating from South Africa, this charming plant is often considered a symbol of good luck and prosperity.


jade plant bushy

Many plant enthusiasts seek ways to make their jade plants bushy and robust, enhancing their aesthetic appeal and vitality. This guide will delve into effective strategies for cultivating a lush, bushy jade plant, ensuring it thrives in your home or garden.

Understanding the Jade Plant


The jade plant is known for its fleshy, oval-shaped leaves that store water. These plants can grow up to three feet tall and even taller in their natural habitat. Their thick, woody stems and branches give them a miniature tree-like appearance, making them a favorite for bonsai enthusiasts.

Benefits of Growing Jade Plants


Jade plants are not only attractive but also relatively easy to care for, making them suitable for both novice and experienced gardeners.

5 Best Tips to Make Jade Plant Bushy
Jade Plant Bushy

They are known for their air-purifying qualities, removing toxins from the environment. Additionally, their ability to store water makes them drought-resistant, reducing the frequency of watering needed.

5 Best Tips to Make Jade Plant Bushy


Effective Pruning Techniques for a Bushy Jade Plant


Actively pruning your jade plant is the best and most effective way to make it bushy. However, it is crucial to prune correctly to ensure optimal growth.

Jade pruning

Prune your jade plant right above the leaf scar or rings on the stem. This technique tricks the plant into growing two more branches from the cut portion, resulting in more leaves and a bushier appearance.

  • Avoid snipping more than 15-20% of the plant at a time and leave the branches you want to mature intact.

Bonus Tip:

  • If your jade plant has become leggy due to insufficient light, cut back the weak portions and place the plant in a bright spot. It will perk up soon.

Best Time to Prune


The ideal time to prune a jade plant is during the active growing season, typically in spring or early summer.

  • This allows the plant to recover and produce new growth more efficiently.

Optimal Positioning for Growth


Proper placement is key to a bushy jade plant. If the plant is kept in a dark area, the stems will stretch in search of sunlight, leading to leggy growth.

Jade plant outdoor sun


To encourage bushiness, place the plant where it receives direct bright sunlight for 5-6 hours a day. This amount of light will work wonders for its growth.

Bonus Tip:

  • Ensure your jade plant gets ample direct sunlight by placing it in the correct position.

Correct Watering Practices


For a bushier jade plant, it is essential to avoid growing it in moist soil. Overhead watering should also be avoided.  Water only when the top inch of soil feels dry to the touch.

watering jade plant

Bonus Tip: The most important thing is to keep the plant on the drier side rather than watering it frequently.

  • During the growing season (spring and summer), water the plant thoroughly but infrequently.
  • In the dormant period (fall and winter), reduce watering significantly.

Check here – Best Way to Water Jade Plant 

Planting Multiple Jade Plants Together


An easy and quick way to make your jade plant look bushier is to grow multiple plants in one pot. Planting 2-3 jade plants together will give the appearance of a bushier plant.

  • Alternatively, you can group 2-3 small pots together to create the impression of a larger, bushier jade plant.

Bonus Tip:

  • Grouping multiple jade plants together can enhance their bushy appearance.

Soil and Potting Needs


soil mix 2

Jade plant prefer well-draining soil, such as a succulent or cactus mix.

  • You can also create a suitable mix by combining regular potting soil with sand or perlite.

Bonus Tip:

  • Ensure the pot has drainage holes to prevent water from accumulating at the bottom, which can lead to root rot.

By following these tips, you can successfully cultivate a lush, bushy jade plant that will be a stunning addition to your indoor or outdoor garden.

Check here – How to make the Best Soil Mixture for Jade Plant

Fertilization Practices


Fertilize your jade plant during the growing season with a balanced, water-soluble fertilizer diluted to half strength. Feeding once a month is generally sufficient.

  • Avoid fertilizing during the dormant period to prevent nutrient buildup in the soil.

Dealing with Leggy Growth


Jade leggy

Leggy growth occurs when a jade plant does not receive enough light, causing it to stretch towards the light source.

  • To rectify this, ensure the plant gets adequate sunlight and prune back the leggy stems to encourage bushier growth.

Conclusion


Cultivating a bushy jade plant requires patience, proper care, and regular maintenance. By understanding the plant’s needs, implementing effective pruning techniques, and providing optimal growing conditions, you can enjoy a lush, vibrant jade plant that enhances your living space.

Whether you are a seasoned gardener or a novice, these tips will help you achieve a beautiful and healthy jade plant.


Follow our Social media channel:


1. Voice of Plant – YouTube Channel

2. Voice of Plant Facebook Page

3. Instagram Voice of Plant Channel


Happy Gardening!

How to Propagate Jade Plant from Cuttings

Propagation of Jade plant


Jade plants, known for their succulent leaves and resilience, can easily be propagated from cuttings of a mature plant. 

jade plant in blue pot

If you have a large Jade plant, you can propagate more Jade plants by taking cuttings from the mature plant.

How to Propagate Jade Plant from Cuttings


1. Select a Healthy Cutting:

Jade plant in clay pot
Healthy Jade plant in clay pot
    • Choose a thick-stemmed, healthy cutting from the parent plant. The cutting should have several leaves and be free from any signs of disease or damage.

2. Make a Clean Cut:

jade cutting

    • Using a sharp tool such as a blade, knife, or scissors, make a clean cut to remove the chosen cutting from the parent plant.

3. Prepare the Cutting:

    • Strip the leaves from the lower part of the cutting. This section will be buried in the soil and should be free of leaves to promote root development.

Planting Methods


Now, you can choose one of the two methods for planting the cutting:

1. Propagate Jade Plant from Cuttings in Coco peat

Jade plant cutting in coco peat

Coco peat is an excellent medium for propagating Jade plants due to its moisture retention and aeration properties.

(i) Prepare the Coco Peat:

Mix the coco peat with a small amount of fertilizer to provide nutrients for the cutting. Ensure the coco peat has a slight moisture content. If it’s dry, add water until it’s moist but not waterlogged.

(ii) Plant the Cutting:


Fill a pot with the prepared coco peat mixture. Gently plant your cutting into the coco peat, ensuring it is placed slightly deep in the pot.


(iii) Care for the Cutting:


Since the coco peat is already moist, avoid watering immediately. Place the pot in a location where it can receive direct sunlight. New leaves should start to appear within a few days.


2. Propagate Jade Plant from Cuttings in the Soil


jade plant cuttings in soil

Using soil from an existing potted plant can also be effective for propagating Jade plants.

(i) Prepare the Soil:

Use soil from a pot that already has a plant growing in it. This soil will have the necessary nutrients and a suitable structure for the cutting.


(ii) Plant the Cutting:

jade cutting in soil
jade cuttings in soil

Insert the cutting into the moisturized soil from another plant.

  • Ensure the soil is moist but not waterlogged to avoid overwatering.

General Care

jade cutting in small pot


1. Watering:


In both coco peat and soil, water the cutting only when the outer layer of the medium becomes dry. Overwatering can cause the stems to rot.

2. Root Development:


Roots will start to develop within approximately 45 days.

  • Once the roots are established, you can transfer the cuttings to larger pots.

Transferring Cuttings


When moving your propagated Jade plants to larger pots, prepare a fresh soil mixture.

  • Avoid using the soil from old plants to ensure the new plants have a nutrient-rich environment for optimal growth.

By following these steps, you can successfully propagate Jade plants and enjoy their beauty in multiple pots around your home or garden.

Organic liquid fertilizers

Top 6 Organic Liquid Fertilizers for Plants in (2024)

Plants, like humans, require regular nutrients for sustenance and survival. These vital nutrients are typically supplied in the form of fertilizers.

In this article, we will explore some organic liquid fertilizers capable of enhancing plant growth and prolonging the life of your beloved greens.

Top Organic Liquid Fertilizers for Plants


1. Cow Dung Liquid Fertilizer:


cow dung liquid fertilizer

Crafted from cow dung cakes, this fertilizer is rich in nutrients and easy to make. Dilute before applying to plants for comprehensive nourishment.

Benefits:

1. Serves as a comprehensive nutrient source for plants, rich in micronutrients alongside NPK.

2. Regular application over 2-3 months results in noticeable growth, vitality, and robustness of plants.

3. Naturally fortifies plants, ensuring sustained strength and vigorous growth.

4. Enhances soil quality, extending moisture retention and reducing water requirements post-application.

2. Neem Cake Tonic:

neem kernel

Made from neem cake, this tonic fortifies plants internally, protecting roots from pests and fungal attacks. It enhances soil quality and boosts plant immunity.

Benefits:

1. Fortifies plants internally, safeguarding roots against pest and fungal attacks.

2. Strengthens plant immunity, inhibiting insect, snail, or ant invasions.

3. Enhances soil quality, improving moisture retention and nutrient availability.

4. Acts as a natural pesticide and fungicide, promoting plant health and vitality.

Suitable for: It is suitable for all types of plants and promotes shiny, healthy leaves.

3. Banana Peel Liquid Fertilizer:


Banana Peel Liquid Fertilizer
Banana Peel Liquid Fertilizer Pic credit: Pinterest

Despite myths, banana peel fertilizer doesn’t attract ants. Rich in potassium and phosphorus, it promotes robust flowering and fruiting in plants.

Benefits:

1. Rich source of potassium and phosphorus, promoting robust flowering and fruiting in plants.

2. Enhances soil fertility and microbial activity, improving overall plant health.

3. Eco-friendly and sustainable way to recycle kitchen waste, reducing environmental impact.

4. Improves soil structure and moisture retention, reducing water requirements.

4. Onion Peel Liquid Fertilizer:


onion peel liquid fertilizer

Derived from dry onion peels, this fertilizer is effective for foliage plants, enhancing growth and leaf shine. Apply monthly for best results.

Benefits:

1. Enhances plant growth and leaf shine, promoting overall plant health.

2. Enriched with essential nutrients including sodium, magnesium, phosphorus, potassium, and more.

3. Suitable for foliage plants, encouraging robust growth and vitality.

4. Eco-friendly and cost-effective solution for plant nourishment.

5. Seaweed Liquid Fertilizer:

seaweed liquid fertilizer

Seaweed liquid fertilizer is made from extracting and processing seaweed, typically varieties such as kelp or algae.

  • Soaking or fermenting the seaweed in water to release nutrients and beneficial compounds.
  • Filtering or straining the liquid to produce a nutrient-rich fertilizer solution.

Benefits of Seaweed Liquid Fertilizer:

1. Seaweed liquid fertilizer contains a wide range of micronutrients, including but not limited to iron, zinc, manganese, copper, and boron.

2. Rich source of trace minerals, vitamins, and plant growth hormones essential for plant health and growth.

3. Enhances root development, leading to stronger and healthier plants.

4. Boosts plant immunity, making them more resistant to stress, diseases, and pests.

5. Improves soil structure and fertility, promoting microbial activity and nutrient uptake.

Best for:

  • All types of plants indoor, outdoor, vegetables and flowering plants.

6. Kitchen Compost Tea Liquid Fertilizer:


kitchen waste

Made from composted kitchen waste, this fertilizer is rich in nutrients and beneficial microorganisms. It improves soil health and enhances plant growth.

Benefits:

    • Provides a nutrient-rich solution for plant growth, promoting healthy foliage and robust root development.
    • Enhances soil structure and fertility, improving moisture retention and nutrient availability.
    • Contains beneficial microorganisms that support plant health and suppress soil-borne diseases.
    • Eco-friendly way to recycle kitchen waste and nourish your garden without chemical additives.

These magical tonics possess potent qualities, capable of elevating your plants to the next level, showcasing magnificent growth. Utilize them to breathe new life into your garden and enhance its vitality.

Application Tips:


liquid fertilizer tonic

1. Dilution:

seaweed liquid fertilizer

Always follow the manufacturer’s instructions for dilution rates to avoid over-fertilizing, which can harm your plants.

2. Frequency:

Most liquid fertilizers should be applied every 1-2 weeks during the growing season.

3. Application Method:

banana peel liquid fertilizer

Use a watering can or garden sprayer to apply the fertilizer to the base of the plants, ensuring even distribution.

Plant-Specific Needs:


all plants outdoor

Different plants have different nutrient requirements, so choose a fertilizer that matches your plants’ needs.

Happy Gardening!
Jade plant FAQs

FAQs on Jade Plant Care Tips

 Introduction to Jade Plant


The Jade plant is a popular succulent renowned for its attractive, fleshy leaves and easy care requirements. Native to South Africa, this resilient plant is a favorite among both novice and experienced gardeners due to its ability to thrive with minimal attention.

jade plant in blue pot

Jade plant are often associated with good luck and prosperity, making them a common choice for both homes and offices. With proper care, a Jade plant can live for many years, growing into a beautiful, tree-like structure that adds a touch of greenery and charm to any space.

Here, we aim to answer some of the most common frequently asked questions (FAQs) and provide you with a better understanding of how to care for your Jade Plant.

Frequently Asked Questions (FAQs) on Jade Plant


Q1. How often should I water my Jade plant?


Ans: Jade plants prefer to be kept on the dry side.

  • Water thoroughly when the soil is completely dry. 

Note:

  • Overwatering can harm your Jade plant, so it’s important to avoid it.

Also, read: Watering tips to Jade plant

2. What type of soil is best for Jade plants?


soil mix 2

Ans: Jade plants thrive in well-draining sandy soil.

  • Adding sand or perlite can improve drainage.

Also, read: Best Soil Mixture for Jade Plant

3. How much sunlight does a Jade plant need?


Ans: Jade plants need at least 4-6 hours of direct sunlight each day. Keep your Jade plant in a sunny spot.

Note:

  • Some people keep Jade plant indoors, which can impact plant overall growth.
  • Jade plant thrive best with adequate sunlight and proper care.

4. Why are the leaves of my Jade plant falling off?


Ans: Leaves may fall off due to overwatering, underwatering, or sudden changes in temperature or light. Ensure consistent care and proper watering practices.

5. Can I propagate my Jade plant?


jade cutting

Ans: Yes, Jade plants can be easily propagated from leaf or stem cuttings. Allow the cuttings to dry for a few days before planting them in soil.

6. How do I deal with pests on my Jade plant?


mealybugs in the rose plant

Ans: Mealybugs are a common pest.

  • Remove them with a cotton swab dipped in neem oil.
  • Regularly inspect your plant and keep it clean to prevent infestations.

7. What is the best temperature range for a Jade plant?


Ans: Jade plants prefer temperatures between 18-30°C during the day and slightly cooler at night. Protect them from frost and extreme heat.

8. How can I encourage my Jade plant to grow thicker stems?

Jade plant in pot

Ans: Ensure your Jade plant gets plenty of sunlight and avoid overwatering. Pruning the plant can also promote thicker, more robust growth.

9. Why are the leaves of my Jade plant turning yellow?

Ans: Yellowing leaves can be a sign of overwatering, poor drainage, or insufficient light. Adjust your care routine accordingly.

10. Can Jade plants be grown outdoors?

Jade plant pot

Ans: Yes, Jade plants can be grown outdoors in warm climates. Ensure they are placed in a sunny location and protected from extreme weather conditions.

Happy Gardening!

Onion peel fertilizer (1)

Why Onion Peel Fertilizer is best Organic Fertilizer for Plants?

Why Onion Peel Fertilizer is best Organic Fertilizer for Plants?


Onion peels, often discarded as kitchen waste, hold a hidden potential to boost plant growth and enhance soil fertility. The concept of utilizing onion peels as a natural fertilizer has gained traction among environmentally conscious gardeners and farmers.

Why Onion Peel Fertilizer is best Organic Fertilizer for Plants?

Benefits of Onion Peel Fertilizer for Plant Growth


This article delves into the benefits of onion peel fertilizer for various plants and its role in sustainable agriculture.

1. Nutrient-Rich Composition:


onion peel fertilizer

Onion peels are not just waste; they are a rich source of nutrients essential for plant growth.

They contain significant amounts of

  • potassium,
  • phosphorus,
  • calcium, and
  • nitrogen,
  • along with trace elements like magnesium and sulfur.

These nutrients are vital for the development of robust root systems, lush foliage, and vibrant blooms in plants.


2. Soil Enrichment and pH Regulation:


soil mixture 1

One of the primary benefits of using onion peel fertilizer is its ability to enrich the soil.

  • When incorporated into the soil, onion peels gradually decompose, releasing nutrients that improve soil fertility.
  • Additionally, onion peels have natural acidic properties, which can help regulate soil pH levels, making them suitable for plants that thrive in slightly acidic conditions, such as tomatoes, peppers, and strawberries.

3. Organic Pest Repellent:


neem pesticide spray

Onion peels contain compounds like quercetin and sulfur compounds, which have natural insect-repelling properties.

  • When used as a mulch or incorporated into the soil, onion peel fertilizer can help deter pests and insects, reducing the need for chemical pesticides.
  • This organic pest control method is particularly beneficial for protecting sensitive plants like herbs and leafy greens from common garden pests.
Also, read – How to make Onion Peel Fertilizer at Home


4. Enhanced Water Retention:


The fibrous nature of onion peels aids in improving soil structure and enhancing water retention capacity.

  • By adding onion peel fertilizer to the soil, gardeners can mitigate water runoff and ensure better moisture retention, especially in sandy or fast-draining soils.
  • This benefit is crucial for promoting healthy root development and reducing water stress in plants during periods of drought or hot weather.

5. Encourages flower and fruit production: 


Portulaca flowers pink

The nutrients found in onion peels play a crucial role in stimulating robust flowering and fruiting in plants, ultimately contributing to higher yields.

  • These nutrients, including potassium, phosphorus, calcium, and nitrogen, among others, provide essential building blocks for plant growth and development.

(i) Potassium, for instance, is known for its role in flower and fruit formation, as well as in improving overall plant vigor and resilience to stress.

tomato

(ii) Phosphorus is essential for energy transfer within plants and is particularly important during flowering and fruiting stages, aiding in the production of seeds and fruits.

(iii) Calcium helps regulate cell division and is vital for strong cell walls, contributing to fruit quality and shelf life.

(iv) Nitrogen is essential for leaf and stem growth, ensuring that plants have the necessary resources to support abundant flowering and fruit set.

Plant growth

6. Sustainable and Cost-Effective:


onion peel liquid

Utilizing onion peels as fertilizer aligns with the principles of sustainable agriculture and waste reduction.

Instead of discarding onion peels as trash, repurposing them as a natural fertilizer minimizes waste and contributes to eco-friendly gardening practices. Moreover, onion peel fertilizer is cost-effective compared to commercial fertilizers, offering a budget-friendly alternative for home gardeners and small-scale farmers.

Conclusion:

In conclusion, onion peel fertilizer offers a plethora of benefits for plant growth and soil health.

  • From enriching the soil with essential nutrients to repelling pests and improving water retention, onion peels are a valuable resource for sustainable gardening and agriculture.

Let’s not throw away onion peels; instead, let’s see them as a way to help our garden grow and thrive.

Happy Gardening!

Soil mix jade plant

Best Soil Mixture for Jade Plant

Is your Jade plant growing well? Are you planting it in a good soil mix? If not, then it is time to take a closer look at your soil mixture.

In this post, we will discuss how to prepare the best soil mixture for your Jade plant.

Assessing Your Jade Plant Growth


jade plant pot 1

Before diving into soil mixture, it is essential to assess the health and growth of your Jade plant. Look for signs of stunted growth, yellowing leaves, or wilting, as these could indicate issues with the current soil mix.

Best Soil Mixture for Jade Plant


soil mix 2

The soil mixture plays a crucial role in providing the necessary nutrients and environment for Jade plant to thrive.

The ideal soil mixture for Jade plant should possess several key characteristics to ensure optimal growth and health.

1. Firstly, it should have excellent drainage properties to prevent waterlogging, which can lead to root rot.

2. Secondly, it should be nutrient-rich to support the plant’s growth and development. 

3. Lastly, the texture of the soil should be well-suited for succulent, allowing for proper aeration and root development.

How to make soil mixture for Jade plant


Now, let’s check how to make soil mixture for Jade plant:

1. Collecting and Preparing Soil

Soil mix


Begin by collecting soil from your garden or local surroundings.

  • Ensure to sieve and clean it thoroughly, removing any debris such as plastic or glass pieces.

2. Adding Sand

sand in soil


Next, add river sand to the soil mixture, comprising approximately one-third of the total volume.

  • Sand aids in improving drainage and preventing soil compaction.
  • Sand also enhances soil aeration, allowing oxygen to reach plant roots more easily.
  • This improved aeration promotes healthy root development and encourages microbial activity in the soil, which further aids in nutrient availability for plants.

3. Adding Compost

compost in soil

Add compost into the mixture, using an amount equal to the quantity of sand.

  • Compost acts as a natural fertilizer, supplying essential nutrients like nitrogen, phosphorus, and potassium to the soil.
  • Additionally, it improves soil structure, retains moisture, and enhances microbial activity, creating a healthy environment for plant roots to thrive.

4. Coco Peat

coco peat image


While Jade plants inherently retain water, coco peat can be beneficial, especially if the plant is exposed to prolonged sunlight.

  • Add coco peat in moderation, around one-fourth of the soil volume, to enhance moisture retention.

5. Neem Cake Powder for Pest Prevention


To safeguard the plant’s roots from pests, fungi, and bacteria, incorporate a small amount of neem cake powder into the soil mixture.

  • Neem cake powder acts as a natural deterrent, promoting the plant’s overall health.

6. Mixing Properly

soil mixture 1


Thoroughly blend all the ingredients to create a porous soil mixture. The resulting mixture should be loose and crumbly, ensuring optimal drainage and root aeration.

Also read, Tips to Care Jade Plant

Additional Care Tips


jade in sunny area

1. Jade plants, being succulents, need minimal watering. Only water them when the soil is completely dry.

2. Avoid overwatering –

Jade plants store water in their fleshy leaves and stems, making them well-equipped to survive in arid conditions.

  • However, when they are overwatered, their roots become saturated, leading to oxygen deprivation and ultimately root rot. 

3. Jade plants thrive with 4-5 hours of direct sunlight daily, making it optimal to keep them outdoors.


By following these steps and understanding the needs of your plant, you can create an environment where your Jade plant will thrive.

Thanks

Happy Gardening!

hibiscus flower

Best Fertilizer for Hibiscus Flowering

Many gardeners often encounter the issue of their healthy hibiscus plant not flowering despite being in good condition. 

As a result, they unknowingly treat the plant with incorrect fertilizers, leading to damage.


For a hibiscus that is healthy but not blooming, several factors may be involved. Choosing the right fertilizer can make a significant difference and promote flowering.

Best Fertilizer for Hibiscus Flowering


So, why is it happening, and what are the reasons behind this? Let’s review a list of concerns your hibiscus may be experiencing if it’s not flowering:


1. Buds Not Blooming:

Hibiscus buds

  • Lack of phosphorus in the soil can hinder flower production, so it’s important to look for a fertilizer that contains phosphorus to promote blooming.


2. Plant Healthy But Not Flowering:

hibiscus plant


    • Sometimes, hibiscus plants focus on growing foliage rather than flowers.
    • Opt for a balanced fertilizer with equal N-P-K ratios to encourage overall plant health and flower production.


3. Yellow Leaves:


hibiscus yellow leaves

    • Yellowing leaves can indicate a lack of nitrogen.
    • Choose a fertilizer with higher nitrogen to address nitrogen deficiency and promote greener foliage.


4. Buds Not Mature:


    • Hibiscus buds may fail to mature if they are not getting enough potassium.
    • Look for a fertilizer with a higher potassium to support bud development and maturation.


5. Buds Falling:

hibiscus bud falling

    • Poor root development or stress can cause buds to drop prematurely.
    • Consider a fertilizer with micronutrients like magnesium and iron to improve root health and resilience.

Why Hibiscus Plant is not Flowering


The main reason for hibiscus plants not flowering is often due to a lack of nutrients. This can be attributed to two factors:

1. Inefficient Nutrient Distribution to Various Plant Parts

When fertilizer is provided to the roots, it is not efficiently distributed to other parts of the plant, such as the stem, leaves, branches, or buds.


2. Limited Distribution of Starch-Based Food to Plant Roots


Additionally, while plants produce their food in the form of starch in their leaves, it is possible for the food to remain in the leaves and not be distributed to other parts of the roots of the plant.


Note: Starch plays a crucial role in providing immunity to plants, especially for their roots.

The above two factors indicate that the transportation system” of the plant is not working well which can be attributed to a lack of potassium.


Luckily, potassium is highly available in bananas and banana peels and can be used to improve the transportation system of the plant.

  • If in this condition, the plant is fed by banana peel fertilizer, then the problem would be resolved.
bananas rich source of potassium

3. Nutrient-Rich Composition of Banana Peels


Not only potassium but banana peels contain many other nutrients like calcium, magnesium, sulfur, and phosphorus, all of which are essential for plant growth and development.

4. Micronutrient Content in Banana Peels


Additionally, banana peels contain other micronutrients, such as zinc, copper, and iron, which are important for plant health.

Must read: How to make Banana Peel Fertilizer At Home

When to give Banana peel fertilizer?


1. Do not give banana peel fertilizer to small plants


Avoid using banana peel fertilizer on plants that are still small or in the growing stage because they require equal amounts of nitrogen, phosphorus, and potassium (NPK) at that time.

In banana manure, the quantity of nitrogen is very low. It will lead to nutrient imbalance and plants might die due to a deficiency of nitrogen.

2. Apply banana peel fertilizer during the flowering or fruiting stage


Always, give banana manure, when the plant is at the stage of flowering or fruiting.


3. Balancing Banana Peel fertilizer with Other fertilizers


While banana peel fertilizer can be used on all plants, it is important to rotate it with other fertilizers to maintain nutrient balance.

  • After applying banana peel fertilizer, wait for at least 10 to 15 days before using other fertilizers such as cow dung liquid fertilizer or any other.


4. Onion peel liquid fertilizer


Following the banana peel fertilizer, wait for another 10 to 15 days and then give onion peel liquid fertilizer to the plant.

  • This fertilizer also promotes flower blooming, and you can expect to see new buds appearing within a few days.

Note:

  • In instances where the leaves of the blooming plant turn yellow, it is an indication of a need for more nutrients.

5. Cow dung liquid fertilizer


cow dung decompose

  • After 10 days of the onion peel fertilizer, provide the plant with a liquid fertilizer made from cow dung.

By adhering to this schedule of applying different liquid fertilizers every 10 days, you can stimulate consistent blooming in your hibiscus.

Also read: How to Get Maximum Flowering in Hibiscus

Plants need sunlight, water, air, and nutrients for healthy growth. Monitor and meet these needs carefully. When blooming, reduce fertilizer to avoid overfeeding. Follow the checklist before applying remedies.