Monthly Archives: August 2023

How to Repot a Plant

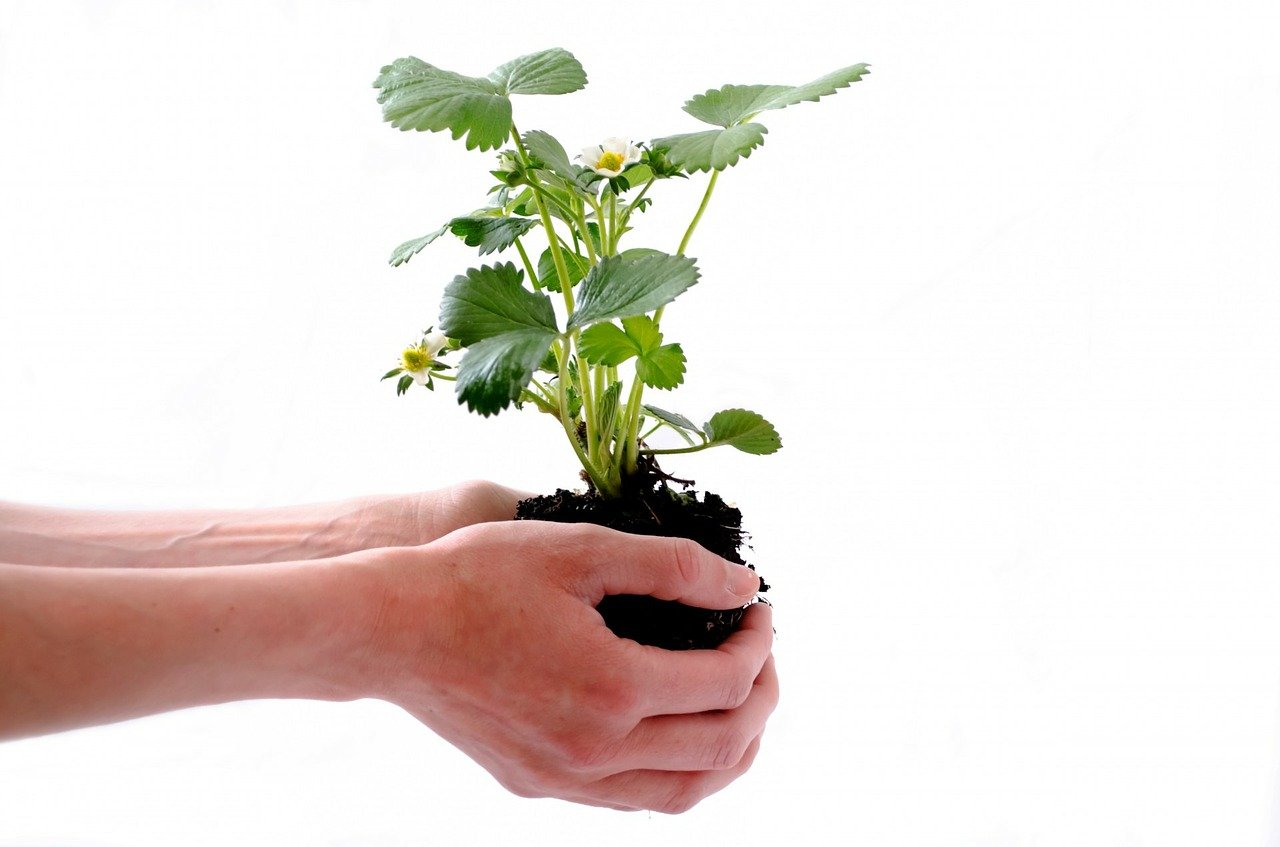
Children and plants both are the purest gifts of nature. If you will love them they will love you back. More care and affection you shower on them, the happier they will grow up. When a child comes out from the mother’s womb, she needs all caution and protection to stay healthy and to adapt to new surroundings. Similarly, when new plants come to your place, you need to be very particular in taking care of them.

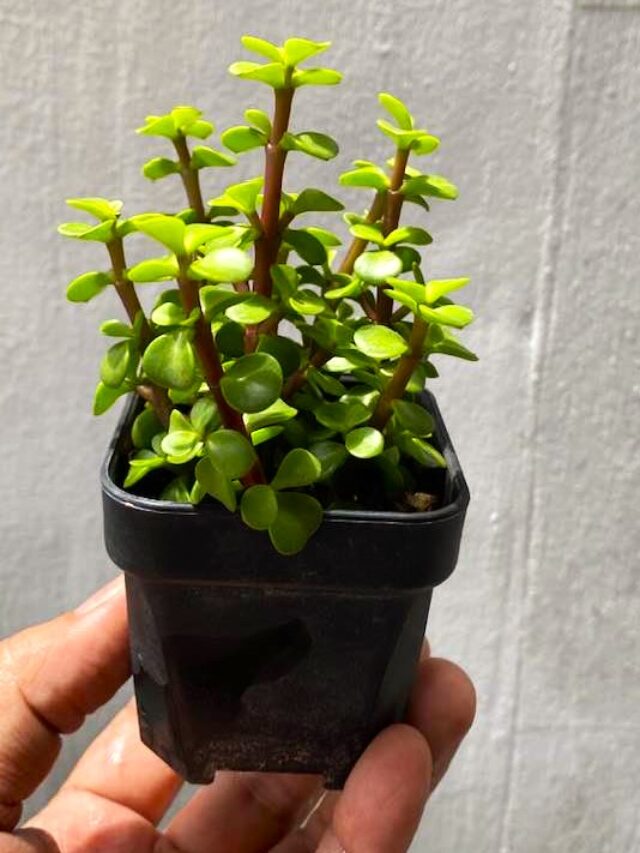
When we buy plants from the nurseries and bring them home, we need to shift them into a new pot.  At the time of shifting, we need to follow the proper technique, otherwise, the plant will go under transplant shock and would not be able to recover back again.

So, in this article, I will share some of the key steps to repot the plant.

Steps to repot a plant
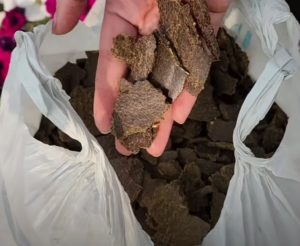
1. Soil 

  • Take normal soil which is available at your place.
  • Make sure there are no traces of glass, plastic, or any garbage in it.
  • It should be clean soil. Make a firm powder of it with your hand, lumps should not be there.
  • Mix some sand also in it, it shields the soil to become stone.
  • Add coco peat also if you have any, it will help the soil to maintain its moisture. Otherwise, normal soil will also work perfectly.

2. Pot size

Normally, take a 10-inch size pot and make two drainage holes at the bottom of your pot. Cover these holes with any stone or paper, so that soil does not come out but it can shed extra water.

3. Fill the pot with the soil

Now, fill the pot with soil and keep on tapping in between to avoid air gaps in the soil. Maintain the level of soil properly.

4. Remove the plant from plastic

  • The next step is to remove the plant from the existing plastic pot.

    Repotting at the correct time is important because sometimes the roots of the plant get bonded to each other and plants can come into problems.

  • If the roots are bounded to each other then first of all we need to open the bottom roots by removing their soil, then only these roots will be able to spread inside the pot properly.
  • Remove the soil carefully, it should not affect the main roots.

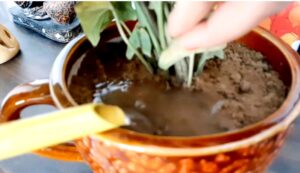
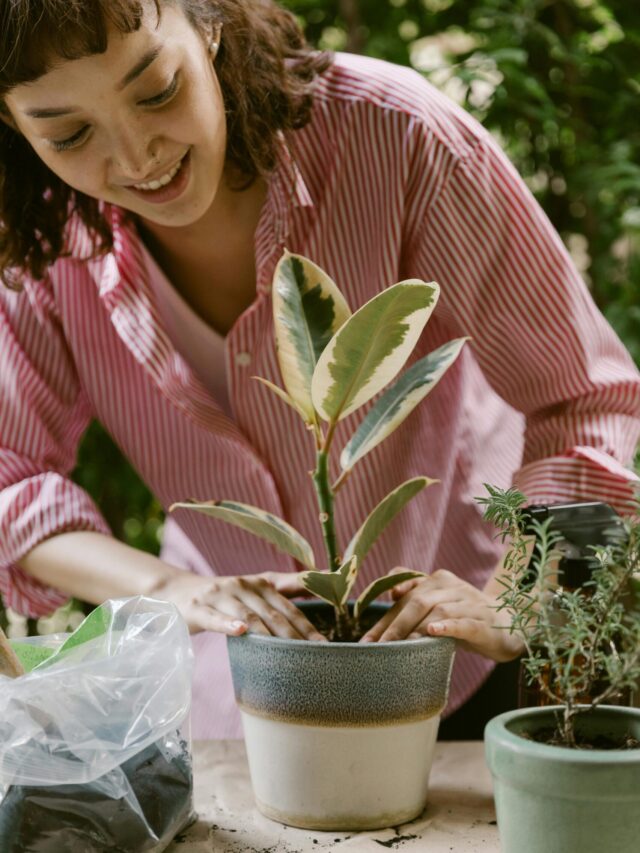
5. Shift the plant to a new pot

After opening the roots, now, we can place the plant in a new pot. Conceal the roots of the plant deep in the soil but make sure the stem is not going inside the soil. Otherwise, stems will start decaying inside the soil. After placing the plant inside the pot, fill the rest of the empty space in the pot with soil.
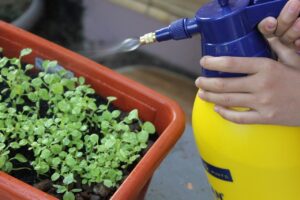
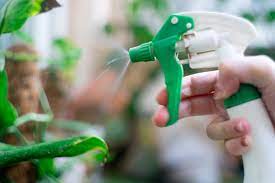
6. Watering

  • Give water to the plant in installments at a gap of a few minutes.
  • We need to give water to the plant till the point where excess water comes out from the drainage hole.
  • When water comes out from the drainage hole, it means roots at the bottom side also get water.
  • After that, if you feel there is any gap you can fill it with soil and adjust the position of your plant in the pot.

Now keep it in the shade for the next three days. It was all about shifting the plant to the new pot.

Enjoy Planting!!

Eco-friendly Plantable Seeds Pen

Plantable eco pens are environment-friendly and biodegradable pens. It decomposes very easily in the soil without affecting nature. These pens hold seeds inside them. After using when ink is finished, entomb them inside the soil and new plants will come out.

In this article, we will discuss the advantages of these plantable eco seeds pens.

  • Why do we need them?
  • What is the cost of these pens?
  • Are they working like normal pens?
  • How to plant them and many more.

So, keep reading.

Why do we need eco-friendly pens?


When we already have a wide range of plastic pens in the market, what is the point of switching to them?

  • Plastic is a curse to the environment because of its non-biodegradable nature and every year in factories tons of plastic are used to produce pens.
  • If we can replace plastic pens with these ecological pens, then it would be a highly appreciable contribution towards green and clean nature.
  • Sometimes small – small steps can make big changes.

“Let’s start writing our future with Green Pens”

Features of Biodegradable Pen 

  • They are easily available online or in the market.
  • These pens come in biodegradable boxes.
  • Almost all the seed pens are available. Like the tomato, lady finger, chilly, brinjal, and many others.
  • Only the nib and pen cap’s top are made up of plastic, the rest 80% material is ecological.
  • Seeds are stored at the bottom side of the pen. They are enclosed in starch-named material, not in plastic.
  • Starch is a degradable element.
  • These pens work like normal pens, with a smooth flow of writing. They are available in different colors like blue, and black. In schools, colleges or they can be used everywhere.

Generally, biodegradable things come a little bit costly in comparison to plastics but they are worth their cost. Many people love eco-friendly stuff, for them, it is a perfect gift or a gesture of love.

How to plant your Plantable Eco Pens?

  • When the ink is finished, it cannot be refilled again. So after using them, bury them inside the soil in the pot at an elevation of around 45 degrees.
  • The starch side containing seeds will go inside the soil and starch will get dissolved in water. After a few days, a new plant will come out.
  1. Different plantable stationery items like paper and pencils are available in the market.
  2. All the plantable items have seeds in them.

Buy them, use them, plant them, and present them to more people to spread more awareness. Actions taken at an individual level are more fruitful and effective.

Love your nature and save it for the future!!!

How to care for Aloe Vera plant

Aloe Vera is a magical and very famous plant. It can be found very easily in any nursery. It grows very fast without much care but sometimes it faces some problems like its growth getting stopped, tips starting getting brown, leaf color starting deteriorating, the arrival of black spots on the leaves, and sometimes the complete plant getting dull.

  • How did this happen?
  • Why does this happen?
  • How to fix all these problems?
  • What are the remedies for all these complications?

In this article, we will discuss “how we can take care of the Aloe Vera plant” at home:

About the Aloe Vera plant

  • Aloe Vera is a perennial plant. It does not survive only for 6 months or 1 year, its life span is of longer duration.
  • It is a succulent plant hence liquid is filled in its leaves. It does not need much water for survival.
  • It is a xerophytic plant and can survive in drought, where there is no water like a desert.

Due to all these features of Aloe Vera plant needs very less care. It is a very hardy plant.

Benefits of Aloe Vera plant

Slice Aloe Vera very useful herbal medicine for skin and hair.
  • Aloe Vera is an African plant with more than 500 species.
  • It is also a Medicinal plant that is used in making medicines and cosmetics.
  • It is very helpful for skin and hair care.
  • You can apply its gel on the burnt area also, it will give instant relief.

How to take care of the Aloe Vera plant?

1. Temperature and sunlight requirement for Aloe Vera plant 
  • It grows very fast between  10℃-30℃.
  • If it is extremely cold or hot, then its growth stops but plants do survive.
  • You can keep this plant outdoors as well as indoors. We have some reasons to keep it an indoor plant.
  • Firstly, it will survive in bright light as well as medium light. Secondly, they absorb harmful chemicals and purify the air.
  • Most importantly, they do not give carbon dioxide during night time. You can keep them near your bed also.
  • If you want fast growth of your plant, then keep it outside in the sunlight.
  • You can give 5 hours, 8 hours, 10 hours of sunlight or as much as possible, it would be good for it.
  • If it is extremely hot, there might be a chance of sunburn also, leaves will start to fade, start turning yellow and plants will be dull.
  • To avoid this you can keep your plant in shade or cover it with some cloth.
2. How often to water the Aloe vera plant
  • As it is a succulent, it needs very little water. Give water when the soil is completely dry.
  • It is also a xerophytic plant, so it can live for a longer duration without water.
3. Soil for Aloe vera plant

You do not need to prepare separate soil for Aloe Vera, you can use the same soil which you have prepared for the rest of the plants.

4. Pot Size for Aloe vera plant
  • The roots of this plant are very small so it does not need much depth or a deeper pot.
  • The pot has to be a wide pot because its roots spread widely.
  • If you want more Aloe Vera, then you can place it in a tub also.
  • The more area they will get, the more pups will come out.
5. Fertilizer for Aloe vera plant
  • You can give any organic fertilizer to the aloe vera plant once every 2 months.
  • Give only organic fertilizer because if you are using its gel for your face, hair, or drinking, it should be chemical-free.

It was all about this magical plant “ALOE VERA”.

Enjoy the soothing of this gel…!!!!!

How to Grow Spinach at Home

Spinach is a green leafy vegetable that originated from Persia now Iran there it was called Aspanakh. In India, Spinach is popularly known as Palak. It is a very healthy green vegetable having all the vitamins and minerals to build a strong immune system. Spinach can be grown at home. In this post, we will discuss how we can grow spinach at home.

Favorable season to grow Spinach

  • Spinach can be grown for both the summer and winter seasons.
  • For summers, it can mature from mid-February to April. If it is extreme summer, then seeds germinate but it will not grow properly.
  • For winters, it can be grown from mid-August to October. During severe cold, its seeds do not germinate.

How to Grow Spinach in Pots 


  • The roots of the spinach do not go very deep nor spread very much. So, this plant does not require a deep pot.
  • The pot should be wider in size in comparison to the depth of the pot, it can be 6 to 8 inches in height.
  • Any old tub or bucket or rectangular plastic pot can also be preferred for planting spinach.

Perfect Soil for Spinach  fertilizer

Soil is a very important factor in gardening. To prepare the soil mixture for Spinach, take normal garden soil, sand, and any compost or fertilizer. Keep the ratio as Soil 50%, Compost 30% and Sand    20%.

❖ Clean the garden soil properly and add sand to it. In sand, seeds germinate faster plus sand does not make soil hard.

❖ To add nutrition to the soil, add any fertilizer or compost. We can also add liquid cow dung fertilizer.

❖ Mix all three things properly and keep this mixture for 3 days.

❖  Soil would be ready to use after 3 days.

How to Grow Spinach from Seeds?

  • Spinach can be grown from seeds very easily and quickly.
  • Seeds can be bought from nurseries or online and they are inexpensive.
  • Spinach cannot be transplanted in another pot or container.
  • From seeds sowing till the final product, only one container would be used. So select all the apparatus attentively.

Below are the steps to grow spinach from seeds: 

  • Take the pot, make holes in its bottom, and cover the hole with any paper.
  • Fill the pot with the prepared soil mixture.
  • Place the seeds on the surface of soil at optimum distance, so that seeds can germinate properly.
  • Cover the seeds with another layer of soil mixture.
  • Spray water on the top layer of the soil. This layer should always be wet. Moisture needs to be maintained in the topmost layer of the soil.
  • Keep the pot in a warm place but not under direct sunlight.
  • Within five days, few germinated seeds can be seen.

By the 7th day, leaves would start coming but not true leaves, only cotyledon.

When seeds germinate, in the initial phase we get two types of leaves. The first two leaves (smaller one) which we get are called cotyledon. Cotyledons are part of the seeds only.

  • After cotyledon, the second type of leaves that comes out are called true leaves. The structure of these two leaves is completely different from cotyledon.
  • Be regular in giving water but do not keep the pot in direct sunlight till the point we get true leaves of spinach.
  • Give water or fertilizer carefully, it should not disturb the seedlings as they are weak in the beginning phase.

Sunlight requirement for Spinach 

  • Shift the pot in sunlight when true leaves have arrived.
  • Initially, keep the pot in sunlight for 1 hour, the next day for 2 hours, and so on.
  • Spinach can bear 2-8 hours of sunlight but the temperature should not be very high.
  • Once a month, any fertilizer can be given to it.

How to harvest Spinach 

  • Approximately, after 40-45 days homemade organic spinach can be harvested. It would be very fresh and pure.
  • Spinach leaves are used not only once but many times, meaning after a few days of harvesting, they will grow again in 25-30 days and can be harvested again. Therefore, while harvesting, take care not to damage the plant and its roots.
  • You can pluck this spinach 3-4 times, not more than that because of nutrition factors.
  • For this, you can use garden scissors while cutting or pinching with light hands.

This was all about spinach planting. Grow it and enjoy it.

Areca Palm Plant Complete Care

All About Areca Palm Plant

1. Areca palm size 

  • Areca palm plants are available in different sizes from 4 feet to 6 feet and some are very small called young plants.
  • You can keep plants of smaller sizes on the table also. You can buy it according to your needs.

2. Propagation of Areca palm

  • You can grow areca palm from seeds. Seeds are available in the market. This plant grows very slowly, seeds will take around 2-3 months to get germinated and they arrive with 1-2 leaves.
  • If you have a healthy and bushy Areca plant then you can divide it into many plants from the roots.
  • The best option for having this plant is to buy it from a nursery.
  1. Choose healthy areca palms from the nursery.
  2. If you see brown leaves or weak plants then don’t buy them.
  3. Sometimes nursery people try to misguide you but we should monitor carefully before buying it. Select green and healthy plants.

3. Pot size for Areca Palm

  • We can grow this plant in any type (ceramic, plastic, clay, etc) of pot but select a medium size pot.
  • If you are not experienced with areca plants then, you should use clay pots over other pots.

4. Soil Mixture for Areca Palm plant

  • The soil of this plant should be well drained as well as compact.
  • The upper portion i.e. leaves of this plant are very big in size as compared to the roots.
  • If we take soft soil then, its roots and the grip of the plant inside the soil will get spoiled.
  • The plant won’t be able to stand straight, it will start bending after some time. If we take compact soil then it will help in keeping the plant straight.
  1. We can take 60% of garden soil, 25% construction sand, and 15% compost for its soil mixture.
  2. We should not add coco peat here plus we are keeping compost quantity also very low because both these things make the soil very soft.
  3. You can add neem cake powder, fungicides, or any insecticides also in very small quantities.

5. Temperature requirement for Areca Palm

  • The ideal temperature for an areca plant is 15-25℃.
  • If the temperature goes beyond 30 degrees and below 11 degrees, this plant goes into stress.
  • Tips of the leaves start getting brown and the growth of the plant stops there only.

6. Sunlight requirement for Areca Palm

  • Areca palm plants need bright and indirect sunlight.
  • If you have kept it at places where light is dim like stairs or corridors then, its growth would stop there only.
  • There should not be direct sunlight falling also otherwise its leaves will start turning brown.
  • In fact, areca plants which are planted on the ground and have direct sunlight also face the issue of sunburn. Their leaves also burn and become brown.
  • If you want to keep Areca in the sun, then keep her in the same sunlight that you can bear.
  • Keep these plants near windows and doors where fresh air comes along with bright and indirect sunlight.

7. Watering for Areca Palm

  • The water requirement of this plant is different in comparison to other indoor plants.
  • Areca palm likes moisture very much so if the topsoil of this plant is completely dry then, the tip of the leaves will turn brown due to underwatering.
  • Check the top layer of soil with your hand and if you notice that it does not have any moisture in it then, give water. It can become completely dry if we do not give water at that time.
  • Give water in installments, like giving one mug of water first then, after some time one more mug and keep on giving in regular intervals till the point water comes out from the bottom drainage hole.
  • If the soil is wet and still you are giving water then, there would be a problem of over-watering. It might catch fungus and pests (like mealybugs and all), plus the tips of the leaves will turn brown. Roots will also get spoiled and it will damage the whole plant.
  • One more thing, If you give water again and again in wet soil, then some white thing starts accumulating in it. It can be fungus or salt present in water.

Now, You can care for your Areca Palm

Keep Planting!!!!

Aromatic flowers for your garden

10 Aromatic Flowers for your Garden

Welcome to the world of fragrant gardens, where enchanting scents and delightful blooms await you! As a gardening enthusiast, you understand the magic flowering plants bring to your space. From classic favourites to exotic wonders, these aromatic treasures will elevate your garden experience and fill the air with captivating fragrances.

10 Aromatic Flowers for your Garden

Get ready to embark on a journey of sensory bliss as we explore the top 10 fragrant flowering plants that will transform your garden into a fragrant oasis.

10 Aromatic Flowers for your Garden


1. Rose:

Rose

Ah, the timeless beauty and captivating scent of roses!

These lovely blooms are every gardener’s dream come true. With various colours and sizes to choose from, you can create your rose haven.

Must read:

Tips to care rose plant

2. Jasmine:


Jasmine

Imagine strolling through your garden in the evening and being embraced by the sweet fragrance of Jasmine.

Known as the “queen of the night, Mogra, Juhi, Chameli etc” Jasmine’s scent turns stronger as the sun sets.

As a homemaker, you’ll adore these evergreen climbers that bloom throughout the summer, creating a dreamy, tropical paradise right at home.

Night Jasmine:

Harshringar/ Parijat

Looking for a fragrant beauty that blooms at night? Night Jasmine, also known as Parijat or Harshingar, is your answer! The charming white flowers release a mesmerizing scent after dark; it’s the perfect addition to your outdoor space. Plus, this compact shrub fits like a charm on your balcony or patio.

Gardenia:

Gardenia

Gandhraj, or Crape Jasmine, is here to wow you with its star-shaped white flowers and captivating fragrance. From late spring to fall, these beauties bloom abundantly, adding an elegant touch to your indoor or outdoor garden. The best part? You can prune them to your heart’s content, keeping them how you like.

Plumeria:

Plumeria

Who doesn’t love a touch of the exotic in their garden? With Plumeria, better known as Champa, you’ll have the feel of a tropical paradise right at your home. These vibrant and fragrant blooms come in various colours, making your garden feel like a dreamy escape. Easy to care for, Plumeria will become your new gardening obsession.

Rangoon Creeper:

Rangoon Creeper

Madhu Malati, Prepare to be amazed by Rangoon Creeper’s colour-changing flowers, transforming from white to pink to red as they bloom. The sweet fragrance attracts butterflies and hummingbirds, creating a lively and enchanting garden. Let it climb or grow as a bush – it’s your call!

Madhu Kamini:

Madhu Kamini

Need a refreshing burst of citrusy fragrance? Madhu Kamini, or Orange Jasmine, has got you covered! With its small, white flowers and evergreen charm, it blooms all year round, turning your indoor garden into a fragrant haven.

Lavender:

Lavender

As someone who cherishes relaxation, Lavender is your best friend. Its calming fragrance will whisk you away to a world of tranquillity. With its vibrant purple spikes and compact size, you can grow it indoors and outdoors.

Tuberose:

Tuberose

Are you looking for a flower that captivates with its intense and mesmerizing scent? Rajnigandha, or Tuberose, is the answer! Its pure white flowers add a touch of elegance to your garden, and the fragrance is pure bliss. Cultivate them in containers or garden beds, and let their enchanting aroma fill your home.

Sweet Pea:

Sweet pea

Finally, we have the cheerful and sweet-scented Sweet Pea! These climbers will be a highlight in your garden, adorning trellises and arches with charming blooms. Their scented flowers are a joy to behold during spring and early summer, making you fall in love with gardening all over again.


Incorporating fragrant flowering plants into your garden is a surefire way to elevate your gardening adventure.

With Roses and Jasmine evoking timeless allure and Plumeria and Rangoon Creeper adding an exotic touch, your garden will become a paradise of delightful aromas.

So, roll up your sleeves and embrace the magic of nature as you create a fragrant sanctuary that will delight your senses and bring joy to your heart.

Happy gardening, and may your garden be a fragrant haven of beauty and tranquillity!

mustard cake fertilizer

How to make Mustard Cake Fertilizer: Benefits & Uses

The mustard cake is an excellent eco-friendly organic fertilizer that offers numerous benefits for plant growth and soil nutrition.

Benefits of Mustard cake fertilizer

Mustard cake fertilizer has several benefits, including:

1. Provides nutrients:

  • Mustard cake is rich in nitrogen, phosphorus, and potassium, which are essential nutrients for plant growth. It has the potential to enhance the production capacity of plants.

2. Improves soil fertility:

  • The organic matter in the mustard cake helps improve soil fertility by increasing soil structure and water-holding capacity. It addresses nutrient deficiencies in the soil.

3. Environmentally friendly:

  • Mustard cake is an organic fertilizer and does not contain any harmful chemicals or synthetic ingredients.
  • It is a sustainable alternative to chemical fertilizers.

What is Mustard Cake?

mustard seeds

In the process of making mustard oil,

  • Mustard seeds are crushed in the machine.
  • After extracting the oil, the leftover material also called a ‘Khali’ or ‘Khal’ or ‘cake’ is obtained. This Khali is a mustard cake.
  • It is a high-protein supplement and can be used as an organic fertilizer for plants.

Natural source of NPK (Nitrogen, Phosphorus, and Potassium). It is a natural source of NPK, with a typical ratio of 4-1-1 for nitrogen, phosphorus, and potassium.

Why is mustard cake fertilizer important in gardening?

1.  It is a nitrogen-rich fertilizer.

  • Everybody is aware of the fact that all types of plants (outdoor, indoor, flowering, non-flowering, or vegetables ) need nitrogen in ample amounts.

Note:

  • A deficiency of nitrogen might spoil the plant.

Mustard cake

2. Protein is needed for the growth of the plant and chlorophyll is required for the photosynthesis process. For protein and chlorophyll, nitrogen plays an important role.

3. Enhanced plant growth:

  • Mustard cake fertilizer has proven to be very beneficial for many plants, especially vegetable plants. Growth of the plants gets enhanced at a notable pace after providing this fertilizer.

How to use Mustard Cake Fertilizer at home?

Mustard cake fertilizer is easily available in the market and can be purchased once and lasts for a longer period of time. There are two methods to use it.

1. Use mustard cake fertilizer in liquid form
  • Take a small amount of cake (break the big pieces into small pieces) and

mustard cake

  • dilute it with water

musatrd cake dilute

  • Cover the vessel and keep it undisturbed for 24 hours. Always make it in a little quantity as it is very dense by nature.

  • It will dissolve in the soil itself. So, do not keep it for more than 24 hours.

Note:

  • If it is too cold, then you can keep it for one to two days, but it should not be left for more than two days in water to decompose.
  • After 24 hours, the cake will have dissolved completely.

mustard cake liquid fertilizer

  • There will be some smell of mustard cake in this liquid fertilizer.
  • Dilute the mixture with 10 times more water, which means mixing 1 part of mustard cake liquid fertilizer with 10 parts of water.

mustard cake liquid fertilizer

  • After mixing very well with a mug or jug, you can give this fertilizer to the plants.
  • It will show results after 4-5 days on the plants and would last for a longer duration.

2. Use mustard cake in powder form

  • Grind the mustard cake into a powder using a grinder.
  • In the pot, remove the top layer of soil, sprinkle the mustard cake powder, and water the soil.

musatrd cake powder

  • Additionally, the powder can be incorporated into the soil mixture to enhance its fertility.

musatrd cake powder

Important points to keep in mind while using mustard cake fertilizer in plants:

1. Do not spray mustard cake liquid fertilizer on the leaves, recommended only for the soil.

2. This fertilizer locks the moisture in the soil. Feed the plant with this when the soil is dry.

3. After giving this, give water when the soil is completely dry.

4. Mustard cake fertilizer can be given to the plants at intervals of 20-25 days.

5. The mustard cake should be stored in a cool, dry place away from direct sunlight. This will help to preserve the nutrients and prevent the cake from becoming rancid.

Use of Mustard Cake Fertilizer during Summer season:

The mustard cake should be applied during the growing season when the plants are actively growing and can benefit from the nutrients.

  • It’s also a good idea to avoid using it during hot, dry weather as it can burn the plants.
  • During summer months, large quantities of mustard cake should be avoided and when used, it should be diluted with additional water in its solution.

By keeping the above points in mind, you can use mustard cake fertilizer effectively to improve soil health and promote healthy plant growth.

Love plants !!

Make Your Own Garden!

mistakes to avoid in gardening

गार्डनिंग में इन 6 गलतियों से बचें

बागवानी करते समय हम अक्सर कुछ गलतियां कर बैठते हैं, जो हमें नहीं करनी चाहिए। इससे हमारे पौधे उतने अच्छे से विकास नहीं कर पाते हैं। चाहे आप अनुभवी हों या बिगनर्स करने वाला, आपको ये कुछ बातें पता होनी चाहिए जो मैं आपको इस लेख के माध्यम से बताने जा रही हूँ।

1. मिट्टी की गुड़ाई” की अनदेखी न करें

मिट्टी की गुड़ाई

सामान्य तौर पर, लोग अपने पौधों की वृद्धि के लिए बहुत सारे प्रयास करते हैं जैसे समय पर उर्वरक देना, ह्यूमिक एसिड या बायो एंजाइम प्रदान करना, नियमित अंतराल पर छंटाई करना और भी बहुत कुछ लेकिन वे बागवानी की बुनियादी बातें अर्थात् “मिट्टी की गुड़ाई” को अधिक महत्व नहीं देते हैं।

गुड़ाई प्रक्रिया निम्न कारणों से महत्वपूर्ण है-

  • यह मिट्टी को मुलायम बनाता है।
  • मिट्टी के पोषक तत्व ऊपर-नीचे होते रहते हैं।
  • यह अच्छा वातायन बनाए रखता है।
  • जड़ें मजबूत और स्वस्थ बनती हैं।

पौधों की सर्वोत्तम वृद्धि के लिए सप्ताह में एक बार मिट्टी की जुताई करनी चाहिए।

2. कीटनाशकों के छिड़काव की उचित तकनीक का प्रयोग न करना

पौधों पर कीटों का हमला बहुत सामान्य बात है और विशेष मौसम में मीली बग, एफिड्स, चींटियाँ, मकड़ी, घुन और कई अन्य जैसे कीड़े पनपने लगते हैं।

कीटनाशक स्प्रे
  • इनसे छुटकारा पाने के लिए कई कीटनाशक घोल उपलब्ध हैं और बनाये जाते हैं। कीड़ों से बचाव के लिए छिड़काव की उचित प्रक्रिया अपनानी होगी।
  • सबसे पहले रुई, टिशू पेपर या किसी सूती कपड़े का उपयोग करके प्रभावित पौधों से सभी कीड़ों को हटा दें। सभी पत्तियों, शाखाओं और पौधों के सभी हिस्सों को साफ करें।

  • उसके बाद, पौधों के प्रत्येक भाग, पत्तियों के किनारे, सभी शाखाओं, कलियों या फूलों पर घोल का छिड़काव करें। यदि पौधे पर एक भी कीट रह गया तो दोबारा कीट का आक्रमण होगा और समाधान की प्रभावशीलता पर प्रश्न उठेंगे।
  • इसलिए, यहां घोल अनुचित नहीं होगा बल्कि इसके लिए उचित कार्यप्रणाली का पालन करने की आवश्यकता है।
  • जब तक पौधा कीट-मुक्त न हो जाए तब तक हर दूसरे दिन उपचार करें।

3. गलत गमले की संरचना का चयन करना

सामग्री के बावजूद, गमले की संरचना बहुत मायने रखती है।

  • संकीर्ण गमलों से बचें क्योंकि जुताई, दोबारा रोपण, खाद या खाद देने और खरपतवार निकालने के समय मिट्टी को ढीला करने के लिए स्थान की आवश्यकता होती है।
  • संकरे गमलों में हमें उपयुक्त स्थान नहीं मिलता है, तो या तो गमला टूट जाएगा या पौधा खराब हो जाएगा।
  • चाहे सिरेमिक, प्लास्टिक या सीमेंट हो, लेकिन चौड़े आकार के गमले का चयन करें। मिट्टी को पर्याप्त धूप मिलेगी, जुताई आसानी से हो सकेगी और चौड़े आकार के गमलों में वातन प्रक्रिया बनी रहेगी।

4. कम्पोस्ट में रसायन मिलाना

जब घर पर कम्पोस्ट बनाई जाती है (कोई भी कम्पोस्ट जैसे- पत्तियों का कम्पोस्ट, किचन कम्पोस्ट या गाय के गोबर की कम्पोस्ट), तो स्वाभाविक रूप से इसे बनाने में 2 और 2.5 महीने लगते हैं। बैक्टीरिया और फंगस की उपस्थिति में सभी पदार्थ विघटित हो जाते हैं जो एक धीमी प्रक्रिया है।

  • कुछ लोग इसमें रसायन डालकर इस प्रक्रिया को तेज करते हैं और कम्पोस्ट 7-10 दिनों में तैयार हो जाती है, जो सही तरीका नहीं है।
  • शुद्ध जैविक खाद प्राप्त करने के लिए कोई भी रसायन नहीं मिलाना चाहिए, इसके अलावा, यदि पौधे में कोई रासायनिक रूप से प्रकट चीजें (खाद) मिलाई जाती है तो यह मिट्टी के पोषण स्तर को कम कर देगी।
  • इस खाद को डालकर उगाए गए फल, फूल या सब्जियाँ जैविक नहीं होंगी क्योंकि उनमें रसायन डाला जाएगा जो स्वास्थ्य के लिए अच्छा नहीं है।
  • कम्पोस्ट बनाने की प्रक्रिया को तेज करने के लिए इसमें जैविक या प्राकृतिक चीजें जैसे छाछ, वर्मीकम्पोस्ट, खट्टा दही या कीड़े मिलाएं। ये सभी चीजें सामग्री के सड़ने की प्रक्रिया को तेज कर देंगी।

5. पौधों को खाद नहीं देना

फूल वाले, फल देने वाले तथा सब्जियों के पौधों को नियमित अन्तराल पर खाद की आवश्यकता होती है। वे नर्सरी में सुंदर और आकर्षक दिखते हैं क्योंकि वहां उनकी उचित देखभाल की जाती है लेकिन उन्हें घर पर लाने के बाद उनमें से कई का बढ़ना बंद हो जाता है।

सरसों की खली 
  • इन पौधों को प्रत्येक 20-25 दिन में उर्वरक की आवश्यकता होती है।
  • पौधे की तेजी से वृद्धि के लिए मिट्टी के पोषक तत्व स्तर को पूरा करने के लिए पौधे को एनपीके, सूक्ष्म पोषक तत्व, या कोई अन्य जैविक खाद दिया जाना चाहिए।

6. नीम के तेल का उपयोग करने का गलत तरीका

नीम का तेल एक जैविक तेल और सबसे अच्छा कीटनाशक है लेकिन कई लोगों की शिकायत होती है कि नीम के तेल का उपयोग करने के बाद उनके पौधे जल जाते हैं। खैर, यहां समस्या नीम के तेल की नहीं है बल्कि समस्या यह है कि इसका उपयोग किस प्रकार किया गया है।

नीम के तेल का स्प्रे
  • नीम का तेल प्रबल (स्ट्रोंग) होता है इसलिए पत्तियों पर लगाने से पत्तियों के छिद्र बंद हो जाते हैं और प्रकाश संश्लेषण की प्रक्रिया रुक जाती है।
  • इससे बचने के लिए हमेशा शाम के समय नीम के तेल का छिड़काव करें और रात भर पौधे को ऐसे ही रहने दें। अगले दिन सुबह सूर्योदय से पहले पौधे को खूब पानी से अच्छी तरह धो लें।
  • नीम का तेल रात में अपना काम करेगा इसलिए सुनिश्चित करें कि नीम के तेल वाली पत्तियां धूप के संपर्क में न आएं। धोते समय तेल मिट्टी में गिर सकता है इससे कोई समस्या नहीं है।

इस प्रकार उपरोक्त बातों का ध्यान रखिये और बागवानी करते रहें!

शुभ बागवानी!!

धन्यवाद!!