Category Archives: Vegetable Gardening

Leaf Curl in Tomato Plant – How to Treat Leaf Curl Disease?

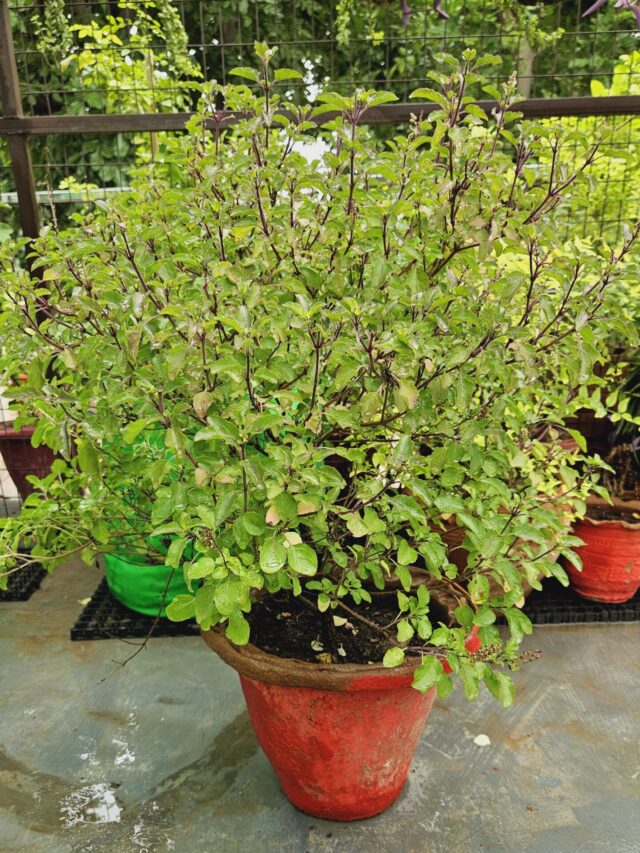
Leaf curl is a common disease often observed in tomato plants. It makes the leaves twist and become deformed, which can reduce the yield of tomatoes. This disease can be very harmful to plants and completely stop the production of fruit – especially if the plants become infected when they are young. It is important to deal with this problem quickly to stop it from spreading.

leaf curl in tomato plant

Many gardeners are concerned about how to overcome this disease. In this article, we will look at good ways to treat leaf curl disease. We will focus on natural remedies and things you can do to stop it from happening again, so your tomato plants stay healthy and give you lots of tomatoes.

Identifying Leaf Curl Disease Symptoms

(i) Early Signs

  • Early signs of leaf curl disease include slight curling or rolling of the leaves, along with discoloration and stunted growth.
  • These symptoms may initially go unnoticed but should be monitored closely to prevent the disease from progressing.

(ii) Advanced Symptoms

  • As the disease progresses, the leaves may become severely curled, brittle, and discolored. The plant may also exhibit signs of wilting and reduced fruit production, indicating a more advanced stage of infection.

Causes of Leaf Curl Disease

leaf curl tomato


1. Lack of Nutrients 

Nutrient deficiencies can also cause leaf curl disease in tomato plants.

  • When tomato plants lack essential nutrients, such as nitrogen, potassium, or magnesium, they may exhibit symptoms like leaf curling.

2. Pathogens

  • Pathogens such as viruses and bacteria can also cause leaf curl disease in tomato plants.
  • These pathogens can be introduced through contaminated soil, infected plant material, or insect vectors.
  • Implementing proper sanitation practices and using disease-resistant tomato varieties can help mitigate the risk of infection.

Importance of Addressing Leaf Curl Disease Early

Early intervention is crucial in treating leaf curl disease and preventing its spread to healthy plants. By identifying and addressing the disease at its early stages, you can minimize damage and preserve the overall health of your tomato crop.

Natural Methods to Treat Leaf Curl Disease

(i) Early Intervention Techniques

Addressing leaf curl disease early involves closely monitoring your plants for symptoms and taking immediate action upon detection.

  • Inspect your tomato plants regularly, and promptly remove any affected leaves or plant parts to prevent the spread of infection.

(ii) Micronutrient Application

Ensuring proper nutrient balance is essential for combating leaf curl disease.

  • Administering micronutrients such as zinc, magnesium, and iron can help strengthen the plant’s immune system and promote healthy leaf development.
  • Consider incorporating organic fertilizers or foliar sprays rich in micronutrients into your regular feeding regimen.

(iii) Pruning Affected Parts

Pruning of affected leaf curl part

Pruning is an effective method for controlling the spread of leaf curl disease within your tomato plants.

  • Remove any visibly infected leaves or branches using sterilized pruning shears, and dispose of the removed plant material properly to prevent recontamination.

(iv) Adding Neem Cake Powder in the Soil Mix

neem cake powder
Adding neem cake powder

Adding Neem cake powder to the soil mix is an effective method for preventing leaf curl disease in plants.

  • Neem cake powder has anti-fungal, anti-bacterial, and anti-inflammatory properties, which help in controlling diseases like leaf curl.
  • When incorporated into the soil mix, neem cake gradually releases beneficial nutrients and bioactive substances, promoting healthier root development and overall plant vigor.

(v) Neem Oil Spray

neem oil spray
neem oil spray

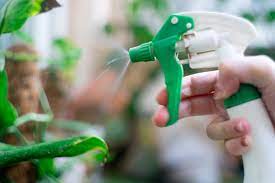
Using neem oil spray is an effective method to slow down the progression of leaf curl disease in plants.

  • Neem oil contains natural compounds that have anti-fungal and anti-bacterial properties, which help to combat the pathogens responsible for leaf curl.
  • To utilize neem oil effectively, spray the solution onto the affected plants twice a week. Additionally, it is essential to monitor your plants regularly to assess their health and the effectiveness of the treatment.

(vi) Buttermilk Solution Treatment

Buttermilk solution has been found to be effective in treating leaf curl disease in tomato plants.

  • The lactic acid present in buttermilk helps suppress fungal and bacterial growth while promoting plant health and vigor.

How to Prepare Buttermilk Solution

To prepare a buttermilk solution, mix one-fourth of buttermilk with 1 liter of water in a spray bottle or garden sprayer. Shake the mixture well to ensure thorough blending.

Application of Buttermilk Solution

The application of buttermilk solution offers dual benefits for treating plant issues. 

1. Pour the solution into the soil around the base of the plant:

  • When poured into the soil around the base of the plant, it provides direct access to the root system, allowing the plant to absorb nutrients and beneficial compounds.

2. Spray the solution onto affected leaves:

  • Spraying the solution onto affected leaves ensures that the active ingredients come into direct contact with the affected areas, effectively combating diseases or pests.
  • Using a fine mist setting on your sprayer ensures even distribution of the solution, minimizing wastage and maximizing its effectiveness.

Incorporating both methods of application can enhance the overall health and resilience of your plants, promoting vigorous growth and improved resistance to stressors.

Frequency of Buttermilk Solution Treatment

Repeat the buttermilk solution treatment every two days for a total of 2-3 treatments, or until symptoms improve. Monitor your plants closely throughout the treatment process, and discontinue if any adverse effects occur.

Other Preventive Measures

In addition to treatment, implementing preventative measures can help reduce the risk of leaf curl disease in your tomato plants.

Maintain proper spacing between plants to promote airflow, and avoid overhead watering to minimize moisture accumulation on the leaves.

  • Practice crop rotation and soil sterilization to prevent the buildup of pathogens in the soil.

Conclusion

Treating leaf curl disease in tomato plants requires a proactive approach and a combination of natural remedies and preventative measures. By addressing the disease early, administering micronutrients, pruning affected parts, and utilizing buttermilk solution treatment, you can effectively manage leaf curl disease and safeguard the health of your tomato crop.

tomatoes

How to Grow Tomatoes at Home from Seeds in Pot: Complete Guide

Tomatoes are highly demanded vegetables that many gardeners want to grow at home in their terrace or balcony gardens. While some are experienced gardeners who grow tomatoes every year but beginners often make mistakes that hinder tomato growth.

They commit following mistakes which are mentioned below:

1. Using small pots/grow bags.

2. Choosing inferior seeds from nurseries or saving seeds from low-quality tomatoes and not adequately fertilizing with the necessary heavy fertilizers.

3. Additionally, difficulties may arise in treating diseases such as leaf miners or mildew.

4. Challenges also arise with issues like sucker removal and pruning.

Despite being common, these problems are often overlooked, hindering tomato growth and productivity.

Let’s delve into both the typical and less typical characteristics of tomatoes to consider before starting their cultivation.

1. Tomato Plant Lifespan:

tomatoes plant

A tomato plant typically completes its life cycle within a single period, lasting around 5-6 months.

  • During this time, the plant will go through flowering, produce tomatoes, and eventually wither after the harvest.
  • It does not persist beyond this single growing season.

2. Growing Season:

tomato-7676653_1280

Tomatoes can be successfully seeded and grown during the spring (starting in February), monsoon (from mid-July onwards), and autumn (late September to mid-October) seasons.

  • However, cultivating tomatoes in summer can be challenging as they have a tendency to ripen prematurely. This results in small, immature fruits that may begin to turn red before reaching their full size.
  • Unfortunately, these prematurely ripened tomatoes often end up rotting during the hot summer months.

3. Process of Growing Tomatoes –  

Seedling tray
Seedling tray

1. Seedling Tray Preparation:

  • Use seedling trays to grow seeds and cover the bottom hole with the newspaper.
  • Fill sections with soil mixture and wet thoroughly with a spray bottle, adding a layer of wet coco peat on top.

2. Seed placing & Selection:

  • Place seeds on soil surface and again cover them with the same coco peat .
  • Prefer hybrid tomato seeds over cherry tomato seeds.

3. Use of Fertilizer:

  •  Use Onion peel liquid fertilizer once seeds start germinating, avoiding heavy fertilizers like NPK, Urea, or DAP because these are heavy fertilizer’s and seedling might die at this stage due to these heavy fertilizer’s. 

4. Mild sunlight exposure:

  • After 2-3 leaves appear, move trays to a location with mild sunlight exposure for 1-1.5 hours.

5. Transplant seedlings into a larger pot:

  • After about a month once the seedlings have strengthened transplant seedlings into larger pots, ensuring delicate roots remain protected.
  • Water seedlings immediately after transplantation. 
  • It is important to note, do the shifting in evening only. 

6. Monitoring seedlings health:

  • Over the next few days, monitor the health of the tomato seedlings closely, noting which ones are thriving and which ones are showing signs of stress.

7. Application of Peanut Cake Fertilizer:

  • Apply peanut cake fertilizer around 15 days after transplanting for increased growth.

8. Pinching 

  • Start doing pinching about 10-12 days after fertilization to encourage new stem growth, repeating every 8-10 days until small tomatoes appear.

4. Basic Requirements: 

1. Sunlight Requirement:

  • Tomato seedlings thrive best with a minimum of 5-6 hours of sunlight daily.

2. Ideal Grow Bag Size:

  • For optimal growth, choose a 12-inch by 12-inch grow bag for tomato plants, avoiding smaller or larger sizes.

3. Uniform Soil Mix:

  • Consistently use the same soil mixture for seedling trays, pots during transplantation, and in grow bags for tomato cultivation.

5. How to shift Plants into Grow Bags?

There are two methods for transplanting the plants.

1. First, fill the grow bags with the prepared soil mixture and water them properly to settle the soil and maintain moisture levels.

  • Carefully remove the plant from its pot and gently place it inside the grow bag. After planting, avoid overwatering; only provide enough water to moisten the roots.

2. Secondly, fill the grow bag with soil and place the plant without pre-watering.

  • After planting, water the plant generously to ensure ample moisture reaches the roots and the bottom soil gets properly wet.

Important note:

  • Each grow bag should accommodate only one plant.
  • Prune the bottom leaves of the plant near the soil to prevent contact with the ground, which can attract insects.
  • Additionally, insert support sticks to prevent the plant from leaning in one direction.
  • The next step should be to enhance the plant’s growth by making it strong, bushy, and dense.

6. Watering Techniques

(i) Normal Watering Routine:

  • Water the plant when the top layer of the soil is dry, avoiding overwatering to prevent fungal attacks.

(ii) Fruiting Stage:

  • Keep the soil consistently moist once tomatoes appear.
  • Water the plant when the soil is slightly dry but still retains moisture.
  • Avoid both overwatering and letting the soil dry out completely.

7. Removing Unwanted Byproducts:

(i) Weed Removal:

  • Remove surrounding weeds before watering to preserve nutrients for tomato growth.

(ii) Bud Removal:

  • Remove small buds along stems to prevent energy diversion from the plant and signal the end of its life cycle.

8. Fertilizer Cycle:

1. Early Stage:

Administer liquid fertilizer every 20 days until small tomatoes appear. Recommended options include

  • Vermicompost Tea,
  • Cow Dung Compost Tea,
  • Kitchen Compost Tea,
  • Groundnut Cake Fertilizer, and
  • Neem Cake Fertilizer.

Note:

  • Avoid Groundnut Cake and Mustard Cake Fertilizers in hot, humid summers, preferring them during the rainy season or winter.

2. Fruiting Stage:

Increase fertilizer dosage during flowering and fruiting, focusing on micronutrients.

  • Apply seaweed spray once tomatoes appear.
  • Adjust frequency to every 15 days, using Seaweed Liquid, Onion Peel Liquid, and Banana Peel Liquid in rotation.

Follow the schedule:

  • Groundnut Cake Liquid Fertilizer (1st of each month),
  • Seaweed Liquid Fertilizer (15th of the same month),
  • Cow Dung Compost Tea (30th of the same month),
  • Subsequently, after 14 or 15 days, switch to Onion Peel Fertilizer. 

Continuing to rotate with all other fertilizers to ensure the plant receives all necessary nutrients and energy.

Note:

  • Consistently remove bottom leaves, weeds, and stems to maintain soil visibility and accessibility.
  • Regularly remove yellowing and blackening leaves to promote plant health.
  • During the fruiting stage, eliminate all suckers, small buds located between stems, to prevent energy diversion and promote overall plant growth.

Common Issues and Solutions:

1. Leaf Miners:

leaf miner on tomato leaves
  • White lines on leaves signal insect infestation, damaging the plant. Remove affected leaves and apply a mixture of water-soluble neem oil and garlic water for 3-4 days to stop the spread and aid recovery.

2. Black Flies:

  • Tiny black flies trapped on branches can be eliminated by spraying with neem oil solution.

3. Leaf Curl:

Leaf curl in tomato

  • Address early to avoid chemical intervention.
  • Ensure timely administration of fertilizers, especially micronutrients.
  • Remove affected plant parts.
  • Dilute buttermilk with water and spray onto the plant twice, with a 2-day interval, for a total of 2-3 treatments.

5. Split Tomatoes:

  • Remove split tomatoes and spray with diluted raw milk.

6. Blackening Tomatoes:

  • Provide ample water and micronutrients with seaweed-based fertilizers.

7. Worm Infestation:

  • Treat with neem oil spray.

8. Tomato Ripening:

  • Use mustard cake fertilizer to aid ripening process.

Conclusion:

  • By following these guidelines, you can successfully grow tomatoes at home.

Enjoy the satisfaction of homegrown produce!

Make Your Own Garden!

10 Herbs Easy to Grow at Home

The magnetism of fresh herbs is undeniable. Not only do they elevate the flavours of our culinary creations, but they also come packed with health benefits. Imagine stepping into your balcony or terrace garden and plucking fresh herbs for that evening tea or aromatic curry.

Growing herbs at home is a delightful journey that connects us with nature’s bounty. Below is the list of herbs which you can grow at home.

1. Tulsi (Holy basil)

2. Curry leaves

3. Mint

4. Coriander 

5. Lemongrass

6. Thyme

7. Parsley

8. Chives

9. Ajwain plant

10. Green Onion 

Let’s explore ten herbs that bringing freshness and flavour to your doorstep.

10 Herbs Easy to Grow at Home

1. Tulsi (Holy Basil)

tulsi plant

Tulsi (Holy basil) is a summer plant and well-suited for cultivation in warm seasons. Tulsi leaves are used into teas or beverages to add a unique herbal flavor. 

Tulsi plant requires well-drained soil and ample sunlight, making it a perfect fit for home garden.

Click here to read step by step: How to grow Tulsi from seeds at home

Medicinal benefit: Tulsi is admired for its medicinal properties. Rich in antioxidants, this sacred herb is easy to grow. Regularly used in Ayurvedic preparations.

2. Curry leaves

curry leaf

The curry leaf is a wonderful addition to kitchens, appreciated for both its delightful fragrance and taste. It serves as a useful herb, commonly found in many households.

It is a plant that thrives in the summertime, flourishing effectively from February to October.

This plant thrives in abundant sunlight, requiring approximately 5-6 hours of exposure each day. However, it does not demand excessive watering.

Medicinal benefit: Curry leaves serve as a rich source of vitamins A, B, C, and E, delivering crucial nutrients essential for overall health. Furthermore, the consumption of curry leaves may play a role in maintaining healthy cholesterol levels, promoting overall heart health.

3. Mint (Pudina)

Mint plant in pot

Cool and refreshing, mint is a must-have herb for every kitchen. Mint is used for various culinary and medicinal purposes. 

  • Mint adds a refreshing and aromatic flavor to a wide range of dishes, including salads, beverages, desserts, and main courses.

Mint thrives in moist soil and partial shade, which makes it ideal for pots or hanging baskets.

Click here to read step by step: How to grow Mint at home

Medicinal benefit: Mint has several potential health benefits, such as; help ease nausea and motion sickness, good source of antioxidants, which help combat oxidative stress in the body, its ability to soothe indigestion and alleviate digestive discomfort.

4. Coriander (Dhaniya)

Coriander

The vibrant green leaves of coriander are a staple in Indian cuisine. From garnishing curries to flavouring dals and chutneys its uses are countless.

Coriander grows best in well-drained, loamy soil and prefers cool conditions, making it a winter favourite in many Indian regions.

Click here to read step by step: How to grow Coriander at home

Medicinal benefit: Also, coriander has several potential health benefits, such as: natural antibacterial properties, potentially contributing to overall immune health.

5. Lemongrass (Gavati Chaha)

lemongrass

A fragrant addition to soups, teas, and curries, lemon grass thrives in India’s warm climate. Its citrusy aroma and flavour make it a refreshing choice for homemade teas.

Lemongrass, also known as Gavati Chaha, is typically grown in the warm seasons, particularly during the summer.

It thrives in a tropical or subtropical climate and requires well-drained soil and ample sunlight for optimal growth.

Medicinal benefit: Lemongrass offers various potential health benefits, including; it promote a healthy digestive system, rich in antioxidants, it has natural antibacterial and antifungal properties, contributing to overall immune support.

6. Thyme

thyme

Thyme is a fragrant herb that belongs to the mint family (Lamiaceae) and is known for its aromatic leaves. Thyme is a flavorful herb that not only enhances the taste of dishes but also offers potential health benefits.

 Thyme thrives in well-drained soil and prefers full sunlight. It is a hardy perennial plant and can be grown in gardens or containers.

Medicinal benefit: Thyme has been traditionally used for its medicinal properties. It contains compounds with potential antibacterial, antifungal, and antioxidant effects. Thyme tea is sometimes used to alleviate respiratory issues.

7. Parsley

parsley

Parsley is a versatile herb with a mild, fresh flavor and is widely used in culinary applications. It is used as a garnish and ingredient in a variety of dishes, including salads, soups, stews, and sauces.

Parsley is relatively easy to grow and can thrive in containers or in ground. It prefers well-drained soil and partial to full sunlight.

Companion Plant: Parsley is sometimes used as a companion plant in gardens. Its strong scent is believed to repel certain pests, making it a beneficial addition to vegetable gardens.

Medicinal benefit: Parsley is rich in vitamins, particularly vitamin K, vitamin C, and vitamin A. It also contains antioxidants and minerals such as iron and calcium.

8. Chives

A close relative of onions and garlic, chives give a mild onion flavour. They thrive in well-drained soil and require moderate sunlight. 

chives

Chives are commonly used as a fresh herb in cooking. They are particularly popular in salads, soups, sauces, and as a garnish for various dishes. Due to their mild flavor, they complement a wide range of foods.

Chives are easy to grow and can thrive in a variety of conditions. They prefer well-drained soil and partial sunlight.

They are often cultivated in home gardens and are a popular herb for indoor container gardening.

Medicinal benefit: Chives are low in calories and rich in vitamins and minerals, including vitamin C, vitamin K, and folate. They also contain antioxidants.

9. Ajwain plant (Mexican mint) 

ajwain plant

The Ajwain plant, alternatively called Mexican mint or Indian Borage, shares both the aroma and taste of carom seeds. In fact, a simple touch can reveal its identity as an oregano plant.

The leaves of the Ajwain plant, known as oregano, are not only used in pizzas but also has numerous benefits. You can create homemade oregano by drying the leaves of the Ajwain plant.

This plant tends to bloom more during the summer, as it is well-suited for warmer seasons.

It thrives with a sunlight requirement of 1-4 hours maximum, not exceeding this duration.

Click here to read step by step: How to grow Ajwain Plant at home

Medicinal benefit: The Ajwain plant is rich in many nutrients such as protein, carbohydrates, fiber, sodium, potassium, calcium, phosphorus, iron, and thiamine, due to which it is used as a medicinal plant.

10. Green Onion 

Green Onion

Green onion leaves, also known as scallions or spring onions. Green onion leaves are not only a flavorful addition to a wide range of dishes but also contribute essential nutrients to a balanced diet.

Green onions are easy to grow and can be cultivated in gardens or containers. They prefer well-drained soil and partial sunlight. 

Medicinal benefit: Green onion leaves are low in calories but rich in vitamins and minerals. They contain vitamin K, vitamin C, vitamin A, and various B vitamins. They also provide folate, potassium, and fiber.

——————————

Growing herbs at home is a rewarding experience that brings nature’s freshness to your doorstep. From the sacred Tulsi to the versatile mint and the aromatic oregano, these ten herbs offer a symphony of flavours and fragrances.

Also read:

9 Plants You Should Grow at Home

Happy Gardening!!

grow Radish thumbnail

How to Grow Radish in Pots at Home?

Radishes are a good source of antioxidants and help to flush out toxins from the body. What if you could get organic and unadulterated homegrown radishes? Isn’t that exciting?

Well! In this detailed write-up, we will be learning how to grow radishes at home with all the necessary precautions.

Best Season to Grow Radish

Radishes are a winter season crop, typically grown in winter. However, their seeds need to be germinated before winter starts. The best duration for growing and consuming radishes is from October to March.

From where to get Radish Seeds

Generally, at all the nurseries good quality seeds can be found. Also, you can purchase seeds online.


Grow Bags for Radish

grow bags for radish

For vegetables like radishes or carrots, it is highly recommended to use grow bags sized at 12” x 18” inches.

  • In buckets or other pots, these vegetables may not grow properly.

Radishes, when grown in buckets or containers, often lack the necessary space for proper width, resulting in only 4-5 radishes per batch.

grow bags

  • It is essential to choose high-quality grow bags to avoid tearing during the growing process.
  • Good-quality grow bags are readily available in the market.


Soil Mixture for Radish

Soil mixture for radish (1)


  • Soil: Collect soil from nearby nurseries or surroundings. Clean, sieve, and remove any unwanted debris.
  • Compost: Add any compost, approximately 1/4th of the soil. Vermicompost is a suitable option.
  • Epsom Salt: Optionally, add a small amount of Epsom salt.
  • Fungicide: Include a small quantity of fungicide. Cinnamon powder can also be used as an alternative.
  • Construction Sand: Add sand in the same quantity as the compost. If the soil is clayey, increase the amount of sand in the mixture.

Mix all the ingredients thoroughly and fill the prepared mixture into the grow bags.

Water the soil before sowing seeds

water soil (1)

  • Ensure the soil receives ample water until the bottom soil is well-moisturized.
  • Allow the bags to sit for 10-12 hours to ensure proper absorption of moisture and settling of the soil.

Sowing Radish Seeds in the Soil

1. Make holes at appropriate distances in the soil-filled grow bags.

  • Fill these holes with coco peat and place the seeds on the coco peat. Coco peat is used here because it facilitates quick seed germination.

2. After placing the seeds, spray an adequate amount of water to ensure proper moisture for both the seeds and coco peat.

3. Subsequently, regularly spray water whenever the top layer of the soil or coco peat appears dry. Avoid using mugs or pipes for watering to prevent seeds from shifting; instead, use only sprays.

4. Position the grow bags in an area with a minimum of 3 hours of direct sunlight. Adequate sunlight is crucial for the proper growth of radishes.

5. Minimize unnecessary movements of the bags; once placed, keep them in the same position.

Germination of Seeds


1. After 5-6 days, some seeds will likely have germinated.

2. By the 10th to 12th day, seedlings should become visible.

  • If seedlings appear bent, it indicates insufficient sunlight. Ensure they receive an adequate amount of sunlight for proper growth.

3. Check that seedlings have sufficient space between them.

  • Radishes require space to grow, and if there isn’t enough room between two seedlings, radishes may not develop properly.

Repotting of Seedlings

While vegetables like carrots, radishes, spinach, and others generally do not require repotting, if there is a lack of space between seedlings, consider repotting them to provide the necessary room for healthy growth.

Following these steps will help ensure successful germination and optimal growth of radish seedlings.

  • Take out the seedling carefully with the help of any tool.
  • Dip the roots of uprooted seedling in water for at least 5-10 minutes in any vessel.
  • Now, sow the seedling in another grow bag by making a hole in the soil.
  • Adjust all other seedlings also, if they are tilted then align them.
  • Pour water properly now and always prefer to do repotting in the evening

One-Month Growth: Radish Emerges from the Soil

  • After approximately one month, you should start to see the radishes emerging from the soil.

Pest Identification and Remediation:

During this period, there might be instances of pest attacks, which can be identified by:

  • Yellowing leaves
  • Leaves with holes (indicating insect damage)
  • Possible presence of leaf miners

To address pest issues, take the following measures:

1. Immediate Removal of Damaged Leaves:

  • Remove any leaves that show signs of damage promptly to prevent further pest spread.

2. Neem Decoction Treatment:

    • Boil neem leaves in water to create a neem decoction.
    • Sieve the neem decoction to obtain a clear solution.
    • Dilute the neem decoction with ten parts water.
    • Spray this diluted neem solution on the leaves 2-3 times to combat pests.

These measures will help protect your radish plants from pests and promote healthy growth.

Fertilizer for Radish Plants

Radish plants typically do not require additional fertilizers, as the soil is already enriched with compost, maintaining adequate nutrient levels.

Watering Tips to Radish Plants

Radishes are typically cultivated in winter, where the soil tends to retain moisture for longer periods. It is essential to water the plants judiciously:

1. Watering Frequency:

    • Water the radishes when the soil is dry, as the winter season often keeps the soil moist for extended periods.
    • Avoid frequent watering, as overwatering can lead to plant decay, while underwatering may impede plant growth. Maintain a balanced watering schedule.

2. Balanced Watering:

    • Strive to strike a proper balance in watering to ensure the health and growth of the radish plant.

3. Watering Technique:

    • When watering, use a mug and apply water from the sides to prevent any potential damage to the plant.

By adhering to these watering practices, you can support the well-being and successful growth of your radish plants.

Harvesting Radish

After approximately 2 months, you will observe the radishes emerging from the soil. Follow these steps for a successful harvest:

1. Timing:

    • Uproot the radishes when they become visible, typically around the 2-month mark.

2. Harvesting Technique:

    • Gently uproot the radishes from the soil, ensuring minimal damage to the roots.

3. Result:

    • The outcome will be a bountiful harvest of organic radishes with healthy leaves.

4. Careful Measures:

    • Throughout the growth period, adhere to the provided measures diligently to ensure the successful cultivation of homemade, organic radishes.

By following these guidelines, you will enjoy the satisfaction of harvesting homegrown, organic radishes with robust and healthy leaves.

HAPPY GARDENING!!