Category Archives: Outdoor plants

Find tips here for caring for outdoor plants, including guidance on watering, soil mixture, fertilizers, and more.

10 Reasons Why You Should Have a Tulsi (Holy Basil) Plant At Home

Why You Should Have a Tulsi (Holy Basil) Plant At Home


Tulsi, also known as Holy Basil, Vrinda, and Vaishnavi, among other names, is a popular plant in many regions. It is a herb and holds immense significance in Hindu culture. It is revered for its medicinal properties and spiritual importance.

From spiritual significance to medicinal properties, Tulsi offers countless reasons to consider having it in your home. Let’s delve into the top 10 reasons why Tulsi should find a place in your home.

Why You Should Have a Tulsi (Holy Basil) Plant At Home.
Tulsi plant in a pot

 Why You Should Have a Tulsi (Holy Basil) Plant At Home


1. Auspicious Plant (Holy)


Tulsi is revered as a sacred plant in Hindu culture.

  • It is often worshipped and considered an embodiment of the goddess Lakshmi.


2. Lucky Plant and Gives Positive Vibes


  • The Tulsi plant brings peace, happiness, wellness, positive energy, and good luck to a home.
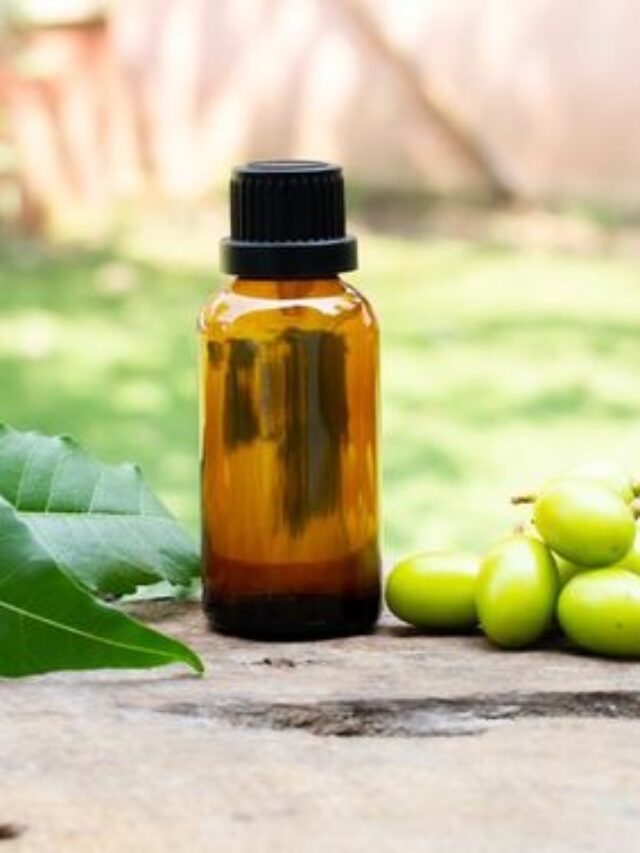
 

3. Medicinal Plant


Tulsi is a powerhouse of medicinal properties. Its leaves are rich in antioxidants, essential oils, and other bioactive compounds that offer a range of health benefits.

  • From boosting immunity to relieving respiratory ailments, Tulsi is a natural remedy for many health issues.


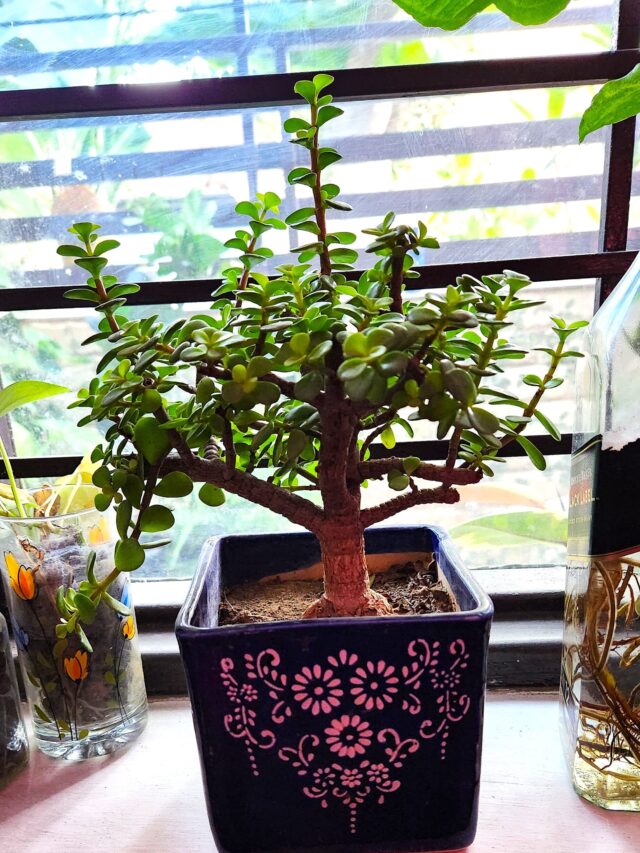
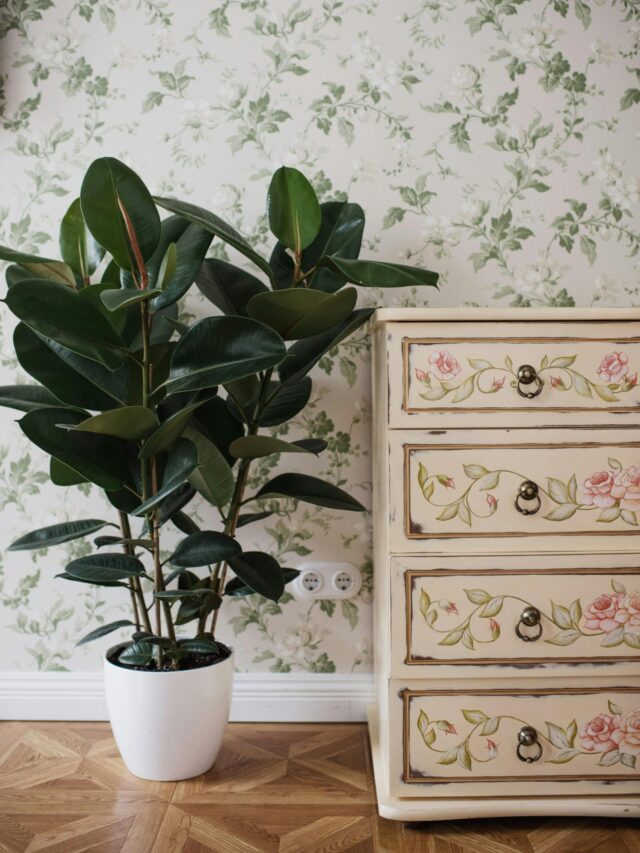
4. Perfect for Container Gardening

Tulsi plant soil

Tulsi is well-suited for container gardening, making it an ideal choice for urban dwellers with limited space.

  • You can easily grow Tulsi in pots or containers on your balcony, terrace adding a touch of greenery to your living space.

5. Easy to Care


One of the best things about Tulsi is its low-maintenance nature.

  • It requires minimal care and attention, making it suitable for both novice and experienced gardeners.
  • With regular watering and occasional pruning, Tulsi can thrive and flourish without much fuss.


Also Read: Watering Tips for Healthy Tulsi Plant
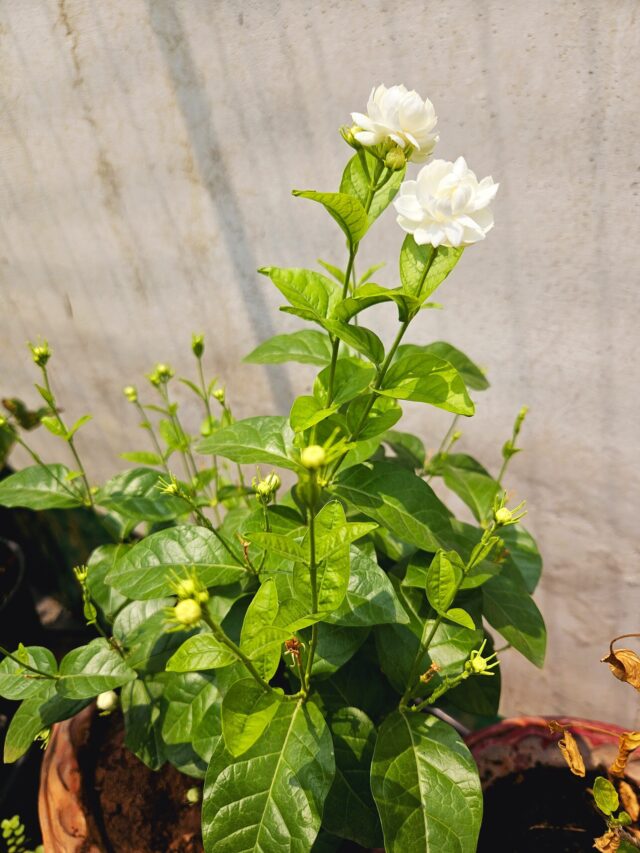
 

6. Perennial Plant

Tulsi is a perennial plant, meaning it can live for several years with proper care.

  • Its longevity ensures that you can enjoy its beauty and benefits for a long time, making it a worthwhile investment for your home garden.


7. Antibiotic and Pest Repellent Plant

tulsi leaves in bowl


Tulsi possesses natural antibiotic properties that help boost the immune system and fight off infections.

  • Additionally, its strong fragrance acts as a natural repellent against common garden pests like mosquitoes, flies, and ants, reducing the need for chemical pesticides.


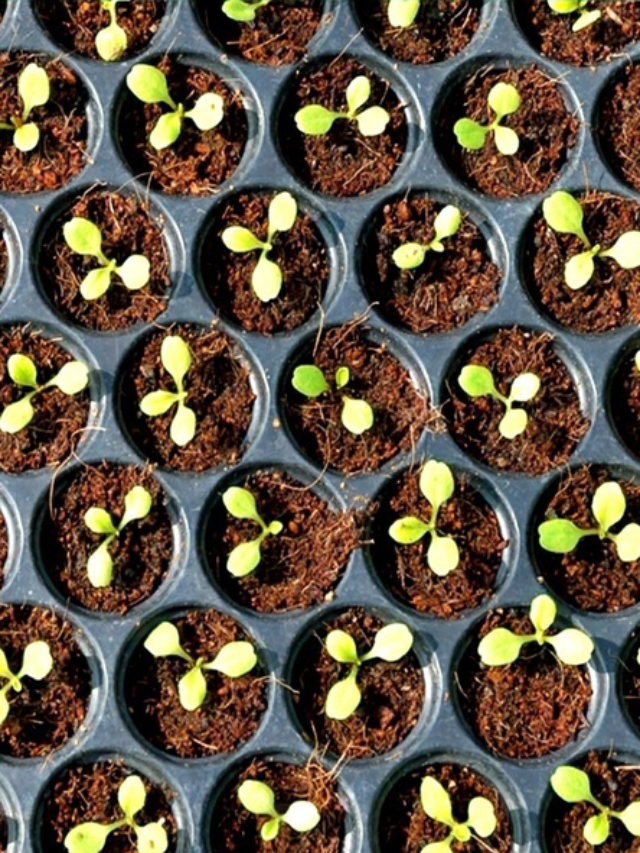
8. You Can Grow from Seeds and Cuttings

tulsi seedlings


Whether you prefer starting from scratch with seeds or opting for the convenience of cuttings, Tulsi offers both options.

  • You can easily propagate Tulsi by planting seeds in well-draining soil or rooting cuttings in water, giving you flexibility in how you choose to grow this versatile plant.


Also, read: Grow Tulsi plant from seeds


9. Not a Very Heavy Feeder Plant, Does Not Need Much Fertilizer


Tulsi is not a demanding plant when it comes to nutrients.

  • A balanced fertilizer applied once or twice a year is sufficient to promote healthy growth, making it an economical choice for home gardening.

Also Read: How to Care Tulsi Plant


10. Can Be Kept in a Balcony of 3 to 4 Hours of Sunlight

Tulsi balcony


Tulsi is a sun-loving plant that thrives in full sunlight.

  • However, it can also tolerate partial shade, making it adaptable to various light conditions.
  • If you have a balcony or terrace that receives 3 to 4 hours of sunlight daily, it’s the perfect spot to place your Tulsi plant.


FAQs (Frequently Asked Questions) on Tulsi Plant


1. Can I Grow Tulsi plant in balcony?

Ans: Yes, Tulsi can be grown in balcony as long as it receives sufficient sunlight.


2. How Often Should I Water My Tulsi Plant?

Ans: Water Tulsi regularly, allowing the soil to dry out slightly between waterings.


3. Is Tulsi Easy to Care For?

Ans: Yes, Tulsi is relatively low-maintenance and can thrive with minimal attention.


4. Can I Use Tulsi Leaves for Cooking?

Ans: Absolutely! Tulsi leaves add a unique flavor to various dishes and beverages.

Follow our Social media channel:

1. Voice of Plant – YouTube Channel

2. Voice of Plant Facebook Page

3. Instagram Voice of Plant Channel

Happy Gardening!

How To Make Aparajita Bushy & Flowering – Simple Care Tips

How To Make Aparajita Bushy & Flowering


Aparajita (Clitoria ternatea), also known as Butterfly Pea, is a stunning flowering plant that can enhance the beauty of any garden with its vibrant blooms. Available in blue, white, purple, and pink colors, Aparajita flowers can be single or double-petaled. This fast-growing climber requires proper care to remain bushy and full of flowers throughout the season.

As winter fades and spring arrives, it’s time to rejuvenate your Aparajita plant. Follow these essential care tips, including pruning, soil preparation, fertilization, and more, to ensure a healthy, bushy, and flowering Aparajita plant.

How To Make Aparajita Bushy & Flowering
White Aparajita Flower

How To Make Aparajita Bushy & Flowering


1. Sunlight – Essential for Maximum Growth


Aparajita thrives in full sunlight, making sunlight one of the most crucial factors for its healthy growth.

  • Ensure your plant receives at least 5-6 hours of direct sunlight daily for optimum flowering.

Why Sunlight is Important?


  • Sunlight helps in photosynthesis, providing energy for the plant’s overall growth.
  • Insufficient sunlight leads to leggy growth and fewer blooms.
  • Too much shade can cause yellowing leaves and stunted growth.

Best Practices for Sunlight Exposure:


Morning Sunlight is Best: Place the plant where it gets direct morning sunlight, which is less harsh than the afternoon sun.
Avoid Complete Shade: If growing indoors, position the pot near a south-facing window or under grow lights.
Outdoor Placement: If growing in a garden, plant Aparajita in an open area with ample sunlight.

2. Soil – The Foundation of a Healthy Aparajita


Aparajita prefers well-draining, nutrient-rich soil that supports its root system and prevents waterlogging.

Ideal Soil Composition:


  • 50% Garden Soil – Provides structure and support.
  • 30% Compost (Vermicompost, Cow Dung Compost, or Leaf Mold) – Enriches soil with essential nutrients.
  • 20% Sand or Perlite – Improves drainage and aeration.

Soil Preparation Tips:


🔹 Loosen the Soil: Before planting, till the soil to improve air circulation.
🔹 Check Drainage: Avoid compacted or clayey soil, as it retains excess water.
🔹 pH Level: The ideal soil pH is 6.0 – 7.5, slightly acidic to neutral.

3. Temperature – The Right Climate for Aparajita


Aparajita grows best in warm climates, with an ideal temperature range of 15°C-35°C.

Seasonal Care:


  • Spring & Summer: The plant thrives and produces abundant flowers.
  • Winter: Growth slows down, and the plant may shed leaves or become dormant.
  • Monsoon: The plant enjoys rain but ensure good drainage to avoid root rot.

Protecting Aparajita from Temperature Stress:


In Winter: Shift potted plants indoors or cover them with mulch to protect roots from cold.
In Extreme Heat: Provide partial shade during peak summer afternoons to prevent dehydration.

Also, read: How To Boost Flowering in Hibiscus Plant


4. Watering – Maintaining Moisture Balance


Watering is crucial for Aparajita, but overwatering can be harmful.

How Often to Water?


💧 Summer & Spring: Water every 2-3 days, keeping the soil slightly moist.
💧 Winter: Reduce watering to once a week as the plant needs less water.
💧 Monsoon: Avoid overwatering; water only if the soil feels dry.

Watering Tips:


Check Soil Moisture: Insert a finger into the soil; if the top inch feels dry, it’s time to water.
Morning Watering is Best: Helps the plant absorb moisture before the heat of the day.
Avoid Wetting Leaves: Direct water at the soil to prevent fungal diseases.

Also, read: How To Water Plants Correctly?


5. Pot – Choosing the Right Container


If growing Aparajita in a pot, selecting the right size and material is essential.

Best Pot for Aparajita:


  • Material: Clay pots are ideal as they absorb excess moisture and keep roots cool.
  • Size: A 12-inch diameter pot with good depth allows healthy root development.
  • Drainage: Ensure the pot has at least 2-3 drainage holes to prevent root rot.

Repotting Tips:


🔹 Repot Every 2 Years: Refreshes the soil and provides more space for growth.
🔹 Use Fresh Potting Mix: While repotting, add compost to enrich the soil.

6. Pruning – Encouraging Bushier Growth


Regular pruning helps Aparajita become denser and promotes more blooms.

When & How to Prune?


Best Time: Late winter or early spring before new growth starts.
Remove Dead Stems: Cut off weak, dry, or diseased branches.
Pinch New Shoots: Encourage bushier growth by pinching the top of young shoots.

Pro Tip: After pruning, apply compost or fertilizer to support new growth.

Also, read: When & How To Do Pruning of Plants?


7. Support – Helping the Plant Grow Upright


Aparajita is a climber and needs support to grow properly.

Types of Support:


  • Trellis: Perfect for garden spaces.
  • Bamboo Stakes: Ideal for small pots.
  • Fence or Wall Support: Helps spread the vines beautifully.

8. Fertilizer – Boosting Growth & Flowering


Aparajita requires regular feeding to remain lush and full of flowers.

Best Fertilizers for Aparajita:


🌱 Organic Compost: Enhances soil fertility.
🌱 Liquid Fertilizer (Seaweed Extract, Cow Dung Liquid, or Vermicompost Tea): Boosts blooming.
🌱 Banana Peel & Onion Peel Fertilizer: Potassium in banana & Onion peels directly encourages flowering, helping plants produce more abundant and vibrant blooms.

Must read: Which Fertilizer Is Best for Flowering? 

Feeding Schedule:


Once a Month: Apply compost for steady nutrient supply.
During Flowering Season: Use a potassium-rich fertilizer like banana peel liquid fertilizer every 15 days.

9. Flowering Time – Getting the Best Blooms


To ensure consistent flowering, follow these care tips:

🌼 Deadhead Spent Flowers: Removing faded blooms encourages new flowers.
🌼 Provide Adequate Sunlight: Lack of sunlight reduces flowering.
🌼 Use Organic Fertilizers: Promote healthy and abundant blooms.

Tip: Using banana peel and onion peel fertilizers during flowering season enhances flower production.

Conclusion

Growing a lush, bushy, and flowering Aparajita plant is easy when you provide proper care. With ample sunlight, well-draining soil, regular watering, timely pruning, and organic fertilizers, your Aparajita will reward you with beautiful blooms all season long. Follow these simple yet effective care tips to keep your plant healthy and thriving.

Follow our Social media channel:

1. Voice of Plant – YouTube Channel

2. Voice of Plant Facebook Page

3. Instagram Voice of Plant Channel

Happy Gardening!

jade plant and crassula ovata which plant is easy to care

Crassula Ovata vs Jade Plant Which Plant Is Easier To Care: Check 5 Tips

Crassula Ovata vs Jade Plant Which Plant Is Easier To Care

The Crassula Ovata and the Jade Plant are two of the most popular succulents, loved for their resilience and beauty. However, if you’re new to gardening, it’s essential to understand their differences before choosing the right one for your home.

Let’s explore the key differences between these plants to help you make the best choice!


Crassula Ovata vs Jade Plant Which Plant Is Easy To Carer Discover their key differences, care tips.
Jade Plant & Crassula Ovata

Crassula Ovata vs Jade Plant Which Plant Is Easier To Care

1. Sensitivity

Crassula Ovata

Crassula Ovata is highly sensitive to overwatering and poor drainage.

  • If its roots sit in water for too long, they can rot quickly.
  • It also prefers stable conditions and may show signs of stress when exposed to extreme changes in temperature or light.

Jade Plant

Jade Plants are much tougher and more forgiving.

  • They can handle irregular watering and adapt to various environments, making them ideal for beginners.

2. Light Requirements

Crassula Ovata

Prefers bright sunlight but can tolerate some direct sun.

  • However, too much harsh sunlight can cause leaf scorching.

Jade Plant

  • It thrives with 3 to 4 hours of direct sunlight each day, making it ideal for a sunny windowsill or outdoor spot with plenty of sun.

3. Watering Needs

Crassula Ovata

Requires careful watering. Overwatering is the most common mistake and can lead to root rot.

  • It’s best to let the soil dry out completely before watering again.

Jade Plant

Far less demanding when it comes to watering.

  • It can survive occasional missed waterings without showing immediate signs of stress.

4. Soil Preferences

Crassula Ovata

Needs well-draining soil and struggles in compact, water-retentive soil. A cactus or succulent mix is best.

Jade Plant

Less fussy about soil, as long as it drains well. This makes it easier to manage for beginners.

5. Sensitivity to Environment

Crassula Ovata

Highly sensitive to environmental changes, including humidity levels, temperature fluctuations, and light. Regular monitoring is required to keep it healthy.

Jade Plant

A much tougher plant that can tolerate a wide range of conditions, including lower humidity and moderate temperature variations.


Which Plant Is Easy To Care

If you’re a beginner looking for a low-maintenance plant, the Jade Plant is the better choice.

  • Its hardiness, adaptability, and forgiving nature make it perfect for those still learning the basics of plant care.

Final Tip**

If you’re still undecided, why not try both? Place the Jade Plant in a direct sunlight spot and the Crassula Ovata in a bright light area to enjoy the best of both worlds!

Also, read: How to make Jade Plant Bushy

Follow our Social media channel:

1. Voice of Plant – YouTube Channel

2. Voice of Plant Facebook Page

3. Instagram Voice of Plant Channel

Happy gardening!!

How To Prune A Curry Leaf Plant To Make It Bushy

How To Prune A Curry Leaf Plant To Make It Bushy


Pruning a curry leaf plant may seem daunting to many inexperienced owners who fear stunting growth or losing their chance at a sizable tree. However, the secret to flourishing foliage lies in regular pruning. This essential practice not only shapes the plant but also stimulates fresh growth, ensuring a bushy, healthy appearance.


Understanding the art of pruning is vital. One common mistake is timing – knowing when to prune is crucial. Additionally, improper techniques, such as over-pruning or neglecting to trim, can harm the plant’s vitality.

How To Prune A Curry Leaf Plant To Make It Bushy


Let’s understand the benefits of pruning Curry Leaf Plant:

1. Encourages new growth:


How To Prune A Curry Leaf Plant To Make It Bushy
New growth in Curry leaf plant

Firstly, it encourages new growth by stimulating the emergence of shoots and branches.

  • Removing the dominant tip prompts the plant to produce side shoots, resulting in a fuller, bushier appearance.

2. Increases leaf production


Moreover, pruning facilitates increased leaf production.

  • Each branch yields fresh leaflets, enhancing the overall foliage density.


3. Controls Size


Especially important in non-tropical climates where plants are often container-grown, regular pruning prevents overgrowth.


4. Promotes Plant Health


Removing dead stems and leaves improves air circulation, reducing the risk of disease and pest infestation.

  • Eliminating crossed branches prevents damage and potential entry points for pathogens.

What is the best time to prune a curry leaf plant?


Curry stem pruning

Choosing the right time to prune is crucial. Pruning a curry leaf plant is best done during its active growth phases in spring, summer, and early fall.

Note:

  • Avoid pruning your curry leaf plant as it transitions into colder weather during late fall and throughout the winter months.
  • During this period, the plant enters a dormancy phase, which can potentially harm it and lead to damage.

How to Prune Curry Leaf Plant To Make It Bushy


Here’s a structured approach to pruning:

1.Pruning Techniques


pruning curry leaf

Curry leaf plant primarily grows from its tips, so pruning or plucking from the tip stimulates the emergence of 2-3 new shoots, leading to the development of new branches and leaves.

2. Remove Dead & Yellow Leaves:


Begin by pruning off any dried, dull, or yellow leaves from the stem to maintain plant health.

3. Identify the branches you want to prune


Curry pruning stem

Look for branches that are growing too long and sparse or those that are crossing each other. These are the branches that you will want to prune to encourage bushier growth.


4. Plucking leaves from the bottom of the plant


Curry pruning

  • When harvesting leaves for use, prioritize plucking leaves from the bottom of the plant.  Leaves at the top are still in the growth phase and should be allowed to mature.

5. Remove entire branches when harvesting leaves for use


Additionally, when you are harvesting leaves for use, it is advisable to remove entire branches rather than just individual leaves.


6. Remove any flowers


curry leaf flowers pruning

If your curry leaf plant has started to flower, it’s best to remove these flowers.

  • While the flowers are beautiful, they divert energy away from leaf production, which is what you want to encourage for a bushy plant.

7. Prune strategically


Use sharp, clean pruning shears to make precise cuts.

  • Avoid tearing or ripping the plant tissue as this can introduce pathogens and cause unnecessary stress to the plant. 

Important Note:

If your plant is relatively new, around 6 or 3 months old, it’s best to stick to light pruning.

  • From February to October, regular light pruning can be performed to encourage new branch growth, but avoid harsh pruning.
  • After new stems emerge, wait until they reach a length of 5-6 inches before further pruning.

Hard pruning of Curry Leaf Plant


For plants that are one or two years old, hard pruning can be quite beneficial.

By removing yellow leaves, dead, or leggy stems, you encourage the plant to grow more branches and denser foliage.
  • This type of pruning helps maintain the plant’s shape and promotes healthier growth overall.

Note:

  • After hard pruning, add vermicompost into the soil. Avoid using heavy fertilizers as the plants are currently leafless.

Important note:

  • Perform hard pruning of your plant only in the evening and keep it shaded for at least 7 days until new leaves emerge.
  • This will assist the plant in adapting to its new environment more effectively.

Maintain a regular pruning schedule


Pruning your curry leaf plant should be an ongoing process rather than a one-time event.

  • Aim to prune your plant every few weeks during the growing season to maintain its shape and encourage healthy growth.

Provide proper care after pruning


After pruning, make sure to water your curry leaf plant adequately and provide it with sufficient sunlight.

  • This will help it recover from the pruning process and stimulate new growth.
Also, read: Best Fertilizers for Curry Leaf Plant for Healthy Growth


In conclusion, pruning is an essential part of caring for a curry leaf plant and is necessary for maintaining its health and promoting bushy growth. By following these steps and incorporating regular pruning into your plant care routine, you can ensure that your curry leaf plant thrives and produces an abundance of flavorful leaves for all your culinary adventures.

Don’t be afraid to trim your curry leaf plant – it’s the key to a flourishing and bushy plant!

Happy Gardening!

Follow our Social media channel:

1. Voice of Plant – YouTube Channel

2. Voice of Plant Facebook Page

3. Instagram Voice of Plant Channel

Happy gardening!!

Rose Flowering Care & Tips in February

Rose Flowering Care and Tips in February – Rose Will Bloom Again If You Do This Task in February Now

Rose Flowering Care and Tips in February

February is a make-or-break month for rose lovers. After months of dormancy, your roses need some attention to wake up and bloom beautifully in spring. If you ignore them now, they might struggle, bloom weakly, or even fail to thrive.

Many gardeners assume that roses will take care of themselves once winter ends, but that’s not the case. Proper pruning, feeding, watering, and pest control in February will ensure that your roses return with full, vibrant blooms.

So, what exactly should you do this month to guarantee a stunning rose garden? Let’s dive into the essential tasks.

Rose Flowering Care and Tips in February
Rose Red Flowers

Understanding Rose Dormancy


Before jumping into rose care, it’s important to understand what happens to them during winter.

Why Do Roses Go Dormant?


Dormancy is nature’s way of protecting roses from the harsh winter cold. When temperatures drop, roses stop growing, lose their leaves, and appear lifeless. However, they are still very much alive beneath the surface, conserving energy for spring growth.

Signs Your Roses Are Waking Up


By February, roses begin to show signs of coming out of dormancy. Look for these indicators:

  • Swelling buds on stems
  • Small green shoots appearing
  • Slight softening of branches

When you notice these signs, it’s time to start your February rose care routine.


Rose Flowering Care and Tips in February


Rose Will Bloom Again If You Do This Task in February Now


1. Pruning: The First Step to Revival


Pruning is the most important task you must do in February. It encourages new growth, removes dead or diseased branches, and improves air circulation.

How to Prune Roses Correctly:

Use sharp, clean pruning shears.
✅ Cut at a 45-degree angle, about ¼ inch above an outward-facing bud.
✅ Remove dead, weak, or inward-growing branches.

2. Cleaning Up the Rose Bed


A clean rose bed is essential for preventing diseases and ensuring healthy soil.

Steps to Clean Your Rose Bed:


  • Remove fallen leaves, as they can harbor pests and fungi.
  • Pull out any weeds that might compete for nutrients.
  • Loosen compacted soil to improve drainage.

Cleanliness reduces the risk of black spot and powdery mildew, two common rose diseases.

3. Feeding Your Roses with the Right Nutrients


Roses are heavy feeders, and after winter, they need a boost.

Best Fertilizers for February:

  • Organic: Compost, bone meal, banana peels (for potassium).

Feed your roses at the base, avoiding the leaves to prevent burns.


4. Watering Wisely After Winter

Roses don’t need a lot of water in winter, but as they wake up, they need a steady supply.

Watering Tips for February:

  • Water deeply but less frequently.
  • Avoid watering leaves to prevent fungal infections.
  • Test the soil—if it’s dry an inch below the surface, it’s time to water.

5. Checking for Pests and Diseases


Early spring brings pests like aphids and fungal diseases.

Preventing Pests:

  • Use neem oil or insecticidal soap.
  • Introduce ladybugs (natural aphid predators).

Preventing Diseases:

  • Keep good airflow by proper pruning.
  • Avoid overhead watering.
  • Apply a preventive fungicide if needed.

Conclusion

If you take care of your roses in February, you’ll be rewarded with an explosion of blooms in spring. Prune, feed, water, and protect your roses, and they’ll return healthier and more beautiful than ever.

Check this – Best Fertilizers for Rose Flowering


Follow our Social media channel:

1. Voice of Plant – YouTube Channel

2. Voice of Plant Facebook Page

3. Instagram Voice of Plant Channel

Happy Gardening !!

hibiscus flowering

How to Get Maximum Flowering in Hibiscus

How to Get Maximum Flowering in Hibiscus


Every flowering plant naturally tends to bloom, and if a hibiscus fails to do so for 2-3 months, it becomes a cause for concern. Typically, an underlying problem or issue is responsible for the lack of blooming. Therefore, the primary focus should be on identifying the problem before applying any treatment to the plant. Always refer to the checklist below to ensure all the plant’s requirements are being met.

How to Get Maximum Flowering in Hibiscus
Hibiscus flower plant

How to Get Maximum Flowering in Hibiscus


Sunlight requirement


Hibiscus, renowned for its large flowers, necessitates a minimum of 5-6 hours of direct sunlight to promote blooming on all pruned branches.

  • This plant requires a substantial amount of energy to bloom, and if it receives only 1-2 hours of sunlight exposure, successful blooming may be hindered.

Soil composition


Soil mixture

The primary requirement for the growth of any plant is suitable soil.

  • It is crucial that the soil is not clayey, and any signs of algae formation should be addressed by tilling it.
  • To enhance the soil’s nutritional content and promote a looser texture, incorporate vermicompost.
  • For strong root development, the soil should possess an effective drainage system and not be compacted.

Water requirement


Excessive watering in hibiscus can result in root rot and hinder flower blooming.

  • If overwatered, buds may form but will ultimately drop without blossoming.
  • Conversely, insufficient watering can lead to the plant’s demise, with no chance of blooming and eventual withering.

“It is crucial to provide a balanced water supply for hibiscus—water when the soil is dry and ensure watering until excess water drains out from the bottom of the pot.”

Pest attack in Hibiscus plant


Examine the plant for potential insect infestations, as hibiscus plants are susceptible to attacks from pests such as aphids, mealybugs, and other insects.

  • These dense plants may conceal pests, making early detection challenging.

Use of Neem Oil


Inspect for leaf miners and other pests, and be vigilant for potential soil issues such as fungal infections or diseases. Safeguard against these pest attacks by thoroughly spraying the entire plant with neem oil.

  • To address soil diseases, if present, create a mixture of neem oil and a small amount of cinnamon powder in water and administer it to the soil.

Pot Size for Hibiscus plant


While hibiscus typically thrives in a 10-12 inch pot, if, despite addressing the previously mentioned considerations, the plant fails to bloom, it is crucial to thoroughly inspect the pot for potential root binding.

  • Although hibiscus tends to appreciate being slightly root-bound, excessive binding can induce stress.
  • To assess this, carefully remove the plant from its pot, examine the roots, and if necessary, engage in root pruning.
  • Transplant the hibiscus into a larger pot to provide ample space, fostering optimal growth conditions. It will start flourishing again.


Soft pruning of Hibiscus plant


Generally, it is advised to conduct hard pruning on hibiscus in February, while soft pruning can be carried out year-round, excluding the harsh winter months.

If your hibiscus is not producing blooms, consider soft pruning and follow up with a diluted mustard cake liquid fertilizer to replenish soil nutrients to promote the development of new branches.

“It is important to refrain from giving the mustard cake liquid fertilizer during extremely hot summers.”

  • The diluted form of mustard cake liquid fertilizer is recommended due to its potency.
  • When pruning is performed, hormones are released at the pruned tips, stimulating the growth of fresh branches.

Lack of Nutrients


If, despite pruning, your hibiscus is not blooming as expected, it likely indicates a nutrient deficiency. To address this, apply Epsom salt to the entire plant.

Banana peel fertilizer:


After 10 days of the Epsom salt treatment, nourish the plant with a liquid fertilizer made from banana peel fertilizer. This particular fertilizer enhances the flowering process, and you will likely notice the emergence of new buds shortly after application.

Read article on:

How to make Banana peel fertilizer


Onion peel liquid fertilizer:

Following the banana peel fertilizer, wait for another 10 days and then give onion peel liquid fertilizer to the plant.

  • This fertilizer also promotes flower blooming, and you can expect to see new buds appearing within a few days.

Note:

  • In instances where the leaves of the blooming plant turn yellow, it is an indication of a need for more nutrients.

Cow dung liquid fertilizer


  • After 10 days of the onion peel fertilizer, provide the plant with a liquid fertilizer made from cow dung.

Read article on:

How to make Cow dung fertilizer

Note:

  • By adhering to this schedule of applying different liquid fertilizers every 10 days, you can stimulate consistent blooming in your hibiscus.

Increase the dosage of fertilizer after thoroughly inspecting all the concerns mentioned above. To cure the main problem is necessary to promote the blooming in plants rather than applying random theories of experiments.

As living entities, plants require a well-balanced diet consisting of sunlight, water, air, and essential nutrients. It is crucial to meticulously monitor and fulfill each of these requirements to ensure the effective growth and flourishing of the plant.

Once the plant is blooming at the anticipated rate, reduce the fertilizer dosage, as an excessive amount may adversely affect the plant. It is advisable to adhere to the hierarchical checklist mentioned earlier before administering any remedies to the plant.

Follow our Social media channel:

1. Voice of Plant – YouTube Channel

2. Voice of Plant Facebook Page

3. Instagram Voice of Plant Channel


Happy Gardening!!

jade lucky plant

Does Jade Plant Really Bring Good Luck?

Does Jade Plant Really Bring Good Luck?

The Jade Plant, also known as the Lucky Plant, is widely known for its association with good fortune and prosperity. It is believed that keeping this plant in your home brings good luck, happiness, and an increase in wealth. But is there something truly special about this plant that can bring positive changes to our lives? Let’s explore this in detail.

Does Jade Plant Really Bring Good Luck?
Jade Plant

Does Jade Plant Really Bring Good Luck?

The Jade Plant and Its Importance in Feng Shui


In Feng Shui, the Jade Plant symbolizes wealth and prosperity.

  • It is recommended to place it in directions that attract positive energy, such as the southeast direction.
  • This plant is believed to create an atmosphere of peace and happiness in the place it is kept.

Does the Jade Plant Really Enhance Luck?


The belief that the Jade Plant boosts luck and prosperity is prevalent across various cultures and civilizations.

  • Its presence fosters a positive environment and provides mental peace.
  • Many people keep it in their homes, hoping that good fortune stays with them.

Benefits of Keeping a Jade Plant


1. Mental Peace: The greenery of this plant brings mental peace and helps reduce stress.

2. Wealth Growth: Keeping it in homes or commercial spaces is said to enhance wealth and prosperity.


Where Should You Place the Jade Plant?


  • Place it in the southeast direction of your home, as this direction is associated with wealth.
  • In offices, keep it on your work desk to maintain positive energy around your workspace.

How to Care for a Jade Plant?


1. Watering: Water it only when soil looks completely dry.

  • Overwatering can lead to root rot.

2. Sunlight: Ensure the plant gets adequate sunlight for healthy growth.

3. Placement: Keep your Jade plant outdoor in sunny spot.

Must read: Where to Keep Jade Plant for Healthy Growth


Common Problems in Jade Plants


1. Yellow Leaves: This may occur due to overwatering.

2. Root Rot: Excess water can cause the roots to rot, which is harmful to the plant.


Can Jade Plants Be Gifted?


The Jade Plant makes an excellent gift, symbolizing friendship and good wishes. It is a perfect gift for occasions like housewarming or starting a new business.


Conclusion


The Jade Plant is not just a beautiful houseplant; it also brings positivity, prosperity, and happiness to your home. By placing it in the right direction and caring for it properly, it can not only enhance the aesthetic appeal of your space but also bring good fortune into your life.

Follow our Social media channel:

1. Voice of Plant – YouTube Channel

2. Voice of Plant Facebook Page

3. Instagram Voice of Plant Channel


Thank you!

Happy Gardening!

When and How to Give Fertilizer to Jasmine Plant for Maximum Flowering

When and How to Give Fertilizer to Jasmine Plant


Fertilizers are essential for providing the necessary nutrients to the soil and plants to support optimal growth. When plants require fertilizers, they exhibit various symptoms, including:

1. Dull, faded, or curled leaves.

2. Stagnant or limited plant growth.

3. Withered or deteriorating plant condition.

4. Failure to form buds.

5. Bud formation without subsequent flower development.

6. Blooming flowers that lack fragrance.

When and How to Give Fertilizer to Jasmine Plant
Jasmine Flower

For Jasmine plants, regular pruning is recommended to encourage the growth of branches, buds, and flowers. To ensure the plant’s growth aligns with the desired pace, it’s important to match the nutrient requirements. Adjusting the dosage of different fertilizers based on the plant’s various growth phases is a key practice.

When and How to Give Fertilizer to Jasmine Plant


  • During Growing phase of the plant
  • During Flowering Phase of the Plant

A. Growing phase of the plant:

Jasmine plant

1. Mustard Cake Fertilizer:

  • This is a favored fertilizer for Jasmine (Mogra) plants during the initial growth stage.
  • Apply it once a month to promote the development of a robust and healthy plant.
  • It is advisable to skip this fertilizer during extreme summers, replacing it with alternatives like neem cake powder.


Read article on: Mustard Cake Fertilizer

2. Liquid Fertilizers:

  • Apart from Mustard Cake Fertilizer, you can use vermicompost tea, cow dung fertilizer, or kitchen compost tea during the growing phase.
  • You can give liquid fertilizers once a month to maintain a nutrient-rich soil environment.


Read article on:

1.  Vermicompost tea

2. Cow Dung Fertilizer

3. Micronutrients:

  • While liquid fertilizers are rich in essential nutrients like nitrogen, phosphorus, and potassium (NPK), they might lack sufficient micronutrients.
  • Every two months, address potential micronutrient deficiencies to prevent issues like faded leaves or a lack of fragrance in flowers.
  • Liquid micronutrients are effective for Jasmine (mogra) plants; dilute 3 ml in 1 liter of water and spray it on the leaves and soil during the evening.
  • Feromones micronutrients also available in sticks can be used here.

B. Flowering Phase of the Plant:


1. Enhanced Frequency:

  • As the plant enters the flowering phase with visible branches, increase the frequency of fertilizer.
  • Alongside the regular fertilizers, introduce additional ones like onion peel or banana peel fertilizer once a month. This adjustment reduces the interval between fertilizations to 15 days.

2. Pruning and Flowering:


  • Pruning is particularly crucial during the flowering phase to encourage lateral growth.
  • Given the simultaneous demand for nutrients during pruning and flowering, maintaining a consistent and nutrient-rich fertilizer schedule becomes vital.

General Tips:

  • The dosage of different fertilizers should be adjusted according to the different phases of the plant. This is a good practice, as the nutritional needs of the plant can vary during different stages of growth, such as the growing phase and flowering phase.
  • Rather than increasing concentrations, adjust the frequency of fertilizer. Always dilute fertilizers with sufficient water before applying to prevent any adverse effects on the plant.

By following these guidelines, anyone can cultivate a thriving Jasmine (Mogra) plant at home. 

Also read:

How to Grow and Care Jasmine Plant


Follow our Social media channel:

1. Voice of Plant – YouTube Channel

2. Voice of Plant Facebook Page

3. Instagram Voice of Plant Channel

Happy Gardening !!

How to Get More Pups in Aloe Vera Plant

How to Get More Pups in Aloe Vera Plant

How to Get More Pups in Aloe Vera Plant

Introduction


Aloe vera is a household favorite, cherished for its soothing gel and low-maintenance nature. But did you know that your aloe plant can become a propagation powerhouse? By nurturing your aloe vera properly, you can encourage it to produce more pups—miniature versions of the parent plant. These pups are a great way to expand your plant family or gift loved ones a piece of your green haven.

How to Get More Pups in Aloe Vera Plant
Aloe Vera pups

Understanding Aloe Vera Pups


What Are Aloe Vera Pups?


Aloe vera pups, also known as offsets, are small, identical clones of the parent plant that grow from the base. They share the same root system until they’re mature enough to be separated and planted individually.

Why Do Aloe Vera Plants Produce Pups?


In nature, pups are the aloe plant’s way of spreading and reproducing. When the plant is thriving, it directs energy into creating these offspring to ensure survival in its environment.


How to Get More Pups in Aloe Vera Plant

Choosing the Right Aloe Vera Plant


1. Healthy Parent Plant is Key


For a plant to produce pups, it needs to be healthy and thriving. Look for a mature aloe vera with thick, fleshy leaves and a robust root system.

Signs of a Pup-Ready Aloe Vera


Aloe vera plants typically start producing pups when they’re about 1-2 years old. You may notice small green shoots emerging from the soil near the base of the plant.


Best Growing Conditions for Aloe Vera


1. Soil Requirements


Aloe vera thrives in well-draining soil. Use a cactus or succulent mix, or prepare your own blend with sand, perlite, and potting soil.

2. Sunlight Needs


Place your aloe vera in bright sunlight. While it can tolerate direct sun, too much exposure can stress the plant and inhibit pup production.

3. Watering Practices


Water your aloe vera deeply but infrequently. Allow the soil to dry out completely between waterings to mimic its natural desert habitat.


Techniques to Encourage Pup Growth


1. Providing Adequate Space


Overcrowded pots can hinder pup growth. Ensure your aloe vera has enough room to expand its root system.

2. Fertilizing the Plant


Aloe vera doesn’t need much fertilizer, but a light feeding of a balanced, organic fertilizer during the growing season can encourage pups.

3. Stressing the Plant Slightly


Mild stress, such as reducing water frequency or sunlight slightly, can sometimes trigger the plant to produce pups as a survival mechanism.

Common Mistakes to Avoid


  • Overwatering: Too much water can cause root rot and harm both the parent plant and pups.
  • Neglecting Soil Quality: Poor soil drainage can stunt growth and pup production.

Best Times of Year for Pup Growth


Spring and summer are the best seasons for aloe vera to produce pups, as the plant is actively growing.

Aloe vera pups are nature’s gift to plant lovers, offering a simple way to propagate this amazing plant. With the right care and techniques, you can encourage your aloe vera to produce plenty of pups, turning one plant into a thriving collection.

Check this out – Aloe Vera Plant Complete Care


Follow our Social media channel:

1. Voice of Plant – YouTube Channel

2. Voice of Plant Facebook Page

3. Instagram Voice of Plant Channel

Happy gardening!

aloe vera thumbnail

How to Grow Aloe Vera Plant

How to Grow Aloe Vera Plant


In today’s world, almost everyone is aware of the benefits and uses of Aloe Vera, particularly its ability to thrive and propagate easily. However, to make the most of its benefits, it is important to know how to care for it properly. In this article, we will discuss several tips to help you maintain healthy and lush Aloe Vera plants.


Tip 1: Healthy roots are essential for a thriving and robust Aloe Vera plant


Aloe Vera

To strengthen the roots:

1. Ensure the soil mixture is optimal.

  • A well-draining soil mix, such as a cactus or succulent potting mix, promotes healthy root growth.

2. Maintain balanced watering practices.

aloe vera watering

  • Overwatering can cause fungal infections, attract insects, and promote bacterial growth in the roots.
  • It may also lead to root decay.
  • Allow the soil to dry out completely between waterings to prevent these issues.

Tip 2: Sometimes, ignorance is bliss when it comes to caring for Aloe Vera plants


This resilient plant does not demand excessive attention or care.

  • Once you have ensured it receives adequate sunlight, water, and well-draining soil, you can largely leave it to thrive on its own.
  • Aloe Vera plants typically produce pups, or offsets, which can be planted separately.
  • After planting, minimal intervention is needed; the plant will flourish and eventually bloom without the need for fertilizers or frequent repotting.

Tip 3: Choose Broad Pots for Aloe Vera Planting


When selecting pots for your Aloe Vera, opt for broad containers rather than deep ones.

  • Aloe Vera plants require ample space to spread out and thrive.
  • Consider using a pot that is approximately 6 inches deep and 14 inches wide, or any rectangular-shaped container that provides sufficient room for the plant to expand its roots and grow comfortably.

Tip 4: Optimal Sunlight Exposure for Aloe Vera


While Aloe Vera can tolerate bright indoor light, placing it on a work desk indoors might hinder its growth potential.

For optimal and healthy growth, it is best to expose your Aloe Vera plant to direct sunlight.

  • Aim to provide as much sunlight as possible to promote its magnificent growth.

However, be mindful to protect the plant from scorching heat.

If temperatures soar to extreme levels, consider relocating the plant to a shaded area to prevent damage.

  • Balancing ample sunlight with protection from excessive heat ensures the best conditions for your Aloe Vera’s thriving growth.

You may also read:

Aloe Vera Plant Care: Pest Attack and Black Spot

Tip 5: Optimal Growing Season for Aloe Vera


The ideal growing season for Aloe Vera is from late September to late November, which coincides with autumn.

  • During this period, Aloe Vera exhibits maximum growth potential.
  • To ensure robust and blooming growth, it is advisable to prepare the plant beforehand.

Before September arrives, take all necessary measures to prepare the soil, apply fertilizer, and address any other requirements to facilitate optimal growth during the upcoming season.

  • By preparing in advance, you can set the stage for your Aloe Vera plant to thrive and flourish during its peak growing period.

Tip 6: Pruning


Remove any dead or damaged leaves regularly to encourage new growth.

  • Use clean, sharp scissors or pruning shears to avoid damaging the plant.

Tip 7: Fertilizer


Aloe Vera plants are not heavy feeders. Fertilize sparingly, using a balanced fertilizer diluted to half strength, only during the growing season (spring and summer).

Tip 8: Pests and Diseases:


Aloe Vera plants are relatively pest-resistant, but they can occasionally attract mealybugs or aphids. Treat infestations promptly with insecticidal soap or neem oil.

Tip 9: Propagation:


Aloe vera pot


Aloe Vera plants can be easily propagated by removing offsets (pups) that grow around the base of the plant.

You may also read:

How to Propagate Aloe Vera

Follow our Social media channel:

1. Voice of Plant – YouTube Channel

2. Voice of Plant Facebook Page

3. Instagram Voice of Plant Channel

Happy gardening!!