Category Archives: Blog

How to Grow and Care for ZZ Indoor Plants

ZZ plants, scientifically known as Zamioculcas zamiifolia are known for their resilience and ability to thrive in low-light conditions. They are considered perennial indoor plants and are well-suited for various locations within a home. They are recognized for their low-maintenance characteristics and are often used as decorative elements. Understanding the specific needs of ZZ plants is essential for their successful growth.

zz plant

In this article, we will discuss key steps on how to grow and care for ZZ plants at home.

ZZ plants known for Air-purifying qualities

zz plant indoor

ZZ plants are recognized for their air-purifying qualities and ability to contribute to oxygen levels in indoor environments. These plants are often included in lists of air-purifying houseplants because they can help remove certain toxins from the air and enhance indoor air quality. 

Preferred Season and Temperature

zz plant

ZZ plants thrive in typical summer conditions and can prosper year-round in regions without harsh winters.

  • During winter, they may face challenges such as yellowing leaves and occasional branch loss. However, they generally remain manageable and tend to recover independently once the weather shifts.
  • The optimal season for their growth is spring, with an ideal temperature range of 15-25°C.
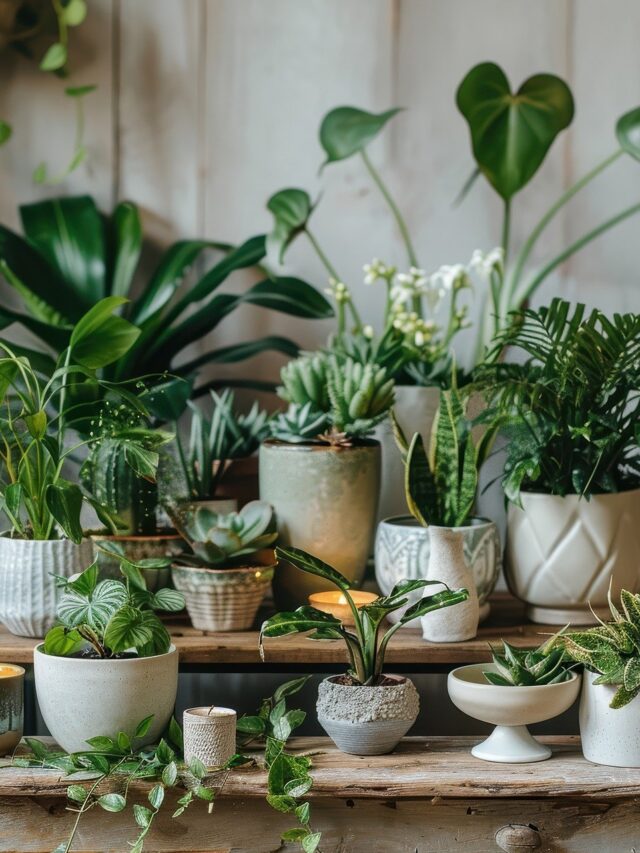
Types of ZZ plant

ZZ plants come in two varieties: Green ZZ and Black ZZ.

black zz plant

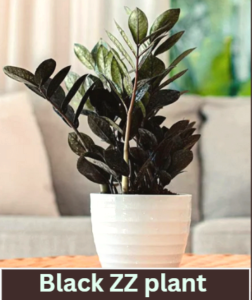
  • Mature black ZZ plants feature leaves with a blackish hue, while their smaller leaves initially exhibit a green color.

green zz plant

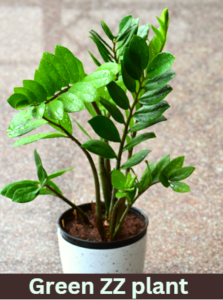
  • On the other hand, green ZZ plants maintain their characteristic green leaves throughout their growth.

How to Get ZZ Plant

From Nursery
Green ZZ plants are readily available at all nurseries, while black ZZ plants can be found at select renowned nurseries. They are also easily accessible online, though prices may be comparatively higher.

  • A medium-sized ZZ plant typically costs between Rs 150-200, and prices increase with the size of the plant.
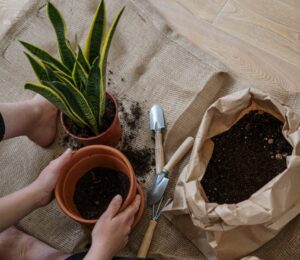
Propagation Methods

➢ By bulbs
ZZ plants propagate through bulbs in their roots.

  • By carefully separating a healthy ZZ plant from its dense growth, you can collect a ZZ plant along with its bulb and nurture a new plant using this method.

➢ By stem
ZZ plants can also be grown from stem cuttings.

  • Simply place cut pieces of the stem into the soil, and you can cultivate a new plant from these cuttings.
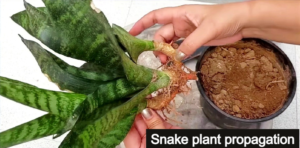
➢ By leaves
ZZ plants can be propagated through leaves as well.

  • By placing the leaves in the soil mixture, a new plant will emerge after some time.

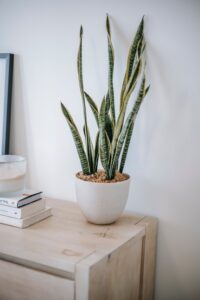
Preferred Pots for ZZ plants

1. ZZ plant can thrive in the same pot for years

ZZ plants thrive when their roots are tightly bound, this condition encourages robust leaf growth. However, they are not fond of frequent pot changes or relocations. Once comfortably settled, a ZZ plant can thrive in the same pot for years.

Note:

  • When obtained from a nursery, it is recommended to refrain from repotting the plant for a minimum of three months after purchase.

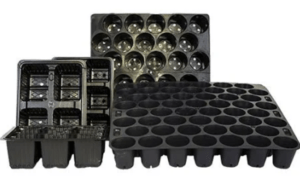
2.Versatile pot types
ZZ plants are versatile in terms of pot types—they can be grown in ceramic, clay, plastic, soil, cement, or metal pots.

  • The choice of pot material depends on the plant’s placement; for decorative purposes, ceramic pots are a great option. However, it’s recommended to avoid using grow bags.

3. Repotting Guidelines
When repotting, always choose a pot that is 1 or 2 sizes larger than the current one.

  • Going beyond that size increase is not advisable for the well-being of the ZZ plant.

Sunlight and Location for ZZ plants

The ZZ plant does not thrive in direct sunlight or exposure to rainwater, as its leaves are prone to drying out in heat.

  • To ensure its well-being, it is recommended to keep the ZZ plant indoors, away from direct sunlight and rain exposure.
  • Choose a location inside the home with bright, medium, or low light for the optimal growth of the plant. Despite being a slow-growing plant, it flourishes best in an area with bright light.

Read article on:

Different Lighting Areas for Plants

Watering tips for ZZ plants

Moisture Retention:

The bulbs of ZZ plants are adept at retaining moisture, making them well-suited for minimal watering. Typically kept indoors away from direct sunlight, the soil tends to stay wet for extended periods.

Check soil condition before watering to ZZ plant

To gauge the need for watering, insert a stick into the soil, reaching the bottom where the bulbs are located. If the soil is dry at that depth, move the plant outdoors and water it generously until drainage occurs from the bottom hole.

After-Watering Care:

After watering, spray water on the leaves and ensure they are thoroughly cleaned.

  • Once water stops draining from the bottom hole and the leaves have dried (usually after 2-3 hours), relocate the plant back indoors. This careful watering routine contributes to maintaining the ZZ plant’s health and well-being.

Importance of Careful Watering:

Careful watering is crucial for ZZ plants due to their delicate bulbs, which can be adversely affected if not handled with care.

  • Overwatering may lead to bulb melting or rotting, with the plant showing signs such as yellowing leaves and drooping stems. If these indications are observed, a thorough inspection is essential.

Dealing with Bulb Rot:

If bulb rot is detected, remove the ZZ plant from its pot and examine the bulbs.

  • Any rotted bulbs should be removed, cleaned, and surrounded with soil or coco peat to enhance soil dryness.
  • It is important to note that the rotting of one bulb can impact others. After thorough cleaning, repot the plant with a well-balanced soil mixture to ensure continued health.

Resilience to Underwatering:

ZZ plants are resilient to underwatering, but caution must be exercised to avoid overwatering.

  • Determining the frequency of watering can be challenging due to varying weather conditions across regions.
  • As a general guideline, individuals in North India often check every 20 days by inserting a stick into the soil to assess its moisture content.

“Watering is recommended when the soil is completely dry at the bottom of the pot, creating a balanced and suitable environment for the ZZ plant.”

How to prepare Soil mixture for ZZ plant

1. Collect local garden soil:

  • Begin by collecting local garden soil for the ZZ plant. Ensure the soil is clean by removing any debris or glass pieces.

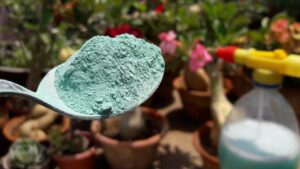
2. Add Compost in the soil

  • For a well-balanced soil mix, add compost which should be half the amount of soil.
    You can choose from various compost options such as vermicompost, kitchen compost, cow dung compost, or leaf compost.

3. Add Sand in the soil

  • Include construction sand in approximately ¾ of the compost quantity.
  • Adding sand to the soil promotes good drainage.

4. Add cocopeat in the soil

  • To further enhance the soil mixture, consider adding a small amount of cocopeat.
  • Coco peat is effective in retaining water. It has excellent water-holding capacity, helping the soil stay moist for a longer time.
  • However, in regions where temperatures are not excessively high, cocopeat can be omitted.

5. Optionally, add perlite and vermiculite in small quantities.

Mix all the ingredients thoroughly, and your ZZ plant’s soil is ready for use.

———————-

If you like this article, kindly leave a comment and consider sharing it with your friends. Your support is greatly appreciated!

Happy Gardening!

lighting conditions thumbnail (1)

Different lighting Areas for Plants

Different lighting areas for plants play a crucial role in their growth and well-being. Various plant species exhibit distinct preferences when it comes to lighting conditions in their natural habitats.

For example, succulents and cacti grow in deserts and very dry climates, so they prefer hours of sun and minimal watering.

On the other hand, tropical plants such as ferns, birds of paradise, and philodendrons prefer bright, indirect light and more frequent watering to mimic a rainforest environment.

Understanding these distinct lighting needs is essential for cultivating a healthy indoor garden.

Are your plants getting the right amount of light?

Light is the most essential element for healthy houseplants (indoor plants). The energy obtained from photosynthesis depends on the amount of light the leaves block.

Indoor plants can be classified according to their light needs and tolerance – high, medium, or low.

Choose houseplants based on the availability of natural light in your home. Otherwise, you will have to supplement the light with artificial light.

In this article, we will learn about the different lighting areas for plants.

Different lighting Areas for Plants

1. Dark Room

The area where there is no natural or artificial light is a dark room.

dark room

“Do not keep your plants in a dark room, they will stop growing.”

2. Direct Light Area

The area where there is direct sunlight falling in the room with visible yellow light, that light is called the Direct Light Area.

direct light area for plants

There are some plants that require hours of direct light to grow. They are called outdoor plants.

Direct light area for plants

Below are some of the plants which require direct sunlight to grow:

  • Tulsi (Holy basil),
  • Hibiscus,
  • Curry Patta,
  • Jasmine,
  • Marigold,
  • Rose,
  • Brinjal,
  • Tomato, etc.

3. Bright Light Area

bright light area

The area where there is no direct sunlight but is very bright due to day time, that light is called a bright light Area.

bright light area for plants

4. Medium Light Area

medium light area

In comparison to bright light areas, where there is little low light, that area is called a medium light area.

medium light area for plants

List of some indoor plants that can grow in bright and medium light areas:

  • ZZ Plant
  • Snake plant
  • Dumb cane
  • Syngonium
  • Peace Lily
  • Money plant
  • Areca Palm
  • Aglaonema
  • Rubber plant
  • Pothos
  • Anthurium
  • Dracaena
  • Philodendron
  • Fiddle leaf fig plant
  • Cactus
  • Ficus Bonsai

5. Low Light Area

low light area

The area which has very low light with reading visibility is called a low-light area.

low light area for plants

List of some indoor plants that can grow in low-light areas:

  • Snake Plant (Sansevieria)
  • ZZ Plant (Zamioculcas zamiifolia)
  • Spider Plant 
  • Dracaena

Note:

  • While these plants can adapt to less light, providing some indirect or filtered light periodically will contribute to their overall well-being.
  • Always consider factors like humidity, temperature, and watering needs in addition to light conditions for optimal plant care.

Conclusion:

When indoor plants do not receive an adequate amount of light, their ability to carry out photosynthesis is compromised. Without sufficient energy production from photosynthesis, plants cannot manufacture the nutrients they need for growth and maintenance. This deficiency in energy and nutrients can result in weakened plants, stunted growth, yellowing of leaves, and, ultimately, plant death.

It is important to consider the light requirements of the plants and provide an environment that meets those needs.

Different plants have varying light preferences, and understanding these requirements is essential for maintaining healthy and thriving indoor greenery.

Also, read,

All about Indoor Plants

Happy Gardening!

How to Remove Ants and Fungus from the Plant?

The issue of fungus in plants persists in almost every season of the year, leading to various problems. Additionally, the constant threat of ant attacks is alarming, as ants often bring along harmful insects that can cause extensive damage to the entire plant. In this article, we will explore organic treatments on how to remove ants and fungus from plants. 

Problems:

1. Fungus on soil surface:

Initially, fungus appears on the soil surface, gradually spreading to the entire plant and causing potential damage to the entire plant.

2. Another issue is related to ants:

If ants are consistently present around your plants, it’s a sign that mealybugs or aphids have attacked.

ants on plant


  • Mealybugs and aphids release a sweet, wax-like substance on the leaves, attracting ants to feed on it. In return, ants protect these insects from other harmful predators.

Mealybugs on plant leaves

Organic remedy to remove fungus and ants

For both the issues of fungus and ants, there’s a single solution—cinnamon powder.

Note:

  • Cinnamon powder serves as a potent organic and chemical-free fungicide, conveniently available in our homes.

How to Remove Ants and Fungus from the Plant

How to use Cinnamon Powder as a Fungicide?

Cinnamon powder


1. Remove the affected layer of the soil:

  • If your pot’s soil is well-drained, the likelihood of a fungus attack is minimized. In the event that fungus has already appeared on the surface, the first step is to remove that layer of soil.

fungus on soil surface

2. Once the fungus is cleared, evenly sprinkle cinnamon powder on the soil’s surface. You will observe the fungus disappearing. This serves as the easiest and quickest remedy for this problem.

Sprinkle Cinnamon powder on the soil surface (1)

Note:

  • It’s important to note that this is a one-time treatment; there’s no need to repeat it.
  • While there are various fungicides, also known as Trichoderma spp, available in the market, you can achieve better results with cinnamon powder.

How to use cinnamon as an insecticide for ants?

The potent smell of cinnamon is an effective deterrent for ants, making them avoid areas with this fragrance.

However, for ants that roam extensively on branches, stems, leaves, and soil, simply sprinkling cinnamon powder may not suffice.

ants on plant

To address ant infestations, it is recommended to create a cinnamon solution and spray it thoroughly over the entire plant.

To make the solution, follow these steps:

1. Add 1 tbsp. cinnamon powder to 2 cups of water.

Add Cinnamon powder in water

2. Boil the solution until it reduces to 1/4 of its initial quantity.

Boil the solution cinnamon powder

3. Sieve the solution using a cotton cloth.

Sieve the solution

4. Dilute 20% of this solution with 80% normal water, fill it into a spray bottle, and then spray it on your plants. This will effectively repel ants, causing them to flee from the plants.

5. If the ant infestation is severe, you can spray the solution daily on your plants.

Spray the solution on your plants

6. The organic nature of this solution ensures it won’t harm your plants.

7. It is worth noting that the solution will not kill ants; they will simply move away from the treated plants.

8. The solution can be stored at room temperature for 20-25 days unless the weather is exceptionally hot.

Now, I am sure you can save your plants from ants and fungi.

Must read:

1. How to make Neem Pesticide at home

2. How to use Neem oil in gardening

Keep planting !!

seeds germination FAQs

FAQs on How to Germinate Seeds Successfully

Seed germination is an art in gardening, influenced by factors like growing mediums, watering techniques, sunlight requirements, and more.

In this article, we will answer the most frequently asked questions (FAQs) about seed germination, covering essential aspects such as seed quality, optimal seasons, temperatures, and key success factors.

Q1. What is seed germination?

seed germination

Ans: Seed germination is the process by which a seed transforms into a new plant. It involves the activation of the embryo within the seed, leading to the emergence of a seedling.

Q2. How to check if seeds are of good quality?

seeds growing

Ans: To check seed quality, look for uniform size, a firm and undamaged seed coat, and a lack of mold or discoloration. 

  • Purchase seeds from reputable sources, and ensure that the packaging is sealed and undamaged. Properly stored seeds are more likely to maintain their viability.

seeds packet

Check the seed packets for the expiration date:

  • Even after taking all the necessary measures, old or poor-quality seeds may not germinate. Hence, Check the seed packets for the expiration date and use them before the date has passed.

Q3. Which is the best season for successful seed germination?

Ans: The best seasons for the successful seed germination are the Spring and Autumn season.

  • However, the germination of seeds gets stopped in extreme summers and winters.

Q4. What is the optimal temperature for seed germination?

Ans: The optimal temperature for seed germination varies among plant species. However, a range of 15°C – 25°C is suitable for many common garden plants.

Q5. What are the important factors for successful seed germination?

Ans: Critical factors include proper moisture, temperature, oxygen, and light conditions. Each plant species may have specific requirements.

Read article:

How to Germinate Seeds Successfully

Q6. What is the best growing medium for seed germination?

Ans: A well-balanced seed-starting mix with a combination of peat moss, vermiculite, and perlite is often recommended. It provides good aeration and moisture retention.

Q7. Can I use coco peat as a growing medium for seed germination?

coco peat

Ans: Yes, coco peat is a suitable growing medium for seed germination.

  • It retains moisture well, promotes aeration, and is a sustainable alternative to traditional peat moss.

Q8. How often should we water seeds during the germination process?

watering tips to seedlings

Ans: Keep the growing medium consistently moist but not waterlogged.

  • Watering frequency depends on factors like temperature, humidity, and the specific needs of the plant.
  • Moist the soil as soon as you notice that the top layer is drying out.

Q9. Does sunlight play any role during the seeds germination process?

Ans: Sunlight is not necessary for the germination of seeds.

  • Always refer to specific plant requirements. Once seedlings emerge, they generally need adequate light for photosynthesis.

Q10. Can I use a seed tray for seed germination?

seedling tray

Ans: Yes, seed trays are commonly used for seed germination.

  • They provide a controlled environment, make it easy to monitor seedlings, and allow for efficient use of space.

Q11. How much time does it take for successful seed germination?

seedlings

Ans: The germination time varies widely among plant species.

  • The duration of germination may vary from five to ten days, and it is important to be patient and wait for at least ten days for the seeds to germinate.

Q12. When should we transplant seedlings into the pot?

press seedlings to remove from tray

Ans: Transplant seedlings when they have developed a few true leaves and are large enough to handle.

Happy Gardening!

epsom salt FAQs

FAQs on Epsom Salt for Plants

Epsom Salt is considered one of the best fertilizers in gardening due to its various benefits.

In this comprehensive guide, we aim to answer some of the most frequently asked questions (FAQs) to provide you with a better understanding of how Epsom Salt can enhance your plant growth.

Epsom salt

Q1: What is Epsom salt?

Ans: Epsom salt, chemically known as magnesium sulfate, is a mineral compound containing magnesium, sulfur, and oxygen. 

Q2: How can Epsom salt benefit plants?

Ans: Epsom salt provides essential nutrients, particularly magnesium, which is crucial for plant growth.

  • It can enhance nutrient absorption, chlorophyll production, and overall plant health. Additionally, it may help prevent magnesium deficiency in plants.

Q3: How do I use Epsom salt in gardening?

Ans: You can give Epsom salt in two ways:

First method:

  • Dissolve 1 tablespoon (tbsp) Epsom Salt in 1 Liter water.
  • Now, spray this solution on plant leaves. In this procedure, Epsom Salt will enter the plant through the pores of leaves.

Second method:

add epsom salt in soil

  • Loosen your soil, and dig it a little. After that, put Epsom Salt in the soil.

Q4: When should I use Epsom salt on plants?

Ans: Epsom salt can be applied throughout the growing season.

  • However, it is often recommended during periods of rapid growth, such as when plants are flowering or fruiting.
  • It can also be beneficial if magnesium deficiency symptoms, like yellowing leaves, are observed.

Q5: Can Epsom salt be used on all types of plants?

Ans: Epsom salt is generally suitable for a wide range of plants, including flowers, vegetables, and shrubs.

  • However, it’s essential to be mindful of the specific needs of certain plants and to avoid overuse, as excessive magnesium can negatively affect some plants.

Q6: Is Epsom salt a substitute for other fertilizers?

Ans: Epsom salt primarily provides magnesium and sulfur, but it lacks other essential nutrients like nitrogen, phosphorus, and potassium.

  • It is best used as a supplement alongside a balanced fertilizer to ensure plants receive a full spectrum of nutrients.

Q7: Can Epsom salt be used to remedy yellow leaves in plants?

Ans: Yes, yellowing leaves can be a sign of magnesium deficiency.

  • Applying Epsom salt can help alleviate this issue by providing the plant with the necessary magnesium for chlorophyll production.

Q8: How often should I use Epsom salt on my plants?

Ans: It is generally recommended to use Epsom salt sparingly and as needed.

  • Overuse can lead to an excess of magnesium in the soil, which may negatively impact plant health.

Q9: Can Epsom salt be used in potted plants?

Ans: Yes, Epsom salt can be used in potted plants.

  • However, it is crucial to adjust the application rate based on the size of the pot and the plant’s specific needs to avoid over-fertilizing.

Must read this article

Epsom Salt for plants: Benefits & Uses

Happy Gardening!

How to Grow Plants from Cuttings

Growing plants from cuttings is a simple and affordable way to propagate your favorite plants. Plants can be grown from the seeds or from the cuttings as well. Monsoon and spring seasons are considered the best season for plant propagation.

In this article, we will cover all the important points such as:

  • What is plant propagation from cutting?
  • Benefits of planting from cuttings,
  • Best time for planting from cuttings,
  • How and where to take cutting from the plant?

What is plant propagation from cutting?

Plant propagation from cuttings involves taking a portion of a plant, such as a stem, root, or leaf, and placing it in a suitable environment to encourage it to grow into a new plant.

  • This method allows for the rapid and efficient production of new plants that are genetically identical to the parent plant and can be used to propagate a wide variety of plant species.

Benefits of planting from cutting

1. Cost-Effective

Growing plants from cuttings is an economical way to enrich your garden with vibrant flowers, herbs, and various plants.

  • This method allows you to expand your garden without incurring significant expenses. You can easily prepare cuttings at home without any additional cost.

2. Accessibility

Cuttings can be obtained inexpensively or even for free.

  • You can ask friends or relatives for cuttings, and often, a variety of plant cuttings are readily available in your local surroundings. This accessibility makes cuttings a budget-friendly option for expanding your garden.

3. Immediate availability

During trips, individuals often encounter various plants.

  • Instead of relying on seeds or searching for new plants, it is advisable to take cuttings of the plants they admire.
  • By using cuttings from existing plants, one can conveniently grow the same type of plant without delay.

Best time for planting from cuttings

The optimal time to cultivate cuttings aligns with the specific growing period of each plant. Generally, spring and rainy seasons are considered the most favorable for gardening activities.

Among these, the rainy season is particularly advantageous due to the heightened humidity in the environment. This increased humidity helps lock moisture in the air, acting as a catalyst for the growth of cuttings.

monsoon season

  • During the spring season, it is recommended to cover the plant with plastic to retain moisture, facilitating an environment conducive to successful cutting growth.

Selection of cutting

The choice of cuttings plays a crucial role in the success of plant propagation, as the saying goes, “as you sow, so shall you reap.”

“It is essential to select a healthy plant when taking a cutting.”

  • Ensure that the chosen plant is free from contamination, including diseases, bacteria, or fungus. Opting for a plant without such issues increases the likelihood of successful propagation.
  • Avoid selecting weak or unstable plants for cuttings, as they are less likely to thrive.
  • By choosing robust and stable plants, you enhance the chances of successful growth and development of the cuttings.

How to take cuttings from the flourishing plant?

When harvesting cuttings from a thriving plant, follow these guidelines for successful propagation:

1. Selecting Cuttings:

  • Always choose cuttings with 2-3 nodes (joints), and make the cut just above the node. Cuttings can be categorized into two types:

(i) Soft Stem Cuttings: For plants with soft stems (e.g., Jade plant or Pothos), select healthy cuttings with 2-3 nodes.

(ii) Hard Stem Cuttings: For plants with hard stems, choose a stem approximately the thickness of a Natraj pencil.

Hard stem pruning


2. Considerations:

    • For thicker stems, be aware that they may take longer to develop roots, potentially extending the plant’s growing period.
    • Avoid taking cuttings from stems that are too thin, as they may be prone to decay.

By following these guidelines, you can increase the likelihood of successful root development and overall propagation success.

Perfect Soil Mixture

soil mixture

To ensure optimal growth from cuttings, a well-balanced soil mixture is essential. The perfect soil mixture comprises:

1. Pure River Sand:

River sand

  • Obtain sand from a construction site to provide a stable and well-draining base for the plants.

2. Vermicompost:

compost

Use vermicompost, rich in nutrients, in equal quantities to the river sand. This organic material enhances soil fertility.

3. Perlite:

perlite

Add perlite, an organic compound that also retains water, in an amount half of the sand. Perlite is readily available at most nurseries.

Instructions:

  • Thoroughly mix equal parts vermicompost and river sand, along with half the amount of perlite.
  • Ensure proper blending of all three components.
  • In case this soil mixture is unavailable, an interim solution is to place the cutting in water temporarily (ensuring it doesn’t dry out) and later transfer it to the recommended soil mixture.

By following these steps, you provide an ideal environment for the successful growth of plants from cuttings.

How to raise the Cuttings?

1. Leaf Removal:


Start by removing all leaves from the cuttings. This encourages the stem to channel its energy into developing new roots. Use a pruner for efficient leaf removal.

2. Cutting Placement:

Keep both the upper and lower sides of the stems intact while placing them in the soil mixture. Plant the cuttings with the cut side in the soil, ensuring proper alignment.

3. Container Selection:

Avoid using plastic bags or weak containers for growing cuttings.

  • Opt for high-quality pots made of ceramic, clay, or plastic to provide stability and support during the growth period. This is crucial, considering the 1-2 month duration for cuttings to develop.

4. Pot Preparation:

Fill the selected pot with the prepared soil mixture and add water to allow the mixture to settle.

5. Rooting Hormone Application:

rooting hormone

Apply rooting hormone to the part of the cutting that will be inserted into the soil. Rooting hormone facilitates faster root development and is readily available in the market.

6. Planting Depth:

cutting depth

Plant the cutting approximately 3 inches deep into the soil, ensuring that 3-4 inches remain above the soil.

  • Ensure that at least 2-3 nodes are buried in the soil for proper root development.

By following these steps, you provide the optimal conditions for the successful propagation of cuttings.

How to take care of cutting after sowing?

1. Sunlight Exposure:

Cuttings should not be exposed to direct sunlight, as this can lead to stem dehydration. Place them in an area with sufficient bright light.

2. Protection from Rainwater:

Avoid direct exposure to rainwater, as the force of rain can damage the delicate stems. Provide a sheltered location for the cuttings.

3. Soil Moisture:

Check the soil every 3-4 days by touching it with your hand. Water sparingly if the soil is dry, ensuring water does not drain from the bottom hole. Maintain moisture without excess.

4. Root Growth Monitoring:

The time required for root growth varies for each cutting. Monitor your cuttings patiently; some may develop roots in 15-20 days, while others may take up to 2 months.

5. Avoid Disturbance:

Refrain from disturbing the cuttings frequently. Exercise patience and observe the progress; the results will be rewarding.

6. Multiple Cuttings:

It’s advisable to grow 3-4 cuttings of one plant to ensure successful propagation. This increases the likelihood of obtaining at least 2 propagated cuttings.

By following these guidelines, you can nurture your cuttings effectively and witness successful results without incurring significant expenses.

Happy Gardening!

Self vegetable gardening

Self-Taught Techniques for Bountiful Vegetable Gardens

Growing your own vegetables is not just a practical task; this is a rewarding one. With rising food prices and increasing demand for pesticide-free, healthy produce, more and more people are taking up vegetable gardening.

vegetables gardening

What is really inspiring is that many successful vegetable gardeners are completely self-taught. In this article, we will discuss in detail self-taught techniques for creating an abundant vegetable garden ready for any context.

We will discuss on the following points:

  • Soil Enrichment and Preparation
  • Smart Water Management
  • Companion Planting
  • Crop Rotation
  • Organic Pest Control
  • Seed Saving
  • Continuous Learning
  • Space Optimization

1. Soil Enrichment and Preparation

Successful vegetable gardening begins with the soil.

  • Many self-taught gardeners take the first step by enhancing their soil quality. They utilize kitchen waste, dried leaves, and cow dung to create nutrient-rich organic matter.

soil mixture

  • The practice of vermicomposting, which involves using earthworms to break down organic material, is particularly popular among self-taught gardeners. This enriched soil lays the perfect foundation for robust and healthy plant growth.

compost

2. Smart Water Management

Water is a precious resource in many parts, and self-taught gardeners are experts at water management.

self watering system

  • Techniques such as drip irrigation and mulching are commonly used to conserve water.
  • Drip irrigation systems deliver water directly to the plant roots, reducing wastage.
  • Mulching with materials like straw or dried leaves helps retain soil moisture, suppress weeds, and reduce the need for frequent watering.

3. Companion Planting

Many self-taught gardeners embrace the concept of companion planting.

marigold + Tomato

  • This technique involves planting certain vegetables together to enhance growth and deter pests.
  • For instance, planting marigolds alongside tomatoes can help repel nematodes and other harmful insects.
  • By experimenting with companion planting, self-taught gardeners can naturally protect their crops and increase yields.

Also, read:

Winter Gardening Ideas & Planning

4. Crop Rotation

Crop rotation is another technique that self-taught gardeners adopt to maintain soil health and prevent pest infestations.

crop rotation

  • By changing the placement of crops each season, they minimize the risk of soil depletion and the buildup of plant-specific pests and diseases. This practice leads to healthier, more productive vegetable gardens.

5. Organic Pest Control

The self-taught gardeners in India often avoid chemical pesticides due to concerns about their impact on health and the environment.

pest control

  • Instead, they opt for natural pest control methods.
  • They often use neem pesticide solution, garlic spray, and even homemade chili, etc. solutions to deter common garden pests.
  • These natural remedies are safe, cost-effective, and eco-friendly.

6. Seed Saving

Many self-taught gardeners understand the importance of saving seeds from their produce.

seed saving

  • It not only saves money but also helps preserve traditional varieties of vegetables.
  • By selecting and saving seeds from the healthiest and most robust plants, they ensure that future generations of vegetables are well-suited to local conditions.

7. Continuous Learning

Self-taught gardeners are committed to lifelong learning.

winter vegetables

  • They experiment with new varieties of vegetables, adapt to changing weather patterns, and seek knowledge from fellow gardeners and online resources.
  • This commitment to continuous learning ensures that their vegetable gardens remain productive year after year.

8. Space Optimization

In densely populated urban areas, space for gardening can be limited.

tomato gardening

  • Self-taught gardeners maximize space by using vertical gardening techniques, hanging pots, and creating compact raised beds.
  • They also choose vegetables that grow well in confined spaces, such as cherry tomatoes, mint, and spinach.

Conclusion:

Self-taught vegetable gardeners are a testament to the power of determination and resourcefulness. Their bountiful vegetable gardens are a source of fresh, healthy produce. These also reflect their dedication to sustainable and eco-friendly gardening practices.

  • By enriching the soil, managing water efficiently, embracing companion planting, and continuously learning, they have discovered the secrets to successful vegetable gardening.

These self-taught techniques offer inspiration and valuable lessons for anyone looking to start their vegetable garden, proving that a green thumb can be cultivated through passion and perseverance.

Happy Gardening!

Winter Gardening Ideas and Planning

Did you know that you can grow a lush green variety of winter vegetables and beautiful array of flowering plants all from the comfort of your home?

Organic, fresh and pure vegetables can be planted at home such as;

winter vegetables
winter vegetables
  • tomato,
  • beans,
  • radish,
  • cauliflower,
  • carrot,
  • peas,
  • spinach,
  • coriander,
  • cabbage and many more.

Furthermore, with the right care, your garden can flourish with vibrant winter flowers like;

winter flowers
winter flowers
  • roses,
  • rosemary,
  • marigold,
  • petunia,
  • verbena, 
  • dianthus,
  • dog flower,
  • hybrid periwinkle and many more. 

This practice of nurturing these plants during the colder months is known as “winter gardening.”

In the context of winter gardening, we will explore both minor and major aspects. Typically, basic preparations for winter gardening, such as getting the right pots and tools, preparing suitable soil mixture and other necessary processes begin from mid-September (in India).

The planning of a garden depends on a few simple things:

1. First, it is important to know what the is your choice and what you want to grow like, such as favorite plants, fruits, or vegetables.

  • The planning starts based on the chosen plants because each plant has its own unique needs, and it’s essential to cater to those needs.

2. Second, the size of the gardening area is a crucial factor.

  • The number of plants you can grow depends on the available space.
  • The available area determines how you can diversify and choose the different types of plants to grow.

3. Third, the amount of sunlight is essential for plants to grow well.

Before sowing any seeds, it’s important to check how much sunlight the garden area receives.

  • Based on the sunlight available in your area, you should select the seeds.
  • If you have a lot of sunlight, you can grow plants like chili, capsicum, and tomatoes that require plenty of sunlight.
  • If there’s limited sunlight, it’s better to choose plants like coriander, spinach, and other herbs that can thrive with less sunlight.

Requirements for winter Gardening

1. Season and Temperature:

  • Winter gardening typically begins in mid September or from October and continues until March.
  • It’s essential to choose a time with pleasant weather for seed sowing because seedlings won’t survive in hot or humid conditions.

“The ideal temperature for sowing seeds is 15-20℃.

2. Pot size and types

grow bags for gardening

(A) For Vegetables

(i) 10*10 or 12*12 inch grow bags:

  • suitable for tomatoes, chili, cabbage, cauliflower, and capsicum.

(ii) 12*18 inch grow bag:

  • good for radish, coriander, carrot, spinach, onion, or garlic.

(iii) 15*15 or 16*16 inch grow bags:

  • ideal for brinjal, beans, lubia, runner beans, or peas.

(iv) Rectangular boat-shaped pots can also be used for herbs like coriander, spinach, etc. 

Note:

  • It’s a good idea to have 4-5 pots or grow bags for each category because in one pot only 5-6 vegetables would grow out.

(B) For Flowers

(i) 12-inch clay pots:

clay pots

  • Permanent plants like rose, marigold, and chrysanthemum do well in these pots.
  • If they survive for two seasons, they will stay with you without needing to be repotted.
  • Always choose good-quality clay pots for these flowers.

(ii) 4*4, 6*6, or 8*8 inch pots:

  • These smaller pots are suitable for growing seasonal flowers like petunia, verbena, dianthus, dog flower, etc.

(iii) Rectangular boat-shaped pots:

rectangular pot
rectangular pot
  • Flowers grow well in this type of pots as they have enough space for their roots and to bloom properly.

3. Soil Mixture

(i) Soil:

Garden area soil
Garden area soil
  • Get the soil from any nursery or reuse the summer plants’ soil by adding organic manure and neem cake powder to make it pest-free.
  • Make sure to expose the soil to sunlight.

(ii) Add compost to enrich the soil:

compost
kitchen compost
  • You can add any compost like; kitchen waste compost, vermicompost, cow dung compost, leaf compost, or any suitable compost to enrich the soil.

(iii) Use Sand:

river sand
river sand
  • Use river sand to enhance soil porosity, as many vegetables thrive in sandy soil.

(iv) Coco peat:

coco peat
coco peat
  •  You can add cocopeat to aid in seed germination, especially when sowing the seeds.

(iv) Add fungicides

Fungicide powder
Fungicide powder
  • Use fungicides such as Trichoderma or Cinnamon powder to safeguard against fungus or bacterial attacks.

4. Gardening Box

gardening box
gardening box

A basic gardening box should contain essential items needed at various stages of planting:

1. Bulbs and Seeds: Enthusiastic gardeners always have a variety of plant seeds and bulbs on hand.

2. Gloves: Wearing gloves is advisable to prevent injuries when using sharp gardening tools, particularly pruners.

3. Fertilizers and Micronutrients: Keep a range of fertilizers and nutrients for different growth stages of plants.

  • For example, Neem cake powder, Mustard Cake, Epsom Salt, Rose bloom fertilizers, Curry leaf boosters, and Seaweed micronutrients, etc. 

4. Insecticides: These are essential to protect your plants from insect attacks.

  • For example: Actara acts as an insecticide for edible vegetables.

5. Fungicides: Use fungicides to prevent fungal infestations.

6. Ice Cream Sticks: These are useful for labeling seedlings in a seedling tray.

7. Pen/Permanent Marker: Keep one for writing the names of seedlings on the ice cream sticks.

8. Tool Kit: Different gardening tools serve various roles, including digging, mixing, stirring, pruning, and more.

All the above components should be included in any gardening box to facilitate basic gardening tasks.

5. Seedling Trays

Seedling tray
Seedling tray

Seeds can either be sown directly into pots or in seedling trays, with the option to transplant them into pots after 20-25 days. Seedling trays offer several advantages:

1. They are useful when the soil mixture isn’t ready yet, but it’s time to sow seeds.

  • You can place seeds in these trays and later transfer them to pots with the appropriate soil mixture.
seedlings
seedlings

2. Seedling trays are practical for situations where pots need to be relocated due to weather conditions, protecting them from excessive heat or unexpected rainfall. The trays are easy to transport.

seedlings in seedling tray

3. Transplanting from a seedling tray to larger pots is simpler compared to moving plants from one pot to another.

  • It minimizes root disturbance – in a seedling tray, gently press the tray from the bottom, and the seedling will come out effortlessly.
press seedlings to remove from tray

Note:

  • Seedling trays are readily available in the market and can serve you for multiple seasons once purchased.
seedling tray
seedling trays

6. Spray Bottle

Spray bottle
spray bottle
  • Using spray bottles is recommended for watering or applying neem oil to your plants.
  • Be sure to clean and thoroughly dry your spray bottle after each use to prevent residue buildup inside the nozzle, which can damage the bottle.

7. Support Sticks

wooden support stick
wooden support sticks
  • Wooden sticks can be utilized to provide support to plants, such as tomatoes, ensuring they stand upright, typically after a month or two of planting.

8. Rainwater Cover

  • A rainwater cover can be employed to shield the soil mixture during preparation or to protect plants during rainy periods.

All of these mentioned requirements are essential for initiating your winter gardening journey. By following these guidelines and tips, you can nurture a vibrant and healthy garden.

Wishing you a Happy Gardening!

areca palm thumbnail

Areca Palm Care: Fertilizer and Pruning

Areca Palm Care: Fertilizer and Pruning


Areca Palms are lovely indoor plants with pretty green leaves. To keep them healthy and beautiful, you need to feed them the right food (fertilizer) and give them a little haircut (pruning).

areca palm care

Additionally, Areca Palms are fantastic at cleaning the air and giving off oxygen, making them a wonderful addition to your indoor spaces for a breath of fresh air.

In this article, we will guide you how to care your Areca palm. Whether you are new to gardening or an expert, these tips will help your Areca Palm thrive and stay beautiful.

Check this article:

White patches on Areca Palm leaves: How to treat


Fertilizer for Areca Palm


Areca palms are known for their slow growth, making them ideal indoor plants. They should be kept away from direct sunlight as they prefer indirect or filtered light. These plants typically do not produce flowers or fruits, which means there is no need for chemical fertilizers. Instead, opt for simple organic liquid fertilizers.

“Give simple organic liquid fertilizer to Areca palm.”

(i) Growing season:

cow dung liquid fertilizer

  • During their growing season (from February to September), you can use cow-dung liquid fertilizer every two months.

(ii) Rainy season:

  • Before the rainy season, consider applying neem cake liquid fertilizer, and before winter starts, give some mustard cake liquid fertilizer.
seaweed liquid fertilizer
Seaweed liquid fertilizer
  • If you don’t have these specific solutions, Seaweed solution can also work well.

Additionally, you can provide Epsom salt to the plant, but it’s essential to use it only when the plant shows signs of needing it.

  • Overusing Epsom salt can cause stress to the plant and result in browning leaves.

Pruning Areca Palms


Areca palms typically don not require extensive pruning, but they do benefit from occasional trimming.

  • If you notice a frond that is severely damaged, with burnt leaves or affected by fungus, it is best to remove the entire frond.

areca palm leaves brown


  • Additionally, if the tips of the leaves turn brown, it is a good practice to trim off those browned sections.

pruning of leaves of areca palm


Follow our Social media channel:

1. Voice of Plant – YouTube Channel

2. Voice of Plant Facebook Page

3. Instagram Voice of Plant Channel

Happy Gardening!

FAQs on Snake Plant

Snake plant is popular indoor plant and known for being easy to care for. Snake Plant is also known for being one of the best air-purifying plants.

In this comprehensive guide, we aim to answer some most common frequently asked questions (FAQs) and provide you with a better understanding of how to take care your Snake plant.

sansevieria snake plant

Frequently asked questions (FAQs)

Qs. 1: How often should I water my Snake plant?

Ans: Water the snake plant when the top inch or so of the soil is dry.

  • You can test the moisture level by inserting a finger or probe into the soil about 2 inches deep.
  • The frequency of watering may vary according to environmental factors such as temperature and humidity.

“Snake plants are hardy plants and quite tolerant of drought, so its is better to water them less frequently than to overwater them.”

watering snake plant

Qs 2: Can I use tap water to water my snake plant?

Ans: Yes, you can use tap water with a total dissolved solid  (TDS) of less than 500.

Qs 3: Can Snake plants tolerate low light conditions?

snake plant in indirect light

Ans: Yes, snake plants can tolerate low light conditions, but they prefer bright indirect light for optimal growth.

  • They are one of the few plants that can thrive in low-light environments, but their growth may be slower in such conditions.

Qs 4: How often should I give fertilizer to my Snake plant?

Ans: Give fertilizer to your snake plant once every two months, preferably throughout the growing season, which is typically spring and summer.

  • Use a balanced, diluted, liquid houseplant fertilizer.

Qs 5: Can I place my Snake plant in direct sunlight?

Snake plant leaf burn
Snake plant leaves sunburned

Ans: No, avoid placing snake plants in direct sunlight as it can cause leaf burn.

  • They are best suited for indirect sunlight, such as near a window with sheer curtains or in a room with bright but indirect natural light.

Qs 6: What should I do if my Snake plant’s leaves start to rot?

Ans: If your snake plant’s leaves are rotting, it’s important to address the issue promptly.

  • Remove the affected leaves immediately to prevent the rot from spreading.
  • Repot the plant in fresh, well-draining soil, and adjust the watering routine to prevent the soil from becoming excessively wet.
  • Ensure the pot has proper drainage to avoid waterlogged soil, which can lead to rot.

Qs 7: How to propagate Snake plants?

snake plant propagation

Ans: You can propagate snake plants by dividing the rhizomes or by planting leaf cuttings. Separate the pups or cuttings and plant them in well-draining soil.

Qs 8: When to repot Snake plants?

potting mix provides good drainage system

Ans: Repot your snake plant when it becomes root-bound, typically every 2-3 years.

  • The best time for repotting is in the spring.

Qs 9: Can snake plants be grown outdoors?

snake plant in bright light

Ans: While snake plants are commonly grown indoors, they can thrive outdoors in mild to warm climates, provided the conditions are suitable.

Qs 10: How to prevent pests on Snake plants?

Ans: To prevent pests like spider mites or mealybugs, use a neem water solution regularly and inspect your plant for infestations.

  • Keep the plant clean and wipe the leaves with a damp cloth to remove dust and pests.

Qs 11: Can snake plants be placed in the bedroom for air purification?

snake plant in bedroom

Ans: Yes, snake plants can be placed in the bedroom to improve air quality, but they need some light and should not be kept in the dark place.

  • Snake plant can grow in bright light, medium and low light as well. 

Qs 12: Can snake plants survive in cold temperatures?

Ans: Yes, snake plants can survive in cold temperatures with proper care, but they thrive best in temperatures between 15°C to 35°C (59°F to 95°F).

Qs 13: How long does it take for Snake plants to produce pups?

Ans: Snake plants can produce pups within about 3 to 5 months, but the timing can vary based on conditions and the plant’s health.

Qs 14: Can Snake plants be grown in water?

Ans: Yes, snake plants can be propagated in water.

  • Place cuttings in a jar of water with the base submerged, change the water regularly, and eventually transfer the plant to soil for long-term growth.

Must read:

How to Grow and Care Snake Plant

Make Your Own Garden!