Category Archives: Basic Gardening

If you’re new to gardening or want to learn more, this is the perfect place to get tips on caring for plants, growing seeds, watering, soil mix, using fertilizers, pruning, and more.

Hydroponic

What is Hydroponics and How does it work?

Hydroponics Demystified: Growing Plants Without Soil 

In the ever-evolving world of agriculture, hydroponics has emerged as a revolutionary technique, challenging traditional soil-based cultivation methods. This is particularly relevant to those places where arable land is precious, and water resources are increasingly scarce.

Hydroponics offers a sustainable solution for cultivating crops in a country grappling with resource limitations.

In this article, we delve into the concept of hydroponics and explore its application:

Understanding Hydroponics

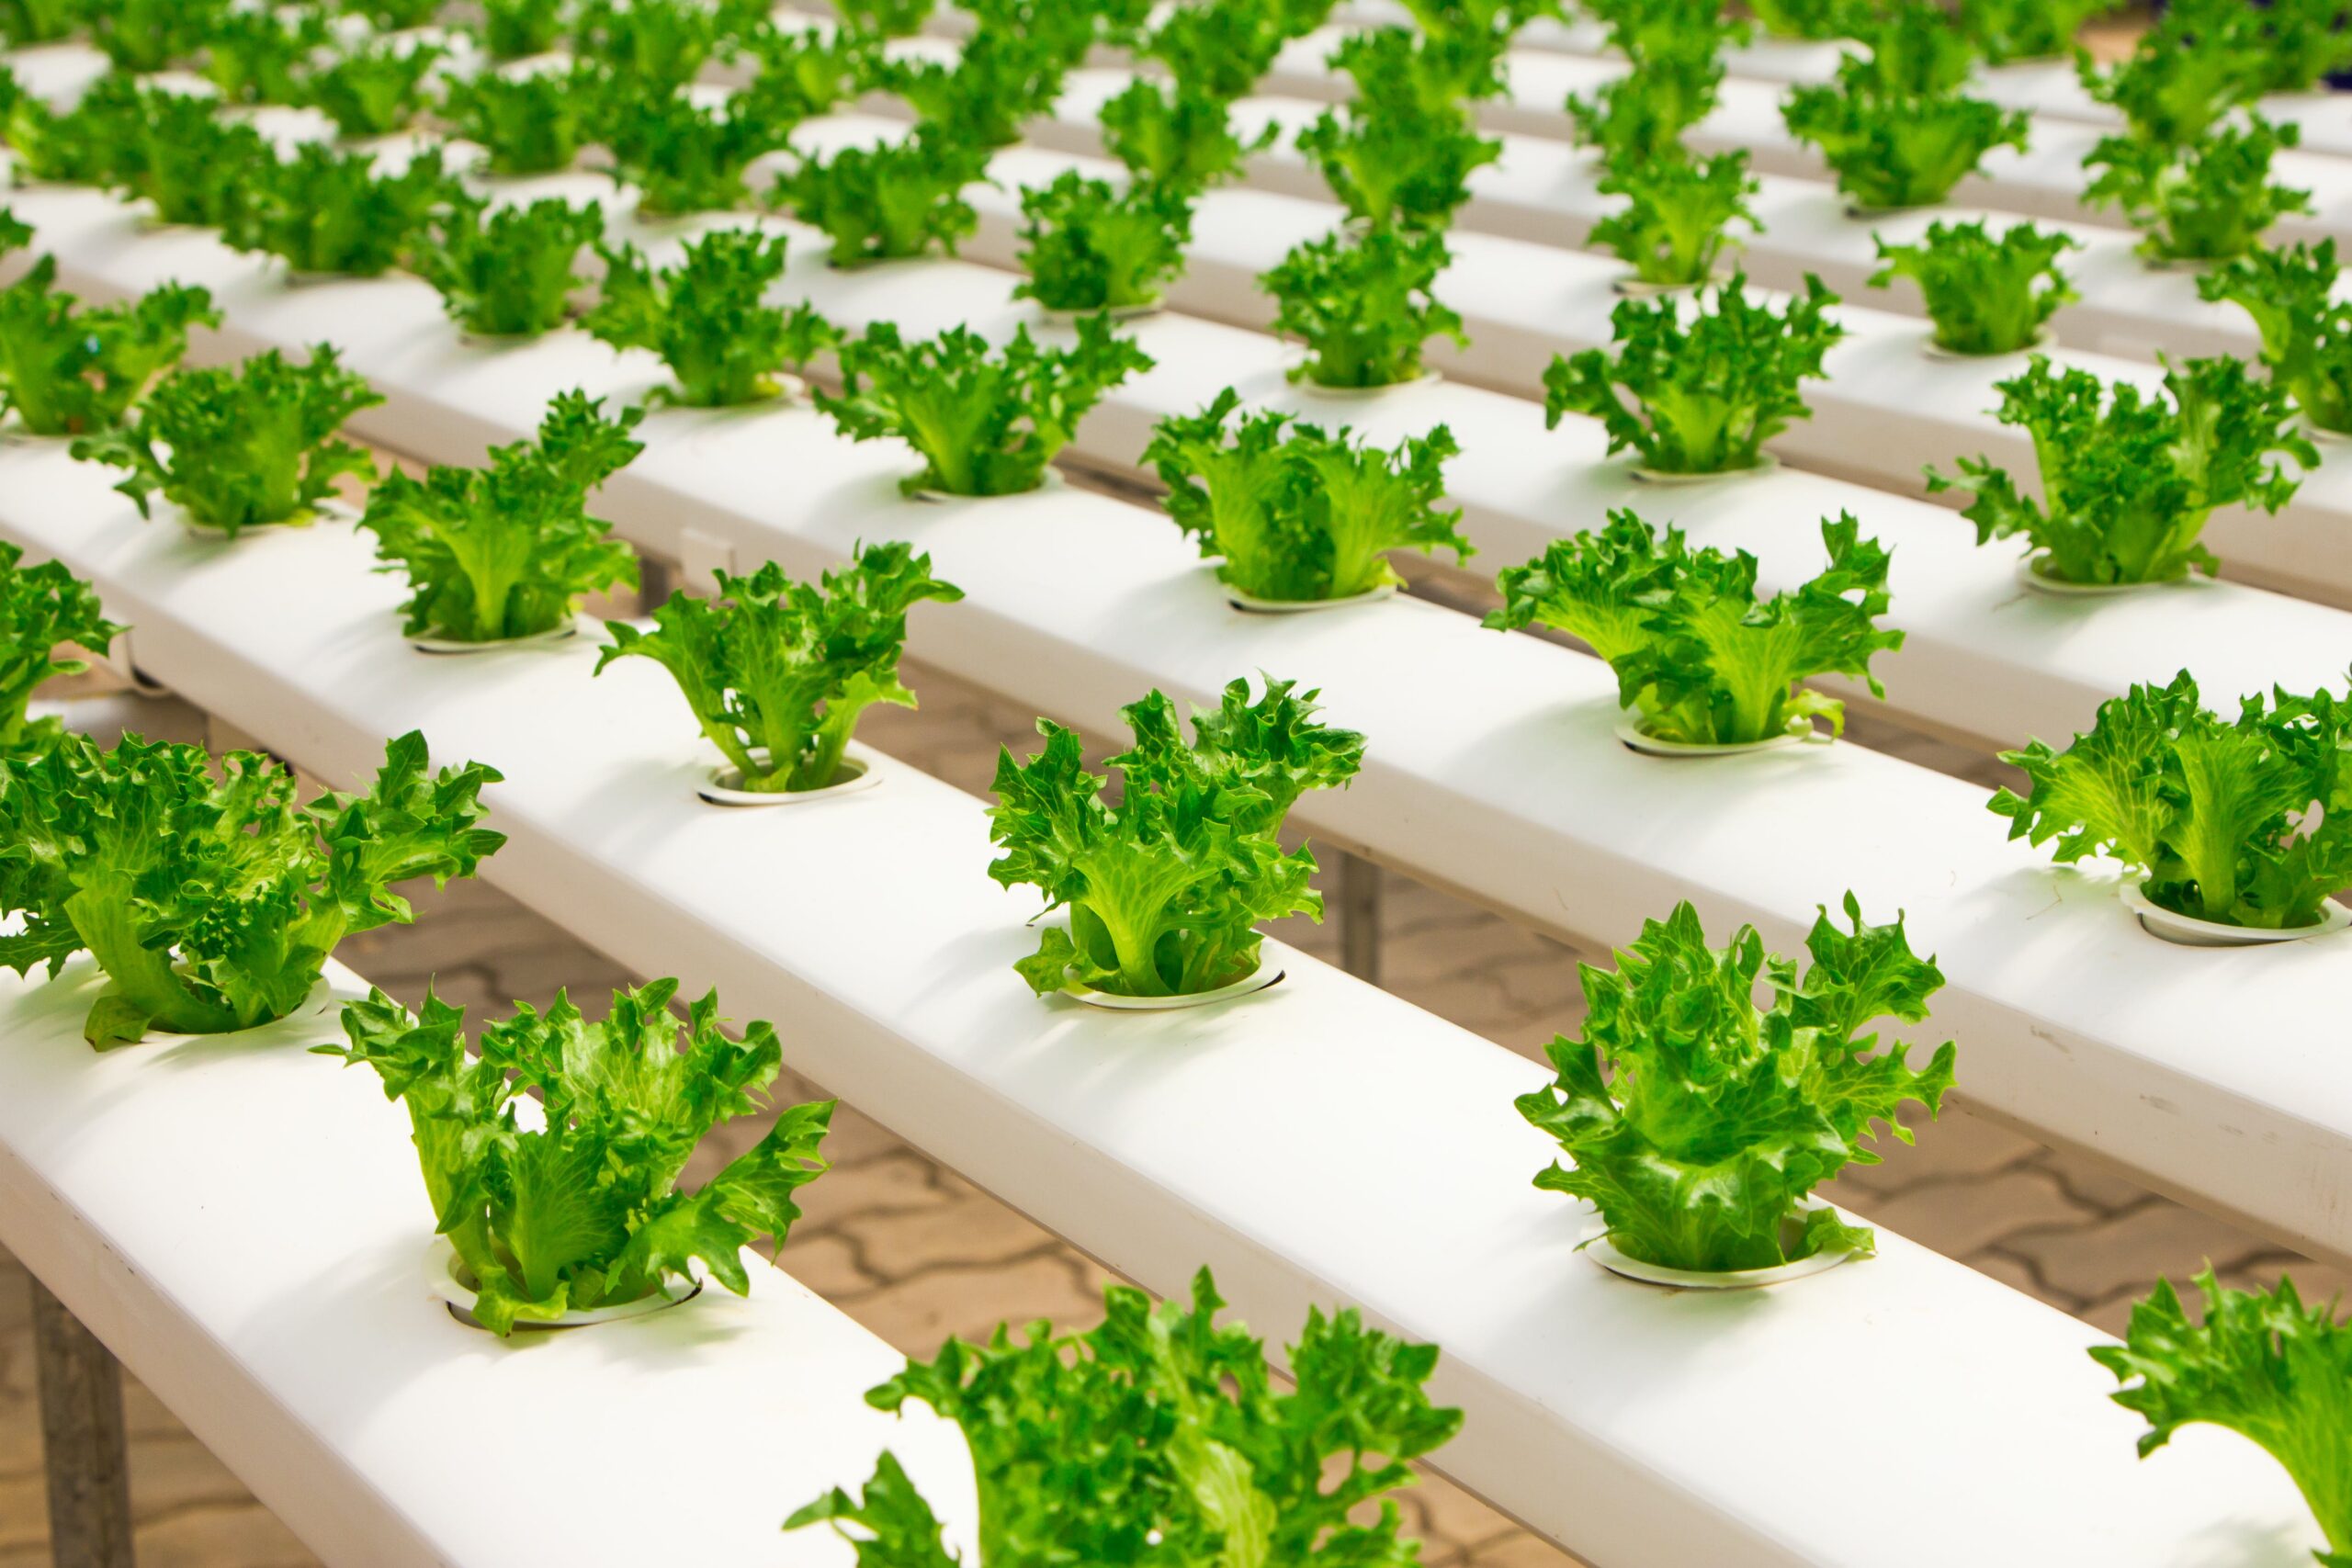
Hydroponics is a method of growing plants without soil, where nutrient-rich water solutions directly feed the plant roots.

The term ‘hydroponics’ originates from the Greek words ‘hydro’ (water) and ‘ponos’ (work), encapsulating the essence of this innovative cultivation technique.

How Does Hydroponics Work?

Hydroponic farming


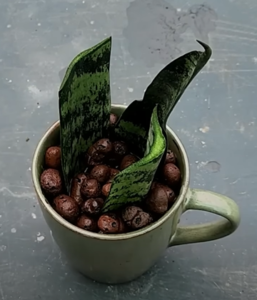
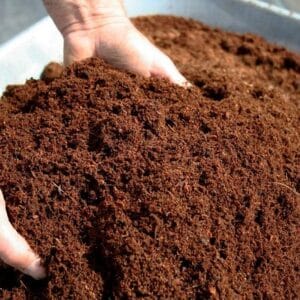
Instead of relying on soil to provide plants with nutrients, hydroponic systems use various mediums such as perlite, vermiculite, coco coir, or even water alone to support plant roots. Here’s a simplified explanation of how hydroponics works:

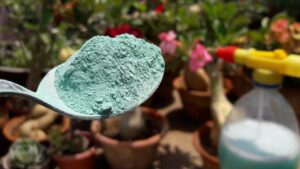
1. Nutrient Solution: Plants require essential nutrients for growth.

  • In hydroponics, these nutrients are dissolved in water to create a carefully balanced nutrient solution, providing optimal nourishment for plants.

2. Growing Medium: In the absence of soil, a growing medium serves as a support structure for plant roots.

  • This medium holds the plant in place while enabling roots to absorb nutrients from the nutrient solution.

3. Roots and Oxygen: Plant roots in hydroponic systems are either submerged or periodically exposed to the nutrient solution.

  • Ensuring adequate oxygen for the roots is crucial and can be achieved through techniques such as oxygenating the nutrient solution or using aerated systems.

4. Controlled Environment: Hydroponic setups often operate in controlled environments where factors like temperature, humidity, and light can be optimized for plant growth.

  • This proves particularly advantageous for cultivating crops year-round, overcoming seasonal variations.

By adopting hydroponics, nation has the potential to revolutionize its agricultural practices, maximizing yield while conserving precious land and water resources.

  • As the nation faces increasing challenges related to climate change and resource scarcity, hydroponics stands out as a sustainable and forward-thinking solution for the future of agriculture.

Types of Hydroponic Systems

1. Deep Water Culture (DWC): In this system, plants float on a nutrient solution, with their roots suspended in the water. Air stones or pumps are used to oxygenate the solution, ensuring that roots receive an ample supply of oxygen.

2. Nutrient Film Technique (NFT):  A thin film of nutrient solution flows over the plant roots, providing essential nutrients while allowing roots to access oxygen from the air.

3. Ebb and Flow (Flood and Drain): This system involves periodically flooding plants with the nutrient solution and then draining it, creating a cycle that ensures a consistent supply of nutrients and oxygenation.

4. Wick System: A simple and passive system that utilizes a wick to draw nutrient solution from a reservoir to the plant roots.

Benefits of Hydroponics 

hydroponics

1. Water Efficiency: Hydroponic systems use significantly less water compared to traditional farming methods, a critical advantage in water-scarce regions around the world.

2. Space Utilization: Hydroponics allows for vertical farming and can be practiced in urban settings, maximizing the use of limited land resources.

3. Year-round Cultivation: Controlled environments in hydroponics enable year-round cultivation, reducing the dependency on seasonal crops.

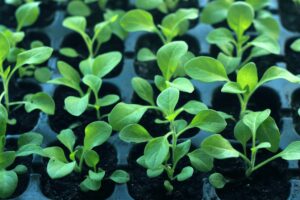
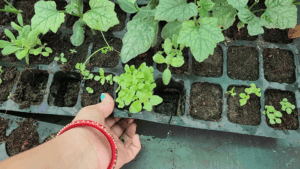
4. Higher Yields and Faster Growth: Under optimal conditions, plants in hydroponic systems often exhibit faster growth rates and higher yields compared to conventional methods.

5. Reduced Pesticide Use: The controlled environments in hydroponics can minimize the incidence of pests and diseases, leading to a reduced need for chemical pesticides.

Hydroponics offers a ray of hope for sustainable agriculture in the world, combining innovation with efficiency. By reimagining plant cultivation without the constraints of soil, hydroponics paves the way for a greener agricultural future.

As world grapples with challenges such as land scarcity and water stress, embracing techniques like hydroponics can usher in a new era of sustainable farming, ensuring food security while preserving precious natural resources.

Happy gardening!!

Leca balls in gardening

Benefits and Uses of Leca Balls in Gardening

LECA stands for Lightweight Expanded Clay Aggregate”, widely used in gardening nowadays.

LECA balls, made of clay, are small, lightweight, and hollow. They are heated at high temperatures, causing the clay to expand and all moisture to evaporate. This process results in lightweight yet very strong and slightly expanded balls.

Leca Balls

  • They won’t break when falling, nor will they swell or melt when dipped in water.
  • These balls have small pores that allow air to pass through, and water is also retained in these small holes.

LECA balls provide a solution by maintaining aeration and preventing soil compaction. Their lightweight and porous structure create an environment where roots can thrive, promoting healthier and more robust plant growth.

Benefits and Uses of Leca Balls in Gardening

The use of LECA balls in gardening is versatile and offers several benefits in different applications:

1. Hydroponics: LECA balls are preferred by those practicing aquatic gardening in hydroponic systems.

2. Hanging Plants: They serve as a lightweight alternative to soil for hanging pots.

Plant cuttting in leca balls

3. Growing Cuttings: Soft plant cuttings, such as monstera, money plant (pothos), snake plant, syngonium, and more, thrive in LECA balls.

Plant cuttting in leca balls


  • The porous structure promotes aeration, preventing root rot.

4. Container/Pot/Vessels/Bottle: Unlike water propagation, where a bottle is required, LECA balls can be used in any vessel or pot.

5. Probability of Root Rotting: LECA balls address the issue of root rot by providing aeration, preventing waterlogged roots. The porous nature allows good air circulation.

6. Ease of Transplanting: Transplanting cuttings grown in LECA balls to soil is less disruptive, as the sturdier roots are better adapted to a non-water environment.

Plant cuttting in leca balls

7. Growing Medium for Medium Size Plants: LECA balls serve as a versatile growing medium for medium-sized plants like Areca Palm or Moss Chara.

8. Ingredients in Soil Mixture: They are commonly incorporated into soil mixtures to enhance soil quality.

9. Maintaining Drainage System in Pots: Placing LECA balls beneath the bottom layer of soil inside pots helps retain moisture while allowing excess water to drain away, maintaining the pot’s drainage system.

10. Mulching: During extreme summers, LECA balls can be used for mulching instead of dry leaves or rice husks.

Remember:

  • Availability: LECA balls are readily available online in different sizes.
  • Preparation: Always wash or sterilize them before use to remove any unwanted dirt or dust.
  • Sterilization: To sterilize, boil them in water for 10 minutes and then wash with clean water.

How to Use Leca Balls in Gardening!

Propagating Cuttings

1. Container Selection:

    • Fill a decorative container or pot with LECA balls.
    • Place the cuttings into the filled container.

2. Additional LECA Balls:

    • Add more LECA balls to secure the cuttings.

3. Moisture Control:

    • Pour water to retain moisture, but be cautious of excess water, as it may lead to cutting rot. Maintain the water level up to a certain point.

4. Monitoring and Watering:

    • Keep an eye on the moisture level in the LECA balls.
    • When the balls appear dry, add a small amount of water.
    • Frequency depends on weather conditions; in summer, it may be every 5 days, and during the rainy season, it could extend to 15-20 days.

5. Water Change:

    • Change the water when cuttings show significant growth, and roots have spread extensively (if you prefer not to change the growing medium).

6. Transplanting:

    • Transplant the cuttings into a different growing medium once the roots have reached a noticeable level of growth.

Nutrients in LECA Balls:

LECA balls contain fewer nutrients compared to soil.

1. For cuttings in LECA balls, additional fertilizer or tonic is not required, as the water inherently contains sufficient minerals.

2. For plants in LECA balls, it is recommended to provide liquid fertilizer once a month.

  • Options include seaweed, micronutrients, pheromones, or epsom salt.
  • Avoid teas made from cow dung compost, vermicompost, mustard cake, or kitchen compost, as they can cause stagnant water, unpleasant odors, and clog the pores of the LECA balls.

Reuse of LECA Balls:

LECA balls are reusable and can be employed for propagating additional cuttings or as a growing medium for any plant.

In summary, using LECA balls is a simple and easy method suitable for everyone in gardening.

Happy Gardening !!

gardening tools thumbnail (1)

Gardening Tools and Their Uses

Tools and machines make our tasks easier. In gardening, we can accomplish even the most challenging tasks with the help of tools specifically designed for various purposes. Sometimes, a variety of gardening tools is needed to expedite the process, such as pruners, garden trowels, watering cans, and more. These tools serve various functions, from preparing the soil to sowing seeds, watering, and harvesting. 

gardening tools

Gardening Tools and Their Uses

Let’s discuss each gardening tool in detail:

1. Gardening Trowel

gardening trowel

The gardening trowel is used to loosen the soil and shift the soil from one pot to another pot.

  • The edge of the trowel should be blunt from the front, not a sharp one. If the trowel is sharp then it might damage the roots.
  • The handle of the trowel should be sturdy.
  • The trowel is inexpensive, durable, and an easily available tool.

Many types of trowels are available, such as broad trowels, narrow trowels, those with blunt fronts, and those with sharp edges.

gardening trowel

  • A broad trowel can be used to shift the soil and different ingredients from one container to another container.
  • A sharp and narrow trowel can be used to shift the plant with roots from one pot to another pot.

2. Spray Bottle

spray bottle

The spray bottle is one of the most important tools used in gardening.

  • This tool is used very widely to give water, spray pesticides, spray liquid fertilizer, and other manure.
  • With these spray bottles, plants can be washed properly.

Spray bottles are available in different sizes.

  • A big-size bottle is preferred for water spray. For fertilizer, neem water, pesticides, and other manures, small-size bottles are fine.
  • It is ideal to use different spray bottles for various solutions. For water, a larger bottle is preferred, while smaller bottles are suitable for fertilizers, neem water, pesticides, and other manures
  • It is not necessary to buy it from the market, normal Colin or any Sanitizer bottle available at home can also be used as a spray bottle.
  • These bottles are quite delicate and get damaged easily. Sometimes spring breaks down or the pump stops working. Handle them with care.

3. Pruner

pruning

Pruner is also another important tool used in gardening for various purposes.

  • This tool is used to cut the unwanted leaves, small branches, and hard stems of the plants.
  • Like the stems of Night Jasmine (Parijat) and Hibiscus are strong, you cannot cut them easily with a scissor.

jasmine hard pruning

  • If the stem is delicate and soft then you can use a scissor also.
  • For pruning, it’s advisable to have a dedicated pair of scissors.”
  • Many people do not know about Pruning.

4. Watering Cans

watering can

Watering cans are used to give water to the plants.

  • If we give water with a mug, then there are chances of overwatering whereas in watering cans water comes out at a decent pace and in moderate quantity.
  • One more thing, when water is given by a mug, water goes with more force on the surface of the soil. This pressure might disturb the placement of the plant.

watering a jade plant

Especially for indoor plants, watering cans should be used, as they provide a controlled and moderate flow of water. Outdoor plants also benefit from the use of watering cans.

watering to plants

5. Hand Weeder

hand weeder

Basically, this tool is used for two things:

  • Firstly, for shifting any seedling from one pot to another pot. It can be done easily by using this tool.
  • Secondly, to loosen the soil in small pots instead of trowel this can be used.

6. Gardening Fork

gardening fork

This tool is used to loosen the soil and prepare the land, making it especially useful for lawns or yards.

7. Rake

rake

Rake is used to make lines on the surface of the gardening area for sowing seeds inside the soil.

  • After making lines, seeds can be sowed in those lines to germinate. This tool is also used to remove unwanted weeds from the soil.

8. Seedling Tray

seedling tray

In seedling trays, multiple seeds can be grown simultaneously. These trays are an excellent option for those with limited space.

seedlings

  • Ice cream sticks can be used as tags to differentiate different saplings.

9. Green Net

green net

During summers, when the temperature and sunlight both are very high, plants should be covered with a green net.

  • The net provides shade and protection to plants from the intense heat during summer.

10. Jute Rope

jute rope

Jute rope is needed to provide support to climbers.

  • Climbing plants grow upward and require support sticks.
  • Jute rope can be used to make these supporting sticks.

gardening tools

If you are a beginner in gardening, you may find that a normal trowel, watering can, and pruner can efficiently handle all your gardening tasks.

Happy gardening!

gardening working professional

How to Manage Gardening while Working

In the chaos of daily life, managing a garden while working a full-time job might seem like a terrifying task. However, with some smart strategies, you can turn your gardening dreams into a reality. In this article, we explore practical tips for managing a garden while juggling the demands of a job.

How to Manage Gardening while Working

1. Choose Low – Maintenance Plants 

all plants indoor

When time is a precious commodity, opt for plants that require minimal attention.

  • Hardy and resilient varieties like succulents, snake plants, and pothos can thrive with little care. These plants can endure periods of neglect and still add greenery to your space.

Read article:

All about Indoor Plants

2. Create a Simple Garden Design

Keep your garden design straightforward.

  • A complex layout demands more time and effort. Stick to a well-organized, easy-to-maintain design that complements your available time and energy.

3. Embrace Container Gardening

container gardening

Container gardening is a game-changer for busy individuals.

  • It allows you to cultivate plants in pots, making them easier to move and manage.
  • You can even place containers strategically around your home for a touch of greenery wherever you go.

4. Invest in Time-Saving Tools

Smart gardening tools can significantly reduce your workload.

  • Automatic irrigation systems, like drip irrigation, can water your plants efficiently, eliminating the need for daily attention.
  • Additionally, long-handled tools save you from constant bending and reaching.

Read here:

Gardening Tools & Their Uses

5. Set Realistic Goals

Understand your schedule and set achievable gardening goals.

  • Don’t overcommit to a garden that requires more time than you can spare.
  • Start small, and you can gradually expand your green haven.

6. Weekend Warrior Gardening

Use weekends strategically for more time-consuming gardening tasks.

  • Your week-offs can be devoted to pruning, weeding, and other maintenance activities that require more time.

7. Emphasize Drought-Tolerant plants

Choose plants that adapt to drought conditions because you may go for a vacation or back to your hometown for festivities.

  • It ensures your plants don not die.
  • Succulents, cacti, and certain native plants can survive with less frequent watering, making your gardening routine more manageable.

8. Enlist Help

If your schedule is exceptionally tight, consider hiring a gardening service for periodic maintenance.

  • Many local services offer affordable packages for weeding, watering, and overall garden upkeep.

9. Create a Gardening Calendar

Plan your gardening tasks according to the seasons.

  • Different plants have various needs throughout the year. A gardening calendar will help you stay organised.

10. Enjoy the Process

Gardening should be enjoyable, not stressful.

  • Embrace it as a therapeutic activity that allows you to unwind after a busy day.
  • Nature can significantly contribute to your overall well-being.

Conclusion:

Amid the whirlwind of work, traffic, and daily responsibilities, maintaining a garden might seem challenging, but it’s not impossible.

  • Adopt these practical tips and adjust them to your unique schedule. Gardening is not just about the result; it’s also about enjoying the journey and finding moments of tranquility amid the chaos.

“Get your hands dirty, and let your garden be a source of joy and relaxation in your bustling life.”

gardening

Also, read:

Importance of Gardening in our Life

Happy Gardening!!

lighting conditions thumbnail (1)

Different lighting Areas for Plants

Different lighting areas for plants play a crucial role in their growth and well-being. Various plant species exhibit distinct preferences when it comes to lighting conditions in their natural habitats.

For example, succulents and cacti grow in deserts and very dry climates, so they prefer hours of sun and minimal watering.

On the other hand, tropical plants such as ferns, birds of paradise, and philodendrons prefer bright, indirect light and more frequent watering to mimic a rainforest environment.

Understanding these distinct lighting needs is essential for cultivating a healthy indoor garden.

Are your plants getting the right amount of light?

Light is the most essential element for healthy houseplants (indoor plants). The energy obtained from photosynthesis depends on the amount of light the leaves block.

Indoor plants can be classified according to their light needs and tolerance – high, medium, or low.

Choose houseplants based on the availability of natural light in your home. Otherwise, you will have to supplement the light with artificial light.

In this article, we will learn about the different lighting areas for plants.

Different lighting Areas for Plants

1. Dark Room

The area where there is no natural or artificial light is a dark room.

dark room

“Do not keep your plants in a dark room, they will stop growing.”

2. Direct Light Area

The area where there is direct sunlight falling in the room with visible yellow light, that light is called the Direct Light Area.

direct light area for plants

There are some plants that require hours of direct light to grow. They are called outdoor plants.

Direct light area for plants

Below are some of the plants which require direct sunlight to grow:

  • Tulsi (Holy basil),
  • Hibiscus,
  • Curry Patta,
  • Jasmine,
  • Marigold,
  • Rose,
  • Brinjal,
  • Tomato, etc.

3. Bright Light Area

bright light area

The area where there is no direct sunlight but is very bright due to day time, that light is called a bright light Area.

bright light area for plants

4. Medium Light Area

medium light area

In comparison to bright light areas, where there is little low light, that area is called a medium light area.

medium light area for plants

List of some indoor plants that can grow in bright and medium light areas:

  • ZZ Plant
  • Snake plant
  • Dumb cane
  • Syngonium
  • Peace Lily
  • Money plant
  • Areca Palm
  • Aglaonema
  • Rubber plant
  • Pothos
  • Anthurium
  • Dracaena
  • Philodendron
  • Fiddle leaf fig plant
  • Cactus
  • Ficus Bonsai

5. Low Light Area

low light area

The area which has very low light with reading visibility is called a low-light area.

low light area for plants

List of some indoor plants that can grow in low-light areas:

  • Snake Plant (Sansevieria)
  • ZZ Plant (Zamioculcas zamiifolia)
  • Spider Plant 
  • Dracaena

Note:

  • While these plants can adapt to less light, providing some indirect or filtered light periodically will contribute to their overall well-being.
  • Always consider factors like humidity, temperature, and watering needs in addition to light conditions for optimal plant care.

Conclusion:

When indoor plants do not receive an adequate amount of light, their ability to carry out photosynthesis is compromised. Without sufficient energy production from photosynthesis, plants cannot manufacture the nutrients they need for growth and maintenance. This deficiency in energy and nutrients can result in weakened plants, stunted growth, yellowing of leaves, and, ultimately, plant death.

It is important to consider the light requirements of the plants and provide an environment that meets those needs.

Different plants have varying light preferences, and understanding these requirements is essential for maintaining healthy and thriving indoor greenery.

Also, read,

All about Indoor Plants

Happy Gardening!

How to Remove Ants and Fungus from the Plant?

The issue of fungus in plants persists in almost every season of the year, leading to various problems. Additionally, the constant threat of ant attacks is alarming, as ants often bring along harmful insects that can cause extensive damage to the entire plant. In this article, we will explore organic treatments on how to remove ants and fungus from plants. 

Problems:

1. Fungus on soil surface:

Initially, fungus appears on the soil surface, gradually spreading to the entire plant and causing potential damage to the entire plant.

2. Another issue is related to ants:

If ants are consistently present around your plants, it’s a sign that mealybugs or aphids have attacked.

ants on plant


  • Mealybugs and aphids release a sweet, wax-like substance on the leaves, attracting ants to feed on it. In return, ants protect these insects from other harmful predators.

Mealybugs on plant leaves

Organic remedy to remove fungus and ants

For both the issues of fungus and ants, there’s a single solution—cinnamon powder.

Note:

  • Cinnamon powder serves as a potent organic and chemical-free fungicide, conveniently available in our homes.

How to Remove Ants and Fungus from the Plant

How to use Cinnamon Powder as a Fungicide?

Cinnamon powder


1. Remove the affected layer of the soil:

  • If your pot’s soil is well-drained, the likelihood of a fungus attack is minimized. In the event that fungus has already appeared on the surface, the first step is to remove that layer of soil.

fungus on soil surface

2. Once the fungus is cleared, evenly sprinkle cinnamon powder on the soil’s surface. You will observe the fungus disappearing. This serves as the easiest and quickest remedy for this problem.

Sprinkle Cinnamon powder on the soil surface (1)

Note:

  • It’s important to note that this is a one-time treatment; there’s no need to repeat it.
  • While there are various fungicides, also known as Trichoderma spp, available in the market, you can achieve better results with cinnamon powder.

How to use cinnamon as an insecticide for ants?

The potent smell of cinnamon is an effective deterrent for ants, making them avoid areas with this fragrance.

However, for ants that roam extensively on branches, stems, leaves, and soil, simply sprinkling cinnamon powder may not suffice.

ants on plant

To address ant infestations, it is recommended to create a cinnamon solution and spray it thoroughly over the entire plant.

To make the solution, follow these steps:

1. Add 1 tbsp. cinnamon powder to 2 cups of water.

Add Cinnamon powder in water

2. Boil the solution until it reduces to 1/4 of its initial quantity.

Boil the solution cinnamon powder

3. Sieve the solution using a cotton cloth.

Sieve the solution

4. Dilute 20% of this solution with 80% normal water, fill it into a spray bottle, and then spray it on your plants. This will effectively repel ants, causing them to flee from the plants.

5. If the ant infestation is severe, you can spray the solution daily on your plants.

Spray the solution on your plants

6. The organic nature of this solution ensures it won’t harm your plants.

7. It is worth noting that the solution will not kill ants; they will simply move away from the treated plants.

8. The solution can be stored at room temperature for 20-25 days unless the weather is exceptionally hot.

Now, I am sure you can save your plants from ants and fungi.

Must read:

1. How to make Neem Pesticide at home

2. How to use Neem oil in gardening

Keep planting !!

Self vegetable gardening

Self-Taught Techniques for Bountiful Vegetable Gardens

Growing your own vegetables is not just a practical task; this is a rewarding one. With rising food prices and increasing demand for pesticide-free, healthy produce, more and more people are taking up vegetable gardening.

vegetables gardening

What is really inspiring is that many successful vegetable gardeners are completely self-taught. In this article, we will discuss in detail self-taught techniques for creating an abundant vegetable garden ready for any context.

We will discuss on the following points:

  • Soil Enrichment and Preparation
  • Smart Water Management
  • Companion Planting
  • Crop Rotation
  • Organic Pest Control
  • Seed Saving
  • Continuous Learning
  • Space Optimization

1. Soil Enrichment and Preparation

Successful vegetable gardening begins with the soil.

  • Many self-taught gardeners take the first step by enhancing their soil quality. They utilize kitchen waste, dried leaves, and cow dung to create nutrient-rich organic matter.

soil mixture

  • The practice of vermicomposting, which involves using earthworms to break down organic material, is particularly popular among self-taught gardeners. This enriched soil lays the perfect foundation for robust and healthy plant growth.

compost

2. Smart Water Management

Water is a precious resource in many parts, and self-taught gardeners are experts at water management.

self watering system

  • Techniques such as drip irrigation and mulching are commonly used to conserve water.
  • Drip irrigation systems deliver water directly to the plant roots, reducing wastage.
  • Mulching with materials like straw or dried leaves helps retain soil moisture, suppress weeds, and reduce the need for frequent watering.

3. Companion Planting

Many self-taught gardeners embrace the concept of companion planting.

marigold + Tomato

  • This technique involves planting certain vegetables together to enhance growth and deter pests.
  • For instance, planting marigolds alongside tomatoes can help repel nematodes and other harmful insects.
  • By experimenting with companion planting, self-taught gardeners can naturally protect their crops and increase yields.

Also, read:

Winter Gardening Ideas & Planning

4. Crop Rotation

Crop rotation is another technique that self-taught gardeners adopt to maintain soil health and prevent pest infestations.

crop rotation

  • By changing the placement of crops each season, they minimize the risk of soil depletion and the buildup of plant-specific pests and diseases. This practice leads to healthier, more productive vegetable gardens.

5. Organic Pest Control

The self-taught gardeners in India often avoid chemical pesticides due to concerns about their impact on health and the environment.

pest control

  • Instead, they opt for natural pest control methods.
  • They often use neem pesticide solution, garlic spray, and even homemade chili, etc. solutions to deter common garden pests.
  • These natural remedies are safe, cost-effective, and eco-friendly.

6. Seed Saving

Many self-taught gardeners understand the importance of saving seeds from their produce.

seed saving

  • It not only saves money but also helps preserve traditional varieties of vegetables.
  • By selecting and saving seeds from the healthiest and most robust plants, they ensure that future generations of vegetables are well-suited to local conditions.

7. Continuous Learning

Self-taught gardeners are committed to lifelong learning.

winter vegetables

  • They experiment with new varieties of vegetables, adapt to changing weather patterns, and seek knowledge from fellow gardeners and online resources.
  • This commitment to continuous learning ensures that their vegetable gardens remain productive year after year.

8. Space Optimization

In densely populated urban areas, space for gardening can be limited.

tomato gardening

  • Self-taught gardeners maximize space by using vertical gardening techniques, hanging pots, and creating compact raised beds.
  • They also choose vegetables that grow well in confined spaces, such as cherry tomatoes, mint, and spinach.

Conclusion:

Self-taught vegetable gardeners are a testament to the power of determination and resourcefulness. Their bountiful vegetable gardens are a source of fresh, healthy produce. These also reflect their dedication to sustainable and eco-friendly gardening practices.

  • By enriching the soil, managing water efficiently, embracing companion planting, and continuously learning, they have discovered the secrets to successful vegetable gardening.

These self-taught techniques offer inspiration and valuable lessons for anyone looking to start their vegetable garden, proving that a green thumb can be cultivated through passion and perseverance.

Happy Gardening!

Winter Gardening Ideas and Planning

Did you know that you can grow a lush green variety of winter vegetables and beautiful array of flowering plants all from the comfort of your home?

Organic, fresh and pure vegetables can be planted at home such as;

winter vegetables
winter vegetables
  • tomato,
  • beans,
  • radish,
  • cauliflower,
  • carrot,
  • peas,
  • spinach,
  • coriander,
  • cabbage and many more.

Furthermore, with the right care, your garden can flourish with vibrant winter flowers like;

winter flowers
winter flowers
  • roses,
  • rosemary,
  • marigold,
  • petunia,
  • verbena, 
  • dianthus,
  • dog flower,
  • hybrid periwinkle and many more. 

This practice of nurturing these plants during the colder months is known as “winter gardening.”

In the context of winter gardening, we will explore both minor and major aspects. Typically, basic preparations for winter gardening, such as getting the right pots and tools, preparing suitable soil mixture and other necessary processes begin from mid-September (in India).

The planning of a garden depends on a few simple things:

1. First, it is important to know what the is your choice and what you want to grow like, such as favorite plants, fruits, or vegetables.

  • The planning starts based on the chosen plants because each plant has its own unique needs, and it’s essential to cater to those needs.

2. Second, the size of the gardening area is a crucial factor.

  • The number of plants you can grow depends on the available space.
  • The available area determines how you can diversify and choose the different types of plants to grow.

3. Third, the amount of sunlight is essential for plants to grow well.

Before sowing any seeds, it’s important to check how much sunlight the garden area receives.

  • Based on the sunlight available in your area, you should select the seeds.
  • If you have a lot of sunlight, you can grow plants like chili, capsicum, and tomatoes that require plenty of sunlight.
  • If there’s limited sunlight, it’s better to choose plants like coriander, spinach, and other herbs that can thrive with less sunlight.

Requirements for winter Gardening

1. Season and Temperature:

  • Winter gardening typically begins in mid September or from October and continues until March.
  • It’s essential to choose a time with pleasant weather for seed sowing because seedlings won’t survive in hot or humid conditions.

“The ideal temperature for sowing seeds is 15-20℃.

2. Pot size and types

grow bags for gardening

(A) For Vegetables

(i) 10*10 or 12*12 inch grow bags:

  • suitable for tomatoes, chili, cabbage, cauliflower, and capsicum.

(ii) 12*18 inch grow bag:

  • good for radish, coriander, carrot, spinach, onion, or garlic.

(iii) 15*15 or 16*16 inch grow bags:

  • ideal for brinjal, beans, lubia, runner beans, or peas.

(iv) Rectangular boat-shaped pots can also be used for herbs like coriander, spinach, etc. 

Note:

  • It’s a good idea to have 4-5 pots or grow bags for each category because in one pot only 5-6 vegetables would grow out.

(B) For Flowers

(i) 12-inch clay pots:

clay pots

  • Permanent plants like rose, marigold, and chrysanthemum do well in these pots.
  • If they survive for two seasons, they will stay with you without needing to be repotted.
  • Always choose good-quality clay pots for these flowers.

(ii) 4*4, 6*6, or 8*8 inch pots:

  • These smaller pots are suitable for growing seasonal flowers like petunia, verbena, dianthus, dog flower, etc.

(iii) Rectangular boat-shaped pots:

rectangular pot
rectangular pot
  • Flowers grow well in this type of pots as they have enough space for their roots and to bloom properly.

3. Soil Mixture

(i) Soil:

Garden area soil
Garden area soil
  • Get the soil from any nursery or reuse the summer plants’ soil by adding organic manure and neem cake powder to make it pest-free.
  • Make sure to expose the soil to sunlight.

(ii) Add compost to enrich the soil:

compost
kitchen compost
  • You can add any compost like; kitchen waste compost, vermicompost, cow dung compost, leaf compost, or any suitable compost to enrich the soil.

(iii) Use Sand:

river sand
river sand
  • Use river sand to enhance soil porosity, as many vegetables thrive in sandy soil.

(iv) Coco peat:

coco peat
coco peat
  •  You can add cocopeat to aid in seed germination, especially when sowing the seeds.

(iv) Add fungicides

Fungicide powder
Fungicide powder
  • Use fungicides such as Trichoderma or Cinnamon powder to safeguard against fungus or bacterial attacks.

4. Gardening Box

gardening box
gardening box

A basic gardening box should contain essential items needed at various stages of planting:

1. Bulbs and Seeds: Enthusiastic gardeners always have a variety of plant seeds and bulbs on hand.

2. Gloves: Wearing gloves is advisable to prevent injuries when using sharp gardening tools, particularly pruners.

3. Fertilizers and Micronutrients: Keep a range of fertilizers and nutrients for different growth stages of plants.

  • For example, Neem cake powder, Mustard Cake, Epsom Salt, Rose bloom fertilizers, Curry leaf boosters, and Seaweed micronutrients, etc. 

4. Insecticides: These are essential to protect your plants from insect attacks.

  • For example: Actara acts as an insecticide for edible vegetables.

5. Fungicides: Use fungicides to prevent fungal infestations.

6. Ice Cream Sticks: These are useful for labeling seedlings in a seedling tray.

7. Pen/Permanent Marker: Keep one for writing the names of seedlings on the ice cream sticks.

8. Tool Kit: Different gardening tools serve various roles, including digging, mixing, stirring, pruning, and more.

All the above components should be included in any gardening box to facilitate basic gardening tasks.

5. Seedling Trays

Seedling tray
Seedling tray

Seeds can either be sown directly into pots or in seedling trays, with the option to transplant them into pots after 20-25 days. Seedling trays offer several advantages:

1. They are useful when the soil mixture isn’t ready yet, but it’s time to sow seeds.

  • You can place seeds in these trays and later transfer them to pots with the appropriate soil mixture.
seedlings
seedlings

2. Seedling trays are practical for situations where pots need to be relocated due to weather conditions, protecting them from excessive heat or unexpected rainfall. The trays are easy to transport.

seedlings in seedling tray

3. Transplanting from a seedling tray to larger pots is simpler compared to moving plants from one pot to another.

  • It minimizes root disturbance – in a seedling tray, gently press the tray from the bottom, and the seedling will come out effortlessly.
press seedlings to remove from tray

Note:

  • Seedling trays are readily available in the market and can serve you for multiple seasons once purchased.
seedling tray
seedling trays

6. Spray Bottle

Spray bottle
spray bottle
  • Using spray bottles is recommended for watering or applying neem oil to your plants.
  • Be sure to clean and thoroughly dry your spray bottle after each use to prevent residue buildup inside the nozzle, which can damage the bottle.

7. Support Sticks

wooden support stick
wooden support sticks
  • Wooden sticks can be utilized to provide support to plants, such as tomatoes, ensuring they stand upright, typically after a month or two of planting.

8. Rainwater Cover

  • A rainwater cover can be employed to shield the soil mixture during preparation or to protect plants during rainy periods.

All of these mentioned requirements are essential for initiating your winter gardening journey. By following these guidelines and tips, you can nurture a vibrant and healthy garden.

Wishing you a Happy Gardening!

gardening

Gardening on a Budget: Thrifty Tips from a Self-Taught Gardener

Gardening is a wonderful hobby that allows you to connect with nature, enhance your surroundings, and grow your produce. However, there is a  perception that gardening can be an expensive pursuit. The truth is with a bit of ingenuity, resourcefulness, and a willingness to learn, you can cultivate a thriving garden without emptying your wallet.

indoor gardening

Let’s explore some practical tips for budget-friendly gardening inspired by my experiences as a self-taught gardener including:

  • starting with seeds,
  • creating DIY compost,
  • embracing container gardening,
  • selecting native plants,
  • reusing and upcycling materials,
  • implementing rainwater harvesting,
  • mastering plant propagation,
  • leveraging community and online resources,
  • practicing selective pest control, and
  • remembering the importance of patience and perseverance.

Start with seeds

To kickstart your garden without a hefty price tag, begin with seeds.

“Seeds are more affordable than seedlings or mature plants and offer the joy of nurturing a plant from its beginning.”

  • You will get a variety of economical seeds for flowers, vegetables, and herbs.
  • You can easily source these from local nurseries, online marketplaces, or through seed swaps with fellow gardeners.
  • You can buy packets of seeds instead of buying ready-to-plant seedlings of your favourite vegetables, like tomatoes, capsicum, bell peppers, etc. 

vegetables

DIY Compost

Compost is the lifeblood of a garden, but you don’t have to buy it.

  • Create your compost bin using kitchen scraps such as fruit and vegetable peels, coffee grounds, and eggshells. Mix in dry leaves and a bit of soil.

kitchen waste

Creating homemade compost, such as cow dung compost and leaf compost, is not only cost-effective but also highly beneficial for plant growth.

  • Cow dung compost is rich in nutrients like nitrogen and serves as an excellent organic fertilizer. 
  • Leaf compost, on the other hand, is an eco-friendly way to recycle fallen leaves from your garden or yard.
compost
kitchen compost

“By creating composts at home, you not only reduce waste but also play a crucial role in ensuring that your plants receive the best nutrition while minimizing your environmental impact.”

Container Gardening

When you are short on space or looking to keep costs low, container gardening is an excellent solution.

container gardening

  • Reuse containers like old buckets, plastic bottles, or wooden crates as planters.
  • An old wooden crate can become a charming herb garden, and repurposed plastic bottles with the tops cut off can serve as ideal containers for growing herbs like mint and basil.

Container gardening allows you to control your soil quality, ensuring optimal growing conditions without the expense of buying pots.”

Local and Indigenous Plants

Select plants native to your region or well-suited to your local climate.

  • These plants are generally robust, requiring less maintenance and fewer interventions like pesticides or excessive watering. By choosing native varieties, you are saving money and promoting biodiversity.

bougainvillea

  • For instance, if you live in a hot and arid area you might choose drought-resistant plants like Bougainvillea, Desert Marigold, Aloe Vera, Agave, Date Palm, etc. These plants require less water and care, reducing your gardening expenses.

Aloe vera pot


Reuse and Upcycle

Get creative with your garden decor.

  • Old tires can become colorful flower beds, discarded wooden pallets can transform into vertical gardens, and even broken teacups can serve as charming plant containers.
  • Look around your home for items that can be upcycled into the garden decor, saving you money and reducing waste.

Rainwater Harvesting

rain water

Water is often a precious resource in India, and implementing a rainwater harvesting system can conserve both water and money.

  • Use collected rainwater for watering your plants, and you’ll notice significant cost savings over time.

Plant Propagation

plant from cutting

Learn the art of plant propagation.

  • Many plants can be multiplied from cuttings or by dividing established plants.
  • It eliminates the need to buy new plants and allows you to share your garden’s bounty with friends and family.
  • For example, a single healthy rose cutting can lead to the growth of a new rose bush with beautiful blooms. Other examples include the money plant, jade plant, and many more.

Community and Online Resources

Join local gardening groups or forums, both in your neighborhood and online.

gardener

  • Gardeners are usually generous with advice, seeds, and even plant cuttings. This sense of community can be a valuable resource for budget-conscious gardeners.

Selective Pest Control

neem pesticide

Rather than reaching for expensive chemical pesticides, try exploring natural and homemade pest control methods.

  • Neem oil, garlic spray, and marigold companion planting can help protect your plants without harming your budget or the environment.

Patience and Perseverance

Remember that gardening is a journey that takes time. Plants need time to grow and flourish. Be patient, learn from your successes and failures, and gradually invest in tools and materials as your gardening skills develop.

Conclusion

butterfly in garden

In conclusion, gardening on a budget is not only possible; it can also be incredibly fulfilling. By starting with seeds, creating your compost, embracing container gardening, and tapping into local resources you can nurture a thriving garden without burning a hole in the pocket. Along the way, you will enjoy the beauty of nature and deepen your connection with the environment and your community.

“So, roll up your sleeves, get your hands dirty, and watch your budget-friendly garden bloom and flourish.”

Happy gardening!

What is potting mix and how is it different from garden soil?

Understanding Potting Mix: A Gardener’s Guide

In gardening, deciding between potting mix and garden soil can determine whether your plants grow well or not. Let’s explore what potting mix is and how it’s different from garden soil.

“Healthy soil is the foundation of healthy plants and a healthy environment.”

Potting Mix vs. Garden Soil: Unveiling the Differences

1. The Composition

soil mixture
potting mix

Potting mix, often referred to as potting soil (soil mix), is a specialized mixture prepared for container gardening. It is prepared by gardening experts to provide an ideal environment for potted plants. Unlike garden soil, which is found naturally in your outdoor space, potting mix is a man-made soil-mixture customize to the specific needs of potted plants. 

2. Key ingredients

Potting mix typically comprises a combination of organic and inorganic materials. These ingredients may include:

  • compost – (cow dung compost, vermicompost, leaf compost)
  • sand
  • coco peat
  • neem cake powder
  • bone meal
  • vermiculite
  • perlite
  • fungicide

3. Drainage and Aeration

potting mix provides good drainage system

A big difference between potting mix and garden soil is how well they let water and air move around.

  • Potting mix is made to let water drain well and give plant roots plenty of air. This helps roots grow strong and avoids them sitting in water.
  • Garden soil might not let water drain as well, so it is not the best choice for potted plants.

4. Nutrient levels

garden soil
plant growing in garden soil

“Garden soil typically has plenty of nutrients due to natural processes over time.”

  • On the other hand, potting mix is purposefully designed to provide a steady release of necessary nutrients over time to ensure that your potted plants get the nutrition they require.

5. Pest and disease resistance

plants in pot
plants in pot

Potting mix is good because it is less likely to have pests and plant diseases compared to garden soil. Garden soil can sometimes have harmful things that can harm your plants, but potting mix is treated to lower the chances of that happening.

Making the right choice for your garden

Now that you understand the fundamental differences between potting mix and garden soil, it is time to make an informed decision for your gardening endeavors. Here are some quick tips:

Consider mixing both

Garden area soil
garden soil

Mixing both potting mix and garden soil can be beneficial in certain situations. This combination offers the advantages of both, providing your plants with necessary nutrients and good drainage. It is a balanced approach to support healthy plant growth.

1. Use potting mix for container gardening

soil mixture
potting mix

If you are planning to grow plants in pots, containers, or indoor settings, opt for potting mix. It is superior drainage, aeration, and reduced risk of pests make it the perfect choice for container gardening.

Container gardening
container gardening

2. Stick to garden soil for outdoor gardening

outdoor gardening
outdoor gardening

For outdoor garden beds or in-ground planting, garden soil is the natural choice. It is rich in nutrients and provides a suitable environment for your garden plants to thrive.

Conclusion

In conclusion, knowing how potting mix and garden soil are different is really important for your gardening success. So, choose the one that fits your needs best, and you will be on your way to growing a healthy and thriving garden.

Read here:

How to make best soil-mixture for plants

Happy Gardening