Monthly Archives: May 2024

How to Propagate Jade Plant from Cuttings

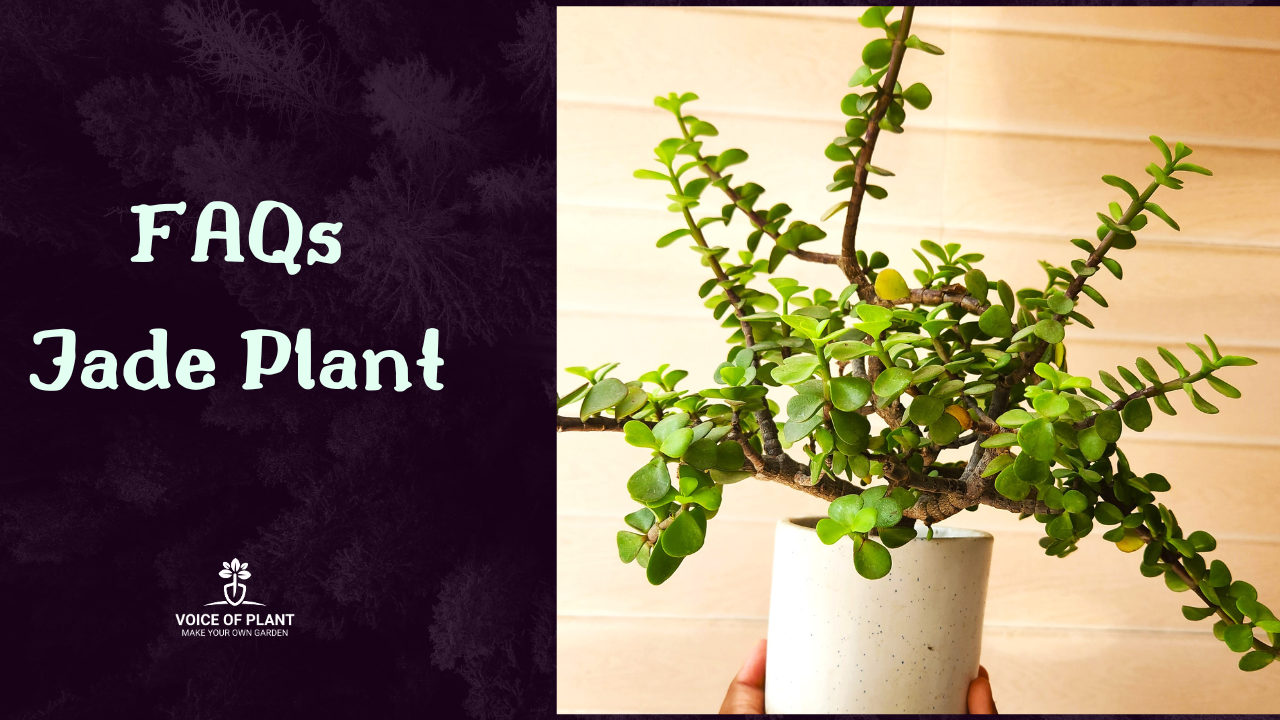
Propagation of Jade plant


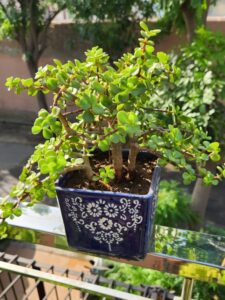
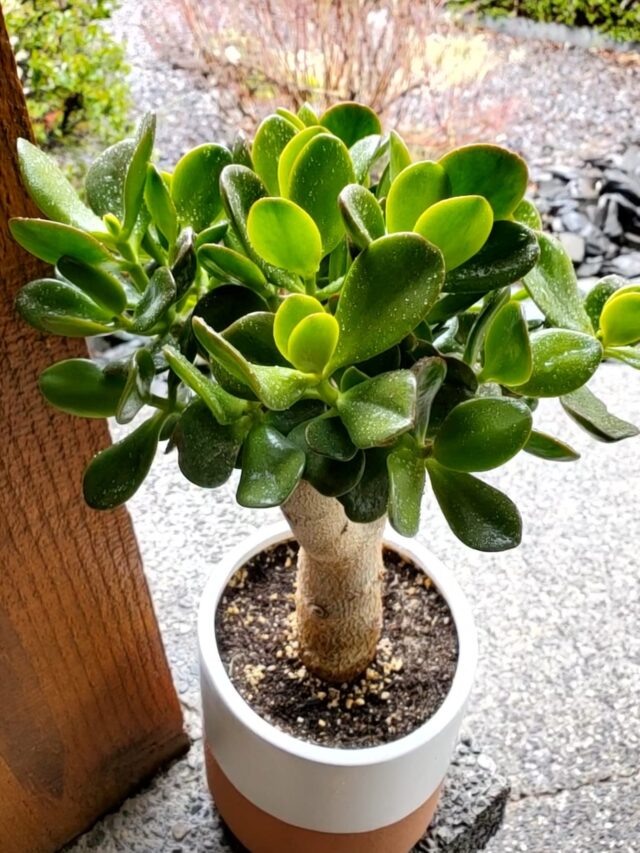
Jade plants, known for their succulent leaves and resilience, can easily be propagated from cuttings of a mature plant. 

jade plant in blue pot

If you have a large Jade plant, you can propagate more Jade plants by taking cuttings from the mature plant.

How to Propagate Jade Plant from Cuttings


1. Select a Healthy Cutting:

Jade plant in clay pot
Healthy Jade plant in clay pot
    • Choose a thick-stemmed, healthy cutting from the parent plant. The cutting should have several leaves and be free from any signs of disease or damage.

2. Make a Clean Cut:

jade cutting

    • Using a sharp tool such as a blade, knife, or scissors, make a clean cut to remove the chosen cutting from the parent plant.

3. Prepare the Cutting:

    • Strip the leaves from the lower part of the cutting. This section will be buried in the soil and should be free of leaves to promote root development.

Planting Methods


Now, you can choose one of the two methods for planting the cutting:

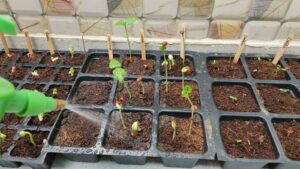
1. Propagate Jade Plant from Cuttings in Coco peat

Jade plant cutting in coco peat

Coco peat is an excellent medium for propagating Jade plants due to its moisture retention and aeration properties.

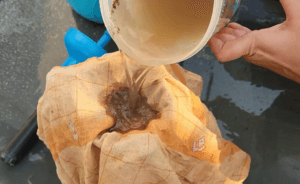
(i) Prepare the Coco Peat:

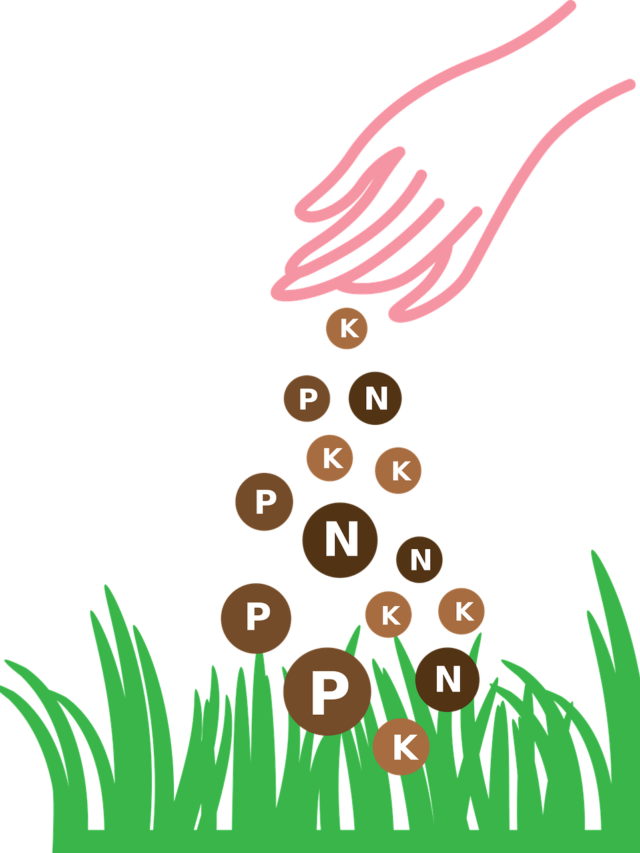
Mix the coco peat with a small amount of fertilizer to provide nutrients for the cutting. Ensure the coco peat has a slight moisture content. If it’s dry, add water until it’s moist but not waterlogged.

(ii) Plant the Cutting:


Fill a pot with the prepared coco peat mixture. Gently plant your cutting into the coco peat, ensuring it is placed slightly deep in the pot.


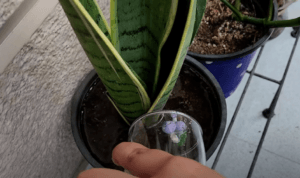
(iii) Care for the Cutting:


Since the coco peat is already moist, avoid watering immediately. Place the pot in a location where it can receive direct sunlight. New leaves should start to appear within a few days.


2. Propagate Jade Plant from Cuttings in the Soil


jade plant cuttings in soil

Using soil from an existing potted plant can also be effective for propagating Jade plants.

(i) Prepare the Soil:

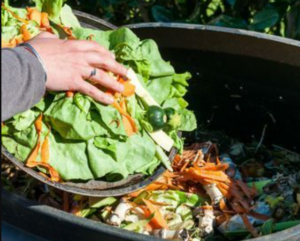
Use soil from a pot that already has a plant growing in it. This soil will have the necessary nutrients and a suitable structure for the cutting.


(ii) Plant the Cutting:

jade cutting in soil
jade cuttings in soil

Insert the cutting into the moisturized soil from another plant.

  • Ensure the soil is moist but not waterlogged to avoid overwatering.

General Care

jade cutting in small pot


1. Watering:


In both coco peat and soil, water the cutting only when the outer layer of the medium becomes dry. Overwatering can cause the stems to rot.

2. Root Development:


Roots will start to develop within approximately 45 days.

  • Once the roots are established, you can transfer the cuttings to larger pots.

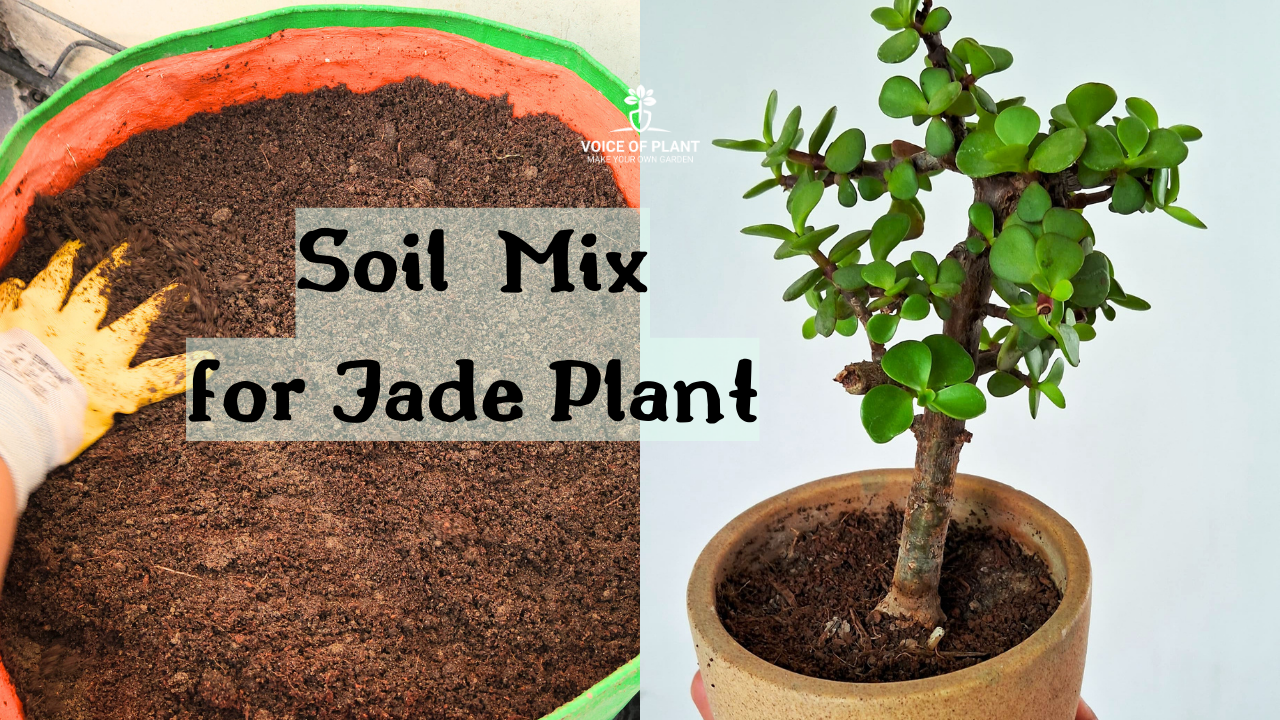
Transferring Cuttings


When moving your propagated Jade plants to larger pots, prepare a fresh soil mixture.

  • Avoid using the soil from old plants to ensure the new plants have a nutrient-rich environment for optimal growth.

By following these steps, you can successfully propagate Jade plants and enjoy their beauty in multiple pots around your home or garden.

Top 6 Organic Liquid Fertilizers for Plants in (2024)

Plants, like humans, require regular nutrients for sustenance and survival. These vital nutrients are typically supplied in the form of fertilizers.

In this article, we will explore some organic liquid fertilizers capable of enhancing plant growth and prolonging the life of your beloved greens.

Top Organic Liquid Fertilizers for Plants


1. Cow Dung Liquid Fertilizer:


cow dung liquid fertilizer

Crafted from cow dung cakes, this fertilizer is rich in nutrients and easy to make. Dilute before applying to plants for comprehensive nourishment.

Benefits:

1. Serves as a comprehensive nutrient source for plants, rich in micronutrients alongside NPK.

2. Regular application over 2-3 months results in noticeable growth, vitality, and robustness of plants.

3. Naturally fortifies plants, ensuring sustained strength and vigorous growth.

4. Enhances soil quality, extending moisture retention and reducing water requirements post-application.

2. Neem Cake Tonic:

neem kernel

Made from neem cake, this tonic fortifies plants internally, protecting roots from pests and fungal attacks. It enhances soil quality and boosts plant immunity.

Benefits:

1. Fortifies plants internally, safeguarding roots against pest and fungal attacks.

2. Strengthens plant immunity, inhibiting insect, snail, or ant invasions.

3. Enhances soil quality, improving moisture retention and nutrient availability.

4. Acts as a natural pesticide and fungicide, promoting plant health and vitality.

Suitable for: It is suitable for all types of plants and promotes shiny, healthy leaves.

3. Banana Peel Liquid Fertilizer:


Banana Peel Liquid Fertilizer
Banana Peel Liquid Fertilizer Pic credit: Pinterest

Despite myths, banana peel fertilizer doesn’t attract ants. Rich in potassium and phosphorus, it promotes robust flowering and fruiting in plants.

Benefits:

1. Rich source of potassium and phosphorus, promoting robust flowering and fruiting in plants.

2. Enhances soil fertility and microbial activity, improving overall plant health.

3. Eco-friendly and sustainable way to recycle kitchen waste, reducing environmental impact.

4. Improves soil structure and moisture retention, reducing water requirements.

4. Onion Peel Liquid Fertilizer:


onion peel liquid fertilizer

Derived from dry onion peels, this fertilizer is effective for foliage plants, enhancing growth and leaf shine. Apply monthly for best results.

Benefits:

1. Enhances plant growth and leaf shine, promoting overall plant health.

2. Enriched with essential nutrients including sodium, magnesium, phosphorus, potassium, and more.

3. Suitable for foliage plants, encouraging robust growth and vitality.

4. Eco-friendly and cost-effective solution for plant nourishment.

5. Seaweed Liquid Fertilizer:

seaweed liquid fertilizer

Seaweed liquid fertilizer is made from extracting and processing seaweed, typically varieties such as kelp or algae.

  • Soaking or fermenting the seaweed in water to release nutrients and beneficial compounds.
  • Filtering or straining the liquid to produce a nutrient-rich fertilizer solution.

Benefits of Seaweed Liquid Fertilizer:

1. Seaweed liquid fertilizer contains a wide range of micronutrients, including but not limited to iron, zinc, manganese, copper, and boron.

2. Rich source of trace minerals, vitamins, and plant growth hormones essential for plant health and growth.

3. Enhances root development, leading to stronger and healthier plants.

4. Boosts plant immunity, making them more resistant to stress, diseases, and pests.

5. Improves soil structure and fertility, promoting microbial activity and nutrient uptake.

Best for:

  • All types of plants indoor, outdoor, vegetables and flowering plants.

6. Kitchen Compost Tea Liquid Fertilizer:


kitchen waste

Made from composted kitchen waste, this fertilizer is rich in nutrients and beneficial microorganisms. It improves soil health and enhances plant growth.

Benefits:

    • Provides a nutrient-rich solution for plant growth, promoting healthy foliage and robust root development.
    • Enhances soil structure and fertility, improving moisture retention and nutrient availability.
    • Contains beneficial microorganisms that support plant health and suppress soil-borne diseases.
    • Eco-friendly way to recycle kitchen waste and nourish your garden without chemical additives.

These magical tonics possess potent qualities, capable of elevating your plants to the next level, showcasing magnificent growth. Utilize them to breathe new life into your garden and enhance its vitality.

Application Tips:


liquid fertilizer tonic

1. Dilution:

seaweed liquid fertilizer

Always follow the manufacturer’s instructions for dilution rates to avoid over-fertilizing, which can harm your plants.

2. Frequency:

Most liquid fertilizers should be applied every 1-2 weeks during the growing season.

3. Application Method:

banana peel liquid fertilizer

Use a watering can or garden sprayer to apply the fertilizer to the base of the plants, ensuring even distribution.

Plant-Specific Needs:


all plants outdoor

Different plants have different nutrient requirements, so choose a fertilizer that matches your plants’ needs.

Happy Gardening!
Jade plant FAQs

FAQs on Jade Plant Care Tips

 Introduction to Jade Plant


The Jade plant is a popular succulent renowned for its attractive, fleshy leaves and easy care requirements. Native to South Africa, this resilient plant is a favorite among both novice and experienced gardeners due to its ability to thrive with minimal attention.

jade plant in blue pot

Jade plant are often associated with good luck and prosperity, making them a common choice for both homes and offices. With proper care, a Jade plant can live for many years, growing into a beautiful, tree-like structure that adds a touch of greenery and charm to any space.

Here, we aim to answer some of the most common frequently asked questions (FAQs) and provide you with a better understanding of how to care for your Jade Plant.

Frequently Asked Questions (FAQs) on Jade Plant


Q1. How often should I water my Jade plant?


Ans: Jade plants prefer to be kept on the dry side.

  • Water thoroughly when the soil is completely dry. 

Note:

  • Overwatering can harm your Jade plant, so it’s important to avoid it.

Also, read: Watering tips to Jade plant

2. What type of soil is best for Jade plants?


soil mix 2

Ans: Jade plants thrive in well-draining sandy soil.

  • Adding sand or perlite can improve drainage.

Also, read: Best Soil Mixture for Jade Plant

3. How much sunlight does a Jade plant need?


Ans: Jade plants need at least 4-6 hours of direct sunlight each day. Keep your Jade plant in a sunny spot.

Note:

  • Some people keep Jade plant indoors, which can impact plant overall growth.
  • Jade plant thrive best with adequate sunlight and proper care.

4. Why are the leaves of my Jade plant falling off?


Ans: Leaves may fall off due to overwatering, underwatering, or sudden changes in temperature or light. Ensure consistent care and proper watering practices.

5. Can I propagate my Jade plant?


jade cutting

Ans: Yes, Jade plants can be easily propagated from leaf or stem cuttings. Allow the cuttings to dry for a few days before planting them in soil.

6. How do I deal with pests on my Jade plant?


mealybugs in the rose plant

Ans: Mealybugs are a common pest.

  • Remove them with a cotton swab dipped in neem oil.
  • Regularly inspect your plant and keep it clean to prevent infestations.

7. What is the best temperature range for a Jade plant?


Ans: Jade plants prefer temperatures between 18-30°C during the day and slightly cooler at night. Protect them from frost and extreme heat.

8. How can I encourage my Jade plant to grow thicker stems?

Jade plant in pot

Ans: Ensure your Jade plant gets plenty of sunlight and avoid overwatering. Pruning the plant can also promote thicker, more robust growth.

9. Why are the leaves of my Jade plant turning yellow?

Ans: Yellowing leaves can be a sign of overwatering, poor drainage, or insufficient light. Adjust your care routine accordingly.

10. Can Jade plants be grown outdoors?

Jade plant pot

Ans: Yes, Jade plants can be grown outdoors in warm climates. Ensure they are placed in a sunny location and protected from extreme weather conditions.

Happy Gardening!

Hibiscus flowers

How to Get Maximum Flowering in Hibiscus

Every flowering plant naturally tends to bloom, and if a hibiscus fails to do so for 2-3 months, it becomes a cause for concern. Typically, an underlying problem or issue is responsible for the lack of blooming. Therefore, the primary focus should be on identifying the problem before applying any treatment to the plant. Always refer to the checklist below to ensure all the plant’s requirements are being met.

hibiscus flower


How to Get Maximum Flowering in Hibiscus

Sunlight requirement

Hibiscus, renowned for its large flowers, necessitates a minimum of 5-6 hours of direct sunlight to promote blooming on all pruned branches.

  • This plant requires a substantial amount of energy to bloom, and if it receives only 1-2 hours of sunlight exposure, successful blooming may be hindered.

Soil composition

Soil mixture

The primary requirement for the growth of any plant is suitable soil.

  • It is crucial that the soil is not clayey, and any signs of algae formation should be addressed by tilling it.
  • To enhance the soil’s nutritional content and promote a looser texture, incorporate vermicompost.
  • For strong root development, the soil should possess an effective drainage system and not be compacted.

Water requirement

overwatering
overwatering

Excessive watering in hibiscus can result in root rot and hinder flower blooming.

  • If overwatered, buds may form but will ultimately drop without blossoming.
  • Conversely, insufficient watering can lead to the plant’s demise, with no chance of blooming and eventual withering.

“It is crucial to provide a balanced water supply for hibiscus—water when the soil is dry and ensure watering until excess water drains out from the bottom of the pot.”

Pest attack in Hibiscus plant

Mealybugs on plant leaves

Examine the plant for potential insect infestations, as hibiscus plants are susceptible to attacks from pests such as aphids, mealybugs, and other insects.

  • These dense plants may conceal pests, making early detection challenging.

Use of Neem Oil

neem oil spray

Inspect for leaf miners and other pests, and be vigilant for potential soil issues such as fungal infections or diseases. Safeguard against these pest attacks by thoroughly spraying the entire plant with neem oil.

  • To address soil diseases, if present, create a mixture of neem oil and a small amount of cinnamon powder in water and administer it to the soil.

Pot Size for Hibiscus plant

clay pots

While hibiscus typically thrives in a 10-12 inch pot, if, despite addressing the previously mentioned considerations, the plant fails to bloom, it is crucial to thoroughly inspect the pot for potential root binding.

  • Although hibiscus tends to appreciate being slightly root-bound, excessive binding can induce stress.
  • To assess this, carefully remove the plant from its pot, examine the roots, and if necessary, engage in root pruning.
  • Transplant the hibiscus into a larger pot to provide ample space, fostering optimal growth conditions. It will start flourishing again.

hibiscus flower

Soft pruning of Hibiscus plant

pruning

Generally, it is advised to conduct hard pruning on hibiscus in February, while soft pruning can be carried out year-round, excluding the harsh winter months.

If your hibiscus is not producing blooms, consider soft pruning and follow up with a diluted mustard cake liquid fertilizer to replenish soil nutrients to promote the development of new branches.

“It is important to refrain from giving the mustard cake liquid fertilizer during extremely hot summers.”

  • The diluted form of mustard cake liquid fertilizer is recommended due to its potency.
  • When pruning is performed, hormones are released at the pruned tips, stimulating the growth of fresh branches.

Lack of Nutrients

If, despite pruning, your hibiscus is not blooming as expected, it likely indicates a nutrient deficiency. To address this, apply Epsom salt to the entire plant.

Banana peel fertilizer:


After 10 days of the Epsom salt treatment, nourish the plant with a liquid fertilizer made from banana peel fertilizer. This particular fertilizer enhances the flowering process, and you will likely notice the emergence of new buds shortly after application.

Read article on:

How to make Banana peel fertilizer

Onion peel liquid fertilizer:

Following the banana peel fertilizer, wait for another 10 days and then give onion peel liquid fertilizer to the plant.

  • This fertilizer also promotes flower blooming, and you can expect to see new buds appearing within a few days.

Note:

  • In instances where the leaves of the blooming plant turn yellow, it is an indication of a need for more nutrients.

Cow dung liquid fertilizer

cow dung decompose

  • After 10 days of the onion peel fertilizer, provide the plant with a liquid fertilizer made from cow dung.

Read article on:

How to make Cow dung fertilizer

Note:

  • By adhering to this schedule of applying different liquid fertilizers every 10 days, you can stimulate consistent blooming in your hibiscus.

Increase the dosage of fertilizer after thoroughly inspecting all the concerns mentioned above. To cure the main problem is necessary to promote the blooming in plants rather than applying random theories of experiments.

As living entities, plants require a well-balanced diet consisting of sunlight, water, air, and essential nutrients. It is crucial to meticulously monitor and fulfill each of these requirements to ensure the effective growth and flourishing of the plant.

Once the plant is blooming at the anticipated rate, reduce the fertilizer dosage, as an excessive amount may adversely affect the plant. It is advisable to adhere to the hierarchical checklist mentioned earlier before administering any remedies to the plant.

hibiscus flower

Happy Gardening!!

Onion peel fertilizer (1)

Why Onion Peel Fertilizer is best Organic Fertilizer for Plants?

Why Onion Peel Fertilizer is best Organic Fertilizer for Plants?


Onion peels, often discarded as kitchen waste, hold a hidden potential to boost plant growth and enhance soil fertility. The concept of utilizing onion peels as a natural fertilizer has gained traction among environmentally conscious gardeners and farmers.

Why Onion Peel Fertilizer is best Organic Fertilizer for Plants?

Benefits of Onion Peel Fertilizer for Plant Growth


This article delves into the benefits of onion peel fertilizer for various plants and its role in sustainable agriculture.

1. Nutrient-Rich Composition:


onion peel fertilizer

Onion peels are not just waste; they are a rich source of nutrients essential for plant growth.

They contain significant amounts of

  • potassium,
  • phosphorus,
  • calcium, and
  • nitrogen,
  • along with trace elements like magnesium and sulfur.

These nutrients are vital for the development of robust root systems, lush foliage, and vibrant blooms in plants.


2. Soil Enrichment and pH Regulation:


soil mixture 1

One of the primary benefits of using onion peel fertilizer is its ability to enrich the soil.

  • When incorporated into the soil, onion peels gradually decompose, releasing nutrients that improve soil fertility.
  • Additionally, onion peels have natural acidic properties, which can help regulate soil pH levels, making them suitable for plants that thrive in slightly acidic conditions, such as tomatoes, peppers, and strawberries.

3. Organic Pest Repellent:


neem pesticide spray

Onion peels contain compounds like quercetin and sulfur compounds, which have natural insect-repelling properties.

  • When used as a mulch or incorporated into the soil, onion peel fertilizer can help deter pests and insects, reducing the need for chemical pesticides.
  • This organic pest control method is particularly beneficial for protecting sensitive plants like herbs and leafy greens from common garden pests.
Also, read – How to make Onion Peel Fertilizer at Home


4. Enhanced Water Retention:


The fibrous nature of onion peels aids in improving soil structure and enhancing water retention capacity.

  • By adding onion peel fertilizer to the soil, gardeners can mitigate water runoff and ensure better moisture retention, especially in sandy or fast-draining soils.
  • This benefit is crucial for promoting healthy root development and reducing water stress in plants during periods of drought or hot weather.

5. Encourages flower and fruit production: 


Portulaca flowers pink

The nutrients found in onion peels play a crucial role in stimulating robust flowering and fruiting in plants, ultimately contributing to higher yields.

  • These nutrients, including potassium, phosphorus, calcium, and nitrogen, among others, provide essential building blocks for plant growth and development.

(i) Potassium, for instance, is known for its role in flower and fruit formation, as well as in improving overall plant vigor and resilience to stress.

tomato

(ii) Phosphorus is essential for energy transfer within plants and is particularly important during flowering and fruiting stages, aiding in the production of seeds and fruits.

(iii) Calcium helps regulate cell division and is vital for strong cell walls, contributing to fruit quality and shelf life.

(iv) Nitrogen is essential for leaf and stem growth, ensuring that plants have the necessary resources to support abundant flowering and fruit set.

Plant growth

6. Sustainable and Cost-Effective:


onion peel liquid

Utilizing onion peels as fertilizer aligns with the principles of sustainable agriculture and waste reduction.

Instead of discarding onion peels as trash, repurposing them as a natural fertilizer minimizes waste and contributes to eco-friendly gardening practices. Moreover, onion peel fertilizer is cost-effective compared to commercial fertilizers, offering a budget-friendly alternative for home gardeners and small-scale farmers.

Conclusion:

In conclusion, onion peel fertilizer offers a plethora of benefits for plant growth and soil health.

  • From enriching the soil with essential nutrients to repelling pests and improving water retention, onion peels are a valuable resource for sustainable gardening and agriculture.

Let’s not throw away onion peels; instead, let’s see them as a way to help our garden grow and thrive.

Happy Gardening!

How To Prune A Curry Leaf Plant To Make It Bushy

Pruning Curry Leaf Plant

Pruning a curry leaf plant may seem daunting to many inexperienced owners who fear stunting growth or losing their chance at a sizable tree. However, the secret to flourishing foliage lies in regular pruning. This essential practice not only shapes the plant but also stimulates fresh growth, ensuring a bushy, healthy appearance.


Understanding the art of pruning is vital. One common mistake is timing – knowing when to prune is crucial. Additionally, improper techniques, such as over-pruning or neglecting to trim, can harm the plant’s vitality.

Let’s understand the benefits of pruning Curry Leaf Plant:

1. Encourages new growth:


curry leaf plant new growth

Firstly, it encourages new growth by stimulating the emergence of shoots and branches.

  • Removing the dominant tip prompts the plant to produce side shoots, resulting in a fuller, bushier appearance.

2. Increases leaf production


Curry leaf green

Moreover, pruning facilitates increased leaf production.

  • Each branch yields fresh leaflets, enhancing the overall foliage density.


3. Controls Size


curry plant in pot

Especially important in non-tropical climates where plants are often container-grown, regular pruning prevents overgrowth.


4. Promotes Plant Health


Removing dead stems and leaves improves air circulation, reducing the risk of disease and pest infestation.

  • Eliminating crossed branches prevents damage and potential entry points for pathogens.

What is the best time to prune a curry leaf plant?


Curry stem pruning

Choosing the right time to prune is crucial. Pruning a curry leaf plant is best done during its active growth phases in spring, summer, and early fall.

Note:

  • Avoid pruning your curry leaf plant as it transitions into colder weather during late fall and throughout the winter months.
  • During this period, the plant enters a dormancy phase, which can potentially harm it and lead to damage.

How to Prune Curry Leaf Plant To Make It Bushy


Here’s a structured approach to pruning:

1.Pruning Techniques


pruning curry leaf

Curry leaf plant primarily grows from its tips, so pruning or plucking from the tip stimulates the emergence of 2-3 new shoots, leading to the development of new branches and leaves.

2. Remove Dead & Yellow Leaves:


Curry yellow leaves

Begin by pruning off any dried, dull, or yellow leaves from the stem to maintain plant health.

3. Identify the branches you want to prune


Curry pruning stem

Look for branches that are growing too long and sparse or those that are crossing each other. These are the branches that you will want to prune to encourage bushier growth.


4. Plucking leaves from the bottom of the plant


Curry pruning

  • When harvesting leaves for use, prioritize plucking leaves from the bottom of the plant.  Leaves at the top are still in the growth phase and should be allowed to mature.

5. Remove entire branches when harvesting leaves for use

curry leaves
Pic credit: Pinterest

Additionally, when you are harvesting leaves for use, it is advisable to remove entire branches rather than just individual leaves.


6. Remove any flowers


curry leaf flowers pruning

If your curry leaf plant has started to flower, it’s best to remove these flowers.

  • While the flowers are beautiful, they divert energy away from leaf production, which is what you want to encourage for a bushy plant.


7. Prune strategically

Use sharp, clean pruning shears to make precise cuts.

  • Avoid tearing or ripping the plant tissue as this can introduce pathogens and cause unnecessary stress to the plant. 

Important Note:

If your plant is relatively new, around 6 or 3 months old, it’s best to stick to light pruning.

  • From February to October, regular light pruning can be performed to encourage new branch growth, but avoid harsh pruning.
  • After new stems emerge, wait until they reach a length of 5-6 inches before further pruning.

Hard pruning of Curry Leaf Plant

For plants that are one or two years old, hard pruning can be quite beneficial.

By removing yellow leaves, dead, or leggy stems, you encourage the plant to grow more branches and denser foliage.
  • This type of pruning helps maintain the plant’s shape and promotes healthier growth overall.

Note:

  • After hard pruning, add vermicompost into the soil. Avoid using heavy fertilizers as the plants are currently leafless.


Important note:

  • Perform hard pruning of your plant only in the evening and keep it shaded for at least 7 days until new leaves emerge.
  • This will assist the plant in adapting to its new environment more effectively.

Maintain a regular pruning schedule

Pruning your curry leaf plant should be an ongoing process rather than a one-time event.

  • Aim to prune your plant every few weeks during the growing season to maintain its shape and encourage healthy growth.

Provide proper care after pruning

After pruning, make sure to water your curry leaf plant adequately and provide it with sufficient sunlight.

  • This will help it recover from the pruning process and stimulate new growth.


In conclusion, pruning is an essential part of caring for a curry leaf plant and is necessary for maintaining its health and promoting bushy growth. By following these steps and incorporating regular pruning into your plant care routine, you can ensure that your curry leaf plant thrives and produces an abundance of flavorful leaves for all your culinary adventures.

Don’t be afraid to trim your curry leaf plant – it’s the key to a flourishing and bushy plant!

Happy Gardening!

vermicompost tea

How to make Vermicompost tea? Benefits & Uses

Vermicompost is an organic and most powerful compost made up of earthworms. Today, Vermicompost is widely used by many gardeners and farmers in gardening activities.

Vermicompost is also known as earthworm manure. It is a natural process in which earthworms consume the remains of organic matter such as plants and fruit and converts them into nutrient-rich manure in the form of feces. This natural process of composting is beneficial in improving the quality of the soil, making it more suitable for plant growth.

vermicompost manure
Vermicompost manure

What is ‘tea’ in gardening?

  • Any solid manure, when diluted in water to make liquid fertilizer, is commonly known as compost tea in gardening.
  • Examples include cow dung manure tea, kitchen manure tea, and vermicompost tea. The methods of making tea from these fertilizers may vary.

How to make Vermicompost tea?

Vermicompost tea
Vermicompost tea
  • Take good quality vermicompost in the bucket.
  • Add lots of water to the bucket. After some time the manure may expand, so keep extra water so that it dissolves well.
  • Cover the bucket with a lid and place it in a cool place, shaded area, away from direct sunlight.
  • Water extracts the nutrients of vermicompost when it starts mixing with water.
  • Before using the solution (tea), strain it through a cloth or fine mesh to remove any compost particles that may clog your spray bottle.
vermicompost tea
strain vermicompost tea before using

Important note:

Soaked vermicompost can be used in two ways.

  • It can be used after 24 hours of soaking.
  • It can also be used after 1 week of soaking.

 Both solutions have different benefits and can be used in different ways.

1. Benefits of using Vermicompost tea after 24 hours of soaking

Steps to use it:

  • Sieve the solution and dilute the obtained tea with water in a 1:1 ratio.
  • Fill the diluted tea in a spray bottle for multipurpose use.

You can use this diluted vermicompost tea in the following ways:

  • Spray it on small seedlings and the leaves of plants.
  • Use it as a mild nourishing tonic for cuttings.
  • Apply it to plants during times of stress, such as after pruning, repotting, or when propagating new plants.

Vermicompost tea is a quick and effective fertilizer that can be made in 24 hours.

spray vermicompost tea
you can spray liquid tonic in plants
  • It can be sprayed on plants every 15 days in the evening.
  • This treatment promotes healthy growth and makes leaves shiny.

2. Benefits of using Vermicompost tea after 1 week of soaking

If compost is soaked for 1 week in water, it will result in a more concentrated, dark-colored solution. While soaking vermicompost in water, it is important to stir the solution occasionally to ensure proper mixing of the compost with water.

  • Strong fertilizer: Vermicompost tea obtained by this method is indeed a strong fertilizer due to its higher concentration.

Steps to use it:

  • Take this tea (there’s no need to sieve it at this point) and dilute it with water at a ratio of 1 part tea to 4 parts water.
  • Give this diluted tea to your plants gradually until it starts to flow out from the bottom hole of the container.
  • The compost residue left after separating the tea can be incorporated into the soil as a soil conditioner.

Vermicompost tea can be applied to all types of plants

vermicompost tea
liquid tonic can be given to all types of plants

This vermicompost tea is enriched with nutrients and can be given to all types of plants, including indoor and outdoor plants, flowering and non-flowering plants, and succulents.

a) For indoor plants when using only vermicompost tea, apply it once every 45 to 60 days.

vermicompost tea in indoor plants
liquid tonic can also be given to indoor plants

b) For outdoor plantswhen using only vermicompost tea, apply it every 20 to 25 days.

Note:

  • Ensure that no other fertilizer is applied to the plants for 10 days both before and after using vermicompost tea.

Why is Vermicompost Tea recommended instead of solid form?

Vermicompost tea is often recommended over vermicompost (solid form) for many reasons:

1. Vermicompost (s0lid form) cannot be used as a spray for plants. 

2. For small seedlings, a liquid tonic is recommended. A liquid form of nutrition is suitable for small seedlings.

seedlings
liquid tonic is easy to give in seedlings

3. Additionally, for cuttings and Lecca balls, vermicompost (solid form) cannot be added directly. It is preferable to use liquid tea filled in a spray bottle.

4. Some plants require regular nutrition every 15-20 days for optimal growth. Adding vermicompost (solid form) again and again every 15 days may disrupt soil structure. Therefore vermicompost tea is a more suitable option.

5. A small amount of compost can produce significant amounts of tea, which can effectively nourish all plants. In contrast, solid manure, if available in limited quantities, may not be sufficient for all plants.

6. When adding fertilizer or manure to plants, it is also important to water the soil. This helps the soil absorb nutrients from the compost, which is a slower process than providing a nutrient-rich tonic (like compost tea) directly.

At last:

  • Liquid tonics significantly enhance plant growth, and vermicompost tea is particularly effective when used as a nutrient source for plants.

Also read:

1. Benefits of Seaweed Fertilizer

2. How to make Cow Dung Fertilizer

Happy Gardening !!!

Soil mix jade plant

Best Soil Mixture for Jade Plant

Is your Jade plant growing well? Are you planting it in a good soil mix? If not, then it is time to take a closer look at your soil mixture.

In this post, we will discuss how to prepare the best soil mixture for your Jade plant.

Assessing Your Jade Plant Growth


jade plant pot 1

Before diving into soil mixture, it is essential to assess the health and growth of your Jade plant. Look for signs of stunted growth, yellowing leaves, or wilting, as these could indicate issues with the current soil mix.

Best Soil Mixture for Jade Plant


soil mix 2

The soil mixture plays a crucial role in providing the necessary nutrients and environment for Jade plant to thrive.

The ideal soil mixture for Jade plant should possess several key characteristics to ensure optimal growth and health.

1. Firstly, it should have excellent drainage properties to prevent waterlogging, which can lead to root rot.

2. Secondly, it should be nutrient-rich to support the plant’s growth and development. 

3. Lastly, the texture of the soil should be well-suited for succulent, allowing for proper aeration and root development.

How to make soil mixture for Jade plant


Now, let’s check how to make soil mixture for Jade plant:

1. Collecting and Preparing Soil

Soil mix


Begin by collecting soil from your garden or local surroundings.

  • Ensure to sieve and clean it thoroughly, removing any debris such as plastic or glass pieces.

2. Adding Sand

sand in soil


Next, add river sand to the soil mixture, comprising approximately one-third of the total volume.

  • Sand aids in improving drainage and preventing soil compaction.
  • Sand also enhances soil aeration, allowing oxygen to reach plant roots more easily.
  • This improved aeration promotes healthy root development and encourages microbial activity in the soil, which further aids in nutrient availability for plants.

3. Adding Compost

compost in soil

Add compost into the mixture, using an amount equal to the quantity of sand.

  • Compost acts as a natural fertilizer, supplying essential nutrients like nitrogen, phosphorus, and potassium to the soil.
  • Additionally, it improves soil structure, retains moisture, and enhances microbial activity, creating a healthy environment for plant roots to thrive.

4. Coco Peat

coco peat image


While Jade plants inherently retain water, coco peat can be beneficial, especially if the plant is exposed to prolonged sunlight.

  • Add coco peat in moderation, around one-fourth of the soil volume, to enhance moisture retention.

5. Neem Cake Powder for Pest Prevention


To safeguard the plant’s roots from pests, fungi, and bacteria, incorporate a small amount of neem cake powder into the soil mixture.

  • Neem cake powder acts as a natural deterrent, promoting the plant’s overall health.

6. Mixing Properly

soil mixture 1


Thoroughly blend all the ingredients to create a porous soil mixture. The resulting mixture should be loose and crumbly, ensuring optimal drainage and root aeration.

Also read, Tips to Care Jade Plant

Additional Care Tips


jade in sunny area

1. Jade plants, being succulents, need minimal watering. Only water them when the soil is completely dry.

2. Avoid overwatering –

Jade plants store water in their fleshy leaves and stems, making them well-equipped to survive in arid conditions.

  • However, when they are overwatered, their roots become saturated, leading to oxygen deprivation and ultimately root rot. 

3. Jade plants thrive with 4-5 hours of direct sunlight daily, making it optimal to keep them outdoors.


By following these steps and understanding the needs of your plant, you can create an environment where your Jade plant will thrive.

Thanks

Happy Gardening!

hibiscus flower

Best Fertilizer for Hibiscus Flowering

Many gardeners often encounter the issue of their healthy hibiscus plant not flowering despite being in good condition. 

As a result, they unknowingly treat the plant with incorrect fertilizers, leading to damage.


For a hibiscus that is healthy but not blooming, several factors may be involved. Choosing the right fertilizer can make a significant difference and promote flowering.

Best Fertilizer for Hibiscus Flowering


So, why is it happening, and what are the reasons behind this? Let’s review a list of concerns your hibiscus may be experiencing if it’s not flowering:


1. Buds Not Blooming:

Hibiscus buds

  • Lack of phosphorus in the soil can hinder flower production, so it’s important to look for a fertilizer that contains phosphorus to promote blooming.


2. Plant Healthy But Not Flowering:

hibiscus plant


    • Sometimes, hibiscus plants focus on growing foliage rather than flowers.
    • Opt for a balanced fertilizer with equal N-P-K ratios to encourage overall plant health and flower production.


3. Yellow Leaves:


hibiscus yellow leaves

    • Yellowing leaves can indicate a lack of nitrogen.
    • Choose a fertilizer with higher nitrogen to address nitrogen deficiency and promote greener foliage.


4. Buds Not Mature:


    • Hibiscus buds may fail to mature if they are not getting enough potassium.
    • Look for a fertilizer with a higher potassium to support bud development and maturation.


5. Buds Falling:

hibiscus bud falling

    • Poor root development or stress can cause buds to drop prematurely.
    • Consider a fertilizer with micronutrients like magnesium and iron to improve root health and resilience.

Why Hibiscus Plant is not Flowering


The main reason for hibiscus plants not flowering is often due to a lack of nutrients. This can be attributed to two factors:

1. Inefficient Nutrient Distribution to Various Plant Parts

When fertilizer is provided to the roots, it is not efficiently distributed to other parts of the plant, such as the stem, leaves, branches, or buds.


2. Limited Distribution of Starch-Based Food to Plant Roots


Additionally, while plants produce their food in the form of starch in their leaves, it is possible for the food to remain in the leaves and not be distributed to other parts of the roots of the plant.


Note: Starch plays a crucial role in providing immunity to plants, especially for their roots.

The above two factors indicate that the transportation system” of the plant is not working well which can be attributed to a lack of potassium.


Luckily, potassium is highly available in bananas and banana peels and can be used to improve the transportation system of the plant.

  • If in this condition, the plant is fed by banana peel fertilizer, then the problem would be resolved.
bananas rich source of potassium

3. Nutrient-Rich Composition of Banana Peels


Not only potassium but banana peels contain many other nutrients like calcium, magnesium, sulfur, and phosphorus, all of which are essential for plant growth and development.

4. Micronutrient Content in Banana Peels


Additionally, banana peels contain other micronutrients, such as zinc, copper, and iron, which are important for plant health.

Must read: How to make Banana Peel Fertilizer At Home

When to give Banana peel fertilizer?


1. Do not give banana peel fertilizer to small plants


Avoid using banana peel fertilizer on plants that are still small or in the growing stage because they require equal amounts of nitrogen, phosphorus, and potassium (NPK) at that time.

In banana manure, the quantity of nitrogen is very low. It will lead to nutrient imbalance and plants might die due to a deficiency of nitrogen.

2. Apply banana peel fertilizer during the flowering or fruiting stage


Always, give banana manure, when the plant is at the stage of flowering or fruiting.


3. Balancing Banana Peel fertilizer with Other fertilizers


While banana peel fertilizer can be used on all plants, it is important to rotate it with other fertilizers to maintain nutrient balance.

  • After applying banana peel fertilizer, wait for at least 10 to 15 days before using other fertilizers such as cow dung liquid fertilizer or any other.


4. Onion peel liquid fertilizer


Following the banana peel fertilizer, wait for another 10 to 15 days and then give onion peel liquid fertilizer to the plant.

  • This fertilizer also promotes flower blooming, and you can expect to see new buds appearing within a few days.

Note:

  • In instances where the leaves of the blooming plant turn yellow, it is an indication of a need for more nutrients.

5. Cow dung liquid fertilizer


cow dung decompose

  • After 10 days of the onion peel fertilizer, provide the plant with a liquid fertilizer made from cow dung.

By adhering to this schedule of applying different liquid fertilizers every 10 days, you can stimulate consistent blooming in your hibiscus.

Also read: How to Get Maximum Flowering in Hibiscus

Plants need sunlight, water, air, and nutrients for healthy growth. Monitor and meet these needs carefully. When blooming, reduce fertilizer to avoid overfeeding. Follow the checklist before applying remedies.

flowering plants

Top 10 Flowers That Bloom in Summer Season

Top 10 Summer Flowering Plants to Brighten Your Home

Are you a budding gardener, eager to bring life to your balcony or garden this summer but unsure where to start? Fear not! We are here to guide you with a list of vibrant summer flowers that will thrive beautifully in your outdoor spaces, even if you are new to gardening.

Let’s explore the vibrant world of summer blooms you can bring into your home, transforming your garden, balcony into a floral paradise.

Flowers That Bloom in Summer Season

1. Hibiscus

pink hibiscus bt

    • Hibiscus comes in a wide range of colors, including red, pink, yellow, orange, white, and purple. These plants thrive in warm, humid climates and prefer full sun and well-draining soil.
    • Hibiscus flowers are also used in various cultures for culinary, medicinal, and ceremonial purposes.

Also read – Tips to care Hibiscus Plant

2. Sunflower

Sunflower

    • Sunflowers are heliotropic, meaning that they track the movement of the sun across the sky, facing east in the morning and west in the afternoon.
    • Sunflowers are also cultivated for their seeds, which are rich in nutrients and oil.
    • Sunflowers are relatively easy to grow and thrive in full sun and well-draining soil.
    • They are tolerant of drought and poor soil conditions, making them suitable for a wide range of climates and environments.

3. Zinnia

zinnia

    • Zinnias come in a variety of colors, including shades of pink, red, orange, yellow, white, and purple. Known for their long blooming period, which typically lasts from late spring to early fall, zinnias thrive in full sun and well-draining soil.
    • They can tolerate a range of growing conditions and are relatively low-maintenance, making them suitable for beginner gardeners.

4. Bougainvillea

Bougainvillea

    • Bougainvillea comes in a variety of colors, including pink, red, purple, orange, white, and yellow.
    • Bougainvillea plants typically have thorny stems and can grow as sprawling shrubs or climbing vines.
    • Bougainvillea is prized for its ability to thrive in hot and dry climates. It blooms profusely throughout the warmer months, adding a burst of color to the landscape.

5. Cosmos

cosmos

    • Cosmos is known for its ability to thrive in a wide range of growing conditions, making it suitable for various climates and soil types.
    • These plants prefer full sun and well-draining soil.
    • Cosmos plants are relatively low-maintenance and easy to grow, making them ideal for beginner gardeners.

6. Aprajita (Clitoria)

aprajita

    • Aprajita, also known as Clitoria ternatea or butterfly pea. It is often grown as a climbing vine.
    • Aprajita is known for its striking blue flowers and is cultivated worldwide for its ornamental, culinary, and medicinal purposes.
    • Aprajita is relatively easy to grow and can thrive in a variety of soil types, although it prefers well-draining soil and full sunlight.

7. Portulaca

Portulaca

    • Portulaca, commonly known as moss rose or purslane.
    • Portulaca is prized for its vibrant and colorful flowers, which come in shades of red, pink, orange, yellow, white, and purple.
    • Portulaca is valued for its ability to thrive in hot and sunny conditions, making it an excellent choice for rock gardens, containers, and other dry, well-drained areas.

8. Jasmine (Mogra)

mogra flower

    • Jasmine is an alluring and aromatic flowering plant that comes in different varieties, including single petal, double petal, and plants with round or thin leaves.
    • Jasmine, a hardy and perennial summer plant, blooms continuously in regions where the warmth of the sun prevails.

Also read: Tips to care Jasmine (Mogra) 

9. Plumeria

Plumeria
  • Plumeria is renowned for its stunning and fragrant flowers, which come in a variety of colors, including white, yellow, pink, red, and orange.
  • Plumeria plants are relatively easy to grow and care for, requiring well-draining soil, plenty of sunlight, and regular watering during the growing season.

10. Sadabahar (Periwinkle)

periwinkle-8012991_1280

  • Sadabahar, also known as periwinkle, thrives in both summer and winter seasons.
  • This evergreen plant is characterized by its glossy, dark green leaves and vibrant flowers that come in shades of pink, purple, and white.

Also read: Tips to care Vinca Plant

Can You Grow These Plants at Home?

Absolutely! With some planning, many of these summer plants can thrive indoors, allowing you to enjoy their beauty year-round.

Tips for Growing Summer Plants at Home

1. Choose the Right Plants:

  • Pick plants that suit your local climate and whether you’re growing them indoors or outdoors.

2. Provide Adequate Sunlight:

  • Place your plants where they can get enough sunlight, or choose shade-tolerant varieties for shaded spots.

3. Water Wisely:

  • Avoid overwatering or underwatering; find the right balance for your plants.

4. Choose the Right Containers:

  • Ensure your pots have drainage holes and are spacious enough for the plant’s roots.

5. Soil and Fertilization:

  • Use nutrient-rich, well-draining soil and fertilize regularly during the growing season.

6. Pruning:

  • Trim your plants to encourage new growth and maintain their shape.

7. Pest and Disease Management:

  • Keep an eye out for pests and diseases, and take action promptly.

8. Consistent Care:

  • Maintain a regular care routine, adjusting as needed based on your plants’ needs.

Where to Get These Plants

1. Local Nurseries:

  • Visit local nurseries for a hands-on shopping experience and expert advice.

2. Online Plant Delivery:

  • Browse and buy plants online for convenience and a wide selection.

Bring the beauty of summer blooms into your home and enjoy a colorful and fragrant oasis all year long!