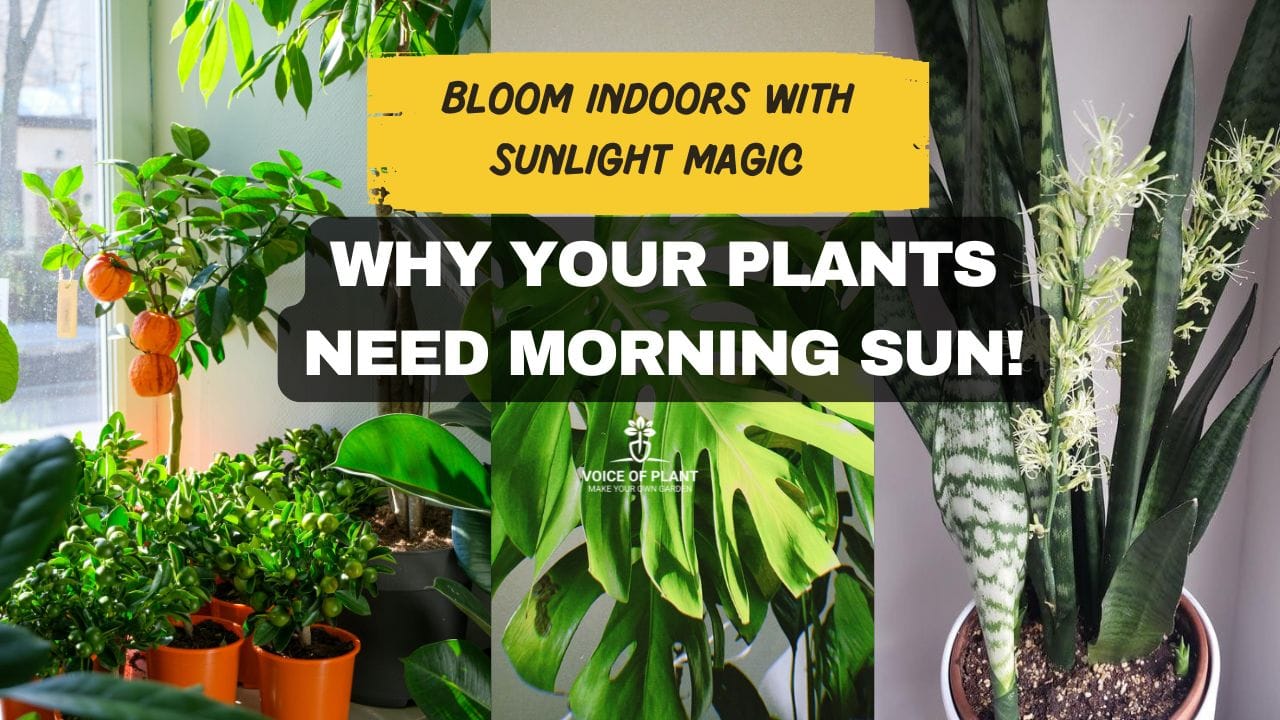
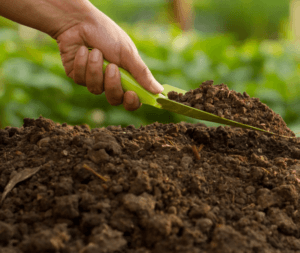
Why Is Morning Sunlight Best for Indoor Plants? Morning sunlight is a blessing for indoor plants. Many gardeners aren’t aware of this and always keep their plants indoors all the time.
Yes, you read that right — morning sunlight benefits all indoor plants, whether they bloom or not.
In this post, I’ll share some important facts about why you should expose your indoor plants to morning sunlight for at least 2 to 3 hours, twice a week.
Morning Sunlight Blessing for Indoor plants
Fact 1: Plants cannot grow without sunlight
No plant can grow and survive in complete darkness. This is absolutely true – plants need sunlight to survive.
Indoor plants grow slowly so they need less light. But if we keep them in the morning sunlight for some time, their growth improves significantly.
Fact 2: It boost flowering in plants
Flowering is not possible without direct sunlight. In some indoor plants, direct morning sunlight encourages blooming.
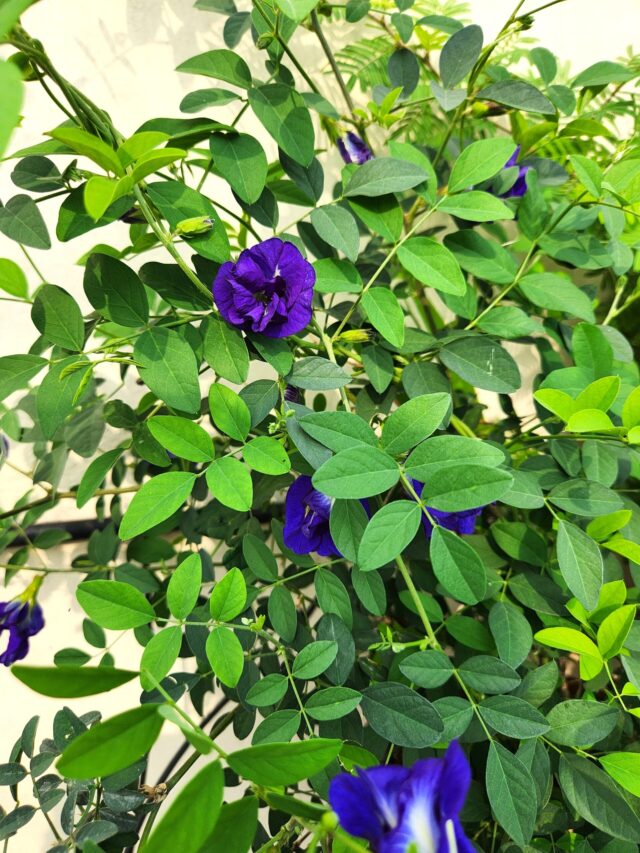
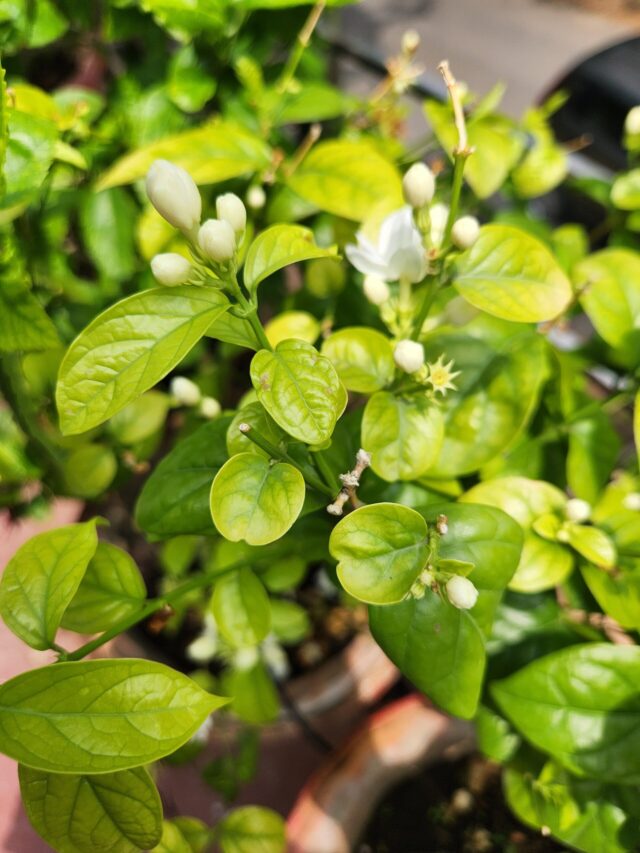
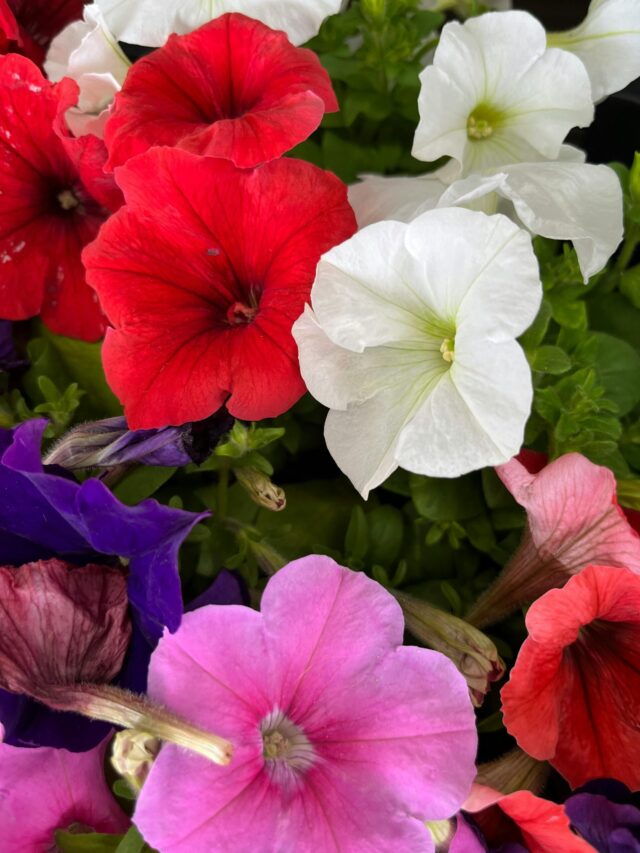
Indoor plants like Aglaonema, Peace Lily, and others often begin to bloom when they receive 2 to 3 hours of direct morning sunlight two to three times a week.
Fact 3. It enhances the colour of the leaves
Morning sunlight contribute to vibrant green coloration of the leaves in indoor plants.
It promotes the production of chlorophyll in the indoor plants, which makes the leaves look lush green. A few hours of morning sunlight can improve the overall appearance and health of the plant.
4. It boost photosynthesis in plants
Morning sunlight boost Photosynthesis in indoor plants as well. Direct morning sunlight is gentle and soft but it is very effective, helping indoor plants produce more energy without the risk of sunburn.
Note:
Photosynthesis is the process by which plants make their own food, and this process is most efficient in natural light.
Fact 5: It Promotes Strong and Healthy Stems
Regular exposure to morning sunlight leads to stronger stems, denser foliage, and a healthier root system, resulting in a more resilient and attractive plant.
Note:
To encourage bushiness in indoor plants, place the plant where it receives direct bright sunlight for 2-3 hours twice in a week. This amount of light will work wonders for their growth.
Avoid keeping indoor plants in direct harsh sunlight, as it can cause leaf burn.
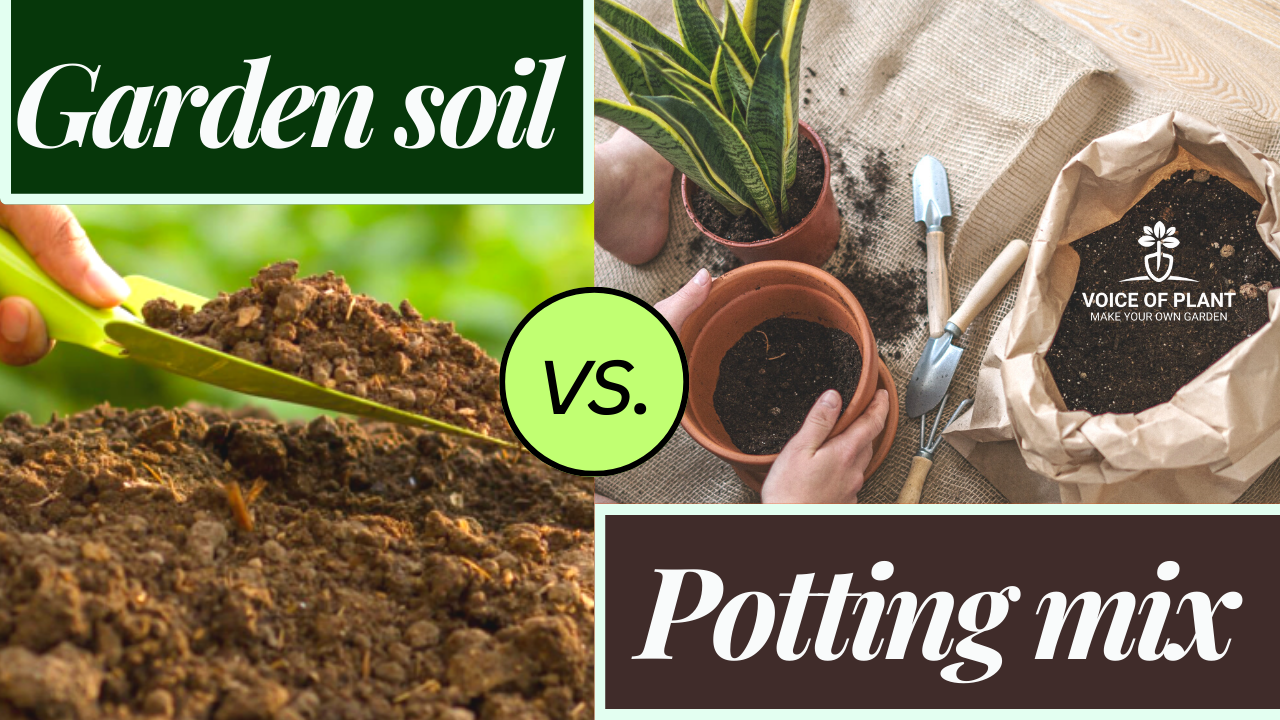
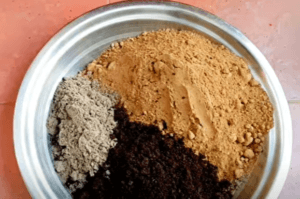
In gardening, deciding between potting mix and garden soil can determine whether your plants grow well or not. Let’s explore what potting mix is and how it’s different from garden soil.
“Healthy soil is the foundation of healthy plants and a healthy environment.”
Potting Mix vs. Garden Soil: Unveiling the Differences
1. The Composition
potting mix
Potting mix, often referred to as potting soil (soil mix), is a specialized mixture prepared for container gardening. It is prepared by gardening experts to provide an ideal environment for potted plants. Unlike garden soil, which is found naturally in your outdoor space, potting mix is a man-made soil-mixture customize to the specific needs of potted plants.
2. Key ingredients
Potting mix typically comprises a combination of organic and inorganic materials. These ingredients may include:
A big difference between potting mix and garden soil is how well they let water and air move around.
Potting mix is made to let water drain well and give plant roots plenty of air. This helps roots grow strong and avoids them sitting in water.
Garden soil might not let water drain as well, so it is not the best choice for potted plants.
4. Nutrient levels
plant growing in garden soil
“Garden soil typically has plenty of nutrients due to natural processes over time.”
On the other hand, potting mix is purposefully designed to provide a steady release of necessary nutrients over time to ensure that your potted plants get the nutrition they require.
5. Pest and disease resistance
Potting mix is good because it is less likely to have pests and plant diseases compared to garden soil. Garden soil can sometimes have harmful things that can harm your plants, but potting mix is treated to lower the chances of that happening.
Making the right choice for your garden
Now that you understand the fundamental differences between potting mix and garden soil, it is time to make an informed decision for your gardening endeavors. Here are some quick tips:
Consider mixing both
garden soil
Mixing both potting mix and garden soil can be beneficial in certain situations. This combination offers the advantages of both, providing your plants with necessary nutrients and good drainage. It is a balanced approach to support healthy plant growth.
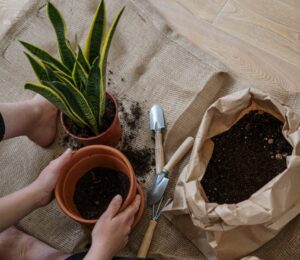
1. Use potting mix for container gardening
If you are planning to grow plants in pots, containers, or indoor settings, opt for potting mix. It is superior drainage, aeration, and reduced risk of pests make it the perfect choice for container gardening.
container gardening
2. Stick to garden soil for outdoor gardening
outdoor gardening
For outdoor garden beds or in-ground planting, garden soil is the natural choice. It is rich in nutrients and provides a suitable environment for your garden plants to thrive.
Conclusion
In conclusion, knowing how potting mix and garden soil are different is really important for your gardening success. So, choose the one that fits your needs best, and you will be on your way to growing a healthy and thriving garden.
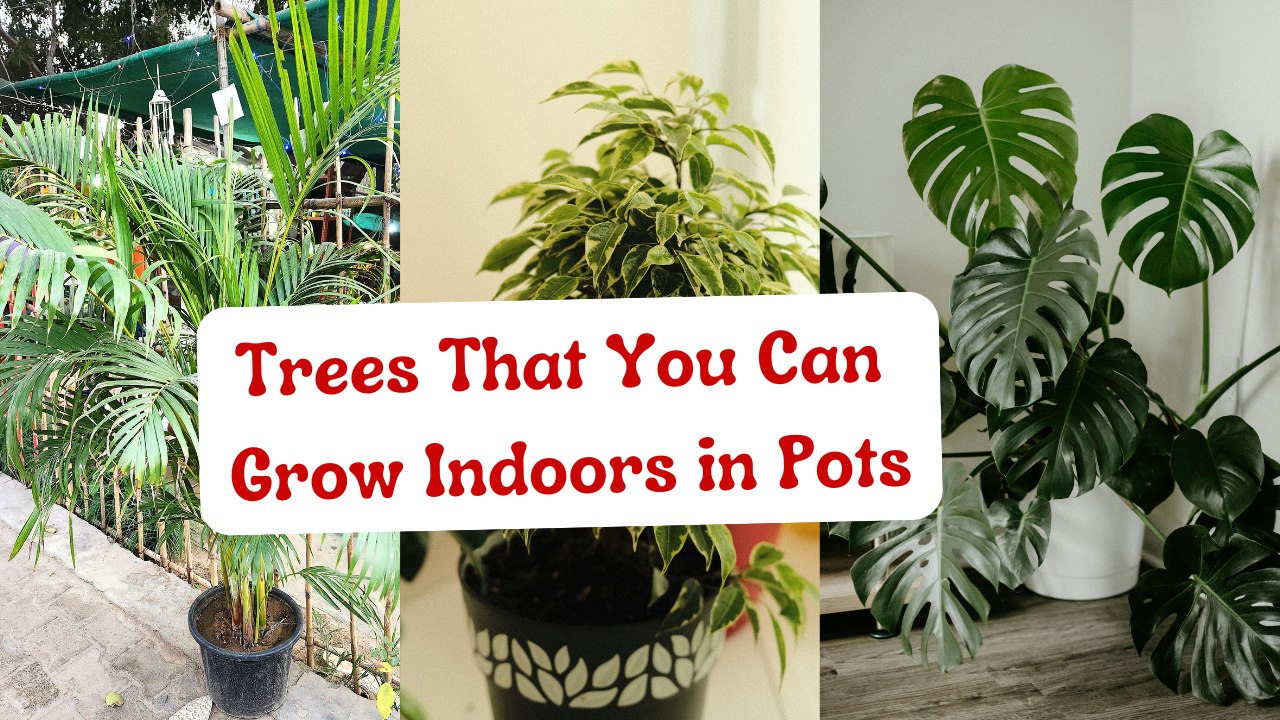
10 Majestic Forest Trees That You Can Grow Indoors in Pots
Did you know? Some indoor plants that you grow in pots are actually trees that grow tall in forests.
Nature is truly amazing! These trees have adapted beautifully to indoor conditions, bringing the grandeur of nature right into your living room. Here’s a list of large indoor plants that resemble trees and thrive indoors with proper care:
1. Fiddle Leaf Fig (Ficus lyrata)
Fiddle Leaf Fig
Description:
Known for its large, violin-shaped leaves, the Fiddle Leaf Fig is a favorite among indoor tree enthusiasts.
Tips to Care:
Prefers bright, indirect sunlight and minimal watering. Allow the soil to dry between waterings.
Did You Know?
The Fiddle Leaf Fig, known for its iconic leaves, is a rainforest tree that can grow over 50 feet tall in the wild. Indoors, it’s a stylish houseplant reaching around 10 feet.
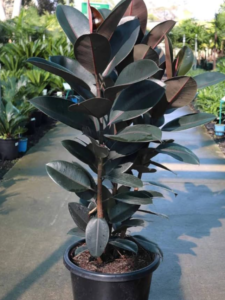
2. Rubber Tree (Ficus elastica)
Rubber Plant
Description:
This plant has glossy, dark green leaves and can grow tall if provided enough space and care.
Tips to Care:
Thrives in medium to bright light. Water when the top inch of soil is dry.
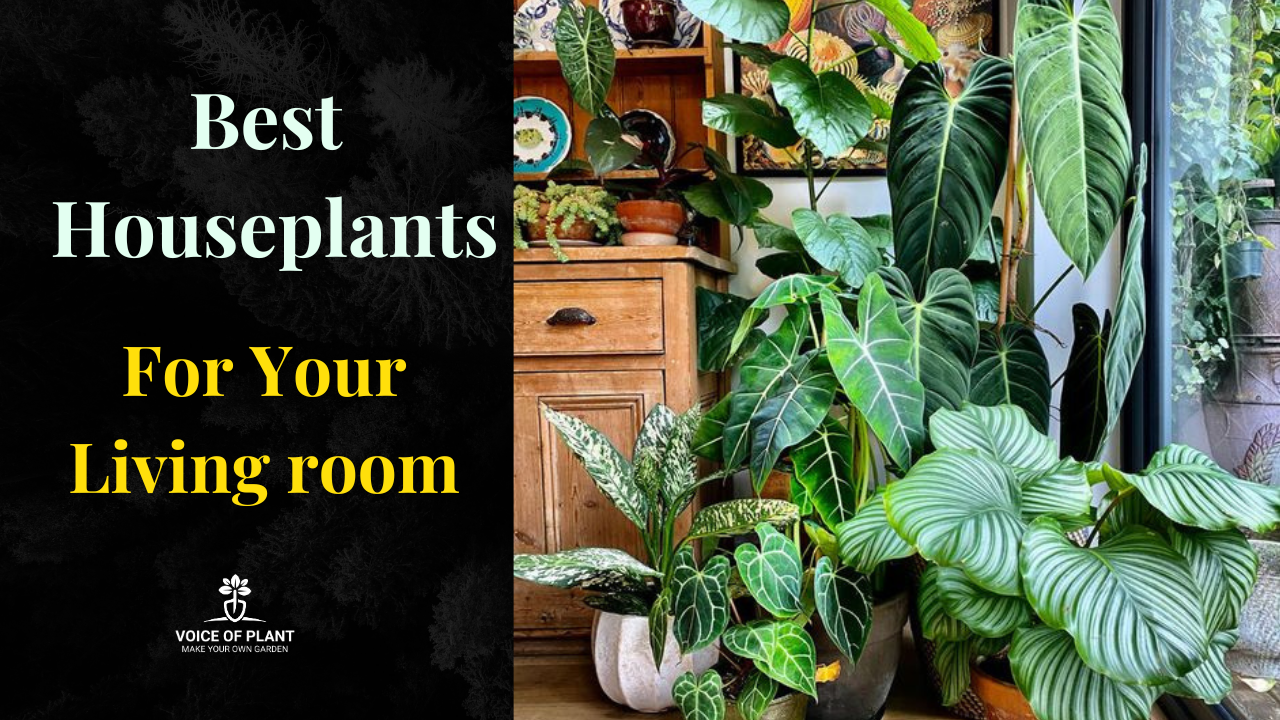
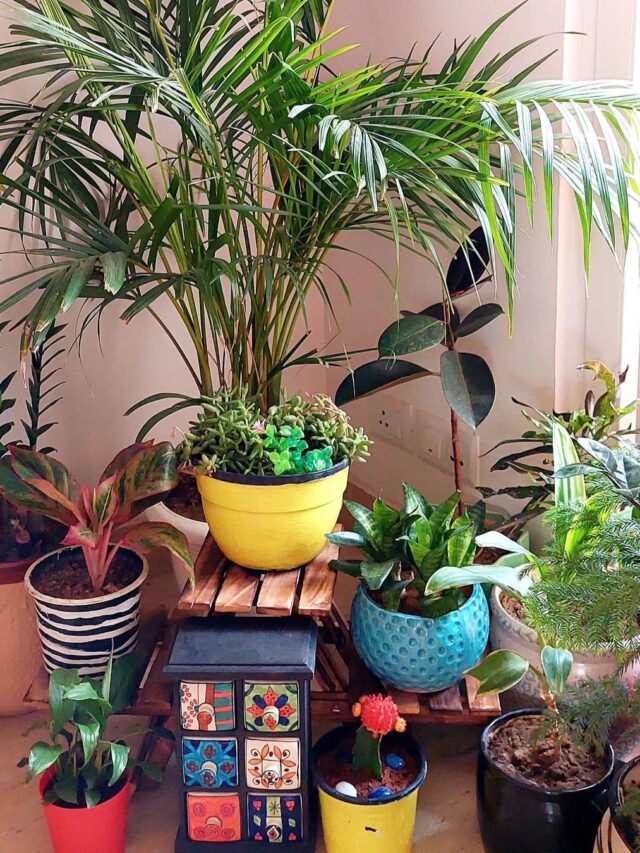
Spruce up your living room with some greenery! Houseplants not only add a touch of nature to your home but also improve air quality and bring a sense of calm into your space. They can make any living room feel more vibrant and alive.
10 Best Houseplants for Your Living Room
1. Monstera Deliciosa
2. Fiddle Leaf Fig
3. Snake Plant
4. Pothos (Money Plant)
5. ZZ Plant
6. Aloe Vera
7. Rubber Plant
8. Areca Palm
9. Spider Plant
10. Aglaonema (Chinese Evergreen)
Let’s dive in and explore the best houseplants for your home!
1. Monstera Deliciosa
Monstera Deliciosa
Monsteras thrive in bright, indirect light.
Direct sunlight can scorch their leaves, so a spot near a window with a curtain works well.
2. Fiddle Leaf Fig
Fiddle Leaf Fig
Fiddle leaf figs have big, gorgeous leaves that make any space look lush and vibrant.
Place them near a window where they get filtered light. Too much direct sun can scorch their leaves.
3. Snake Plant
Snake plant
Snake plants are easy to care for and perfect for living rooms.
They thrive in low light, so you don’t need a bright, sunny room for these beauties.
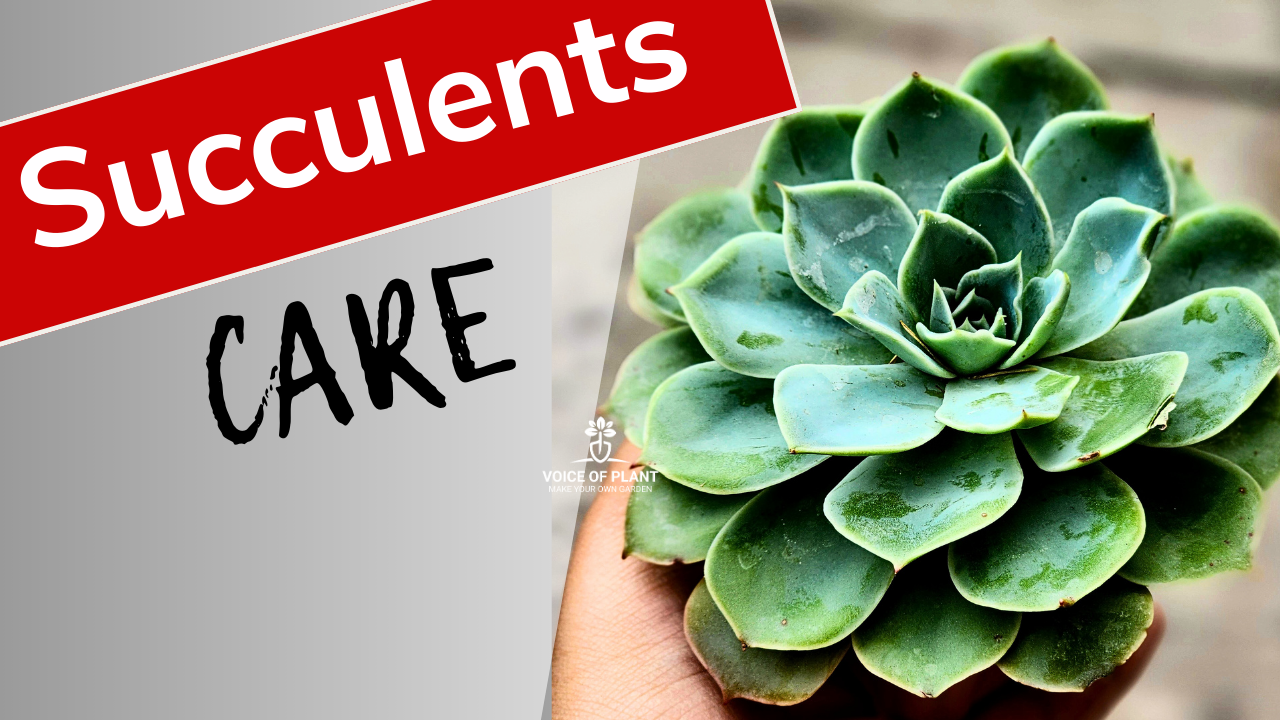
Succulents have become increasingly popular due to their minimal care requirements and stunning aesthetic. Whether you are a beginner plant parent or an experienced gardener, succulents are a great addition to any home or garden.
It’s a common issue for many gardeners: they bring a succulent home, and after just a week, their succulent begins to rot, its leaves turn brown, and eventually fall off. This can be frustrating, especially since succulents are often perceived as low-maintenance plants.
However, the key to keeping succulents healthy lies in understanding their unique needs. In this article, we will cover everything from essential care tips to propagation methods, soil mixtures, and more, ensuring your succulents thrive in any environment.
1. What Are Succulents?
Succulents are hardy plants known for their ability to store water in their thick, fleshy leaves, stems, or roots, making them incredibly drought-resistant.
They have evolved to survive in some of the harshest climates, and their minimal care requirements make them an excellent choice for both seasoned gardeners and beginners.
2. The Popularity of Succulents
Over the years, succulents have gained massive popularity in India and world due to their low maintenance and the fact that they thrive in a variety of environments.
Whether in homes, offices, or gardens, succulents are loved for their exotic look and ease of care.
Succulents Care – Basic Tips
To grow healthy succulents, it is essential to understand their basic care needs. From the right soil mixture to ideal watering schedules, each element contributes to the plant’s overall health and growth.
1. Ideal Temperature for Succulents
Succulents thrive in temperatures around 15°C – 25°C. If temperatures rise and the environment becomes too hot or humid, it’s recommended to use a white shade net to protect the plants.
Avoid using green or dark-colored nets, as they may trap too much heat.
2. Best Soil Mixture for Succulents
Succulents require well-draining sandy soil to prevent root rot. A mix of sieved soil and cow dung compost in a 3:1 ratio works well.
Note:
If the available soil is too clayey, you can add materials like sand, concrete, or wood chips to improve the texture.
Succulents should be kept in a separate area from other plants to prevent accidental overwatering.
Ensure they’re not placed in locations where they might be exposed to direct rain or intense sunlight, such as open balconies.
5. Sunlight Requirements for Succulents
Although succulents don’t need direct sunlight, they do require some exposure to indirect light. A well-lit space with indirect sunlight and good airflow is perfect for these plants.
They will not thrive in complete darkness, so make sure they receive enough light during the day.
Tips to Encourage Denser Growth in Succulents
To encourage denser growth, consider trimming the branches at the nodes or taking cuttings from mature plants. This stimulates new branch development, resulting in a bushier and fuller plant.
Pot Size Matters for Denser Growth in Succulents
The size of the pot plays a crucial role in how well your succulents grow, particularly in achieving dense, healthy foliage.
If you plant your succulent in a small pot, its growth may be restricted, preventing it from becoming as full and lush as it could.
Succulents need adequate space to spread their roots and develop thicker, more robust growth.
To encourage denser growth, it’s best to plant your succulents in a larger pot, ideally one that is 6 to 8 inches in diameter. This allows the plant to expand both above and below the soil, promoting healthier foliage.
Note:
Its important that the pot has a drainage hole at the bottom to prevent water from accumulating, as succulents are prone to root rot in waterlogged soil.
Conclusion:
Succulents are beautiful, low-maintenance plants that can bring a touch of nature to any space. By following these care tips—from proper soil mixtures to ideal watering schedules—you can ensure that your succulents thrive.
Why Do Plants Dry Up After Bringing Them Home from the Nursery?
Bringing a new plant home from the nursery is always exciting, but it can be disheartening when that fresh, vibrant plant starts to dry up just days after you have settled it into its new environment.
Many gardeners often complain that their plants dry up soon after bringing them home from the nursery. What causes this, and how can you prevent it?
Croton in stress
Let’s dive into the possible reasons and how you can ensure your new plant thrives.
Why Do Plants Dry Up: Causes and Solutions
1. Young plants are more prone to stress
Did you know that young plants are more prone to stress compared to older ones?
Most of the plants we get from nurseries are young, which is why they often go into stress after being brought home.
However, if a plant is at least a year old, it’s less likely to experience stress and can adapt better to its new environment.
Young plant from nursery in poly bag
2. Transition Shock: Why It’s a Big Deal
When plants move from the controlled environment of a nursery to your home, they often experience “transition shock.”
Nurseries offer different conditions: watering, lighting, and humidity, plus they give heavy fertilizers like DAP, Urea, etc.
Your home might not match these conditions, leading to stress that causes your plant to dry up.
2. Temperature Fluctuations
Sudden changes in temperature, especially if the plant was transported in cold or hot conditions, can stress the plant.
The temperature in your home might also be different from the stable climate of the nursery, which could contribute to the drying process.
3. Give your new plants time to settle down in new environment
Do not transplant the plant immediately after bringing it.
Many gardeners tend to transplant their plants immediately after bringing them home from the nursery. However, it’s best to avoid this practice.
Instead, allow the plants some time to acclimatize to their new environment.
Balcony garden
Note:
Keep the new plants alongside your other plants in the garden, and wait at least 4-5 days before transplanting them into pots.
4. Avoid direct Sunlight for the first two days
When you bring your plant home, do not place it in direct sunlight for the first two days to prevent sunburn.
5. Ensure Proper Lighting
Make sure your plant is not kept in a dark place; find a bright spot for it to acclimatize.
6. Monitor Your Plant’s Health
After two days, if the plant appears healthy, you can place it in sunlight and water it when the topsoil dries out. If it continues to look good after five days, it’s ready for a new pot.
How to transplant new plant?
1. Best Time to Transplant
Only transplant your plants in the evening to minimize stress.
2. Do not disturb the roots of plant
When removing a plant from the nursery bag, be careful to tear the bag gently so as not to disturb the roots.
This helps prevent wilting or death of the plant.
4. Choose the right pot Size
Select a pot that is the appropriate size to accommodate the plant’s roots.
Use a smaller pot for young plants and transfer to a larger one as they grow.
5. Prepare the soil
Preparing soft soil is essential for your plant’s growth.
Hard soil can restrict root development and hinder growth.
After transplanting, keep the plant in a shaded area for 7 to 10 days, allowing it to receive indirect sunlight before moving it to full sunlight or semi-shade according to its needs.
9. Add Organic matter later
After 1 or 2 months, once the plant is established in your garden, you can add vermicompost along with bone meal or rock phosphate.
Adding manure or kitchen waste compost can further enhance the plant’s growth.
10. Regular Monitoring and Adjustments
Keep a close eye on your plant in the first few weeks after bringing it home.
Look for signs of stress, such as yellowing leaves or wilting, and make adjustments as needed.
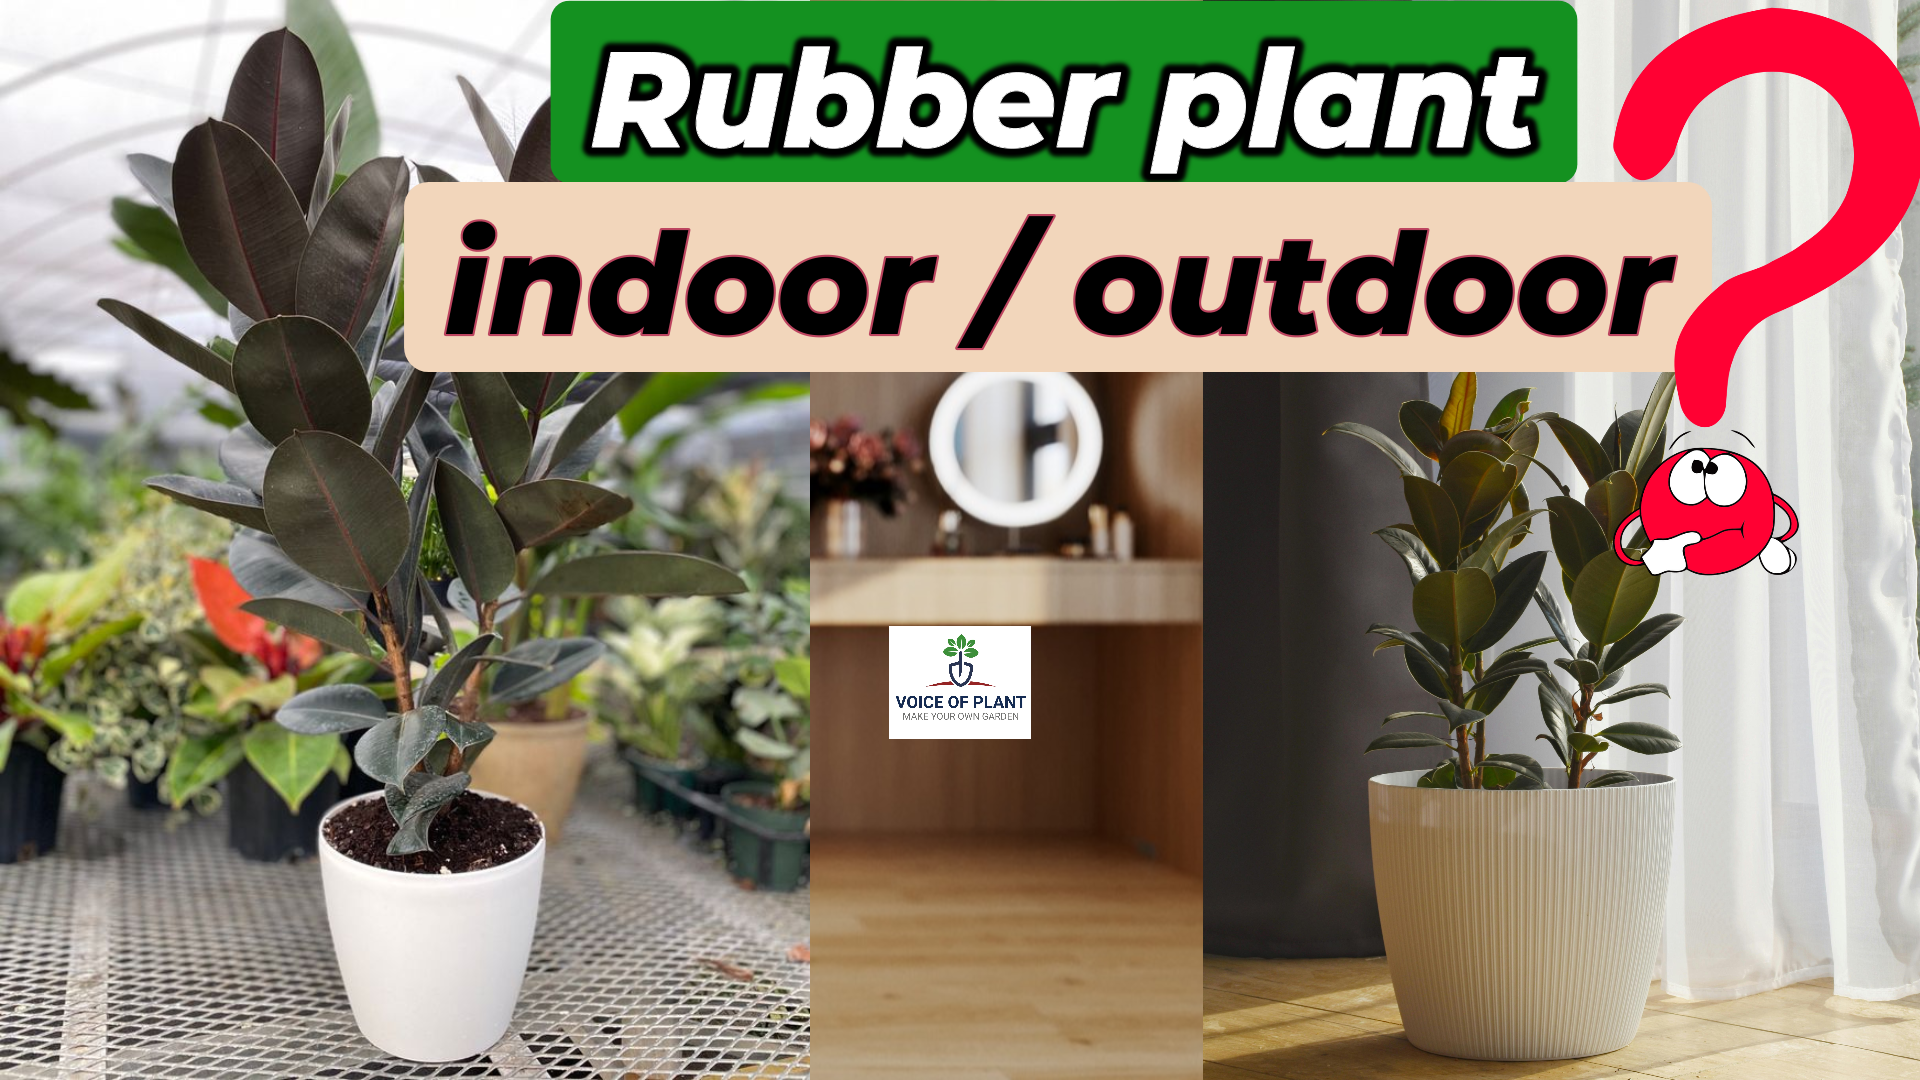
This article explores whether rubber plants should be grown indoors or outdoors, how to care for them in different settings, and the benefits and challenges of both approaches.
1 Kitchen Item Will Make Your Peace Lily Bloom
10 Easy Winter Flowering Plants to Grow Before Winter
10 Best Beautiful Summer Flowering Plants for Home Garden
10 Best Flowering Plants to Grow at Home
10 Best Houseplants for Your Living Room
10 Flowers That Bloom in Summer Season
10 Houseplants That Brings Peace & Prosperity At Home
10 Plants Can Survive Without Water for a Longer Period
Ideal Conditions for Rubber plant
1. Temperature:
The Rubber Plant is a typical summer plant that thrives in temperatures ranging from 20-30℃.
Note:
While it can handle high temperatures if kept in the shade, it experiences stress when temperatures drop in winter.
Protect your rubber plant from cold.
2. Placement & Sunlight requirement of the Rubber plant
Rubber plant in bright light area
The Rubber plant can be grown both indoors and outdoors.
Indoor placement:
Rubber plant in bright light area
Rubber plants are ideally suited for indoor growth. They prefer bright, indirect sunlight but can tolerate lower light levels.
If you prefer to keep Rubber plant indoor, ensure it receives ample bright light.
Placing it near a window where it can receive about half an hour of direct sunlight is ideal.
However, if the plant is kept in low or medium light conditions, it may struggle to thrive.
Best Indoor care tips for Rubber plant
Rubber plant near window Pic credit: Pinterest
Place them near windows or doors with bright, indirect light.
Water them when the top inch of soil feels dry.
Wipe the leaves occasionally to remove dust and maintain their shine.
Can Rubber Plants Grow Outdoors?
Rubber plant in bright light outdoor
Ideal outdoor growing conditions:
When kept outdoors, avoid exposing it to the direct, scorching heat of the sun for extended periods.
Instead, provide 2-3 hours of mild sunlight in the morning and evening.
During the afternoon, keep the plant in the shade.
Best outdoor care tips for Rubber plant
Place them in a shade.
Avoid placing them in a direct sunlight.
Water them when the top inch of soil feels dry.
Wipe the leaves occasionally to remove dust and maintain their shine.
Comparing Indoor & Outdoor Rubber plant care
Differences in Light Requirements
Indoors, rubber plant need bright but indirect light. Outdoors, they can tolerate some direct sunlight, especially in the morning, but too much can scorch their leaves.
Watering Needs: Indoors vs. Outdoors
Indoor rubber plants need to be watered moderately, while outdoor plants might require more frequent watering, especially in hot or dry climates.
In summary, rubber plants can thrive both indoors and outdoors, depending on your climate and care. Understanding their needs in each environment will help ensure they stay healthy and vibrant.
Creating a diverse garden with plants that offer multiple benefits is a wonderful way to contribute to the ecological richness of your outdoor space. So, here goes the list of nine essential plants that everyone should have, each offering a multitude of benefits to enrich and beautify any garden.
1. Tulsi plant
2. Curry leaf
3. Ajwain plant
4. Giloy
5. Aloe Vera
6. Pothos
7. Jade Plant
8. Hibiscus Plant
9. Jasmine Plant
9 Plants You Should Grow at Home
1. Tulsi Plant (Holy Basil)
Tulsi plant
Embarking on your gardening journey? Make room for the auspicious Tulsi plant – it is a must-have at home.
This summer-loving plant thrives from February to October, although it may start to wither in winter. With proper care, it can recover after the cold season.
Direct sunlight
For this outdoor plant, ensure it receives at least 4 hours of direct sunlight. When it comes to hydration, water it when the top layer of soil gets parched.
Be cautious not to drown it if the soil is still damp; that’s a surefire way to root rot.
Medicinal benefits
This Ayurvedic plant has many medicinal benefits and is used to treat cold, cough and many other problems.
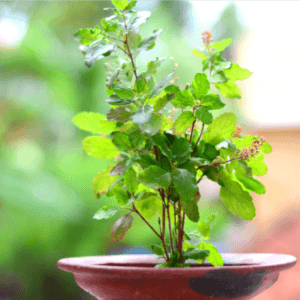
2. Curry Leaf
The curry leaf is a fantastic addition to kitchens because it smells and tastes great. It is also a useful herb and you will find it in many homes.
Summer plant
It is a plant that loves the summertime, growing well from February to October.
In winter, its leaves may look sad and black, but do not worry, it comes back to life in February after a good trim.
Sunlight
This plant likes lots of sunlight, about 5-6 hours a day, but it does not need too much water.
Curry leaves provide various medicinal benefits:
Curry leaves are a good source of vitamins A, B, E and E, which provide essential nutrients for overall health.
Curry leaves are a good source of antioxidants, which help deal with oxidative stress and protect the body from damage.
They may contribute to maintaining healthy cholesterol levels, supporting heart health.
3. Mexican Mint/ Ajwain plant
The Mexican mint, also known as Indian Borage or ajwain plant, is a cool addition to your garden, smelling like carom seeds.
Summer plant
It is a summer -hardy plant, flourishes in warmer months but might struggle in winter season.
As winter sets in, its growth may face some challenges—leaves could lose their shine, turn black, and wither.
Sunlight
A minimum of 2-3 hours of direct sunlight is a must, but if you can offer more, it will surely appreciate the extra sunshine.
Medicinal benefits
Being a medicinal plant, it is very beneficial in treating gastric problems.
The problem will be cured by eating some leaves on an empty stomach. Moreover, it enhances aroma in various dishes.
4. Giloy (heart-leaved moonseed)
Giloy is an important plant that should be in your home. The plant is characterized by heart-shaped leaves, which is reflected in its common name, “heart-leaved moonseed.”
Summer plant
Giloy is a summer plant that thrives in a warmer season but tends to get a bit sad in winter, losing its leaves and keeping only the stem.
It starts growing again when summer comes back, usually in the hottest months, not so much in February or March.
Sunlight
For optimal growth, provide abundant sunlight. Place it in the area with the maximum sun exposure.
Medicinal benefits
In traditional medicine, especially Ayurveda, Giloy (Heart-Leaved Moonseed) is highly valued for its medicinal properties.
Giloy is often used to boost the immune system, promote longevity, and support overall health and well-being.
People use Giloy sticks to make a special drink that helps in fever and other health problems.
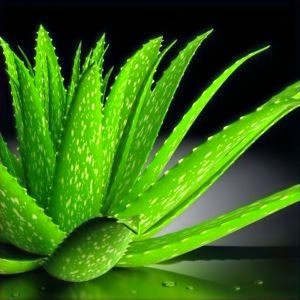
5. Aloe Vera
Aloe Vera is one of the most important plants that you should keep at your home. It has many benefits.
This plant loves ignorance, occasional watering is sufficient, and it doesn’t require extensive care for optimal growth.
Flourishes in all seasons
Aloe vera flourishes in all seasons—summer, winter, and the rainy season.
While its growth may experience a slight hindrance in winter, autumn is considered the optimal season for cultivation.
Medicinal benefits
Aloe vera, a medicinal plant, is famous for its healing properties, which solve problems like joint pain, stomach discomfort and migraine.
The gel extracted from aloe vera serves many purposes and provides various benefits.
People apply its gel on the face and hair, using its soothing properties to treat sunburn and deal with hair fall, respectively.
6. Pothos (Money plant)
Here is another plant you should keep at home: Pothos, also known as the Money Plant.
It is a popular indoor plant known for its attractive trailing vines and heart-shaped leaves. It is also commonly referred to as the Devil’s Ivy.
Summer plant
As a typical summer plant, this plant is highly adaptable and can thrive in various conditions, making it suitable for both beginners and experienced plant enthusiasts.
Light Requirements:
Pothos can tolerate a wide range of light conditions, from low to bright, indirect light. However, it tends to do best in moderate, indirect light.
Air-Purifying Qualities:
Pothos is known for its air-purifying abilities, helping to remove common indoor pollutants.
7. Jade Plant
Jade Plants are known for their hardiness and adaptability. They can thrive in outdoor environments with proper care.
The Jade Plant, also known as the Lucky Plant, is a popular succulent and bring glory to your garden.
Summer plant
While it’s a typical summer plant, it doesn’t succumb entirely to winter.
Although its growth may slow down, and leaves might gracefully exit, with proper care, it can retain its green charm even through the winter months.
This sun-friendly plant thrives with a minimum of 2 hours of sunlight, but it’s even happier with an extended exposure of up to 8 hours.
Pot size
Its adaptability shines through, fitting seamlessly into any type of pot—small, big, hanging, or whatever suits your gardening style.
If buying a new pot, an 8-12 inch size is preferred.
Watering
The plant requires minimal watering—just ensure the soil is completely dry, even at a deeper level, before giving it a drink.
Succulents know how to thrive with a little negligence.
Overwatering can lead to issues like leaf shedding, darkening, and unwanted insect guests.
This lucky plant can make your luck shine if cared for well, bringing brightness to your garden.
8. Hibiscus Plant
A blossoming plant that enhances the garden with its splendid beauty.
Summer plant
This flowering plant is a classic summer variety that experiences stress in winter.
Young plants of 5-6 months might exhibit a slowdown in flowering, while mature plants bloom consistently throughout the year, with the possibility of smaller flower sizes.
Sunlight
It will blossom well if exposed to 5-6 hours of sunlight.
Medicinal benefits
Many medicines and hair oils are being made from hibiscus flowers.
9. Jasmine Plant
A beautiful white flowers yielding plant , graces the garden with its magical aromatic flowers. This plant can offer the option to be either a graceful creeper or kept as a normal plant by propagating its cutting.
Flower jewellery like Gajras and all are also crafted from jasmine flowers.
Summer plant
A classical summer plant grows well in summers, growth gets hindered during winters but mature plants would yield the flowers throughout the year.
Sunlight
Medium sunlight of 3-4 hours is enough for its ample growth.
Medicinal benefits
This medicinal, aromatic, sacred and beautiful plant is such a stress reliever that everyone should grace their garden with it.
————————–
Sounds like a fantastic lineup of plants! Having a variety that not only enhances the beauty of the garden but also brings multiple benefits is a win-win. It’s like creating a harmonious and beneficial ecosystem right in your own backyard.
Giving fertilizers to plants is an important aspect of gardening that provides the essential nutrients required for healthy plant growth. Just as humans and other animals require food for survival and growth, plants also require nutrients for growth and production. In the absence of these nutrients, the growth of plants stops and the yield decreases.
For proper nourishment and growth, plants require soil, water, sunlight, fertilizers, as well as human love and care. It’s essential to use these resources effectively and efficiently. This article will address four essential questions (3 W and 1 H- Why, What, When and How) related to feeding your plants:
1. Why should you feed your plants?
2. What should you feed them?
3. When should you feed them?
4. How should you feed them?
Classification of fertilizers for Outdoor plants
Organic fertilizers are rich in organic matter, which helps to improve soil structure, retain moisture, and promote the growth of beneficial microorganisms in the soil. They also release nutrients slowly, providing a steady supply of nutrients to the plants over time.
Some of the fertilizers are mentioned below:
Compost
Neem cake
Mustard cake
Epsom salt
Banana peel liquid fertilizer
Cow dung liquid fertilizer
Seaweed fertilizer
1. Compost for Outdoor plants
When making a soil mixture for outdoor plants, compost is a preferred ingredient.
Compost is a natural fertilizer that is rich in nutrients and can be used to improve soil health.
It makes the soil porous and also retains water for a longer duration.
If the soil in existing plants is becoming clayey or tight, adding compost can help to improve the soil quality.
You can use any type of compost, including cow dung, vermicompost, leaf compost, or kitchen compost.
2. Neem Cake fertilizer for outdoor plants
Neem cake, a byproduct of neem seed oil extraction, can be used as a natural pesticide and fungicide to prevent attacks by insects, viruses, bacteria, or fungi in soil.
It helps to improve soil quality by adding essential nutrients, enhancing soil structure, and increasing water retention.
It can be added to the soil mixture in small amounts as it is very potent.
We can add neem cake powder to the soil mixture as well as we can make neem cake liquid fertilizers and give them once a month.
The mustard cake fertilizer is a very strong fertilizer and should be used with caution.
It is recommended to apply it during the winter season when the weather is cooler and the soil is more receptive to nutrients.
However, it can also be used during summers, but it is not recommended during extremely hot weather when the temperature is near 40 ℃.
We can add a little bit of mustard cake powder in soil-mixture as well as we can give mustard cake liquid fertilizer to plants once a month.
It is important to dilute mustard cake properly in a handsome amount of water before applying it to plants, as it can be too strong for plants if used directly.
4. Epsom Salt (Magnesium Sulfate) for outdoor plants
In cases where plants are not growing properly despite receiving adequate fertilizers, water, and sunlight, Epsom salt can be considered as a good supplement.
We can either directly add Epsom salt to the soil or make a dilute solution and give it in the soil or can make a foliar spray.
We have to give Epsom salt only when it is needed.
It is important to use Epsom salt in moderation and always maintain a gap of at least 10 -12 days between the two fertilizers to avoid over-nutrients to the plants.
This will allow the plants to absorb the nutrients from each fertilizer effectively and prevent any negative effects on plant growth.
Banana peel fertilizer can act as a catalyst for plants during the flowering or fruiting stage, or in cases where the plant is not blooming.
The high levels of Potassium and Phosphorus in banana peels can help to promote the growth and development of flowers and fruits, while also providing other essential nutrients to the plants.
The best is to make Banana peel liquid fertilizer and give it to the soil. Otherwise, you can add Banana peel to the Kitchen compost as raw banana peels may attract pests and insects.
Banana peel liquid fertilizer should be given once every fifteen days.
Cow Dung liquid fertilizer is a widely used and popular form of organic fertilizer.
It is rich in nutrients like Nitrogen, Phosphorus, and Potassium, which are essential for plant growth. Additionally, it contains microorganisms that help in the breakdown of organic matter in the soil and improve soil fertility.
It can be given to any outdoor as well as indoor plants once a month.
It is important to ensure that the cow dung compost tea has been properly aged or composted before using it, as fresh cow manure can contain high levels of ammonia that can harm plants.
1. All the liquid fertilizers are endowed with balanced nutrients like NPK, Magnesium, Zinc, Calcium, and all other nutrients.
2. Rotation of the above-mentioned fertilizers is recommended every 20-25 days.
3. A deficiency of nutrients can be recovered in the plants but excess nutrition will damage the plant. So, even if you are giving any tonic or any supplement to plants always maintain the suggested time gap of at least 10-15 days.
4. Vegetable plants such as tomatoes, green chilies, brinjal, cabbage, bitter gourd, etc. should be fertilized with liquid fertilizers every 20 days.
5. For other outdoor plants, including both flowering and non-flowering ones like Tulsi (Holy basil) and Curry tree, etc. and Hibiscus, liquid fertilizer should be applied every 25 days.
Fertilizers for Indoor Plants
It is important to select an appropriate fertilizer for indoor plants, as they have specific nutritional needs. A balanced fertilizer with equal amounts of Nitrogen, phosphorus, and Potassium as well as micronutrients is often recommended for indoor plants.
Indoor plants such as ZZ plants, Areca Palms, Syngoniums, Money plants, Anthurium, Snake plants, Peace lilies, etc. require nutrients approximately once every two months during their active growth period, typically in the spring and summer months.
Giving fertilizers to these plants during the dormant period in winter is generally not recommended, as they require less water and nutrients during this time.
Fertilizers:
Cow Dung fertilizer is the most suitable fertilizer for this category.
Mustard cake fertilizer can also be given to them once a year.
Seaweed fertilizer (granules/liquid fertilizer) can be given once in a 2 months gap.
Vegetable plants need water, sunlight, fertilizer, and everything in a maximal amount whereas indoor plants need minimal of everything.
Prioritize your plants and pick suitable fertilizer to nourish them.
Money plants also known as Pothos, can benefit significantly from occasional fertilization, especially during their active growing season, which typically spans from spring to fall.Proper fertilization provides them with essential nutrients to promote vigorous growth and lush foliage.
In this article, we will take an in-depth look at the importance of fertilizing your money plant and provide valuable information on how to do it effectively.
Understanding the need for Fertilizer
Fertilizing your Money plant serves several crucial purposes:
1. Nutrient Enrichment:
Money plants require essential nutrients for their growth.
In their natural habitat, these nutrients are drawn from the soil. However, when cultivated indoors in pots, they depend on you to supply these nutrients.
2. Vigorous Growth:
Regular fertilization ensures your Money plant has an abundant supply of vital nutrients, promoting robust growth and lush foliage.
Proper nourishment can lead to more extensive vines and larger, more vibrant leaves.
3. Soil Rejuvenation:
Over time, the potting soil your Money plant resides in may become depleted of nutrients.
Fertilizing helps rejuvenate the soil, making it more conducive to sustained plant health and vitality.
4. Enhanced Aesthetic Appeal:
Well-fed Money plants are more likely to exhibit the attractive variegation and lushness that makes them so appealing.
Proper fertilization can contribute to the plant’s visual charm, making it a stunning addition to your home decor.
Choosing the Right Fertilizer
The choice of fertilizer is crucial. It is advisable to alternate between fertilizers with different formulations to ensure your Money plant receives a balanced supply of nutrients.
High NPK (nitrogen, phosphorus, potassium) fertilizers are suitable choices, but also consider using micronutrient-rich options to provide a comprehensive nutrient profile.
Maintaining the health of your Money plant can be challenging when it becomes densely vegetated, making it difficult to change the soil or add additional substrates like cocopeat.
In such situations, liquid fertilizer can serve as an effective solution, as it can be easily applied to the plant without disturbing the root system.
When to give Fertilizer to Money Plant
When it comes to fertilizing your Money plant, it is important to establish a regular schedule. Fertilizing every 25 days can be a useful guideline, but the specific timing may vary based on factors such as the type of fertilizer used, environmental conditions, and the growth rate of your plant.
Here’s a suggested schedule for fertilizing your Money plant:
1. Start with a Cow dung liquid fertilizer (with high NPK) and apply it every 25 days.
Cow dung liquid fertilizer
2. After the next 25-days interval, switch to Seaweed fertilizerto provide additional micronutrients.
Seaweed liquid fertilizer
3. Follow this sequence with Mustard cake fertilizer, also at 25-day intervals.
Important note:
Avoid using mustard cake fertilizer in extreme temperature, during hot weather.
mustard cake liquid fertilizer
4. Subsequently, use Epsom salt as a magnesium source, followed by neem cake fertilizer,and continue with other nutrient sources in a similar pattern.
Epsom salt
Important note:
When applying fertilizer, remember to dilute it properly by using more water and less fertilizer in the mixture.
This helps prevent over-fertilization, which can lead to issues such as yellowing leaves and stunted growth.
Reduce fertilizer during winter season
One important thing to note is that money plant growth slows down during the winter months.
As a result, it is advisable to reduce or even stop fertilization during this period to avoid overstimulating the plant when it is not actively growing.
Avoid using strong liquid fertilizers
Lastly, avoid using strong liquid fertilizers, as they can potentially harm your Money plant.
Over-fertilization should always be avoided, as it can lead to a range of problems, including yellowing leaves, stunted growth, and other issues.
In summary, the key to giving fertilizer to the money plant is to keep it simple, provide balanced nutrients during the growing season, and reduce or eliminate fertilization during the winter months. It is essential to monitor your plant’s condition and adjust your care routine as needed.