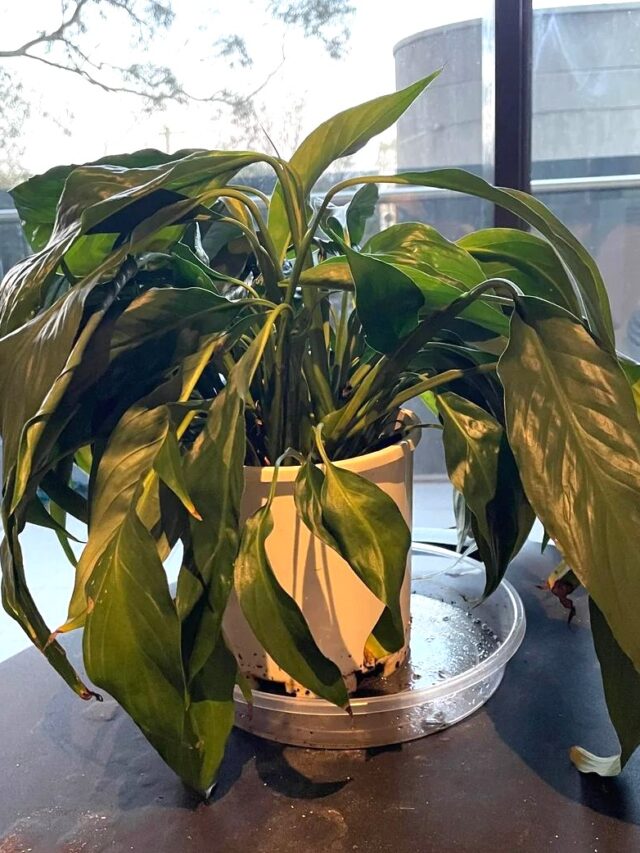
How to Get Rid of Black Spots on Curry Leaves: Expert Tips
Black spots on curry leaves are a common issue that usually indicates stress on the plant. These spots can arise from various factors, including fungal infections, pest infestations, or environmental stress. By identifying the cause, you can address the issue effectively and prevent further damage.
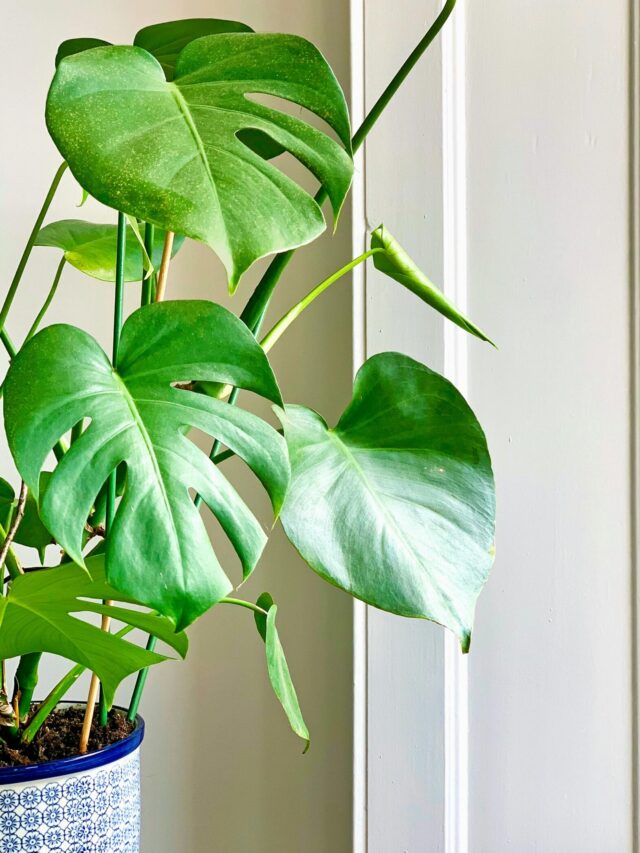
Black Spots on Curry Leaves
Causes of Black Spots on Curry Leaves
1. Fungal Infections in the Roots
Fungal infections in the roots are a primary cause of black spots on curry leaves. These infections often occur due to overwatering or poor soil drainage.
2. Excessive Moisture
Water sitting on the leaves for extended periods encourages fungal growth, which manifests as black spots.
3. Leaf Spot Disease
Leaf spot disease is a fungal infection that leads to small black or brown spots on the leaves.
4. Overwatering
Overwatering can cause root rot, a condition that weakens the plant and often results in black spots on the leaves.
How to Get Rid of Black Spots on Curry Leaves
Preventing Black Spots on Curry Leaves
1. Ensure Proper Ventilation
Place the curry leaf plant in a well-ventilated area. This reduces humidity around the plant, cutting down the chances of fungal growth.
2. Water at the Base
Always water the base of the plant, not the leaves. This prevents the leaves from staying wet and creating a favorable environment for fungus.
3. Avoid Overwatering
Water only when the topsoil feels dry. This helps to maintain proper soil moisture levels and prevents root rot.
Solutions to Treat Black Spots on Curry Leaves
1. Neem Oil Spray
Neem oil is a natural fungicide. Spray it on affected plants to eliminate fungal infections.
2. Baking Soda Solution
Mix 1 teaspoon of baking soda, 1 liter of water, and a few drops of dish soap. Spray this solution on the leaves to prevent and treat fungal growth.
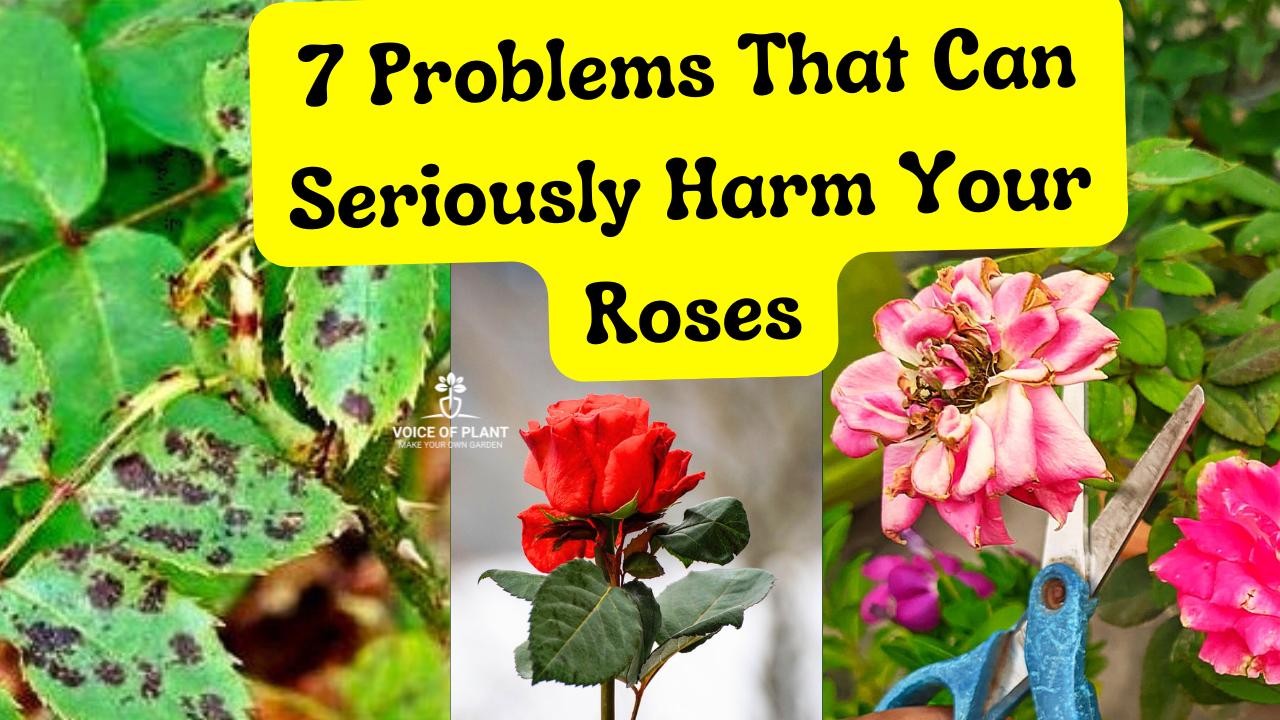
Roses are the crown jewel of any garden, but keeping them healthy and vibrant is no easy task. From fungal diseases to sneaky pests, roses are vulnerable to various problems that can hinder their beauty and growth. In this guide, we’ll explore seven major problems that can seriously harm your roses and provide actionable solutions to tackle them.
Rose Problem & Care
1. Powdery Mildew
Powdery mildew is a common fungal disease that plagues roses, especially in warm, humid conditions. It’s characterized by a white, powdery coating on the leaves, stems, and even flower buds. This disease can stunt growth and weaken your plant over time.
Causes and Contributing Factors: Powdery mildew thrives in environments with poor air circulation and high humidity. Overwatering and overhead watering can also increase the risk.
Prevention and Treatment:
Ensure proper spacing between rose plants for better air circulation.
Use fungicides designed to combat powdery mildew.
Prune infected parts immediately and dispose of them to prevent further spread.
Avoid wetting the foliage during watering.
2. Black Spot
Black spot is another notorious fungal disease that manifests as dark, circular spots on rose leaves. These spots are often surrounded by a yellow halo, and as the disease progresses, affected leaves fall off, weakening the plant.
Causes: Black spot thrives in wet and humid conditions, especially when water splashes onto leaves.
Prevention and Treatment:
Water roses at the base to avoid wetting leaves.
Apply fungicides regularly during the growing season.
Remove and destroy infected leaves promptly.
Mulch around the base of the plant to prevent fungal spores from splashing onto the foliage.
Aphids are small, pear-shaped insects that suck the sap from rose stems, leaves, and buds. They can multiply rapidly, weakening your roses and causing distorted growth.
Recognizing Aphid Infestations: Look for clusters of tiny green, yellow, or black insects on new growth. Sticky residue or a sooty mold may also appear due to their secretions.
Control Methods:
Use a strong jet of water to dislodge aphids from your plants.
Introduce beneficial insects like ladybugs and lacewings, which prey on aphids.
Apply insecticidal soaps or neem oil as needed.
4. Spider Mites disease in Rose plant
Spider mites are minuscule pests that can wreak havoc on your roses, causing yellowing, stippling, and webbing on the leaves. These pests are especially problematic during hot, dry weather.
Detection: Inspect the undersides of leaves for tiny red or green mites and fine webbing.
Control Options:
Increase humidity around your roses to deter spider mites.
Spray the plant with a mixture of water and insecticidal soap.
In severe cases, use miticides specifically formulated for spider mites.
5. Rose Thrips problem
Thrips are tiny, slender insects that feed on rose buds and flowers, causing discolored, distorted blooms. Their feeding can also leave behind silvery streaks on petals.
Spotting Thrips Damage: Look for buds that fail to open properly or flowers with brown edges and discolored petals.
Management Strategies:
Remove and discard heavily infested buds and flowers.
Use sticky traps to monitor and reduce thrips populations.
Apply insecticides like spinosad or neem oil if necessary.
6. Rose Dieback problem
Dieback is a condition where rose canes gradually wither and die back from the tips. It’s often caused by improper pruning, fungal infections, or environmental stress.
Symptoms: Brown or blackened stems that appear brittle and lifeless.
Prevention and Treatment:
Always use clean, sharp tools when pruning.
Seal pruning cuts with a pruning sealer to prevent infections.
Remove and dispose of affected canes.
Keep roses well-watered and fertilized to maintain their health.
Leaf curl can result from various issues, including pest infestations, nutrient deficiencies, or viral infections. Curled, distorted leaves are often the first sign of trouble.
Causes: Common culprits include aphids, fungal diseases, or poor watering practices.
Solutions:
Address pest issues promptly by using insecticidal soaps or natural predators.
Ensure your roses receive adequate nutrients by fertilizing regularly.
Avoid overwatering or underwatering, as both can stress the plant and lead to leaf curl.
Conclusion
Roses are undoubtedly worth the effort, but they demand attention and care to thrive. By identifying these seven common problems—powdery mildew, black spot, aphids, spider mites, thrips, dieback, and leaf curl—you can take proactive steps to keep your roses healthy and flourishing. Regular inspection, proper watering, and timely treatment will ensure your garden remains a vibrant oasis of roses.
Oh! So, you are worried about garden waste such as fallen leaves cluttering your garden? Are you wondering, “What can I do with all these leaves—should I throw them away or burn them?” We get it; dried leaves scattered across your garden can make it look messy. But here’s the secret: there’s no such thing as waste in the garden!
Fallen leaves in garden
Did you know these leaves can be one of the most beneficial things for your garden?
Instead of throwing or burning them, which harms the environment, you can turn them into leaf compost, a nutrient-rich treasure for your plants and soil.Leaf compost not only improves soil health but also enhances your plants’ growth naturally.
Introduction of Leaf Compost
Leaf compost is a nutrient-rich organic material derived from decomposed leaves. It’s one of the easiest and most natural ways to recycle garden waste (leaves) into a valuable organic compost for our plants.
Essentially, leaf composting transforms fallen leaves into a crumbly, dark material that resembles soil, packed with nutrients to enrich your garden.
What is Leaf Compost?
Leaf compost is created when leaves break down through natural decomposition.
Through the natural process of breakdown by microorganisms, leaves are transformed into a dark, crumbly, soil-like substance. It’s packed with nutrients like potassium, phosphorus, and trace minerals that plants love.
The beauty of leaf compost is its simplicity. It doesn’t require fancy equipment or special skills—just patience and a little effort. Plus, it’s entirely free, making it one of the most cost-effective ways to improve your garden’s soil.
So instead of disposing of leaves, why not transform them into something your garden will thank you for?
How to Make Leaf Compost at Home
If you’ve been wondering how to get started with leaf composting, don’t worry—it’s easier than you think! All it takes is a little organization, some time, and an understanding of the process. Here’s a simple step-by-step guide.
1. Collect the Leaves
Start by gathering the fallen leaves in your garden.
You can use a rake, a blower, or even your hands if you have a small area.
Make sure to remove any debris like rocks, plastic, or sticks.
Also, avoid leaves treated with pesticides, as they can hinder the composting process.
2. Use any bucket or container and Make holes
You can use a large container, bucket, durable poly bag, or any type of bag that suits your needs.
For leaf compost opt for a larger, deeper container based on the amount of waste you plan to compost. You can choose a clay pot or a plastic container (such as a bucket).
Make holes
Ensure there are enough holes around the container for air circulation.
Oxygen is vital for the decomposition process, as it supports the activity of beneficial microorganisms that break down organic material.
3. Shred the Leaves
Shredding the leaves into smaller pieces helps them break down faster.
You can do this by running over them with a lawnmower or using a garden shredder.
If you don’t have these tools, you can still compost whole leaves—it will just take a little longer.
4. Make a Layer
Once you’ve collected the leaves, it’s time to layer them properly. Layering is essential for an efficient composting process. Here’s how to do it:
1. Add a Base Layer:
Begin by adding a layer of garden soil or compost at the bottom of the container. You can use ready-made compost like vermicompost or even kitchen waste compost for this purpose.
2. Add the Leaves: Place a layer of garden leaves over the soil or compost.
This balance is essential for microbial activity, which drives the decomposition process.
3. Moisture Matters: Sprinkle some water on the leaves to maintain the right moisture level. The pile should be damp but not soaking wet.
Maintain Moisture
If it’s too dry, decomposition slows down; if it’s too wet, it can become smelly and compacted.
5. Cover the Container
Ensure that the container, bucket, or bag is properly covered to retain moisture and heat, which speeds up the composting process.
You can use a lid, cloth, or plastic sheet to cover it securely.
However, do not seal it completely—proper ventilation is crucial for decomposition.
6. Maintenance and Aeration
To keep the composting process active and effective, regular maintenance is necessary:
(i) Check Every 15 Days: Open the container once every two weeks to check the moisture levels. Add water if the compost feels dry.
(ii) Turn the Compost: Aerate the pile by using a pitchfork, shovel, or any long tool to turn the contents. This helps oxygen circulate, prevents odors, and accelerates the breakdown process.
Wait and Watch
With the right balance of materials, moisture, and aeration, you’ll have rich, dark, and crumbly leaf compost in a few months. If you’re using a cold composting method, it might take a bit longer—but patience pays off in the end.
Why is Leaf Compost Beneficial for Your Garden?
Leaf compost is a gardener’s best friend. It improves the health of your soil, saves money, and benefits the environment. Let’s dig a little deeper into its benefits.
1. Enriches Soil Nutrients
Packed with nutrients like potassium and magnesium, leaf compost naturally feeds your soil, promoting healthier plant growth.
2. Improves Soil Structure
It enhances soil texture by improving moisture retention, drainage, and preventing compaction, making it easier for roots to thrive.
3. Boosts Microbial Activity
Leaf compost supports beneficial microbes and earthworms, creating a fertile, thriving soil ecosystem.
4. Reduces Garden Waste
Instead of throwing away leaves, composting transforms them into a valuable resource, cutting down landfill contributions.
5. Saves Money
Leaf compost eliminates the need for expensive fertilizers or soil conditioners, offering a cost-free, sustainable alternative.
6. Eco-Friendly
Composting leaves reduces pollution, minimizes garden waste, and limits reliance on harmful synthetic fertilizers.
Where Can You Use Leaf Compost?
(i) Vegetable Gardens: Mix leaf compost with garden soil to provide essential nutrients for your veggies.
(ii) Flower Beds: Use it as mulch to keep flower beds weed-free and retain moisture.
(iii) Lawns: Spread a thin layer of leaf compost over your lawn to enrich the soil and promote healthy grass growth.
During winter or in cold regions where natural light is insufficient, grow lights are the perfect solution for providing the necessary light to Jade plants.
Jade Plant under grow lights
Can Jade Plants Thrive Under Grow Lights?
Here are some key points to consider:
1. Light Requirements for Jade Plant
Jade plants thrive in direct and in bright sunlight.
If natural light is insufficient, full-spectrum LED grow lights can provide the necessary light for healthy growth.
Aim for 12-14 hours of light per day, simulating daylight conditions.
Curry Leaf or Curry Patta often referred to as “Dr. Sensitive,” earns its nickname due to its delicate nature, requiring careful attention and nurturing. This plant primarily valued for its leaves rather than its flowers or fruits, although some flowers or buds may appear during the spring season.
To ensure robust growth and abundant leaf production, it is crucial to provide curry leaf plants with the proper nutrients. Similar to other leafy plants, curry plants highly depend on essential nutrients such as nitrogen, phosphorus, and potassium (NPK), with a particular emphasis on a higher proportion of nitrogen for optimal growth and leaf production.
Best Fertilizers for Curry Plant
Organic fertilizers for Curry Plant
In locations where air, water, and sunlight quality may not be optimal, supplementary organic fertilizers can provide the necessary nutrients for the curry leaf plant. Organic fertilizers with high nitrogen-phosphorus-potassium (NPK) content are particularly beneficial.
(i) Cow Dung Cake Liquid Fertilizer:
Best Fertilizers for Curry Leaf Plant
Cow dung cake liquid fertilizer is an excellent source of organic nutrients for curry leaf plants, especially during periods of suboptimal environmental conditions.
Its high nitrogen content promotes lush foliage growth, enhancing the overall health of the plant. However, during extreme cold, it is best to avoid using cow dung liquid fertilizer.
Mustard cake liquid fertilizer is another organic option rich in NPK content, particularly beneficial for curry leaf plants.
It provides essential nutrients for healthy foliage development and overall plant vigor. However, during extreme hot, it is best to avoid using mustard cake fertilizer.
Before the onset of the monsoon season, applying neem cake fertilizer once to the curry leaf plant can provide additional benefits.
Neem cake fertilizer not only enriches the soil with nutrients but also possesses natural pesticidal properties, protecting the plant from pests and diseases.
To maintain optimal soil conditions for your curry leaf plant, it is crucial to regularly check the soil texture every two months.
Loosen the soil around the plant and add compost (vermicompost or leaf compost or cow dung compost) to keep it soft and rich in nutrients. After adding compost, ensure to water the plant generously to facilitate nutrient absorption.
Use of Buttermilk to make Curry Plant Bushy
Buttermilk is an excellent tonic for promoting healthy and bushy foliage in curry plants.
To use buttermilk effectively, mix one-fourth glass of buttermilk with one litre of water for an 8-inch pot, and water the soil with this mixture.
Make sure the buttermilk is not too sour and is still suitable for drinking.
Curry plants belong to the citrus family, so they thrive in acidic soil conditions.
After applying any fertilizer, wait for at least 10 days before giving this tonic or Epsom salt to the plant.
By incorporating organic fertilizers such as cow dung cake, mustard cake, neem cake, and seaweed fertilizers, you can enhance the health, vigor, and flavor of your curry leaf plant, ultimately enriching your culinary experience.
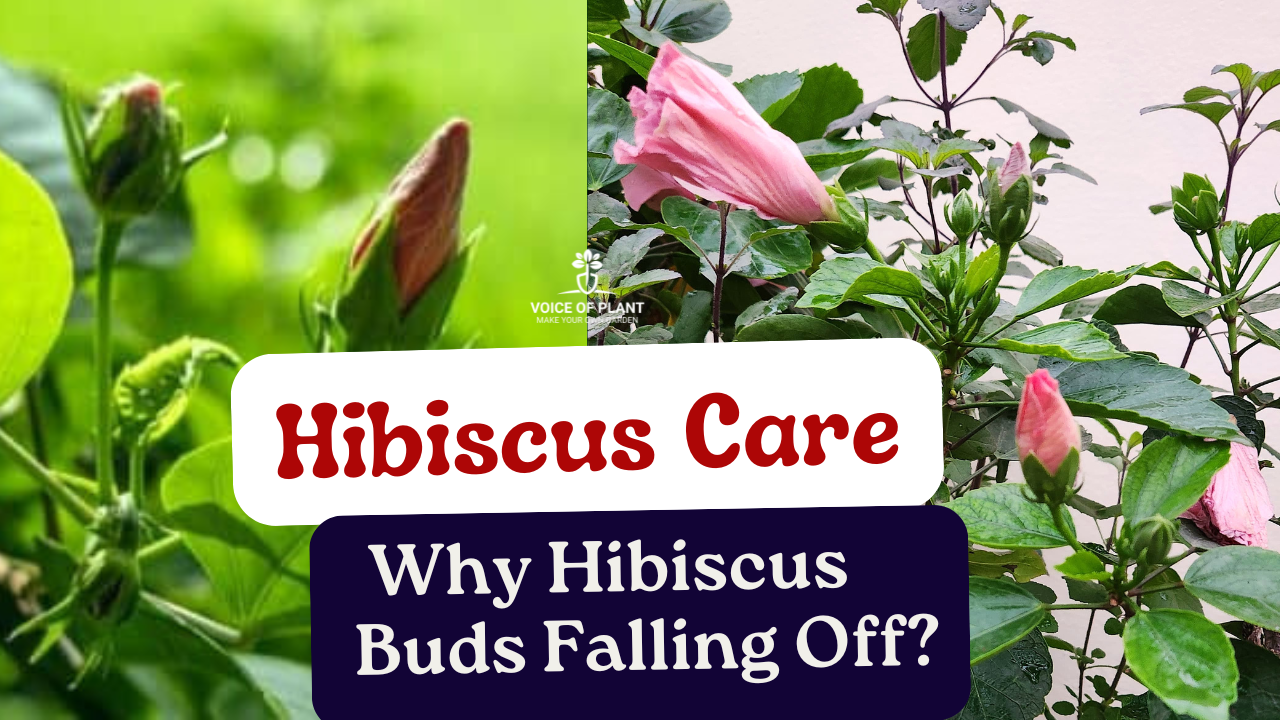
Hibiscus plants are known for their vibrant flowers, but when the buds drop before blooming, it can be disheartening for plant lovers. Certain environmental and care factors might cause this issue. Here’s how to address it:
Common Reasons for Hibiscus Bud Drop and How to Address Them
1. Temperature Sensitivity
Cause: Hibiscus plants are sensitive to sudden temperature fluctuations.
If the weather is too cold or there’s a sharp drop in nighttime temperatures, buds may fall off.
Solution: Place the plant in a location where it is protected from cold winds.
If temperatures are consistently low, keep your plant in shaded area or cover it with a breathable fabric at night.
2. Watering Issues
Cause: Overwatering or underwatering can stress the plant, leading to bud drop.
In cooler months, hibiscus plants require less water.
Solution: Check the soil before watering.
Only water when the top 1-2 inches of soil feel dry. Avoid letting the soil stay soggy.
3. Nutrient Deficiency
Hibiscus flower plant
Cause: Lack of essential nutrients like phosphorus and potassiumcan weaken the plant, preventing buds from fully developing.
Solution: Use a balanced fertilizer, preferably one high in phosphorus and potassium like Banana Peel Fertilizer, to support flowering.
Avoid over-fertilizing, as too much nitrogen can lead to excessive leaf growth at the expense of flowers.
Cause: Pests like aphids, spider mites, or whiteflies can weaken the buds and cause them to drop.
Solution: Inspect the plant for signs of pests. Use neem oil or an organic insecticidal soap to control infestations.
6. Humidity and Dry Air
Cause: Hibiscus plants thrive in humid conditions.
Dry air or low outdoor humidity can cause stress and bud drop.
Solution: Increase humidity around the plant by misting it or placing a tray of water nearby.
Avoid misting in late evenings to prevent fungal infections.
7. Pruning and Deadheading
Cause: Lack of regular pruning can lead to weak branches that may not support budding flowers.
Solution: Lightly prune the plant to remove weak or dead branches. This encourages healthier growth and flower production.
Final Tips
1. Ensure the pot has proper drainage to avoid waterlogging.
2. Regularly clean the leaves to keep them dust-free and healthy.
3. Monitor the plant closely during seasonal transitions and adjust care routines as needed.
By addressing these common issues, your hibiscus plant should thrive and bloom beautifully. With a little extra care and attention, those falling buds can turn into vibrant flowers in no time!
The rose plant is known for its beautiful flowers. If the rose plant does not bloom, we start worrying. During winter, special care is required to get maximum flowers from the plant. Many times, the plant develops buds but they do not bloom, plant does not look healthy.
Rose plants are heavy feeders and need a balanced supply of nutrients to thrive. To grow healthy and vibrant roses, providing the right fertilizers is essential. Here, we are sharing some fertilizers that can help keep your plant healthy and strong as well as produce beautiful flowers.
1. Groundnut Fertilizer
2. Tea Leaves + Seaweed Granules
3. Mustard Cake Fertilizer
4. Rose Tonic – Rose Radiant Organic Fertilizer
Best Fertilizers for Rose Plants
1. Groundnut Liquid Fertilizer
Groundnut liquid fertilizer is an excellent organic option for roses.
How to use:
Soak the groundnut cake in water overnight.
Dilute the liquid mixture in the ratio 1:4 (groundnut liquid: water) and apply it to the soil once every 15-20 days.
Benefits:
The composition of groundnut cake includes essential elements such as nitrogen (N), phosphorus (P), and potassium (K), commonly referred to as NPK, along with fibers and proteins.
Rich in nitrogen, it supports lush green foliage and healthy plant growth.
Encourages root development.
Improves soil fertility.
Boosts flowering and helps the plant grow strong and healthy.
This organic fertilizer, enriched with nitrogen, effectively addresses the problem of yellowing leaves in plants, providing a valuable solution when leaf discoloration occurs.
A combination of tea leaves + seaweed granules is a powerhouse of nutrients.
How to use:
Mix two teaspoons each of used tea leaves and seaweed granules and add this mixture to the soil.
Ensure that you loosen the soil before adding the powder, then water the plant after application.
Benefits:
Tea leaves provide nitrogen and improve soil structure.
Seaweed granules are rich in potassium and trace elements, promoting better flowering and overall plant health.
This organic mix not only boosts flower production but also improves the plant’s resistance to stress.
3. Mustard Cake Fertilizer
Mustard cake fertilizer is a fantastic natural choice for roses. Derived from mustard seeds, it is packed with essential nutrients like nitrogen, phosphorus, and potassium.
How to Use:
Soak the mustard cake in water overnight.
Dilute the mixture with 5 times more water, which means mixing 1 part of mustard cake liquid fertilizer with 5 parts of water.
Feed the plant with this when the soil is dry.
Apply it to the soil once every 15-20 days.
It will show results after 4-5 days on the plants and would last for a longer duration.
Benefits:
This fertilizer encourages root development.
It improves soil fertility.
It boosts flowering and helps the plant grow strong and healthy.
This cost-effective fertilizer is perfect for all types of roses and complements other fertilizers for balanced nutrition.
Roses thrive on the right combination of nutrients, and fertilizers play a vital role in their growth. Groundnut fertilizer, tea leaves with seaweed granules, mustard cake fertilizer, and the Rose Radiant Organic Fertilizer are some of the best options for ensuring healthy and blooming rose plants. With regular feeding and proper care, you can enjoy vibrant roses in your garden throughout the year.
Taking care of plants during the winter season is crucial for their well-being. Just as humans adapt to changes in weather, plants also need adjustments to their care routine to thrive during the colder months. This is especially true for summer plants, which require special attention and nurturing in winter to prevent deterioration.
Achieving remarkable results is possible with minor tweaks in plant care. By making subtle adjustments in response to current weather conditions, you can ensure the sustainability of your plants. Let’s explore the winter care journey of plants through the following 8 tips.
Watering tips
Protect plants from cold
Accept changes in plants
Avoid pruning and repoting of plants
Do not Disturb Summer Plants in Winters
Protect plants from pest attack
How and When to Give Fertilizer
Old plants are strong plants
How to Care Plants in Winter Season
1. Watering tips
In winter, plants require less water compared to summer, but it is crucial not to neglect their hydration needs.
Unlike in summer, when we typically water when the topsoil is dry, in winter, wait until the soil is dry down to the roots before watering. Allow the top layer to dry for 4-5 days before providing water.
When watering in winter,avoid using extremely cold water as it can harm the plants.
Opt for lukewarm water for a more plant-friendly approach. Thoroughly assess the soil’s moisture content; refrain from watering if it still retains moisture, and water adequately if the soil is completely dry, allowing water to drain from the pot’s bottom hole.
Maintain plant cleanliness by using lukewarm water for spraying when necessary, applying the spray to leaves and flowers to keep them clean and healthy.
It is crucial to protect plants from harsh, cold waves to prevent their demise. As winter approaches, typically around October to November, consider:
Relocating summer plants indoors.
Placing them under protective shade.
Additionally, cover them with a protective sheet for added insulation.
4. Accepting visible changes in plants during winters
In winter, summer plants inevitably experience stress, leading to visible changes that should be acknowledged and accepted to a certain extent. These changes may include:
hibiscus yellow leaves
Reduction in the size of leaves.
Survival mode with minimal or no growth.
Development of leggy stems.
Yellowing or browning of leaves.
Admit that these changes are temporary, and plants generally recover when the weather aligns with their specific requirements.
Embrace positive changes, such as the blossoming of flowers and the growth of winter vegetables like carrots and radishes.
Cherish these transformations with a positive outlook and appreciation for the natural cycles.
5. Do not Disturb Summer Plants in Winters
During winter, when summer plants experience stress, it is advisable to refrain from intensifying their disturbance by avoiding certain practices stated below.
Avoid normal pruning,
Avoid hard pruning,
Root pruning should also be neglected,
Repotting is not favourable at this time,
Pinching is also not recommendable,
No experiment should be performed with the plant at this time.
When the plant is healthy and in its growing stage at that time all the experiments and treatment can be performed with the plant but not when it is already under stress.
(i) Avoid using pruners and scissors on summer plants: Dry leaves and mature flowers of plants like tulsi which can be removed from hands, can be removed but avoid using pruners and scissors on summer plants.
Remove mature flowers of Tulsi plant
(ii) Avoid Har Pruning of winter plants:Pruning and repotting of winter plants can be done during winters on the day when the temperature is little warm and favourable but hard pruning of winter plants should not be practiced at this time.
Mature plants that have been nourished over the years experience less stress and endure winter conditions well. Conversely, newly acquired or recently planted plants, especially those introduced 4-5 months ago, are more susceptible to stress.
Robust plants exhibit a faster recovery pace compared to newly established ones. However, with time, these plants will gradually recover.
It is important to note that as the next season arrives, all summer plants have the inherent ability to recover on their own. There is no need to worry about winter gardening; instead, embrace and appreciate the unique aspects of the season.
The Tulsi plant, often referred to as the “Holy Basil,” holds a revered place in Indian households for its religious and medicinal significance.
While it thrives effortlessly in the warm and tropical climates of India, many enthusiasts wonder if this sacred plant can grow indoors in cooler regions or foreign countries. The good news is that with proper care and the right conditions, growing Tulsi indoors in cooler climates is absolutely achievable.
Healthy Tulsi plant in indoor place Pic credit: FB
Understanding Tulsi’s Natural Habitat
Tulsi is a tropical plant native to India. It flourishes in warm climates with ample sunlight, temperatures between 20–35°C and moderate humidity levels.
Despite its natural preference for warm environments, the adaptability of the Tulsi plant allows it to grow indoors in cooler regions when its fundamental needs are met.
Key Factors for Growing Tulsi Indoors in Cool Climates
1. Temperature for Tulsi plant
Tulsi is highly sensitive to frost and low temperatures.
In cool places or foreign countries, maintaining an indoor temperature between 18–25°C is crucial for its survival.
Placing the plant near a heat source during winter, but away from direct drafts or cold windows, helps ensure optimal growth.
2. Adequate Sunlight for Tulsi plant
Tulsi requires at least 5-6 hours of sunlight daily to thrive.
Tulsi plant in grow light in Denmark P.C. – FB
For indoor setups in cooler climates:
Place the plant near a south-facing window to maximize sunlight exposure.
Use LED grow lights if natural light is insufficient, ensuring the plant receives 12-14 hours of light per day during winter months.
3. Soil requirements for Tulsi plant
Tulsi grows best in well-draining soil that is rich in organic matter.
A mix of:
60% garden soil
20% sand or perlite
20% organic compost
This combination ensures proper aeration and nutrient availability, preventing waterlogging that could damage the roots.
Loosen the soil every 15 days to improve airflow and facilitate the flow of nutrients.
Replace the top layer of soil every two months.
4. Watering Tips for Tulsi plant
Overwatering in Tulsi plant
Overwatering is one of the most common mistakes when growing Tulsi indoors.
Follow these tips:
Water the plant only when the topsoil feels dry.
Use room-temperature water to avoid shocking the plant.
Avoid using cold water directly from the tap.
Ensure the pot has drainage holes to allow excess water to escape.
5. Humidity Management for Tulsi plant
Cool places often have dry indoor air, especially during winter. Tulsi prefers moderate humidity levels, which can be achieved by:
Placing a small humidifier near the plant.
Grouping plants together to increase the surrounding humidity.
Misting the leaves lightly, ensuring not to overdo it, which may encourage fungal growth.
Pots and Containers: The Right Setup
1. Material Matters
Use clay, terracotta, or plastic pots with proper drainage holes.
Avoid heavy pots if you plan to move the plant frequently for sunlight or warmth.
If your plant is old and need larger pot then provide a larger pot for healthy growth.
2. Size and Depth
Tulsi’s roots spread out moderately, so a pot with a diameter of at least 8–12 inches and a depth of 6–8 inches is ideal.
3. Pot Placement
Place the pot on a raised tray or stand to improve air circulation and prevent moisture buildup at the base.
Fertilizing Tulsi for Indoor Growth
Indoor Tulsi plants often require extra nutrition to compensate for the lack of natural nutrients found in outdoor soil. Use:
Organic fertilizers like vermicompost or liquid seaweed every 4-6 weeks.
Refrain from using harsh fertilizers such as raw kitchen waste.
Avoid chemical fertilizers, as they may harm the plant or reduce its medicinal properties.
Pruning and Maintenance for Healthy Growth
Pruning of flowers of Tulsi plant
Regular pruning keeps your Tulsi plant healthy and encourages bushier growth.
Follow these tips:
Trim the top leaves once the plant has 4-6 sets of leaves.
Remove yellow or dead leaves promptly.
Pinch off flower buds if you want the plant to focus on leaf production rather than seed formation.
Protecting Tulsi from Pests and Diseases Indoors
Although indoor plants are less prone to pests, Tulsi may still attract:
Aphids: Spray neem oil solution every two weeks.
Fungal infections: Avoid overwatering and ensure good air circulation around the plant.
Inspect your plant regularly and address issues early to prevent significant damage.
Move the plant outdoors for fresh air and sunlight if temperatures are suitable.
2. Autumn and Winter:
Bring the plant indoors before the onset of frost, and maintain warmth with artificial lights and heating.
Conclusion
Growing Tulsi indoors in cool places or foreign countries is a rewarding endeavor when approached with care. By providing optimal temperature, light, soil, and water conditions, you can successfully nurture this sacred plant, even in challenging climates.
Whether for its spiritual significance, medicinal properties, or sheer beauty, Tulsi can transform your indoor space into a thriving green sanctuary.
Jade plants are hardy succulents that flourish during warmer seasons, but they require special care in winter due to reduced sunlight and low temperatures.
Many gardeners are often confused about how to care for Jade plants in the winter season, including questions like where to keep them, how to water them, and whether to give fertilizer or not.
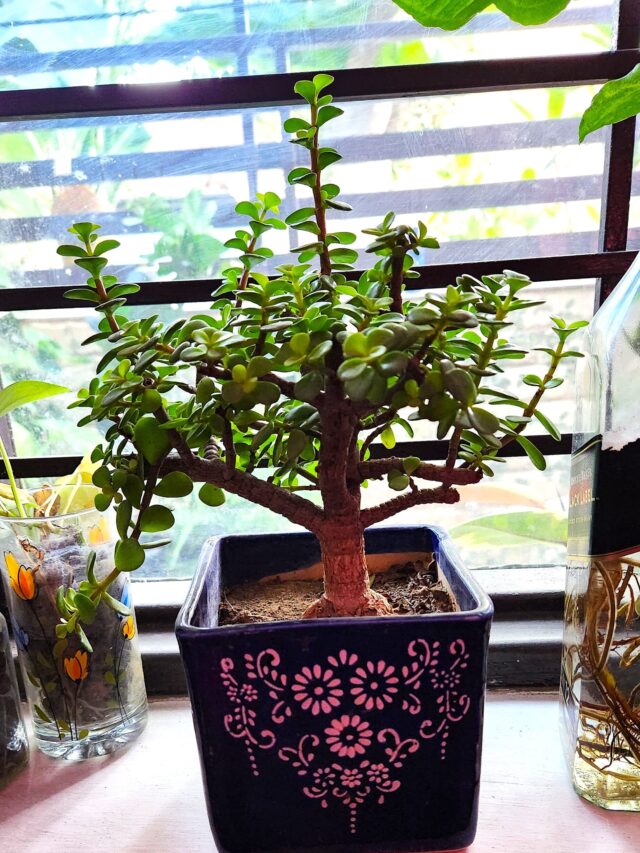
Jade Plants
Why Jade Plants Go Dormant in Winter
Dormancy is a natural process for jade plants in response to shorter daylight hours and cooler temperatures. Growth slows, but this doesn’t mean the plant is unhealthy.
Here are some essential tips to help your Jade plant stay healthy during the colder months.
5 Simple Tips to Care Jade Plant in Winter Season
1. Place in a Shaded Area
Jade plant near window
While Jade plants thrive in sunlight, excessive exposure to winter’s harsh conditions can harm them. Move your Jade plant to a shaded area where it is protected from frost.
If you keep the plant indoors, place it near a sunny window.
2. Monitor Sunlight Exposure
Sunlight is crucial for Jade plants even in winter.
Ensure the plant gets sufficient natural light to maintain its growth and prevent wilting.
Winter is a dormant period for Jade plants, so they don’t need additional nutrients. Fertilizer can stress the plant further.
Resume feeding when the growing season begins in spring.
5. Avoid Unnecessary Pruning
Pruning during winter can hinder the plant’s recovery and growth. Trim only if absolutely necessary, such as to remove damaged or dead leaves.
Wait until the active growing season for regular pruning.
Signs Your Jade Plant Needs Extra Care
1. Yellowing Leaves
Yellow leaves often indicate overwatering or insufficient light.
Adjust the watering schedule and relocate the plant to a brighter spot.
2. Drooping or Wrinkled Leaves
Wrinkled leaves usually mean the plant is thirsty.
While jade plants need less water in winter, they shouldn’t go too long without hydration.
Is it good to Repot a Jade Plant in Winter?
Repotting is generally not recommended during winter dormancy unless absolutely necessary, such as in cases of severe root rot or pest infestation.
———————–
By following these tips, your Jade plant can survive and even thrive during the winter season. Proper placement, minimal watering, and protection from cold will ensure your plant remains healthy until warmer days return.