Category Archives: Indoor Plants

Find tips here for caring for indoor plants, including guidance on watering, soil mixture, fertilizers, and more.

How to Care for Aglaonema Plant: Complete Indoor Plant Guide

How to Care for Aglaonema Plants: Complete Indoor Plant Guide


The Aglaonema, also known as the Chinese Evergreen, is a highly desirable plant for any home, celebrated for its beauty and decorative qualities. It adds a touch of elegance to home gardens and indoor spaces.

How to Care for Aglaonema Plants: Complete Indoor Plant Guide

However, many people find that despite their best efforts, Aglaonema plants do not thrive as well as they do in nurseries. In this article, we will explore all aspects of care and treatment necessary to help your Aglaonema flourish.

Basic Nature of Aglaonema Plant


Aglaonema is renowned for its stunning ornamental leaves, which come in various colors like red, pink, and green.

AGLAONEMA

  • It is one of the most attractive plants for enhancing home decor and is also valued for its air-purifying qualities.

Aglaonema is a perennial plant that, with proper care, can thrive for many years and even multiply over time.

Tips to Care Aglaonema Plant


1. Temperature for Aglaonema plant


The ideal temperature range for this plant is between 18-35°C.

  • Aglaonema plants are not inherently hardy; they gradually adapt to their environment.

2. Pot size for Aglaonema plant


This plant thrives in medium-sized pots. The roots of Aglaonema are relatively short and thin, so it does not require a large pot.

Using an oversized pot can lead to excessive moisture retention in the soil, which can cause root rot.

  • A pot size of 6-8 inches is generally adequate, with clay pots being the preferred choice.

3. When to repot Aglaonema plant


Aglaonema is a slow-growing plant, so repotting is only necessary when the roots begin to emerge from the top or bottom of the pot, indicating that the plant has outgrown its container.

If you wish to separate the plant’s pups—multiple Aglaonemas growing in a single pot—then repotting is appropriate.

  • Use a pot that is only slightly larger than the current one.

4. Ideal Location and Sunlight for Aglaonema plant


Aglaonema plant does not require direct sunlight, making it ideal for indoor spaces with low light conditions.

  • Aglaonema should not be placed in direct sunlight or complete darkness.
  • It thrives best with about two hours of morning sunlight.
  • A location with bright, indirect light is ideal spot for this plant.
  • Avoid moving the plant unnecessarily, both indoors and outdoors.

Once you find a suitable spot, let the plant remain there.

Check here

Different lighting conditions for plants

5. Soil Mixture for Aglaonema plant


Aglaonema plants thrive in soil rich in organic matter.

  • To provide the nutrients they need, opt for a high-quality potting mix that includes coco peat, compost, or other organic materials.

Avoid using heavy or clayey soil, as it can hinder the plant’s growth.

Check here

How to prepare soil – mix for plants

6. Watering tips for Aglaonema plant


Aglaonema plants have delicate roots and do not require frequent watering.

Overwatering can lead to root rot, causing the leaves to turn yellow and decay.

  • Water the plant only when the top layer of soil appears dry.
  • Use a stick to check the soil’s moisture level near the roots before watering.

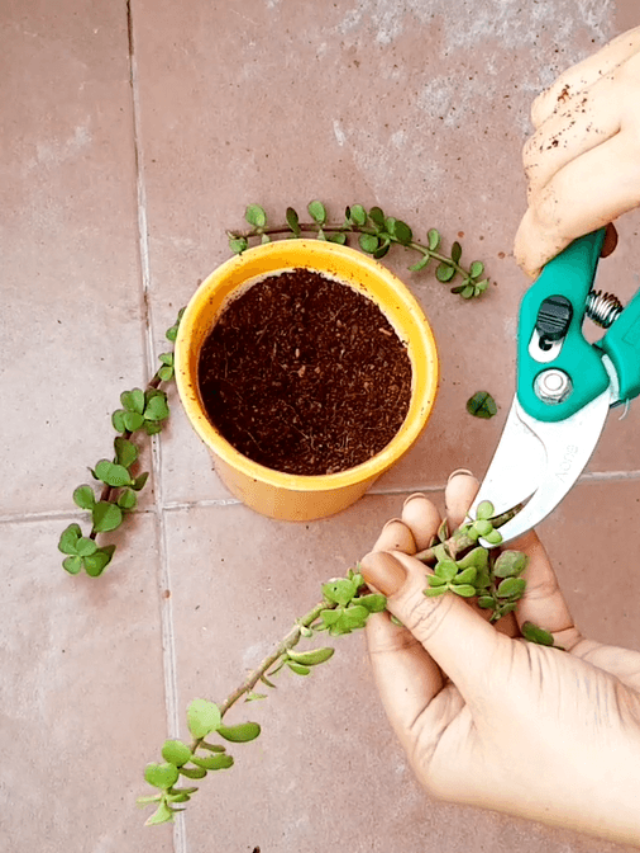
7. Pruning tips for Aglaonema plant 


Pruning is not always required, but it can be done to promote new growth, remove damaged leaves, or trim seasonal blooms.

  • The best time to prune is in the spring or in monsoon season.

8. Fertilizers for Aglaonema plant 


The plant grows slowly, so it requires very little fertilizer.

With these care tips, your Aglaonema will thrive, adding beauty and elegance to your home for years to come.

———————–

Follow our Social media channel:

1. Voice of Plant – YouTube Channel

2. Voice of Plant Facebook Page

3. Instagram Voice of Plant Channel

Happy Gardening!

Top Low Maintenance Plants for Beginners & Busy People

Top Low Maintenance Plants for Beginners and Busy People

Top Low Maintenance Plants for Beginners and Busy People


Are you a beginner gardener looking for plants that can survive almost anything? Whether you are new to gardening or just too busy to care for high-maintenance plants, we have got you covered.

Top Low Maintenance Plants for Beginners and Busy People
Balcony garden

Here is a list of  top low maintenance plants for beginners and busy people. 

Top Low Maintenance Plants for Beginners and Busy People


1. Devil’s Backbone (Euphorbia tithymaloides)


Devil's Backbone 1
Devil’s Backbone

Devil’s Backbone plant is drought-tolerant and can handle neglect. It is a great option for busy plant owners or those who often forget to water.

1. Light: Prefers direct, bright light conditions.

2. Water: Water sparingly. Allow the soil to dry out between watering.

3. Location: Keep this plant in an outdoor location like balcony or terrace for better growth.

4. Bonus: It is also known for its unique zig-zag stems, adding an interesting look to your space.

2. Dracaena (Song of India)


Dracaena
Dracaena

Dracaena is extremely resilient and can handle neglect. This plant requires very little attention, making it perfect for beginners and busy plant owners, or even those who often travel.

1. Light: Thrives in direct, bright light conditions.

2. Water: Water when the top inch of soil is dry. 

3. Location: Keep this plant in an outdoor location like balcony or terrace for better growth.

4. Bonus: This plant is resistant to pests and diseases, making it ideal for beginners.

3. Aloe Vera 


Aloe vera
Aloe Vera

Aloe Vera is a magical and very famous low – maintenance plant. This plant thrives in dry conditions and requires very little attention, making it perfect for beginners, busy plant owners

1. Light: Prefers bright, direct sunlight but can adapt to partial shade.

2. Water: Aloe Vera’s water requirements are minimal; if kept indoors, watering once or twice a month will suffice.

3. Location: This hardy outdoor plant seamlessly adapts to various environments, including bedrooms, making it a versatile choice.

4. Bonus: The gel inside the leaves has healing properties and can be used for burns, cuts, and skincare.

Must read:

Tips to Care Aloe Vera Plant


4. Purple Heart (Tradescantia pallida)


Purple Heart
Purple Heart

Purple Heart (Tradescantia pallida) is one of the hardiest flowering plants, making it an excellent choice for office-goers and beginner gardeners. Its vibrant purple leaves and delicate flowers add a pop of color, while its low-maintenance nature makes it easy to care for.


1. Light: Enjoys direct and bright light conditions.

2. Water: Water when the top of the soil feels dry, but avoid overwatering.

3. Location: Place it in a sunny location. Perfect for outdoor environments, making it a good addition for balcony or terrace garden.

4. Bonus:  It’s a fast grower plant. You can grow more plants from it’s cutting. Prune occasionally to maintain shape and promote new growth.

5. Jade Plant


Jade plant in pot
Jade Plant

The  Jade plant is a popular  succulent plant known for its hardiness and low maintenance requirements. 

1. Light: Jade plant is sun worshippers, requiring at least 4-5 hours of direct sunlight daily.

2. Water: Water when the soil is completely dry. Overwatering can cause root rot.

3. Location: Place it in a sunny location. Perfect for outdoor environments, making it a good addition for balcony or terrace garden.

4. Bonus: Jade plants are considered to bring good luck and prosperity, making them a popular choice for home decor.

Must read:

Jade Plant Care Complete Guide


6. Sadabahar (Periwinkle / Vinca)


periwinkle
Sadabahar (Periwinkle)


Periwinkle (Vinca) is another great option for those seeking an easy-care plant. It’s also resistant to pests and diseases, making it ideal for beginners.

1. Light: It’s incredibly hardy and can tolerate a range of conditions, from full sun to partial shade.

Watering: Periwinkle requires minimal watering once established and can thrive in both garden beds and containers.

3. Location: Perfect for outdoor environments, making it a good addition for balcony or terrace garden.

4. Bonus: Its vibrant flowers bloom continuously, adding color to your garden with very little effort.


General Care Tips for Hardy Plants


1. Use well-draining soil to prevent root rot.

2. Avoid overwatering. Most hardy plants prefer their soil to dry out between watering.

3. Occasional pruning can encourage new growth and maintain the plant’s shape.

4. Fertilize sparingly, as these plants don’t need heavy feeding.

With these easy-care tips, your hardy plants will not only survive but thrive, even if you’re new to gardening or have a busy schedule!

———————————-

Follow our Social media channel:

1. Voice of Plant – YouTube Channel

2. Voice of Plant Facebook Page

3. Instagram Voice of Plant Channel

Happy Gardening!

Is Rubber Plant an Indoor or Outdoor Plant?

Is Rubber Plant an Indoor or Outdoor Plant?

Is Rubber Plant an Indoor or Outdoor Plant?


Rubber plants (Ficus elastica) are among the most popular houseplants due to their stunning, glossy leaves and easy-to-manage nature.

Often people get confused about whether it is more appropriate to keep it indoors or outdoors for better growth.

Is Rubber Plant an Indoor or Outdoor Plant?
Rubber plant outdoor placement – Pic credit: Pinterest

This article explores whether rubber plants should be grown indoors or outdoors, how to care for them in different settings, and the benefits and challenges of both approaches.

Ideal Conditions for Rubber plant


1. Temperature:


The Rubber Plant is a typical summer plant that thrives in temperatures ranging from 20-30℃.

Note:

  • While it can handle high temperatures if kept in the shade, it experiences stress when temperatures drop in winter.
  • Protect your rubber plant from cold.

2. Placement & Sunlight requirement of the Rubber plant 


Rubber plant in bright light area


The Rubber plant can be grown both indoors and outdoors.

Indoor placement:


rubber plant
Rubber plant in bright light area

Rubber plants are ideally suited for indoor growth. They prefer bright, indirect sunlight but can tolerate lower light levels.

  • If you prefer to keep Rubber plant indoor, ensure it receives ample bright light.
  • Placing it near a window where it can receive about half an hour of direct sunlight is ideal.
  • However, if the plant is kept in low or medium light conditions, it may struggle to thrive.

Best Indoor care tips for Rubber plant

rubber plant indoor
Rubber plant near window Pic credit: Pinterest
  • Place them near windows or doors with bright, indirect light.
  • Water them when the top inch of soil feels dry.
  • Wipe the leaves occasionally to remove dust and maintain their shine.

Can Rubber Plants Grow Outdoors?


rubber plant
Rubber plant in bright light outdoor

Ideal outdoor growing conditions:


When kept outdoors, avoid exposing it to the direct, scorching heat of the sun for extended periods.

  • Instead, provide 2-3 hours of mild sunlight in the morning and evening. 
  • During the afternoon, keep the plant in the shade.

Best outdoor care tips for Rubber plant

  • Place them in a shade. 
  • Avoid placing them in a direct sunlight.
  • Water them when the top inch of soil feels dry.
  • Wipe the leaves occasionally to remove dust and maintain their shine.

Comparing Indoor & Outdoor Rubber plant care


Differences in Light Requirements


Indoors, rubber plant need bright but indirect light. Outdoors, they can tolerate some direct sunlight, especially in the morning, but too much can scorch their leaves.

Watering Needs: Indoors vs. Outdoors


Indoor rubber plants need to be watered moderately, while outdoor plants might require more frequent watering, especially in hot or dry climates.

Click here to read:

9 Tips to care Rubber plant


Best places to keep a Rubber plant indoors


Rubber plant indoor home
Rubber plant indoor placement

Rubber plants thrive in well-lit indoor spaces. They are perfect for:

1. Living Rooms: Bright and spacious areas.

2. Office Spaces: Their air-purifying qualities can improve air quality and create a calm atmosphere.

3. Bedrooms: These rooms offer high humidity levels, which rubber plants love.


Are Rubber Plants Safe for Pets Indoors?


Rubber plants can be toxic to pets if ingested, causing irritation to the mouth and stomach.

  • It is best to keep the plant out of reach of curious cats or dogs.

Ideal Soil – Mix for Rubber Plants


Soil mixture

Rubber plants do best in loose, well-drained soil.

  • Enrich the soil with organic compost to promote healthy root development.

Check this article:

How to make Soil – mixture for plants


Conclusion

In summary, rubber plants can thrive both indoors and outdoors, depending on your climate and care. Understanding their needs in each environment will help ensure they stay healthy and vibrant.


Follow our Social media channel:


1. Voice of Plant – YouTube Channel

2. Voice of Plant Facebook Page

3. Instagram Voice of Plant Channel


Happy Gardening!

5 Expert Tips to treat White Patches on Areca Palm Leaves

White Patches on Areca Palm Leaves


Areca Palms are fantastic at cleaning the air and giving off oxygen, making them a wonderful addition to your indoor spaces for a breath of fresh air.

areca palm light

Many gardeners often worry about white patches on their Areca Palm and, without fully understanding the issue, apply treatments that can harm the plant.

There is no need to worry; we have identified the cause and will provide the correct treatment to resolve the problem. Follow our guidance to ensure your Areca Palm stays healthy and vibrant.

Areca palm white patches
White patches on Areca palm

White patches on Areca Palm leaves can be caused by several factors, including fungal infections, pest infestations, or mineral deposits. Here’s how you can treat them:

5 Expert Tips to treat White Patches on Areca Palm Leaves

1. Identify the Cause


(1) Fungal Infection:


If the white patches are powdery and spread across the leaves, it might be a fungal issue like powdery mildew.

(2) Pests:


White patches could also be due to pests like spider mites or mealybugs.

(3) Mineral Deposits:


Sometimes, hard water can leave mineral deposits on the leaves, creating white patches.

2. Treatment for Fungal Infection


(1) Neem Oil:


Neem oil uses

Mix neem oil with water and spray it on the affected leaves. Neem oil has antifungal properties.

(2) Fungicide:


cinnamon powder


To treat fungal infection on areca palm plant, you can use neem oil solution, neem soap solution and cinnamon liquid solution.

  • You can boil small amount of cinnamon powder in water, let the solution cool down, add 1 litre of water and then spray it on the leaves.
  • You can add small amount of fungicide in 1 litre of water and then spray it on the leaves.

Note:

  • Spray your plants with a neem solution weekly to protect them from fungus and pest attacks.

(3) Improve Air Circulation:


Ensure the plant has good air circulation to prevent the spread of the fungus.

3. Treatment for Pests


(i) Soap Spray:


Mix a few drops of mild liquid soap in water and spray it on the leaves. This can help eliminate pests like mealybugs and spider mites.

(2) Rubbing Alcohol:


Dab a cotton swab in rubbing alcohol and apply it directly to the pests. This is particularly effective against mealybugs.

(3) Neem Oil:


Mix neem oil with water and spray it on the affected leaves. 

Check this article:

Areca Palm Care Tips


4. Treatment for Mineral Deposits


(1) Wipe Leaves:


wipe leaves of areca palm

Use a damp cloth to gently wipe the leaves and remove the mineral deposits.

(2) Use Distilled Water:


Water your Areca Palm with distilled or filtered water to prevent future mineral buildup.

5. Preventive Care


(1) Proper Watering:


Water the plant when the top inch of soil is dry, and avoid overwatering.

(2) Humidity:


Maintain proper humidity levels, especially in dry conditions, by misting the plant or using a humidifier.

(3) Regular Inspection:


Check your plant regularly for early signs of pests or diseases.

Must read this article:

Fertilizer & Pruning of Areca Palm


By identifying the cause and taking appropriate action, you can restore your Areca Palm’s health and prevent future issues.

Note: 

  • Areca palm plants need bright and indirect sunlight.
  • If you have kept it at places where light is dim like stairs or corridors then, its growth would stop there only.
  • There should not be direct sunlight falling also otherwise its leaves will start turning brown.
  • Ensure proper ventilation for areca palm plants by keeping doors and windows open.

Follow our Social media channel:


1. Voice of Plant – YouTube Channel

2. Voice of Plant Facebook Page

3. Instagram Voice of Plant Channel

Happy Gardening!

rotted snake plant

How to Revive a Rotted Snake Plant? Check 7 Steps to Save Snake Plant

How to Revive a Rotted Snake Plant?


Snake plants, known for their striking appearance and low maintenance needs, are popular among houseplant enthusiasts. But like all plants, they require proper care to thrive. When neglected, they can suffer from root rot, which poses a significant threat to their health. When your Snake plant starts showing signs of distress, it’s time to act.

Snake plant

In this guide, we’ll delve into the steps and tips on how to revive a rotted snake plant, ensuring it returns to its former glory.

Signs of a Rotted Snake Plant


How to Revive a Rotted Snake Plant?
Rotted Snake Plant

Root rot is a common issue for many houseplants, and snake plants are no exception. Recognizing the early signs is crucial for a successful revival. Key symptoms include:

1. Yellowing Leaves:

  • If the lower leaves are turning yellow, it could be a sign of overwatering or poor root health.

2. Soft or Mushy Stems:

  • Healthy snake plant stems are firm to the touch. Mushy or soft stems indicate rot.

3. Stunted Growth:

  • When roots are rotting, the plant struggles to absorb nutrients, leading to slowed growth.

Causes of Root Rot of Snake Plant


1.  Overwatering


The biggest reason for the root rot of Snake plant is most of the time is overwatering. 

  • Snake plants are drought-tolerant and prefer to dry out between waterings.
  • Consistently wet soil can suffocate the roots, leading to rot.

Check this- How to Avoid Overwatering in Plants

2. Poor Drainage


Using pots without drainage holes or heavy, compacted soil can cause water to pool at the roots, creating ideal conditions for rot.

3. Using Poor Soil Mix


Low-quality soil that retains too much moisture can contribute to root rot.

  • Using a well-draining soil mix is essential for preventing rot.
  • Always use sandy mixture soil.

Check this: Snake Plant Complete Care Tips

Immediate Steps to Take


1. Isolate the affected plant

The first step is to isolate the affected plant from others to prevent the potential spread of any pathogens.

2. Inspect the roots

Carefully remove the plant from its pot and inspect the roots. Healthy roots are white or light tan and firm. Rotted roots appear brown or black and mushy.

How to Revive a Rotted Snake Plant


1. Stop Watering immediately


The primary cause of root rot in snake plants is often overwatering. Therefore, it is crucial to stop watering immediately.


2. Remove infected parts


snake plant cutting

If you have a snake plant whose leaves started decaying then first of all remove all the infected parts which are rotting.

  • With clean scissors or pruning shears, trim away all the rotted roots. If necessary, remove rotted parts of the stem as well.

3. Use Fungicide or Cinnamon Powder


Spray cinnamon powder or fungicide on the cut to prevent fungi from growing.

4. Repot Your Snake Plant

Snake plant soil

Repot your Snake plant in a sandy soil mixture. Cactus or succulent soil mixes are ideal as they prevent water retention.

  • Always prefer small pots for Snake plants.

5. Keep in a direct or indirect light area


Now, keep it in any corner with a medium or bright light (not in direct sunlight).

  • Snake plants thrive in bright, indirect light.
  • However, they can also tolerate low-light conditions. Avoid placing them in direct sunlight, which can scorch the leaves.

6. Do not feed with any fertilizer or water

 At this stage, avoid giving any fertilizer and water.

7. Do not disturb for some days  


 Just keep it for some days undisturbed and it will start recovering on its own.


Preventing Future Rot 

1. Proper Watering: Allow the soil to dry out between waterings.

2. Good Drainage: Always use pots with drainage holes.

3. Soil Quality: Use well-draining soil mixes.

4. Monitoring: Regularly check the soil moisture and the overall health of your plant. Early detection of issues can prevent severe damage.

Conclusion


Reviving a rotted snake plant may seem daunting, but with the right steps, it’s entirely possible. By identifying the signs early, addressing the causes, and following a structured approach to care, you can bring your snake plant back to health.

Remember, the key lies in proper watering, good drainage, and regular monitoring. With patience and diligence, your snake plant will once again become a thriving, vibrant part of your indoor garden.


Follow our Social media channel:


1. Voice of Plant – YouTube Channel

2. Voice of Plant Facebook Page

3. Instagram Voice of Plant Channel


Happy Gardening!

Money plant care tips

Money Plant Care Tips: Complete Guide

Money Plant Care Tips


Money plants, also known as Pothos are available in so many colors and different varieties rule the world by distinct names. This plant flourishes in almost every second home.

Beautiful, shiny, big green leaves of the money plant always magnify the beauty of every garden. Its leaves are typically green and variegated and can grow to be several feet long.

A money plant is considered to be:

  • a hardy,
  • low-maintenance plant
  • that is easy to care for and
  • also purifies the air.
Money Plant Care Tips
Money plant

Some people keep money plants inside the house and some people keep these plants outside the house. If properly cared for, this plant can easily thrive in both indoor and outdoor environments.

Money plant Care tips


In this complete guide article, we will discuss:

  • best season,
  • from where to get,
  • propagation & care.
  • light requirements,
  • pot size,
  • soil mixture,
  • watering,
  • moss stick,
  • pruning and
  • fertilizer’s for money plant.

1. Best season for money plant


(i) It is a summer plant.
  • It grows best during the interval of February- October.
(ii) Monsoon is the best season for money plants.
  • During rain, both the plant and cutting of the money plant grow at a faster pace.
(iii) During winters, it slows down its growing speed.
  • Whereas, the leaves of the money plant also start turning yellow or black and should be kept in a warm place (during winter).

2. How to get a Money plant?


(i) Get it from Nursery
  • Money plants are easily available in nurseries.
  • At the nursery, it would be available in pots or in polybags.
  • Do not repot it, if it is available in the pot. Let it get settled at your place for some time.
  • If it comes in a polybag then also wait for 7-8 days for the repotting process.
  • Shift the money plant in the pot when it is out of stress.
(ii) From the Cutting


  • Money plant cutting can be borrowed from anywhere.
  • Borrowed cuttings of money plants can be used to turn into a full-fledged highly dense money plant.
  • Always take cuttings from healthy money plants.
  • Make sure the chosen branch has at least 3-4 nodes in it.
  • Money plants always grow from nodes or aerial roots, not from the leaves.


Important note:

  • Do the repotting of the money plant in the evening only.
  • While repotting, the moss stick of the money plant and the roots should not be disturbed.

3. Propagation & Care for Money plant


Indeed, you can also cultivate money plants from cuttings.

  • Taking cuttings represents a simple and efficient method for propagating money plants, allowing you to generate new plants at no cost.
  • These cuttings can be cultivated in various mediums such as water, soil, LECA balls, coco peat, sand, and more.

4. Light requirements for Money plant


  • Avoid placing money plants in strong direct sunlight.
  • Money plants thrive best in indirect light, both bright and medium.
  • You can keep money plants either indoors or outdoors, but avoid exposing them to strong sunlight.
  • Consider placing them on a roof or balcony covered by a green net or other shade.
  • It’s not recommended to frequently move the plant.
  • Allow it to settle in one place; avoid excessive relocation.

5. Pot size for Money plant


  • Ideally, an 8-10 inch-sized pot is sufficient for a money plant, but it can also thrive in smaller pots.
  • Hanging pots are another option for growing money plants.
  • Do not repot them until and unless the roots of the plant start coming out from the pot.
  • Moreover, they show some signals also if there is a need to change the pot.

5. Best soil mixture for Money plant


  • The soil should be well-drained, which means the drainage system of the soil should be very good.
  • The soil should quickly absorb water when you provide it, and it should not stagnate on the top.

6. Watering tips for Money plant


  • Money plants require humus, water, and moisture in their soil to bloom properly, whether they are kept indoors or outdoors. Its soil should not dry up.
  • Give water properly whenever it seems that the soil is getting dry and hard.
  • Spray some water on the moss stick also (if it is there).
  • Always clean the leaves of money plants by spraying some water to get rid of dust and also this process will enhance the process of photosynthesis.

watering tips to money plant

  • All the above steps will uplift the growth of the money plant.

7. Moss stick support for Money plant


  • If you want your money plant to be very dense, then first of all you need to support it.
  • You can use sticks for support like moss sticks, jute sticks, or any other stick covered with cloth.
  • Moss sticks are the most preferred and inexpensive option (easily available at all nurseries).
  • Wrap the branches of the plant across the stick keeping in mind that aerial nodes get directly in touch with sticks.

moss stick for money plants

6. Pruning of Money plant


You should prune the money plant at regular intervals to achieve a bushy and dense appearance.


  • Pruning of yellow and damaged leaves is very essential for the healthy growth of money plants.
  • Always use sharp and clean tools for pruning.
  • The more you prune it, the denser it will become.

“It is important not to over-prune your money plant, as this can slow its growth and decrease its overall health.

Pruning should be done sparingly and only when necessary.”

7. Fertilizer for Money plant


Money plants can benefit from occasional fertilization, especially during the growing season (spring to fall). Moreover, different nutrients should be provided at the gap of 20 days. To begin, use cow dung liquid fertilizer (with high NPK), and then switch to seaweed fertilizer.

  • Always remember to feed your plant with diluted fertilizer, with a higher proportion of water compared to the fertilizer.

Click here to read: 5 Tips to Care Money Plant in Winter Season

====================

It was all about the “Money Plant”.

Make your own garden!

Follow our Social media channel:

2. Voice of Plant Facebook Page

3. Instagram Voice of Plant Channel

Happy Gardening!

Fertilizer for Money Plant (Pothos)

Money plants also known as Pothos, can benefit significantly from occasional fertilization, especially during their active growing season, which typically spans from spring to fall. Proper fertilization provides them with essential nutrients to promote vigorous growth and lush foliage.

pothos money plant

In this article, we will take an in-depth look at the importance of fertilizing your money plant and provide valuable information on how to do it effectively.

Understanding the need for Fertilizer

fertilizer

Fertilizing your Money plant serves several crucial purposes:

1. Nutrient Enrichment:

  • Money plants require essential nutrients for their growth.
  • In their natural habitat, these nutrients are drawn from the soil. However, when cultivated indoors in pots, they depend on you to supply these nutrients.

2. Vigorous Growth:

  • Regular fertilization ensures your Money plant has an abundant supply of vital nutrients, promoting robust growth and lush foliage.
  • Proper nourishment can lead to more extensive vines and larger, more vibrant leaves.

money plant

3. Soil Rejuvenation:

  • Over time, the potting soil your Money plant resides in may become depleted of nutrients.
  • Fertilizing helps rejuvenate the soil, making it more conducive to sustained plant health and vitality.

4. Enhanced Aesthetic Appeal:

  • Well-fed Money plants are more likely to exhibit the attractive variegation and lushness that makes them so appealing.
  • Proper fertilization can contribute to the plant’s visual charm, making it a stunning addition to your home decor.

Choosing the Right Fertilizer

NPK fertilizer

The choice of fertilizer is crucial. It is advisable to alternate between fertilizers with different formulations to ensure your Money plant receives a balanced supply of nutrients.

  • High NPK (nitrogen, phosphorus, potassium) fertilizers are suitable choices, but also consider using micronutrient-rich options to provide a comprehensive nutrient profile.

Click here to read: Money Plant Complete Care Guide…

Maintaining the health of your Money plant can be challenging when it becomes densely vegetated, making it difficult to change the soil or add additional substrates like cocopeat.

dense money plant

  • In such situations, liquid fertilizer can serve as an effective solution, as it can be easily applied to the plant without disturbing the root system.

When to give Fertilizer to Money Plant

When it comes to fertilizing your Money plant, it is important to establish a regular schedule. Fertilizing every 25 days can be a useful guideline, but the specific timing may vary based on factors such as the type of fertilizer used, environmental conditions, and the growth rate of your plant.

Here’s a suggested schedule for fertilizing your Money plant:

1. Start with a Cow dung liquid fertilizer (with high NPK) and apply it every 25 days.

cow dung decompose
Cow dung liquid fertilizer

2. After the next 25-days interval, switch to Seaweed fertilizer to provide additional micronutrients.

seaweed liquid fertilizer
Seaweed liquid fertilizer

3. Follow this sequence with Mustard cake fertilizer, also at 25-day intervals.

Important note:

  • Avoid using mustard cake fertilizer in extreme temperature, during hot weather. 
mustard cake liquid fertilizer

4. Subsequently, use Epsom salt as a magnesium source, followed by neem cake fertilizer, and continue with other nutrient sources in a similar pattern.

epsom salt
Epsom salt

Important note:

  • When applying fertilizer, remember to dilute it properly by using more water and less fertilizer in the mixture.
  • This helps prevent over-fertilization, which can lead to issues such as yellowing leaves and stunted growth.

Reduce fertilizer during winter season

pothos money plant

One important thing to note is that money plant growth slows down during the winter months.

  • As a result, it is advisable to reduce or even stop fertilization during this period to avoid overstimulating the plant when it is not actively growing.

Avoid using strong liquid fertilizers

watering tips to money plant

Lastly, avoid using strong liquid fertilizers, as they can potentially harm your Money plant.

  • Over-fertilization should always be avoided, as it can lead to a range of problems, including yellowing leaves, stunted growth, and other issues.

In summary, the key to giving fertilizer to the money plant is to keep it simple, provide balanced nutrients during the growing season, and reduce or eliminate fertilization during the winter months. It is essential to monitor your plant’s condition and adjust your care routine as needed.

Happy Gardening!

top 6 less water requirements plants (2)

06 Best Plants That Need Less Water

Welcome to the world of low-maintenance greenery! In this article, we will explore a great range of plants that do not require a lot of water. Whether you’re a seasoned plant lover or just starting your indoor garden, these plants are the perfect companion.

From the sturdy snake plant to the stylish jade plant, let’s discover the top 06 plants that thrive on less water, making them ideal for those who want lush, vibrant greenery without the constant watering routine.

Here is the list of 06 best plants that need less water

1. Snake Plant

2. ZZ Plant

3. Echeveria

4. Aloe Vera

5. Cactus

6. Jade Plant

06 Best Plants That Need Less Water

1. Snake Plant

snake plant

Snake plant is one of the best and hardy indoor plant which requires less water. The Snake plant, being a succulent, has unique needs compared to other plants.

watering snake plant

  • With moisture is already stored in its leaves, frequent watering is not necessary.
  • Watering every 15 to 20 days, when the soil appears completely dry, is sufficient.
  • The primary factors leading to the plant’s failure are either overwatering or underwatering.

Snake Plants is a great option for those people who may forget to water their plants regularly.

Special feature

  • The Snake plant can grow well even in low light conditions and is also known for its air-purifying properties.

2. ZZ Plant

zz plant

The ZZ Plant is a popular indoor plant known for its resilience and low-maintenance care requirements.

ZZ plant green

The ZZ plant has thick rhizomes that store water, which helps the plant stay healthy even if you forget to water it for a week. 

  • When it comes to watering, it is important to let the soil dry out completely.
  • As overwatering can lead to root rot.
  • Generally, a thorough watering every 2-3 weeks is sufficient.
  • Reduce watering frequency during the winter months or if the plant is placed in low-light conditions.

As a result, the ZZ Plant is an excellent choice for busy working professionals or those who travel most of the time. 

Special feature

  • The ZZ plant grows well in low to bright indirect light and is also known for its air-purifying qualities which can be kept inside the bedroom also.

3. Echeveria

Echeveria

Echeveria is indeed a low-maintenance plant, known for its striking rosette-shaped leaves and resilience.

Echeveria

Echeverias are succulents, and like many succulent plants, they have low water requirements. Give water in the gap of  15 to 20 days.

  • Before watering to this plant, allow the soil to dry out completely to prevent overwatering, which can lead to root rot.
  • Water sparingly, and ensure that the pot has good drainage to prevent waterlogged soil.

Key to successful Echeveria care is a well-draining soil mix, proper watering practices, and providing adequate light.

Special feature

  • Echeverias thrive in bright, indirect light. Like all plants, they can help improve air quality by absorbing carbon dioxide and releasing oxygen.

4. Aloe Vera

Aloe-Vera-Plants

Aloe Vera is a versatile and easy-to-care-for succulent with not only cosmetic and medicinal uses but also some positive effects on indoor air quality.

  • Aloe Vera’s water requirements are minimal; if kept indoors, watering once or twice a month will suffice.
  • Overwatering can lead to root rot, so it’s crucial to let the soil dry before adding more water.

Slice Aloe Vera very useful herbal medicine for skin and hair.

Special feature

  • Aloe Vera, not just a pretty face, is also a medicinal powerhouse. The gel derived from its leaves provides instant relief when applied to burnt areas.

5. Cactus

cactus

Cacti are fascinating and resilient plants with unique adaptations that make them well-suited for arid environments.

cactus

Cacti are adapted to store water in their thick stems, allowing them to survive extended periods (1 month) without rainfall. Cacti prefer infrequent but deep watering.

  • Allow the soil to dry out completely between waterings.
  • Overwatering is a common issue, so it’s crucial to err on the side of underwatering.
  • Avoid overwatering, especially during dormant periods, to prevent root rot.
  • Rotate indoor cacti periodically to ensure even exposure to sunlight.

Special feature

Unlike most plants, cacti carry out photosynthesis at night to minimize water loss during the day, a feature known as Crassulacean Acid Metabolism (CAM).

  • While many cacti are outdoor plants, some smaller varieties can adapt to indoor conditions with bright, indirect light.

6. Jade Plant

Jade plant

Jade plant popularly known as “lucky plant” and is cherished for its attractive, fleshy green leaves and its reputation for bringing good fortune.

watering a jade plant

Jade plants, being succulents, have lower water requirements. Give water in the gap of 7 to 10 days.

  • If you touch the soil and it feels damp, then the plant does not require additional watering.

  • Conversely, if you observe the leaves wilting, it signals that your plant is not getting enough water.
  • In such instances, water the plant when the topsoil has completely dried out.
  • During winter seasons, Jade plants require less water than usual, so always check the soil before deciding to water.

Special feature

  • Jade Plants thrive in bright, indirect light. While they can tolerate some direct sunlight also. 

———————————-

Also read:

Best Indoor Air Purifier Plants

Embrace the beauty of low-maintenance plants that thrive with minimal water, allowing you to indulge in the joy of gardening effortlessly while balancing your work. These resilient plants not only bring greenery into your space but also add a touch of nature’s tranquility to your busy life.

Happy reading!

Top 10 Air Purifying Indoor Plants

Air pollution have significant impacts on health, leading to various issues such as burning eyes and a sore throat. These health concerns are particularly prevalent among vulnerable populations, including senior citizens and individuals with pre-existing conditions like asthma.

The younger population also grapples with severe problems caused by air pollution. This is a major issue that needs attention because the health of every individual is a priority.

indoor plants

“Nature indeed provides solutions to many of our challenges, and indoor plants serve as natural air purifiers.”

While man-made air purifiers are widely used nowadays in various settings such as offices, schools, and homes.

“Did you know that there are plants that absorb toxic gases and chemicals, contributing to the purification of the surrounding air?”

all plants indoor

Also, they can be conveniently placed in various locations, including inside the house, bedroom, kitchen, or study table.

Embarking on the exploration of indoor plants with air-purifying qualities, let’s delve into the study.

Top 10 Air Purifying Indoor Plants

  • AGLAONEMA
  • SYNGONIUM
  • RUBBER PLANT
  • GOLDEN POTHOS
  • SPIDER PLANT
  • PEACE LILY
  • ALOE VERA
  • ARECA PALM
  • ZZ
  • SNAKE PLANT

10. AGLAONEMA

aglaonema

AGLAONEMA, commonly known as Lipstick or Chinese Evergreen, is known for air-purifying plant not only cleanses the air but also adds a magical burst of colour to your home.

AGLAONEMA

Colours:

  • Available in various varieties and colours such as red, green, pink, pale silver green, etc. 

Light requirement

  • Indoors, position it in bright or medium sunlight; while it may not bloom indoors but it will still thrive well.
  • When exposed to sunlight, it produces delightful white flowers.

AGLAONEMA

  • Ensure well-drained soil, preventing water from stagnating. 

Pot size

  • Ideal for small spaces, it fits perfectly in a 4-8 inch pot.
  • Place it on a study table, above the fridge, near a window, or on centre tables.

AGLAONEMA

Watering tips

  • Water your aglaonema plant when the upper inch of soil becomes dry.
  • The leaves will show signs of wilting when the plant is in need of water.
  • Ensure thorough watering until water starts draining from the pot’s drainage holes, but be cautious to avoid overwatering.

This tender plant symbolizes peace, vibrancy, elegance, and love.

9. SYNGONIUM

Syngonium

Another popular and hassle-free air-purifying plant trending nowadays is the Syngonium.

Colours

  • Available in various varieties such as green, white, yellow, black, and baby pink

SYNGONIUM

  • This climber can be easily propagated by placing cuttings in water or regular pots and is suitable for hanging pots as well.

SYNGONIUM

Light requirement

  • This resilient plant thrives in bright, medium or low light conditions.
  • In low light, it may become leggy, but it will endure and survive.

Watering tips

  • Give water whenever it is needed.
  • Do not overwater. 

Syngonium wins all the races of coming first on its own without much care, it will grow on its own and will purify the air at a remarkable level.

8. RUBBER PLANT

rubber plant

Rubber plant plays a significant role in air purification, effectively removing toxic gases and chemicals from its surroundings.

Colours:

  • It is available in various colours and varieties such as  light green, dark green, gray, pink, and  variegated.

rubber plant golden

  • It features a single stem with wide, unique, shiny, and smooth leaves continually emerging.

Pot size

  • Given its characteristic to grow large, it’s advisable to choose an 8-10 inch pot.
  • Suitable for placement beside sofas, fridges or in any corner.

Watering tips

  • Water it when the soil has dried up.

Light requirement

  • Although it is typically an outdoor plant, it adapts well to indoor settings with medium, indirect, or bright light.
  • During winters, when pollution and dew levels rise, it’s recommended to keep this plant indoors.

rubber plant

 With its shiny and polished leaves, this plant exudes a classy charm.

7. GOLDEN POTHOS (Money Plant)

pothos money plant

It is a money plant variant which is light in colour, reflecting shades of golden or light green. Its leaves are comparatively smaller in size but grows at a high pace in comparison to other plants like areca palm or ZZ plant.

  • Money plant (Pothos) is an excellent air purifying plant which can be kept inside the bedroom also.

“The money plant also secures the top position among the top 10 air-purifying indoor plants.”

Pot size:

  • There is no need to keep it in a very big pot.
  • Small and medium size pot is sufficient for it, when it becomes dense, trim it but do not change the pot.

Light requirement

  • Bright or medium light conditions suit it well.

Watering tips

  • It will thrive well in less water but if over watering then leaves will start turning yellow and the plant will deteriorate so water it when the soil is completely dry.

Read complete article on:

Money Plant Care Tips

6. SPIDER PLANT

spider plant

This distinctive plant earns its name, “Spider,” due to its unique spider-like spread. However, it has no connection to inviting actual spiders into your home.

  • Ranked among the best indoor plants, it’s perfect for bedrooms, contributing to air purification and a fresh atmosphere.

Colours:

  • Spider plants are available in various colors, including green and variegated varieties with white or cream stripes on the leaves

Pot size:

  • A small to medium-sized pot suffices, larger pots are unnecessary.
  • Versatile in placement, it can adorn the top of the fridge, dining table, office desk or centre table.

Light requirement

  • Thriving in both bright and medium light, it adapts well to various lighting conditions.

Watering tips

    • Spider plants prefer moderate watering.
    • Allow the top inch of the soil to dry before watering again.
    • Keep an eye on the leaves. If they start to droop, it’s a sign that the plant needs water.

This petite plant spreads positive vibes with its extended wings.

5. PEACE LILY

peace-lilies

Meet the Peace Lily, a renowned air-purifying flowering indoor plant that excels at absorbing various toxic gases and harmful chemicals in its surroundings.

Light requirement

  • It blossoms beautifully when placed outside in direct sunlight, but it tends to forgo flowering when kept in bright or medium light, although it still thrives.

peace lily

Pot size:

  • Possessing small stems and large leaves, this plant is suitable for small to medium-sized pots. However, if planted in the ground, it can grow into a sizable plant with increased height.

Watering tips

  • Water only when the soil is completely dry.
  • To check, insert a stick into the soil; if it comes out dry, it’s time to water.
  • It is crucial to avoid both overwatering plus underwatering, as the plant can weaken and show signs of distress, such as bending leaves due to lack of water.

peace lily black leaves

The Peace Lily may be a bit demanding, but with proper attention, it adds a touch of elegance to any indoor space.

4. ALOE VERA

Aloe-Vera-Plants

Introducing the Aloe Vera, a highly acclaimed succulent and xerophytic plant renowned for its air-purifying abilities and unique feature of releasing oxygen during the night.

  • This hardy outdoor plant seamlessly adapts to various environments, including bedrooms, making it a versatile choice.
  • During periods of increased pollution, it can even be brought indoors to contribute to air purification.

Slice Aloe Vera very useful herbal medicine for skin and hair.

Medicinal benefits

  • Aloe Vera, not just a pretty face, is also a medicinal powerhouse. The gel derived from its leaves provides instant relief when applied to burnt areas.

Light requirement

  • This resilient plant thrives in bright, direct, medium, or low light—just steer clear of dark areas.

Watering tips

  • Aloe Vera’s water requirements are minimal; if kept indoors, watering once or twice a month will suffice.

Read article on:

1. Aloe Vera Plant Care

2. Aloe Vera Care: Pest Attack and Black Spot

Known for its durability and cost-effectiveness, Aloe Vera stands as a low-maintenance plant with a multitude of benefits, making it a valuable addition to any space.

3. ARECA PALM

areca palm

  • Meet the Areca Palm, a widely acclaimed and stunning indoor plant celebrated for its air-purifying qualities.
  • Its aesthetic allure makes it an irresistible addition to any home, enhancing the decor with its impressive size that effortlessly fits into any corner.

“Areca Palm also claims the top position among the top 10 air-purifying indoor plants.”

Light requirement

  • To ensure optimal growth, place the Areca Palm in bright light, avoiding direct sunlight.

Watering tips

  • Watering is a breeze—simply moisten the soil when the top layer is dry.

areca palm

Pot size:

  • Choose a pot that is 10-12 inches in size to accommodate its dimensions, although smaller options are also available for study tables.

  • This plant craves ventilation, so strategically position it near windows or doors to allow a constant influx of fresh air.

Read article on: 

Areca Palm Care Tips

While the Areca Palm may seem straightforward but it does require some specific care and attention to thrive. Embrace the opportunity to care for this elegant green companion in your home.

Also, read

Areca Palm: Fertilizer & Pruning

2. ZZ (ZAMIOCULCAS ZAMIIFOLIA) PLANT

zz plant

Meet the ZZ Plant, a delightful and embracing green companion that not only boosts oxygen supply but also cleanses the air by removing toxic elements. With its shiny and glossy leaves, this plant effortlessly brings a touch of greenery to any space.

  • The ZZ Plant comes in two varieties: green and black, offering options to suit different preferences.

black zz plant

Light requirement

  • It thrives in bright or medium light, contributing to its overall resilience.

Watering tips

  • When it comes to watering, less is more—give it a good soak, then let it be.
  • Excessive watering can lead to the rotting of its bulbs which are potato- like structures.
  • If it begins to rot, it can result in the deterioration of the entire plant.

Pot size:

  • This hardy plant doesn’t appreciate unnecessary pot shifting.
  • A standard guideline is to use a pot that is 1-2 inches larger in diameter than the current one.

Read article on:

ZZ Plant Care Tips

The ZZ Plant is a testament to resilience, master the art of watering and it will flourish in all conditions, becoming a constant source of green vibrancy in your surroundings.

1. SNAKE PLANT

snake plant

Also known as Sansevieria or the mother-in-law plant, the Snake Plant earns its name from its distinctive structure.

  • The snake plant takes the top spot among the top 10 air-purifying indoor plants.

Colours:

  • Snake plants are commonly available in various shades of green.
  • While the traditional variety exhibits dark green leaves with yellow borders, there are cultivars with different patterns and shades, such as lighter greens or variations in leaf margins.

snake plant

Pot size:

  • Snake Plants flourish in small pots, as their roots spread well in small pots, producing frequent pups and creating a dense appearance.
  • When the need for shifting arises, opt for a slightly larger pot only.

Light requirement:

  • These resilient plants can thrive in bright, medium, or low light, but for optimal results, place them in a bright area.

Watering tips

  • Exercise patience with watering—when you feel it’s time, wait an additional 2 days before providing water.

sansevieria snake plant

  • Excessive watering can lead to plant rot.
  • As succulents, establish a watering interval, ideally once every 10 days.

Read article on:

Snake Plant Complete Care Guide

The Snake Plant stands as a robust survivor, radiating positive vibes in any condition, making it a resilient and charming addition to your space.

snake plant

These top 10 air purifying indoor plants excel at air purification and can be placed throughout your home, creating a pollution-free environment. Plant them, nurture them, and they will take care of you in return.

Also, read:

All about Indoor Plants

Happy Gardening!

How to Grow and Care for ZZ Indoor Plants

ZZ plants, scientifically known as Zamioculcas zamiifolia are known for their resilience and ability to thrive in low-light conditions. They are considered perennial indoor plants and are well-suited for various locations within a home. They are recognized for their low-maintenance characteristics and are often used as decorative elements. Understanding the specific needs of ZZ plants is essential for their successful growth.

zz plant

In this article, we will discuss key steps on how to grow and care for ZZ plants at home.

ZZ plants known for Air-purifying qualities

zz plant indoor

ZZ plants are recognized for their air-purifying qualities and ability to contribute to oxygen levels in indoor environments. These plants are often included in lists of air-purifying houseplants because they can help remove certain toxins from the air and enhance indoor air quality. 

Preferred Season and Temperature

zz plant

ZZ plants thrive in typical summer conditions and can prosper year-round in regions without harsh winters.

  • During winter, they may face challenges such as yellowing leaves and occasional branch loss. However, they generally remain manageable and tend to recover independently once the weather shifts.
  • The optimal season for their growth is spring, with an ideal temperature range of 15-25°C.

Types of ZZ plant

ZZ plants come in two varieties: Green ZZ and Black ZZ.

black zz plant

  • Mature black ZZ plants feature leaves with a blackish hue, while their smaller leaves initially exhibit a green color.

green zz plant

  • On the other hand, green ZZ plants maintain their characteristic green leaves throughout their growth.

How to Get ZZ Plant

From Nursery
Green ZZ plants are readily available at all nurseries, while black ZZ plants can be found at select renowned nurseries. They are also easily accessible online, though prices may be comparatively higher.

  • A medium-sized ZZ plant typically costs between Rs 150-200, and prices increase with the size of the plant.

Propagation Methods

➢ By bulbs
ZZ plants propagate through bulbs in their roots.

  • By carefully separating a healthy ZZ plant from its dense growth, you can collect a ZZ plant along with its bulb and nurture a new plant using this method.

➢ By stem
ZZ plants can also be grown from stem cuttings.

  • Simply place cut pieces of the stem into the soil, and you can cultivate a new plant from these cuttings.

➢ By leaves
ZZ plants can be propagated through leaves as well.

  • By placing the leaves in the soil mixture, a new plant will emerge after some time.

Preferred Pots for ZZ plants

1. ZZ plant can thrive in the same pot for years

ZZ plants thrive when their roots are tightly bound, this condition encourages robust leaf growth. However, they are not fond of frequent pot changes or relocations. Once comfortably settled, a ZZ plant can thrive in the same pot for years.

Note:

  • When obtained from a nursery, it is recommended to refrain from repotting the plant for a minimum of three months after purchase.

2.Versatile pot types
ZZ plants are versatile in terms of pot types—they can be grown in ceramic, clay, plastic, soil, cement, or metal pots.

  • The choice of pot material depends on the plant’s placement; for decorative purposes, ceramic pots are a great option. However, it’s recommended to avoid using grow bags.

3. Repotting Guidelines
When repotting, always choose a pot that is 1 or 2 sizes larger than the current one.

  • Going beyond that size increase is not advisable for the well-being of the ZZ plant.

Sunlight and Location for ZZ plants

The ZZ plant does not thrive in direct sunlight or exposure to rainwater, as its leaves are prone to drying out in heat.

  • To ensure its well-being, it is recommended to keep the ZZ plant indoors, away from direct sunlight and rain exposure.
  • Choose a location inside the home with bright, medium, or low light for the optimal growth of the plant. Despite being a slow-growing plant, it flourishes best in an area with bright light.

Read article on:

Different Lighting Areas for Plants

Watering tips for ZZ plants

Moisture Retention:

The bulbs of ZZ plants are adept at retaining moisture, making them well-suited for minimal watering. Typically kept indoors away from direct sunlight, the soil tends to stay wet for extended periods.

Check soil condition before watering to ZZ plant

To gauge the need for watering, insert a stick into the soil, reaching the bottom where the bulbs are located. If the soil is dry at that depth, move the plant outdoors and water it generously until drainage occurs from the bottom hole.

After-Watering Care:

After watering, spray water on the leaves and ensure they are thoroughly cleaned.

  • Once water stops draining from the bottom hole and the leaves have dried (usually after 2-3 hours), relocate the plant back indoors. This careful watering routine contributes to maintaining the ZZ plant’s health and well-being.

Importance of Careful Watering:

Careful watering is crucial for ZZ plants due to their delicate bulbs, which can be adversely affected if not handled with care.

  • Overwatering may lead to bulb melting or rotting, with the plant showing signs such as yellowing leaves and drooping stems. If these indications are observed, a thorough inspection is essential.

Dealing with Bulb Rot:

If bulb rot is detected, remove the ZZ plant from its pot and examine the bulbs.

  • Any rotted bulbs should be removed, cleaned, and surrounded with soil or coco peat to enhance soil dryness.
  • It is important to note that the rotting of one bulb can impact others. After thorough cleaning, repot the plant with a well-balanced soil mixture to ensure continued health.

Resilience to Underwatering:

ZZ plants are resilient to underwatering, but caution must be exercised to avoid overwatering.

  • Determining the frequency of watering can be challenging due to varying weather conditions across regions.
  • As a general guideline, individuals in North India often check every 20 days by inserting a stick into the soil to assess its moisture content.

“Watering is recommended when the soil is completely dry at the bottom of the pot, creating a balanced and suitable environment for the ZZ plant.”

How to prepare Soil mixture for ZZ plant

1. Collect local garden soil:

  • Begin by collecting local garden soil for the ZZ plant. Ensure the soil is clean by removing any debris or glass pieces.

2. Add Compost in the soil

  • For a well-balanced soil mix, add compost which should be half the amount of soil.
    You can choose from various compost options such as vermicompost, kitchen compost, cow dung compost, or leaf compost.

3. Add Sand in the soil

  • Include construction sand in approximately ¾ of the compost quantity.
  • Adding sand to the soil promotes good drainage.

4. Add cocopeat in the soil

  • To further enhance the soil mixture, consider adding a small amount of cocopeat.
  • Coco peat is effective in retaining water. It has excellent water-holding capacity, helping the soil stay moist for a longer time.
  • However, in regions where temperatures are not excessively high, cocopeat can be omitted.

5. Optionally, add perlite and vermiculite in small quantities.

Mix all the ingredients thoroughly, and your ZZ plant’s soil is ready for use.

———————-

If you like this article, kindly leave a comment and consider sharing it with your friends. Your support is greatly appreciated!

Happy Gardening!