Category Archives: Basic Gardening

If you’re new to gardening or want to learn more, this is the perfect place to get tips on caring for plants, growing seeds, watering, soil mix, using fertilizers, pruning, and more.

flowers

Spring Gardening 10 Important Tasks

Spring Gardening 10 Important Tasks


The spring season plays a vital role in gardening, serving as a period of rejuvenation for plants that may have become weak or withered during the winter months.

It is a time for plants to recover from dormancy and prepare for the upcoming summer season. Additionally, spring marks the beginning of essential preparations for summer gardening. Basically, it is an important time in gardening for carrying out multiple tasks which are foundations for next year for the plants.

Spring Gardening 10 Important Tasks

Spring Gardening 10 Important Tasks


Important tasks to undertake in Spring season


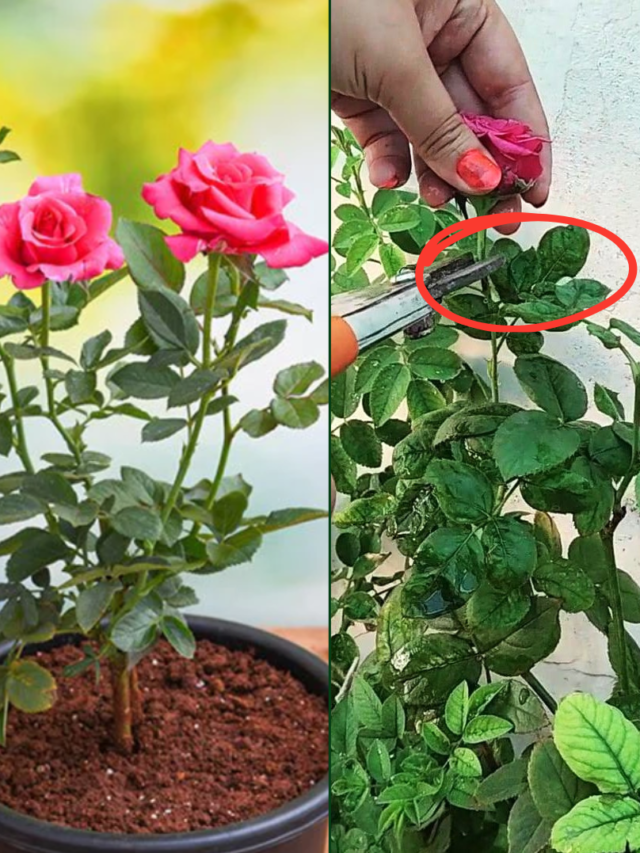
1. Identifying the Correct Time for Pruning


One crucial aspect of spring gardening is determining the right time for hard pruning and root pruning, which is not always straightforward.

pruning of plants

While February is commonly associated with spring, it can vary depending on the yearly cycle and geographical location. To identify the optimal timing for these pruning tasks, gardeners should:

(i) Assess Plant Condition:

  • Look for signs such as the emergence of new leaves, buds, and shoots.

(ii) Observe Weather Patterns:

  • Note when temperatures begin to rise, signaling the transition to warmer weather and reduced need for heavy clothing.

These indicators signify the ideal time for hard pruning, as it’s generally avoided during the summer months. By following these guidelines, gardeners can ensure their plants receive the necessary care and preparation for the months ahead.

Must read:

What is Hard Pruning?

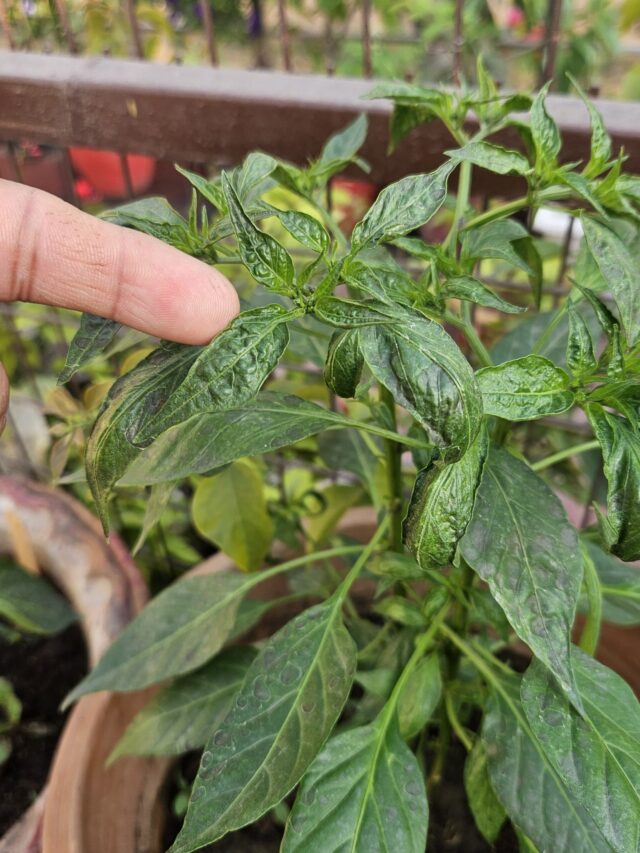
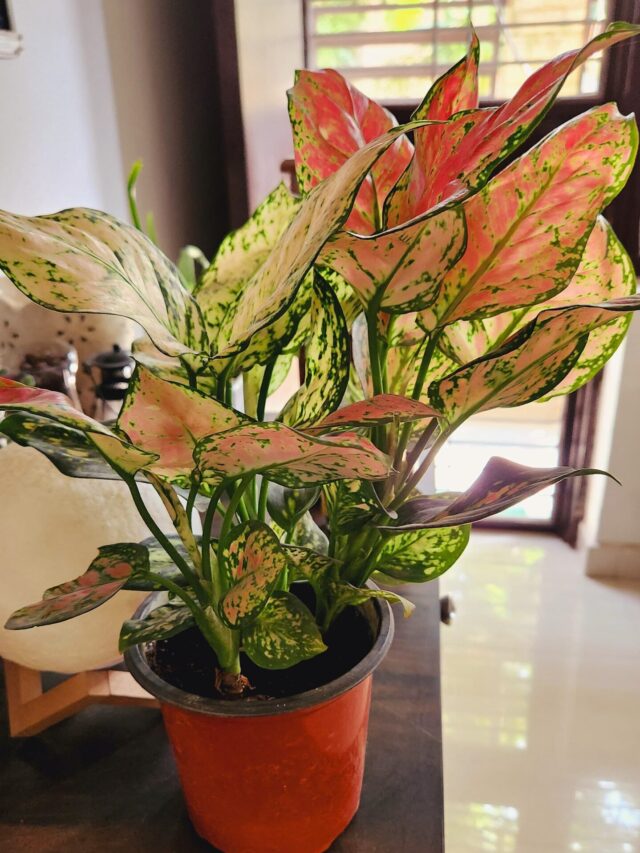
2. Winter Plants Inspection:


Inspect all winter plants to assess their condition.

  • Any plants that are thriving should be left undisturbed.
  •  While those that have withered or become damaged should be removed.

3. Soil Collection from Pots:


Gather any loose or leftover soil from the garden, ensuring it is cleaned thoroughly. Then, sift the soil through a sieve to remove any debris or impurities.

  • Finally, expose the soil to sunlight to ensure it is dry and ready for use in various gardening activities such as repotting plants or sowing seeds.

Must read:

How to Make Soil Mixture for Summer Plants

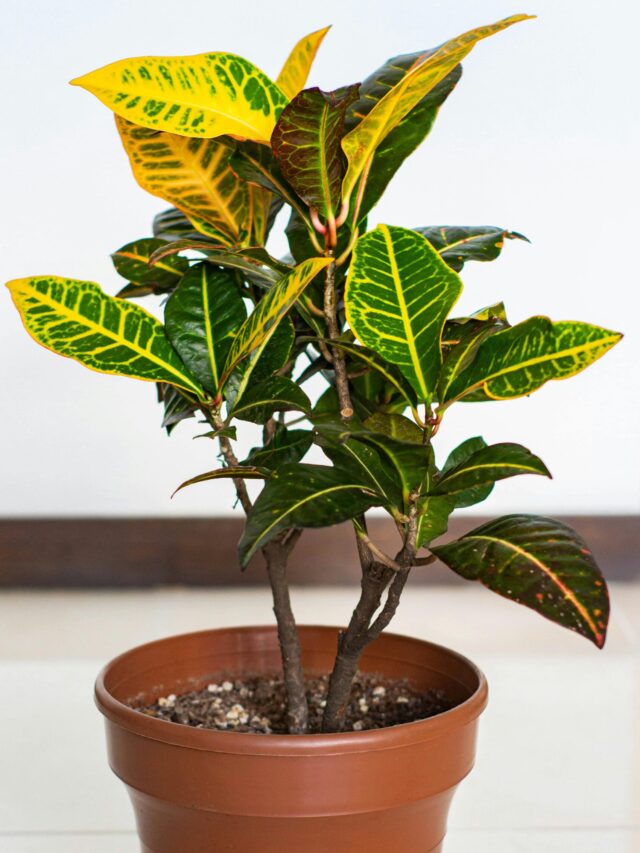
4. Summer Plants Monitoring:


Monitor each summer plant individually during the spring season and assess their condition. Treat each plant according to its specific needs:

  • some plants may be in excellent condition and require no treatment,
  • others may only need mild pruning, such as the removal of damaged leaves,
  • certain plants might benefit from repotting,
  • there could be instances where hard pruning is necessary,
  • some plants may require both root pruning and repotting.

Carefully assess each summer plant, addressing its specific needs accordingly.

5. Adding Compost after Tilling:


If your plant is thriving and does not require any treatment, start by removing any excess grass or weeds from the soil.

  • Then, make sure to till the soil thoroughly and mix in compost, such as vermicompost or kitchen compost, to boost nutrient levels and enhance soil health.

Adding compost is crucial regardless of whether you perform other tasks like hard pruning, root pruning, or repotting.

6. Seed Collection from Garden:


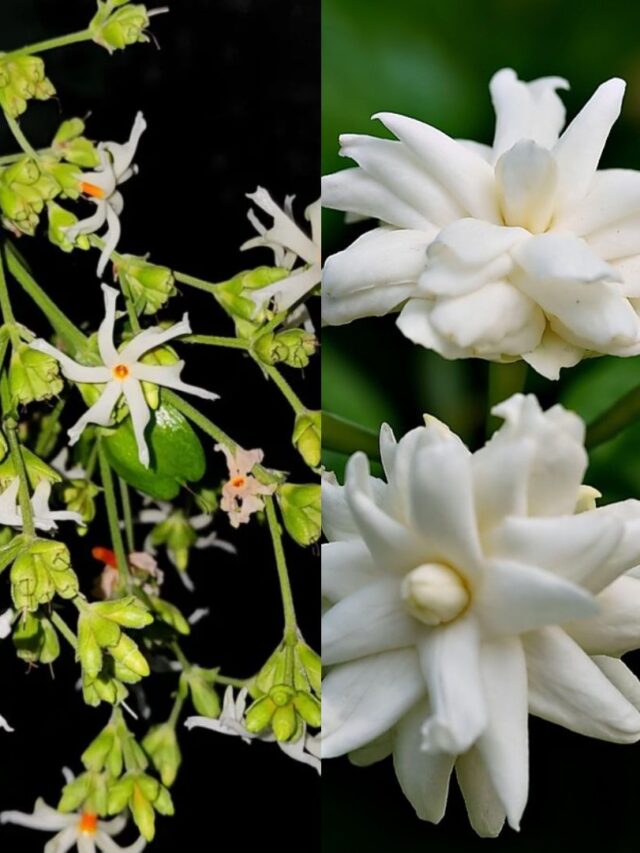
Collect seeds from different plants in the garden, including Night Jasmine (Harshringar), vegetables, and flowering plants such as Vinca, Clitoria (Aprajita), etc.

  • Wait until the seeds have fully dried and turned a toasted, brown color before gathering them. These dry seeds are ready to be sown for planting in the next season.

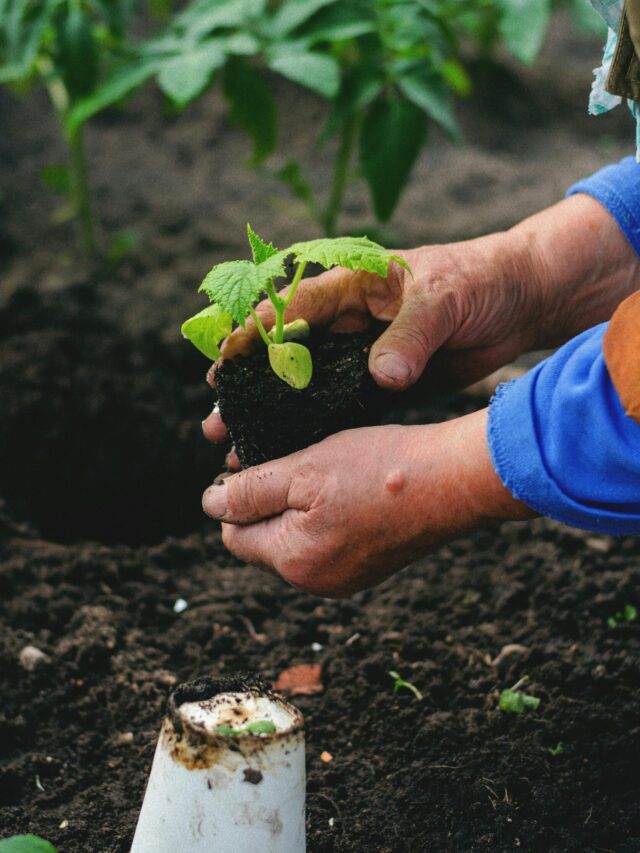
7. Sowing Time for Summer Plant Seeds/Bulbs:


Now is the perfect time to sow seeds and bulbs for summer plants.

seedling tray

  • While it is possible to sow them later, the resulting seedlings might struggle to stand properly, leading to bending and weakness, and even death.
  • Seeds of flowering, fruiting, and vegetable plants can be sown during this period.

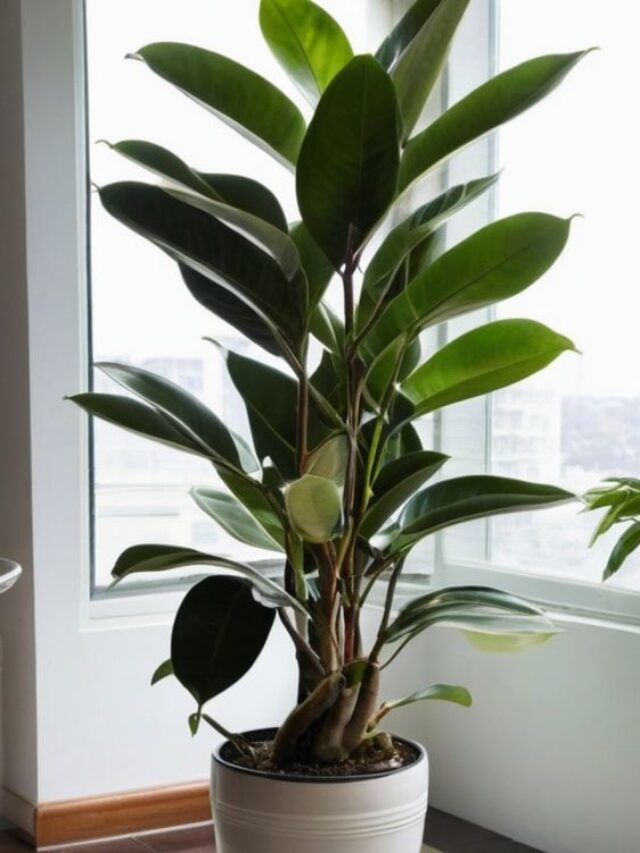
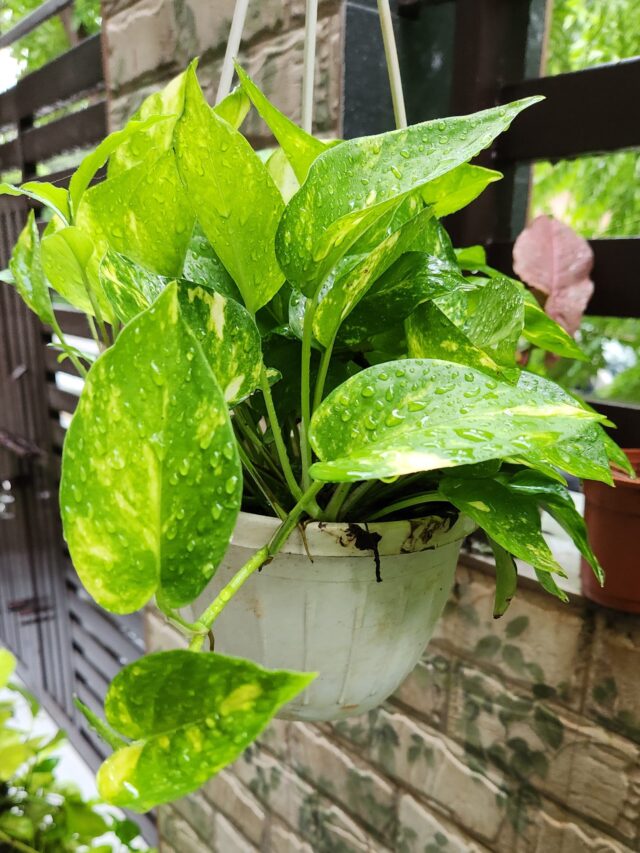
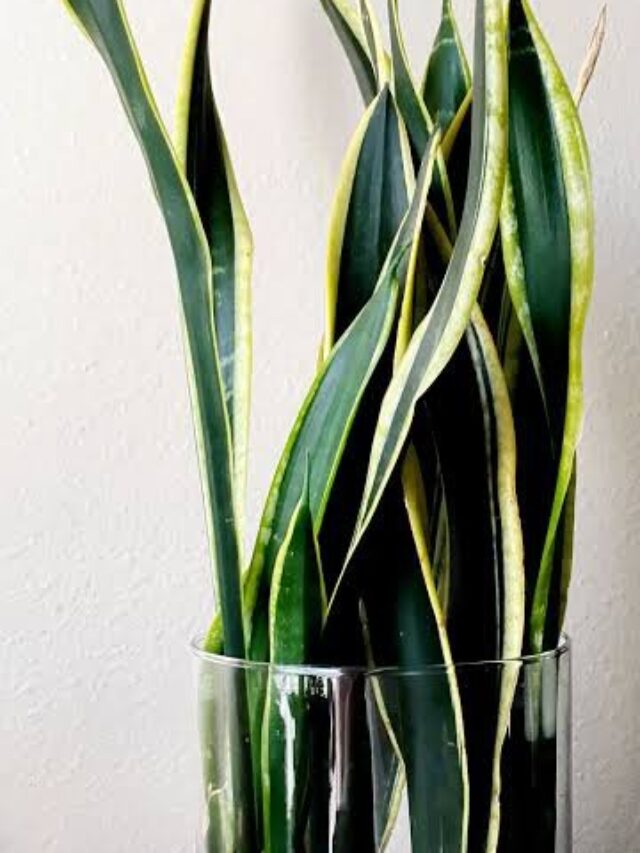
8. Propagation through Roots and Cuttings:


Now is the perfect time to propagate plants from cuttings, as dividing plants into cuttings and planting them results in multiple new plants.

  • Species like aloe vera, snake plants, money plants, and many others can be propagated through cuttings.
  • Glass bottles are commonly used as containers for growing plants from cuttings, and various mediums such as sand, water, or clay balls are suitable for planting the cuttings.

Spring season offers an ideal opportunity to propagate plants through cuttings.

9. Garden Layout Design:


Designing your garden layout involves:

1. Sunlight & Space: Place sun-loving plants in sunny spots and shade-loving ones in shaded areas. Group plants with similar light needs together to optimize space.

2. Plant Selection: Choose plants that match your preferences, climate, and soil type. 

3. Compact & Climbers: Opt for compact plants in small spaces and use climbers to maximize vertical space. 

4. Seasonal Planning: Map out areas for both summer and winter plants, considering sunlight, temperature, and growth requirements.

By considering these factors, you can create a visually appealing and well-utilized garden space.

10. Initializing the process of composting


During winters, the composting process slows down, while in summers, compost can be generated at a faster pace. Therefore, it is advisable to commence the composting process during this season.

  • You can begin making various types of compost such as cow dung compost, kitchen waste compost, or dry leaves compost from the current season onwards.

Must read:

How to Make Kitchen Waste Compost

At last –


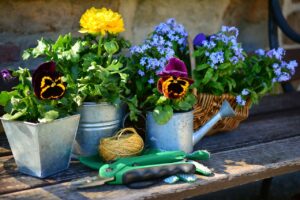
Gathering Garden Assets:


Ensure you have all necessary gardening supplies on hand by assessing your current inventory and acquiring any needed resources such as pruners, spray bottles, coco peat, sand, soil and other items.


Adhering to the dos and don’ts of the spring season can significantly enhance your gardening experience. By following these guidelines, you can effectively nurture and beautify your garden. 

Follow our Social media channel:

1. Voice of Plant – YouTube Channel

2. Voice of Plant Facebook Page

3. Instagram Voice of Plant Channel

Happy gardening!!

Which Fertilizer Is Best for Flowering

Which Fertilizer Is Best for Flowering? Banana Peel vs Onion Peel Fertilizer

 Which Fertilizer Is Best for Flowering?


When it comes to flowering plants, providing the right nutrients can make all the difference between a garden full of vibrant blooms or one that struggles to thrive. Organic fertilizers, like banana peel and onion peel fertilizers, have gained popularity among gardeners for their cost-effectiveness and eco-friendliness.

But which one is better for encouraging flowers to bloom? In this article, we’ll dive deep into the benefits, preparation methods, and effectiveness of banana peel and onion peel fertilizers to help you choose the best liquid fertilizer for flowering plants.

Which Fertilizer Is Best for Flowering

Importance of Fertilizers for Flowering Plants


Flowering plants need a well-balanced supply of essential nutrients to produce blooms. Key nutrients like potassium, phosphorus, and trace minerals play vital roles in enhancing flower development, improving color, and increasing the number of blooms.

  • Without these nutrients, plants may struggle to flower or produce weak, dull blooms.

Which Fertilizer Is Best for Flowering?


Banana Peel Fertilizer


Nutrient Profile of Banana Peels

Banana peels are a treasure trove of nutrients, particularly potassium, which is crucial for flowering. They also contain phosphorus and calcium, though in smaller amounts. These nutrients support root development, strengthen stems, and boost flower production.

How Banana Peel Fertilizer Benefits Flowering Plants


Potassium in banana peels directly encourages flowering, helping plants produce more abundant and vibrant blooms. Additionally, calcium strengthens plant cell walls, reducing the risk of diseases, while phosphorus supports root health.

How to Make Banana Peel Liquid Fertilizer


Making banana peel fertilizer is simple:

  1. Gather 3–4 banana peels and chop them into small pieces.
  2. Soak the pieces in a liter of water for 24–48 hours.
  3. Strain the solution and store it in a spray bottle or watering can.
  4. Apply the liquid to the soil around your plants or spray directly onto the leaves.

Tips:

  • Use the fertilizer every 1–2 weeks for best results.
  • Dilute the solution if using it on delicate plants.
Must read this; Benefits of Banana Peel Liquid Fertilizer

Onion Peel Fertilizer


Nutrient Profile of Onion Peels


Onion peels are rich in potassium and sulfur, both of which are vital for plant health. They also contain antioxidants and other trace minerals that promote resilience against pests and diseases.

How Onion Peel Fertilizer Benefits Flowering Plants


Potassium in onion peels supports flowering and improves the overall health of the plant, while sulfur boosts enzyme production, aiding in photosynthesis and pest resistance. The antioxidants provide an additional layer of protection against environmental stress.

How to Make Onion Peel Liquid Fertilizer


To prepare onion peel fertilizer:

  1. Collect onion peels from 3–4 onions.
  2. Boil the peels in 1 liter of water for 10–15 minutes.
  3. Allow the mixture to cool, then strain the liquid into a container.
  4. Use the liquid as a soil drench or foliar spray.

Tips:

  • Apply once every two weeks.
  • Store any leftover fertilizer in a cool, dark place for up to a week.

Banana Peel Fertilizer vs. Onion Peel Fertilizer


Nutritional Comparison


While both fertilizers provide potassium, banana peels have slightly higher levels, making them more targeted for flowering.

  • Onion peels, on the other hand, offer sulfur and antioxidants, which support overall plant health and pest resistance.

Ease of Preparation


Both Banana peel fand Onion Peel Liquid fertilizer is easier to prepare, requiring only soaking. 

Effectiveness on Flowering Plants


If your primary goal is abundant, vibrant blooms, banana peel fertilizer might be the better choice.

  • However, onion peel fertilizer can complement banana peel fertilizer by strengthening the plant’s defenses and overall health.
Check this; Benefits of Onion Peel Liquid Fertilizer

Conclusion

Both banana peel and onion peel fertilizers are excellent choices for flowering plants, each offering unique benefits. Banana peel fertilizer is ideal for promoting vibrant blooms, while onion peel fertilizer enhances plant health and pest resistance.

For the best results, consider using a combination of both. By experimenting and observing your plants’ response, you’ll find the perfect formula for a thriving garden full of stunning flowers.

Follow our Social media channel:

1. Voice of Plant – YouTube Channel

2. Voice of Plant Facebook Page

3. Instagram Voice of Plant Channel

Happy Gardening !!

leaf miner

What is Leaf Miner How to control and treat Leaf Miner

What is Leaf Miner How to control and treat Leaf Miner


Leaf miners, those tiny but troublesome pests, can wreak havoc in your garden if left unaddressed. In this comprehensive guide, we will delve into the world of leaf miners, exploring their life cycle, impact on plants, and effective strategies for prevention and removal. Let’s embark on a journey to safeguard your garden from these pesky intruders.


What is Leaf Miner How to control and treat Leaf Miner


Leaf miners are insects whose larvae feed on the internal tissues of plant leaves, creating distinctive patterns or mines. These pests encompass various species, each with its unique characteristics and preferences.

Read this article to learn about What is Leaf Miner? How to control and treat Leaf Miner. Check steps to prevent leaf miner.
leaf miner on tomato leaves

Understanding the significance of leaf miners is crucial for gardeners. The damage inflicted by these pests can compromise the overall health of plants, leading to economic consequences and diminished aesthetic appeal in gardens.

Identification of Leaf Miner Infestation


Signs and Symptoms


Detecting leaf miner infestations early is essential. Look for telltale signs such as discolored or distorted leaves, and the presence of winding trails or blotches on foliage.

Affected Plants


Leaf miners are not picky eaters. They target a wide range of plants, from vegetables and ornamentals to fruit-bearing trees. Identifying the affected plants is key to implementing effective control measures.

Life Cycle of Leaf Miner


Eggs and Larvae


Leaf miners undergo a fascinating life cycle, starting with eggs laid on the undersides of leaves. The hatching larvae then burrow into the leaf tissue, feeding as they grow.

Pupae Stage


As the larvae complete their feeding phase, they enter the pupae stage within the leaf. This transformation prepares them for adulthood.

Adult Stage


The emergence of adult leaf miners signifies the completion of their life cycle. Understanding this process aids in devising timely control strategies.

Impact on Plants


Damage to Foliage


Leaf miners compromise plant health by tunneling through leaves, disrupting the normal functioning of chlorophyll and hindering photosynthesis.

Reduction in Plant Health


Repeated infestations can lead to weakened plants, making them more susceptible to other diseases and environmental stressors.

Economic Consequences


In agricultural settings, leaf miner damage can have severe economic implications, affecting crop yields and quality.

Common Types of Leaf Miners


Blotch Miners

leaf miner Blotch Miners

Blotch miners create large, irregular mines on leaves, causing significant damage.

Serpentine Miners


Serpentine Miners

Serpentine miners leave distinctive, winding trails on leaves as they feed.

Needle Miners


Needle Miners

Needle miners target coniferous trees, causing needle discoloration and loss.

Prevention Strategies


Proper Plant Care


Maintaining optimal plant health through proper watering, fertilization, and pruning is a fundamental preventive measure.

Crop Rotation


Rotating crops helps disrupt the life cycle of leaf miners, reducing the likelihood of infestations.

Natural Predators


Encourage the presence of natural predators, such as parasitic wasps and predatory beetles, to keep leaf miner populations in check.

Click here to read: Leaf Miner in Tomato Plant: Treatment & Cure

What is Leaf Miner How to control and treat Leaf Miner


Organic Control Methods


Neem Oil


Neem oil acts as a natural insecticide, disrupting the feeding and reproductive processes of leaf miners.

Beneficial Insects


Introducing beneficial insects like ladybugs can help control leaf miner populations without resorting to chemical solutions.

Chemical Control Options


Insecticides


Selecting and applying insecticides with precision is crucial for effective leaf miner control.

Systemic Treatments


Systemic treatments, such as soil-applied insecticides, provide long-lasting protection against leaf miners.

Timing of Application


Applying control measures at the right stage of the leaf miner life cycle maximizes their effectiveness.

Cultural Practices for Leaf Miner Management


Regular Pruning


Pruning affected leaves helps remove larvae and minimizes the spread of infestations.

Removing Infested Leaves


Promptly removing infested leaves prevents the further development and spread of leaf miners.

Maintaining Soil Health


Healthy soil contributes to strong plant growth, making them more resilient to leaf miner attacks.

DIY Remedies


Homemade Insecticidal Soap

A simple mixture of soap and water can be an effective and eco-friendly solution for controlling leaf miners.

Garlic Spray

Garlic’s natural insect-repelling properties make it a valuable ingredient in homemade sprays.

Sticky Traps

Placing sticky traps around affected plants captures adult leaf miners, disrupting their reproductive cycle.

Importance of Early Detection


Monitoring Techniques


Regularly inspecting leaves and using sticky traps helps detect leaf miners in their early stages.

Regular Inspection


Routine checks on your garden ensure timely identification and intervention, preventing severe infestations.

Follow our Social media channel:

1. Voice of Plant – YouTube Channel

2. Voice of Plant Facebook Page

3. Instagram Voice of Plant Channel

Happy Gardening!

How to Save Overwatering in Plants

How to Save Overwatering in Plants: How to Identify and Fix It

How to Save Overwatering in Plants

Introduction


Taking care of plants is both an art and a science, and knowing how much water your plant needs is essential. While we often think more water is better, overwatering is one of the most common mistakes plant owners make.

It’s important to recognize the signs of overwatering before it’s too late. This article will help you identify the symptoms of overwatering and offer solutions to fix the problem.

What is Overwatering?


How to Save Overwatering in Plants
Overwatering in Portulaca plant


Overwatering occurs when plants receive more water than they can absorb.

  • This leads to waterlogged soil and deprives the roots of the oxygen they need to thrive.
  • Without proper oxygen, plants can suffocate, leading to serious health problems or even death.
  • Understanding how to avoid overwatering is key to maintaining healthy, vibrant plants.


How to Save Overwatering in Plants

Key Signs of Overwatering in Plants

Yellowing Leaves


One of the earliest signs of overwatering is yellowing leaves.

  • If your plant’s leaves start turning yellow, especially the lower ones, it may be an indication that it’s getting too much water.

Wilting, Even with Wet Soil


It’s counterintuitive, but a plant that wilts despite having moist soil is likely suffering from overwatering.

  • Overwatered roots struggle to function properly, causing the plant to droop.

Mushy or Soft Stems


Plants with soft or mushy stems are often experiencing root rot, a common consequence of overwatering.

  • This typically happens when excess water creates an environment conducive to fungal growth, which attacks the roots.

Root Rot


Root rot is one of the most severe signs of overwatering.

  • When roots remain submerged in water, they become blackened and mushy, eventually dying off. This condition is dangerous and difficult to reverse if not caught early.

Dropping Leaves


Another sign of overwatering is when a plant starts dropping its leaves, especially green or new ones.

  • This occurs because the plant is stressed and struggling to maintain its health.

Stunted Growth


Plants that are overwatered often show signs of stunted growth.

  • This happens because the roots aren’t able to absorb nutrients efficiently, causing the plant’s overall growth to slow down.


How to Check for Overwatering in Plants


To determine if your plant is overwatered, check the soil moisture by sticking your finger about an inch into the soil.

  • If the soil is still wet or soggy, overwatering is likely.
  • You can also examine the plant’s pot for drainage holes, as insufficient drainage exacerbates the issue.

Differences Between Overwatering and Underwatering


It’s easy to confuse overwatering with underwatering since both can cause wilting and yellowing leaves.

  • However, in underwatering, the soil will be dry, and the plant’s leaves may appear crispy or shriveled.
  • Overwatering, on the other hand, leads to soggy soil and soft, limp leaves.

How to Fix Overwatered Plants

Stop Watering Immediately


The first step to fix an overwatered plant is to stop watering it until the soil dries out.

  • Allow the plant to recover by withholding additional water.

Improve Drainage


Ensure that your plant’s pot has drainage holes to allow excess water to escape. If it doesn’t, consider transferring your plant to a container with better drainage.

Prune Damaged Roots


If root rot has set in, you’ll need to trim away the affected roots. Remove the plant from its pot, carefully cut away the mushy, discolored roots, and replant it in fresh soil.

Repotting the Plant


If your plant’s soil is severely waterlogged, repotting might be necessary. Gently remove the plant from its current pot, shake off the wet soil, and place it in a new pot with fresh, well-draining soil.


Prevention Tips for Overwatering


To avoid overwatering, make sure you’re using the correct watering techniques. Water your plants less frequently but deeply, ensuring the soil has time to dry out between waterings. Choose the right soil type and pot with good drainage, and monitor moisture levels using a moisture meter or the finger test.

Must read: How to Water Plants Correctly


Follow our Social media channel:

2. Voice of Plant Facebook Page

3. Instagram Voice of Plant Channel

How to Make Plants Grow Faster

How to Make Plants Grow Faster: The Ultimate Guide

How to Make Plants Grow Faster


Growing plants faster is not just about luck; it’s about understanding what plants need and providing them with the right conditions to thrive.

How to Make Plants Grow Faster
Syngonium Plant

Whether you are a gardening novice or an experienced green thumb, this guide will equip you with actionable tips to speed up plant growth while keeping them healthy. Let’s dive right in!

How to Make Plants Grow Faster


Understanding Plant Growth Basics


The Science of Plant Growth


Plant growth depends on the process of photosynthesis, where plants convert sunlight, water, and carbon dioxide into energy.

Nutrient uptake from the soil complements this process by supplying essential minerals like nitrogen, phosphorus, and potassium.

  • These elements form the building blocks for healthy growth and development.

Factors Influencing Growth Rate


Several factors directly impact how quickly a plant grows:

1. Light: The right amount of sunlight fuels photosynthesis.

2. Water: Hydration is crucial for nutrient transport within plants.

3. Soil: Healthy soil provides nutrients and anchorage.

4. Temperature: Optimal warmth accelerates metabolic processes.

By mastering these fundamentals, you set the stage for faster plant growth.


1. Optimizing Soil for Faster Growth


1. Importance of Soil Quality


Healthy soil is the foundation of plant growth.

The ideal soil should be well-draining, rich in organic matter, and have a balanced pH (6.0 to 7.0 for most plants).

  • Poor-quality soil can stunt growth, even if other conditions are perfect.

2. Amending Soil with Organic Matter


Incorporating organic matter like compost, fertilizer, or aged manure into your soil enriches it with nutrients.

  • These materials also improve soil structure, making it easier for roots to penetrate and absorb nutrients.

Benefits of Adding Compost in Soil


When added to soil, compost improves its quality by providing essential nutrients and enhancing its texture.

  • The organic matter in compost undergoes decomposition, releasing nutrients like nitrogen, phosphorus, and potassium, which are vital for plant growth.
  • It also boosts the soil’s ability to retain moisture and support healthy root development.
  • Compost introduces beneficial microorganisms into the soil, such as bacteria and fungi. These microbes break down organic matter further and make nutrients more accessible to plants.
  • Compost acts like a sponge, helping the soil retain moisture.

2. Providing Adequate Watering


How Much Water Do Plants Need?


The key to successful watering lies in consistency.

  • Overwatering can suffocate roots, while underwatering deprives them of essential hydration.
  • Most plants thrive when the soil remains consistently moist but not soggy.

Tips for Efficient Watering


1. Water in the Morning: Early watering allows plants to absorb moisture before the sun evaporates it.

2. Use Drip Irrigation: This method delivers water directly to the roots, reducing waste.

3. Check Soil Moisture: Use your finger or a moisture meter to ensure you’re watering appropriately.

  • Check the soil before watering.

A thoughtful watering schedule can significantly enhance plant growth rates.

Click here to read: How to Water Plants Correctly


3. Ensuring Proper Sunlight


Understanding Light Requirements


Different plants have different sunlight needs:

Sunlight is essential for photosynthesis. Ensure your plants receive the appropriate amount:

Full Sun Plants: Require 6–8 hours of sunlight daily (e.g., Tulsi, Curry leaf, Hibiscus, Roses, Marigolds, etc).

Partial Shade Plants: Thrive in bright and indirect light or 4–6 hours of morning sunlight (e.g., Peace Lily, Money plant (pothos), ferns, Aglaonema, etc.).


4. Nutrient Boosters for Plants


Choosing the Right Fertilizer


A balanced fertilizer with equal parts nitrogen, phosphorus, and potassium (e.g., 10-10-10) can work wonders. However, some plants have specific needs—for example, flowering plants benefit from phosphorus-rich formulas.

For Outdoor Plants: Apply organic fertilizers like cow dung compost, vermicompost or any other liquid fertilizer every 15–20 days.

For Indoor Plants: Feed them less frequently, about once every 45 days.

  • Using organic options ensures sustainable growth without harming the environment.

Click here to read: Best Organic Fertilizers for Plants

5. Pruning and Maintenance


Benefits of Regular Pruning


Pruning is like giving your plants a haircut—it helps them grow stronger and look better.

  • By cutting off overgrown or damaged parts, you allow your plant to focus its energy on new growth.
  • Regular pruning promotes air circulation, prevents overcrowding, and reduces the chances of pest infestations.
  • For flowering and fruit-bearing plants, it encourages more blooms and higher yields.

Removing Dead Leaves and Stems


Dead leaves and stems not only make your plant look messy but also waste energy.

  • When these parts are removed, the plant can redirect its resources toward producing new leaves, flowers, or fruit.
  • Use sterilized pruning shears to snip away dead material, and always cut at an angle to minimize stress on the plant.

Click here to read: Pruning of Plants Complete Guide


6. Controlling Pests and Diseases


Common Plant Pests


Unwanted visitors like mealybugs, aphids, spider mites, and whiteflies can wreak havoc on your plants. These pests often feed on sap, weakening the plant and slowing its growth. Signs of infestation include yellowing leaves, holes, and sticky residue on the foliage.

Natural Pest Control Methods


You don’t need harsh chemicals to protect your plants. Try these natural solutions:

  • Neem Oil: A natural pesticide that disrupts pest lifecycles.
  • Soap Spray: Mix mild dish soap with water to suffocate small pests.

These methods are not only effective but also eco-friendly.

7. Preventing Fungal Diseases


Fungal diseases like powdery mildew and root rot can stunt plant growth. To prevent them:

  • Avoid overwatering, as excessive moisture creates a breeding ground for fungi.
  • Ensure proper air circulation around your plants by spacing them adequately.
  • Treat affected plants with a baking soda solution (1 teaspoon per gallon of water).

8. Avoiding Common Mistakes


Over-Fertilization Dangers

More fertilizer doesn’t always mean faster growth. Over-fertilizing can burn your plant’s roots and even kill it. Stick to recommended amounts, and opt for slow-release formulas to avoid overwhelming your plants.

Ignoring Plant-Specific Needs

Every plant is unique. While general tips work for most, it’s crucial to tailor care to each plant’s specific requirements.

  • For instance, succulents need well-draining soil and minimal water, while tropical plants thrive in high humidity and rich organic soil.

Conclusion

Helping plants grow faster is all about providing the right balance of light, water, nutrients, and care. By optimizing these conditions and avoiding common mistakes, you can speed up growth while ensuring your plants stay healthy and vibrant. Remember, patience and consistency are key—your plants will thank you for the effort!

Also, read: How to Grow Healthy Plants at Home


Follow our Social media channel:

1. Voice of Plant – YouTube Channel

2. Voice of Plant Facebook Page

3. Instagram Voice of Plant Channel

Happy Gardening!

How to make leaf compost at home

How to Make Leaf Compost at Home Know the Benefits of Leaf Compost in Gardening

How to Make Leaf Compost at Home

Oh! So, you are worried about garden waste such as fallen leaves cluttering your garden? Are you wondering, “What can I do with all these leaves—should I throw them away or burn them?” We get it; dried leaves scattered across your garden can make it look messy. But here’s the secret: there’s no such thing as waste in the garden!

How to Make Leaf Compost at Home
Fallen leaves in garden

Did you know these leaves can be one of the most beneficial things for your garden?

Instead of throwing or burning them, which harms the environment, you can turn them into leaf compost, a nutrient-rich treasure for your plants and soil. Leaf compost not only improves soil health but also enhances your plants’ growth naturally.

Introduction of Leaf Compost


Leaf compost is a nutrient-rich organic material derived from decomposed leaves. It’s one of the easiest and most natural ways to recycle garden waste (leaves) into a valuable organic compost for our plants. 

Leaf compost

Essentially, leaf composting transforms fallen leaves into a crumbly, dark material that resembles soil, packed with nutrients to enrich your garden.


What is Leaf Compost?


Leaf compost is created when leaves break down through natural decomposition.

Through the natural process of breakdown by microorganisms, leaves are transformed into a dark, crumbly, soil-like substance. It’s packed with nutrients like potassium, phosphorus, and trace minerals that plants love.

The beauty of leaf compost is its simplicity. It doesn’t require fancy equipment or special skills—just patience and a little effort. Plus, it’s entirely free, making it one of the most cost-effective ways to improve your garden’s soil.

So instead of disposing of leaves, why not transform them into something your garden will thank you for?

How to Make Leaf Compost at Home


If you’ve been wondering how to get started with leaf composting, don’t worry—it’s easier than you think! All it takes is a little organization, some time, and an understanding of the process. Here’s a simple step-by-step guide.

1. Collect the Leaves


Start by gathering the fallen leaves in your garden.

  • You can use a rake, a blower, or even your hands if you have a small area.
  • Make sure to remove any debris like rocks, plastic, or sticks.
  • Also, avoid leaves treated with pesticides, as they can hinder the composting process.

2. Use any bucket or container and Make holes


You can use a large container, bucket, durable poly bag, or any type of bag that suits your needs.

  • For leaf compost opt for a larger, deeper container based on the amount of waste you plan to compost. You can choose a clay pot or a plastic container (such as a bucket).

Make holes

  • Ensure there are enough holes around the container for air circulation.
  • Oxygen is vital for the decomposition process, as it supports the activity of beneficial microorganisms that break down organic material.

3. Shred the Leaves


Shredding the leaves into smaller pieces helps them break down faster.

  • You can do this by running over them with a lawnmower or using a garden shredder.
  • If you don’t have these tools, you can still compost whole leaves—it will just take a little longer.

4. Make a Layer


Once you’ve collected the leaves, it’s time to layer them properly. Layering is essential for an efficient composting process. Here’s how to do it:

1. Add a Base Layer:

Begin by adding a layer of garden soil or compost at the bottom of the container. You can use ready-made compost like vermicompost or even kitchen waste compost for this purpose.

2. Add the Leaves: Place a layer of garden leaves over the soil or compost.

This balance is essential for microbial activity, which drives the decomposition process.

3. Moisture Matters: Sprinkle some water on the leaves to maintain the right moisture level. The pile should be damp but not soaking wet.

Maintain Moisture

  • If it’s too dry, decomposition slows down; if it’s too wet, it can become smelly and compacted.

5. Cover the Container


Ensure that the container, bucket, or bag is properly covered to retain moisture and heat, which speeds up the composting process.

  • You can use a lid, cloth, or plastic sheet to cover it securely.
  • However, do not seal it completely—proper ventilation is crucial for decomposition.

6. Maintenance and Aeration


To keep the composting process active and effective, regular maintenance is necessary:

(i) Check Every 15 Days: Open the container once every two weeks to check the moisture levels. Add water if the compost feels dry.

(ii) Turn the Compost: Aerate the pile by using a pitchfork, shovel, or any long tool to turn the contents. This helps oxygen circulate, prevents odors, and accelerates the breakdown process.


Wait and Watch


With the right balance of materials, moisture, and aeration, you’ll have rich, dark, and crumbly leaf compost in a few months. If you’re using a cold composting method, it might take a bit longer—but patience pays off in the end.


Why is Leaf Compost Beneficial for Your Garden?


Leaf compost is a gardener’s best friend. It improves the health of your soil, saves money, and benefits the environment. Let’s dig a little deeper into its benefits.

1. Enriches Soil Nutrients

Packed with nutrients like potassium and magnesium, leaf compost naturally feeds your soil, promoting healthier plant growth.

2. Improves Soil Structure

It enhances soil texture by improving moisture retention, drainage, and preventing compaction, making it easier for roots to thrive.

3. Boosts Microbial Activity

Leaf compost supports beneficial microbes and earthworms, creating a fertile, thriving soil ecosystem.

4. Reduces Garden Waste

Instead of throwing away leaves, composting transforms them into a valuable resource, cutting down landfill contributions.

5. Saves Money

Leaf compost eliminates the need for expensive fertilizers or soil conditioners, offering a cost-free, sustainable alternative.

6. Eco-Friendly

Composting leaves reduces pollution, minimizes garden waste, and limits reliance on harmful synthetic fertilizers.


Where Can You Use Leaf Compost?


(i) Vegetable Gardens: Mix leaf compost with garden soil to provide essential nutrients for your veggies.

(ii) Flower Beds: Use it as mulch to keep flower beds weed-free and retain moisture.

(iii) Lawns: Spread a thin layer of leaf compost over your lawn to enrich the soil and promote healthy grass growth.

Also, read: How to make Kitchen Waste Compost at Home


Follow our Social media channel:

1. Voice of Plant – YouTube Channel

2. Voice of Plant Facebook Page

3. Instagram Voice of Plant Channel

Happy Gardening!

how to grow healthy plants at home

Gardener’s Guide: How to Grow Healthy Plants at Home: Follow 10 Tips

How to Grow Healthy Plants at Home


Whether you’re a beginner or an experienced gardener, growing healthy plants requires consistent care and attention. Growing healthy plants at home is not a difficult task. Just you need to follow these 10 simple tips to make your plant healthy throughout the season. 

How to Grow Healthy Plants at Home
Balcony garden

Here are some practical tips on “How to Grow Healthy Plants at Home”


1. Use Clay Pots for Best Results


Clay pots are an excellent choice for gardening.

  • They are porous, allowing air circulation to the roots and preventing overwatering.
  • They also help keep the soil cooler, which is beneficial for most plants.

2. Balance Watering


mid day watering

Watering is crucial, but it’s a balance:

  • Overwatering: Can lead to root rot.
  • Underwatering: Can cause plants to dry out and weaken.
  • Check the soil before watering.
  • The top layer should feel dry but not cracked.
  • Maintain a consistent watering schedule tailored to your plant’s needs.

Click here to read: How to Water Plants Correctly


3. Fertilize Regularly


Fertilizers supply essential nutrients that soil alone may lack:

For Outdoor Plants: Apply organic fertilizers like cow dung compost, vermicompost or any other liquid fertilizer every 15–20 days.

For Indoor Plants: Feed them less frequently, about once every 45 days.

  • Using organic options ensures sustainable growth without harming the environment.

Click here to read: Best Organic Fertilizers for Plants


4. Pruning and Deadheading


Pruning of CRYSANTHEMUM plant


Pruning: Remove dead or yellowing leaves to promote airflow and prevent disease.

Deadheading: Regularly remove spent flowers to encourage new blooms and improve the plant’s appearance.

Click here to read: Pruning of Plants Complete Guide


5. Use a Rich Soil Mix


Healthy plants start with healthy soil. A good mix should include:

  • Garden soil for structure.
  • Compost for nutrients.
  • Sand or cocopeat to ensure the soil is porous and drains well.

A well-draining soil mix prevents water stagnation while retaining adequate moisture for roots.

Click here to read: Best Soil Mix for Plants


6. Provide Adequate Sunlight


Sunlight is essential for photosynthesis. Ensure your plants receive the appropriate amount:

Full Sun Plants: Require 6–8 hours of sunlight daily (e.g., Tulsi, Curry leaf, Hibiscus, Roses, Marigolds, etc).

Partial Shade Plants: Thrive in bright and indirect light or 4–6 hours of morning sunlight (e.g., Peace Lily, Money plant (pothos), ferns, Aglaonema, etc.).


7. Pest Treatment


Pests can damage even the healthiest plants. Inspect leaves and stems regularly for signs of trouble.

  • For mild infestations, wash the leaves with water.
  • For persistent pests, use a neem oil spray (1 tablespoon neem oil + 1 liter water).

8. Tilling the Soil Every 15 Days


Loosening the soil every 15 days aerates the roots and ensures better water and nutrient absorption. This practice also helps in breaking up compacted soil, which can restrict root growth.


9. Do Not Move Plants Unnecessarily


Plants acclimate to their environment over time. Constantly moving them can cause stress and disrupt their growth.

  • Position your plants carefully and allow them to thrive in their chosen spot unless there’s a compelling reason to relocate them.

10. Repot When Necessary


As plants grow, their roots may outgrow the pot. Repot them into a slightly larger container every 1-2 years to ensure they have enough room to thrive.

Learn and Experiment


Gardening is about learning through experience.

  • Observe how your plants respond to light, water, and fertilizers, and adjust accordingly.
  • Don’t hesitate to try new plant varieties or techniques.

Be Patient and Enjoy the Process


Plants take time to grow and flourish. Be patient and enjoy the journey of caring for them. Each new leaf or bloom will be a reward for your efforts.

Gardening is both an art and a science. By following these tips, you’ll create a thriving garden filled with vibrant, healthy plants. Remember, plants are living beings that respond to care and patience, so enjoy the journey and learn from every experience!

Happy Gardening!

Follow our Social media channel:

1. Voice of Plant – YouTube Channel

2. Voice of Plant Facebook Page

3. Instagram Voice of Plant Channel

FAQs on Indoor Plant Care in the Winter Season

Indoor Plant Care in the Winter Season


Winter can be a challenging time for indoor plants, as the season brings shorter days, lower light levels, and drier air due to indoor heating. Many plant lovers notice changes in their plants during this time, such as slower growth, yellowing leaves, or drooping foliage. This is natural, as most plants enter a semi-dormant state during winter and require adjustments to their care routine.

Indoor Plant Care in the Winter Season
Indoor plants

Here, we aim to address some of the most common questions about keeping indoor plants healthy and thriving throughout the winter season.

Frequently Asked Questions (FAQs) on Indoor Plant Care During Winter


1. How often should I water my indoor plants in winter?

Water only when the top inch of soil feels dry.

  • Plants grow more slowly in winter, meaning they require less water.

2. What is the best way to increase humidity for my plants?

You can increase humidity by:

  • Using a humidifier near your plants.
  • Grouping plants together to create a microclimate.
  • Placing pebble trays filled with water under your plant pots (ensure pots don’t sit directly in the water).

3. Can I use regular LED lights as grow lights?

Regular LED lights may provide some light, but specialized grow lights are designed to emit the full spectrum of light that plants need for photosynthesis and are more effective.

4. Why are my plant leaves turning yellow in winter?

Yellowing leaves during winter may result from:

  • Overwatering.
  • Low humidity levels.
  • Inadequate light.
    Check your plant’s environment and adjust watering, humidity, and lighting conditions accordingly.

5. Is it okay to mist plants during the cold season?

Yes, but sparingly.

  • Mist only plants that enjoy high humidity, such as ferns and Calatheas.
  • Avoid misting in the evening to prevent excess moisture from sitting on leaves, which can lead to mold or fungal growth.

6. Is it good to repot my indoor plant during winter?

No.

  • Winter is not the ideal time to repot most plants, as they are in their dormant phase.

7. Is it good to prune my indoor plant during winter?

No. During the winter season, indoor plants that thrive in the summer often experience stress.

  • Avoid regular pruning
  • Avoid hard pruning
  • Skip root pruning
  • No pinching
  • Avoid experiments: Do not try new techniques or treatments when plants are already stressed.

Must read:

Indoor Plant Complete Care in Winter Season

Follow our Social media channel:

Happy Gardening!

Indoor plant care in winter season

How to Care Indoor Plants in the Winter Season: Check 7 Expert Tips

How to Care Indoor Plants in the Winter Season


Winter has arrived, and it is time to give your indoor plants some extra attention. During this season, most plants enter a dormancy phase, meaning their growth slows down, and they may appear less vibrant. 

How to Care Indoor Plants in the Winter Season

As the days grow shorter and temperatures drop, your plants face new challenges like reduced light, lower humidity, and fluctuating indoor temperatures. With a little effort and the right approach, you can help your plants overcome these seasonal hurdles and stay lush and green all winter long.

Understanding the Challenges of Winter for Indoor Plants


Winter introduces unique challenges that require extra attention. Indoor plants are affected by several factors:

1. Decreased Light Availability:

Shorter daylight hours mean your plants may not receive enough sunlight for photosynthesis.

2. Fluctuating Indoor Temperatures:

Cold drafts or the heat from radiators can stress plants, leading to wilting or yellowing leaves.

3. Reduced Humidity Levels:

Indoor heating systems strip moisture from the air, causing leaves to dry out.

4. Winter Stress Signs:

Keep an eye out for symptoms like drooping, leaf yellowing, or slow growth, as these indicate your plant is struggling.

Addressing these issues proactively ensures your plants remain healthy throughout the season.


1. Adjusting Lighting for Indoor Plants in Winter


Natural Light Adjustments


During winter, maximizing natural light is crucial.

  • Position your plants near south- or west-facing windows where they can receive the most sunlight.
  • Clean the windows regularly to let in more light, and avoid obstructing the path of sunlight with curtains or blinds.

Artificial Light Options


If natural light is insufficient, consider using LED grow lights. These lights mimic sunlight and promote photosynthesis.

  • Place the grow light a few inches above the plant canopy and follow the recommended duration for each plant type.

Rotating Plants for Balanced Growth


  • Turn your plants every week to ensure even exposure to light, preventing uneven growth and leggy stems.

2. Regulating Temperature for Indoor Plants


Most indoor plants thrive between 18 to 25 degrees Celsius

Avoiding Temperature Extremes


It is crucial to protect plants from harsh, cold waves to prevent their demise. Keep plants away from cold drafts near doors and windows.

  • Similarly, avoid placing them too close to heat sources like radiators or fireplaces, as these can scorch the leaves.

3. Watering Indoor Plants During Winter


Plants grow more slowly in winter, meaning they require less water. Overwatering is one of the most common mistakes during this season.

Tips for Correct Watering for Indoor Plants


watering indoor plant

1. Check Soil Moisture:

  • Always test the top inch of soil before watering.
  • If it feels dry, your plant likely needs water.

2. Avoid Overwatering:

Too much water can lead to root rot.

  • Ensure pots have drainage holes, and empty any standing water from saucers.

3. Use Room-Temperature Water:

Cold water can shock plant roots.

4. Timing Matters:

  • Water plants during the morning, allowing excess water to evaporate throughout the day.

4. Do not use Pruner 


During the winter season, indoor plants that thrive in the summer often experience stress. It is crucial to avoid any major interventions, such as:

  • Avoid Regular Pruning: Hold off on trimming foliage as plants are in a dormant phase.
  • No Hard Pruning: Cutting back large portions of the plant can weaken it further.
  • Skip Root Pruning: Disturbing the roots during winter can harm the plant’s ability to recover.
  • No Pinching: Removing growth tips or experimenting with shaping should be avoided.
  • Avoid Experiments: Do not try new techniques or treatments when plants are already stressed.

The best time to perform pruning or other experiments is when the plant is healthy and actively growing. Winter is a period of rest for most plants, so allowing them to conserve energy ensures they can bounce back stronger in the growing season.

Also, read: How to Care Plants in Winter Season

5. Is Repotting Necessary in Winter?


Winter is not the ideal time to repot most plants, as they are in their dormant phase.

6. Clean Your Plants


1. Dust the Leaves:

Gently wipe plant leaves with a damp cloth to clear dust that can block sunlight.

2. Inspect for Pests:

Look for signs of common pests like spider mites or aphids, which can multiply indoors during winter.

7. Refrain from Over-Fertilizing


During dormancy, plants do not need as many nutrients. Fertilizing in winter can lead to salt buildup in the soil, which may harm roots. Save heavy feeding for spring when plants resume active growth. If you must fertilize, use a diluted solution every 6-8 weeks for minimal impact.


Follow our Social media channel:

Happy Gardening!

best plants for festive season

Top 10 Best Low-Maintenance Plants to Gift in Festive Season (Deepwali & Christmas)

Top 10 Best Low-Maintenance Plants to Gift in Festive Season


Whether it’s Diwali, Christmas, or any special occasion, plants make an evergreen gift that continues to give long after the celebration is over. Not only do they symbolize life, growth, and positivity, but they also bring a natural aesthetic into any space.


Plants are more than just a decorative gift. They help purify the air, reduce stress, and even boost productivity.

When it comes to gifting plants, low-maintenance varieties are ideal as they require minimal effort, making them perfect for even the busiest of people. Let’s explore the top 7 best low-maintenance plants you can gift this festive season!

Top 7 Best Low-Maintenance Plants to Gift in Festive Season

1. Jade Plant
2. Snake Plant

3. ZZ Plant

4. Tulsi Plant

5. Syngonium

6. Aglaonema

7. Dracena

8. Curry Leaf plant

9. Lucky Bamboo

10. Sukh Shanti

1. Jade Plant


The Jade plant  is considered a symbol of good luck and prosperity. Gifting Jade plant is a perfect choice for any plant lover. 

jade plant in blue pot

  • Jade plant is a low – maintenance plant and requires minimal caring. This is an ideal choice for busy people. 

Care Tips for Jade Plant:

  • Place in a sunny spot in direct sunlight (outdoor). 
  • Water only when soil is dry.
  • Avoid overwatering to prevent root rot.

Must read this – Complete Care Tips for Jade Plant

2. Snake Plant


Snake Plant is one of the most durable and low-maintenance indoor plant.  This plant can survive in low light, needs minimal water, and purifies the air by filtering toxins such as formaldehyde and benzene.

snake plant in indirect light

Snake plant is easy to care for and perfect for living rooms. 

Care Tips for Snake Plant:

  • Thrives in low to bright indirect light.
  • Water once every few weeks.
  • Avoid overwatering.
  • Can tolerate drought.

Must read: Snake Plant Complete Care

3. ZZ Plant (Zamioculcas Zamiifolia)


The ZZ Plant is well-known for its glossy, dark green leaves and its ability to thrive in almost any indoor condition.

zz plant

  • This plant can tolerate low light, and its thick rhizomes store water, meaning you won’t have to water it often.
  • It’s perfect for someone with a busy lifestyle.

Care Tips for ZZ Plant:

  • Place in low to moderate light.
  • Avoid overwatering.
  • Water when the soil is dry to the touch.
  • Keep away from direct sunlight.

Must read: ZZ plant complete care guide

4. Tulsi Plant (Holy Basil)


Tulsi, also known as Holy Basil, holds significant spiritual and medicinal value. It’s believed to bring peace and prosperity and is often found in sacred spaces.

tulsi plant
tulsi plant

Gifting a Tulsi plant is a meaningful gesture, and its simple care routine makes it easy to maintain.

Care Tips for Tulsi Plant:

  • Requires direct sunlight 4 to 5 hrs for optimal growth. 
  • Water regularly, but do not let the soil stay soggy.
  • Pinch off the flowers to encourage bushier growth.

Must read: How to care and grow Tulsi plant at home

5. Syngonium (Arrowhead Plant)


Syngonium plant is a fast-growing, low-maintenance plant that’s perfect for gifting. Its heart-shaped leaves symbolize love and prosperity, making it a thoughtful festive gift.

Syngonium

  • It thrives in bright light and can even adapt to various indoor conditions.

Care Tips for Syngonium:

  • Prefers bright light.
  • Keep the soil slightly moist, but avoid overwatering.
  • Prune regularly to maintain its shape.

6. Aglaonema (Chinese Evergreen)


Aglaonema, or Chinese Evergreen, is well-loved for its attractive foliage and ability to thrive in bright and indirect light.

  • It’s an air-purifying plant that’s perfect for people who may not have time to care for high-maintenance plants.
  • This plant makes an elegant gift with its colorful leaves and easy care.

Care Tips for Aglaonema:

  • Suitable for bright indirect light.
  • Water moderately, allowing the soil to dry out between waterings.
  • Avoid placing in direct sunlight.

Must read: Aglaonema Complete Care Guide 

7. Dracaena


Dracaena is a popular plant with tall, slender leaves that add an elegant touch to any room. Its ability to thrive in bright light and minimal watering needs make it a perfect low-maintenance gift.

Dracaena - song of India 1

  • Dracaena also helps in improving air quality, which is a bonus for any recipient.

Care Tips for Dracaena:

  • Prefers bright and indirect light.
  • Water every 2-3 weeks.
  • Dust the leaves occasionally to maintain their shine.

8. Curry Leaf Plant (Murraya Koenigii)


The Curry Leaf plant is an aromatic herb often used in  cooking at home. It’s not only useful in the kitchen but also has many medicinal properties.

curry leaf

  • It requires minimal care, making it a unique and thoughtful gift for anyone who loves to cook or values its medicinal benefits.

Care Tips for Curry Leaf Plant:

  • Place in direct sunlight for 3 to 4 hrs.
  • Water regularly, ensuring the soil remains moist but not waterlogged.
  • Prune occasionally to encourage bushier growth.

Must read: Curry Leaf Plant Complete Care Guide

9. Lucky Bamboo (Dracaena Sanderiana)


Lucky Bamboo is a popular plant in Feng Shui, symbolizing prosperity and good fortune. It is incredibly easy to care for and can grow in both soil and water.

Lucky Bamboo plant

  • Lucky Bamboo is an ideal gift for anyone looking for a minimalist yet meaningful addition to their home or office.

Care Tips for Lucky Bamboo:

  • Can grow in low to moderate indirect light.
  • Change water every two weeks or water the soil when it starts to dry.
  • Avoid placing in direct sunlight.

10. Sukh Shanti Plant (Justicia gendarussa)


The Sukh Shanti plant, scientifically named Justicia gendarussa, is a well-known plant in India valued for its calming properties and vibrant green foliage.

sukh shanti plant in sunlight

  • Commonly referred to as a “lucky plant,” it is believed to promote peace and well-being in its environment. 

Care Tips for Sukh Shanti Plant:

  • Prefers bright and indirect light.
  • Water when the top inch of soil is dry. 

Conclusion

Choosing low-maintenance plants as gifts is not only practical but also incredibly thoughtful. The ten plants listed above are easy to care for, making them perfect for anyone, whether they’re a seasoned gardener or a beginner. So, as you celebrate the festive season, consider gifting one of these beautiful plants and spread the joy of greenery!


Follow our Social media channel:

1. Voice of Plant – YouTube Channel

2. Voice of Plant Facebook Page

3. Instagram Voice of Plant Channel

Happy gardening!