All posts by Neeraj

Self vegetable gardening

Self-Taught Techniques for Bountiful Vegetable Gardens

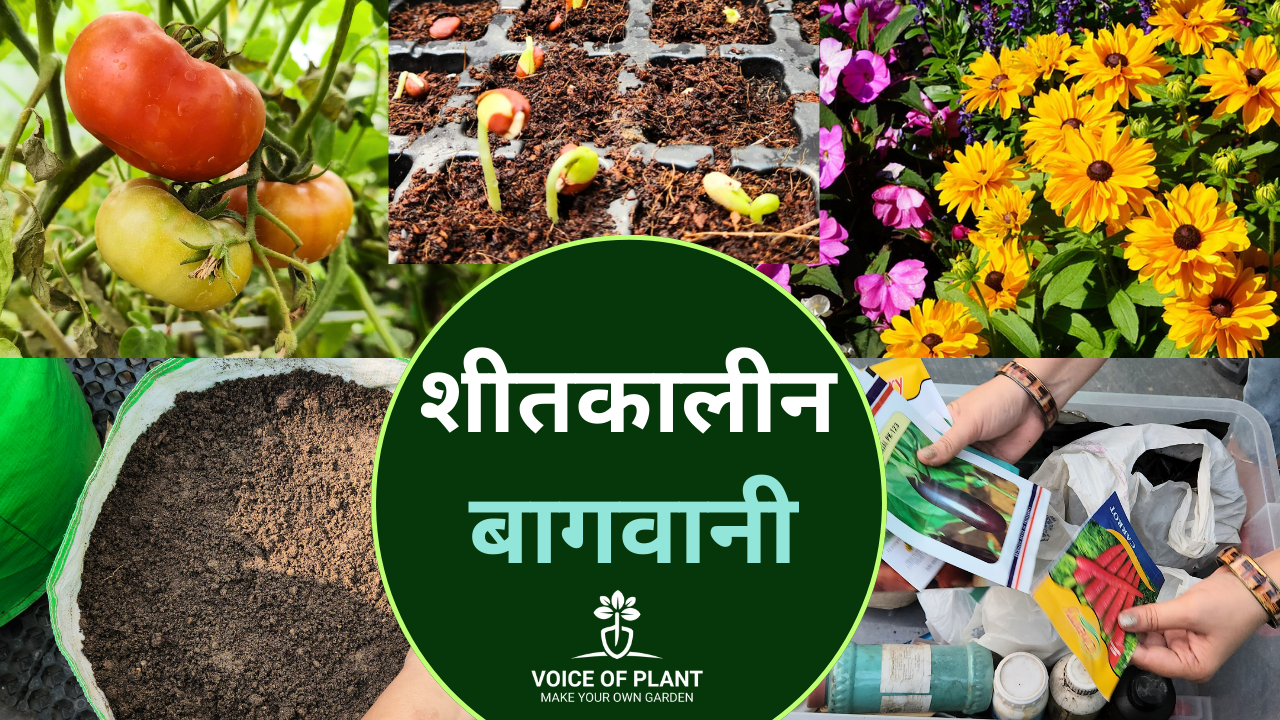
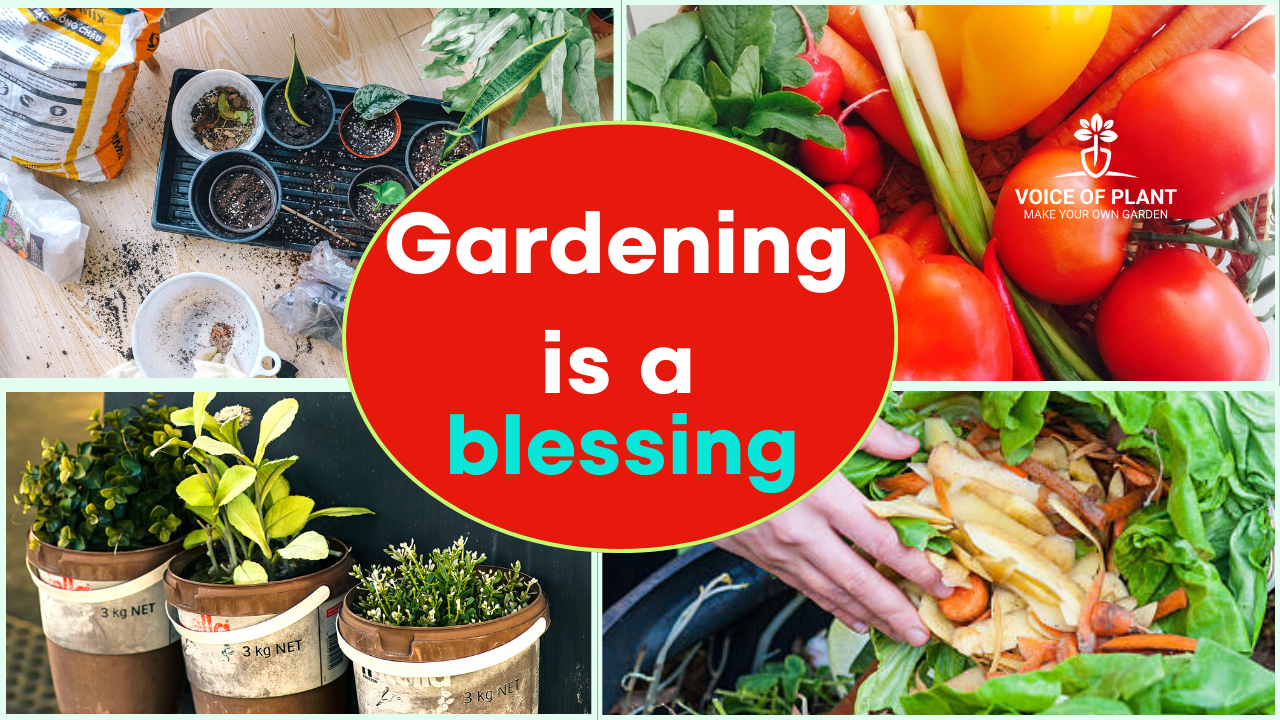
Growing your own vegetables is not just a practical task; this is a rewarding one. With rising food prices and increasing demand for pesticide-free, healthy produce, more and more people are taking up vegetable gardening.

vegetables gardening

What is really inspiring is that many successful vegetable gardeners are completely self-taught. In this article, we will discuss in detail self-taught techniques for creating an abundant vegetable garden ready for any context.

We will discuss on the following points:

  • Soil Enrichment and Preparation
  • Smart Water Management
  • Companion Planting
  • Crop Rotation
  • Organic Pest Control
  • Seed Saving
  • Continuous Learning
  • Space Optimization

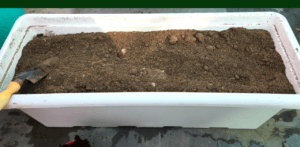
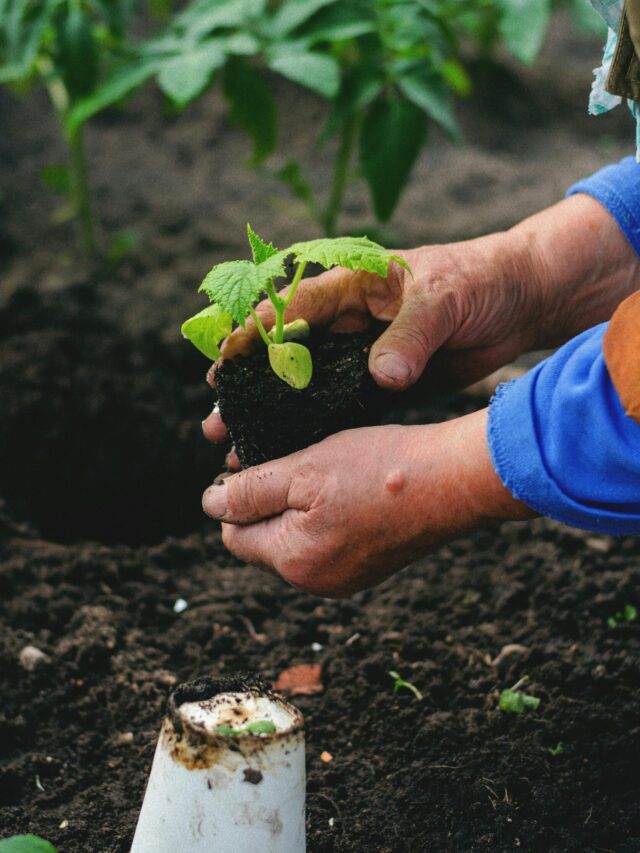
1. Soil Enrichment and Preparation

Successful vegetable gardening begins with the soil.

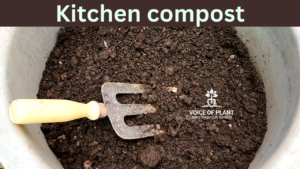
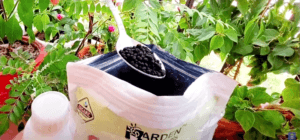
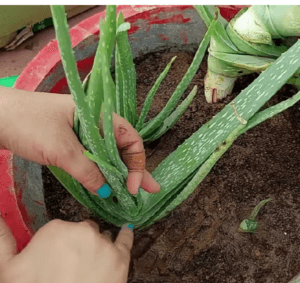
  • Many self-taught gardeners take the first step by enhancing their soil quality. They utilize kitchen waste, dried leaves, and cow dung to create nutrient-rich organic matter.

soil mixture

  • The practice of vermicomposting, which involves using earthworms to break down organic material, is particularly popular among self-taught gardeners. This enriched soil lays the perfect foundation for robust and healthy plant growth.

compost

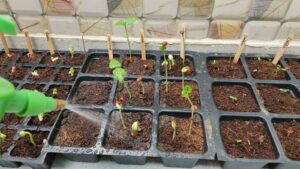
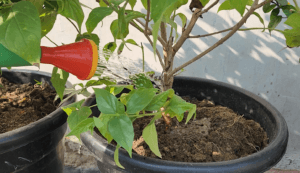
2. Smart Water Management

Water is a precious resource in many parts, and self-taught gardeners are experts at water management.

self watering system

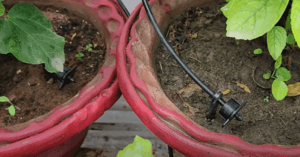
  • Techniques such as drip irrigation and mulching are commonly used to conserve water.
  • Drip irrigation systems deliver water directly to the plant roots, reducing wastage.
  • Mulching with materials like straw or dried leaves helps retain soil moisture, suppress weeds, and reduce the need for frequent watering.

3. Companion Planting

Many self-taught gardeners embrace the concept of companion planting.

marigold + Tomato

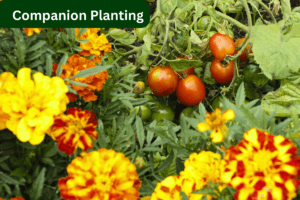
  • This technique involves planting certain vegetables together to enhance growth and deter pests.
  • For instance, planting marigolds alongside tomatoes can help repel nematodes and other harmful insects.
  • By experimenting with companion planting, self-taught gardeners can naturally protect their crops and increase yields.

Also, read:

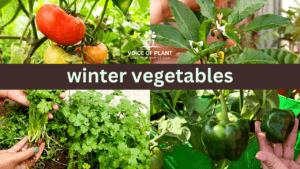
Winter Gardening Ideas & Planning

4. Crop Rotation

Crop rotation is another technique that self-taught gardeners adopt to maintain soil health and prevent pest infestations.

crop rotation

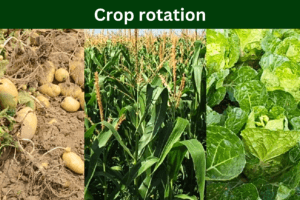
  • By changing the placement of crops each season, they minimize the risk of soil depletion and the buildup of plant-specific pests and diseases. This practice leads to healthier, more productive vegetable gardens.

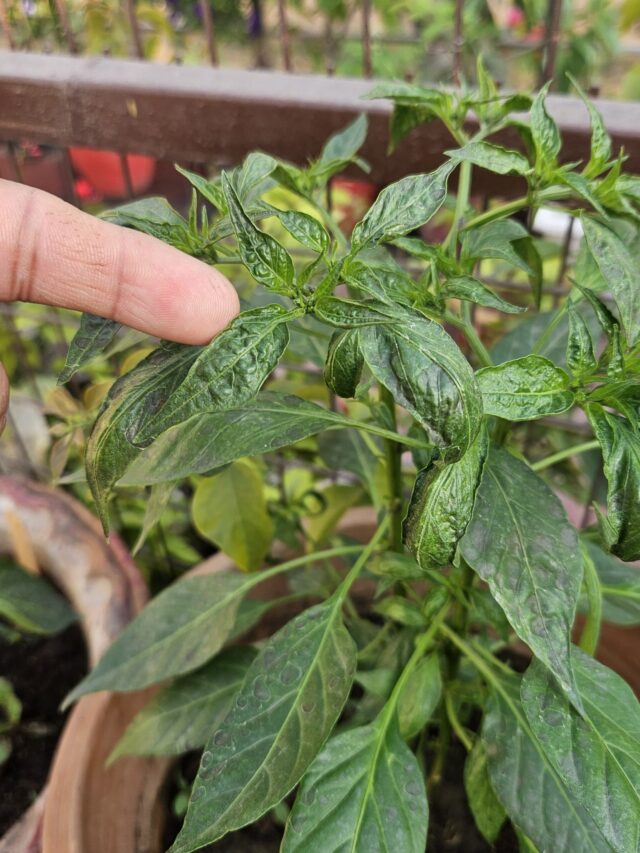
5. Organic Pest Control

The self-taught gardeners in India often avoid chemical pesticides due to concerns about their impact on health and the environment.

pest control

  • Instead, they opt for natural pest control methods.
  • They often use neem pesticide solution, garlic spray, and even homemade chili, etc. solutions to deter common garden pests.
  • These natural remedies are safe, cost-effective, and eco-friendly.
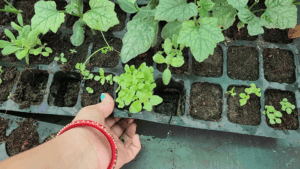
6. Seed Saving

Many self-taught gardeners understand the importance of saving seeds from their produce.

seed saving

  • It not only saves money but also helps preserve traditional varieties of vegetables.
  • By selecting and saving seeds from the healthiest and most robust plants, they ensure that future generations of vegetables are well-suited to local conditions.

7. Continuous Learning

Self-taught gardeners are committed to lifelong learning.

winter vegetables

  • They experiment with new varieties of vegetables, adapt to changing weather patterns, and seek knowledge from fellow gardeners and online resources.
  • This commitment to continuous learning ensures that their vegetable gardens remain productive year after year.

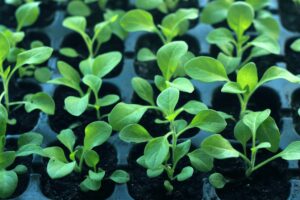
8. Space Optimization

In densely populated urban areas, space for gardening can be limited.

tomato gardening

  • Self-taught gardeners maximize space by using vertical gardening techniques, hanging pots, and creating compact raised beds.
  • They also choose vegetables that grow well in confined spaces, such as cherry tomatoes, mint, and spinach.

Conclusion:

Self-taught vegetable gardeners are a testament to the power of determination and resourcefulness. Their bountiful vegetable gardens are a source of fresh, healthy produce. These also reflect their dedication to sustainable and eco-friendly gardening practices.

  • By enriching the soil, managing water efficiently, embracing companion planting, and continuously learning, they have discovered the secrets to successful vegetable gardening.

These self-taught techniques offer inspiration and valuable lessons for anyone looking to start their vegetable garden, proving that a green thumb can be cultivated through passion and perseverance.

Happy Gardening!

शीतकालीन बागवानी विचार और योजना

क्या आप जानते हैं कि आप अपने घर में आराम से बैठे-बैठे सर्दियों की हरी-भरी विभिन्न प्रकार की सब्जियां और सुंदर फूलों वाले पौधे उगा सकते हैं?

winter vegetables

जैविक, ताजी और साफ-सुथरी सब्जियाँ घर पर लगाई जा सकती हैं जैसे;

  • टमाटर,
  • फलियाँ (बीन्स),
  • मूली,
  • फूलगोभी,
  • गाजर,
  • मटर,
  • पालक,
  • धनिया,
  • पत्तागोभी और भी बहुत कुछ।

इसके अलावा, सही देखभाल करने से, आपका बगीचा जीवंत सर्दियों के फूलों से खिल सकता है जैसे;

winter flowers

  • गुलाब,
  • रोजमैरी,
  • गेंदे का फूल,
  • पेटूनिया,
  • वरबीना,
  • डायन्थस,
  • डॉग फ्लावर,
  • हाइब्रिड पेरिविंकल और भी बहुत कुछ।

जाड़े के महीनों के दौरान इन पौधों को उगाने की इस क्रिया को “शीतकालीन बागवानी” के रूप में जाना जाता है।

शीतकालीन बागवानी के संदर्भ में, हम छोटे और प्रमुख दोनों पहलुओं का पता लगाएंगे। आमतौर पर, शीतकालीन बागवानी के लिए बुनियादी तैयारी, जैसे सही गमले और उपकरण प्राप्त करना, उपयुक्त मिट्टी का मिश्रण तैयार करना और अन्य आवश्यक प्रक्रियाएं सितंबर के मध्य से (भारत में) शुरू हो जाती हैं।

बागवानी की योजना निम्न साधारण बातों पर निर्भर करती है:

1. सबसे पहले, यह जानना महत्वपूर्ण है कि आपकी पसंद क्या है और आप क्या उगाना चाहते हैं, जैसे पसंदीदा पौधे, फल या सब्जियाँ।

  • प्लानिंग चुने गए पौधों के आधार पर शुरू होती है क्योंकि प्रत्येक पौधे की अपनी विशिष्ट ज़रूरतें होती हैं, और उन ज़रूरतों को पूरा करना आवश्यक है।

2. दूसरा, बागवानी क्षेत्र का आकार एक महत्वपूर्ण कारक है।

  • आप कितने पौधे उगा सकते हैं यह उपलब्ध स्थान पर निर्भर करता है।
  • उपलब्ध क्षेत्र यह निर्धारित करता है कि आप किस प्रकार विविधता ला सकते हैं और उगाने के लिए विभिन्न प्रकार के पौधों का चयन कर सकते हैं।

3. तीसरा, पौधों के अच्छे विकास के लिए सूर्य के प्रकाश की मात्रा आवश्यक है।

कोई भी बीज बोने से पहले, यह जांचना ज़रूरी है कि बगीचे के क्षेत्र को कितनी धूप मिलती है।

  • आपके क्षेत्र में उपलब्ध सूर्य के प्रकाश के आधार पर आपको बीज का चयन करना चाहिए।
  • यदि आपके पास बहुत अधिक धूप है, तो आप मिर्च, शिमला मिर्च और टमाटर जैसे पौधे उगा सकते हैं, जिन्हें बहुत अधिक धूप की आवश्यकता होती है।
  • यदि सीमित धूप है, तो धनिया, पालक और अन्य जड़ी-बूटियों जैसे पौधों को चुनना बेहतर है जो कम धूप में पनप सकते हैं।

शीतकालीन बागवानी के लिए आवश्यकताएँ

1. मौसम और तापमान:

  • शीतकालीन बागवानी आम तौर पर सितंबर के मध्य या अक्टूबर से शुरू होती है और मार्च तक जारी रहती है।
  • बीज बोने के लिए सुखद मौसम वाला समय चुनना आवश्यक है क्योंकि गर्म या आर्द्र परिस्थितियों में अंकुर जीवित नहीं रह पाएंगे।

बीज बोने के लिए आदर्श तापमान 15-20 है।”  

2. गमले का आकार और प्रकार

grow bags for gardening

(A) सब्जियों के लिए

(i) 10*10 या 12*12 इंच ग्रो बैग:

  • टमाटर, मिर्च, पत्तागोभी, फूलगोभी और शिमला मिर्च के लिए उपयुक्त।

(ii) 12*18 इंच ग्रो बैग:

  • मूली, धनिया, गाजर, पालक, प्याज, या लहसुन के लिए अच्छा है।

(iii)  15*15 या 16*16 इंच ग्रो बैग:

  • बैंगन, बीन्स, लूबिया, रनर बीन्स या मटर के लिए अच्छा है।

(iv) आयताकार नाव के आकार के गमलों का उपयोग धनिया, पालक आदि जड़ी-बूटियों के लिए भी किया जा सकता है।

Coriander

नोट:

  • प्रत्येक श्रेणी के लिए 4-5 गमले या ग्रो बैग रखना एक अच्छा आईडिया है क्योंकि एक गमले में केवल 5-6 सब्जियां ही उगेंगी।

(B) फूलों के लिए

(i) 12 इंच के मिट्टी के गमले:

clay pots

  • गुलाब, गेंदा और गुलदाउदी जैसे स्थायी पौधे इन गमलों में अच्छा पनपते हैं।
  • यदि वे दो सीज़न तक जीवित रहते हैं, तो वे दोबारा लगाये जाने की आवश्यकता के बिना आपके साथ रहेंगे।
  • इन फूलों के लिए हमेशा अच्छी गुणवत्ता वाले मिट्टी के गमलों को चुनें।

(ii) 4*4, 6*6, या 8*8 इंच के गमले:

  • ये छोटे गमले पेटुनिया, वर्बेना, डायन्थस, डॉग फ्लावर आदि जैसे मौसमी फूल उगाने के लिए उपयुक्त हैं।

(iii) आयताकार नाव के आकार के गमले:

rectangular pot

  • इस प्रकार के गमलों में फूल अच्छे से उगते हैं क्योंकि उनकी जड़ों के लिए और ठीक से खिलने के लिए पर्याप्त जगह होती है।

3. मिट्टी का मिश्रण

Garden area soil

(i) मिटटी:

  • किसी भी नर्सरी से मिट्टी प्राप्त करें या ग्रीष्मकालीन पौधों की मिट्टी को कीट-मुक्त बनाने के लिए उसमें जैविक खाद और नीम केक पाउडर मिलाकर दोबारा उपयोग करें।
  • मिट्टी को सूर्य के प्रकाश में अवश्य रखें।

(ii) मिट्टी को समृद्ध बनाने के लिए खाद डालें:

compost

  • आप कोई भी खाद डाल सकते हैं जैसे; रसोई के अपशिष्ट खाद, वर्मीकम्पोस्ट, गाय के गोबर की खाद, पत्ती की खाद, या मिट्टी को समृद्ध बनाने के लिए कोई उपयुक्त खाद।

(iii) रेत का उपयोग करें:

river sand

  • मिट्टी की सरंध्रता बढ़ाने के लिए नदी की रेत का उपयोग करें, क्योंकि कई सब्जियाँ रेतीली मिट्टी में पनपती हैं।

(iv) कोको पीट:

coco peat

  • आप बीज के अंकुरण में सहायता के लिए कोकोपीट मिला सकते हैं, खासकर बीज बोते समय।

(iv) कवकनाशी (Fungicide) मिलाएं:

Fungicide powder

  • कवक या बैक्टीरिया के हमलों से बचाव के लिए ट्राइकोडर्मा या दालचीनी पाउडर जैसे कवकनाशी का उपयोग करें।

4. बागवानी बॉक्स

gardening box

एक बुनियादी बागवानी बॉक्स में रोपण के विभिन्न चरणों में आवश्यक आवश्यक वस्तुएँ होनी चाहिए:

1. बल्ब और बीज: उत्साही बागवानों के पास हमेशा विभिन्न प्रकार के पौधों के बीज और बल्ब होते हैं।

2. दस्ताने: तीक्ष्ण बागवानी उपकरणों, विशेषकर प्रूनर्स का उपयोग करते समय चोटों से बचने के लिए हमें दस्ताने पहनने चाहिए।

3. उर्वरक और सूक्ष्म पोषक तत्व: पौधों के विकास के विभिन्न चरणों के लिए विभिन्न प्रकार के उर्वरक और पोषक तत्व रखने चाहिए।

  • उदाहरण के लिए, नीम केक पाउडर, सरसों की खली का केक, एप्सम लवण, गुलाब के फूल वाले उर्वरक, करी पत्ता बूस्टर, और समुद्री शैवाल सूक्ष्म पोषक तत्व, आदि।

4. कीटनाशक: ये आपके पौधों को कीड़ों के हमलों से बचाने के लिए आवश्यक हैं।

  • उदाहरण के लिए: एक्टारा खाद्य सब्जियों के लिए कीटनाशक के रूप में कार्य करता है।.

5. कवकनाशी (Fungicide): कवक संक्रमण को रोकने के लिए कवकनाशी का प्रयोग करें।

6. आइसक्रीम स्टिक: ये सीडलिंग ट्रे में अंकुरों को लेबल करने के लिए उपयोगी हैं।

7. पेन/स्थायी मार्कर: आइसक्रीम स्टिक पर पौधों के नाम लिखने के लिए एक पेन रखें।

8. टूल किट: अलग-अलग बागवानी उपकरण अलग-अलग भूमिकाएँ निभाते हैं, जिनमें खुदाई, मिश्रण, सरगर्मी, छंटाई और बहुत कुछ शामिल है।

बुनियादी बागवानी कार्यों को सुविधाजनक बनाने के लिए उपरोक्त सभी घटकों को किसी भी बागवानी बॉक्स में शामिल किया जाना चाहिए।

5. सीडलिंग ट्रे

seedling tray

बीज या तो सीधे गमलों में या सीडलिंग ट्रे में बोए जा सकते हैं, 20-25 दिनों के बाद उन्हें गमलों में रोपने का विकल्प होता है। सीडलिंग ट्रे कई लाभ प्रदान करती हैं:

1. वे तब उपयोगी होते हैं जब मिट्टी का मिश्रण अभी तैयार नहीं है, लेकिन बीज बोने का समय हो गया है।

  • आप इन ट्रे में बीज रख सकते हैं और बाद में उन्हें उपयुक्त मिट्टी के मिश्रण वाले गमलों में स्थानांतरित कर सकते हैं।

seedlings

2. सीडलिंग ट्रे उन स्थितियों के लिए व्यावहारिक हैं जहां मौसम की स्थिति के कारण गमलों को स्थानांतरित करने की आवश्यकता होती है, जिससे उन्हें अत्यधिक गर्मी या अप्रत्याशित वर्षा से बचाया जा सके। ट्रे को परिवहन करना आसान है।

seedlings in seedling tray

3. पौधों को एक गमले से दूसरे गमले में ले जाने की तुलना में सीडलिंग ट्रे से बड़े गमलों में रोपाई करना आसान है।

press seedlings to remove from tray

  • यह जड़ की गड़बड़ी को कम करता है – एक सीडलिंग ट्रे में, ट्रे को नीचे से धीरे से दबाएं, और अंकुर आसानी से बाहर आ जाएगा।

नोट:

  • सीडलिंग ट्रे बाजार में आसानी से उपलब्ध हैं और एक बार खरीदने के बाद कई मौसमों तक आपकी सेवा कर सकती हैं।

6. स्प्रे बॉटल

Spray bottle

  • अपने पौधों को पानी देने या नीम का तेल लगाने के लिए स्प्रे बोतलों का उपयोग करने की सलाह दी जाती है।
  • नोजल के अंदर अवशेष जमा होने से रोकने के लिए प्रत्येक उपयोग के बाद अपनी स्प्रे बोतल को साफ करना और अच्छी तरह से सुखाना सुनिश्चित करें, जो बोतल को नुकसान पहुंचा सकता है।

7. सपोर्ट स्टिक

wooden support stick

  • टमाटर जैसे पौधों को सहारा देने के लिए लकड़ी की छड़ियों का उपयोग किया जा सकता है, जिससे यह सुनिश्चित होता है कि वे सीधे खड़े रहें, आमतौर पर रोपण के एक या दो महीने बाद।

8. वर्षा जल आवरण

  • तैयारी के दौरान मिट्टी के मिश्रण को ढालने या बरसात के दौरान पौधों की सुरक्षा के लिए वर्षा जल कवर का उपयोग किया जा सकता है।

ये सभी उल्लिखित आवश्यकताएँ आपकी शीतकालीन बागवानी यात्रा शुरू करने के लिए आवश्यक हैं। इन दिशानिर्देशों और युक्तियों का पालन करके, आप एक जीवंत और स्वस्थ उद्यान का पोषण कर सकते हैं।

शुभ बागवानी !!!

धन्यवाद!!!

औषधीय पौधे एवं उनके उपयोग: Part II

औषधीय पौधे प्रकृति के उपचार हैं। वे विशेष पौधे हैं जिनमें हमारे स्वास्थ्य को ठीक करने और बेहतर बनाने की शक्ति है। इन पौधों का उपयोग सदियों से विभिन्न बीमारियों और बीमारियों के इलाज के लिए किया जाता रहा है।

इस लेख में, आइए अधिक औषधीय पौधों के बारे में जानें जिन्हें आप घर पर उगा सकते हैं और जानें कि वे हमें कैसे लाभ पहुंचा सकते हैं।

4. करी पत्ता

इसे मीठा नीम या डॉ. सेंसिटिव भी कहा जाता है।

  • करी पत्ते में कई स्वास्थ्यवर्धक गुण होते हैं, जो कई स्वास्थ्य संबंधी बीमारियों के इलाज में मदद करते हैं।
  • आजकल बाजार में सूखे करी पत्ते उपलब्ध हैं, और मुख्य रूप से रसोई में इस्तेमाल होने वाले मसाले के रूप में उपयोग किये जाते हैं।

करी पत्ते के औषधीय लाभ

curry leaves

करी पत्ते में कई औषधीय गुण पाए जाते हैं.

(i) लीवर और दिल से जुड़ी बीमारियों में करी पत्ते का सेवन फायदेमंद होता है।

(ii) एनीमिया के खतरे को कम करता है और शरीर में रक्त शर्करा के स्तर को नियंत्रित करता है।

(iii) करी पत्ता त्वचा रोग और दाग-धब्बे, कील-मुंहासों से छुटकारा दिलाने में फायदेमंद है।

(iv) करी पत्ते में पाए जाने वाले एंटीऑक्सीडेंट दिल को स्वस्थ रखने का काम करते हैं। यह खराब कोलेस्ट्रॉल को कम करने के साथ-साथ अच्छे कोलेस्ट्रॉल के स्तर को बढ़ाने का भी काम करता है।

(v) साइनस संक्रमण, खांसी और सर्दी की समस्या को दूर करने के लिए करी पत्ते का सेवन किया जा सकता है। इसमें विटामिन ए और सी उच्च मात्रा में पाए जाते हैं।

रोजाना खाली पेट 6-8 पत्तियां खाने की दिनचर्या का पालन करना उपरोक्त सभी समस्याओं का एक प्रस्तावित समाधान है।

5. पथरचट्टा प्लांट (कलानचो पिनाटा)

पत्थरचट्टा एक आयुर्वेदिक पौधा है जिसमें कई औषधीय गुण होते हैं।

  • इसका उपयोग घर पर कई स्वास्थ्य संबंधी समस्याओं के इलाज के लिए किया जाता है।
  • पत्थरचट्टा में मौजूद उपचारात्मक गुण कई बीमारियों के इलाज में मदद करते हैं।
पत्थरचट्टा के औषधीय लाभ

Patharchatta

इस गुणकारी और सदाबहार पौधे के उपयोग से प्राप्त प्रमुख स्वास्थ्य लाभों में निम्नलिखित शामिल हैं –

(i) अगर आपको पथरी की समस्या है तो पत्थरचिट्टा आपकी सेहत के लिए रामबाण है।

(ii) पत्थरचट्टा की पत्तियों से प्राप्त रस में विशेष तत्व होते हैं, जो रक्तचाप के स्तर को नियंत्रित करने में मदद करते हैं।

(iii) पत्थरचट्टा की पत्तियों में विशेष प्रकार के यौगिक पाए जाते हैं, जो घावों के भरने की प्रक्रिया को तेज करते हैं।

(iv) इसके साथ ही इसमें मौजूद एंटी-इंफ्लेमेटरी गुण सूजन, लालिमा और जलन जैसे लक्षणों को भी कम करते हैं।

पत्थरचट्टा को औषधि के रूप में कैसे उपयोग करें?

1. 2-3 पत्तियां लें, उन्हें पीस लें और शहद के साथ मिला लें।

2. गुर्दे की पथरी के इलाज के लिए रोजाना खाली पेट गुनगुने पानी के साथ इसका सेवन करें।

3. इससे पेट दर्द से भी राहत मिलती है

“पत्थरचट्टा पौधे को एक पत्ती काटकर भी बहुत आसानी से लगाया जा सकता है।”

6. पारिजात (हरश्रृंगार या शूली)

पारिजात के पौधे को हरसिंगार के नाम से भी जाना जाता है, जो औषधीय गुणों से भरपूर होते हैं।

  • यह कई बीमारियों का प्रभावी ढंग से इलाज कर सकता है।
  • अत्यंत सुगंधित, छोटी पंखुड़ियों वाले और सफेद रंग के हरसिंगार के फूल केवल रात में ही खिलते हैं, इसलिए इन्हें नाइट ब्लूमिंग जैस्मीन या रात की रानी भी कहा जाता है।
  • एंटीऑक्सीडेंट, एंटी-इंफ्लेमेटरी और एंटीबैक्टीरियल गुणों से भरपूर पारिजात कई बीमारियों से लड़ने में मददगार है।

पारिजात के औषधीय लाभ

Night jasmine

इस पौधे की पत्तियां, फूल और छाल में औषधीय गुण मौजूद होते हैं:

(i) गठिया के मरीजों के लिए यह बहुत कारगर है।

(ii) इसकी पत्तियों का उपयोग सर्दी और फ्लू के इलाज के साथ-साथ पेट के कीड़ों को मारने के लिए भी किया जा सकता है।

(iii) यह किसी भी तरह के घाव को ठीक करने में सहायक है।

(iv) यह मधुमेह के लिए बहुत फायदेमंद है।

(v) इससे आंखों के रोगों में भी लाभ मिलता है।

(vi) इसका उपयोग बुखार को ठीक करने के लिए भी किया जाता है।

(vii) पारिजात के गुणों से दाद का भी इलाज किया जा सकता है।

(viii) इसका एक बीज प्रतिदिन खाने से बवासीर रोग ठीक हो जाता है।

(ix) इसके फूल हृदय के लिए भी सर्वोत्तम माने जाते हैं। इसके फूलों के रस का सेवन करने से हृदय रोग से बचा जा सकता है।

उपचार के लिए पारिजात का उपयोग कैसे करें?

(i) पारिजात की 6-7 पत्तियां लें।

(ii) इन्हें पानी से धो लें। इन्हें आधा लीटर पानी में तब तक उबालें जब तक पानी की मात्रा एक चौथाई न रह जाए।

(iii) इसे छान लें और इस पानी को मिश्री के साथ पी लें।

इसे घावों पर कैसे लगाएं?

कभी-कभी घावों को ठीक होने में समय लगता है।

  • इन्हें जल्दी ठीक करने के लिए पारिजात की पत्तियों का लेप लगाएं।
  • इसमें एंटीफंगल और एंटीबैक्टीरियल गुण होते हैं इसलिए यह घाव को फैलने नहीं देगा।

7. बेल का पौधा

बेल एक महत्वपूर्ण औषधीय पौधा है। आयुर्वेद में इसके कई फायदे बताए गए हैं।

  • इसका फल बहुत सख्त होता है लेकिन
  • अंदर से नरम और गूदेदार होता है और इसमें बीज भी होते हैं।

Bael plant

बेल का प्रयोग कई प्रकार की औषधियां बनाने में किया जाता है, साथ ही कई स्वादिष्ट व्यंजनों में भी इसका प्रयोग प्रमुखता से किया जाता है।

  • बेल में प्रोटीन, बीटा-कैरोटीन, थायमिन, राइबोफ्लेविन और विटामिन सी प्रचुर मात्रा में पाया जाता है।
बेल के पौधे के औषधीय लाभ

bael juice

(i) दस्त और पेचिश के लिए बेल फल का उपयोग किया जा सकता है।

(ii) बेल के रस का उपयोग रक्त को शुद्ध करने के लिए किया जाता है।

(iii) यह किडनी की कार्य क्षमता को भी बढ़ाता है।

(iv) बेल का फल खाने से लीवर अच्छे से काम करता है क्योंकि यह शरीर की सभी अशुद्धियों को नष्ट कर देता है।

(v) हैजा की समस्या में बेल का रस और बेलपत्र का चूर्ण पानी के साथ लेना चाहिए, इससे राहत मिलती है।

बेल का सेवन कैसे करें?

1. उपरोक्त सभी बीमारियों को ठीक करने के लिए पत्तियों को नमक के साथ खाएं।

2. लू से बचने के लिए बेल का जूस पीने की सलाह दी जाती है क्योंकि बेल का जूस ठंडक प्रदान करता है और जब भी आप घर से बाहर जाएं तो बेल का जूस पीएं ताकि आपका शरीर ठंडा रहे और आपको लू न लगे।

3. बेल के पत्ते का रस निकालकर काली मिर्च के साथ सेवन करने से पीलिया और पुरानी कब्ज से राहत मिलती है।

“बेल का पौधा आमतौर पर जमीन में पाया जाता है लेकिन इसे 12-14 इंच के गमले में भी उगाया जा सकता है।”

अवश्य पढ़ें:

औषधीय पौधे एवं उनके उपयोग: (I)

शुभ बागवानी!

FAQs on Snake Plant

Snake plant is popular indoor plant and known for being easy to care for. Snake Plant is also known for being one of the best air-purifying plants.

In this comprehensive guide, we aim to answer some most common frequently asked questions (FAQs) and provide you with a better understanding of how to take care your Snake plant.

sansevieria snake plant

Frequently asked questions (FAQs)

Qs. 1: How often should I water my Snake plant?

Ans: Water the snake plant when the top inch or so of the soil is dry.

  • You can test the moisture level by inserting a finger or probe into the soil about 2 inches deep.
  • The frequency of watering may vary according to environmental factors such as temperature and humidity.

“Snake plants are hardy plants and quite tolerant of drought, so its is better to water them less frequently than to overwater them.”

watering snake plant

Qs 2: Can I use tap water to water my snake plant?

Ans: Yes, you can use tap water with a total dissolved solid  (TDS) of less than 500.

Qs 3: Can Snake plants tolerate low light conditions?

snake plant in indirect light

Ans: Yes, snake plants can tolerate low light conditions, but they prefer bright indirect light for optimal growth.

  • They are one of the few plants that can thrive in low-light environments, but their growth may be slower in such conditions.

Qs 4: How often should I give fertilizer to my Snake plant?

Ans: Give fertilizer to your snake plant once every two months, preferably throughout the growing season, which is typically spring and summer.

  • Use a balanced, diluted, liquid houseplant fertilizer.

Qs 5: Can I place my Snake plant in direct sunlight?

Snake plant leaf burn
Snake plant leaves sunburned

Ans: No, avoid placing snake plants in direct sunlight as it can cause leaf burn.

  • They are best suited for indirect sunlight, such as near a window with sheer curtains or in a room with bright but indirect natural light.

Qs 6: What should I do if my Snake plant’s leaves start to rot?

Ans: If your snake plant’s leaves are rotting, it’s important to address the issue promptly.

  • Remove the affected leaves immediately to prevent the rot from spreading.
  • Repot the plant in fresh, well-draining soil, and adjust the watering routine to prevent the soil from becoming excessively wet.
  • Ensure the pot has proper drainage to avoid waterlogged soil, which can lead to rot.

Qs 7: How to propagate Snake plants?

snake plant propagation

Ans: You can propagate snake plants by dividing the rhizomes or by planting leaf cuttings. Separate the pups or cuttings and plant them in well-draining soil.

Qs 8: When to repot Snake plants?

potting mix provides good drainage system

Ans: Repot your snake plant when it becomes root-bound, typically every 2-3 years.

  • The best time for repotting is in the spring.

Qs 9: Can snake plants be grown outdoors?

snake plant in bright light

Ans: While snake plants are commonly grown indoors, they can thrive outdoors in mild to warm climates, provided the conditions are suitable.

Qs 10: How to prevent pests on Snake plants?

Ans: To prevent pests like spider mites or mealybugs, use a neem water solution regularly and inspect your plant for infestations.

  • Keep the plant clean and wipe the leaves with a damp cloth to remove dust and pests.

Qs 11: Can snake plants be placed in the bedroom for air purification?

snake plant in bedroom

Ans: Yes, snake plants can be placed in the bedroom to improve air quality, but they need some light and should not be kept in the dark place.

  • Snake plant can grow in bright light, medium and low light as well. 

Qs 12: Can snake plants survive in cold temperatures?

Ans: Yes, snake plants can survive in cold temperatures with proper care, but they thrive best in temperatures between 15°C to 35°C (59°F to 95°F).

Qs 13: How long does it take for Snake plants to produce pups?

Ans: Snake plants can produce pups within about 3 to 5 months, but the timing can vary based on conditions and the plant’s health.

Qs 14: Can Snake plants be grown in water?

Ans: Yes, snake plants can be propagated in water.

  • Place cuttings in a jar of water with the base submerged, change the water regularly, and eventually transfer the plant to soil for long-term growth.

Must read:

How to Grow and Care Snake Plant

Make Your Own Garden!


medicinal plants thumbnail

Medicinal Plants: Benefits and Uses (II)

Medicinal plants are nature’s remedies. They are special plants that have the power to heal and improve our health. These plants have been used for centuries to treat various illnesses and ailments. 

In this article, let’s explore more medicinal plants you can grow at home and discover how they can benefit us.

4. Curry Leaf

It is also known as ‘Meetha Neem’ or ‘Dr. Sensitive.’

  • Curry leaves possess numerous healthful properties that aid in the treatment of various health conditions.
  • Nowadays, dried curry leaves are available in the market and are primarily used as spices in the kitchen.

Medicinal benefits of Curry leaves

Many medicinal properties are found in curry leaves which are as follows:

curry leaves

  • Consuming curry leaves is beneficial for diseases related to the liver and heart.

  • They reduce the risk of anemia and help control blood sugar levels in the body.

  • Curry leaves are also effective in treating skin conditions, including spots and pimples. 

  • The antioxidants in curry leaves contribute to heart health by reducing bad cholesterol and increasing the levels of good cholesterol.

  • They can also be consumed to alleviate sinus infections, coughs, and colds.

  • It is suggested to incorporate a daily routine of consuming 6-8 leaves on an empty stomach as a potential solution for the mentioned health issues.

“High levels of vitamins A and C are found in the curry leaves.”

5. Patharchatta Plant (kalanchoe Pinnata)

Pattharchatta is an Ayurvedic plant with numerous medicinal properties.

  • It is commonly used to address various health-related issues at home.
  • The healing properties found in Pattharchatta are beneficial in treating a wide range of diseases.

Patharchatta


Medicinal benefits of Patharchatta

The significant health benefits derived from the use of this potent and evergreen plant include the following:

1. If you have kidney stone problems, Pattharchatta is a natural remedy for your health.

2. The juice extracted from Pattharchatta leaves contains special elements that help control blood pressure levels.

3. Stonecrop leaves contain specific compounds that accelerate the wound-healing process.

4. Additionally, its anti-inflammatory properties can alleviate symptoms such as swelling, redness, and irritation.

How to use Patharchatta as a medicine?

1. Take 2-3 leaves, grind them, and mix the paste with honey.

2. Consume this mixture on an empty stomach with lukewarm water daily to treat kidney stones.

3. It can also provide relief from stomach aches.

“Patharchatta plant can be easily grown from a single leaf cutting.”

6. Night Jasmine (Parijat) 

The Parijat plant, also known as Night Jasmine, Harsingar, is renowned for its abundant medicinal properties, which make it effective in treating various diseases.

  • These small-petaled, white Harsingar flowers are highly fragrant and bloom only at night, earning them the names ‘Night Blooming Jasmine’ or ‘Queen of the Night.
  • Parijat is rich in antioxidants, anti-inflammatory, and antibacterial properties, making it valuable in combating a wide range of illnesses.”

Night jasmine

Medicinal benefits of Parijat (Night Jasmine)

The leaves, flowers, and bark of this plant contain medicinal properties.

1. It is highly effective for arthritis patients.

2. Its leaves can be used to treat colds, flu, and to expel stomach worms.

3. It aids in healing various types of wounds.

4. It is beneficial for individuals with diabetes.

5. It provides benefits for eye diseases.

6. It is also used to treat fever.

7. The properties of Parijat can be useful in managing ringworm.

8. Pile disease can be treated by consuming one seed of Parijat daily.

9. The juice of its flowers is considered effective for heart health and may help prevent heart disease.

How to prepare Parijat for the treatment?

1. Take 6-7 leaves of Parijat.

2. Wash them with water.

3. Boil them in half a liter of water until the quantity reduces to one-fourth.

4. Strain the liquid and consume it with sugar candy.

How to apply it on the wounds?
  • Sometimes wounds take time to heal.
  • To expedite the healing process, apply a paste of Parijat leaves to the wounds.
  • Parijat has antifungal and antibacterial properties, which help prevent the wound from spreading.

7. Bael Plant (Stone Apple)

Bael, also known as the stone apple, is a significant medicinal plant.

Bael plant

  • Ayurveda mentions many of its benefits. The fruit has a tough outer shell, but the inside is soft, pulpy, and contains seeds.
  • Bael is used in the preparation of various medicines, and it also features prominently in many delicious dishes.

“Bael (stone apple) is rich in protein, beta-carotene, thiamin, riboflavin, and vitamin C.”

Medicinal benefits of Bael plant

bael juice

1. Bael fruit can be used to alleviate diarrhea and dysentery.

2. Bael juice is employed to purify the blood.

3. It also enhances the functioning of the kidneys.

4. Consuming Bael fruit aids in the effective removal of impurities from the body.

5. In cases of cholera, consuming Bael juice and Belpatra powder with water provides relief.

How to consume Bael?

1. To treat the above-mentioned ailments, consume the leaves with salt.

2. To prevent heat stroke, it is advisable to drink Bael juice because it has cooling properties. When going out, drinking Bael juice can help keep your body cool and prevent heat stroke.

3. Extracting the juice from Bael leaves and consuming it with black pepper can provide relief from jaundice and chronic constipation.

Bael plants are generally grown in the ground, but they can also be grown in a 12-14 inch pot.

Must read:

Medicinal Plants: Benefits and Uses (Part 1)

Happy Gardening!

seaweed fertilizer FAQs

10 FAQs on Seaweed Fertilizer

Seaweed fertilizer is considered to be one of the best fertilizers in gardening. It contains various micronutrients like nitrogen, phosphorus, and potassium, making it a valuable addition to fertilizers and plant nutrition.

FAQs on Seaweed Fertilizer

In this comprehensive guide, we aim to answer some most common frequently asked questions (FAQs) and provide you with a better understanding of how seaweed fertilizers can enhance your gardening and plant care efforts.

Frequently Asked Questions (FAQs) on Seaweed Fertilizer

Qs: 1 What is seaweed fertilizer?


Ans: Seaweed fertilizer is a natural plant nutrient derived from various types of seaweed or algae.

  • It is used to enhance plant growth, improve soil health, and provide essential nutrients to plants.

Qs: 2 What are the benefits of using seaweed fertilizer for plants?


seaweed liquid fertilizer

Ans: Seaweed fertilizer offers numerous benefits, including improved plant growth, increased yield, enhanced resistance to stress and disease, and better nutrient absorption.

  • It also enriches the soil with essential elements.

Qs: 3 How often can we give seaweed fertilizer?


Ans: The frequency of applying seaweed fertilizer depends on the product and plant type.

  • Typically, it can be used every 2-4 weeks during the growing season.

Qs: 4 Can we give seaweed fertilizer to all types of plants?


all plants indoor

Ans: Yes. Seaweed fertilizer is suitable for most types of plants outdoor and indoor plants, including flowers, vegetables, fruits, and ornamental plants. 

Qs: 5 Can we give seaweed fertilizer in all seasons? 


Ans: Seaweed fertilizer is effective in most seasons.

  • It can be used year-round, but adjustments in application frequency may be needed based on plant growth and seasonal changes.

Qs: 6 Is seaweed fertilizer environment friendly? 


green chili leaves

Ans: Yes, seaweed fertilizer is considered environmentally friendly.

  • It is a natural and sustainable product that doesn’t harm the environment, making it a responsible choice for gardeners.

Qs: 7 What are the two main forms of seaweed fertilizer available in the market?


Ans: The two primary forms of seaweed fertilizer are liquid seaweed extracts and seaweed granules.

seaweed fertilizer

  • Seaweed Liquid extracts are mixed with water and applied as a solution, while
  • Seaweed granules are typically spread directly in the soil.

Qs: 8 Is seaweed fertilizer easily absorbed by plants?


seaweed liquid fertilizer

Ans: Yes, seaweed fertilizer is known for its high bioavailability, meaning that plants can easily absorb and utilize the nutrients it provides.

Qs: 9 Is seaweed granules good for plants?


Seaweed Granules
Seaweed Granules

Ans: Yes, seaweed granules are beneficial for plants.

  • They slowly release nutrients into the soil, providing a consistent source of nourishment and improving soil structure.

Qs: 10 Can we give seaweed granules directly in the soil?


Seaweed Granules

Ans: Yes, you can apply seaweed granules directly to the soil. Simply follow the recommended application rates provided on the product label and mix them into the soil during planting or sprinkle them on the soil surface.

Must read more about seaweed fertilizer:

Seaweed Fertilizer: Benefits and How to Use

Happy Gardening!

FAQs on Cow Dung Fertilizer

Cow dung fertilizer, also known as cow manure, holds a special place in gardening due to its rich nutrient content and soil-enhancing properties.

In this guide, we will address some frequently asked questions and provide insightful answers to help you make the most of this natural, eco-friendly fertilizer in your gardening endeavors.

Qs: 1 What is cow dung fertilizer?

Ans: Cow dung fertilizer, also known as cow manure or cow dung compost, is a natural and organic fertilizer made from cow excrement.

Qs: 2 What are the benefits of using cow dung fertilizer for plants?

Ans: It is beneficial for plants because it is rich in nutrients such as nitrogen, phosphorus, and potassium.

It also improves

  • soil structure,
  • water retention, and
  • microbial activity,
  • plant growth and health.

Qs: 3 Can I use raw cow dung as a fertilizer?

cow-dung
raw cow-dung

Ans: No. Cow dung contains high levels of ammonia and salt, which can cause soil heating.

Qs: 4 Can I use fresh cow dung as a fertilizer?

Ans: Fresh cow dung can be too high in ammonia and harmful to plants if used directly.

    • It is best to decompose completely before applying it to your garden.

Qs: 5 Why should we decompose cow dung before giving it to plants?

cow dung decompose

Ans: Decomposing cow dung can reduce the risk of harmful bacteria and parasites that may be present in fresh dung. 

Qs: 6 Why is it important to dilute the liquid cow dung fertilizer before giving it to plants?

Ans: Diluting liquid cow dung fertilizer before application is essential to prevent nutrient imbalances, maintain plant health, reduce environmental impacts, and support soil microbial activity.

Qs: 7 How often can we give liquid cow dung fertilizer?

Ans: The frequency of application depends on the plant’s needs. 

  • During the growing season, you can give the solution twice a month at the gap of 15 days.
  • However, the specific frequency and amount of fertilizer you should apply may vary based on the type of plants, soil conditions, and the type of fertilizer being used.

Qs: 8 Can we give cow dung fertilizer to all types of plants?

hibiscus flower

Ans: Cow dung fertilizer is generally suitable for a wide range of plants, including vegetables, fruits, flowers, and ornamental plants.

  • However, it may not be ideal for plants that prefer acidic soil, as cow dung tends to raise soil pH. In such cases, you may need to mix it with other organic matter or use alternative fertilizers.

Qs: 9 Can we use cow dung fertilizers in all seasons? 

Ans: Yes. Cow dung fertilizers can be used in all seasons as it’s considered one of the best organic fertilizers.

Qs: 10 Can we store cow dung liquid fertilizer for a long time? 

Ans: Yes, you can generally store cow dung liquid fertilizer for up to 6 months if it’s stored properly in suitable conditions.

Qs: 11 From where can I collect cow dung for fertilizer?

cows in dairy farm

Ans: You can collect cow dung from a local dairy farm or from your own livestock if you have cows. 

Must read this article:

How to make Cow dung fertilizer at home?

Happy Gardening!

gardening

Gardening on a Budget: Thrifty Tips from a Self-Taught Gardener

Gardening is a wonderful hobby that allows you to connect with nature, enhance your surroundings, and grow your produce. However, there is a  perception that gardening can be an expensive pursuit. The truth is with a bit of ingenuity, resourcefulness, and a willingness to learn, you can cultivate a thriving garden without emptying your wallet.

indoor gardening

Let’s explore some practical tips for budget-friendly gardening inspired by my experiences as a self-taught gardener including:

  • starting with seeds,
  • creating DIY compost,
  • embracing container gardening,
  • selecting native plants,
  • reusing and upcycling materials,
  • implementing rainwater harvesting,
  • mastering plant propagation,
  • leveraging community and online resources,
  • practicing selective pest control, and
  • remembering the importance of patience and perseverance.

Start with seeds

To kickstart your garden without a hefty price tag, begin with seeds.

“Seeds are more affordable than seedlings or mature plants and offer the joy of nurturing a plant from its beginning.”

  • You will get a variety of economical seeds for flowers, vegetables, and herbs.
  • You can easily source these from local nurseries, online marketplaces, or through seed swaps with fellow gardeners.
  • You can buy packets of seeds instead of buying ready-to-plant seedlings of your favourite vegetables, like tomatoes, capsicum, bell peppers, etc. 

vegetables

DIY Compost

Compost is the lifeblood of a garden, but you don’t have to buy it.

  • Create your compost bin using kitchen scraps such as fruit and vegetable peels, coffee grounds, and eggshells. Mix in dry leaves and a bit of soil.

kitchen waste

Creating homemade compost, such as cow dung compost and leaf compost, is not only cost-effective but also highly beneficial for plant growth.

  • Cow dung compost is rich in nutrients like nitrogen and serves as an excellent organic fertilizer. 
  • Leaf compost, on the other hand, is an eco-friendly way to recycle fallen leaves from your garden or yard.
compost
kitchen compost

“By creating composts at home, you not only reduce waste but also play a crucial role in ensuring that your plants receive the best nutrition while minimizing your environmental impact.”

Container Gardening

When you are short on space or looking to keep costs low, container gardening is an excellent solution.

container gardening

  • Reuse containers like old buckets, plastic bottles, or wooden crates as planters.
  • An old wooden crate can become a charming herb garden, and repurposed plastic bottles with the tops cut off can serve as ideal containers for growing herbs like mint and basil.

Container gardening allows you to control your soil quality, ensuring optimal growing conditions without the expense of buying pots.”

Local and Indigenous Plants

Select plants native to your region or well-suited to your local climate.

  • These plants are generally robust, requiring less maintenance and fewer interventions like pesticides or excessive watering. By choosing native varieties, you are saving money and promoting biodiversity.

bougainvillea

  • For instance, if you live in a hot and arid area you might choose drought-resistant plants like Bougainvillea, Desert Marigold, Aloe Vera, Agave, Date Palm, etc. These plants require less water and care, reducing your gardening expenses.

Aloe vera pot


Reuse and Upcycle

Get creative with your garden decor.

  • Old tires can become colorful flower beds, discarded wooden pallets can transform into vertical gardens, and even broken teacups can serve as charming plant containers.
  • Look around your home for items that can be upcycled into the garden decor, saving you money and reducing waste.

Rainwater Harvesting

rain water

Water is often a precious resource in India, and implementing a rainwater harvesting system can conserve both water and money.

  • Use collected rainwater for watering your plants, and you’ll notice significant cost savings over time.

Plant Propagation

plant from cutting

Learn the art of plant propagation.

  • Many plants can be multiplied from cuttings or by dividing established plants.
  • It eliminates the need to buy new plants and allows you to share your garden’s bounty with friends and family.
  • For example, a single healthy rose cutting can lead to the growth of a new rose bush with beautiful blooms. Other examples include the money plant, jade plant, and many more.

Community and Online Resources

Join local gardening groups or forums, both in your neighborhood and online.

gardener

  • Gardeners are usually generous with advice, seeds, and even plant cuttings. This sense of community can be a valuable resource for budget-conscious gardeners.

Selective Pest Control

neem pesticide

Rather than reaching for expensive chemical pesticides, try exploring natural and homemade pest control methods.

  • Neem oil, garlic spray, and marigold companion planting can help protect your plants without harming your budget or the environment.

Patience and Perseverance

Remember that gardening is a journey that takes time. Plants need time to grow and flourish. Be patient, learn from your successes and failures, and gradually invest in tools and materials as your gardening skills develop.

Conclusion

butterfly in garden

In conclusion, gardening on a budget is not only possible; it can also be incredibly fulfilling. By starting with seeds, creating your compost, embracing container gardening, and tapping into local resources you can nurture a thriving garden without burning a hole in the pocket. Along the way, you will enjoy the beauty of nature and deepen your connection with the environment and your community.

“So, roll up your sleeves, get your hands dirty, and watch your budget-friendly garden bloom and flourish.”

Happy gardening!

medicinal plants hindi thumbnail

औषधीय पौधे एवं उनके उपयोग: (I)

प्रकृति ने हमें अनगिनत अद्भुत पौधों प्रदान करके हम पर बड़ी कृपा की है। आप  जितना अधिक उनसे परिचित होंगे, उतना ही वे आपको आश्चर्यचकित करेंगे। ये सिर्फ फल, फूल, पत्ते, सब्जियां और ऑक्सीजन ही नहीं बल्कि आयुर्वेदिक औषधियों का भी खजाना हैं।

आयुर्वेद में कुछ औषधीय पौधे और जड़ी-बूटियाँ शामिल हैं, जो कई स्वास्थ्य समस्याओं का प्रभावी ढंग से इलाज या उपचार कर सकते हैं और हमारे समग्र स्वास्थ्य के लिए अच्छे साबित हो सकते हैं। ये पौधे लंबे समय से भारतीय परंपरा का हिस्सा रहे हैं और प्राचीन काल से ही विभिन्न औषधीय प्रयोजनों के लिए उपयोग किए जाते रहे हैं।

आइए जानते हैं ऐसे कौन से औषधीय पौधे हैं, जिन्हें आप अपने घर में लगा सकते हैं और कई बीमारियों से छुटकारा पा सकते हैं।

1. तुलसी (Holy Basil)

तुलसी कई औषधीय गुणों से भरपूर एक पवित्र पौधा है, जो लगभग हर घर में पाया जाता है।

  • तुलसी में कई बीमारियों और दर्द के उपचारात्मक गुण हैं। तुलसी एक अलौकिक माउथ फ्रेशनर है।

tulsi plant

तुलसी के औषधीय लाभ

इस रहस्यमय पौधे की पत्तियों का काढ़ा पीने से खांसी, सर्दी, गले में खराश, सिरदर्द, बंद नाक, मनोवैज्ञानिक तनाव और कई अन्य परेशानियों का इलाज किया जा सकता है। इन पत्तियों को चाय में मिलाया जा सकता है या तरल पदार्थ के रूप में सेवन किया जा सकता है।

कैसे बनाएं तुलसी का काढ़ा?
  • एक पैन में कुछ पत्तियां और 1 लीटर पानी लें।
  • इसे तब तक उबलने दें जब तक पानी की मात्रा आधी न हो जाए।
  • इसे छानकर खाली पेट पियें।

2. गिलोय (Giloy)

गिलोय का उपयोग सदियों से आयुर्वेद में एक औषधि के रूप में किया जाता रहा है और इसने कोविड-19 महामारी में काफी सहायता प्रदान की है।

giloy

  • इसे अमृता भी कहा जाता है और इसमें तीनों रोगों – वात, पित्त और कफ को ठीक करने की अलौकिक शक्ति है।
  • गिलोय को बढ़ने के लिए सहारे की जरूरत होती है और बढ़ते समय यह विभिन्न पेड़ों से लिपट जाती है।
  • इस प्रक्रिया में, यह सहायक पौधों के कुछ लाभकारी गुण भी प्राप्त कर लेता है। इसीलिए नीम के पेड़ पर चढ़ी गिलोय सर्वोत्तम मानी जाती है।

गिलोय के औषधीय लाभ

  • गिलोय से बुखार, पीलिया, एसिडिटी, अपच, अस्थमा, खांसी और फ्लू के कई मामलों को ठीक किया जा सकता है।
  • हालाँकि इस पौधे के सभी भाग जैसे पत्तियाँ, छाल, बेल और जड़ें औषधीय प्रयोजनों के लिए उपयोग की जा सकती हैं, लेकिन इन सभी के अलावा इसकी बेल ने अधिक लोकप्रियता हासिल की है।

giloy plant

गिलोय को औषधि के रूप में कैसे उपयोग करें?
  • लगभग एक इंच की एक बेल लें (चाहे वह नरम हो या सख्त), इसे काटें और अच्छी तरह से कुचल दें।
  • इसे आधा लीटर पानी में तब तक उबालें जब तक पानी आधा न रह जाए।
  • तापमान पीने योग्य अवस्था में आने पर इसे मिश्री के साथ पियें।

3. एलोविरा (Aloe Vera)

Aloe-Vera-Plants

एलोवेरा अपनी मांसल पत्तियों में पानी जमा करता है, यही कारण है कि यह बहुत शुष्क परिस्थितियों में भी स्वयं को बनाए रख सकता है।

  • इसके अनगिनत फायदों के कारण इसका इस्तेमाल लगभग हर घर में किया जाता है।
  • इस रसीले के कई कॉस्मेटिक लाभ हैं। कई बड़े ब्रांड इस पौधे से कॉस्मेटिक और सौंदर्य उत्पाद बनाकर पैसा कमा रहे हैं।
एलोवेरा के औषधीय लाभ

अगर एलोवेरा के औषधीय गुणों की बात करें तो इसमें एंटीसेप्टिक, एंटी-बैक्टीरियल, एंटी-इंफ्लेमेटरी और ऐसे ही कई गुण होते हैं। साथ ही इनमें विटामिन ए और फोलिक एसिड जैसे जरूरी पोषक तत्व भी पाए जाते हैं।

aloe vera gel


  • यह त्वचा और बालों में क्रमशः प्राकृतिक चमक और रौनक प्रदान करता है।
  • मॉइस्चराइजेशन के लिए एलोवेरा जेल को सीधे शरीर पर लगाया जा सकता है।
  • एलोवेरा की तासीर ठंडी होती है।
  • धूप से होने वाली टैनिंग और गर्मी की लू से राहत पाने के लिए इस जेल को सीधे शरीर पर लगाया जा सकता है।
  • एलोवेरा जली हुई त्वचा के लिए मरहम की तरह काम करता है। यह जेल बिना कोई निशान या दाग छोड़े जले हुए हिस्से को ठीक करने में मदद करता है।
  • एलोवेरा खून को साफ करता है और कई लोग इसे रोजाना पीते हैं।

मानव रोगों के उपचार के लिए प्राचीन काल से ही विभिन्न प्रकार के औषधीय पेड़-पौधों का उपयोग किया जाता रहा है। पेड़-पौधे प्रकृति का दिया हुआ वरदान हैं, जो मानव जीवन चक्र में अपनी विशेष भूमिका निभाते हैं।

ऐसे अनगिनत पौधे हैं जिनके चिकित्सीय लाभ बहुत अधिक हैं, लेकिन कई स्वास्थ्य समस्याओं से तुरंत राहत पाने के लिए ये पौधे हर घर में होने चाहिए।

धन्यवाद!

शुभ बागवानी!

vermicompost tea hindi thumbnail (1)

कैसे बनायें वर्मीकम्पोस्ट टी? लाभ एवं उपयोग

वर्मीकम्पोस्ट केंचुओं (अर्थवर्म) से बना एक जैविक और सबसे शक्तिशाली खाद है। आज, कई बागवानों और किसानों द्वारा बागवानी गतिविधियों में वर्मीकम्पोस्ट का व्यापक रूप से उपयोग किया जाता है।

वर्मीकम्पोस्ट को केंचुआ खाद भी कहा जाता है। यह एक प्राकृतिक प्रक्रिया है जिसमें केंचुए पौधों और फलों जैसे कार्बनिक पदार्थों के अवशेषों को खा जाते हैं और उन्हें मल के रूप में पोषक तत्वों से भरपूर खाद में बदल देते हैं। खाद बनाने की यह प्राकृतिक प्रक्रिया मिट्टी की गुणवत्ता में सुधार करने, इसे पौधों के विकास के लिए अधिक उपयुक्त बनाने में फायदेमंद है।

vermicompost manure
vermicompost

बागवानी में टी‘ (tea) क्या है?

  • किसी भी ठोस खाद, को जब तरल उर्वरक बनाने के लिए पानी के साथ घोला जाता है, तो उसे आमतौर पर बागवानी में कम्पोस्ट टी के रूप में जाना जाता है।
  • उदाहरणों में गोबर खाद टी, रसोई खाद टी और वर्मीकम्पोस्ट टी शामिल हैं। इन उर्वरकों से टी बनाने की विधियाँ भिन्न-भिन्न हो सकती हैं।

वर्मीकम्पोस्ट टी (Vermicompost tea) कैसे बनायें?

vermicompost tea
Vermicompost tea
  • बाल्टी में अच्छी गुणवत्ता वाली वर्मीकम्पोस्ट लें।
  • बाल्टी में ढेर सारा पानी डालें। कुछ समय बाद खाद फैल सकती है, इसलिए अतिरिक्त पानी रखें ताकि वह अच्छी तरह घुल जाए।
  • बाल्टी को ढक्कन से ढकें और सीधे धूप से दूर, ठंडी जगह, छायादार जगह पर रखें।
  • पानी वर्मीकम्पोस्ट के पोषक तत्वों को तब खींच लेता है जब यह पानी के साथ मिलना शुरू हो जाता है।
  • घोल (टी) का उपयोग करने से पहले, खाद के कणों को हटाने के लिए इसे कपड़े या महीन छन्नी से छान लें, जो आपकी स्प्रे बोतल में फंस सकते हैं।

vermicompost tea strain

महत्वपूर्ण नोट:

भीगे हुए वर्मीकम्पोस्ट का उपयोग दो प्रकार से किया जा सकता है।

  • भिगोने के 24 घंटे बाद इसका उपयोग किया जा सकता है।
  • इसे भिगोने के 1 सप्ताह बाद भी इस्तेमाल किया जा सकता है।

दोनों घोलों के अलग-अलग लाभ हैं और इन्हें अलग-अलग तरीकों से इस्तेमाल किया जा सकता है।

1. भिगोने के 24 घंटे बाद वर्मीकम्पोस्ट टी का उपयोग करने के लाभ

इसका उपयोग करने के सुझाव

  • घोल को छान लें और प्राप्त टी को 1:1 के अनुपात में पानी के साथ मिलाकर पतला कर लें।
  • बहुउद्देशीय उपयोग के लिए पतले टी को एक स्प्रे बोतल में भरें।

Spray bottle

आप इस पतला वर्मीकम्पोस्ट टी का उपयोग निम्नलिखित तरीकों से कर सकते हैं:

  • इसे छोटे पौधों और पौधों की पत्तियों पर स्प्रे करें।
  • कटिंग के लिए इसे हल्के पौष्टिक टॉनिक के रूप में उपयोग करें।
  • इसे तनाव के समय पौधों पर लगाएं, जैसे कि छंटाई के बाद, दोबारा रोपण के बाद, या नए पौधों का वृद्धि के समय।

वर्मीकम्पोस्ट टी एक त्वरित और प्रभावी खाद है जिसे 24 घंटों में बनाया जा सकता है।

spray vermicompost tea
  • इसका छिड़काव हर 15 दिन में शाम के समय पौधों पर किया जा सकता है।
  • यह उपचार स्वस्थ विकास को बढ़ावा देता है और पत्तियों को चमकदार बनाता है।

2. भिगोने के 1 सप्ताह बाद वर्मीकम्पोस्ट टी का उपयोग करने के लाभ

यदि कम्पोस्ट को 1 सप्ताह तक पानी में भिगोया जाता है, तो इससे अधिक गाढ़ा, गहरे रंग का घोल प्राप्त होगा। वर्मीकम्पोस्ट को पानी में भिगोते समय, पानी के साथ कम्पोस्ट का उचित मिश्रण सुनिश्चित करने के लिए घोल को कभी-कभी हिलाना जरूरी है।

  • मजबूत खाद: इस विधि से प्राप्त वर्मीकम्पोस्ट टी अपनी उच्च सांद्रता के कारण वास्तव में एक मजबूत खाद है।

इसका उपयोग करने के चरण:

  • इस टी को लें (इस समय इसे छानने की कोई जरुरत नहीं है) और इसे 1 भाग टी और 4 भाग पानी के अनुपात में पानी के साथ पतला करें।
  • इस पतली टी को अपने पौधों को धीरे-धीरे तब तक दें जब तक कि यह कंटेनर के निचले छेद से बाहर न निकलने लगे।
  • टी को अलग करने के बाद बचे हुए कम्पोस्ट अवशेषों को मिट्टी के कंडीशनर के रूप में मिट्टी में शामिल किया जा सकता है।

वर्मीकम्पोस्ट टी को सभी प्रकार के पौधों पर डाला जा सकता है

indoor and outdoor plants

यह वर्मीकम्पोस्ट टी पोषक तत्वों से समृद्ध है और इसे सभी प्रकार के पौधों को दिया जा सकता है, जिसमें इनडोर और आउटडोर पौधे, फूल वाले और गैर-फूल वाले पौधे और रसीले पौधे शामिल हैं।

a) इनडोर पौधों के लिए– जब केवल वर्मीकम्पोस्ट टी का उपयोग करते हैं, तब इसे हर 45 से 60 दिनों में एक बार लगाएं।

vermicompost tea in indoor plants

b) आउटडोर पौधों के लिए– जब केवल वर्मीकम्पोस्ट टी का उपयोग करते हैं, तब इसे हर 20 से 25 दिनों में एक बार लगाएं।

नोट:

  • सुनिश्चित करें कि वर्मीकम्पोस्ट चाय का उपयोग करने से पहले और बाद में 10 दिनों तक पौधों पर कोई अन्य खाद न दी जाए।

ठोस रूप के बजाय वर्मीकम्पोस्ट टी की सिफारिश क्यों की जाती है?

कई कारणों से अक्सर वर्मीकम्पोस्ट (ठोस रूप) की तुलना में वर्मीकम्पोस्ट चाय की सिफारिश की जाती है:

1. वर्मीकम्पोस्ट (ठोस रूप) का उपयोग पौधों के लिए स्प्रे के रूप में नहीं किया जा सकता है।

2. छोटे पौधों के लिए, एक तरल टॉनिक की सिफारिश की जाती है। छोटे पौधों के लिए पोषण का तरल रूप उपयुक्त होता है।

watering tips to seedlings

3. इसके अतिरिक्त, कटिंग और लेक्का बॉल्स को, वर्मीकम्पोस्ट (ठोस रूप) को सीधे नहीं दिया जा सकता है। स्प्रे बोतल में भरी हुई तरल टी का उपयोग करना बेहतर होता है।

seaweed sol spray

4. कुछ पौधों को इष्टतम विकास के लिए हर 15-20 दिनों में नियमित पोषण की आवश्यकता होती हैहर 15 दिन में बार-बार वर्मीकम्पोस्ट (ठोस रूप) डालने से मिट्टी की संरचना बाधित हो सकती है। इसलिए वर्मीकम्पोस्ट टी अधिक उपयुक्त विकल्प है।

compost

5. कम्पोस्ट की एक छोटी मात्रा महत्वपूर्ण मात्रा में टी का उत्पादन कर सकती है, जो सभी पौधों को प्रभावी ढंग से पोषण दे सकती है। इसके विपरीत, ठोस खाद, यदि सीमित मात्रा में उपलब्ध हो, तो सभी पौधों के लिए पर्याप्त नहीं हो सकती है।

watering night jasmine plant

6. पौधों में उर्वरक या खाद डालते समय मिट्टी को पानी देना भी महत्वपूर्ण है। इससे मिट्टी को खाद से पोषक तत्वों को अवशोषित करने में मदद मिलती है, जो सीधे पोषक तत्वों से भरपूर टॉनिक (जैसे खाद चाय) प्रदान करने की तुलना में धीमी प्रक्रिया है।

और अंत में:

  • तरल टॉनिक पौधों की वृद्धि में महत्वपूर्ण रूप से सुधार करते हैं, और वर्मीकम्पोस्ट चाय विशेष रूप से तब प्रभावी होती है जब इसे पौधों के लिए पोषक तत्व स्रोत के रूप में उपयोग किया जाता है।

शुभ बागवानी!!!