All posts by Neeraj

gardening

Benefits & Uses of Kitchen Items in Gardening: Garlic, Cinnamon, Buttermilk Tea Leaves

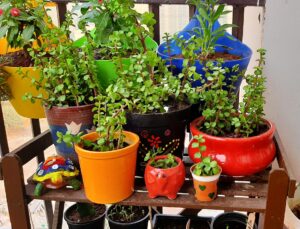
Benefits & Uses of Kitchen Items in Gardening: Garlic, Milk, Buttermilk, Tea Leaves


Our gardening expert, Mrs. Sudeepti Bajpai (founder of Voice of plant Website and YouTube channel), has shared some important insights on various kitchen items — their myths and benefits. She has tested all these items on plants and then shared her observations on whether you should use them in gardening or not. So, let’s get started!

This is the second part of Benefits & Uses of Kitchen Items in Gardening. 

1. Garlic (Lehsun)

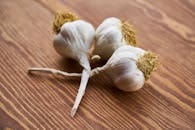
Garlic is often used in gardening as a natural way to repel insects.

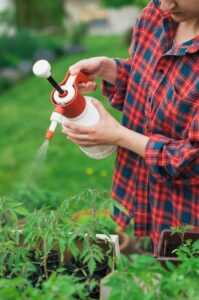
  • To make a garlic-based spray, crush the garlic, boil it in water, and prepare a concentrated solution.
  • This can then be mixed with neem oil and a mild soap to enhance its effectiveness before applying it to plants.

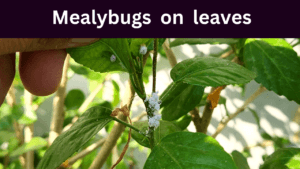
While this mixture can have a generally positive effect on plant health, it’s not particularly effective against visible pests like aphids, mealybugs, or against plant diseases, fungal infections or mildew.

  • However, it can be used as a preventive measure to support plant immunity and keep minor pests at bay.

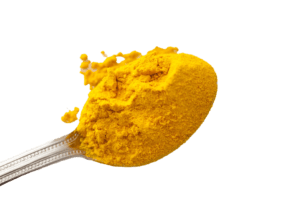
2. Cinnamon (Daalchini)

Cinnamon has various uses in gardening. It’s commonly used as a natural fungicide, an ant repellent, and even as a rooting hormone for plant cuttings.

  • When dealing with fungal infections, sprinkling cinnamon powder directly on the affected area can help eliminate the fungus.
  • It can also be used as a spray—boil cinnamon in water, let it cool, and apply it to the plant.

Cinnamon can be effective in repelling ants if used early, when the infestation is just beginning. However, if ants have already spread extensively, its effectiveness may be limited.

As for its role as a rooting hormone, cinnamon is often used when planting cuttings.

  • While it may help slightly, it doesn’t significantly influence root development.
  • Healthy cuttings will likely root on their own, even without cinnamon.
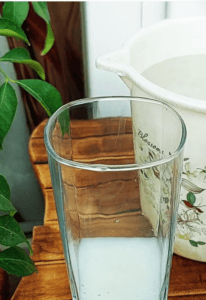
3. Milk

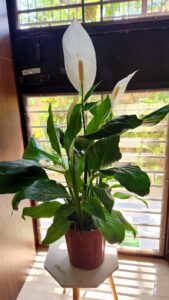
Milk is used in several ways in gardening. One common practice is mixing milk with water and using it to clean the leaves of indoor plants like rubber plants, aglaonema, and peace lilies—this gives the leaves a nice, healthy shine.

Act as a natural fungicide

  • It’s also known to help combat powdery mildew; when sprayed on the affected areas in the early stages, it can significantly reduce the infection.

Used as a calcium supplement for plants

  • Additionally, milk can serve as a mild calcium supplement for plants.
  • When diluted properly, it can be added to the soil or sprayed on leaves to help address calcium deficiencies.

Some gardeners also use milk to promote the growth of vegetable plants or to restore shine to dull leaves.

Note:

  • However, it’s important to note that cleaning leaves with plain water often yields similar visual results, and the effect of milk is more noticeable when powdery mildew is in its early stages.
  • For this purpose, mix milk with 70% water and spray it daily for 4–5 days. It tends to be more effective on foliage plants than on flowering ones.

Overall, milk can be a useful natural remedy in the garden, especially for leaf care, mildew control, and calcium supplementation.

4. Tea and Coffee

Tea and coffee are naturally acidic, making them useful for helping maintain the pH balance of flowering plants—especially since their soil pH often fluctuates.

If a plant appears healthy and all other conditions like sunlight, watering, and care are properly met, but it’s still not flowering, tea or coffee grounds can be a helpful boost.

Simply loosen the soil, add a small amount of tea leaves or coffee grounds, cover it back with soil and water the plant.

  • Within a week, you may start to see new blooms—provided all other growing conditions are in check. This makes tea and coffee a very effective and beneficial ingredient in gardening.

5. Buttermilk

Buttermilk works like magic when it comes to the growth of curry leaf plants.

Acts as a mild calcium supplement

  • Being naturally acidic, it helps maintain the pH level of flowering plants and also acts as a mild calcium supplement.

Also, prevent plants from pests

  • Additionally, spraying buttermilk on plants can help prevent pest and insect infestations.

Used to treat leaf curl

  • It’s also effective in treating leaf curl problems and serves as a good natural decomposer.

How to use::

  • For curry leaf plants, mix one-fourth part of buttermilk with water, add it to the soil, and spray it on the leaves. This not only boosts the plant’s aroma but also supports its overall health.
  • When used for flowering plants, applying buttermilk every 10–15 days can help maintain consistent blooming, although it may not revive a plant whose growth has completely stopped.

As a decomposer, buttermilk is useful—but not essential. Fertilizers can still be prepared effectively without it.

Click here to read: Part 1 of Benefits & Uses of Kitchen Items in Gardening

————————

Follow our Social media channel:

1. Voice of Plant – YouTube Channel

2. Voice of Plant Facebook Page

3. Instagram Voice of Plant Channel

Watch video on this topic

Benefits & Uses of Kitchen Items in Gardening: Buttermilk, Salt, Rice Water, Turmeric

Benefits & Uses of Kitchen Items in Gardening


Our gardening expert, Mrs. Sudeepti Bajpai (founder of Voice of plant Website and YouTube channel), has shared some important insights on various kitchen items — their myths and benefits. She has tested all these items on plants and then shared her observations on whether you should use them in gardening or not. So, let’s get started!


As we all know, our kitchens are full of products primarily meant for cooking. However, many of these ingredients serve multiple purposes—some act as home remedies, others work as whitening agents for laundry, and several find surprising uses in gardening.

You might not be too surprised to learn that various kitchen items can be incredibly helpful in maintaining a garden. Interestingly, these products can be grouped into three categories based on their relevance to gardening: 

  • some are highly beneficial and frequently used
  •  Others have limited but occasional utility
  •  while certain items should be kept completely away from garden spaces

Let’s explore the role of these kitchen products in gardening, starting from the least important to the most essential.

1. Salt 

Salt—whether it’s rock salt, table salt, or plain white salt—is not recommended for plants.

Some people mistakenly add it to the soil or spray it on plants after diluting it in water, which often results in damaging or even killing the plants.

  • Salt should never be added to the soil or sprayed on leaves or flowers.

This confusion often arises due to the similarity in name between regular salt and Epsom salt.

Unlike edible salts, Epsom salt is a mineral compound (magnesium sulfate) that is beneficial for plant growth.

Note:

  • It is not the same as sendha namak (rock salt) or any other edible salt.

Unfortunately, many people mix them up and end up using the wrong type of salt in gardening, which can seriously harm the plants instead of helping them.

Click here to read: All About Epsom Salt: Benefits & Uses in Gardening

2. RO Purifier Waste water 

Many people collect the leftover water from their water purifiers, thinking it’s a great way to avoid waste and reuse it for watering plants. However, this water typically has a very high TDS (Total Dissolved Solids) and contains an excess amount of minerals like calcium.

  • When calcium levels are too high, it interferes with the plant’s ability to absorb other essential nutrients, leading to imbalanced growth.

Note:

  • This leftover water is essentially hard water and lacks the balanced mineral composition that plants need.
  • If using for longer period it can cause noticeable issues over time—plant growth may slow or stop altogether, a white powdery residue may appear on the soil or pots, and the leaves might lose their shine, start fading, or show signs of distress.

Note:

  • If the natural water in your area has a low TDS and is generally of good quality, you can use purifier wastewater cautiously.

But observe your plants closely—if they begin to show any of the symptoms mentioned within a month or two, it’s best to stop using that water altogether.

3. Turmeric (Haldi)

Turmeric is often recommended as a natural remedy to repel pests and insects in plants.

A small pinch of turmeric can be mixed into the soil while preparing the potting mix or sprinkled into the loosened soil if you notice ants or other pests around the plant. However, some gardeners have reported that their plants were damaged after using turmeric.

There could be two main reasons for this.

1. First, turmeric is quite potent.

  • While experienced gardeners may know how to use it effectively, beginners should be cautious and only use it in very small amounts.
  • Overuse can harm the plant.

2. Second, the turmeric powder available in markets is sometimes adulterated with artificial colors and additives, which can be harmful to plants.

  • To avoid this risk, it’s best to use natural, unprocessed turmeric.
  • Get solid turmeric (raw haldi), grind it into powder at home, and then use it sparingly in your garden.

Note:

  • Using turmeric in gardening hasn’t shown significant results in treating fungal infections or repelling insect attacks.
  • However, it has proven somewhat effective in getting rid of ants.
  • Beyond that, its impact on plant health or pest control appears to be minimal.

4. Rice – Pulse Water 

The water used to rinse or immerse rice and pulses can be safely given to plants.

  • While it may not significantly boost plant growth, it doesn’t cause any harm either.
  • Importantly, it doesn’t attract ants, pests, or fungal infections, making it a practical and eco-friendly way to reuse water instead of wasting it.

5. Fitkari (Alum)

Alum is sometimes used for flowering plants to help maintain their soil pH, as the pH levels in these plants tend to fluctuate frequently.

  • A small amount of alum is dissolved in water and given to the plant to help stabilize the pH.
  • In some cases, this can help revive flowering and encourage blooms.

However, the results can vary—it may work well for some plants but show little to no effect on others. Since alum doesn’t have any known harmful side effects when used in moderation, it can be tried as a part of a trial-and-error approach. While it’s not a guaranteed solution, it’s a safe option worth experimenting with.

6. Jaggery (Gud)

Jaggery is commonly used while preparing homemade fertilizers or bio-enzymes for plants, but it should not be given directly to plants by simply dissolving it in water.

  • Instead, it serves as a helpful ingredient during the composting or fermentation process, acting as a natural decomposer.

Note:

  • It’s important to note that jaggery is not essential—fertilizers can work effectively even without it.
  • If you choose to include it, limit its use to 3–4 times a year rather than with every fertilizer application.

That wraps up the first part of the role of various kitchen ingredients in gardening—their myths and their real results. Use them wisely, based on your plant’s needs and observed outcomes.

Happy Gardening !

Follow our Social media channel:

1. Voice of Plant – YouTube Channel

2. Voice of Plant Facebook Page

3. Instagram Voice of Plant Channel

 Watch video on this topic

How to Care Plants in Summer: Check 12 Essential Tips

How to Care Plants in Summer


Plants, like all living beings, need appropriate care to survive the scorching weather. Generally, plants rooted in the ground handle heat better than those in containers, which can suffer significantly when temperatures rise above their comfort zone of 15-35℃, often reaching 41 – 43℃ or higher. 

Balcony garden


The health of plants can suffer significantly in extreme heat. They often dry up, their leaves turn yellow, the soil becomes parched, and the leaves can get scorched, leading to overall plant burn.

How to Care Plants in Summer


Many gardeners struggle to save their plants because they lack the knowledge to properly care for them during intense heat. Some people fail to water correctly, while others apply too much fertilizer. Here are some common tips to help gardeners protect their plants in extreme heat:

1. Positioning of the Plant

2. Covering the Plants

3. Watering During Summers

4. Avoid Pruning in Summer

5. Avoid Repotting

6. Avoid giving heavy fertilizer

7. Water Spray

8. Soil Care

9. Mulching

10. Prevent Pest Attack

11. Avoid Growing New Plants

12. Monitoring plants

12 Tips To Care Plants in Summer


Check essential care tips for plants in summer to ensure they thrive in the scorching heat.

1. Positioning of the Plant


Morning sunlight from 7 am – 10:30 am benefits plants, while the midday sun from 11 am-4 pm can be harsh.

(i) Move summer plants like Hibiscus, Tulsi (Holy basil), Shami, Aprajita (Clitoria), Night Jasmine (Parijat), Curry leaf plant, etc. to areas with morning sun.

(ii) Place winter plants like Rose, Marigold, Calendula, Chrysanthemum, etc. under green shades to catch evening light, and bring delicate plants indoors.

  • Arrange plants near walls, balconies, or corners to shield them from the harsh midday sun.

2. Covering the Plants


Use a green net to cover balconies, terraces, or garden areas, which can be found at hardware stores.

  • If unavailable, use cloth, sarees, or dhoti-type fabrics as alternatives. These coverings not only protect plants but also help maintain home temperatures by blocking direct sunlight.

3. Watering During Summers


Regular watering is crucial during extreme summer. 

(i) Early Morning or Late Evening:

Water your plants early in the morning or late in the evening to minimize evaporation and allow the plants to absorb moisture.

(ii) Deep Watering:

Water deeply and infrequently to encourage deep root growth. Shallow watering can lead to shallow roots, making plants more vulnerable to heat.

Avoid Midday Watering:

Avoid watering during the hottest part of the day, as most water will evaporate before reaching the roots.

4. Avoid Pruning in Summer


Avoid unnecessary cutting, shaping, and pruning, which can lead to fungal infections.

Only cut to remove pests or yellow leaves, and deadhead flowers as needed.

Avoid planting cuttings, as they require humidity and favorable conditions not present in summer.

5. Avoid Repotting


Do not repot your plants in the middle of summer, especially during the hottest part of the day. It can stress them out.

Repotting in extreme heat can cause significant stress to the plants, making them more vulnerable to wilting and damage.

  • If repotting is necessary, try to do it during cooler parts of the day during late evening, to minimize the stress on your plants.

6. Avoid giving heavy Fertilizer


High temperature slow downs plant chemical reactions, so avoid heavy fertilizers like chemical urea, NPK, DAP, mustard cake, and groundnut cake.

Use diluted liquid fertilizers like cow dung liquid fertilizer, vermicompost tea, banana peel liquid fertilizer, seaweed liquid fertilizer, kitchen compost tea, and onion peel liquid fertilizer once in a month.

7. Water Spray


Spray water on plants in the morning or evening to avoid the intense midday sun. This helps remove dust, cool the leaves, and increase humidity.

  • Regular spraying also allows for monitoring plant health and identifying diseases. Aim to spray plants daily in summer, or at least once or twice a week.

8. Soil Care


(i) Well-Draining Soil:

Ensure your soil is well-draining to prevent waterlogging, which can be as harmful as drought.

(ii) Organic Matter:

Add organic matter such as compost to improve soil structure and water-holding capacity.

9. Mulching


Apply a layer of mulch around the base of your plants to help retain moisture, regulate soil temperature, and reduce weed growth.

10. Preventing Pest Attacks


Summer can increase pest vulnerability. Use neem leaf solutions to spray plants, and for severe infestations, use organic plant protectors made from natural ingredients.

Regular applications can prevent and treat pests like aphids, mealybugs, and mites.


11. Avoid Growing New Plants in Summer


Avoid planting new seeds or buying new plants from nurseries during the peak heat of 40°C.

Seeds require milder weather for germination, and new plants may not thrive.

  • Wait until the rainy season to repot existing plants.

12. Regular Monitoring Maintaining Plant Health 


With proper care and attention, plants can thrive even in the scorching summer heat.

Regular watering, careful positioning, and protective measures can ensure your plants remain healthy and vibrant throughout the season.

Follow our Social media channel:

1. Voice of Plant – YouTube Channel

2. Voice of Plant Facebook Page

3. Instagram Voice of Plant Channel

7 Tips To Care Jade Plant in Summer for Healthy Growth

Tips To Care Jade Plant in Summer

Did you know?
Summer provides the ideal environment for the jade plant to spread and grow.

Jade plants are hardy, aesthetically pleasing, and ridiculously easy to care for—especially if you understand what they need.

Jade plant healthy in summer season

Tips To Care Jade Plant in Summer


Why Jade Plants Thrive in Summer


Jade plants are natural sun lovers—more sunlight, longer days, and warmer temperatures all boost their growth and development.

Summer is the season when Jade plant shine and thrive. It’s also the ideal time for repotting, propagating, and fertilizing. 

The high temperatures promote active growth, meaning you’ll notice new leaves and branches popping up quickly. However, summer doesn’t come without its risks.

Excessive heat, intense sunlight, and improper watering can stress the plant if not managed properly.

Understanding Jade Plant Needs in Warm Weather


1. Light Requirements During Summer


Light is like coffee for jade plants—it energizes them and helps them grow. Jade plant prefer bright direct light, and can tolerate direct sun for a few hours daily.

Morning sun is ideal. A good rule of thumb is to provide your jade plant with at least 4–6 hours of bright, filtered sunlight daily.

Note:

  • Too much harsh sunlight can stress your jade plant. Avoid exposing it to intense sun during summer.

Signs that your jade is getting too much sun include:

  • black or brown spots on the leaves,

  • leaf edges turning crispy,

  • overall leaf shrinkage.

If you’re seeing these symptoms, dial down the exposure slightly. Conversely, if your plant looks leggy or pale, it might not be getting enough light.

2. Watering Jade Plants in Summer


How often should you water?


The biggest mistake most people make? Treating them like tropical plants. These are succulents, which means they’re built to withstand dry conditions.

Always check the top 1 to 2 inches of soil—if it’s dry, it’s time to water. If it’s still damp, wait a few more days. Your jade doesn’t like soggy feet.

Use the “soak and dry” method:

  1. Water thoroughly until it runs out of the drainage holes.

  2. Let the soil dry completely before the next watering.

Did You Know?

Proper watering promotes lush foliage, vibrant coloration, and robust growth in Jade plant.

Note:

  • Jade Plant thrive in moderate to high humidity levels. Mist the leaves occasionally to increase humidity.

4. Best Soil Mix for Summer Growth


Soil is the foundation of healthy growth, and in the hotter months, your jade needs a mix that supports rapid drainage and aeration. 

So, what’s the ideal summer soil mix for a jade plant? Think gritty, airy, and well-draining.

Check here – Best Soil Mix for Jade Plant for Healthy Growth

Importance of Well-Draining Pots

Equally crucial as the right soil is the right container.

  • Jade plants hate sitting in water, so your pot must have drainage holes—no exceptions. 
  • Avoid pots that are too large. Oversized pots hold more soil and moisture, which increases the chances of overwatering.
  • Jade plants actually prefer being a bit root-bound, so it’s okay if their current pot feels snug.

5. Fertilizing Jade Plants in the Summer Season

Summer is prime time for feeding your jade plant—it’s growing like crazy and needs nutrients to keep up the pace. But not just any fertilizer will do. You want something tailored for succulents and cacti, which typically need lower nitrogen levels compared to leafy houseplants.

Go for a balanced or low-nitrogen liquid fertilizer with an NPK ratio of around 10-20-10 or 5-10-5. Here’s what those numbers mean:

  • N (Nitrogen): Leaf and stem growth

  • P (Phosphorus): Root development

  • K (Potassium): Overall plant health and disease resistance

Note:

  • While jade plants benefit from a nutrient boost in summer, too much fertilizer can do more harm than good.
  • Too much nitrogen can make your jade grow leggy and weak, especially in summer when it’s already growing fast.

6. Pruning of Jade Plants in Summer

Summer pruning is like giving your jade plant a spa day—it encourages fresh growth, shapes the plant, and improves air circulation. As jade plants grow vigorously during summer, pruning becomes essential for maintaining a balanced, bushy shape.

Check here: Jade Plant Pruning Tips for Healthy & Bushy Growth

7. Common Mistakes to Avoid During Summer


(i) Overwatering is the number one killer of jade plants.

  • In the summer heat, soil may appear dry on the surface, but that doesn’t mean the roots need more water.
  • Always check 1–2 inches below the surface before watering.
  • Remember, jade plants store water in their leaves—they’re built for drought, not swampy soil.
  • Excessive watering leads to root rot, yellowing leaves, and an overall decline in health.

(ii) Ignoring Temperature Fluctuations

Temperature swings are more common than you think in summer—especially in areas where days are scorching but nights cool down significantly. Unfortunately, many plant parents overlook how these shifts can stress their jade plants.

Jade thrives in stable temperatures between (18°C to 35°C). Sudden spikes or drops, especially at night, can cause leaf drop, slowed growth, and even root shock. 

With proper sunlight, watering, and care, your jade plant will flourish throughout the summer months, bringing greenery and joy to your space.

Follow our Social media channel:

1. Voice of Plant – YouTube Channel

2. Voice of Plant Facebook Page

3. Instagram Voice of Plant Channel

Best Pot Size for Jade Plant: Selection The Right Pot – Small, Medium or Large

Best Pot Size for Jade Plant


Jade plants are popular succulents that are easy to care for and make beautiful additions to your garden area. Jade plant can thrive and grow happily in a pot for many years, reaching up to three feet in height. 

When selecting the right pot for a jade plant, there are a few key factors to keep in mind. Jade plants develop thick, woody stems and fleshy, rounded leaves. Though their growth is slow, they can become top-heavy as they mature and produce new foliage.

Since jade plants are sensitive to excess moisture and cannot tolerate water sitting at the base of the pot (often called “wet feet”), proper drainage is essential to prevent root rot. Therefore, it’s best to choose a pot that has a wide, stable base to support the plant’s weight and promotes effective drainage to keep the roots healthy.

Best Pot Size for Jade Plant


Understanding Jade Plant Growth


Jade plant in small pot

Before we discuss pot size, it is important to understand how jade plant grow.

Slow growth

  • These succulents have a slow to moderate growth rate and prefer well-draining soil.

They do not require deep pots to thrive

  • Their root systems are relatively shallow, which means they do not require deep pots to thrive.

Why Pot Size Matters


The size of the pot you choose can significantly impact the health and growth of your jade plant. Here’s how:

1. Drainage:

    • Jade plant is susceptible to root rot if left in waterlogged soil.
    • A pot that is too large may hold excess moisture, increasing the risk of rot.
    • It is essential to choose a pot with good drainage holes to prevent this issue.

2. Root Development:

    • While it might seem like giving your jade plant more space to grow is beneficial, a pot that’s too large can actually hinder root development.

In a large pot, the soil may stay moist for too long, which can lead to root rot before the plant has a chance to establish itself.

3. Stability:

    • Jade plants are known for their thick, woody stems and heavy leaves.
    • A pot that is too small might not provide enough stability, causing the plant to topple over as it grows.
    • On the other hand, a pot that is too large might make it difficult for the plant to anchor itself securely.

Choosing the Right Pot Size for Jade Plant


Healthy Jade plant in ceramic pot

So, what is the best pot size for a jade plant?

1. Small to Medium Pots:

Generally, jade plant do well in small to medium-sized pots, depending on their size.

  • For a young jade plant, a pot that is 2-4 inches larger in diameter than the plant’s root ball is ideal.
Young Jade plant in small pot
  • As the plant grows, you can gradually move it to a slightly larger pot, but avoid jumping to a pot that is too large too quickly.

Also, read:

5 Best Tips to Make Jade Plant Bushy


2. Repotting:

Jade plant do not need frequent repotting.

  • Every 2-3 years is usually sufficient, and when you do repot, only increase the pot size by a couple of inches.
  • This allows the plant to grow steadily without overwhelming its root system.

Pot Material Considerations


The material of the pot can also affect the health of your jade plant:

1. Terracotta Pots:

These are excellent for jade plants because they are porous and allow the soil to dry out between waterings, reducing the risk of root rot.

2. Plastic Pots:

While lightweight and affordable, plastic pots retain moisture longer, which may not be ideal for jade plants.

  • If using a plastic pot, ensure it has adequate drainage holes and monitor soil moisture closely.

3. Ceramic Pots:

Healthy Jade plant in ceramic pot

Glazed ceramic pots can also be a good choice, but like plastic, they hold moisture longer.

  • Just make sure they have good drainage.

Signs Your Jade Plant Needs a New Pot


healthy jade plant

How do you know when it’s time to repot your jade plant? Here are some signs to look out for:

  • Roots Growing Out of the Drainage Holes: If you notice roots coming out of the bottom of the pot, it’s time to move your jade plant to a slightly larger pot.
  • Stunted Growth: If your jade plant has stopped growing and looks cramped, it may need more space.
  • Frequent Wilting: If your plant wilts frequently even though you’re watering it properly, the roots may be overcrowded.

Conclusion


In conclusion, jade plant do not need a large pot for healthy growth. In fact, smaller pots are often better suited to their shallow root systems and preference for well-drained soil.

Choosing the right pot size and material can help ensure your jade plant thrives, offering you beautiful greenery for years to come. When in doubt, opt for a pot that’s just slightly larger than the plant’s root ball and ensure it has good drainage to prevent waterlogging.

By following these guidelines, you can enjoy a healthy and vibrant jade plant in your home or garden.

Follow our Social media channel:


1. Voice of Plant – YouTube Channel

2. Voice of Plant Facebook Page

3. Instagram Voice of Plant Channel


Happy gardening!

Gardener’s Guide: How to Grow Healthy Plants at Home: Follow 10 Tips

How to Grow Healthy Plants at Home


Whether you’re a beginner or an experienced gardener, growing healthy plants requires consistent care and attention. Growing healthy plants at home is not a difficult task. Just you need to follow these 10 simple tips to make your plant healthy throughout the season. 

Balcony garden

Here are some practical tips on “How to Grow Healthy Plants at Home”


1. Use Clay Pots for Best Results


Clay pots are an excellent choice for gardening.

  • They are porous, allowing air circulation to the roots and preventing overwatering.
  • They also help keep the soil cooler, which is beneficial for most plants.

2. Balance Watering


Watering is crucial, but it’s a balance:

  • Overwatering: Can lead to root rot.
  • Underwatering: Can cause plants to dry out and weaken.
  • Check the soil before watering.
  • The top layer should feel dry but not cracked.
  • Maintain a consistent watering schedule tailored to your plant’s needs.

Click here to read: How to Water Plants Correctly


3. Fertilize Regularly


Fertilizers supply essential nutrients that soil alone may lack:

For Outdoor Plants: Apply organic fertilizers like cow dung compost, vermicompost or any other liquid fertilizer every 15–20 days.

For Indoor Plants: Feed them less frequently, about once every 45 days.

  • Using organic options ensures sustainable growth without harming the environment.

Click here to read: Best Organic Fertilizers for Plants


4. Pruning and Deadheading


Pruning: Remove dead or yellowing leaves to promote airflow and prevent disease.

Deadheading: Regularly remove spent flowers to encourage new blooms and improve the plant’s appearance.

Click here to read: Pruning of Plants Complete Guide


5. Use a Rich Soil Mix


Healthy plants start with healthy soil. A good mix should include:

  • Garden soil for structure.
  • Compost for nutrients.
  • Sand or cocopeat to ensure the soil is porous and drains well.

A well-draining soil mix prevents water stagnation while retaining adequate moisture for roots.

Click here to read: Best Soil Mix for Plants


6. Provide Adequate Sunlight


Sunlight is essential for photosynthesis. Ensure your plants receive the appropriate amount:

Full Sun Plants: Require 6–8 hours of sunlight daily (e.g., Tulsi, Curry leaf, Hibiscus, Roses, Marigolds, etc).

Partial Shade Plants: Thrive in bright and indirect light or 4–6 hours of morning sunlight (e.g., Peace Lily, Money plant (pothos), ferns, Aglaonema, etc.).


7. Pest Treatment


Pests can damage even the healthiest plants. Inspect leaves and stems regularly for signs of trouble.

  • For mild infestations, wash the leaves with water.
  • For persistent pests, use a neem oil spray (1 tablespoon neem oil + 1 liter water).

8. Tilling the Soil Every 15 Days


Loosening the soil every 15 days aerates the roots and ensures better water and nutrient absorption. This practice also helps in breaking up compacted soil, which can restrict root growth.


9. Do Not Move Plants Unnecessarily


Plants acclimate to their environment over time. Constantly moving them can cause stress and disrupt their growth.

  • Position your plants carefully and allow them to thrive in their chosen spot unless there’s a compelling reason to relocate them.

10. Repot When Necessary


As plants grow, their roots may outgrow the pot. Repot them into a slightly larger container every 1-2 years to ensure they have enough room to thrive.

Learn and Experiment


Gardening is about learning through experience.

  • Observe how your plants respond to light, water, and fertilizers, and adjust accordingly.
  • Don’t hesitate to try new plant varieties or techniques.

Be Patient and Enjoy the Process


Plants take time to grow and flourish. Be patient and enjoy the journey of caring for them. Each new leaf or bloom will be a reward for your efforts.

Gardening is both an art and a science. By following these tips, you’ll create a thriving garden filled with vibrant, healthy plants. Remember, plants are living beings that respond to care and patience, so enjoy the journey and learn from every experience!

Happy Gardening!

Follow our Social media channel:

1. Voice of Plant – YouTube Channel

2. Voice of Plant Facebook Page

3. Instagram Voice of Plant Channel

How I Care My Tulsi Plant: 7 Easy Tips For Healthy Bushy Green Tulsi Plant

7 Easy Tips For Healthy Bushy Green Tulsi Plant

In my garden, I really love my Tulsi plant. Tulsi is more than just a plant—it’s a symbol of purity, health, and natural healing. Growing a healthy Tulsi plant at home is not only rewarding but deeply fulfilling, especially when you understand how to care for it with love and attention.

Healthy Bushy Green Tulsi Plant

In my own experience, Tulsi has proven to be a generous and resilient plant. With just a little regular care, it transforms into a beautiful, bushy, and aromatic presence in the garden. Here’s how I take care of my Tulsi plant and how you can do the same!


7 Easy Tips For Healthy Bushy Green Tulsi Plant


🌿Tip 1. The Magic of Weekly Pruning & Pinching


Every week, I gently prune the tops of the Tulsi plants. This practice helps encourage branching and fuller growth before the plant starts producing flowers or seeds.

Tulsi belongs to the mint family (Lamiaceae), which means it naturally grows in pairs—each branch with two leaves at the same point. When we pinch off the top growing tip or central flower stalk, the two side shoots begin to grow vigorously. This results in exponential growth, making the plant bushier and more productive.

Not only does this method give us a healthier plant, but it also provides us with more leaves to harvest for herbal teas and natural remedies.

Tip 2: Choose the Right Pot Size

Tulsi plant in clay pot


I always grow my Tulsi plant in a minimum 12-inch clay pot. Why clay pots? Because they are ideal for Tulsi’s growth.

Here’s why:

  • They allow better aeration for the roots.

  • Clay naturally absorbs excess moisture, preventing overwatering.

  • The soil stays cool and breathable, which is great for healthy root development.

🌱 My Tip:
Avoid using small or plastic pots. A small pot restricts root growth, causing the plant to remain weak or dry out quickly. A spacious clay pot encourages a vigorous and bushy Tulsi plant.

Tip 3: Remove Flower Buds (Manjaris)

Pruning of Flowers buds of Tulsi plant

Tulsi plants love to flower, but allowing them to bloom too early reduces the number of leaves.

How I Care:

I remove flower buds (Manjaris) regularly as they appear.

  • This delays blooming, keeps the plant in the leaf-producing stage longer, and ensures the plant stays leafy and green.

Tip 4: Keep the Soil Loose and Well-Aerated

Tulsi thrives in loose, well-drained soil.

🪴 How I Care:
Every 10 to 15 days, I gently till the top layer of the soil. This:

  • aerates the roots,

  • improves water and nutrient absorption,

  • prevents the soil from becoming compacted,

  • supports stronger and deeper root growth.

Secret Tip: Do Not Move Tulsi Plants Unnecessarily

Tulsi plants adapt to their environment. Constantly shifting them from one place to another can stress the plant and hinder growth.

📍 How I Care:
I choose the perfect location for my Tulsi and leave it there to thrive.

  • I only move it if absolutely necessary, such as during extreme weather conditions.

Tip 5: Find the Perfect Sunny Spot

Tulsi is a sun-loving plant and thrives best in direct light.

☀️ How I Care:
I keep my Tulsi on a sunny balcony where it gets 6 to 8 hours of direct sunlight daily.

  • A south- or east-facing window or open terrace works well too.

Tip 6: Water Only When Needed

Watering Tulsi correctly is essential. Both overwatering and underwatering can damage the plant.

💧 How I Care:
I water my Tulsi only when the topsoil feels completely dry to the touch.

  • This prevents root rot and ensures the plant receives just the right amount of moisture.

Tip 7: Feed Organically

Organic nutrition goes a long way in keeping Tulsi vibrant and full of life.

🌿 How I Care:
Every 2 to 3 weeks, I feed my Tulsi with:

  • Cow dung manure

  • Compost tea

  • Or homemade kitchen compost

This keeps the plant healthy, green, and resilient during the growing season.

READ HERE – How To Grow Tulsi Plant From Seeds at Home


🌱 A Sacred Gift of Nature

Tulsi isn’t just a plant—it’s a sacred gift. Revered across cultures for its healing properties, Tulsi blesses us with both health and peace.

  • If we care for her gently and consistently, she will reward us with lush greenery and healing energy.

🌱 Final Thought: Love and Patience Matter

Tulsi is a plant that gives back abundantly when cared for properly. These simple yet powerful tips have helped me grow a strong, bushy, and thriving Tulsi plant at home—and they can help you too!

Start small, observe your plant, and nurture it with care. You’ll be amazed at how it responds with lush growth and healing energy.

Take care of this sacred medicine, and she will take care of all of us.
===================

Follow our Social media channel:

1. Voice of Plant – YouTube Channel

2. Voice of Plant Facebook Page

3. Instagram Voice of Plant Channel

Happy gardening!

How To Grow Peace Lily Big and Tall: Check 7 Smart Tips

How To Grow Peace Lily Big and Tall

Peace Lily is a beautiful indoor plant with shiny green leaves and white flowers. Many people grow it at home, but it often stays small. Want to make yours grow big and tall? Just follow these 7 simple tips and tricks!

How To Grow Peace Lily Big and Tall


1. Choose a Tall-Growing Variety


Not all Peace Lilies are created equal! If you want a tall plant, start by selecting a variety that naturally grows large.

Some types are bred to stay small and compact—so avoid varieties like ‘Jetty,’ ‘Petite,’ ‘Wallisii,’ and ‘Little Angel.’

Sensation Peace Lily

Instead, opt for cultivars like ‘Sensation’ or ‘Mauna Loa’. These types are known for their impressive height and broader leaves.

Did You Know?

The ‘Sensation’ variety can grow up to 6 feet tall and equally wide, making it the perfect choice for those aiming for a towering indoor beauty!


2. Provide Bright, Indirect Light

Peace Lilies are often labeled as “low-light” plants—but for tall growth, they need more than just a dim corner.

  • A spot with bright, indirect light will encourage upward growth and frequent flowering.
  • Low light may keep the plant alive, but better light helps it thrive.

Did You Know?


Just 2 hours of morning sunlight before 9 AM can make your Peace Lily bushier, healthier, and encourage more blooms!


3. Keep It Slightly Rootbound


Here’s a surprising trick: Peace Lilies grow better when slightly rootbound.

  • When the roots are a little snug in their pot, the plant focuses energy on growing upward and producing flowers.

But if you decide to repot, only go up one pot size to avoid too much soil that can trap moisture and harm the roots.


4. Add a Touch of Lemon Juice


This unconventional method can give your plant a boost.

Peace Lilies prefer slightly acidic soil (pH between 5.8 and 6.5). If your tap water is alkaline, you can improve the soil condition by adding lemon juice.

Simply mix 1-2 tablespoons of lemon juice in a gallon of water and use it once a month.

  • You can also lightly mist the leaves with this mixture—it helps clean the foliage, reduces salt buildup, and deters soft-bodied pests.

5. Don’t Overwater – Let Soil Dry Slightly


Overwatering is one of the biggest mistakes Peace Lily owners make. These plants love humidity, yes—but not soggy soil. For tall growth, allow the top inch of soil to dry before watering again.

A dry spell between waterings encourages the roots to grow deeper and stronger, helping your plant access nutrients more efficiently.

Quick Tip:

Use the finger test—poke your finger into the soil about 2 inches. If it feels dry, it’s time to water.


6. Feed With a Potassium-Rich Fertilizer


While nitrogen is great for leafy growth, potassium is the key nutrient when it comes to building strength, supporting photosynthesis, and boosting the plant’s overall vigor.

Choose a balanced fertilizer, ideally something like 10-20-10, where the last number (potassium) supports robust plant health and tall growth.

  • Feed every 4–6 weeks during the growing season.

7. Let the Pups Grow With the Main Plant


Instead of separating the baby plants (pups) from the mother plant, let them grow together in a slightly bigger pot. This promotes a bushier, fuller look and minimizes stress on the main plant.

Pups can actually benefit from the established root system of the mother, making the entire plant grouping stronger and more vibrant.


Bonus Tip:


Wipe the leaves with a damp cloth regularly.

  • Dust can block sunlight and interfere with photosynthesis—keeping the leaves clean helps the plant “breathe” better and grow faster.

With these practical tips, your Peace Lily will not only stay healthy but will also grow taller, fuller, and more beautiful over time. All it takes is a little attention and the right care—and soon, your indoor space will be graced with the elegant presence of a flourishing Peace Lily!
————

Follow our Social media channel:

1. Voice of Plant – YouTube Channel

2. Voice of Plant Facebook Page

3. Instagram Voice of Plant Channel


Tips to Grow and Care for Tuberose Rajnigandha at Home in a Pot

Tips to Grow and Care for Tuberose Rajnigandha at Home in a Pot


 Tuberose also known as Rajnigandha is a beautifully fragrant flower that can be easily grown at home in pots. Known for its white, waxy, and highly aromatic blooms, tuberose is often used in perfumes, floral arrangements, and gardens.

Growing tuberose in pots is an excellent option for those with limited space, allowing you to move the plant around easily to provide optimal growing conditions.

Whether you’re a beginner or an experienced gardener, this guide will help you grow and care for tuberose successfully in a pot.

How to get Tuberose (Rajnigandha)

Tuberose can be grown in two main ways:


1. From Bulbs

Tuberose bulbs

Growing tuberose from bulbs is a popular method as it ensures good growth and flowering.

  • Choose Healthy Bulbs: Select firm, disease-free bulbs for planting.

  • Planting Depth: Plant bulbs 2–3 inches deep with the pointed end facing upwards.

  • Spacing: Keep a distance of 6–8 inches between bulbs for proper growth.

  • Watering: Water immediately after planting and keep the soil moist but not soggy.

2. Buying from a Nursery

If you want an easier option, you can buy a potted tuberose plant from a nursery.

Things to Consider When Buying from a Nursery:
  • Choose a plant with healthy green leaves and no signs of pests or disease.

  • Check if the plant already has flower buds or if it is still growing.


Tips to Grow and Care for Tuberose Rajnigandha


1. Best time to plant Tuberose (Rajnigandha)


The best time to plant tuberose bulbs is in early spring, once the risk of frost has passed and daytime temperatures remain above  21°C.

2. Sunlight for Tuberose Plant

Tuberose flower


Tuberose thrives in direct sunlight, making it essential to place the plant in a location that receives 6 to 8 hours of sunlight daily.

  • The ideal temperature range for tuberose growth is 15°C to 35°C.

  • If temperatures exceed this range, move the plant to partial shade to prevent leaf burn.

  • Protect the plant from extreme cold and winter dew, as excessive moisture and frost can damage its delicate bulbs and leaves.

3. Choosing the Right Pot

Rajnigandha in pot

Selecting the right pot is crucial for the healthy growth of tuberose.

  • Size: Choose a pot that is at least 10-12 inches deep and wide to accommodate the bulb’s growth and root expansion.

  • Material: Clay pots are the best choice due to their breathability, but you can also use cement, ceramic, or plastic pots based on your preference.

  • Drainage: Ensure the pot has drainage holes at the bottom to prevent waterlogging, which can lead to root rot.

4. Selecting the Best Soil


Tuberose thrives in well-draining, nutrient-rich soil.

  • Soil Mix: A mix of garden soil, compost and sand (in equal proportions) works best.

  • Aeration: Avoid compact soil; adding perlite or cocopeat can improve aeration.

  • Signs of Underwatering: Dry, crispy leaves and slow growth.

5. Watering Tuberose Plant 


Tuberose requires balanced watering—both overwatering and underwatering can negatively affect plant health.

  • Excess water can lead to fungal infections and pest infestations, stunting growth and causing yellowing leaves, weak buds, and flower drop.
Tuberose (Rajnigandha)

Steps for Proper Watering:

Water thoroughly when first planting tuberose to help the soil settle.Before watering again, check the topsoil by touching it.

  • If the soil feels dry, loosen it gently with a small gardening tool and check deeper.
  • If the soil sticks to your fingers or feels moist, avoid watering.

Note:

  • Do not overwater, especially in winter, as tuberose requires less moisture during dormancy.
  • Water deeply but infrequently, allowing the soil to dry out slightly between waterings.

Also, read: Tips to Get Maximum Flowering in Hibiscus Plant

6. Pruning of Tuberose Plant

Regular pruning helps encourage more flowers and maintains plant health.

  • Trim yellow, damaged, or spotted leaves to prevent the plant from wasting energy on unhealthy foliage.

  • Remove lower leaves that do not contribute to photosynthesis and may trap moisture, leading to fungal infections.

  • Avoid excessive pruning, as it can disrupt the photosynthesis process and weaken the plant.

  • Always prune during the active growing season (spring and summer), and avoid pruning in winter, as plant growth slows down during colder months.

7. Best Fertilizer for Tuberose Plant

Tuberose is a heavy feeder and requires regular fertilization for healthy growth and blooming.

  • Apply fertilizer every 15 days for optimal flowering.

  • Use organic fertilizers such as cow dung liquid manure, mustard cake liquid fertilizer, or vermicompost to enrich the soil.

  • Banana peel fertilizer is also beneficial, as it provides potassium, which is essential for plant growth and flower production.

  • Do not use mustard cake liquid fertilizer in extreme summer.

Supporting Tuberose Growth

Since tuberose grows tall (up to 3-4 feet), it may need support.

  • Using Stakes: Insert small stakes around the plant to support stems.

  • Tying Stems: Gently tie the stems to stakes using soft garden ties.

8. Pests and Diseases

Tuberose is prone to pests like aphids, spider mites, and mealybugs.

  • Prevention: Spray neem oil or insecticidal soap.

  • Fungal Diseases: Avoid overwatering to prevent root rot and fungal infections.

Propagation of Tuberose

  • Bulb Division: Every 2-3 years, separate new bulbs from the mother plant and replant them.

  • Offsets: Small bulb-like structures can be replanted in fresh soil.

Common Mistakes to Avoid

  • Overwatering – Leads to root rot.

  • Using Heavy Soil – Prevents proper drainage.

  • Insufficient Sunlight – Causes weak, leggy growth.

Tuberose Bulbs

Saving bulbs for next season: Dig up bulbs after the first frost, let them air dry for several days, and store them in a cool, dry place.


Growing tuberose in a pot is a rewarding experience. With the right pot, soil, and care, you can enjoy its delightful fragrance and stunning blooms for months. Just remember to provide enough sunlight, proper watering, and occasional fertilization for the best results.

Follow our Social media channel:

1. Voice of Plant – YouTube Channel

2. Voice of Plant Facebook Page

3. Instagram Voice of Plant Channel

Happy Gardening !!

Gardner’s Guide: How to Get Rid of Mealybugs from Hibiscus Plant

How to Get Rid of Mealybugs from Hibiscus Plant

Mealybugs can be a nightmare for hibiscus plant lovers. These tiny, white, cotton-like insects suck the sap from plants, causing weak growth, yellow leaves, and even plant damage. They spread quickly, so it’s important to act fast to keep your hibiscus healthy and pest-free.

Mealybugs on Hibiscus plant leaves

If you have noticed white, fluffy masses on your hibiscus stems and leaves, it’s time to take action. In this guide, we’ll explore effective ways to eliminate mealybugs and prevent them from coming back.


How to Get Rid of Mealybugs from Hibiscus Plant


Understanding Mealybugs

Mealybugs are small, soft-bodied insects covered in a white, powdery wax that makes them look like tiny cotton balls.

  • They belong to the Pseudococcidae family and thrive by feeding on plant sap.

Why Are They Harmful to Hibiscus Plants?


  • Suck plant sap, leading to weak and stunted growth.

  • Produce honeydew, which encourages sooty mold.

  • Attract ants that protect them from natural predators.

  • If left untreated, can cause severe plant damage or death.


How to Identify Mealybug Infestation


Physical Appearance of Mealybugs

  • Small, oval-shaped insects covered in white, cottony wax.

  • Typically found on the undersides of leaves, stems, and flower buds.

Symptoms of Infestation on Hibiscus

  • Leaves turning yellow or curling.

  • Sticky honeydew residue on leaves and stems.

  • Presence of ants moving around the plant.

  • White, cotton-like clusters on plant surfaces.


Natural Ways to Get Rid of Mealybugs

If you prefer eco-friendly methods, try these natural remedies:

Manual Removal

  • Use a cotton swab dipped in rubbing neem oil to remove individual mealybugs.

  • Squish visible mealybugs by hand.

Water Spray Technique

  • Use a strong jet of water to wash away mealybugs.

  • Repeat daily for best results.

Using Neem Oil

  • Mix 2 teaspoons of neem oil with water and spray on affected areas.

  • Neem oil disrupts mealybugs’ feeding and reproduction.

Applying Insecticidal Soap

  • Use store-bought or homemade insecticidal soap (dish soap + water).

  • Spray directly onto mealybugs to suffocate them.

Introducing Beneficial Insects

  • Release ladybugs or lacewings in your garden to naturally control mealybugs.


DIY Remedies to Eliminate Mealybugs


Neem liquid pesticide and Water Mixture

  • Add 10 tablespoons of neem liquid to 1 liter of regular water.

  • Spray directly on infected leaves and on mealybugs. 

Click here to read: How to make Neem Pesticide at home

Soap and Water Spray

  • Mix 1 tablespoon dish soap with 1 quart water.

  • Spray directly on mealybugs.

Garlic and Chili Spray

  • Blend garlic, chili peppers, and water.

  • Strain and spray on hibiscus.


How to Revive a Hibiscus Plant After Mealybug Damage

  • Prune affected leaves and stems.

  • Apply a balanced fertilizer to encourage recovery.

  • Adjust watering to prevent stress.

  • Monitor new growth and watch for reinfestation.


Conclusion

Mealybugs can be a serious threat to hibiscus plants, but with the right strategies, you can eliminate them and keep your plants healthy. Regular inspections, natural remedies, and preventive measures are key to long-term success. Stay proactive, and your hibiscus will thrive!

Also, read:

Common Hibiscus Problems & Solutions You Should Know

Follow our Social media channel:

1. Voice of Plant – YouTube Channel

2. Voice of Plant Facebook Page

3. Instagram Voice of Plant Channel