Monthly Archives: December 2024

rose Problem & Care

Rose Problem & Care: 7 Problems That Can Seriously Harm Your Roses: Check Prevention & Treatment

Rose Problem & Care


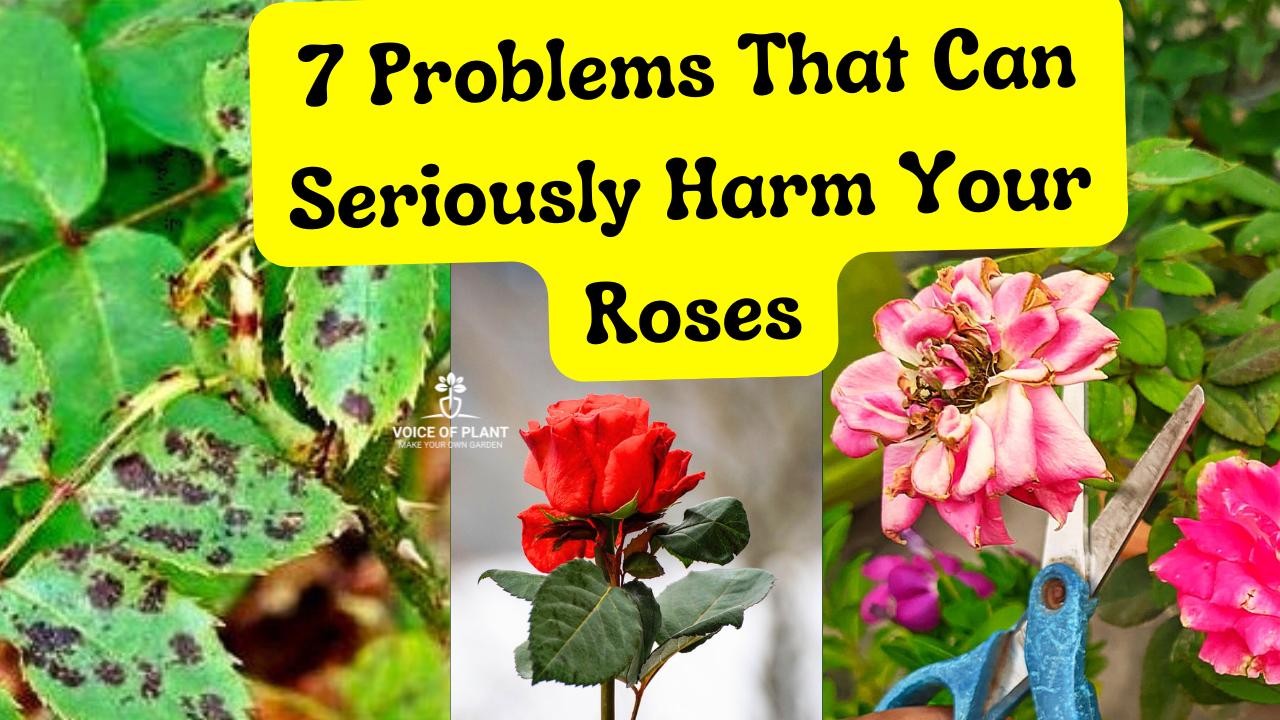
Roses are the crown jewel of any garden, but keeping them healthy and vibrant is no easy task. From fungal diseases to sneaky pests, roses are vulnerable to various problems that can hinder their beauty and growth. In this guide, we’ll explore seven major problems that can seriously harm your roses and provide actionable solutions to tackle them.

Rose Problem & Care


Rose Problem & Care


1. Powdery Mildew


Powdery mildew is a common fungal disease that plagues roses, especially in warm, humid conditions. It’s characterized by a white, powdery coating on the leaves, stems, and even flower buds. This disease can stunt growth and weaken your plant over time.

Causes and Contributing Factors: Powdery mildew thrives in environments with poor air circulation and high humidity. Overwatering and overhead watering can also increase the risk.

Prevention and Treatment:

  • Ensure proper spacing between rose plants for better air circulation.
  • Use fungicides designed to combat powdery mildew.
  • Prune infected parts immediately and dispose of them to prevent further spread.
  • Avoid wetting the foliage during watering.

2. Black Spot


Black spot is another notorious fungal disease that manifests as dark, circular spots on rose leaves. These spots are often surrounded by a yellow halo, and as the disease progresses, affected leaves fall off, weakening the plant.

Causes: Black spot thrives in wet and humid conditions, especially when water splashes onto leaves.

Prevention and Treatment:

  • Water roses at the base to avoid wetting leaves.
  • Apply fungicides regularly during the growing season.
  • Remove and destroy infected leaves promptly.
  • Mulch around the base of the plant to prevent fungal spores from splashing onto the foliage.

Click here to read:

How to Treat Black Spot on Rose Leaves


3. Aphids attack in Rose plant


Aphids are small, pear-shaped insects that suck the sap from rose stems, leaves, and buds. They can multiply rapidly, weakening your roses and causing distorted growth.

Recognizing Aphid Infestations: Look for clusters of tiny green, yellow, or black insects on new growth. Sticky residue or a sooty mold may also appear due to their secretions.

Control Methods:

  • Use a strong jet of water to dislodge aphids from your plants.
  • Introduce beneficial insects like ladybugs and lacewings, which prey on aphids.
  • Apply insecticidal soaps or neem oil as needed.

4. Spider Mites disease in Rose plant


Spider mites are minuscule pests that can wreak havoc on your roses, causing yellowing, stippling, and webbing on the leaves. These pests are especially problematic during hot, dry weather.

Detection: Inspect the undersides of leaves for tiny red or green mites and fine webbing.

Control Options:

  • Increase humidity around your roses to deter spider mites.
  • Spray the plant with a mixture of water and insecticidal soap.
  • In severe cases, use miticides specifically formulated for spider mites.

5. Rose Thrips problem


Thrips are tiny, slender insects that feed on rose buds and flowers, causing discolored, distorted blooms. Their feeding can also leave behind silvery streaks on petals.

Spotting Thrips Damage: Look for buds that fail to open properly or flowers with brown edges and discolored petals.

Management Strategies:

  • Remove and discard heavily infested buds and flowers.
  • Use sticky traps to monitor and reduce thrips populations.
  • Apply insecticides like spinosad or neem oil if necessary.

6. Rose Dieback problem


Dieback is a condition where rose canes gradually wither and die back from the tips. It’s often caused by improper pruning, fungal infections, or environmental stress.

Symptoms: Brown or blackened stems that appear brittle and lifeless.

Prevention and Treatment:

  • Always use clean, sharp tools when pruning.
  • Seal pruning cuts with a pruning sealer to prevent infections.
  • Remove and dispose of affected canes.
  • Keep roses well-watered and fertilized to maintain their health.

Click here to read:

Rose Dieback problem and solutions


7. Leaf Curl


Leaf curl can result from various issues, including pest infestations, nutrient deficiencies, or viral infections. Curled, distorted leaves are often the first sign of trouble.

Causes: Common culprits include aphids, fungal diseases, or poor watering practices.

Solutions:

  • Address pest issues promptly by using insecticidal soaps or natural predators.
  • Ensure your roses receive adequate nutrients by fertilizing regularly.
  • Avoid overwatering or underwatering, as both can stress the plant and lead to leaf curl.

Conclusion


Roses are undoubtedly worth the effort, but they demand attention and care to thrive. By identifying these seven common problems—powdery mildew, black spot, aphids, spider mites, thrips, dieback, and leaf curl—you can take proactive steps to keep your roses healthy and flourishing. Regular inspection, proper watering, and timely treatment will ensure your garden remains a vibrant oasis of roses.

Follow our Social media channel:

2. Voice of Plant Facebook Page

3. Instagram Voice of Plant Channel

Happy Gardening!

Do Succulents Need Any Fertilizer

Do Succulents Need Any Fertilizer?

Do Succulents Need Any Fertilizer?


Succulents have become a favorite among plant lovers thanks to their stunning appearance and low-maintenance nature. From vibrant Echeverias to hardy Jade plants, these drought-tolerant beauties are famous for thriving even in challenging environments. But while succulents are easy to care for, many enthusiasts wonder, “Do succulents really need fertilizer?” Let’s dig into the science of succulent care to answer this important question.

Do Succulents Need Any Fertilizer?

Do Succulents Need Any Fertilizer?

Succulents are a group of plants that store water in their thick, fleshy leaves, stems, or roots. Popular examples include Crassula Ovata, Echeveria, Aloe Vera, Sedum, and Agave. Their unique ability to retain water allows them to survive in arid climates, making them well-suited for homes, offices, and gardens worldwide.

Do Succulents Need Any Fertilizer

Unlike many other plants, succulents don’t rely heavily on nutrient-rich soil. Their native habitats are often rocky or sandy, where nutrients are sparse. This is why succulents are hardy and adaptable—but does this mean they don’t need fertilizer? Not necessarily.

Understanding the Nutritional Needs of Succulents


Like all plants, succulents require essential nutrients such as nitrogen, phosphorus, and potassium (NPK). While they can survive with minimal input, providing the right balance of nutrients can enhance their growth, improve their color, and encourage blooming.

Do Succulents Need Fertilizer?


The simple answer is: succulents don’t need fertilizer to survive.

In their natural habitat, succulents rely on whatever minimal nutrients are available. However, when grown in pots or garden settings, fertilizer can help them flourish.

Fertilizer promotes growth, strengthens roots, and can even enhance the vibrancy of succulent leaves. For flowering varieties, like Kalanchoe or Christmas Cactus, fertilizing can lead to more abundant and longer-lasting blooms.

Must read: How to Make Succulents Bushy & Healthy


Adding Compost in Soil is best the options for succulents growth


Compost serves as an organic powerhouse, providing essential nutrients and improving soil quality. Compost is a natural, nutrient-rich material made from decomposed organic matter. While succulents thrive in nutrient-poor environments, adding compost to their soil can significantly enhance their growth and overall health.

While fertilizers can enhance succulent growth, there are alternatives that provide nutrients more naturally:

1. Nutrient-Rich Soil: Using a high-quality succulent or cactus mix can reduce the need for frequent fertilization.

2. Compost: Adding a small amount of compost to the soil provides a steady supply of organic nutrients. You can use cow dung compost or vermicompost for best result. 

3. Mulch: A thin layer of organic mulch can help retain soil moisture and slowly release nutrients.

These options are particularly helpful for gardeners who prefer a low-maintenance approach to succulent care.

Homemade Fertilizer Options for Succulents


If you prefer a natural approach, homemade fertilizers can provide your succulents with the nutrients they need. These DIY solutions are affordable, eco-friendly, and easy to prepare. Here are a few popular options:

1. Banana Peel Tea:

    • Chop up banana peels and soak them in water for a day or two.
    • Strain the mixture and use it to water your succulents. The potassium in banana peels can boost plant health and encourage vibrant growth.

2. Eggshell Powder:

      • Crush clean, dry eggshells into a fine powder.
      • Sprinkle a small amount around the base of your succulent or mix it into the soil. This adds calcium, which helps strengthen roots and prevents deficiencies.

3. Used Coffee Grounds:

    • Mix used coffee grounds into the soil for a nitrogen boost.
    • Use sparingly, as too much acidity can harm succulents.

4. Epsom Salt Solution:

      • Dissolve one teaspoon of Epsom salt in a gallon of water.
      • Use the mixture once a month to supply magnesium, which supports chlorophyll production and vibrant foliage.

These natural fertilizers are gentle and won’t overwhelm your succulents, making them ideal for occasional use.

Signs of Over-Fertilization


Succulents are sensitive to over-fertilization, which can lead to several problems, including:

  • Soft, Mushy Leaves: Excess nutrients can cause leaves to swell and become weak.
  • Yellowing or Browning Leaves: High nutrient levels can burn the plant’s roots or leaves.
  • Salt Buildup in Soil: Visible crusty deposits on the soil surface indicate over-fertilization.

If you suspect over-fertilization, take immediate action:

  1. Remove the plant from its pot and rinse the roots with water.
  2. Repot the succulent in fresh, well-draining soil.
  3. Water lightly and avoid fertilizing for at least a month to allow the plant to recover.

Also, read: All About Succulents Care


Follow our Social media channel:

1. Voice of Plant – YouTube Channel

2. Voice of Plant Facebook Page

3. Instagram Voice of Plant Channel

Happy Gardening!

How to Make Plants Grow Faster

How to Make Plants Grow Faster: The Ultimate Guide

How to Make Plants Grow Faster


Growing plants faster is not just about luck; it’s about understanding what plants need and providing them with the right conditions to thrive.

How to Make Plants Grow Faster
Syngonium Plant

Whether you are a gardening novice or an experienced green thumb, this guide will equip you with actionable tips to speed up plant growth while keeping them healthy. Let’s dive right in!

How to Make Plants Grow Faster


Understanding Plant Growth Basics


The Science of Plant Growth


Plant growth depends on the process of photosynthesis, where plants convert sunlight, water, and carbon dioxide into energy.

Nutrient uptake from the soil complements this process by supplying essential minerals like nitrogen, phosphorus, and potassium.

  • These elements form the building blocks for healthy growth and development.

Factors Influencing Growth Rate


Several factors directly impact how quickly a plant grows:

1. Light: The right amount of sunlight fuels photosynthesis.

2. Water: Hydration is crucial for nutrient transport within plants.

3. Soil: Healthy soil provides nutrients and anchorage.

4. Temperature: Optimal warmth accelerates metabolic processes.

By mastering these fundamentals, you set the stage for faster plant growth.


1. Optimizing Soil for Faster Growth


1. Importance of Soil Quality


Healthy soil is the foundation of plant growth.

The ideal soil should be well-draining, rich in organic matter, and have a balanced pH (6.0 to 7.0 for most plants).

  • Poor-quality soil can stunt growth, even if other conditions are perfect.

2. Amending Soil with Organic Matter


Incorporating organic matter like compost, fertilizer, or aged manure into your soil enriches it with nutrients.

  • These materials also improve soil structure, making it easier for roots to penetrate and absorb nutrients.

Benefits of Adding Compost in Soil


When added to soil, compost improves its quality by providing essential nutrients and enhancing its texture.

  • The organic matter in compost undergoes decomposition, releasing nutrients like nitrogen, phosphorus, and potassium, which are vital for plant growth.
  • It also boosts the soil’s ability to retain moisture and support healthy root development.
  • Compost introduces beneficial microorganisms into the soil, such as bacteria and fungi. These microbes break down organic matter further and make nutrients more accessible to plants.
  • Compost acts like a sponge, helping the soil retain moisture.

2. Providing Adequate Watering


How Much Water Do Plants Need?


The key to successful watering lies in consistency.

  • Overwatering can suffocate roots, while underwatering deprives them of essential hydration.
  • Most plants thrive when the soil remains consistently moist but not soggy.

Tips for Efficient Watering


1. Water in the Morning: Early watering allows plants to absorb moisture before the sun evaporates it.

2. Use Drip Irrigation: This method delivers water directly to the roots, reducing waste.

3. Check Soil Moisture: Use your finger or a moisture meter to ensure you’re watering appropriately.

  • Check the soil before watering.

A thoughtful watering schedule can significantly enhance plant growth rates.

Click here to read: How to Water Plants Correctly


3. Ensuring Proper Sunlight


Understanding Light Requirements


Different plants have different sunlight needs:

Sunlight is essential for photosynthesis. Ensure your plants receive the appropriate amount:

Full Sun Plants: Require 6–8 hours of sunlight daily (e.g., Tulsi, Curry leaf, Hibiscus, Roses, Marigolds, etc).

Partial Shade Plants: Thrive in bright and indirect light or 4–6 hours of morning sunlight (e.g., Peace Lily, Money plant (pothos), ferns, Aglaonema, etc.).


4. Nutrient Boosters for Plants


Choosing the Right Fertilizer


A balanced fertilizer with equal parts nitrogen, phosphorus, and potassium (e.g., 10-10-10) can work wonders. However, some plants have specific needs—for example, flowering plants benefit from phosphorus-rich formulas.

For Outdoor Plants: Apply organic fertilizers like cow dung compost, vermicompost or any other liquid fertilizer every 15–20 days.

For Indoor Plants: Feed them less frequently, about once every 45 days.

  • Using organic options ensures sustainable growth without harming the environment.

Click here to read: Best Organic Fertilizers for Plants

5. Pruning and Maintenance


Benefits of Regular Pruning


Pruning is like giving your plants a haircut—it helps them grow stronger and look better.

  • By cutting off overgrown or damaged parts, you allow your plant to focus its energy on new growth.
  • Regular pruning promotes air circulation, prevents overcrowding, and reduces the chances of pest infestations.
  • For flowering and fruit-bearing plants, it encourages more blooms and higher yields.

Removing Dead Leaves and Stems


Dead leaves and stems not only make your plant look messy but also waste energy.

  • When these parts are removed, the plant can redirect its resources toward producing new leaves, flowers, or fruit.
  • Use sterilized pruning shears to snip away dead material, and always cut at an angle to minimize stress on the plant.

Click here to read: Pruning of Plants Complete Guide


6. Controlling Pests and Diseases


Common Plant Pests


Unwanted visitors like mealybugs, aphids, spider mites, and whiteflies can wreak havoc on your plants. These pests often feed on sap, weakening the plant and slowing its growth. Signs of infestation include yellowing leaves, holes, and sticky residue on the foliage.

Natural Pest Control Methods


You don’t need harsh chemicals to protect your plants. Try these natural solutions:

  • Neem Oil: A natural pesticide that disrupts pest lifecycles.
  • Soap Spray: Mix mild dish soap with water to suffocate small pests.

These methods are not only effective but also eco-friendly.

7. Preventing Fungal Diseases


Fungal diseases like powdery mildew and root rot can stunt plant growth. To prevent them:

  • Avoid overwatering, as excessive moisture creates a breeding ground for fungi.
  • Ensure proper air circulation around your plants by spacing them adequately.
  • Treat affected plants with a baking soda solution (1 teaspoon per gallon of water).

8. Avoiding Common Mistakes


Over-Fertilization Dangers

More fertilizer doesn’t always mean faster growth. Over-fertilizing can burn your plant’s roots and even kill it. Stick to recommended amounts, and opt for slow-release formulas to avoid overwhelming your plants.

Ignoring Plant-Specific Needs

Every plant is unique. While general tips work for most, it’s crucial to tailor care to each plant’s specific requirements.

  • For instance, succulents need well-draining soil and minimal water, while tropical plants thrive in high humidity and rich organic soil.

Conclusion

Helping plants grow faster is all about providing the right balance of light, water, nutrients, and care. By optimizing these conditions and avoiding common mistakes, you can speed up growth while ensuring your plants stay healthy and vibrant. Remember, patience and consistency are key—your plants will thank you for the effort!

Also, read: How to Grow Healthy Plants at Home


Follow our Social media channel:

1. Voice of Plant – YouTube Channel

2. Voice of Plant Facebook Page

3. Instagram Voice of Plant Channel

Happy Gardening!

How Much Water Do Succulents Need for Healthy Growth

How Much Water Do Succulents Need for Healthy Growth?

How Much Water Do Succulents Need for Healthy Growth?


Succulents are some of the most low-maintenance plants you can grow, but their watering needs require a bit of precision. These drought-tolerant plants have adapted to store water in their thick leaves, stems, or roots, allowing them to thrive in arid conditions. However, overwatering or underwatering can affect their health and growth. Let’s dive into everything you need to know about how much water succulents need to grow beautifully and stay healthy.

How Much Water Do Succulents Need for Healthy Growth?

How Much Water Do Succulents Need for Healthy Growth?


Understanding Succulents and Their Water Needs

Why Succulents Require Minimal Water


Succulents are native to regions with scarce rainfall, like deserts and dry landscapes.

  • Their fleshy leaves are designed to retain water for extended periods.
  • This ability allows them to survive for weeks, even months, without water.
  • Unlike tropical plants, succulents don’t need constant hydration and prefer their soil to dry out between waterings.

Common Types of Succulents and Their Water Storage


Popular succulents like Aloe Vera, Jade Plant, and Snake Plant are perfect examples of plants that store water in their leaves.

  • Others, like Echeveria and Haworthia, use their roots and stems to store moisture.
  • This built-in reservoir helps them weather periods of drought but makes them prone to root rot if overwatered.

How Much Water Do Succulents Need for Healthy Growth?


The Risks of Overwatering Succulents


How Overwatering Can Damage Succulents


While succulents love dry conditions, excessive watering can be fatal.

  • Overwatering saturates the soil, causing roots to suffocate and decay.
  • Once the roots rot, the plant’s ability to absorb water and nutrients is compromised, leading to wilting and eventual death.

Signs of Overwatered Succulents


Spotting an overwatered succulent early can save it. Common signs include:

  • Mushy or translucent leaves.
  • Yellowing of the plant.
  • Moldy soil or an unpleasant smell.
  • Dropping leaves or a generally wilted appearance.

Ideal Watering Schedule for Succulents


General Watering Guidelines


The golden rule for succulents is simple: water only when the soil is completely dry. Depending on the season and climate, this could range from once a week to once every two weeks.

Seasonal Watering Adjustments


Summer Watering Needs


In the hot months, succulents dry out faster due to increased evaporation.

  • Watering once a week, or even twice if the plant is outdoors, is usually necessary.

Winter and Rainy Season Adjustments


During colder months or rainy seasons, succulents enter a dormant phase.

  • They consume less water, and overwatering during these times can cause root rot.
  • Water them sparingly—about once every 3-4 weeks.

Location of Succulents


Outdoor (Terrace or Garden) Plants


Succulents on terraces or gardens face prolonged sunlight exposure and dry out quicker. These may need water every few days, especially in summer.

Indoor and Balcony Placement


Indoor succulents stay moist longer due to limited sun and wind exposure. Watering every 10-15 days is usually enough.

  • Balcony succulents, receiving partial sun, need slightly more frequent watering than indoor ones.

Step-by-Step Guide to Watering Succulents Correctly


Checking Soil Moisture Levels


Always test the soil before watering.

  • Stick your finger about an inch deep into the soil.
  • If it feels dry, it’s time to water.

The Soak-and-Dry Method


This method is highly effective for succulents.

  • Drench the soil completely until water drains out of the pot, then allow it to dry thoroughly before watering again.

Tools to Help You Water Succulents Properly


Using tools like moisture meters can help monitor soil dampness.

  • Watering cans with narrow spouts or syringes are perfect for targeted watering.

Special Care for Other Xerophytes and Bulbous Plants


Understanding the Water Needs of Cacti


Cacti, another xerophyte, need even less water than succulents.

  • They thrive on deep but infrequent watering, often needing water only once a month in colder seasons.

Watering Plants with Bulbs (Peace Lily, ZZ Plant)


Bulbous plants like the Peace Lily and ZZ Plant can easily rot if overwatered. Water only when their topsoil feels dry, roughly every 10-15 days.


Common Mistakes in Watering Succulents


Overwatering Due to Poor Drainage


Using pots without drainage holes or soil that doesn’t drain well is a major mistake. This traps water and leads to root rot.

Neglecting Seasonal and Location Factors


Not adjusting the watering schedule based on seasons or where the succulent is kept can harm the plant. Always consider the plant’s environment.


Click here to read:

How to Make Succulents Bushy and Healthy


FAQs About Watering Succulents


1. How Do I Know When My Succulents Need Water?


Check the soil’s dryness and the leaves’ appearance. Wrinkled or dry leaves indicate the need for water.

2. Can I Mist Succulents Instead of Watering?


No, misting is not enough for mature succulents. They require a deep soak to thrive.

3. How Long Can Succulents Survive Without Water?


Depending on the type, succulents can survive 2-3 weeks without water, sometimes longer during dormancy.

4. Why Is My Succulent Losing Its Leaves?


Leaf drop can result from overwatering, underwatering, or sudden environmental changes.

5. What Are the Best Pots for Succulents?


Terracotta pots with drainage holes are ideal as they wick away moisture, preventing overwatering.

Follow our Social media channel:

1. Voice of Plant – YouTube Channel

2. Voice of Plant Facebook Page

3. Instagram Voice of Plant Channel

Happy Gardening!

How to make leaf compost at home

How to Make Leaf Compost at Home Know the Benefits of Leaf Compost in Gardening

How to Make Leaf Compost at Home

Oh! So, you are worried about garden waste such as fallen leaves cluttering your garden? Are you wondering, “What can I do with all these leaves—should I throw them away or burn them?” We get it; dried leaves scattered across your garden can make it look messy. But here’s the secret: there’s no such thing as waste in the garden!

How to Make Leaf Compost at Home
Fallen leaves in garden

Did you know these leaves can be one of the most beneficial things for your garden?

Instead of throwing or burning them, which harms the environment, you can turn them into leaf compost, a nutrient-rich treasure for your plants and soil. Leaf compost not only improves soil health but also enhances your plants’ growth naturally.

Introduction of Leaf Compost


Leaf compost is a nutrient-rich organic material derived from decomposed leaves. It’s one of the easiest and most natural ways to recycle garden waste (leaves) into a valuable organic compost for our plants. 

Leaf compost

Essentially, leaf composting transforms fallen leaves into a crumbly, dark material that resembles soil, packed with nutrients to enrich your garden.


What is Leaf Compost?


Leaf compost is created when leaves break down through natural decomposition.

Through the natural process of breakdown by microorganisms, leaves are transformed into a dark, crumbly, soil-like substance. It’s packed with nutrients like potassium, phosphorus, and trace minerals that plants love.

The beauty of leaf compost is its simplicity. It doesn’t require fancy equipment or special skills—just patience and a little effort. Plus, it’s entirely free, making it one of the most cost-effective ways to improve your garden’s soil.

So instead of disposing of leaves, why not transform them into something your garden will thank you for?

How to Make Leaf Compost at Home


If you’ve been wondering how to get started with leaf composting, don’t worry—it’s easier than you think! All it takes is a little organization, some time, and an understanding of the process. Here’s a simple step-by-step guide.

1. Collect the Leaves


Start by gathering the fallen leaves in your garden.

  • You can use a rake, a blower, or even your hands if you have a small area.
  • Make sure to remove any debris like rocks, plastic, or sticks.
  • Also, avoid leaves treated with pesticides, as they can hinder the composting process.

2. Use any bucket or container and Make holes


You can use a large container, bucket, durable poly bag, or any type of bag that suits your needs.

  • For leaf compost opt for a larger, deeper container based on the amount of waste you plan to compost. You can choose a clay pot or a plastic container (such as a bucket).

Make holes

  • Ensure there are enough holes around the container for air circulation.
  • Oxygen is vital for the decomposition process, as it supports the activity of beneficial microorganisms that break down organic material.

3. Shred the Leaves


Shredding the leaves into smaller pieces helps them break down faster.

  • You can do this by running over them with a lawnmower or using a garden shredder.
  • If you don’t have these tools, you can still compost whole leaves—it will just take a little longer.

4. Make a Layer


Once you’ve collected the leaves, it’s time to layer them properly. Layering is essential for an efficient composting process. Here’s how to do it:

1. Add a Base Layer:

Begin by adding a layer of garden soil or compost at the bottom of the container. You can use ready-made compost like vermicompost or even kitchen waste compost for this purpose.

2. Add the Leaves: Place a layer of garden leaves over the soil or compost.

This balance is essential for microbial activity, which drives the decomposition process.

3. Moisture Matters: Sprinkle some water on the leaves to maintain the right moisture level. The pile should be damp but not soaking wet.

Maintain Moisture

  • If it’s too dry, decomposition slows down; if it’s too wet, it can become smelly and compacted.

5. Cover the Container


Ensure that the container, bucket, or bag is properly covered to retain moisture and heat, which speeds up the composting process.

  • You can use a lid, cloth, or plastic sheet to cover it securely.
  • However, do not seal it completely—proper ventilation is crucial for decomposition.

6. Maintenance and Aeration


To keep the composting process active and effective, regular maintenance is necessary:

(i) Check Every 15 Days: Open the container once every two weeks to check the moisture levels. Add water if the compost feels dry.

(ii) Turn the Compost: Aerate the pile by using a pitchfork, shovel, or any long tool to turn the contents. This helps oxygen circulate, prevents odors, and accelerates the breakdown process.


Wait and Watch


With the right balance of materials, moisture, and aeration, you’ll have rich, dark, and crumbly leaf compost in a few months. If you’re using a cold composting method, it might take a bit longer—but patience pays off in the end.


Why is Leaf Compost Beneficial for Your Garden?


Leaf compost is a gardener’s best friend. It improves the health of your soil, saves money, and benefits the environment. Let’s dig a little deeper into its benefits.

1. Enriches Soil Nutrients

Packed with nutrients like potassium and magnesium, leaf compost naturally feeds your soil, promoting healthier plant growth.

2. Improves Soil Structure

It enhances soil texture by improving moisture retention, drainage, and preventing compaction, making it easier for roots to thrive.

3. Boosts Microbial Activity

Leaf compost supports beneficial microbes and earthworms, creating a fertile, thriving soil ecosystem.

4. Reduces Garden Waste

Instead of throwing away leaves, composting transforms them into a valuable resource, cutting down landfill contributions.

5. Saves Money

Leaf compost eliminates the need for expensive fertilizers or soil conditioners, offering a cost-free, sustainable alternative.

6. Eco-Friendly

Composting leaves reduces pollution, minimizes garden waste, and limits reliance on harmful synthetic fertilizers.


Where Can You Use Leaf Compost?


(i) Vegetable Gardens: Mix leaf compost with garden soil to provide essential nutrients for your veggies.

(ii) Flower Beds: Use it as mulch to keep flower beds weed-free and retain moisture.

(iii) Lawns: Spread a thin layer of leaf compost over your lawn to enrich the soil and promote healthy grass growth.

Also, read: How to make Kitchen Waste Compost at Home


Follow our Social media channel:

1. Voice of Plant – YouTube Channel

2. Voice of Plant Facebook Page

3. Instagram Voice of Plant Channel

Happy Gardening!

Tips to Make your Succulents dense & bushy

How to Make Succulents Bushy and Healthy

How to Make Succulents Bushy and Healthy


Succulents are beloved for their unique appearance and low-maintenance nature, making them a popular choice among plant enthusiasts. However, achieving bushy and healthy succulents requires attention to a few key factors, including the size of the pot, soil, and overall care. Here’s a guide to help your succulents thrive and grow dense, lush foliage.

Succulents Bushy and Healthy

How to Make Succulents Bushy and Healthy


The Importance of Pot Size


The size of the pot plays a critical role in the growth of succulents. Planting your succulent in a pot that is too small can restrict its root system, limiting its ability to grow and preventing it from developing full, healthy foliage.

How to Make Succulents Bushy and Healthy

To encourage robust and bushy growth, opt for a larger pot, ideally one with a diameter of 6 to 8 inches. A larger pot provides ample space for the roots to spread and supports the plant’s growth above the soil.

Choosing the Right Pot


When selecting a pot for your succulent, both material and functionality matter.

Plastic and ceramic pots are excellent choices as they help retain the right amount of moisture while offering aesthetic appeal.

However, it is essential to ensure that the pot has a drainage hole at the bottom. Proper drainage prevents water from accumulating in the soil, which can lead to root rot—a common issue for succulents.

Soil and Watering Tips


In addition to the pot size and type, the soil plays a vital role in your succulent’s health. Use well-draining soil specifically designed for succulents and cacti to prevent water from sitting in the roots. When watering, follow the “soak and dry” method: water the soil thoroughly, then allow it to dry out completely before watering again. Overwatering can harm the plant and impede its growth.

Additional Tips for Bushier Succulents


1. Pruning:

Regularly prune your succulents to remove dead or damaged leaves. This helps the plant focus its energy on new, healthy growth.

2. Sunlight:

Place your succulents in a location where they can receive bright, indirect sunlight for at least 4-6 hours a day. Adequate sunlight promotes compact and dense growth.

3. Fertilization:

Feed your succulents with a balanced, diluted fertilizer once a month during the growing season (spring and summer) to encourage lush foliage.

Click here to read, Tips to Care Succulents Plant at Home

Conclusion


By choosing the right pot size, ensuring proper drainage, and providing appropriate care, you can help your succulents grow bushy and healthy. Remember, succulents thrive when given the space to spread their roots and the right conditions to flourish. With a little attention and care, your succulents will reward you with vibrant, dense growth that adds charm to your indoor or outdoor spaces.

Follow our Social media channel:

1. Voice of Plant – YouTube Channel

2. Voice of Plant Facebook Page

3. Instagram Voice of Plant Channel

Happy Gardening!

groundnut fertilizer

Groundnut Fertilizer: Strongest Fertilizer for Plants

Groundnut Fertilizer for Plants

What is Groundnut Organic Fertilizer?


Groundnut cake is an organic fertilizer derived from the byproduct of the groundnut oil extraction process. During the extraction of cooking oil from groundnuts using machines, the residual cake is obtained. This cake, free from any chemicals, serves as an excellent organic fertilizer, enriched with nutrients beneficial for plant growth.

groundnut fertilizer

The composition of groundnut cake includes essential elements such as nitrogen (N), phosphorus (P), and potassium (K), commonly referred to as NPK, along with fibers and proteins. It is important to note that groundnut cake lacks certain micronutrients.

Nutritional value of Groundnut Cake:

  • Nitrogen: 7.3
  • Phosphorous: 3
  • Potassium: 2.2

By incorporating groundnut cake into soil, gardeners and farmers can provide plants with a natural and organic source of nutrients, promoting healthy and robust growth.

Benefits of Groundnut Fertilizer


groundnut cake fertilizer
groundnut cake

When applied at the appropriate time, groundnut cake significantly enhances overall plant growth, stimulating the development of new leaves and branches. This organic fertilizer, enriched with nitrogen, effectively addresses the problem of yellowing leaves in plants, providing a valuable solution when leaf discoloration occurs. Furthermore, groundnut cake expedites the process of photosynthesis in plants, contributing to a more vibrant and lush garden.

In essence, it is a potent fertilizer with essential NPK components that visibly improves the overall health and growth of plants.

Groundnut Fertilizer: Strongest Fertilizer for Plants


1. Where to obtain Groundnut Fertilizer

Groundnut cake can be easily obtained from nearby factories where the extraction of ground oil takes place.

  • Additionally, it is readily available online, with approximately Rs 300 per kilogram.

2. Process of Applying Groundnut Cake to Plants:

Groundnut cake can be incorporated into plant care through three methods:

1. Soil Mixture Addition:

    • Grind the obtained groundnut cake pieces into a fine powder using a mortar.
  • groundnut cake fertilizer in soil
    adding groundnut cake fertilizer in soi-mix
    • Mix this powder into a prepared soil mixture, adding a handful of the fertilizer powder to approximately 5 kg of the soil blend.

2. Adding in Pot Soil:

    • When preparing soil mixtures repeatedly is not feasible due to time constraints, directly add groundnut cake powder to the pot soil.
  • adding in pot soil - groundnut cake fertilizer
    adding in pot soil – groundnut cake fertilizer
    • For a 12-inch pot used for a plant, incorporate 2 tablespoons of groundnut cake powder.
    • Ensure that you loosen the soil before adding the powder, then water the plant after application.

3. Making Liquid Fertilizer:

    • Dilute approximately 100 grams of groundnut cake in 4-4.5 liters of water to create a liquid tonic. This quantity is suitable for approximately 300 plants.
    • Be vigilant for any insects in the cake that may emerge after dilution, and remove them.
    • Keep the solution covered in an area with no direct sunlight exposure.
    • Allow it to ferment for at least 2 days for the cake to dissolve properly in water. This process is best practiced during winter.
    • If left for more than 4 days, it may attract insects and fungus, so it’s advisable to keep it for 2-3 days only.
    • Dilute this tonic with a significant amount of water; for example, add 2 mugs of this solution to 40 liters of water.
    • The final solution’s consistency should be very thin, not resembling a thick paste, as it is enriched with a large quantity of nitrogen and has a warm nature that could potentially harm the plant.
groundnut cake liquid fertilizer

Note:

  • For a small garden with around 20 plants, take 2 small pieces of groundnut cake, dissolve them in 1 liter of water, and allow the mixture to dissolve for 2 days.
  • After 2-3 days, dilute it with 8-10 times the amount of water before applying it to the plants.

The efficiency of the liquid tonic in boosting the growth of plants is much higher compared to the first two methods.

Precautions to take while using Groundnut Cake Fertilizer:

1. Temperature Considerations:

    • Avoid using this fertilizer in hot weather with temperatures above 30-32°C, as it can warm the soil and potentially harm the roots, causing them to burn.

2. Plant Compatibility:

    • While suitable for all types of plants, including outdoor, indoor, flowering, or fruiting plants, refrain from using it on decorative succulents.

3. Timing of Application:

    • In cold weather, apply the fertilizer at any time of the day. As temperatures rise, especially in March, administer the fertilizer during the coolest parts of the day, such as early morning or evening after sunset.

4. Soil Moisture:

    • Ensure that the soil is neither too dry nor too wet before application.
    • If the soil is dry, moisten it with water before adding the fertilizer. If the soil is too wet, adding fertilizer may lead to fungus growth and root rot. Maintain consistently moist soil.

5. Application Method:

    • Feed the plant with the well-diluted solution until it starts draining out from the bottom hole of the pot.
    • The diluted solution should not have adverse effects on the plant at this point.

6. Application Cycle for Different Plants:

    • For leafy outdoor plants (e.g., tulsi, curry patta, and coriander), administer the fertilizer once a month.
    • Avoid using other potent fertilizers during the application month.
    • For heavy feeder plants (e.g., hibiscus and lemon), apply the fertilizer every 20 days.
    • Avoid using the fertilizer during flowering and fruiting stages.

7. Specific Application Situations:

    • Apply the fertilizer when the plant becomes nutrient-deficient, showing yellowing leaves after growing numerous branches and flowers.
    • After hard pruning, wait for 15 days before applying the liquid fertilizer to stimulate new branch growth and enhance overall plant health.

8. Seedlings and Micronutrients:

    • Never feed this fertilizer to seedlings.
    • If necessary, provide micronutrients instead.

9. Compatibility and Neem Oil:

    • Do not mix this fertilizer with any other and avoid applying additional fertilizers for at least 15 days after use.
    • Neem oil can be sprayed while using this fertilizer.

10. Application Method:

  • Never use this fertilizer as a foliar spray; always apply it through the soil.
  • Prepare the required quantity as it cannot be stored due to the risk of attracting fungus and insects.

Limitations of Groundnut Cake Fertilizer:

1. Seasonal Application:

Groundnut cake fertilizer is season-oriented and should not be used in summer.

It is best applied to plants during the period from October to March. Therefore, an alternative fertilizer may be required for the rest of the growing season.

2. Micronutrient Deficiency:

    • Lacks Micronutrients: This fertilizer lacks micronutrients.
    • To meet the required nutrient levels for heavy feeder plants, additional micronutrients should be applied after 15 days of using groundnut cake fertilizer.

In conclusion, while groundnut cake fertilizer has its limitations, it remains an essential addition to your gardening supplies. It significantly enhances the growth of heavy feeder plants to remarkable levels when used appropriately.

Also read:

Mustard Cake Fertilizer Benefits and Uses


Follow our Social media channel:

1. Voice of Plant – YouTube Channel

2. Voice of Plant Facebook Page

3. Instagram Voice of Plant Channel

Happy Gardening!!

Benefits of Grow Lights for Jade Plant

Can Jade Plants Thrive Under Grow Lights?

Can Jade Plants Thrive Under Grow Lights?


During winter or in cold regions where natural light is insufficient, grow lights are the perfect solution for providing the necessary light to Jade plants.

Can Jade Plants Thrive Under Grow Lights?
Jade Plant under grow lights

Can Jade Plants Thrive Under Grow Lights?


Here are some key points to consider:

1. Light Requirements for Jade Plant


Jade plants thrive in direct and in bright sunlight.

  • If natural light is insufficient, full-spectrum LED grow lights can provide the necessary light for healthy growth.
  • Aim for 12-14 hours of light per day, simulating daylight conditions.

Click here to read: Jade Plant Complete Care Guide

2. Type of Grow Light for Jade Plant


Full-spectrum LED lights are ideal as they mimic natural sunlight and support photosynthesis.

  • Ensure the grow light emits light in the blue (for foliage growth) and red (for flowering and overall development) spectrum.

Click here to read: Where to place jade plant at home

3. Placement of the Light for Jade Plant


  • Keep the light source 12-18 inches above the Jade plant to prevent overheating or scorching.
  • Adjust the height based on the intensity of the light and the plant’s response.

4. Benefits of Grow Lights for Jade Plant


  • Promote healthy, compact growth.
  • Prevent leggy or weak stems caused by insufficient natural light.
  • Enable year-round growth, even in low-light environments or during the winter.

Can Jade Plants Thrive Under Grow Lights?

Tips for Best Results


  • Monitor the plant for signs of stress, such as yellowing leaves, which may indicate too much light.
  • Provide periods of darkness (8-12 hours) to mimic the natural day-night cycle.

By using grow lights correctly, Jade plants can thrive indoors, even in spaces with little natural light.

Follow our Social media channel:

1. Voice of Plant – YouTube Channel

2. Voice of Plant Facebook Page

3. Instagram Voice of Plant Channel

Happy Gardening!

how to grow healthy plants at home

Gardener’s Guide: How to Grow Healthy Plants at Home: Follow 10 Tips

How to Grow Healthy Plants at Home


Whether you’re a beginner or an experienced gardener, growing healthy plants requires consistent care and attention. Growing healthy plants at home is not a difficult task. Just you need to follow these 10 simple tips to make your plant healthy throughout the season. 

How to Grow Healthy Plants at Home
Balcony garden

Here are some practical tips on “How to Grow Healthy Plants at Home”


1. Use Clay Pots for Best Results


Clay pots are an excellent choice for gardening.

  • They are porous, allowing air circulation to the roots and preventing overwatering.
  • They also help keep the soil cooler, which is beneficial for most plants.

2. Balance Watering


mid day watering

Watering is crucial, but it’s a balance:

  • Overwatering: Can lead to root rot.
  • Underwatering: Can cause plants to dry out and weaken.
  • Check the soil before watering.
  • The top layer should feel dry but not cracked.
  • Maintain a consistent watering schedule tailored to your plant’s needs.

Click here to read: How to Water Plants Correctly


3. Fertilize Regularly


Fertilizers supply essential nutrients that soil alone may lack:

For Outdoor Plants: Apply organic fertilizers like cow dung compost, vermicompost or any other liquid fertilizer every 15–20 days.

For Indoor Plants: Feed them less frequently, about once every 45 days.

  • Using organic options ensures sustainable growth without harming the environment.

Click here to read: Best Organic Fertilizers for Plants


4. Pruning and Deadheading


Pruning of CRYSANTHEMUM plant


Pruning: Remove dead or yellowing leaves to promote airflow and prevent disease.

Deadheading: Regularly remove spent flowers to encourage new blooms and improve the plant’s appearance.

Click here to read: Pruning of Plants Complete Guide


5. Use a Rich Soil Mix


Healthy plants start with healthy soil. A good mix should include:

  • Garden soil for structure.
  • Compost for nutrients.
  • Sand or cocopeat to ensure the soil is porous and drains well.

A well-draining soil mix prevents water stagnation while retaining adequate moisture for roots.

Click here to read: Best Soil Mix for Plants


6. Provide Adequate Sunlight


Sunlight is essential for photosynthesis. Ensure your plants receive the appropriate amount:

Full Sun Plants: Require 6–8 hours of sunlight daily (e.g., Tulsi, Curry leaf, Hibiscus, Roses, Marigolds, etc).

Partial Shade Plants: Thrive in bright and indirect light or 4–6 hours of morning sunlight (e.g., Peace Lily, Money plant (pothos), ferns, Aglaonema, etc.).


7. Pest Treatment


Pests can damage even the healthiest plants. Inspect leaves and stems regularly for signs of trouble.

  • For mild infestations, wash the leaves with water.
  • For persistent pests, use a neem oil spray (1 tablespoon neem oil + 1 liter water).

8. Tilling the Soil Every 15 Days


Loosening the soil every 15 days aerates the roots and ensures better water and nutrient absorption. This practice also helps in breaking up compacted soil, which can restrict root growth.


9. Do Not Move Plants Unnecessarily


Plants acclimate to their environment over time. Constantly moving them can cause stress and disrupt their growth.

  • Position your plants carefully and allow them to thrive in their chosen spot unless there’s a compelling reason to relocate them.

10. Repot When Necessary


As plants grow, their roots may outgrow the pot. Repot them into a slightly larger container every 1-2 years to ensure they have enough room to thrive.

Learn and Experiment


Gardening is about learning through experience.

  • Observe how your plants respond to light, water, and fertilizers, and adjust accordingly.
  • Don’t hesitate to try new plant varieties or techniques.

Be Patient and Enjoy the Process


Plants take time to grow and flourish. Be patient and enjoy the journey of caring for them. Each new leaf or bloom will be a reward for your efforts.

Gardening is both an art and a science. By following these tips, you’ll create a thriving garden filled with vibrant, healthy plants. Remember, plants are living beings that respond to care and patience, so enjoy the journey and learn from every experience!

Happy Gardening!

Follow our Social media channel:

1. Voice of Plant – YouTube Channel

2. Voice of Plant Facebook Page

3. Instagram Voice of Plant Channel

best fertilizers for flowering plant (1)

फूल वाले पौधों के लिए सबसे अच्छी खाद – जानिए कैसे उपयोग करें Best Fertilizers for Flowering Plant

फूल वाले पौधों के लिए सबसे अच्छी खाद (Best Fertilizers for Flowering Plant)


फूल वाले पौधों के लिए सही खाद और उर्वरक का चुनाव बेहद महत्वपूर्ण है। यह पौधों की बेहतर वृद्धि और अधिक फूल लाने में मदद करता है।

इस आर्टिकल में, हम जानेंगे कि फूल वाले पौधों के लिए कौन-कौन से खाद और उर्वरक सबसे अच्छे हैं, इनका उपयोग कैसे करें, और पौधों की देखभाल में किन बातों का ध्यान रखना चाहिए।

Best Fertilizers for Flowering Plant
Organic Liquid Fertilizers

इसके अलावा, यह भी समझेंगे कि पौधों में अधिक खाद डालने के क्या नुकसान हो सकते हैं। यदि आप इन सभी जानकारियों को विस्तार से जानना चाहते हैं, तो इस आर्टिकल को अंत तक ज़रूर पढ़ें।


फूल वाले पौधों के लिए खाद का महत्व


फूल वाले पौधों को स्वस्थ और सुंदर बनाए रखने के लिए पोषक तत्वों की जरूरत होती है। इनमें मुख्य रूप से नाइट्रोजन (N), फास्फोरस (P), और पोटैशियम (K) का सही संतुलन बहुत महत्वपूर्ण है। इन तीनों पोषक तत्वों को मिलाकर एनपीके (NPK) उर्वरक कहा जाता है। आइए समझते हैं कि इनका पौधों पर क्या प्रभाव पड़ता है:

1. नाइट्रोजन (Nitrogen)

    • पौधों की पत्तियों और तनों की वृद्धि में सहायक।
    • पौधे की हरियाली बनाए रखता है।
    • नाइट्रोजन की कमी से पत्तियां पीली पड़ने लगती हैं।

2. फास्फोरस (Phosphorus)

      • नई जड़ों के विकास में मदद करता है।
      • फूलों के विकास को प्रोत्साहित करता है।
      • फास्फोरस की कमी से फूलों की संख्या कम हो सकती है।

3. पोटैशियम (Potassium)

    • पौधों की प्रतिरक्षा प्रणाली को मजबूत बनाता है।
    • कीट और रोगों से पौधों की रक्षा करता है।

फूल वाले पौधों के लिए सर्वश्रेष्ठ खाद और उर्वरक – Best Fertilizers for Flowering Plant


1. केले के छिलके की खाद (Banana Peel Fertilizer)


banana peel fertilizer
Banana Peel Fertilizer

केले के छिलकों में पोटैशियम और फास्फोरस प्रचुर मात्रा में पाया जाता है।

  • इसे पौधों की मिट्टी में मिलाने से फूलों की संख्या बढ़ती है।

यह लेख पढ़ें : केले के छिलके की खाद कैसे बनाएं: लाभ और उपयोग


2. गोबर की खाद (Cow Dung Liquid Fertilizer)


cow dung liquid fertilizer
Cow Dung Liquid Fertilizer

गोबर की खाद प्राकृतिक खाद है जो मिट्टी की उर्वरता बढ़ाती है।

  • यह पौधों की जड़ों को पोषण देती है और मिट्टी की संरचना को बेहतर बनाती है।

यह लेख पढ़ें

घर पर लिक्विड गोबर खाद बनाने की आसान विधि


गोबर की खाद उपयोग के लिए सावधानियां:

  • केवल तब खाद डालें जब मिट्टी सूखी हो।
  • घोल को पौधे के तने के बहुत पास न डालें, इससे पौधे को नुकसान हो सकता है।
  • हल्का घोल बनाकर महीने में 2 बार ही उपयोग करें।
  • छोटे गमलों में 1 मग और बड़े गमलों में 2 मग घोल का उपयोग करें।

3. सरसों खली खाद (Mustard Cake Fertilizer)


इसमें नाइट्रोजन, फास्फोरस, और पोटैशियम का अच्छा संतुलन होता है।

  • इसे पानी में घोलकर पौधों को दिया जा सकता है।

यह लेख पढ़ें

सरसों खली लिक्विड फर्टिलाइजर कैसे बनाएं


4. सीवीड लिक्विड खाद (Seaweed Liquid Fertilizer)


seaweed liquid fertilizer
Seaweed Liquid Fertilizer

यह जैविक खाद पौधों को सूक्ष्म पोषक तत्व प्रदान करती है और फूलों की गुणवत्ता में सुधार करती है।

यह लेख पढ़ें

Seaweed Fertilizer: लाभ एवं उपयोग कैसे करें


पौधों में फूल लाने के लिए जरूरी टिप्स


1. धूप का महत्व

    • फूल वाले पौधों को रोज़ाना 4-5 घंटे की धूप चाहिए।
    • ऐसे स्थान पर रखें जहां पर्याप्त सूर्य का प्रकाश पहुंचे।

2. मिट्टी का सही चुनाव

    • पौधों के लिए उपजाऊ और भुरभुरी मिट्टी का उपयोग करें।
    • मिट्टी में अच्छी जल निकासी होनी चाहिए।

3. सिंचाई का सही तरीका

    • पौधों को तभी पानी दें जब मिट्टी सूखी लगे।
    • अधिक पानी देने से जड़ों में सड़न हो सकती है।

4. प्रूनिंग (छंटाई) करें

    • समय-समय पर पौधों की सूखी और मरी हुई शाखाओं को हटा दें।
    • प्रूनिंग से पौधे में नई शाखाएं और फूल आने लगते हैं।

ज्यादा खाद डालने के नुकसान


अगर पौधों को आवश्यकता से अधिक खाद दी जाए तो:

  • पौधों की जड़ें कमजोर हो सकती हैं।
  • मिट्टी में लवणता बढ़ सकती है, जिससे पौधों की वृद्धि रुक जाती है।
  • फूलों की संख्या कम हो सकती है।

निष्कर्ष


फूल वाले पौधों को स्वस्थ और सुंदर बनाए रखने के लिए सही खाद और उर्वरक का उपयोग करना बेहद जरूरी है। केले के छिलके, गोबर की खाद, वर्मीकंपोस्ट, और सरसों खली जैसे जैविक खाद पौधों के लिए सबसे अच्छे विकल्प हैं। इसके साथ ही, पौधों को सही मात्रा में धूप, पानी और समय-समय पर छंटाई की आवश्यकता होती है।

यदि आप इन सभी बातों का ध्यान रखेंगे, तो आपके पौधे हरे-भरे रहेंगे और उनमें अधिक फूल खिलेंगे। 🌸

Follow our Social media channel:

1. Voice of Plant – YouTube Channel

2. Voice of Plant Facebook Page

3. Instagram Voice of Plant Channel

Happy planting!