Monthly Archives: January 2024

hybrid vinca

Complete Care of Hybrid Vinca Plant: 11 Tips

11 Tips to Care Hybrid Vinca Plant

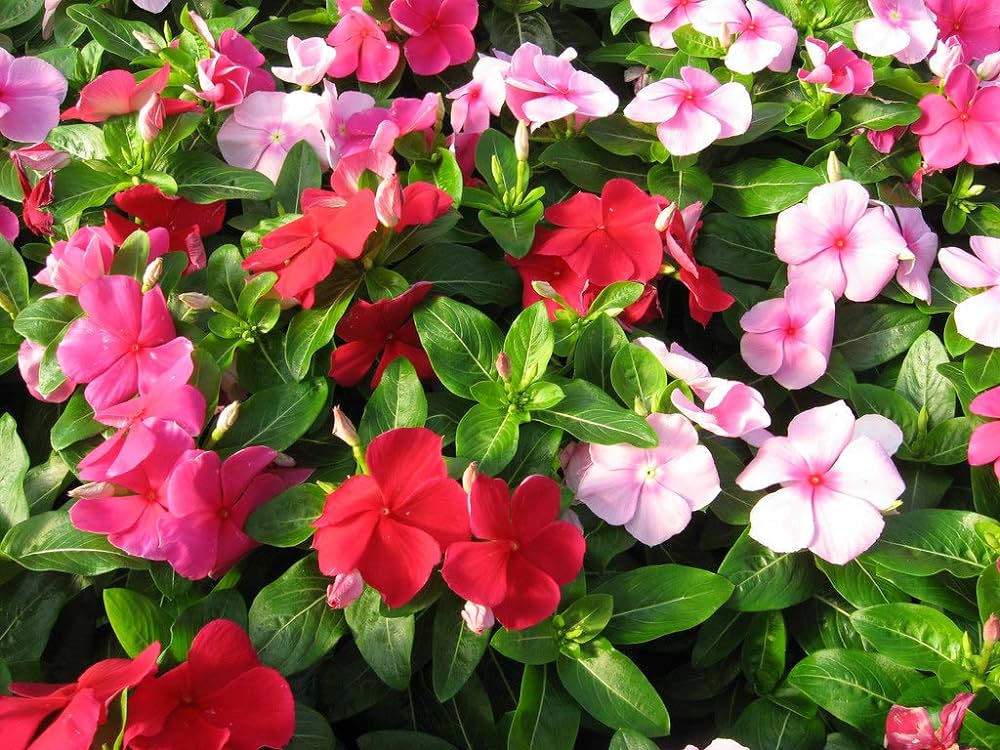
Hybrid Vinca, also known as periwinkle, is a stunning plant that comes in various colors and is typically available during the winter season. However, due to its delicate nature, these plants often struggle to thrive once brought home from the nursery, despite diligent care and precautions.

Red Hybrid Vinca plant

If they manage to survive the initial days, sustaining their well-being beyond one or two weeks becomes a challenge. This unique plant requires distinctive care in various aspects, including the application of pesticides, fertilizers, the best soil, a suitable pot, pruning, meeting specific sunlight and water requirements, and finding the optimal location for its growth.

In this article, we aim to uncover 11 important tips to care for the thriving of hybrid vinca, demystifying the challenges associated with its cultivation.

1. Hybrid Vinca is Fungus Prone

Hybrid Vinca affected by Fungus

Well! Before understanding its care, let’s analyze its problems first, which it faces after being brought home from the nursery.

Within 4-5 days of acquiring the plant from the nursery, signs of deterioration become evident. In typical gardening fashion, individuals often resort to supplementing the plant with substances like Epsom salt, NPK, Neem oil, or other fertilizers to expedite its growth. However, it is crucial to note that when purchased from the nursery, the plant is already enriched with essential nutrients, as nurseries typically ensure proper fertilization before selling their plants. Furthermore, distinct symptoms manifest when the plant is nutrient-depleted, such as reduced leaf size, lack of flowering, and wilting, but the plant does not necessarily succumb entirely.

The primary challenge lies in the plant’s heightened susceptibility to fungus attack. Hybrid Vinca is very much prone to fungus attacks (usually not a local Vinca).

Fungal attacks can lead to the decay of the plant, presenting a significant hurdle in its overall health and well-being.

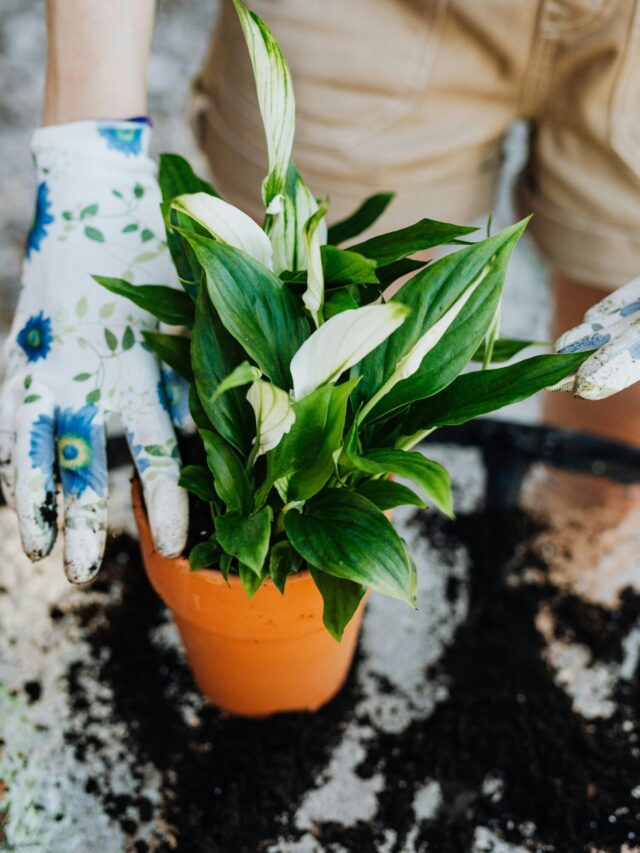
2. Repotting of Hybrid Vinca

This plant dislikes being repotted, so it is advisable to refrain from repotting for at least 6-7 months after bringing it home from the nursery.

  • Only consider repotting if it becomes absolutely necessary, such as when the roots start protruding, and the current pot is insufficient to accommodate the plant.

When repotting is unavoidable, follow a careful procedure:

  • Begin by removing the bottom polythene of the plant and then place it into the new pot.
  • Next, gently pull the side polybag upward, ensuring the roots remain undisturbed to prevent unnecessary stress on the plant.
  • There may be instances where the plant shows suboptimal growth, and repotting can be considered as a solution, but here keep repotting as the last option. Follow all other treatments first to revive the plant.

3. How to Grow Hybrid Vinca

1. Buy From Nursery:

Vinca at nursery
Vinca at nursery

Hybrid Vinca is available at nurseries from October to November and January to February.

  • The most convenient method is to purchase a young plant directly from a nursery, typically priced between Rs 20-30.

2. Grow From Seeds:

Seedpods of Vinca plant

Seeds can be purchased online from various websites. However, growing from seeds is a somewhat tricky process.

    • Alternatively, seeds can be collected from mature seed pods produced when the flowers bloom.
    • Allow the pods to mature and naturally fall off; collect the black-colored seeds for growing new plants.

3. From Cuttings:

After pruning, remove leaves and flowers from the lower sections of the branches.

    • Submerge the pruned branch with its remaining leaves into water, ensuring that 2-3 nodes of the branch are submerged.
    • Plants grown from cuttings take at least 1-1.5 months to grow and will be of the hybrid category only.

By following these methods, you can successfully cultivate hybrid vinca while considering factors like seasonality, seed collection, and the preferred method of propagation.

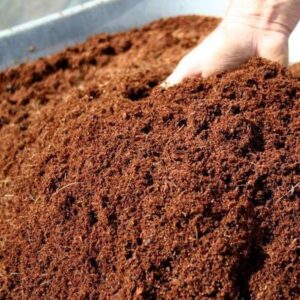
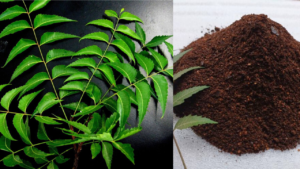
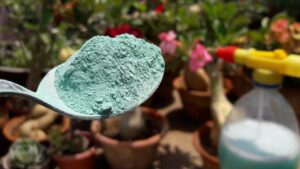
4. Soil Mixture for Hybrid Vinca

Soil mixture


Soil for this plant should be porous and soft to hold the delicate roots properly.

  1. Local Soil- Strain and thoroughly cleanse the soil, ensuring the removal of all debris, insects, and fungus. Expose the soil to sunlight to promote its rejuvenation.
  2. Compost – Take compost one –  third quantity of soil. Prefer vermicompost or cow dung compost here.
  3. Sand – Add the same quantity of sand as of compost.
  4. Fungicide – Add fungicide approximately one – third of a spoon in 5 kg of soil.

Mix all these ingredients and the resultant mixture is the perfect soil for Hybrid Vinca.

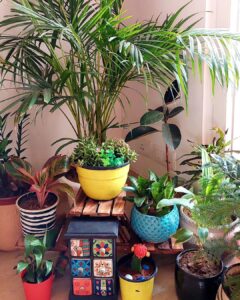
5. Preferred Pot Size for Hybrid Vinca

Pot size for Hybrid Vinca


Regardless of the pot material, the size of the pot plays a crucial role. Whether it is made of cement, clay, plastic, or ceramic, the pot’s size should ideally be one size larger than the plant.

  • Avoid choosing a larger pot if the plant is small in size.
  • When water is provided to the plant, the roots will absorb the necessary moisture.
  • However, if the plant is smaller than the pot, excess soil can retain moisture, leading to fungal issues.
  • Matching the pot size to the plant ensures that water accumulation aligns with the root system’s requirements.
  • Soil in smaller pots dry out faster compared to those in larger pots.

6. Location of Plant:

When fetched from the nursery during October-November, keep this plant in direct sunlight.

  • When the weather changes from winters to summers, shift the plant under a green net.
  • During extreme summers, it may undergo some stress.
  • In the rainy season, keep it under a green sheet to protect against direct rainfall, which may invite fungal attacks. Store rainwater for the plant, but avoid exposing it to direct rainfall.
  • After rain, expose the plant to maximum sunlight.
  • This plant thrives in moderate weather, neither too sunny nor too cold.

7. Watering tips for Hybrid Vinca

watering Hybrid Vinca plant

Before watering, aerate the soil and allow it to dry thoroughly from the inside. The following day, provide water adequately.

  • When spraying any fungicide or water on leaves and flowers, ensure they do not retain water and completely dry out after spraying.
  • Opt for a morning temperature so that any stagnant water on the leaves and flowers dries promptly, preventing the risk of fungal attacks.

8. Pruning of Hybrid Vinca

Pruning of Hybrid Vinca

Regular pruning is not recommended within the first year; a single instance of cutting the tips is sufficient to stimulate blooming.

  • Frequent pruning can increase the risk of fungal attacks.
  • If the plant appears leggy around February, perform standard pruning once.
  • For very bushy plants, opt for hard pruning in October or February, limiting it to once a year.
  • Maintain cleanliness by sanitizing your pruner before use.
  • Apply fungicide to both the pruner and the pruned parts of the plant. Alternatively, spray the fungicide on the plant after pruning, diluting ⅓ spoon of fungicide in 2 liters of water and apply it to both the leaves and the soil.
  • Remove dry and withered leaves from the lower side, as they may potentially attract fungal infections.

9. Fungicides Treatment:

Fungicide treatment on Vinca plant
Giving Fungicide in soil

If the plant shows signs of a fungal attack, trim away the affected parts and apply a fungicide solution to both the leaves and the soil.

  • Administer the same treatment to the plant once a month, even in the absence of issues, as a preventive measure against fungal attacks.

10. Fertilizers for Hybrid Vinca plant

This plant does not require heavy feeding; it thrives well with adequate sunlight and in the absence of fungal attacks.

  • Any fertilizer, such as cow dung, mustard cake, peanut, or others, applied once a month, is ample for its nutritional needs.
  • During peak flowering periods in October-November, February-March, and the rainy season, supplement regular fertilizer with additional banana peel fertilizer after 15 days of the initial application.
  • No other fertilizers are recommended or necessary for this plant.

11. Pesticide Treatment for Hybrid Vinca plant

Black Aphids on Vinca plant

Generally, this plant is not prone to pest attacks, but occasional infestations of small black aphids may occur.

  • If aphids are present, wash the plant thoroughly by spraying it with water to remove all insects and pests.
  • Prepare a solution comprising neem oil, soap, and garlic. Apply this solution by spraying it on the plant to deter further insect attacks.

Click here to read: How to Remove Aphids from the Plant

Hybrid Vinca is an exceptionally beautiful plant that can enhance the aesthetics of your garden. To ensure its well-being, decorate your garden with this plant and provide attentive care by adhering to the recommendations outlined above.

Happy Gardening!

12 Health Benefits of Growing Plants In And Around Your Home

Introduction

In today’s fast-paced world, the importance of creating a healthy living environment cannot be overstated. One effective way to achieve this is by incorporating greenery into your surroundings. The benefits of growing plants in and around your home extend beyond mere aesthetics.

Let’s delve into the 12 health benefits that will convince you to embrace the green revolution.

1. Improved Air Quality

2. Stress Reduction

3. Boosted Immune System

4. Enhanced Mental Health

5. Increased Productivity

6. Better Sleep

7. Temperature Regulation

8. Sustainable Living

9. Connection with Nature

10. Fresh Home Produce

11. Beautiful Aesthetics

12. Community Engagement

12 Health Benefits of Growing Plants

1. Improved Air Quality

Plants act as natural air purifiers, filtering out pollutants and enhancing the quality of the air we breathe. A variety of houseplants, such as spider plants and peace lilies, excel at removing harmful substances like formaldehyde and benzene.

Plants like Aloe Vera, Snake plant, Pothos, ZZ plant, Areca Palm, etc. excel at enhancing indoor air quality, making your home a healthier place.

snake plant


2. Stress Reduction

stress

Nature has a profound impact on stress levels. The presence of greenery in and around your home creates a calming atmosphere, reducing stress and promoting overall well-being.

Immerse yourself in a green oasis at home to experience a noticeable reduction in stress and anxiety.

3. Boosted Immune System

Exposure to plants can boost your immune system. The interaction with soil and plants promotes a diverse microbiome, enhancing your body’s ability to fight off infections.

Regular contact with plants supports your immune system, contributing to a healthier and more resilient body.

4. Enhanced Mental Health

areca palm

Plants contribute significantly to mental well-being. Their presence has been linked to improved mood, decreased feelings of loneliness, and a higher overall sense of happiness.

Cultivate a positive mindset by surrounding yourself with the vibrant energy of indoor plants.

5. Increased Productivity

Green workspaces have been shown to increase productivity and concentration. Integrate plants into your home office or workspace to experience a noticeable improvement in focus.

green workspace

Boost your productivity by creating a green oasis in your workspace, fostering a conducive environment for work.

6. Better Sleep

Certain plants, like lavender and jasmine, emit calming scents that can improve sleep quality. Place them strategically in your bedroom for a restful night’s sleep.

Transform your bedroom into a sleep haven by introducing plants with soothing fragrances.

7. Temperature Regulation

Plants act as natural insulators, regulating temperature and creating a more comfortable living environment. They release moisture during transpiration, cooling the air.

all plants indoor

Enjoy a naturally comfortable home by leveraging plants for temperature regulation and humidity control.

8. Sustainable Living

Growing plants promotes eco-friendly practices, contributing to a sustainable lifestyle. Adopting a greener approach at home reduces your carbon footprint and supports environmental conservation.

Contribute to a healthier planet by embracing sustainable living through plant cultivation in your home.

9. Connection with Nature

Biophilic design, integrating nature into living spaces, fosters a deeper connection with the natural world. This connection positively influences mental and emotional well-being.

Nature

Immerse yourself in nature within the confines of your home, fostering a harmonious connection with the environment.

10. Fresh Home Produce

Indoor gardens allow you to grow your own fresh produce. Cultivate herbs and vegetables, adding a touch of homegrown goodness to your meals.

marigold + Tomato

Experience the joy of harvesting your own produce, bringing fresh flavors and nutritional benefits to your table.

11. Beautiful Aesthetics

Plants enhance the visual appeal of your home, creating a welcoming and aesthetically pleasing atmosphere. Experiment with different plant types and arrangements to elevate your interior design.

Elevate your home’s aesthetics with the natural beauty of plants, transforming spaces into visually stunning havens.

12. Community Engagement

Neighborhood gardens provide a platform for community engagement. Collaborative gardening initiatives strengthen bonds among residents, creating a sense of shared responsibility.

Participate in community gardens to build connections, fostering a spirit of collaboration and shared environmental stewardship.

Click here to read: Importance of Gardening in Our Life

Health Benefits Of Growing Plants In And Around Your Home – FAQs

Q: Can any plant improve indoor air quality?

A: Absolutely! Many houseplants, such as spider plants, peace lilies, and aloe vera, excel at purifying indoor air, removing common pollutants.

Q: How can plants contribute to better mental health?

A: Plants promote better mental health by improving mood, reducing feelings of loneliness, and creating a positive and vibrant living environment.

Q: Are there specific plants that aid in temperature regulation?

A: Yes, plants act as natural insulators, regulating temperature through transpiration. This helps create a more comfortable and climate-controlled home.

Q: How can growing plants at home support sustainable living?

A: Growing plants at home contributes to sustainable living by reducing your carbon footprint and promoting eco-friendly practices.

Q: What are the benefits of community engagement through gardening?

A: Community gardens foster connections among residents, creating a sense of shared responsibility and promoting collaboration in environmental stewardship.

Conclusion

Embracing the practice of growing plants in and around your home goes beyond mere aesthetics. It’s a holistic approach to creating a healthier, more sustainable, and harmonious living environment. By unlocking the myriad health benefits, you not only enhance your well-being but also contribute to a greener, more connected community.

Happy Gardening!

winter flowers

How to Care & Save Plants in Winter Season: 8 Tips

Taking care of plants during the winter season is crucial for their well-being. Just as humans adapt to changes in weather, plants also need adjustments to their care routine to thrive during the colder months. This is especially true for summer plants, which require special attention and nurturing in winter to prevent deterioration.

Summer plants

Achieving remarkable results is possible with minor tweaks in plant care. By making subtle adjustments in response to current weather conditions, you can ensure the sustainability of your plants. Let’s explore the winter care journey of plants through the following 8 tips.

  1. Watering tips
  2. Protect plants from cold
  3. Accept changes in plants
  4. Avoid pruning and repoting of plants
  5. Do not Disturb Summer Plants in Winters
  6. Protect plants from pest attack
  7. How and When to Give Fertilizer
  8. Old plants are strong plants

How to Care & Save Plants in Winter Season

1. Watering tips

In winter, plants require less water compared to summer, but it is crucial not to neglect their hydration needs.

Unlike in summer, when we typically water when the topsoil is dry, in winter, wait until the soil is dry down to the roots before watering. Allow the top layer to dry for 4-5 days before providing water.

watering plants

When watering in winter, avoid using extremely cold water as it can harm the plants.

  • Opt for lukewarm water for a more plant-friendly approach. Thoroughly assess the soil’s moisture content; refrain from watering if it still retains moisture, and water adequately if the soil is completely dry, allowing water to drain from the pot’s bottom hole.
  • Maintain plant cleanliness by using lukewarm water for spraying when necessary, applying the spray to leaves and flowers to keep them clean and healthy.
Click here to read: How to water plants?….

2. Protect plants from cold

It is crucial to protect plants from harsh, cold waves to prevent their demise. As winter approaches, typically around October to November, consider:

plants under green shade

  • Relocating summer plants indoors.
  • Placing them under protective shade.
  • Additionally, cover them with a protective sheet for added insulation.

4. Accepting visible changes in plants during winters

In winter, summer plants inevitably experience stress, leading to visible changes that should be acknowledged and accepted to a certain extent. These changes may include:

hibiscus yellow leaves
  • Reduction in the size of leaves.
  • Survival mode with minimal or no growth.
  • Development of leggy stems.
  • Yellowing or browning of leaves.

Admit that these changes are temporary, and plants generally recover when the weather aligns with their specific requirements.

  • Embrace positive changes, such as the blossoming of flowers and the growth of winter vegetables like carrots and radishes.
  • Cherish these transformations with a positive outlook and appreciation for the natural cycles.

5. Do not Disturb Summer Plants in Winters

During winter, when summer plants experience stress, it is advisable to refrain from intensifying their disturbance by avoiding certain practices stated below.

pruning

  • Avoid normal pruning,
  • Avoid hard pruning,
  • Root pruning should also be neglected,
  • Repotting is not favourable at this time,
  • Pinching is also not recommendable,
  • No experiment should be performed with the plant at this time.

When the plant is healthy and in its growing stage at that time all the experiments and treatment can be performed with the plant but not when it is already under stress.

(i) Avoid using pruners and scissors on summer plants: Dry leaves and mature flowers of plants like tulsi which can be removed from hands, can be removed but avoid using pruners and scissors on summer plants.

pruning of Manjaris
Remove mature flowers of Tulsi plant

(ii) Avoid Har Pruning of winter plants: Pruning and repotting of winter plants can be done during winters on the day when the temperature is little warm and favourable but hard pruning of winter plants should not be practiced at this time.

Click here to read: How to do Pruning of Plants…

6. Protection From Pest Attack

While the likelihood of pest attacks during winter is minimal, remain vigilant, as plants are already under stress. 

Mealybugs on plant leaves

  • If any signs of pest infestation are detected, particularly mealybugs or aphids, take immediate action.
  • Initiate a neem oil treatment by thoroughly cleaning the affected plant with water and then spraying it with a neem oil solution.
  • This prompt response is essential to prevent pests from increasing the plant’s stress, ensuring its survival during the winter months.

7. Fertilizer Requirements

Summer plants exhibit minimal to zero growth during winter, being under stress.

Refrain from applying heavy feeder fertilizers during the winter season.

Exceptions can be made for mustard cake and groundnut cake fertilizers.

How and when to give mustard cake and groundnut cake fertilizers

(i) Thorough dilution with warm water : When using these fertilizers, ensure thorough dilution with warm water before application.

mustard cake liquid fertilizer

(ii) Give at intervals of approximately 50-60 days: Feed the plant with these fertilizers at intervals of approximately 50-60 days during the winter.

Note:

  • Mustard cake and groundnut cake fertilizers possess warming properties, regulating soil temperature and assisting the plant in maintaining warmth.
  • It is important to note that these fertilizers do not stimulate plant growth during the winter months.
Click to read: How to make Mustard Cake Liquid Fertilizers..

8. Mature Plants are Strong Plants

Mature plants that have been nourished over the years experience less stress and endure winter conditions well. Conversely, newly acquired or recently planted plants, especially those introduced 4-5 months ago, are more susceptible to stress.

Robust plants exhibit a faster recovery pace compared to newly established ones. However, with time, these plants will gradually recover.

It is important to note that as the next season arrives, all summer plants have the inherent ability to recover on their own. There is no need to worry about winter gardening; instead, embrace and appreciate the unique aspects of the season.

Happy Gardening !

soil mix rose plants

How to Prepare Soil Mixture for Rose Plant?

When it comes to growing beautiful and healthy roses, the soil mixture you use is indeed one of the most crucial factors to consider.

Roses have specific soil requirements, and providing them with the ideal conditions will significantly impact their health and growth.

Why is the right soil mixture important for Roses?

soil mixture
soil mixture

1. Roses thrive in well-drained soil

    • The first thing to understand about roses is that they prefer well-draining soil.
    • This means that excessive moisture can be harmful to their health.
    • Excessive moisture can lead to problems like waterlogged roots, which can in turn cause issues such as root rot and diseases.
    • Therefore, creating a soil mixture that promotes proper flow of water and prevents it from pooling around the plant’s roots is important for the well-being of rose plants.
rose plant in pot
rose plant in pot

2. Soil mixture should be rich in organic matter

    • Roses also require a soil mixture that is rich in organic matter.
    • Organic matter provides essential nutrients, improves soil structure, and promotes beneficial microbial activity.
    • By incorporating organic matter into the soil mixture, you can enhance moisture retention, nutrient availability, and overall soil fertility, all of which contribute to healthy and vibrant roses.

Components of an ideal soil mixture for Rose plant

1. Garden Soil:
Use good quality garden soil as the base for your mixture. It should be loamy and well-draining. Avoid heavy clay soils.
garden soil
garden soil
2. Compost to increase the organic matter in the soil:

To increase the amount of organic matter in the soil mixture, it is highly recommended to add compost in the soil.

compost
compost
  • You can add cow dung compost or vermicompost.
  • Compost enriches the soil with nutrients and improves its structure, providing a favorable environment for the growth of roses.
3. Sand for drainage improvement:

If your soil is heavy and doesn’t drain well, you can add sand to improve drainage.

sand
sand
4. Coco peat for moisture retention:

It helps retain moisture in the soil and improves its texture.

    • Roses benefit from a soil mixture that can hold onto moisture without becoming overly soggy.
    • Adding coco peat into the soil helps maintain moisture levels, ensuring that the roses get the water they need while avoiding the possibility of root rot.

coco peat

5. Neem Cake powder:

Adding neem cake powder to your soil can be an effective natural way to help prevent soil-borne insects and pests.

neem cake powder
neem cake powder
6. Bone meal –

You can also add bone meal if you wish to.

  • Bone meal is a good source of phosphorus, which is beneficial for root development and flower production in roses.
  • It also contains calcium, which can help improve soil structure.
7. Fungicide –

You can add a fungicide to the soil to prevent fungal in plants.

Fungicide
Fungicide
Fungicide powder
Fungicide powder
  • When it comes to rose plant care, fungal issues, such as powdery mildew or black spot, can be a common concern.

Tips for preparing the soil mixture for rose plants

1. Clean Garden soil: 
garden soil
garden soil
  • Clean your garden soil before preparing soil mixture for rose plants. Remove all the debris, glass and plastic pieces that may hinder the proper growth of the plants.
2. Mix the ingredients in the following proportions:
  • Compost: Add vermicompost or cow-dung compost half the quantity of the garden soil. 
  • Sand: Add sand half the quantity of the garden soil means equal amount of compost.
  • Coco peat: It should be 1/4 of the sand. 
  • Neem Cake powder: Add little bit of neem cake powder in the mixture.
  • Fungicide: You can add very little amount of 3 -4  gm of fungicide in soil mixture. 
  • Bone meal: You can also consider adding a bone meal if you wish.

Thoroughly blend all the components together to create a uniform mixture.

soil mixture
soil mixture

Note:

  • It is a good practice to amend the soil with compost and other organic matter from time to time to maintain soil fertility and structure.
  • Additionally, monitor the performance of your roses and adjust the soil mix as needed to ensure their health and vitality.

rose flowers

Conclusion:

  • Preparing the correct soil for your rose plants is like giving them the perfect home.
  • When you blend soil that drains well with organic stuff, it’s like making a strong base for their growth and overall health.
  • Just keep in mind what your roses really like, mix the right amounts, and use good stuff. If you get the soil right, your roses will grow beautifully and give you pretty flowers with a lovely smell.

Related articles:

1. Rose plant care: Fertilizer & Pest Control

2. How to care Rose plant

Happy gardening!!

7 Gardening Tips for Beginners

Many people are very fond of gardening. They like to see every corner of their house green. Taking care of plants is an important part of their daily routine. But if you’re a beginner in gardening then there are a lot of things you need to know before you start gardening.

You should be aware of the following pointers mentioned below:

  • Which plants are suitable for your place?
  • What is the correct method of watering?
  • How much sunlight is required by different plants?
  • What is the right time of giving fertilizer to the plants?
  • Which fertilizer is suitable for a particular plant?

In this article, we will cover some of the basic tips for healthy gardening.

Basic Gardening Tips for Beginners

1. Start with minimum plant

  • Excess to everything is bad, especially for beginners. If you are planting for the first time then start with only three to four plants.
  • Never start with 15-20 plants in the starting. Gradually increase the number of plants in your garden.
  • In the beginning, we are not aware of various facts and one mistake can spoil all the plants. So, always start with 3-4 plants, not more than that.
  • After 15-20 days, go for 2-3 more new plants and like the way, expand your garden.

2. Select plants according to the space 

  • For gardening, a big terrace or balcony is not required.
  • Plants can be kept in small areas also like windows, near the entrance area, or any corner of the house, and can be hung on curtain rods or nails.
  • Plants cannot grow in the dark area, there should be some sunlight be it direct, indirect, bright, or dim.

A different variety of plants is available like:  

  • Indoor plants
  • Outdoor plants
  • Big Size Plants
  • Small Size Plants

Gardening can be done in any area, sunlight should be there. Select the plant according to the space you have for gardening.

3. Each plant requires contrast treatment

Every plant is unique in its nature hence they need divergent caution and supervision to grow properly. Plants show different behavior in different seasons and climate conditions.

4. Plants need more or direct sunlight

Plants like Tulsi, and Hibiscus need more sunlight. These plants should be kept on the terrace or balcony where the sun is there for at least 4-5 hours.

5. Plants need less or indirect sunlight

  • Some plants need only an hour of sunlight like Syngonium, Aglaonema, and many more. These kinds of plants can be kept in windows or inside the home. So, for terrace or balcony gardening go for the plants which need direct or more sunlight.
  • For balcony gardening, plants that need sunlight for 3-4 hours can opt. For windows and inside the home indoor plants can be selected.
  • Always opt for the right plants according to the place of gardening.

6. List of the plants classified according to the requirement of sunlight

(A) Plants that do not need direct sunlight (but should not be kept in a dark place).

areca palm

  • Monstera 
  • Aglaonema
  • Areca palm
  • Money Plant (Pothos)
  • Syngonium
  • Dieffenbachia
  • Sansevieria (snake Plant)
  • ZZ plant
  • Peace Lily
  • Spider Plant

These plants can be kept inside the home where bright sunlight comes.

(B) If you get sunlight for at least 2-3 hours then opt for all the plants mentioned below.

  • Succulents
  • Caladium
  • Lucky Bamboo
  • Jade Plant
  • Aloe vera
  • Vinca
  • Curry Leaf
  • Christmas Tree
  • Devils Backbone
  • Croton
  • Dracaena
  • All Herbs
  • Coriander
  • Spinach

All these plants can be kept on the balcony or at the entrance area also if direct sunlight is there for 2-3 hours.

(C)  List of plants that need sunlight for at least or more than 4 hours for optimal growth.

sunlight for hibiscus plant

  • Portulaca
  • Rose
  • Marigold
  • Tulsi plant (Holy basil)
  • Shami
  • Hibiscus
  • Aparajita
  • Bougainvillea
  • Night Jasmine (Parijat)
  • Vegetables like tomatoes, brinjal
  • All the flowering and fruit plants.

All these plants need full sunlight for proper growth otherwise they will not grow properly.

7. Location of the House

The direction of the house also affects the gardening a little bit but not much because exposure to the sun also depends on the location of the house. East-facing houses get early morning sunlight in summer which is good for plants whereas in winter sunlight is not sufficient for plants in east-facing homes. 

  • Moreover, if there is a high-rise building in front of your home then you might not get any sunlight on your balcony due to the shade of that high-rise building.
  • Despite the direction, people need to understand the time cycle of the area in which they receive sunlight.
  • Suppose you are getting scorching sunlight during the afternoon in May -June then plants like caladium or croton (which require sunlight only for 2 hours) can be kept on the balcony at that time and then move in the shade.
  • Plants might burn due to red hot sun rays if placed for a longer duration in sunlight.
  • Select the plants according to your space and the sunlight that you are receiving in your gardening area.

Cherish the fun of doing Gardening !!

Happy Gardening!!

Slice Aloe Vera very useful herbal medicine for skin and hair.

Know the 8 Medicinal Benefits of Aloe Vera Plant

Aloe vera, often referred to as the “plant of immortality,” has been celebrated for its therapeutic properties for centuries. This succulent wonder is not just a decorative plant but harbors a treasure trove of medicinal benefits. From skincare to digestive health, aloe vera stands as a versatile healer, earning its rightful place in both traditional and modern medicine.

Here are the 8 medicinal benefits of Aloe Vera plant;

  1. Skin Soothing Supremacy
  2. Hydration Hub for Hair and Scalp
  3. Digestive Dynamo
  4. Immune System Booster
  5. Revitalize Your Skin
  6. Helps to moisturize the skin
  7. Wound Healing Accelerator
  8. Anti-Aging Elixir

Medicinal Benefits of Aloe Vera Plant

1. Skin Soothing Supremacy:

Did You Know?

Aloe vera has been used since ancient times for treating various skin conditions.

Its gel, extracted from the inner leaf, contains a plethora of bioactive compounds, including vitamins, enzymes, and amino acids, making it a powerhouse for skin health.

aloe vera gel

Aloe vera’s natural anti-inflammatory and antimicrobial properties make it a go-to remedy for soothing burns, wounds, and various skin irritations.

  • From minor cuts to sunburns, applying aloe vera gel accelerates the healing process while providing a cooling sensation.

2. Hydration Hub for Hair and Scalp:

Did You Know?

Aloe vera is a secret weapon for maintaining a healthy scalp and luscious locks.

Its enzymatic composition helps in repairing dead skin cells on the scalp, promoting hair growth and preventing dandruff.

  • Incorporating aloe vera into hair care routines can enhance the health of your mane.
  • The gel acts as a natural conditioner, leaving hair smooth and manageable. 

3. Digestive Dynamo:

Did You Know?

Aloe vera has been used for centuries as a natural remedy for digestive issues.


The latex, derived from the inner leaf skin, contains compounds with strong laxative effects, aiding in relieving constipation. Aloe vera’s digestive benefits extend beyond relieving constipation.

  • It can also soothe and repair the digestive tract, making it an excellent choice for individuals with irritable bowel syndrome (IBS) or other inflammatory digestive disorders.

4. Immune System Booster:

Did You Know?

Aloe vera is rich in antioxidants, including beta-carotene, vitamin C, and E.

These antioxidants help combat free radicals in the body, thereby bolstering the immune system.

aloe vera juice

Regular consumption of aloe vera juice or supplements may contribute to overall immune health.

  • The plant’s immune-boosting properties, combined with its ability to soothe inflammation, make it a valuable addition to a wellness routine.

5. Revitalize Your Skin:

Did You Know?

Aloe vera gel aids in repairing damage caused by ultraviolet (UV) radiation, a factor contributing to 80% of visible aging signs.

Aloe vera

  • The sterols found in aloe vera encourage the generation of collagen and hyaluronic acid, which enhance skin plumpness by retaining moisture and smoothing away fine lines and wrinkles.

Click here to read: Aloe Vera Plant Care…

6. Helps to moisturize the skin:

Did You Know?

Aloe Vera gel serves as an effective moisturizer for the skin, distinguishing itself from typical store-bought moisturizers.

Unlike conventional products, when applied as a moisturizing gel, Aloe Vera does not leave a greasy residue on the face or skin. Instead, it performs the opposite function by unclogging pores and imparting a softening effect.

  • Additionally, Aloe Vera gel can be utilized as an aftershave treatment due to its ability to maintain skin hydration and promote the healing of razor burns, minor nicks, and cuts.
  • Moreover, it proves beneficial in addressing dry skin concerns.

7. Wound Healing Accelerator:

Did You Know?

Beyond skin irritations, aloe vera accelerates wound healing by promoting cell regeneration.

  • It has been historically used for treating cuts, scrapes, and minor wounds due to its ability to enhance the natural healing process.

8. Anti-Aging Elixir:

Did You Know?

Aloe vera helps your skin stay young and firm because it stimulates collagen and makes your skin more elastic, acting as a powerful way to reduce signs of aging.

  • Regular application can help minimize the appearance of fine lines and wrinkles, contributing to a more youthful complexion.

Conclusion:

Aloe vera’s medicinal prowess spans a spectrum of health benefits, making it a true gem in the world of natural remedies. From skin rejuvenation to digestive support, this plant continues to captivate the attention of researchers and health enthusiasts alike. As we unlock more secrets within the succulent leaves of aloe vera, it’s clear that this plant’s healing touch is a gift from nature that keeps on giving.

Click here to read: How to Propagate Aloe Vera…

Happy reading!!

10 Herbs Easy to Grow at Home

The magnetism of fresh herbs is undeniable. Not only do they elevate the flavours of our culinary creations, but they also come packed with health benefits. Imagine stepping into your balcony or terrace garden and plucking fresh herbs for that evening tea or aromatic curry.

Growing herbs at home is a delightful journey that connects us with nature’s bounty. Below is the list of herbs which you can grow at home.

1. Tulsi (Holy basil)

2. Curry leaves

3. Mint

4. Coriander 

5. Lemongrass

6. Thyme

7. Parsley

8. Chives

9. Ajwain plant

10. Green Onion 

Let’s explore ten herbs that bringing freshness and flavour to your doorstep.

10 Herbs Easy to Grow at Home

1. Tulsi (Holy Basil)

tulsi plant

Tulsi (Holy basil) is a summer plant and well-suited for cultivation in warm seasons. Tulsi leaves are used into teas or beverages to add a unique herbal flavor. 

Tulsi plant requires well-drained soil and ample sunlight, making it a perfect fit for home garden.

Click here to read step by step: How to grow Tulsi from seeds at home

Medicinal benefit: Tulsi is admired for its medicinal properties. Rich in antioxidants, this sacred herb is easy to grow. Regularly used in Ayurvedic preparations.

2. Curry leaves

curry leaf

The curry leaf is a wonderful addition to kitchens, appreciated for both its delightful fragrance and taste. It serves as a useful herb, commonly found in many households.

It is a plant that thrives in the summertime, flourishing effectively from February to October.

This plant thrives in abundant sunlight, requiring approximately 5-6 hours of exposure each day. However, it does not demand excessive watering.

Medicinal benefit: Curry leaves serve as a rich source of vitamins A, B, C, and E, delivering crucial nutrients essential for overall health. Furthermore, the consumption of curry leaves may play a role in maintaining healthy cholesterol levels, promoting overall heart health.

3. Mint (Pudina)

Mint plant in pot

Cool and refreshing, mint is a must-have herb for every kitchen. Mint is used for various culinary and medicinal purposes. 

  • Mint adds a refreshing and aromatic flavor to a wide range of dishes, including salads, beverages, desserts, and main courses.

Mint thrives in moist soil and partial shade, which makes it ideal for pots or hanging baskets.

Click here to read step by step: How to grow Mint at home

Medicinal benefit: Mint has several potential health benefits, such as; help ease nausea and motion sickness, good source of antioxidants, which help combat oxidative stress in the body, its ability to soothe indigestion and alleviate digestive discomfort.

4. Coriander (Dhaniya)

Coriander

The vibrant green leaves of coriander are a staple in Indian cuisine. From garnishing curries to flavouring dals and chutneys its uses are countless.

Coriander grows best in well-drained, loamy soil and prefers cool conditions, making it a winter favourite in many Indian regions.

Click here to read step by step: How to grow Coriander at home

Medicinal benefit: Also, coriander has several potential health benefits, such as: natural antibacterial properties, potentially contributing to overall immune health.

5. Lemongrass (Gavati Chaha)

lemongrass

A fragrant addition to soups, teas, and curries, lemon grass thrives in India’s warm climate. Its citrusy aroma and flavour make it a refreshing choice for homemade teas.

Lemongrass, also known as Gavati Chaha, is typically grown in the warm seasons, particularly during the summer.

It thrives in a tropical or subtropical climate and requires well-drained soil and ample sunlight for optimal growth.

Medicinal benefit: Lemongrass offers various potential health benefits, including; it promote a healthy digestive system, rich in antioxidants, it has natural antibacterial and antifungal properties, contributing to overall immune support.

6. Thyme

thyme

Thyme is a fragrant herb that belongs to the mint family (Lamiaceae) and is known for its aromatic leaves. Thyme is a flavorful herb that not only enhances the taste of dishes but also offers potential health benefits.

 Thyme thrives in well-drained soil and prefers full sunlight. It is a hardy perennial plant and can be grown in gardens or containers.

Medicinal benefit: Thyme has been traditionally used for its medicinal properties. It contains compounds with potential antibacterial, antifungal, and antioxidant effects. Thyme tea is sometimes used to alleviate respiratory issues.

7. Parsley

parsley

Parsley is a versatile herb with a mild, fresh flavor and is widely used in culinary applications. It is used as a garnish and ingredient in a variety of dishes, including salads, soups, stews, and sauces.

Parsley is relatively easy to grow and can thrive in containers or in ground. It prefers well-drained soil and partial to full sunlight.

Companion Plant: Parsley is sometimes used as a companion plant in gardens. Its strong scent is believed to repel certain pests, making it a beneficial addition to vegetable gardens.

Medicinal benefit: Parsley is rich in vitamins, particularly vitamin K, vitamin C, and vitamin A. It also contains antioxidants and minerals such as iron and calcium.

8. Chives

A close relative of onions and garlic, chives give a mild onion flavour. They thrive in well-drained soil and require moderate sunlight. 

chives

Chives are commonly used as a fresh herb in cooking. They are particularly popular in salads, soups, sauces, and as a garnish for various dishes. Due to their mild flavor, they complement a wide range of foods.

Chives are easy to grow and can thrive in a variety of conditions. They prefer well-drained soil and partial sunlight.

They are often cultivated in home gardens and are a popular herb for indoor container gardening.

Medicinal benefit: Chives are low in calories and rich in vitamins and minerals, including vitamin C, vitamin K, and folate. They also contain antioxidants.

9. Ajwain plant (Mexican mint) 

ajwain plant

The Ajwain plant, alternatively called Mexican mint or Indian Borage, shares both the aroma and taste of carom seeds. In fact, a simple touch can reveal its identity as an oregano plant.

The leaves of the Ajwain plant, known as oregano, are not only used in pizzas but also has numerous benefits. You can create homemade oregano by drying the leaves of the Ajwain plant.

This plant tends to bloom more during the summer, as it is well-suited for warmer seasons.

It thrives with a sunlight requirement of 1-4 hours maximum, not exceeding this duration.

Click here to read step by step: How to grow Ajwain Plant at home

Medicinal benefit: The Ajwain plant is rich in many nutrients such as protein, carbohydrates, fiber, sodium, potassium, calcium, phosphorus, iron, and thiamine, due to which it is used as a medicinal plant.

10. Green Onion 

Green Onion

Green onion leaves, also known as scallions or spring onions. Green onion leaves are not only a flavorful addition to a wide range of dishes but also contribute essential nutrients to a balanced diet.

Green onions are easy to grow and can be cultivated in gardens or containers. They prefer well-drained soil and partial sunlight. 

Medicinal benefit: Green onion leaves are low in calories but rich in vitamins and minerals. They contain vitamin K, vitamin C, vitamin A, and various B vitamins. They also provide folate, potassium, and fiber.

——————————

Growing herbs at home is a rewarding experience that brings nature’s freshness to your doorstep. From the sacred Tulsi to the versatile mint and the aromatic oregano, these ten herbs offer a symphony of flavours and fragrances.

Also read:

9 Plants You Should Grow at Home

Happy Gardening!!

plants at home

9 पौधे जिन्हें आपको घर पर उगाने चाहिए

विभिन्न प्रकार के लाभ प्रदान करने वाले पौधों के साथ एक विविधपूर्ण उद्यान बनाना आपके आउटडोर स्पेस की पारिस्थितिक समृद्धि में योगदान करने का एक शानदार तरीका है। अतः, यहां नौ आवश्यक पौधों की सूची दी गई है जो हर किसी के पास होनी चाहिए, जिनमें से प्रत्येक किसी भी बगीचे को समृद्ध और सुंदर बनाने के लिए कई लाभ प्रदान करता है।

  1. तुलसी का पौधा
  2. करी पत्ता
  3. अजवाईन का पौधा
  4. गिलोय
  5. एलो वेरा
  6. पथोस (मनी प्लांट)
  7. जेड पौधा
  8. गुड़हल का पौधा
  9. चमेली का पौधा

9 पौधे जिन्हें आपको घर पर उगाने चाहिए


1. तुलसी का पौधा (Holy basil)


tulsi plant

क्या आप अपनी बागवानी यात्रा शुरू कर रहे हैं? शुभ तुलसी के पौधे के लिए जगह बनाएं – यह घर में अवश्य होना चाहिए।

  • गर्मी को पसंद करने वाला यह पौधा फरवरी से अक्टूबर तक पनपता है, हालांकि सर्दियों में यह मुरझाना शुरू हो सकता है। उचित देखभाल से यह ठंड के मौसम के बाद ठीक हो सकता है।

सीधी धूप

  • इस बाहरी पौधे के लिए, सुनिश्चित करें कि इसे कम से कम 4-5 घंटे सीधी धूप मिले।

औषधीय लाभ

  • इस आयुर्वेदिक पौधे के कई औषधीय लाभ हैं और इसका उपयोग सर्दी, खांसी और कई अन्य समस्याओं के इलाज के लिए किया जाता है।

2. करी पत्ता (Curry Leaf)


curry leaves

करी पत्ता रसोई के लिए एक अतिरिक्त योग है क्योंकि इसकी खुशबू और स्वाद बहुत अच्छा होता है। यह एक उपयोगी जड़ी बूटी भी है और यह आपको कई घरों में मिल जाएगी।

ग्रीष्मकालीन पौधा  

  • यह एक ऐसा पौधा है जो गर्मियों को पसंद करता है, फरवरी से अक्टूबर तक अच्छी तरह से बढ़ता है।

सूरज की रौशनी

  • इस पौधे को बहुत सारी धूप पसंद है, दिन में लगभग 5-6 घंटे, लेकिन इसे बहुत अधिक पानी की आवश्यकता नहीं होती है।

करी पत्ता विभिन्न औषधीय लाभ प्रदान करता है:

  • करी पत्ता विटामिन A, B, E और E का अच्छा स्रोत है, जो समग्र स्वास्थ्य के लिए आवश्यक पोषक तत्व प्रदान करता है।
  • करी पत्ता एंटीऑक्सिडेंट का एक अच्छा स्रोत है, जो ऑक्सीडेटिव तनाव से निपटने और शरीर को नुकसान से बचाने में मदद करता है।
  • वे स्वस्थ कोलेस्ट्रॉल के स्तर को बनाए रखने, हृदय स्वास्थ्य का समर्थन करने में योगदान दे सकते हैं।

Read this article in English

9 Plants You Should Grow at Home

3. अजवाइन का पौधा (Ajwain Plant)


ajwain plant

मैक्सिकन मिन्ट, जिसे भारतीय बोरेज या अजवाइन के पौधे के रूप में भी जाना जाता है, आपके बगीचे के लिए एक बेहतर है, इसमें कैरम बीज की खुशबू आती है।

ग्रीष्मकालीन पौधा

  • यह ग्रीष्म-हार्डी पौधा है, गर्म महीनों में फलता-फूलता है लेकिन सर्दियों के मौसम में मुरझा सकते हैं।

सूरज की रौशनी

  • कम से कम 4-5 घंटे की सीधी धूप जरूरी है, लेकिन यदि आप अधिक दे सकते हैं, तो यह निश्चित रूप से अतिरिक्त धूप की सराहना करेगा।

औषधीय पौधे

  • औषधीय पौधा होने के कारण यह गैस्ट्रिक समस्याओं के इलाज में बहुत फायदेमंद है।
  • खाली पेट कुछ पत्तियां खाने से ही समस्या ठीक हो जाएगी। इसके अलावा, यह विभिन्न व्यंजनों में सुगंध को बढ़ाता है।

4. गिलोय (Giloy)


giloy plant

गिलोय एक महत्वपूर्ण पौधा है जो आपके घर में होना ही चाहिए। पौधे की विशेषता दिल के आकार की पत्तियां हैं, जो इसके सामान्य नाम, “हार्ट-लीव्ड मूनसीड” में परिलक्षित होती है।

ग्रीष्मकालीन पौधा

गिलोय एक ग्रीष्मकालीन पौधा है जो गर्म मौसम में पनपता है लेकिन सर्दियों में थोड़ा उदास हो जाता है, इसकी पत्तियाँ झड़ जाती हैं और केवल तना ही रह जाता है।

  • जब गर्मी वापस आती है तो यह फिर से बढ़ना शुरू हो जाता है, आमतौर पर सबसे गर्म महीनों में, फरवरी या मार्च में उतना नहीं बढ़ता है।

सूरज की रौशनी

  • अनुकूलतम विकास के लिए, प्रचुर मात्रा में धूप प्रदान करें। इसे अधिकतम धूप वाले क्षेत्र में रखें।

औषधीय लाभ

  • पारंपरिक चिकित्सा में, विशेष रूप से आयुर्वेद में, गिलोय (हार्ट-लीव्ड मूनसीड) को इसके औषधीय गुणों के लिए अत्यधिक महत्व दिया जाता है।
  • गिलोय का उपयोग अक्सर प्रतिरक्षा प्रणाली को बढ़ावा देने, दीर्घायु को बढ़ावा देने और समग्र स्वास्थ्य और कल्याण का समर्थन करने के लिए किया जाता है।
  • लोग गिलोय की छड़ियों का उपयोग एक विशेष पेय बनाने के लिए करते हैं जो बुखार और अन्य स्वास्थ्य समस्याओं में मदद करता है।

5. एलोवेरा (Aloe Vera)


Slice Aloe Vera very useful herbal medicine for skin and hair.

एलोवेरा सबसे महत्वपूर्ण पौधों में से एक है जिसे आपको अपने घर में रखना चाहिए। इसके कई फायदे हैं।

  • इस पौधे को अनदेखी पसंद है, समय-समय पर पानी देना पर्याप्त है, और इसे इष्टतम विकास के लिए व्यापक देखभाल की आवश्यकता नहीं है।

हर मौसम में फलता-फूलता है

  • एलोवेरा सभी मौसमों में फलता-फूलता है – गर्मी, सर्दी और बरसात।
  • यह सूर्य की रोशनी का भी शौकीन है और इसे अधिक समय तक धूप में रखना अच्छा रहता है।
  • हालाँकि, इसे चिलचिलाती धूप में रखने से बचें, सुबह और शाम की धूप सराहनीय है। इसके अलावा यह उज्ज्वल या मध्यम रोशनी में भी विकसित होगा।

औषधीय पौधा

  • एलोवेरा, एक औषधीय पौधा, अपने उपचार गुणों के लिए प्रसिद्ध है, जो जोड़ों के दर्द, पेट की परेशानी और माइग्रेन जैसी समस्याओं का समाधान करता है।
  • एलोवेरा से निकाला गया जेल कई उद्देश्यों को पूरा करता है और विभिन्न लाभ प्रदान करता है।
  • लोग इसके जेल को चेहरे और बालों पर लगाते हैं, इसके सुखदायक गुणों का उपयोग क्रमशः सनबर्न के इलाज और बालों के झड़ने से निपटने के लिए करते हैं।

6. पोथोस (मनी प्लांट)


pothos money plant

यहां एक और पौधा है जिसे आपको घर पर रखना चाहिए: पोथोस, जिसे मनी प्लांट के नाम से भी जाना जाता है।

  • यह एक लोकप्रिय इनडोर पौधा है जो अपनी आकर्षक लताओं और दिल के आकार की पत्तियों के लिए जाना जाता है। इसे आमतौर पर डेविल्स आइवी भी कहा जाता है।

ग्रीष्मकालीन पौधा

  • एक सामान्य ग्रीष्मकालीन पौधे के रूप में, यह पौधा अत्यधिक अनुकूलनीय है और विभिन्न परिस्थितियों में पनप सकता है, जो इसे शुरुआती और अनुभवी पौधे उत्साही दोनों के लिए उपयुक्त बनाता है।

प्रकाश आवश्यकताएँ:

  • पोथोस कम से लेकर उज्ज्वल, अप्रत्यक्ष प्रकाश तक, प्रकाश की एक विस्तृत श्रृंखला को सहन कर सकता है। हालाँकि, यह मध्यम, अप्रत्यक्ष प्रकाश में सबसे अच्छा काम करता है।

वायु-शुद्धिकरण गुण:

  • पोथोस अपनी वायु-शुद्ध करने की क्षमताओं के लिए जाना जाता है, जो सामान्य इनडोर प्रदूषकों को हटाने में मदद करता है।

7. जेड पौधा  (Jade plant)


Jade plant in clay pot

जेड पौधे अपनी कठोरता और अनुकूलनशीलता के लिए जाने जाते हैं। उचित देखभाल के साथ वे बाहरी वातावरण में भी पनप सकते हैं।

जेड प्लांट, जिसे लकी प्लांट के नाम से भी जाना जाता है, एक लोकप्रिय गुद्देदार पौधा है और आपके बगीचे की शोभा बढ़ाता है।

ग्रीष्मकालीन पौधा

हालाँकि यह एक सामान्य ग्रीष्मकालीन पौधा है।

  • यद्यपि इसकी वृद्धि धीमी हो सकती है, और पत्तियां सुंदर ढंग से निकल सकती हैं, उचित देखभाल के साथ, यह सर्दियों के महीनों में भी अपना हरा आकर्षण बरकरार रख सकता है।

पानी देने का तरीका

पौधे को न्यूनतम पानी की आवश्यकता होती है – बस यह सुनिश्चित करें कि पानी देने से पहले मिट्टी पूरी तरह से सूखी हो, यहां तक कि गहरे स्तर पर भी।

  • अधिक पानी देने से पत्तियों का झड़ना, काला पड़ना और अवांछित कीड़ों का आना जैसी समस्याएं हो सकती हैं।

अगर अच्छी तरह से देखभाल की जाए तो यह भाग्यशाली पौधा आपके बगीचे में चमक लाकर आपकी किस्मत चमका सकता है।

8. गुड़हल का पौधा (Hibiscus plant)

Hibiscus in pot

एक खिलता हुआ पौधा जो अपनी सुंदरता से बगीचे की सुदरता को बढ़ाता है।

ग्रीष्मकालीन पौधा

  • यह फूल वाला पौधा एक क्लासिक ग्रीष्मकालीन किस्म है जो सर्दियों में तनाव का अनुभव करता है।

सूरज की रौशनी

  • 5-6 घंटे धूप के संपर्क में रहने पर यह अच्छे से खिलेगा।

औषधीय लाभ

  • गुड़हल के फूलों से कई औषधियां और हेयर ऑयल बनाए जा रहे हैं।

9. चमेली का पौधा (Jasmine plant)

Jasmine flower

एक सुंदर सफेद फूल देने वाला पौधा, अपने जादुई सुगंधित फूलों से बगीचे की शोभा बढ़ाता है। यह पौधा या तो एक सुंदर लता बनने का विकल्प प्रदान कर सकता है या इसकी कटिंग को प्रचारित करके एक सामान्य पौधे के रूप में रखा जा सकता है।

  • फूलों के आभूषण जैसे गजरा आदि भी चमेली के फूलों से तैयार किए जाते हैं।

ग्रीष्मकालीन पौधा

  • एक पारंपरिक ग्रीष्मकालीन पौधा गर्मियों में अच्छी तरह से बढ़ता है, सर्दियों के दौरान विकास में बाधा आती है लेकिन परिपक्व पौधे पूरे वर्ष फूल देते रहेंगे।

सूरज की रौशनी

  • इसकी भरपूर वृद्धि के लिए 3-4 घंटे की मध्यम धूप पर्याप्त है।

औषधीय लाभ

  • यह औषधीय, सुगंधित, पवित्र और सुंदर पौधा इतना तनाव निवारक है कि हर किसी को इससे अपने बगीचे की शोभा बढ़ानी चाहिए।

इस लेख को पढ़ें:

हवा को शुद्ध करने वाले 10 इनडोर पौधे

पौधों की एक शानदार श्रृंखला की तरह लगता है! ऐसी विविधता का होना जो न केवल बगीचे की सुंदरता को बढ़ाती है बल्कि कई लाभ भी पहुंचाती है, फायदे का सौदा है। यह आपके घर के पीछे के आँगन में एक सामंजस्यपूर्ण और लाभकारी पारिस्थितिकी तंत्र बनाने जैसा है।

शुभ बागवानी!!

How to Care Rose Plant?

Roses are attention-seeker and cautious plants. They love to be loved and pampered throughout the year. Being delicate flowers it is essential to understand their behavior and requirements before planting them at home.

So, before planting, let’s first understand how to care for and save rose plants after getting them from the nursery. What are the necessities and preferences of the rose plant?

All the important points are detailed here to maintain the plant’s health because it will flower automatically if it is healthy.

How to care for & save the Rose plant

1. Do not remove new buds & flowers of the Rose plant

  • After fetching from the nursery, do not remove any buds or flowers from the plant.
  • Once the flowers start fading, remove them by cutting from the top of the node.
rose flower and buds
  • At the flowering stage, plants shed all their energy into the flowers, and the rest of the plant’s growth gets hampered.
  • So, if the flowers are mature enough to be plucked, remove them, and the plant will use its energy to bloom more new flowers.
  • This is also called a process of pruning. It promotes the growth of the plant, and new branches and flowers will originate from the point where the old flowers were removed.

2. Remove all the unwanted weeds of the Rose plant

  • Whenever unwanted weeds appear, remove them immediately to prevent them from growing bigger.
weeds in pot

Why should we remove weeds from the rose plant?

  • Weeds take up all the energy and nutrients of the main plant which is required for growth.
  • They spread so fast, that there would be hardly any space left for tilling of the soil.  Also, they block air and sunlight from reaching the soil.
  • Moreover, it spreads downwards and absorbs a significant amount of moisture from the water. Additionally, it invites fungus, ants, and pests.

Important note:

  • The soil of the rose plant should be kept clean and free from fungus or pests.

3. Pruning and deadheading of the Rose plant

deadheading of roses
  • If the pruning is not done correctly and at the right time then the rose plant will become dense and it will not bloom.
  • Hence, pruning is a mandatory in gardening.

4. Feeding Fertilizers to the Rose plant

Fertilizers the rose plant
  • After pruning, hoe the soil and provide it with high NPK fertilizer. Any strong fertilizer, like cow dung compost, vermicompost, or kitchen waste compost is recommended here.
  • Mustard cake fertilizer can also be one good option.

5. Rose plant follows a specific pattern to grow

pink rose
  • Rose plant follows a specific pattern of growth and dormancy.
  • It follows a structured growth cycle that includes growth, pruning, fertilization, and harvesting.
  • After the flowers are harvested, rose plants enter a dormant phase approximately for 20 to 25 days before blooming again.

6. Give liquid tonic to the Rose plant

    • It is very important to give liquid tonic to the rose plant when it is about to bloom and after the formation of buds.

Suggested liquid tonics are –

  • Onion peel fertilizer
  • Banana peel fertilizer
  • Epsom salt
  • Vermicompost tea
  • Seaweed fertilizer
  • Mustard cake fertilizer

Important note:

  • Liquid tonics enhance the size and health of the flowers and also accelerate the growth of the rose plant. 

Read article:

Best Fertilizers for Rose plant

7. Best Season for the Rose plant

  • Rose plants are typically known as autumn-season plants and can be obtained from the nursery from October to March.

FACT

  • Native roses are only red or white in color and have fragrance while hybrid roses are available in different colors and varieties but generally do not have any fragrance.

8. Pot Specifications for the Rose plant

type of pots

  • Earthen pots are the most suitable pots for rose plants. Avoid using cement, ceramic, or plastic pots.
  • Choose those pots that are 10 to 12 inches.
  • Roses also have thorns, so if a small pot is taken, the thorns can harm the gardener’s hands during transplanting into a larger pot.
  • In small pots, the thorns take up a lot of space, making it challenging to transfer the plant to a new pot with the thorns intact.

9. Soil Mixture for the Rose plant

Soil mixture for rose plant
  • Creating the right soil mixture for rose plants is essential for their health and growth. Rose plant prefer well-drained soil that is rich in organic matter.

For the perfect soil mixture follow the given steps:

  • Soil – Take local area soil and clean it to remove all the debris, glass, and plastic pieces.
  • Vermicompost – It should be half the quantity of the soil.
  • Sand – Rose grows best in sandy soil. So, use an equal amount of sand as vermicompost.
  • Coco peat – To balance the moisture level of the soil add cocopeat 1/4th of the sand.
  • Neem Cake powder – To prevent insects, add a little bit of neem cake powder.
  • Bone meal: You can also consider adding a bone meal if you wish.

Read article on:

How to prepare soil mix for rose plants


10. Watering the Rose plant

  • When the soil around the roots dries up, the leaves turn yellow and begin to dry out.
  • If the soil around the roots is too wet, black spots start to appear on the leaves. These black spots can be seen all over the plant.
  • Monitor the soil very carefully and water when it becomes slightly moist, as it will dry out in the next stage.
  • Check the soil with your hand, and if it begins to drain, water it accordingly.

11. Sunlight for Rose plant

  • Roses love sunlight, so give this plant as much sunlight as possible.
  • Flowers require at least 4 hours of sunlight to bloom.

Last but not least is to take care of it properly otherwise do not buy this plant.

Happy Gardening!!

Best fertilizer for rose plant

Best Fertilizers for Rose Plant

Rose plant is considered to be the most popular and favorite plant throughout the world. To keep your rose plants healthy and blooming at their best, it is important to provide them with proper care, including regular fertilization and pest control.

Best fertilizers for the Rose plant

pink rose
pink rose flowers

Rose plants require regular fertilizers because they are nutrient-intensive, which helps them develop strong roots, leaves, and flowers. The best type of fertilizer for rose plant is a balanced fertilizer that contains nitrogen, phosphorus, and potassium (NPK).

List of fertilizers is mentioned below which would help the plant to survive and to grow slowly.

fertilizers for rose plant
  • Rose Bloom Fertilizer
  • Vermicompost
  • Cow Dung Compost
  • Vermicompost Teas or Cow Dung Compost Tea
  • Epsom Salt
  • Seaweed Fertilizer
  • Mustard Cake Fertilizer

Give liquid tonic to the Rose plant

  • It is very important to give liquid tonic to the rose plant when it is about to bloom and after the formation of buds.

Suggested liquid tonics are –

Onion peel fertilizer
Banana peel fertilizer
Epsom salt
Vermicompost tea
Seaweed fertilizer
Mustard cake fertilizer

Important note:

  • Liquid tonics enhance the size and health of the flowers and also accelerate the growth of the rose plant. 

How to give fertilizers to the Rose plant

Must follow the given below steps to give fertilizer to rose plant

First Batch – If using any one from these three 

  • Rose Bloom Fertilizer
  • Vermicompost
  • Cow Dung Compost

Loose the soil, add the fertilizer once in a month for continuous four months (April- July) on the same date of every month.

After adding fertilizer, always give water thoroughly to the rose plant.   

watering to rose plant
watering to rose plant      

Epsom Salt, Seaweed fertilizer, Mustard cake liquid fertilizer, Vermicompost tea or Cow dung compost tea 

  • If you notice the leaves turning white, fading, or the plant becoming weak, you can apply Epsom salt once a month.
  • Mix a small amount of Epsom salt with 5 liters of water and use it as a monthly treatment for the plant.

For maintaining the nutrient levels in the soil and promoting significant plant growth, here’s a schedule to follow:

  • If you apply any fertilizer from the first batch on the 1st of the month, then on the 15th of the same month, alternate it with either Epsom salt, Seaweed fertilizer, Mustard cake fertilizer, vermicompost tea, or cow dung compost tea.

Important note:

  • During summers, the rose plant is under partial dormancy, which means they are still growing, but at a slower rate compared to their active growing season.
  • So, if strong fertilizer is given at this time then the plant would get scorched but any mild fertilizer is needed to sustain the plant.
  • Giving strong or heavy doses of fertilizer during this time can harm the plant, causing damage or “scorching.”
  • Instead, it’s advisable to use a milder or more gentle fertilizer to support the plant’s minimal growth and sustain its overall health during the summer months.

Also read:

1. How to care Rose plant?

2. How to prepare Soil mix for rose plant?

Happy Gardening!